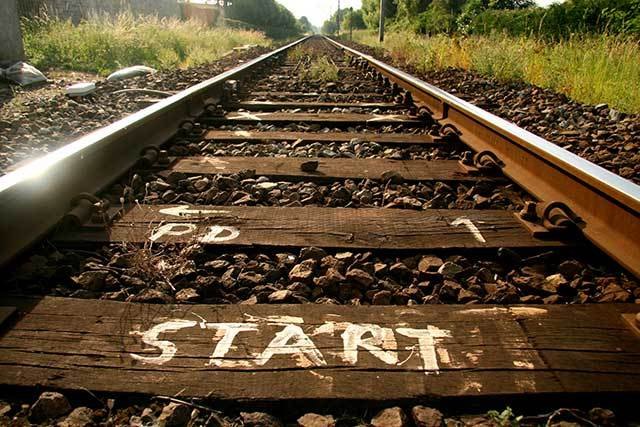
Home2017March (Page 2)

Where to begin prepping?

I imagine a lot of people are like me when it comes to how you were introduced to the subject of prepping. In 2007, there was no Doomsday Preppers TV show that I could look to for ideas, perspective and some humor. I wasn’t sure what I was looking for really, but it all began for me with a sense of urgency. It wasn’t like I was experiencing cold sweats at night in bed or anything like that, but I felt that as a father and husband I needed to get ready. Ready for what? I didn’t know at the time, but I would eventually figure that out.

When I first started prepping I didn’t know specifically what I was supposed to do or what prepping was to be honest – only that I felt that strong need to do something to protect my family. This was a gnawing thought in the back of my mind; like the kind you might get when you see someone whose face is familiar, but you can’t picture where you know them from. When this happens to me, I can’t really think of anything else until I realize where it is that I know that person. It usually passes, but this lingering thought that I needed to get prepared would not go away.

I started to research home security topics first because I imagined someone harming my family and that was an easy jump to make. I needed to get a gun in case of an intruder. I had small children and a wife, so this was logical I thought, but as I was shopping and researching, I entered other areas that increased the world of things I could see as potential problems.

In my mind there was doubt and uncertainty about the future and the only thing that made sense for me to do was to prepare for the worst. It never really occurred to me that I was blowing anything out of proportion or that I should just sit on my 401K until things got better because I knew that eventually bad times were coming. I had energy and a sense of purpose even if I didn’t have my wife on board at the time. I listened to a lot of voices tell me what I should focus on. I read a ton of articles and watched days of YouTube videos but I still felt more urgency than a direction. My gut told me I should be doing something, but still I had no clue where to start. Where to start prepping?

We have a lot of readers on Final Prepper who have been prepping for years. but for this post I wanted to go back to the beginning and try to share what I have learned, what worked for me and what didn’t and hopefully give you some direction that I didn’t have. I know that our readers will help by adding to the conversation in the comments below.

What Every New Prepper Needs to Know:

You are not crazy!

There are a million things we talk about on the subject of prepping, but it all boils down to this. The goal of Prepping is to keep you alive. You prepare for bad things happening in your life. Your preps are those resources (skills, supplies, gear, relationships) you have that will allow you to ride out the bad things with as little negative consequences as possible. Trying to survive isn’t crazy and making sure you have a plan for bad things isn’t nuts either.

Start with visualizing what you are concerned about

In the beginning I focused on a lot of things that I could worry about from the standpoint of my family. There was the possibility of so many things: economic collapse, tornadoes, riots, nuclear war, government tyranny, global pandemic, global warming, global cooling, peak oil, terrorism, peak water, EMP, Zombies, rabid Bigfoot…. OK, I am kidding about the last two obviously but the point here isn’t to focus on a specific threat to your life although thinking about something you are concerned about can help you plan.

Are you ready to start prepping?

How to Start Prepping

Understand what everyone needs for survival

Every human on earth needs the same basic things to live. You need water, food, shelter and security. Can you live without water? Yes, for a while depending on where you are but not for long. Can you live without shelter? It depends; are you in the desert or the mountains of Colorado? Food is probably the one thing you can live without the longest, but lack of a fairly constant source of nutrition will harm your health and make you less able to deal with other issues as effectively as you need. You could have all of these bases covered, but someone who failed to prepared might see you and want to take them away from you and give them to his family.

Read as much about prepping as you can. Learn and get different perspectives before you make snap decisions.

You need all of these survival items, regardless if zombies from outer space are wreaking havoc on earth or the stock market takes a dive and never returns. If almost any of the “threats” mentioned above happened; you can plan on disruptions in your life. They could be minor or they could last years. You can use these things to judge your preparedness level by how long you could survive if you had to count on yourself to get water. If you had to provide your own food, how much would you have? If you couldn’t call the cops would you have some means of defense?

Identify areas where you need to prepare

I think the best thing to do before you start prepping is to think about what your family needs to survive and choose a time-frame. You can start small, take two weeks to begin and start figuring out how much you would need to last for 14 days.

  • Without access to water
  • Without access to food
  • Without access to power/heat/air-conditioning/a house
  • Without the possibility of calling the police

Food and water should be simple. How much food do you need for your family and anyone else who might stop by if you had to stay indoors for 14 days? This should be food that doesn’t need refrigeration that your family eats already. How much water would you need to do the same thing? A good average is one gallon per day per person.

Two posts that might help with your food preps:

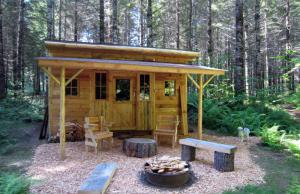
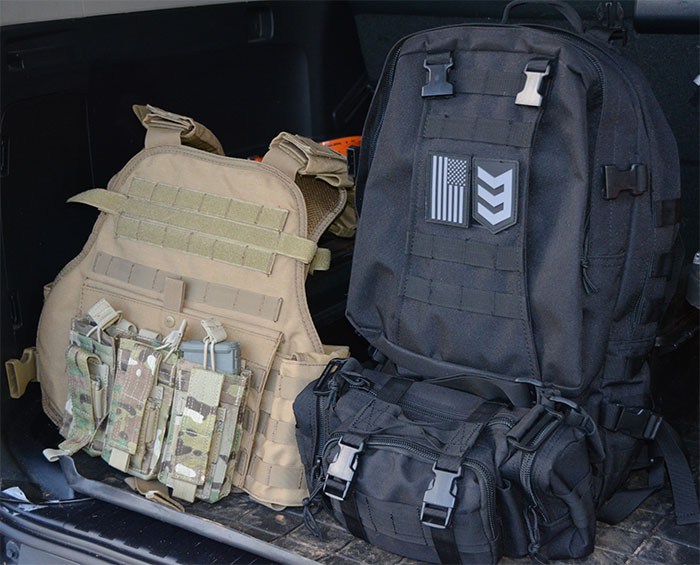
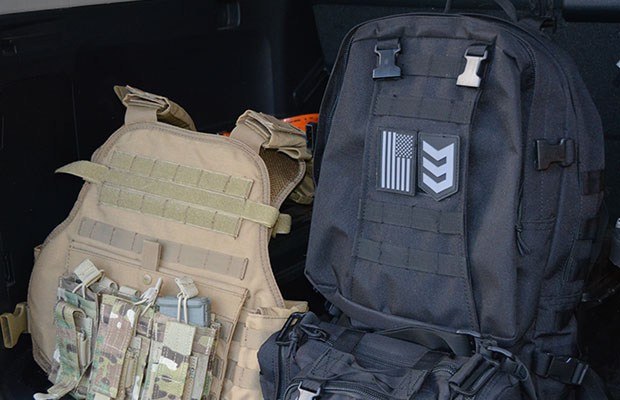
Shelter and Security get into different things depending largely on where you live and your personal beliefs in the case of firearms. They also might require licensing and in some cases a higher entry point – cost wise to prepping than food and water.

Start acquiring supplies, gear and skills

You should have at least a short list now of things you need to consider for basic survival for two weeks. How much of this do you already have? Do you have water stored? Do you need containers to store water?

Take care of food and water first because that is the simplest thing to do. Once you have food and water stored for two weeks, identify other aspects you could need like security, first-aid, alternative power, fuel.

Reevaluate and adjust as necessary

If you followed the plan above you have the basics you need to last for one week. Congratulations! This puts you ahead of 98% of the rest of your neighbors. You should have a sense of accomplishment but you may feel like you have only scratched the surface. My personal goal is to prepared to live for one year without access to food, water, the police, power or fuel. I still have a way to go in some areas, but each day is a journey for me. Some days I make great strides. Other days, I have to step back and regroup, but I am always looking down the road.

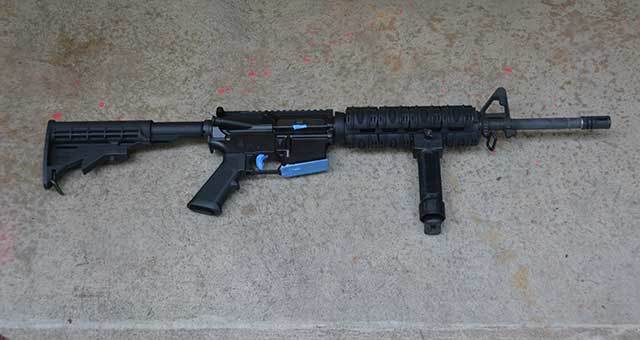
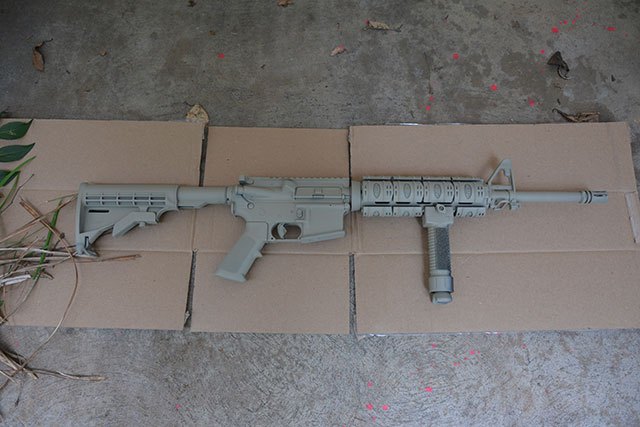
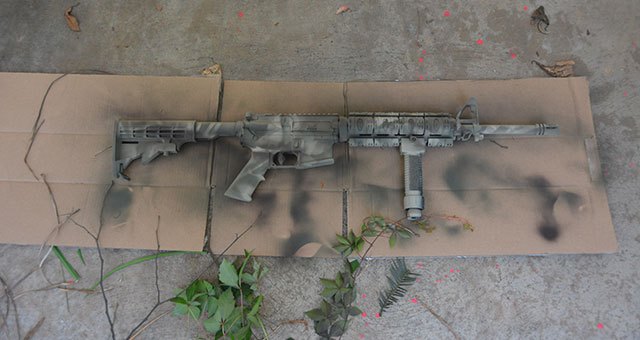
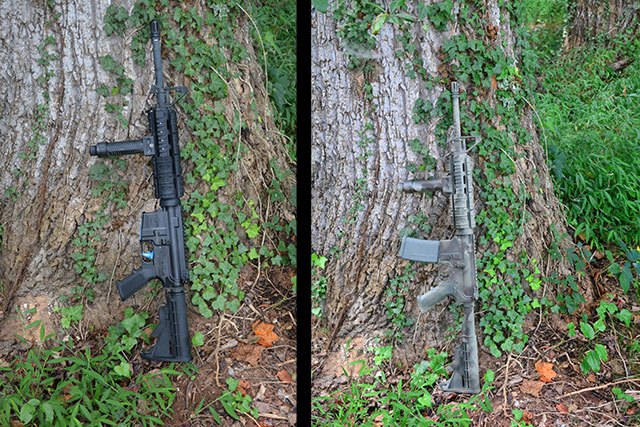
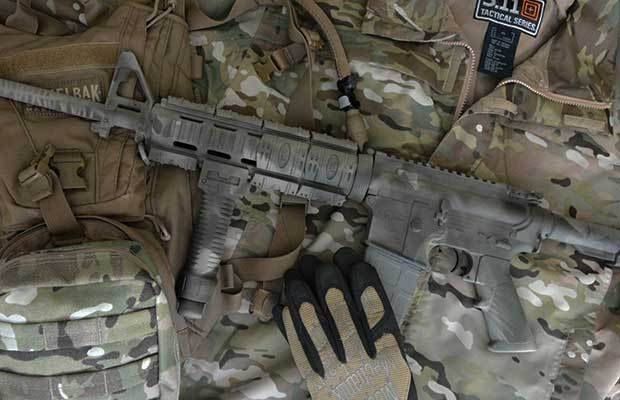
Looking back over the 8 years I have been prepping, I learned that you don’t want to jump into most prepper purchase too soon. Food and water are easy and I didn’t start buying freeze-dried food until I had 6-months of food stored in my pantry first. I didn’t go out and buy the first gun I saw, I gave some serious thought to what could afford and what would be the best gun for home defense if I could only chose one. I had a long-term plan on firearms, but I didn’t buy them all at the same time.

Ammo was another area that I constantly worked on because at some points in the last few years, you simply couldn’t buy any ammo. I had enough to start with to last me for two weeks of anarchy and built from there alongside my food, water, power and other preps. I tried to not let any single prep get too much attention and slowly grew my supplies evenly, when I could get a deal and not at the expense of something I needed more. One key to remember here is that you don’t have to have everything right now.

Relax but don’t quit

In the beginning, I was consumed with the thought of prepping and how I was so far behind the curve. Since that time 8 years ago, I have witnessed thousands of times where disaster was right around the corner only to wake up the next day to find the world still spinning. This will happen to you, but you shouldn’t give up on your prepping efforts. That is another reason not to pin your actions on a specific event or threat. The people who prepared only because of the Mayan calendar 2012 issue were likely disappointed when nothing happened but this shouldn’t happen to you.

Prepping is a lifestyle that will see you through events we might not even see coming. By preparing now and continuing slowly as your resources allow you will give yourself security. You will give your family protection and a chance at survival. You will be someone who can lead in a disaster and give hope when there might not be any left.

For more information you can start with our Prepping 101 series – How to get started prepping.

I know some of this was remedial to my experienced readers, but hope this was able to help give some perspective to those who may just be getting started prepping. Now, you can go and get someone else to join you too. Together we will make it through whatever the future has planned for us.

Where to begin prepping? I imagine a lot of people are like me when it comes to how you were introduced to the subject of prepping. In 2007, there was no

In Part 1 of Introduction to Building a Storage Shed we considered why as a Prepper or survivalist you might want to build a shed, and gave some options and preliminary decisions to make and checking out to do.  In this part, we will look at some other things to consider before you install your storage shed.  And some general lessons learned to keep in mind through the process.

Storage Shed Kit Sources

Doing an online search seems to be an effective method.  Doing a search for “shed kit” on eBay gave me an idea of what was available.  Searching for the top brands found companies specializing in shed kits such as ShedsForLess.com.  Once I found the make and model I was looking for, more specific searches found the best price.  Prices seem fairly universal, although I did happen to find a sale on my choice.  A local source may be cheaper since delivery can be handled in house, but will be increased by sales tax, so the total price should be compared with companies which have to include freight in the cost but don’t have to charge tax.  It seems that shipping is usually “free” (more accurately, included in the cost) on some of the major brands.

Keep in mind that the floor is usually not part of the kit, although often can be ordered with the kit.  Often it is delivered first, from a local source, which means the quality might not be optimal.  On mine, most of the joists could be forced into place, but I had one beam which was warped at a knot, and attempting to force it straight caused the beam to snap.  Replacing it was not trivial, since the only receipt I had was the shipping order, and it took a long time for the local store to find it in their system, since it did not have my name on it or even the name of the company I ordered from.  It was under the name of the kit manufacturer.

There are kits which are material only, and those which are pre-cut.  The latter is easier to assemble and requires less equipment.

Also, when pricing a (wood) kit, keep in mind that hardware is often included, but paint and roofing are usually not, and these products are not cheap.  I could not believe they get over $30 a gallon for paint these days; fortunately Ace had a buy one gallon, get one gallon free sale.  For most (wood) sheds, the specified roofing is shingles, and those run about $1 a square foot.    Flooring, roofing and paint was about 1/4 of the total cost of my kit, and that did not include the roofing gun and scaffolding which will be used for other projects as well.

Options

Often a kit company will offer “options” such as additional or different doors, windows, a ramp, shelving/cabinets and various ventilation methods.  If offered by the kit company you pretty much have to order it with the kit.  Ventilation is good to prevent heat build-up; a “ridge vent” methodology is probably the best, but usually not available with the kit.  If you are going to use the shed strictly for storage, then windows would seem to be pretty silly since you lose wall space and reduce the security.  However, if you are going to be spending much time in there, a window or two will be quite helpful for light, ventilation and to reduce claustrophobia.

What to Have on Hand

The first thing to attempt to arrange is other people.  There are a couple of aspects of building the shed which will be very difficult for a single person to accomplish, without using “tricks” which need to be purchased or constructed.  More people not only allow completing these aspects in a “normal” manner, but will make things quicker and perhaps even “more fun”.  After all, if a single person needs to drive 1000 nails, two people only need to drive 500 each, and so on.  Plus, don’t discount the motivation having others involved provides.  If you can arrange for a person or group to help, that should be great.  If you don’t have people available or that you trust, it does not mean you are out of luck, just that you will need to approach the project differently.

There are certain basic tools you will need.  For a pre-cut wood building, that will be a hammer, drill (primarily for driving screws), tape measure (25′ may be adequate for medium sized buildings), level, framing square, carpenter’s pencil and a circular saw.  Having a cut-off saw was nice (more ergonomic and precise), but is not really needed by the pre-cut kit; the square and circular saw will suffice since there are not that many cuts left to be made.  A panel saw would have been handy, but for the one cut needed for the floor of my kit, a long straight edge, a pair of clamps, and the circular saw did just fine.  And you will need a ladder or two.  And, of course, don’t forget safety glasses and work gloves.  Plus arrange for the equipment for your preferred painting methodology.

Remember those 1000 nails?  I’ve used a nail gun for construction and it is very helpful indeed.  However, since the kit came with all the correct nails, I did not bother getting the pneumatic equivalents.  However, roofing nails were NOT included, and roofing is enough of a pain; I got a roofing nail gun and the nails for it.  Some kits say that “felt” under the shingles is “optional”.  I disagree.  Not only does it provide protection from a small leak in the shingles, but it protects the shingles from the roof panels and vice versa.  For the felt, you will need a hammer stapler and staples (no, a pneumatic stapler won’t do; it goes right through the felt, and your hands will hate you if you try using a standard squeeze stapler).  For the shingles, a utility knife and a bunch of hook blades for it, and a pair of tin snips (for the edging).  Be sure the hook blades fit your utility knife; my knife had a couple of extra pins which match up holes only in the same brand’s (much more expensive) blades.

This list assumes that everything goes perfectly, which it sometimes does not.  For instance, if there is a warped or twisted board, it can often be forced into position using a pipe wrench.  Or a twisted beam can be encouraged to stay in place with a long bolt and nut, tightened with a wrench and socket wrench.  Some places get rain, and getting raw wood wet is not wise.  A tarp big enough to completely cover the roof (and bungee cords to fasten it down with) can be a great help.  Things sometimes don’t fit quite right; I found a package of composite (not wood) shims (from Timberwolf) to be of great help in these cases.  If you end up with a crack or hole that insects can get through, some spray foam like “Great Stuff” can help.  Although roofing CAN be done with ladders, it is a tedious, slightly more dangerous process.  Buying or renting scaffolding can make it go quicker and is a bit safer to boot.  Of course, it might be easier and not much more expensive just to hire someone to do the roofing.

I used several other tools which I had on hand, to overcome problems and make “enhancements” to the shed.  These should not be normally needed.

Caveats

It is tempting to just order the kit and work on the site when the floor kit arrives.  This can be problematical; it took me over a month to get the floor flat and level (since the ground was very much neither).  Yet, the shed kit arrived only a few days after the floor kit.  Be aware of what the relative weather is between the source and your location.  My kit came from Pennsylvania when it was cold and wet, and arrived in Arizona where it was warm and dry, and sat in that wildly different environment for over a month.  It is not surprising that I had more warping and twisting than expected.  Two lessons learned.  Prepare site before ordering, and be aware of relative weather between source and destination.

The floor kit is often delivered by a local lumber outfit, who may have a trailer and fork-lift, and can put the pile in a relatively out of the way location.  The shed kit may be shipped by a standard shipper who has nothing other than pallet jacks to move things around with.  Pallet jacks require a smooth, solid surface, so they had to leave my kit in the road and I had to quickly and manually move it into my pickup.  The total kit weight is a bit over a ton, so to move it from curb to site will take more than one trip with a “1/2 ton” pickup.  When you get to the site, have something for the materials to sit on to keep them off the ground, sort the parts by size, and then stack them with the last needed pieces on the bottom and the first needed pieces on top.  I had two stacks, one of boards and one of sheets.  Cover with tarps if precipitation is expected.

Find the inventory list before you start unpacking and use it to verify the contents as you unpack.  I did a manual inventory, and matching it with the official one I found later was a bit of a challenge, since my descriptions did not match theirs.  There were a couple of pieces missing and a couple which were unusable; a call to the company got replacements sent right out.  Read the manual from cover to cover before you start, then follow it “exactly” (except for any typos) unless you are doing the build by yourself.

It was annoying that the 16′ shed floor kit came with 8′ runners; it was a challenge to keep them together and straight; I eventually gave up and used “StrongTie” connectors to hold them together end-to-end.

Standard felt is very easily torn.  It usually takes two people to install, and after we got one side up and took a break; the wind, more accurately a gentle breeze, ripped most of it off.  I finally had success with double thickness felt which is somewhat stronger, a “tool” I built which allowed me to put it up by myself, and putting on the edging as quickly as possible to prevent  wind from getting under the felt edges.  Yes, you need more rolls (being thicker, there is less length in each roll), but in climates such as ours, you generally put on two layers of standard felt anyway.

How to start

The first step is to figure out everything you want to accomplish with your shed, then find out any limitations on what you are “allowed” to put up and where you want to put it.  This includes finding out what is required by building codes.  Make sure you have plans for any alterations to be made to the shed; find the materials and figure out when in the build process you will need to diverge from the standard instructions.  Next, find the model or models of kits which you like, and get an idea of the pricing.  Arrange financing (cash or credit), prepare the site (marking and leveling for wood, forms. rebar and pouring for concrete), then order the kit.  Find out when it will be delivered and arrange to be available, with a truck or two to move the parts from where they deposit them to the construction site, and preferably people to help to load and unload.

In Part 1 of Introduction to Building a Storage Shed we considered why as a Prepper or survivalist you might want to build a shed, and gave some options and

Why would you want to do this?  Look at the name:  STORAGE Shed.  Most everybody “needs” more storage because they can’t bear to have less stuff.  And someone preparing for bad times probably has more stuff than a person who doesn’t believe anything bad can happen and expects their parents and/or government to take care of them no matter what.  Some of that extra stuff you really don’t have room for in your house, and some of your prepping supplies you REALLY don’t want to have IN your house.  Such as a generator and fuel, oil and vehicle parts, battery banks and so on so building a storage shed makes a lot of sense in some situations.  You can, of course, rent storage space; there is a large industry devoted to just that.

There are a few problems with that solution though.  One, you have to go there to get your stuff, and that assumes that you have a working transport AND that they can or will let you have access if they have no power or their computers don’t work or the people in charge are honesty challenged.  Two, you have signed your stuff over to them if they don’t receive payment for any reason (such as banks being closed).  Three, you are usually contractually obligated NOT to store some of the things you don’t want in your house.  And four, they can raise their rates whenever they please unless you have a long-term lease.  The place I am at currently is charging me TWICE what someone walking in off the street pays, and won’t reduce it.  I could rent another unit, move my stuff over, and cancel the first place, or move to another location, but I know the new price will just start moving up again.  The cost of a storage shed may seem large, but I did the math, and it will be paid off by two years of storage fees, and that is assuming they don’t raise the rate again, which is a very poor assumption.

Look at the other part of the name:  Storage SHED.  Do you have a “post Apocalypse” trade planned or set up; blacksmith, gunsmith, leatherworker, seamstress/tailor, weaver, or the like?  This could be used for your business or the tools and supplies.  Plus, a shed looks like a shed, but it does not mean it must be ONLY a shed.  It could provide camouflage for an entrance or exit from an underground area.  It can be built with concealed areas.  Some sheds are designed as or can be converted to, a greenhouse if you are interested in growing your own food and/or medicinal plants or setting up an aquaponics system.

Ok, let us assume you have decided you want a storage shed.   But can you have one?  Like it or not, there are a number of people or organizations who have control over what you put up.  Do you own the property?  If not, the owner has complete discretion over what you put up, if anything.  And if you don’t own the property, do you really want to make improvements to it?  An option, in this case, might be “portable” storage, like a trailer, or one of those transoceanic shipping containers.

Do you belong to a “Home Owners Association”?  If so, you have contractually agreed to give them complete control of the exterior of your property.  Read the bylaws to see what is currently allowed.  Figure out what you can do which abides by any restrictions.   And once you come to an agreement on what they will accept “today”, get documentation which grandfathers your shed against any future changes to the bylaws.

How close are the neighbors, and are they reasonable?  If you follow all the legal requirements, they may not be able to prevent you from doing what you want, but if they get annoyed enough, they can still cause you plenty of grief.

Dealing with Governments

And then there is the city, town, township, parish and/or county.  Each level of government will have restrictions on what can be done, based on the “zoning” of the property in question.  The less remote the property is, the more stringent the restrictions are likely to be.  These include things like the percentage of the property which can be “covered”, height restrictions, required distances from property lines and other buildings, and many other things, collectively known as “Building Codes”.  Your safest bet is to get a “building permit”, but this has some downsides.  First of all, as a survivalist, you should attempt to stay “under the radar”.  You would be hard-pressed to be more obvious than having your plans on public accessible file with the government and having inspectors checking you out each step of the way.  Second of all, it will cost.  The building permit has a fee, often based on the type of building and square feet.  I once wanted to put up a carport, and they told me I would have to pay $5 per square foot just for the permit.  For posts and an aluminum roof; the building permit would have cost more than the carport.  Not only that, but it is likely they will factor this “improvement” into your property value when computing future property taxes.

By all means, find out all the restrictions on what you can put up; violating restrictions has potential for serious annoyances if the government wants to raise a fuss (and they usually do if violations are brought to their attention).  However, if you can avoid getting a building permit, that might be a good path.  For instance, here, if the shed is less than 200 square feet, you don’t need a permit.  That means a 12′ by 16′ shed (192 square feet) can be put up without a permit being required.  Just because a permit is not required, does not mean the restrictions can be ignored; you just won’t have the public records and government monitoring.

Ways to Get a Storage Shed

The “easiest” way is to have someone build it for you.  This will not be the cheapest option, and a competent builder will likely insist on a building permit, meaning not only public records and government monitoring, but the builder and perhaps others will know all about your shed.  The incompetent builder will refuse the permit and perhaps build something which violates code, with potential for eventual legal challenges or structural problems.  For smaller sheds, you might be able to have it pre-built and delivered.  You could build it yourself, which means you have to come up with a viable design (not that hard) and get the materials, which may be a challenge.  I don’t know about your location, but the lumber here is crap; warped, twisted, split, insufficiently dried.  As my dad said when we were trying to get lumber to replace a rotted porch, “I wouldn’t use this stuff for firewood”.  The remaining option is a “kit”.  This has the advantage that the design, acquisition of materials and much of the cutting are already done for you.  A good kit will have better quality material than you may find locally and instructions which most everyone should be able to follow.

Types of Storage Sheds

There are a number of architectural shed types.  Chose what you like, and what fits your landscape and restrictions.  I’m partial to the “barn” style, because it gives you more height, and even “lofts” in some models.  Possible materials include wood, steel, aluminum and various “plastics”.  Plastic and aluminum tend to be the hallmark of cheap “department store” sheds, great for lawnmowers and garden tools, but not what you would call “durable” or “secure”, and usually limited in size.  For a substantial shed, wood or steel is usually the way to go.  I’m more comfortable working with wood, so that is the path I chose, although steel seems like it might have some advantages.

Modifications

Depending on what you will use the shed for, you may want to make modifications or additions.  For instance, wiring it for electricity may be useful.  But since there is no guarantee electricity will always be available, make sure you have the ability to plug-in a generator (via a transfer switch), or add solar or wind generation capability.  In some cases, you may want to add plumbing.  Note that no matter how much of the electrical or plumbing work you are willing and able to do yourself, you should consider getting a permit for this work and having it inspected.  Unlike the structure, which is hard to mess up (especially if professionally designed), a mistake in the design OR execution of electric or plumbing can cause fire, electrocution, leaks, odors or rot/rust.  And if not up to code, an insurance company may refuse to pay off on a claim.  Wherever practical, have the shed “completed” so it looks like you are “adding” the electrical or plumbing and follow all requirements for what must be visible to the inspector(s).  Of course, if you got the permit for the shed in the first place, follow their instructions on when in the process the various inspections should be scheduled.  If temperature control is a concern, you may want to add insulation, cooling or heating.

Flooring

This foundation (literally) of a shed is an important decision.  The common choices are concrete or joists with flooring panels.  Concrete may be “better” and in some cases easier; pick your location, set up forms and rebar, and have it poured.  It may be more expensive, and less versatile (it is kind of hard to dig through concrete if you decide a partial “basement” would be handy), and “impossible” to move.  Joists are likely to be less expensive and more versatile, and if the ground is not even, may even be more practical.  There will be beams running the length of the building, with the joists running across the building between the beams.  Flooring panels are laid across the joists and fastened in place.  Note that the beams and joists are in contact with the ground and so are at risk for rotting and/or insects.  Thus pressure-treated lumber or corrosion-resistant metal is critical here.

Site preparation is highly important since, in order for the floor to be flat and level, and stay that way, the ground must be flat, level and stable.  If it is not, you may be able to compensate by having a variable thickness concrete floor or building a foundation or partial foundation for your beams out of blocks and concrete.  A “better” floor system is to have runners the length of the building, on which the beams and joists sit.  As long as the runners are flat and level (and adequately supported), it does not matter if the ground is, plus it also allows ventilation below the shed, which can help with cooling and reduction of condensation inside.  It also puts the flooring higher, which may make entry more difficult, but on the other hand, gives more protection against minor flooding.  The runners, of course, must also be pressure-treated wood, corrosion-resistant metal, or even concrete and/or blocks, and a ramp can compensate for the step up.

What Next?

Does this sound like something which might be of value to you?  Check out Part 2 of the Introduction for some more pre-build details.

Why would you want to do this?  Look at the name:  STORAGE Shed.  Most everybody “needs” more storage because they can’t bear to have less stuff.  And someone preparing for

In Prepper circles there are a myriad of opinions on gear selection. From the best survival knife to the best caliber of handgun to purchase all the way down to paracord differences. The good thing for preppers is that there are so many suppliers of quality gear out there and we get the benefit of competition.

We also get the job of making decisions and in some cases; with the large number of choices you have, finding that one “perfect” thing can be elusive. I myself have purchased more than one of several items in my prepping supplies trying out new options or searching for a better solution. Bug Out Bags are another item in which preppers have options. Some might say too many options to make a good determination, right or wrong about the bag they are going to count on when you need to go mobile and survive.

I was fortunate enough to be contacted by the good folks at 3V Gear. 3V Gear came into being based on the owner, Daniel Beck, trying to find a bug out bag. In Daniels experience, most of the packs out there were very expensive or ill-equipped for the general 72-hour time frame. As with most entrepreneurs he decided to create his own bag. What came from that inspiration was the Paratus (based on Semper Paratus) meaning Always Ready. 3V Gear asked me if I wanted to review one of their Paratus bags for the readers of the Prepper Journal.3V-Gear_Logo01

Any long-time readers of this blog know that Final Prepper is not a “review” website typically but I do on occasion review products that I feel would be of significant value to preppers out there. Bug Out Bags fit into a category of gear that isn’t usually cheap either so the less purchases one can make trying to find the perfect bag, the better.

The Paratus 3 Day Operator’s Pack

The Paratus 3 Day Operator's Pack

The Paratus 3 Day Operator’s Pack loaded in the back of the Bug Out Vehicle. The pack itself is generously sized and can easily accommodate a lot of gear or supplies.

Quality

The Paratus 3 Day Operators pack is designed to be a bug out bag. It has double stitched seams, self-healing zippers, 600D PVC backed nylon and almost 3000 cubic inches of internal capacity. It is covered in just enough Military spec MOLLE  to give you a wide array of options for attachments and arrangements. The two outer pouches give you extra capacity and are the perfect size for an IFAK. They wobble slightly but it isn’t anything that bothers me. I removed one of them.

From everything I can tell on this bag it is constructed very well. I took this with me on a trip out-of-town and it served as my luggage for a week-long trip perfectly. I even threw my laptop in there in the main compartment and it fit perfectly. The compartment I put it in was likely made for a water bladder as there is a flap in the top of the Paratus that would allow a drinking tube to come out.

The front compartment has a mesh divider about half-way up the back for throwing loose items in there. You don’t have mini-pockets and internal places for pens and paper, but I never use those things anyway. Actually, I feel like I need to search around for items to put in those mini pockets and dividers…

All of the stitching seems to be quality and the zippers operate with ease. I received the black model so it looks more tactical that some of the other colors, but they all look suited to some form of combat.

Function

According to 3V Gear, the Paratus is designed to be fully adjustable to the users needs. It comes with an accessory pouch, the removable pack and all of the MOLLE you need to customize the pack to suit your needs.

The Deployment pack is the perfect size for some extra rations, spare magazines and blow out kit items.

The removable Deployment pack is the perfect size for some extra rations, spare magazines and blow out kit items. Optionally you could use it for your tactical shower kit to impress all the guys.

The Paratus also comes with a Deployment Pack that is fully MOLLE compatible and will attach to any MOLLE pack, vest or other gear. This compact pack has a convenient grab handle or it can be carried with the concealable waist belt. Perfect for when you need to grab your kit and go or for 100 other possible uses, i.e. first aid kits, ammo bags, for climbing harnesses, survival kits, even video camera bags.

The Paratus’ dimensions are the maximum allowable for airline carry-on requirements. I had this in the back of my car, but it would make a perfect bag for a three-day trip, or bugging out on short notice.

  • Main compartment: 20” H x 12″W x 5.5″D (1320 cubic inches) with internal organization
  • Top front: 13″ H x 12″ W x 3″ D (468 cubic inches) pleated w/ internal organization
  • Two large MOLLE pouches attached to each side, (5″x 2.5″x 8″, 100 cubic inches)
  • Overall Size: 2890 cubic inches
  • Body contoured shoulder straps with D-Ring for equipment attachment
  • Adjustable padded waist belt
  • Waist belt measures 52″
  • External side compression straps
  • Heavy-duty carry and drag handle
  • Molded EVA back panel
  • Two double zipper pulls on the main compartment for easy access
  • All zipper pulls threaded with para-cord for durability and noise reduction
  • MOLLE and PALs attachment points throughout
  • Includes 3V Gear Rapid Deployment pack
  • 3″ x 5″ Velcro ID panel with 3V Gear 3D PVC Logo patch
  • Hydration compatible
  • Sternum strap
  • Available in: Olive Drab, Black, and Coyote Tan

Comparing the Paratus the 5.11 Rush 24

One of the things I wanted to look into were how the Paratus from 3V Gear compared to my trusty Rush 24 from 5.11 Tactical. For starters the price, when I bought the Rush 24 was about $175. Rush is also made out of 1050D nylon as opposed to 600D for the Paratus. What does that mean? The 1050D Nylon has a higher tear strength but to my untrained eyes and fingers it was basically the same fabric. For sitting in the back of my car waiting on an emergency, the fabric of the Paratus seemed more than adequate.

You can see below how the profile of the two packs is different with the Paratus appearing slightly thinner, but they both have almost the same capacity with all added features.

  • Rush 24 – 2070 cubic inch capacity
  • Paratus – Main compartment + Top Front = 1788 cubic inches. Add the Deployment pack (not shown below) and you get another 432 for a total of 2220. The side pouches add another 100 cubic inches.

Paratus4

Paratus2

Overall Impressions of the Paratus 3 Day Pack

The Paratus pack is priced competitively at $80 on Amazon.com and to be perfectly honest, the price is what made me take notice. At the time, the Rush Bags, well anything from Maxpedition or 5.11 to be sure were well in excess of that price so I had discounted the Paratus as being inferior. Surely, they could not offer comparable quality with that much of a price difference could they?

I am happy say that while it isn’t the exact same thing, I think the Paratus makes for a perfectly acceptable alternative to the Rush 24 series bags. We can quibble around the details – does the Rush 24 have more features? Maybe, but at the end of the day, it is a pack you throw on your back that holds stuff. The Paratus, at well under $100 is a great value and I am sure you will agree if you purchase one for yourself.

I just checked and even the Rush 24 price has come down to about $110. Perhaps Paratus is giving 5.11 a run for their money?

In Prepper circles there are a myriad of opinions on gear selection. From the best survival knife to the best caliber of handgun to purchase all the way down to

When I purchased my AR15, I never really considered painting it and I loved the nice black finish. Over the years though I have come to realize that this beautiful black rifle really sticks out in the woods or anywhere else for that matter. All black has a habit of doing that unless it is dark. I finally came to the conclusion that it only made sense for me to paint my AR15 after considering a number of factors. For starters, I wear camouflage when I am hunting to blend in with the surrounding trees, brush and vegetation, so why shouldn’t my rifle? Secondly, professional soldiers who are trying to blend in go to great lengths to camouflage their location so giving your rifle the same treatment only makes sense. Why spend so much time on getting into a nice hiding spot, possibly with a ghillie suit and not have your rifle dressed for the occasion?

I know why I hesitated in the first place. When you pay that much for something, the last thing on your mind is to take a can of spray paint to it. I started researching how to camo paint your AR15 probably 6 months ago and knew I would try this out on my rifle eventually, but I was still a little hesitant to pull the (spray can) trigger and change the stock color of my beautiful black rifle. Maybe one of the things in the back of my mind was that if I ever paint my rifle, I will never be able to sell it. I don’t know why I considered that a problem because as of right now, there is no way I am going to part with my rifle. You can read into that what you like but it is one thing to take into consideration if you are thinking about a camo paint job for your little rifle.

I went online and read a lot about the painting process which if you have ever spray painted anything is ridiculously simple. Krylon has a line of paint that is specifically made for camouflage. Their camo paint works great on Ceramic, Glass, Hard Vinyl Plastic, Wrought Iron, Wicker, Metal, Wood and Plaster. That covered all the bases I needed and the colors perfectly matched all the cammo patterns I would use. As an added bonus, they have good instructions on how to paint camouflage patterns and even provide the camouflage stencils you can download for your own paint job. The stencils look similar to the random designs you would see on multicam patterns. The great part is that this can be used on any weapon out there so if you want to camo paint your hunting rifle (something I plan to do) this paint and the stencils will be perfect.

Rustoleum makes camo paint colors too but I used the Krylon for my rifle.

How to camo paint your AR15

The first thing I did was to remove my sling, scope and light. The reason I removed the scope is that I just purchased it and I want to make sure it will work before I cover it in paint. That is one modification I am sure they wouldn’t take back. The scope is a Nikon P-223 that is designed specifically for the AR platform. I will be reviewing this scope in the future.

AR Prepped for the camo paint job.

Once I had the extras removed, I used painters tape to cover the magazine well, the trigger and the ejection port cover spring so that no paint would get in these areas. I am sure it would have been fine if I painted them, but I took the precaution just in case. Then as everything was wrapped up and ready, I hung the AR up and sprayed it down with brake cleaner. You can buy this at any auto store. The Krylon instructions said you didn’t need any primer but I wanted to make sure I removed the extra oils so the paint would adhere as well as possible. Once the rifle had been sprayed with the brake cleaner, I let it sit for about an hour to dry.

Krylon Khaki as the base coat.

The instructions from Krylon said to work your way from lightest to darkest color. I used three colors (Kahki, Olive and Brown) and I think these are a great match for this time of year and the vegetation we have around our home. The great thing about this camo paint job is that you can repaint the rifle when the seasons change or if you make a mistake. The Krylon went on beautifully and had a great smooth finish that covered nicely. I don’t even think I used a half can on the whole rifle and it looked so good I half considered just leaving it like this.

Camo stencils from nature.

I did consider cutting out the stencils from the Krylon site. I know there are sites that you can download the ACU digital patterns and cut these shapes up for stencils, but I wanted to try something more natural. And, I didn’t want to sit there with scissors all day… So I walked out into the yard and grabbed some various leaves, grass and sticks to use for my own natural stencils. This will work great regardless of where you live because your camouflage will match your local vegetation or it will in shapes anyway.

Place your stencils on the AR15 and over spray with a darker color.

This next part isn’t really scientific and you can’t do this the wrong way unless you spray too much paint I think. For my first stencil I laid a branch with some leaves on the main part of my lower receiver and sprayed with my Olive green. I then repositioned the leaves in other locations and used other elements like the grass to lay down different patterns. The Olive shapes lets the Khaki come through and begins to break up the shape of the AR15. Once I had a nice pattern on the first side I moved the the other side. After both sides had been painted, I started using the brown with these stencils to add additional camo pattern.

Finished product on side one.

The process is so easy and I was really pleased with the results. I plan to do the same thing to my Hunting rifle next since I have so much paint left. You can see the difference a little spray paint makes. In the winter if needed I can tone down the green and just just more Khaki and brown. This is a simple project that anyone can do for less than $20 and it only takes a few hours max from start to finish.

Before and after shot of the Camo paint job on my AR15.

The new paint job works well with the multicam pattern too I think and blends so much better now with the rest of my gear. It’s not perfect, but I think it is so much closer. This is a great project you can try with your rifles too. That is if you don’t plan on getting rid of them. You don’t do you?

When I purchased my AR15, I never really considered painting it and I loved the nice black finish. Over the years though I have come to realize that this beautiful