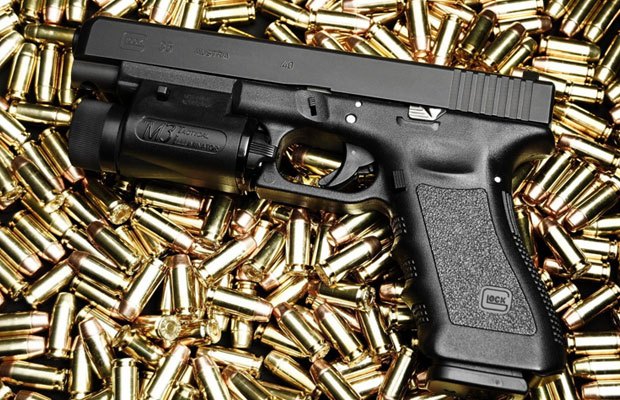
Part II: Modes of Carry
Yesterday we talked about holster selection based on need, intended environment and material. Today we’ll talk about the different methods of OWB (Outside the Waistband) and IWB (Inside the Waistband) carry.
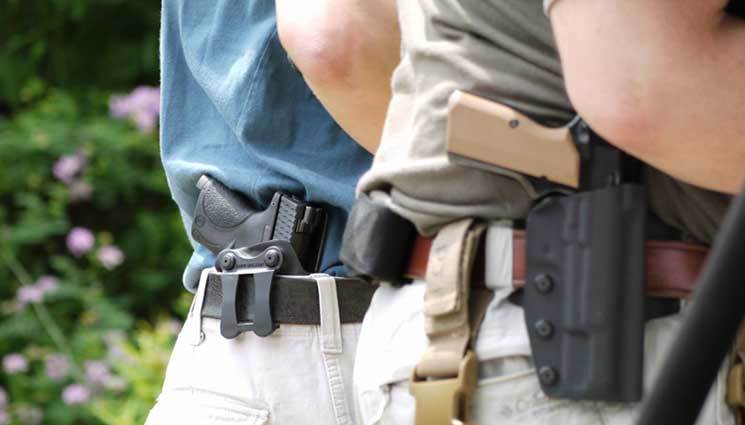
Hip carry
Hip carry is the traditional method of carry for a handgun, the most common and strictly speaking from a biomechanical standpoint, the most efficient (i.e. the distance of travel for the draw to the point of fire with the fewest steps necessary). A handgun at the hip provides a stable platform allowing for ease of access and a strong position for retention due to its location near the center of balance. The most common holster positions are straight cant (muzzle directly down) and a 15/20 degree cant (also known as FBI cant). FBI cant is helpful in making a hip carried weapon more concealable, but it will slow muzzle to target on the draw, and by its position forces the wrist into an extreme bend in order to draw the weapon. The necessary articulation in order to draw the weapon can be reduced depending on the location of the weapon (pushing towards the front or back of the belt) but it still will present an issue for certain shooters. If your body type is one that requires as much concealment help as you can get, a canted holster may be a good choice, just realize that a zero cant holster will be more efficient.
When concealed, either under a T-shirt or cover garment, hip carry does have a higher chance of printing against the clothing but access to the weapon can be made quickly. To avoid printing, clothing can be bought in a larger size, or the weapon can be positioned higher on the belt (a High Ride model holster) to push it into the natural curve of the body above the hips. Weapon size, carrying a compact or sub-compact as opposed to a full size handgun will also help with concealment.
Leg rig
Thigh carry, leg rig, drop-leg, whatever you want to call it, is a good idea in a small (very small) set of circumstances. In every other situation it’s a bad idea. I hate to be blunt, but it’s true. The leg rig has been around (in its present form) for a little more than 30 years, introduced first (arguably) by Safariland at the request of Special Operations Forces who wished to have an alternate carry method for their secondary weapon when wearing scuba gear, a parachute harness or rappelling harness. The leg rig was also useful in allowing the draw to clear the body armor of the time. Obviously the first issue with a leg rig is that it is attached to a part of the body that by nature is designed to move. This tends to bang the weapon around, knock it into the environment and allow it to get hung up on anything that wants to reach out and grab it. Leg rigs also create an almost never ending need for adjustment. Empirically speaking, the leg rig has been shown to have a much slower (as much as half a second) draw than hip carry. Of course I have seen users adjust their leg rig to a position where it is comfortable and carries close to the body with quick access…they did this by drawing it nearly to the belt line, which is where a hip holster could be worn in the first place (including with a 1” drop attachment now available for many styles).
With the advent of thinner body armor and the evolution of load carrying equipment in general, the majority of plate carriers no longer present an issue for a hip worn weapon. This makes the use of a leg rig a moot point. The leg rig is a status symbol for some, or a just because decision for others. My advice – don’t use it unless you genuinely need it. If the leg rig is a mission for job requirement, by all means go forth and be uncomfortable. Avoid leg rigs made of fabric (read: cheap leg rigs) and go for a sturdy Kydex such as a Safariland. Because the holster is going to take more abuse than a hip carried holster, the stronger the holster the better. I once saw a gentleman pressed by exigent events run three blocks. Sadly, his sidearm only ran two. Caveat Emptor.
Shoulder carry
The shoulder holster has been around for almost (or as) long as the hip holster. Generally it’s a harness system worn over the shoulders that supports the handgun under the support hand shoulder in either a vertical or horizontal position. These holsters usually begin at level I retention up to level III and require the user to reach across their body to draw the weapon with their primary hand and that’s where the problem begins. We do not want to point our weapon at anything we do not intend to shoot., yet when the handgun is drawn from the shoulder holster, the user will muzzle a wide area in the arc of the draw before the weapon is brought to target. The issue there is explicit. Now, the shoulder holster does conceal the weapon better than some other holster types, but it is a safety issue by design and in no way faster than a hip carry draw because of the distance the muzzle must travel before coming to the target. A straight line beats an arc all day long.
I do not recommend a shoulder holster, as the only real advantage I can see is that if concealability. One might point to the fact that the weapon is easier to access in a seated position than other holster types and this is true. However, this a small advantage for a under very limited conditions and may not be worth the ND (negligent discharge) risk you will have with this type of holster. Comfort and concealability should not replace safety.
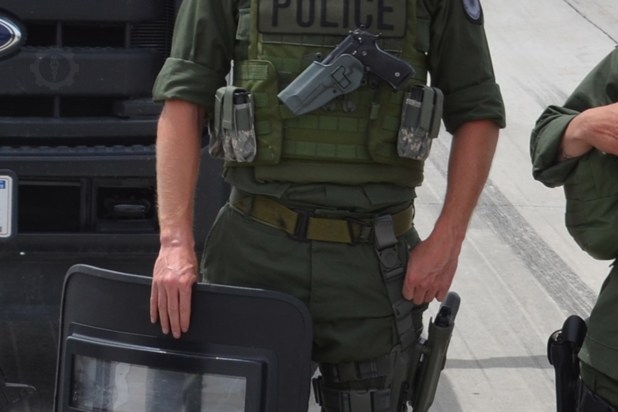
Chest carry
Chest carry implies exactly what it sounds like; the weapon is carried on the chest, usually in a tactical role, with the muzzle of the weapon towards the deck or at a cant for ease of draw. This method of carry is popular and almost exclusive to the military/security contractor world as it is most common on plate carriers worn in both professions. Like shoulder holsters, chest carry presents the same safety issues, though unlike shoulder carry, the time to target is near (sometimes faster) than that of hip carry due to the fact that the weapon is carried high on the chest in the handgun workspace and only has to make a 90 degree turn and be punched out to be put into service.
Chest carry has problems of its own in addition to those it shares with shoulder carry. The main problem in my mind is that if a long gun is carried (which is likely) the sling of that weapon is going to have a nasty habit of hanging up on the chest mounted pistol. This is tantamount to short sheeting your rifle. When you need it, the handgun is going to take away just enough sling to force you to untangle it before you can use it. The second issue with chest carry lies in shooting positions such as prone. It is hard to lay prone on a chest mounted pistol, especially if the holster is bulky Kydex (this creates obvious problems if you are on the embarrassing end of a two-way range and you’re trying to make yourself small). Lastly, if the holster is similar in design to a Serpa, debris from lying prone stands a good chance of jamming the release mechanism for the handgun. If your occupation requires extensive use of a vehicle in a high risk environment, a chest rig provides quick access to the weapon, more so than even a shoulder holster would. My advice is to use a holster such as a Safariland with a MLS/QLS system that can be mounted on the chest when needed, then moved to a hip (or even thigh if that’s your bag) mount when on foot.
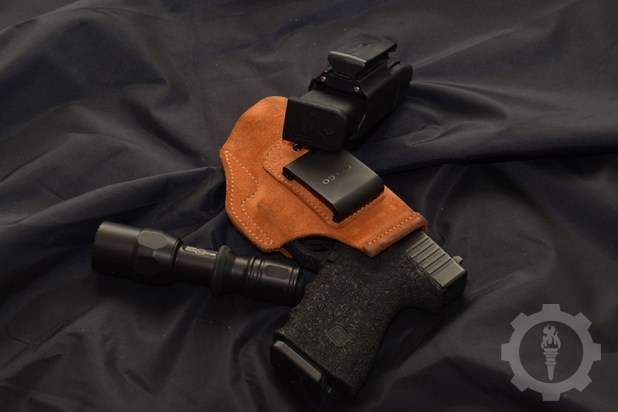
Ankle carry
I mention ankle carry almost as an afterthought, though it is still a very popular method of carry, usually for backup weapons. In this situation, a good holster is one that will protect as much as the weapon as possible and will be very moisture resistant. A hybrid design such as a leather/Kydex or a nylon/leather may be best. When purchasing, find a model that provides the most amount of hook/loop real estate as possible both vertically and horizontally so that retention of the weapon and the holster will be high. I would recommend ankle for a backup weapon, but not your primary. Any weapon that is going to conceal well on the ankle is probably not going to hold enough ammunition for any sort of sustained fight if that’s what you find yourself in. Since none of us have a crystal ball, ill use an old adage; bring enough gun.
Editor’s Note—it can also be problematic if you wind up on your back in a fight and cannot get to your ankle to draw, as I discovered once to my chagrin. DR
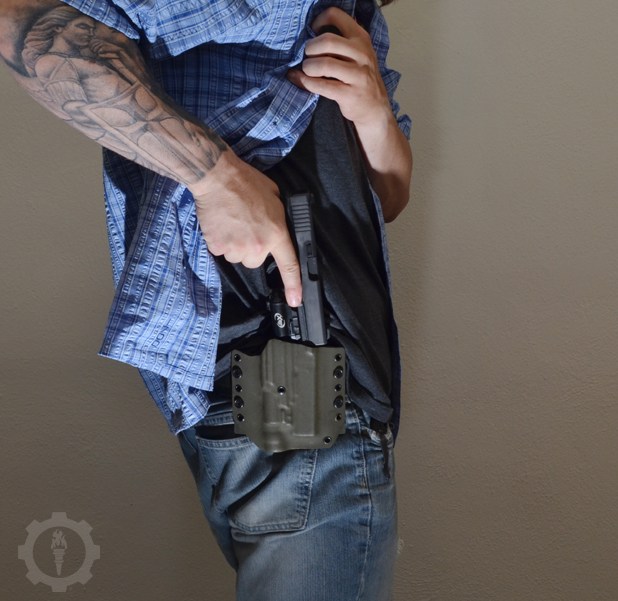
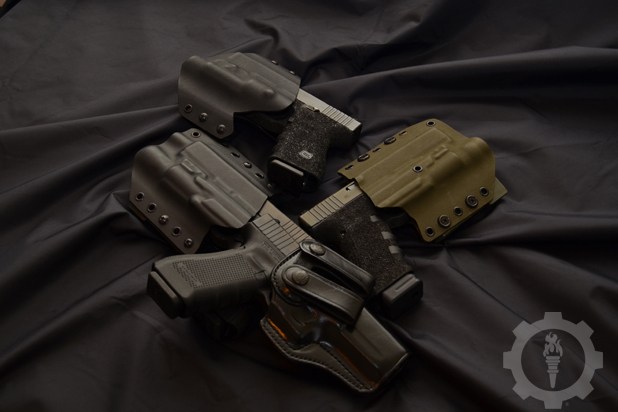
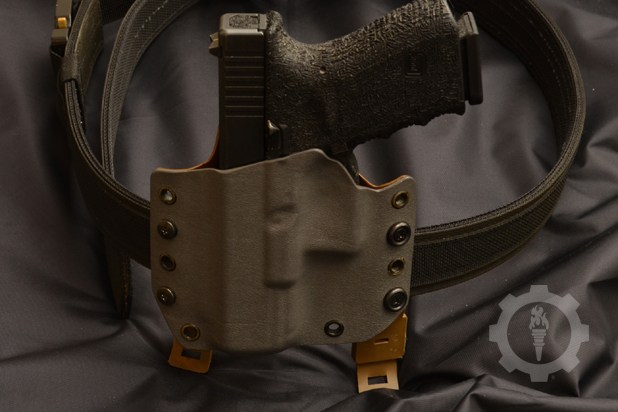
Inside the Waistband (IWB) holsters
For Inside the Waistband (IWB) holsters, there are three general types; Straight pull, canted and appendix carry. IWB holsters can be found in all three common holster materials and come in near countless configurations to aid in concealment. The most common level of retention is friction lock, though level I and II are not unheard of.
The most important aspect of an IWB holster (besides safety and quality) is going to be comfort. Because the holster will be worn against the body, the material should be reasonably flexible, durable and sweat resistant. My personal preference when carrying IWB is a leather holster due to its flexibility and long term comfort. My experience with Kydex IWBs has been poor, as most models I have tried have a tendency to “taco” (the Kydex is so thin that when the weapon is drawn, the tension of the belt bends the holster in on itself, making re-holster difficult). Kydex is also likely to be more uncomfortable against the skin. As for nylon/fabric holsters, the quality is going to vary greatly as the market is flooded with dozens of cheap fabric holsters that are little more than sewn pockets that offer no retention at all. It’s also important to note that I have yet to see a fabric IWB holster that does not “taco” when the weapon is drawn.
Avoid fabric holsters.
The next general consideration is the attachment method. Popular options for IWB include; belt loops, J-hooks and simple clips. The belt clip is the weakest option of the three and most likely to fail, they also have a tendency to have a weak purchase on your belt line and come out with the gun upon draw. The J-hook allows the holster to be concealed deeper into the belt line, which makes them a good choice for concealment. J-hooks are found on Kydex and hybrid holsters. Finally, belt loops are just as reliable as J-hooks, though will by design carry the holster higher in the belt line. Now, the chosen attachment method can also influence positioning of the weapon on the body. A belt loop style can, depending on body type, be worn as far forward or rear as you like, whereas a J-hook style may limit positioning as it sits deeper in the waistline.
Positioning of the IWB is the final consideration. If you carry IWB occasionally but normally prefer OWB, its best to carry inside the waistband in the same general location where your OWB holster would sit. This reinforces repetitious memory and maintains as much continuity with practices skills as possible. If this isn’t possible, or if IWB will be your main carry method, holster positioning should be chosen based on efficiency. The same bio-mechanical efficiency that applies to the shoulder holster also applies to IWB. If you carry at the small of the back (SOB) for example, your draw will require a sweeping arc and rotation of the wrist. A draw from this location will also include incidental muzzling of unintended targets, though not nearly as grievous as a shoulder holster. SOB carry has a printing concern that is likely to be exaggerated in light clothing and any bending forward at the waist. Carry on the hip, or just rear of the hip instead will allow for greater efficiency and concealment in appropriate clothing. Having discussed the general carry considerations, we can look at our three popular IWB holster types.
Straight cant
Just like its OWB cousin, the straight cant holster points the muzzle of the weapon directly towards the deck. This style is designed to be worn more or less in the same location as a hip holster, though it can be moved forward or rear of the hip. Doing so may complicate the draw, slightly forcing a bend at the waist. The straight cant style does present some concealment issues if worn at the hip as it places the grip of the weapon more-or-less on the same plane as the belt line and this allows he cover clothing to bunch above the weapon and fall between the grip and the body. This can be corrected by adjusting the holster off the hip where the clothing is usually looser and not as likely to cling to the body. This solution isn’t a blanket fix but may work depending on your body type. The advantages to straight cant carry at the hip is in the draw. A draw from concealment is going to be slower than from unconcealed. Likewise, a draw from an IWB holster has a good chance of being slower than OWB because the weapon is held closer to the body and the primary hand must first wedge between weapon and body before the draw. Because hip carry is more biomechanically efficient than other methods, it provides a faster draw potential.
Canted
The canted style of IWB holster offers more placement options in the beltline, and some with better concealment. By angling the weapon, the grip does not sit parallel to the beltline and will not have as high of a tendency to print on slimmer body types. These holsters are common in 5 to 20 degree cants and are usually canted based on where the holster is recommended for carry. A SOB holster will have a more aggressive cant than one intended for rear-of-hip-carry. When it comes to choosing a canted holster, its best to get an idea of where the weapon will be carried and how likely that location is to interact with the world around you. A SOB holster, for example, will make your choice in seating a bit tricky. There is nothing like the bruise on the back from wearing an SOB holster and then sitting in a hard backed chair for a few hours.
For canted (and IWB in general, of course) low quality holsters should be avoided altogether. With shoddy design and materials, some holsters will have a tendency to let the gun sit too low in the beltline and the rear sights can hook on the pants or belt, making an immediate draw a problem. Canted fabric may also drag against the front sight on the draw, or be so pliable that it grabs the front sight upon draw and causes a tug o’ war in your pants. No bueno.
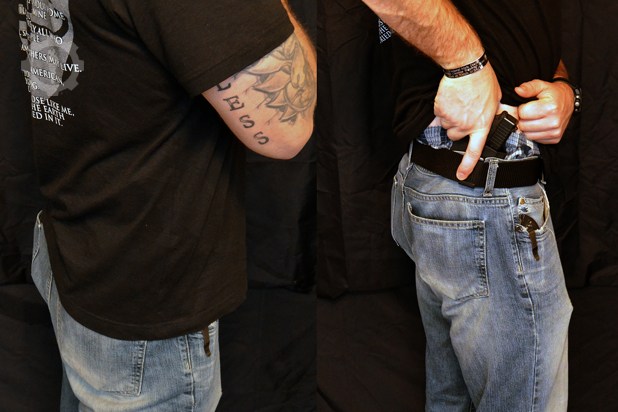
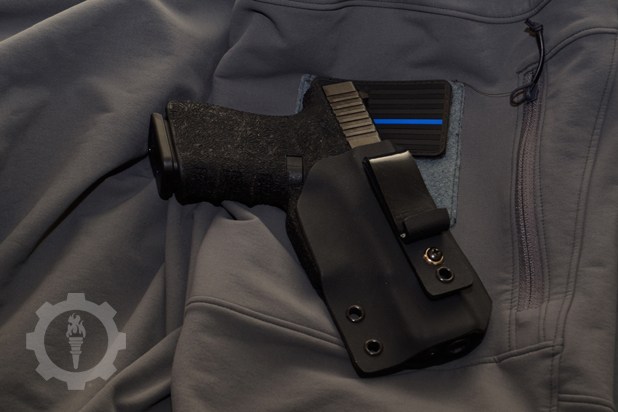
The final popular IWB method is appendix carry. Essentially this is where the weapon is carried in the natural pocket of the body between the thigh and the groin with the muzzle generally pointed towards the deck, however I have seen appendix carry holsters with a 5-15 degree cant or more.
Now, take a deep breath if this is your chosen method of carry.
Appendix carry is unsafe and stupid; it is literally a bad idea wrapped around a gun. Let me qualify that statement. With appendix carry, the weapon is muzzling your femoral artery and you genitals. Where a gunshot wound to the latter may be life (and sex) changing, a gunshot wound to the former has a high probability of killing you dead. For those with little or no knowledge of anatomy, the appendix carry are of the body houses the lateral pelvis, hips, genitals, bladder, lower intestines, colon, and the aorta (which branches into the left/right femoral) as well as some other things that don’t react well to gunfire. All things considered, I don’t want to be shot in any of them, especially with my own weapon.
Regardless of the holster type or design, the weapon is carried in an area of the body where ANY sitting or bending at the waist is going to muzzle the body as the legs bend up towards the torso to sit, or the torso down to bend over. Before I go any further, you may believe that you are safe enough with appendix carry and it’s just fine for you. Sorry, no. Safety should never be violated for the sake of better concealment or comfort, nor should it be ignored simply because someone believes they are proficient enough to avoid a negligent discharge. Appendix carry is the only method of carry that intentionally and knowingly muzzles the body and you should not like that. Ever.
As to the efficiency of appendix carry, there is no advantage save better concealment. A draw from the hip is demonstrably faster. In appendix, the weapon is drawn from near center line of the body and must be pushed either away (towards the target) or brought past the primary hand hip (to the side) before the weapon can be fired in close contact. If the weapon is fired from centerline immediately upon clearing the holster, the slide will impact the body and runs a high risk of malfunction. Add to that, the weapon essentially clears the holster sideways and must be rotated before the sights can be used, which delays the first aimed round. The lag between appendix carry and hip carry is minimal, literally fractions of a second, though we must obviously keep in mind that we carry a handgun for self-defense from an unexpected attack. Those fractions of a second may be the difference between winning a gunfight and losing your life.
The final issue with appendix is drawing from less-than-ideal or austere shooting positions. Drawing from the fetal or prone or for shooters with more girth, seated or even supine can be highly difficult. Under stress these complications have a real chance of causing a negligent discharge.
A word on exposed “open” carry
Many states allow the exposed carry of a weapon either in conjunction with or in lieu of a concealed carry permit for the non LEO citizen. Often when I see someone carrying exposed, they are doing so in a holster that offers zero retention (Fobus holsters come to mind) or are carrying in such a way as to display the weapon needlessly. I applaud the responsible carry of a weapon by any citizen. The key word there is responsible. Look, just because you can do something doesn’t mean you should. One only has to look at the FBI’s Law Enforcement Officers Killed and Assaulted annual report to see how many LEOs lose their lives every year after being shot with their own weapon. Why do I mention that? Because most LEOS open carry, often in a level II or higher holster. They receive hours of weapon retention training in the academy and hundreds of more hours throughout their career. They are taught how to stand to keep the weapon out of reach, how to recognize target glances towards their weapon, and how to prevent their weapon from being taken from them…and officers are still killed with their sidearms. A LEO of course goes places and interacts with people the average citizen doesn’t so their risk for having their weapon used against them is higher, though the comparison is apt nonetheless.
Any confrontation, argument, disagreement or chance encounter you have in the public has at least one weapon present, and if it is exposed, all parties involved know it is there. If you choose to open carry in a friction retention or even a level I holster, you are significantly increasing your chances of being killed with your own gun. Certainly it is your right. So if you are going to exercise it, carry in a level II or higher and seek professional training in weapon retention. If you aren’t willing to do this, please cover it up (legally, or course). Personally and professionally, I would rather not see someone open carry simply because they can; it’s foolish and the sort of machismo posturing the pro-gun community does not need. Thousands of people conceal carry every day without a single issue. If you have the option, you should too.
In the end when it comes time to choose your first holster or your next holster or just to rethink your current holster, choose your holster based on its safety, usefulness and comfort. Choose based on your occupation or common carry preferences and always, always train with the holster you carry. Leg rigs are Gucci, chest carry is Gucci, but it does you little benefit to train with either if the only time you carry that way is on the range.
We don’t go to the range to learn how to go to the range. We go to train for real life.
This has been a semi-comprehensive look at holster types and methods of carry, but by no means is it exhaustive. Of any carry method or material, a great deal can (and has) been written. I am only one professional voice in a field of my peers, so I encourage you to do more research. Should you disagree with anything written here or want more advice on a specific topic, feel free to email me and we’ll discuss.
Part II: Modes of Carry
Yesterday we talked about holster selection based on need, intended environment and material. Today we’ll talk about the different methods of OWB (Outside the Waistband) and


 Preparing for the future requires forethought; the more you accomplish before an emergency event, the less you’ll need to accomplish during or after one. Stockpiling alone, however, can only carry you so far. You must be able to find renewable food sources. Once the SHTF, it will be too late to harvest Ramen at Walmart. Even if you could get your hands on that last brick of tasty noodles, fighting a gang of thugs for looting privileges is not sound tactical advice. If the gangs control your local Walmart, what then? Wouldn’t you rather be able to safely feed you’re your family from home than having to wander the means streets of some post-apocalyptic city scavenging for a nice clean dumpster? So, let’s assume you’ve already taken care of your short-term physical needs. You’ve got plenty of Evian and