Home2019April (Page 2)

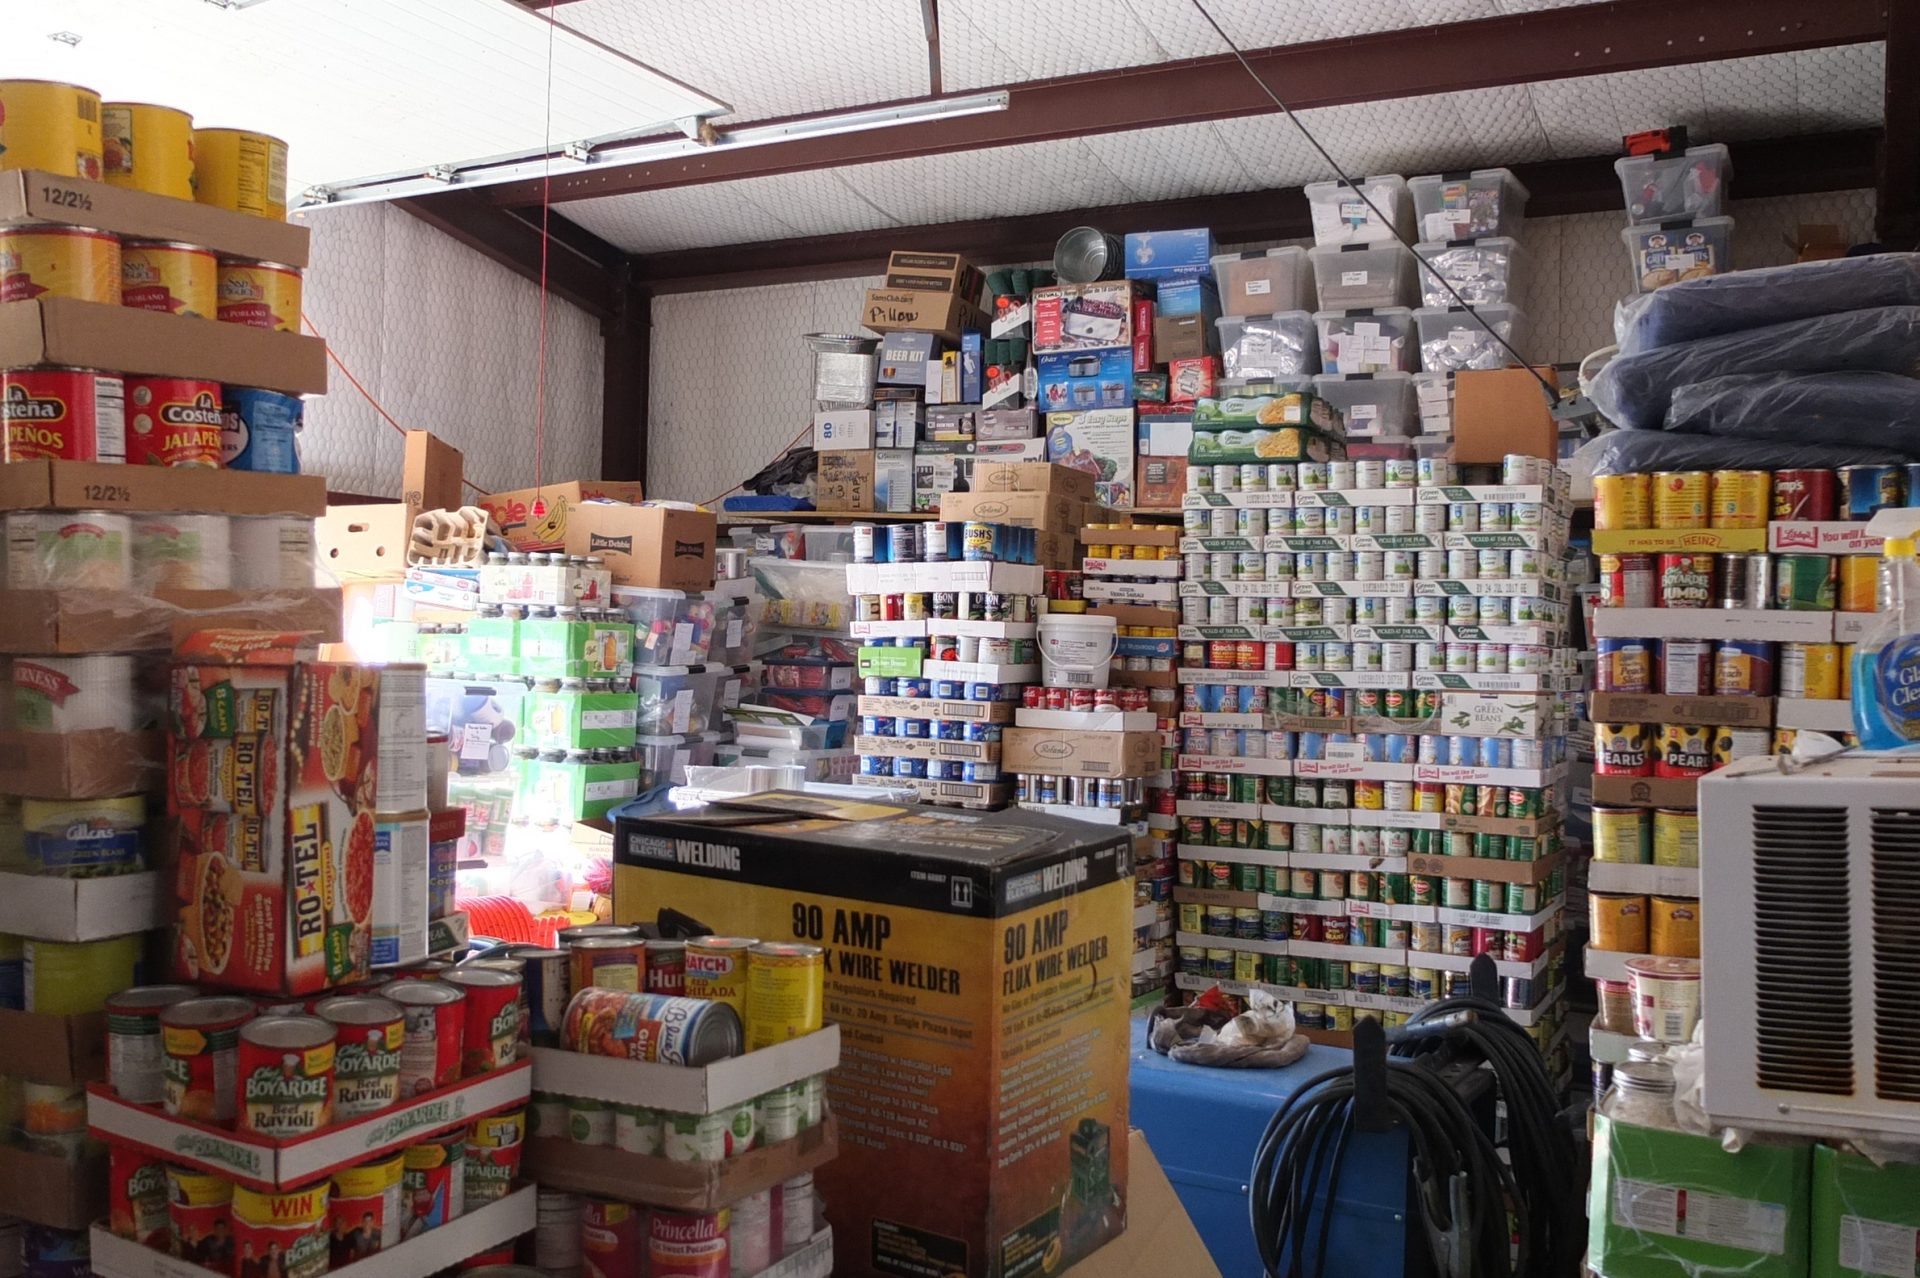
One thing you learn as a prepper is that any new skill you acquire will come handy one the day, cooking including. Sure, not all of us have the talent of whipping up a terrine or a souffle, but at least we learn to go by without actually having to starve to death or wasting away money on takeaways.

For my part, I actually managed to pick up a thing or two about the art of preparing delish and nutritious meals during one of those long blackouts. Yes, I’m still here, and no, the city council hasn’t gotten around to fixing the problem yet.

Now, for most of us, cooking’s not that big of a deal – get online, pick a recipe, follow the steps, and, Shazam, dinner’s ready! Still, the rules of engagement tend to change a bit if you’re forced to do the same thing during a power outage.

No electricity means that you will not be able to use the mixer, microwave, electric oven, toaster, and whatever cooking appliance running on electricity. Such a situation calls for some serious improv and, in today’s article, I’m going to show you my favorite blackout dishes and how to cook ‘em.

So, without further ado, here are my top 7 choices in no-power food.

  1. Oats

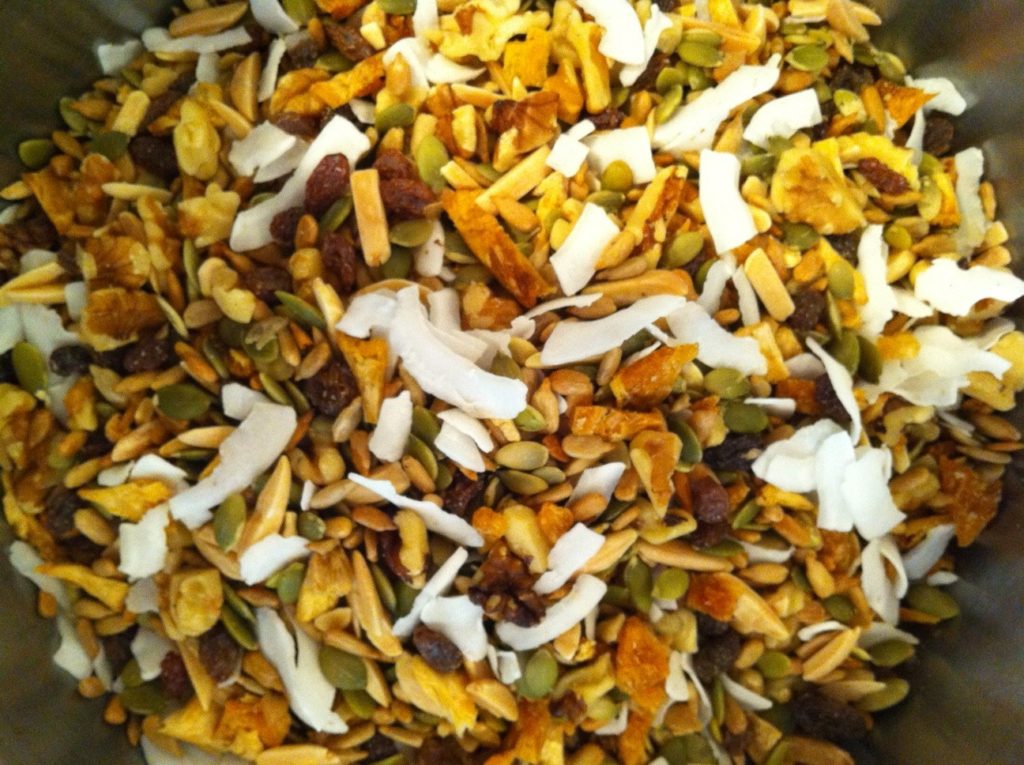
Yes, I know they’re not palatable, but they do wonder for the body. Most importantly, you can prepare anywhere and at any time, power or no power. Just let them soak overnight in a bowl of water. You can serve them for breakfast or dinner with assorted nuts, honey, and dehydrated fruits.


2. Gazpacho

Great Spanish dish and stupidly easy to make. I personally like to have fresh gazpacho year-round, since it’s packed with vitamins and minerals. More than that, this over glorified tomato soup is a wonderful thirst quencher during those hot summer days.

So, grab yourself a couple of diced tomatoes cans and empty them inside a large bowl (don’t forget to drain all of the juice). All that remains is to add one chopped onion, a thinly-sliced cucumber, a dash of cayenne pepper, salt, and pepper. If you’re looking for a bit a hit, you can add one teaspoon of Tabasco. Finish the dish by adding a little bit of olive oil, chopped parsley, and some lemon juice. That’s it!

3. Corn salad

This is what I like to call the lazy man’s easy way out of the kitchen. I usually like to prepare this dish when my wife’s away – kids love it, and it takes me about five minutes to get everything ready. So, it’s a win-win. Take a can of corn, drain the excess liquid, and put the contents inside a large bowl.

Chop any veggies you have left in the fridge (I like to add onions, red and yellow bell peppers, and tomatoes to my salad). For extra flavor, you can add a can of black beans. Toss it around a little, add a sprinkle of olive oil, and serve. If you fancy a bit of dressing, you can quickly make one by combining apple cider vinegar, olive oil, dried basil, pepper, and salt in a bowl.

4. A simple salad with apples and white beans

By far, my wife’s favorite Sunday morning salad. Super easy to make: pour the contents of white beans can in a large bowl and add some apple chunks. To finish the dish, you need only add some olive oil, fresh thyme, a handful of walnuts, salt, pepper, and scallions. Give it a good mix and serve.


5. Good, old grains and beans salad

This is one of the first recipes I learned during the first bout of blackouts. It’s very handy to know since anyone has at least one can of beans and a grain sack around the house. Take out your portable stove from the B.O.B and boil water in a small pan. Add the grains and let them cook for about 10 minutes.

Drain the grains and allow them to cool down. In a large bowl, combine one can of beans (works great with both black and grain beans) and the pre-cooked grains. Add salt, pepper, and a sprinkle of olive oil. If you wanna add consistency to your dish, throw in a couple of diced veggies, and chickpeas.

6. Chickpea or white beans spread

If you ever get tired of PB & J sandwiches, you might want to give this recipe a try. Empty the contents of a chickpea or white beans jar inside a bowl. Use a fork or potato masher to make them into a coarse paste.

Add some olive oil, parleys, a little bit of mint, half a tablespoon of garlic powder, and some oregano. You can serve this spread with white bread, toast, and even crackers. I personally like to serve it with oven-baked white bread – if you want to get all fancy, take a clove of garlic and smear each slice of bread before adding the spread.


7. Tuna salad with canned corn and green lettuce

Personally, I prefer this recipe over all those BS, new age stuff with salmon or whatever. Grab yourself green lettuce and wash it thoroughly with cold water. Using your hands, rip it into big chunks. Add a can of tuna over the salad (don’t drain the oil inside) and a can of sweet corn.

To finish this dish, pour half a tablespoon of olive or sunflower seed oil, salt, and lemon juice. Toss it around and serve. This is what I like to call the ultimate detox dish – very healthy and tuna being packed with omega-3 fatty acids and all that, it’s a breath of fresh air after eating spare ribs and burgers.

Hope you’ve enjoyed my list of blackout dishes. Think I’ve missed something? Hit the comment section and let me know.

No electricity means that you will not be able to use the mixer, microwave, electric oven, toaster, and whatever cooking appliance running on electricity. Such a situation calls for some

You know ‘em, love ‘em, and, most of the time, you buy them by the pallet. No wonder MREs are so popular since they make excellent snacks while providing your body with all the proteins and fats it needs to keep on rolling. But let me ask you a question here – is it really necessary to go to the military supplies store to buy MREs every time you run out? The answer’s “no” because these delish treats can be baked in the comfort of your kitchen. What’s even great is that you already have all the ingredients this recipe requires.

When I was doing my research for the first piece on pickling meat (be sure to check it if you haven’t done so already), I discovered, much to my bemusement, that there are lots of preppers out there who wanna know the best places from where one can buy Meals Ready to Eat. Can’t say that I wasn’t tempted in pulling a fast one by doing a piece on top 10 places that offer great bargains on MREs, but, then again, I really wouldn’t want you guys to spend more of that hard-earned cash.

I came to realize that my folks were baking MREs, long before the stuff hit the market. So, is this a family recipe? Yes, it is! An old one, at that. Mom told me she picked it up from my great-grandmother’s recipe book, who was a sister of mercy back in WW1. Apparently, this stuff would sell like hot cakes during the Great Depression, mostly because they go along so well with a glass of beer or moonshine or whatever (that raised a couple of eyebrows, back in the time).

After baking the first batch, my wife and I did the math: we spend somewhere around 20 on the ingredients for 8 jumbo-size MREs (although we could have made more if yours truly wouldn’t have sampled the mix too many times). That kind of money will probably get you around 4 or 5, and we still got enough left for another batch.

Still not convinced? Keep on reading for our killer survival ration baton recipe.

Why should I bother baking when I can always hop on the Internet to buy some more?

Because, contrary to popular belief, knowing your way around the kitchen is as important as learning how to swim or perform CPR. And we’re not talking here about whipping a quick breakfast or curing meat for long-term storage.

Nope, far from it! Cooking’s a no-brainer if you know how to follow a couple of simple steps.  And by that, I mean that you’ll be able to whip up a delicious and nutritious dish in no time, even if you’re that kind of person who sees the kitchen as just a room. Since I know most of you guys enjoy a good survival ration baton every now and then, I’m going to show you that it’s easy-peasy.

As I’ve said, the recipe involves ingredients found around the house – honey, assorted nuts, sugar, oats; stuff like that. There’s nothing fancy about this recipe, and it will only take you a quarter of an hour, tops. The result – 8 crunchy and sweet energy bars, each of them packing at least 3,000 calories. Check out it for yourself.

Get ready to ruuuuuumble!

As I’ve told you, all the ingredients for this recipe will cost you around 20 bucks, at most.  If you’re not too keen about going shopping, you can always order them online. Now, for 8 survival ration bars you’re going to need:

  • 5 cups of dry milk powder.
  • 3 tablespoons of honey.
  • 3 tablespoons of water.
  • 1 cup of granulated or white sugar.
  • 1 pack of gelatin (at least 3 oz)
  • 1 cup of peanuts or assorted nuts.
  • 2 cups of dry oats (you can also use normal oats).
  • 1 cup of dried cranberries (if you’re not too fond of cranberries, you can replace them with trail mix or assorted dried fruits of your choice).

Managed to grab all the ingredients? Neat! Let’s start making some survival bars.

Step 1. Preheat you over. Aim for 350 degrees.

Step 2. Grab a large bowl from your pantry and mix the following ingredients in order: milk, oats, nuts, and sugar.

Advice: use a wooden spoon or spatula to mix the ingredients (avoid using metal because the resulting mixt will have a bitter taste to it). Don’t stir too fast. You’ll want your mix to be a little chunky. What I like to do is to sort of dip the spatula and bring everything from the ground up top. Do this for a couple of minutes to make sure that there are no air bubbles left.

Step 3. Time to prepare the gelatin for the bars.

  • Grab a small pan and empty the gelatin pack’s contents inside.
  •  Add three tablespoons of water (don’t add more otherwise you would end up with mush).
  • Add three tablespoons of honey to the pan.
  • Crank up the heat and bring the mixture to a boil.

If you want to add a dash of color to your energy bars, try using some edible paint. Go crazy with them.

Step 4. It’s now time to put together everything – the dry and the moist ingredients. One thing you shouldn’t do would be to let the gelatin and honey mixture cool down completely. If you do that, you won’t be able to mix them with the dry ingredients.

So, toss the spatula aside, and ready your hands. Yes, you’re going to use the hands for this part. It’s much easier and, why not, fun. Don’t forget to wash them hands before messing with the mix.

Just like before, stick your hands inside the mix and bring the stuff on the bottom right to the top. Do this for a couple of time to make sure your dry ingredients are thoroughly mixed.

When you’re done, grab the gelatin pan. Pour a little over the mixture and use your hands to knead the stuff. Continue pouring and kneading until there’s no more gelatin.

Advice: the first time I tried doing this one on my own, the dough turned out to be way too dry even after pouring the entire contents of the pan. To make is moister (wipe that smirk off your face), add a little bit of lukewarm water or even a tablespoon of milk.

Knead, knead, and knead again, until everything’s hunky-dory. If you want your batons to be extra puffy, cover with a clean cloth and it aside to rest for around half an hour. Plastic wrap also works if you don’t have a cloth.

Step 5. Place some baking paper on an oven tray and pour the mix right in the middle. Then, using a spatula or your hands, spread it around as to cover the entire surface of the tray. Over should have reached the desired temperature by now.

Step 6. Use a pizza knife or the other end of a wooden spoon to separate your energy bars. I like to make them rectangular, but you’re free to try out any shape you like (next time, I think I’ll make them in the shape of hearts or Christmas trees just because I can).

Step 7. Stick the tray into the pre-heated oven and bake for 20 to 25 minutes (might takes less if you have one of those convection ovens). Here’s what I like to do in order to see if the bars are ready to be taken out of the oven.

FYI, this trick works for all your baking needs (cake, cookies, pastry). So, what I do is take a toothpick or small piece of wood (grandma used a clean straw from the broom), and sort of poke a small hole in the middle of the dough. Take out the toothpick and look at it – if the dough’s still clinging to the toothpick, it means that it’s not yet ready. On the other hand, if the toothpick’s clean, take it out of the oven before it hardens.

Step 8. Take the tray out of the oven and allow the power bars to cool down before bagging them. You can store them in zip-lock bags or airtight plastic container.

More on home-made MREs

That’s about it for the baking part. It’s exactly what I’ve been telling you – simplicity itself. Now, some of you are probably wondering about shelf life.

Well, since this recipe calls only for ingredients with very long shelf life, in theory, they should last for quite a while if you’re careful enough to store them in a proper environment. Still, if I were you, I would bake a fresh batch every couple of months or so just to be that the B.O. Bs are up to speed.

For those of you with peanut allergy, I would advise you to replace them with dehydrated fruits. You can also use more oats if you like that stuff.

Also, if the good, old doc told you to cut back on the sugar, you can always 86 the sugar from the recipe and stick to honey, pun intended. I wouldn’t use artificial sweeteners like stevia because that would give the bars and unpleasant, metallic-like taste.

The best thing about this recipe is that no matter how clumsy you are in the kitchen, you’ll still be able to make it to the finish line. First time I tried baking MREs, I poured the mixture from the side, instead of putting it in the middle of the tray. Yeah, I ended up doing more cleaning than actual baking.

If the power goes out, which tends to happen of a weekly basis where I live, you can still bake these thingies if you have a gas oven, a thing I highly recommend.

Another thing you can try out is to try an all-nut version (without fruits). Of course, that would definitely make the calorie count go through the roof..

So, have fun with your baking and don’t forget to hit the comment section to show me how your MREs turned out. Ta-da, guys!

Is it really necessary to go to the military supplies store to buy MREs every time you run out? The answer’s “no” because these delish treats can be baked in

Power’s out; car won’t start, pantry’s empty – anything can happen. You either need to learn how to make do without or to take the high road which, in this case, means making it yourself. I’ve spent many sleepless nights thinking about how to be even more self-sufficient. Sure, learning how to whip up a quick dinner or to repair stuff around the house helps, but something was missing.

Then it hit me: what if took a breather from shopping and instead tried to make my own things at home? “How hard can it be?”, I told myself. Well, everything’s hard if don’t know what you’re doing. Luckily, I have this magic lamp called Google which revealed a couple of very handy instructions on how to make day-to-day items.

So, for my first no-shop month, I started with one of the most common things found around the house: soap. Yes, I stopped stockpiling it for a while and instead I tried a quick and easy recipe I got off the Internet. Have to say that I’m quite impressed with how it turned out, considering that I had no clue as to how soap-making works.

Pity that my great-grandmother passed away. Mom always used to talk about how she spent hours toiling in the shed, making soap and all kind of cosmetic stuff. Apparently, the bars my great-granny made were so good, that you could hardly make any difference between her home-stuff and supermarket soap.

Anyway, because I know that most of you people would rather make than buy, I’ve decided to share with you the recipe I’ve uncovered. As I’ve told you, it’s super easy to make, and with a couple of other ingredients, you won’t even know the difference. So, enough chit-chat! Let’s get cooking.

Materials needed

  • An old newspaper (to cover your work area)
  • Canning jar (I used a quart jar for this project).
  • Gloves and goggles.
  • Spoon.
  • Thermometer.

As for ingredients, you will need:

  • Coconut oil (about 2/3 of a cup).
  • Olive oil (2/3 of a cup).
  • Liquid oil of choice (you can use sunflower, almond or grapeseed oil; aim for 2/3 of a cup).
  • Lye (around ¼ of a cup).
  • Distilled water (2/3 of a cup).

How to make

Step 1. Cover the table with the newspaper and put on your protective gear.

Step 2. Put the canning jar on your work area.

Step 3. Pour the water into the canning jar.

Step 4. Slowly pour the lye over the water, while stirring with your spoon. Don’t get too close, as the fumes resulting from the reaction are toxic.

Step 5. Wait for the mixture to settle. You can proceed with the next step when the water clears up.

Step 6. In a pan or bowl, mix your coconut oil, olive oil, and the third oil of your choice (I used sunflower for this recipe).

Step 7. Stick the pan of mixed oils in a microwave for about one or two minutes. When it’s done, stick the thermometer in and check the temperature. It should be between 95 and 105 degrees. This is the sweet spot of soap-making – it the temp’s lower, you’ll end up with mush.

Step 8. After the oil mixture reached the right temp, pour it in the canning jar over the lye and water. You may want to add an extra ¼ cup of lye to ensure consistency. Slowly add the lye while stirring with your spoon.

Step 9. Stir the mixture for about five minutes. It should have a nice, vanilla-like color. You know it’s done when it starts to thicken.

Step 10. Add herbs or oil of your choice. Stir until they’re incorporated.

Step 11. Place the mixture into molds (I used an old baking tray for this experiment).

Step 12. Cover with plastic wrap and store in a dry and dark place.

Step 13. Check the mold every 24 hours.

I should warn you though that home-made soap is not something that magically appears overnight. In fact, the curing process takes about two to four weeks depending on environmental factors such as moisture and heat. So, if I were you, I wouldn’t hold my breath. Another thing you should know is that your kitchen or garage will end up smelling like a funeral home after doing this, mostly because of the lye.

Last, but not least, always remember to measure your stuff before adding them to the canning jar. If you pour too much or too little, you’ll end up with a mushy thing that won’t cure. As for the aesthetic part, you’re free to choose the shape of your soap.

Sure, the rectangular part would be the most obvious choice since it’s easier to handle, but you can opt for any shape that comes to mind. Just be sure to make hand-size bars. What I did after the soap has cured was to drill a hole near one of the edges and draw a string through it. That way, I don’t have to worry about dropping the soap while bathing (no, it’s not what you think).

As for the storage bit, once you’ve cut them into shape, you can store them in an airtight container. Make sure that the place you’ll be keeping your bars of home-made soap is dry.

Now, if you want to add a bar of soap into your B.O.B or household survival kit, wrap it in food foil before tossing it inside. It may be a good idea to throw in a desiccant pack or two to prevent the soap from drawing too much moisture from the air.

See how easy it is to make your own hygiene products? Well, this turned out rather well, if I can say so myself. In fact, this project gave me enough confidence to try out some other stuff. I have this buddy of mine who uses natural glycerin and herbs to make ointments and beauty cream. Maybe I’ll try a recipe or two and let you know how it turned up.

Power’s out; car won’t start, pantry’s empty – anything can happen. You either need to learn how to make do without or to take the high road which, in this

I recently found out that you really don’t need to hit the drug store or dip into your stash of meds each time the ouchie rolls your way. As unlikely as this may sound, nature does have its ways of healing the body, even though some concoctions and decoctions might look like something you would usually find in a witch’s hut.

If you have a backyard, then you must know how annoying weed-whacking can become. You really don’t need to have a degree in herbology to figure out that most of them are harmful to your garden, regardless if you planted veggies or roses.

Anyway, a couple of weeks ago, my wife asked me to help my in-laws with the garden. Yes, that included a lot of mowing, weed-whacking, pruning, and other stuff. It’s a thankless job, but somebody’s got to do it. Put my overalls on, grabbed my tools, and went out back to see what was growing there.

I kid you not when I tell you that I’ve stepped in treasure. Well, weed to some, riches to people like us. And so, instead of gathering everything and setting them on fire, I asked my father-in-law for garbage back. As you would imagine, I got back home with a bunch of casseroles and a trunk filled with weeds.

I chuckled a couple of times while driving, thinking what a police officer might say if he pulled me over and saw the trunk filled to the brim with some weird-looking weed.

So, after doing a little bit of chopping, cleaning, and cooking, I’ve decided to write this short and sweet piece about the herbs I’ve picked up from my in-law’s yard. All of them are top-notch plants. Some can be eaten, as in diced, mashed, and stuck in a broth, but most are used for medicinal purposes. No, they can’t heal every pain and pang in the world, but they’re very helpful in relieving some of them.

The best thing about the plants on my list is that you don’t even need to bother tending them – they literally spring up from the ground and, in fall, you would get yourself a nice backyard natural pharmacy. Here’s what I was thinking in terms of backyard plants used for preparing healing decoctions.

  1. Dandelion roots

Dandelions are there to remind us of the good things in life – a child’s laughter (unless it’s midnight and you don’t have a kid), the first romance, reading my awesome article. Anyways, probably most of you have picked up and blown on dandelion until all those tiny little flowers flew away. Fun fact: one of my best buds, who’s from Romania, told me that in his country this flower is called the hog’s fart.

Don’t know much about them, but can’t seem to find any association. Anyway, dandelion roots are what you’re really looking for – once you’ve plucked them from the ground and gave them a washing, they kinda resemble parsley roots. As for medicinal purposes, the roots of these plant can be dried up and use as a coffee replacement or made into tea.

It’s very healthy for those who like everything about coffee, except the caffeine (noticed no difference in taste either). Teas made from dandelion roots are great for stomach aches and for stimulating appetite. Don’t drink too much, though because it tends to have a powerful laxative.

2. Nettle

Remember what your mother used to say? Don’t go number two in the nettles because you’re going to get one Hell of a keister ache. True for the most part, but the things you can do with nettles.

For instance, the juice left behind by nettle roots after boiling them can be used to counter iron deficiencies. Moreover, teas made from this plant can help in reducing prostate swelling. The only annoying thing about preparing anything form nettle is the cleaning part. I for one use surgical gloves to clean them.

3. Raspberry leaves

Nothing beats the subtle and fragrant aroma of freshly-picked raspberry. Unfortunately, the leaves of this plant are often overlooked. Pity, because they’re great for a lot of things. For instance, I like to prepare my own teas by picking up an assortment of plant parts such as blueberry stems, raspberry leaves, mint, and elderberry.

You just leave them to dry for a couple of weeks, bag and tag and you have yourself a nearly endless supply of tea. As far as the health benefits are concerned, decoctions made from the leaves of raspberry work wonders on the digestive system. Also, according to the docs, teas made from the green part of this plant are known to boost fertility in women.

4. Jewelweed

Also known as the Koh-I-Noor of plants due to its very distinct jewel-like aspect, jewelweed is an efficient poison buster.  Tinctures made from the plant’s flower are used to treat sumac and oak poisonings. Moreover, if you have irritation after tiptoeing through nettles or getting too physical with ivy, a poultice made from jewelweed will quickly bring down the swelling.


5. Rosemary

I know that I covered rosemary in a previous article, but I forgot to tell you about its medicinal values. Apart from getting along splendidly with any meat, rosemary is a great antibacterial agent. Rosemary teas can be used to clear up a throat infection. More than that, you can use dried rosemary to wish away awful smells from the room; yeah, just like incense.


6. Comfrey roots

Have to admit that this one’s a doozie. On the one hand, this plant’s stems, root, and flowers are very toxic, but only when taken internally. However, comfrey roots can be successfully employed in the treatment of laryngitis or other throat conditions, if they’re made into gargle. Moreover, some studies have shown that purified extracts from comfrey roots can enhance recovery in case of a bone injury.

That’s it for my backyard herbal apothecary. Hope you’ve enjoyed my article. Don’t forget to hit the comment to let me know your thoughts on medicinal herbs.

The best thing about these plants is that you don’t even need to bother tending them – they literally spring up from the ground and, in fall, you would get

There are many signs and symptoms of serious disaster. Natural or manmade disasters that affect large populations come together in many of the same ways.

We need only look at places like Syria and Venezuela to see the signs and symptoms. These nations are nearly on opposite sides of the world, but they are experiencing some very similar collapse symptoms.

One of the most alarming of all is when the doctors and nurses disappear. The medical establishment of an area takes huge hits the moment resources cannot be shipped in any longer.

What sort of position would you be in if the medical centers in your area began to implode?

Do you have any background in first aid or medical training?

Many of us do not and we need a serious resource to be there for us when everything else is gone. There is one prepper medical resource that is truly the master class. It’s called The Doomsday Book of Medicine.

Its 800+ pages of prevention, detection, natural remedies, nutrition and true medical response to a long list of injuries and ailments!

The Basics You Need to Know

The Doomsday Book of Medicine is separated into 5 sections. Each section is made up of several chapters and each chapter has a clear table of contents. The information density is such that it requires this kind of organization.

Navigating sections is also a breeze because of this layout.

The Basics You Need to Know is also the title of section one and offers up the most comprehensive look at preventative medicine that you are going to find in a volume of this type. This section focuses on the core elements that modern practitioners are just catching up with today.

You are going to see a focus on personal hygiene, nutrition, healthy foods from healthy soil and even eating fermented foods for gut health.

Some Essential Tools

This book hooked me in Section 2. When you read a title like essential tools you are expecting to see some OTC meds and things of that nature. You are going to find healing profiles on things like baking soda, honey, a variety of herbs, wood ash and activated charcoal, to name a few.

Doctor La Guardia explores health from a holistic point of view rather than the traditional “burn, cut and poison” methodology that many doctors are mocked for these days.

This section offers up real-life solutions for the average person. That’s where the power lies.

What’s Your Problem?

The third section of this book makes up half of its content and is a full discourse on various injuries and ailment stools and how to deal with them. You are often given several methods for dealing with a single ailment. You have options and that is important in austere environments.

Entire chapters on The Eye and The Ear put an emphasis on things that can happen to these body parts and how they would be drastically affected in a survival situation.

You also get great chapters on things like diabetes and wound care and hypertension.

Odds and Ends

Section 4 is a three chapter breakdown on a variety of medical supplies that people will want to have in a long term disaster. There is also a great conversation about Ebola and dealing with the frightening virus.

Section 4 also features an entire chapter on the importance and methods of sterilisation which is critical when you are living in a world that might be devoid of common antibiotics and full of ways to garner infection.

Your Survival Medicine Chest  

This incredible section is more of an appendix and a checklist than a chapter. Don’t let that fool you. It’s a well thought out and alphabetical breakdown of what you should include in your own survival medicine chest.

In this list you will find everything from tools to OTC meds and beyond. The list spans everything from A – Z and has an inclusion for each. If you are truly interested in building an effective medical supply this chapter is worth the whole price of the book!

The choice to store or not store certain items is completely up to you but you should review them all. These are not recommendations made by doomsday bloggers. Dr. La Guardia has taken his training and practice into account, as well as his own personal health, to create this list of items.


The Doomsday Book of Medicine is a massive resource that should be the cornerstone of your medical preparedness. It deserves a home in the library of anyone who has a mind for preparedness and wants to do more than cower in a disaster.

There are hidden gems all throughout this book. Here is a short list of what else hides within these 800+ pages.

  • Learn what is 8 times more affective at preventing flu than the flu vaccine
  • The Antioxidant that is 6000 times more powerful than Vitamin C
  • Learn about the amino acid that not only treats anxiety and depression but also eliminates cravings for drugs and alcohol.
  • The weed that is not only the perfect food for your body, but also can be used to produce biofuel for your vehicles
  • The common cleaning product that will not only control your arthritis but will also make your bones rock hard

In every serious disaster there are a few things that happen. Supply chain is disrupted, and medical supplies start to disappear. What will you do when the doctors are no longer around and someone in your home has an injury or illness?

Are you prepared to be the family physician?

With 800+ pages of medical information and your survival medicine chest, you will feel well more confident at what must be done.


Are you prepared to be the family physician?With 800+ pages of medical information and your survival medicine chest, you will feel well more confident at what must be done.

I can’t remember the first time I heard the word “prepping.” Probably back during those school camping trips when our PE teacher tried to show us how the Native Americans used to whip up a fire, long before matches and lighters were ever invented. Of course, what child was taken far away from home with his friends would have the energy or the attention span of listening to a man rubbing two sticks together?

That’s one of the things I tried showing to my students – if someone shows you a trick, even a small one like I don’t know, turning a poncho into a rainwater collector, pay attention and learn. You’ll never know when that stuff will come in handy.

Anyway, on to the topic du jour – what is prepping and when should we start, well, doing it, I suppose? This isn’t Merriam-Webster, nor the “P” volume of Encyclopedia Britannica. Don’t know any fancy definitions and never needed one, for that matter. For me, prepping is like knowing you will receive a slap for somebody and doing things in order to prevent it to the best of your powers. Something like that, I suppose.

Come to the prepping side! We have MREs

We don’t prep because we’re members of the tinfoil brigade or strongly believe that the world’s coming to an end and survival of the strongest and all that BS. We do it because it makes sense. I remember reading in a magazine (yes, I’m that old!) that prepping is like having your own crystal ball and being able to see into possible futures.

Leaving the mystical mumbo-jumbo aside, this sentence does raise a very good point – being able to predict something and act in accordance. For instance, if your car’s bulbs would burn out while you’re on the road, the most sensible thing to do would be to go to the nearest auto shop and get them replaced.

However, a good prepper would have the hindsight of carrying a box of extra in his glove box or vehicular emergency kit. A seasoned one would, however, get his car a good going-over before hitting the road, in addition to making sure that he has everything he needs to deal with this sort of emergencies.

This is just one example. There are countless more out there, and neither one spells out crazy or paranoia. Do you consider yourself “having bats in your belfry” just because you have a stockpile of canned food around the house or an extra pack of bottled water? No, you’re not, my friend. It’s, in fact, the other way around – it would be foolish not to have those around the house. All it takes is something as ‘harmless’ as a blackout to realize just how much you would have needed those stuff.

I tend to get this question a lot: when do you start prepping? Well, let me put it to you this way. This is not the sort of thing you only do when it’s convenient or fits into your agenda. You just start doing it and never stop. Still, anything has to start somewhere, and a good starting step would be the news. Have you tried reading them lately? One thing you’ll realize is that no matter where you live, there’s always something happening – a blackout, earthquakes, tsunamis, snow blizzards, rioting, active shooter.

The world’s littered with danger, and you can’t always rely on the authorities to keep you safe. Remember the Christchurch mosque shooting, the event that ended with the death of over 50 people? Well, as it happens, New Zealand was and is still considered one of the safest countries in the world, even though it has the same gun regulations as the United States.

The last event of this magnitude occurred in the early 50s, and even then, the country was still considered a safe one. Don’t make the mistake of assuming that you live in this glass menagerie, where everything is pink, fluffy, and happy. Shit happens, and when it does, it brings along all its friends.

Congrats! You have just taken the first step of your prepping journey. It’s called risk assessment and, in my opinion, the most important aspect. Knowing the name of the demon gives you power over it, the guy from The Exorcist used to say. The same goes for natural and man-made disasters.

The next steps are fairly easy, and all of them have, more or less, to do with your little incursion in the realm of danger. As a future master prepper, you will have to focus on the following areas: food, water, shelter, and security. Let’s take this one step at a time.

Water

Fact: the human body needs water for, well, everything. You need water to digest the food, and your brain needs water to keep the lights on. Remember the rule of threes? You may go for three weeks without food, but no more than three days without water. That’s how important water is. And no, chugging energy drinks, soft beverages, coffee or booze does not replenish your body’s water supply. In any survival-type situation, find a source of water is crucial.

More than that, you will need to know how to make water drinkable and maybe palatable. For instance, in heavily wooded areas, there are plenty of ways to get water: springs, tree holes, puddles, rivers. Some of that water’s safe to drink, but, in most cases, you will need some sort of filtration like water purification tablets. Even tap water can sometimes become unsafe to drink, especially in the aftermath of a disaster. Water purification is an essential skill, one that you will need to master.

Food

Food for the belly, food for thought, and food for the soul. No matter your choice, you should also have a well-stocked pantry at home. This includes emergency rations such as canned or easy-to-prepare food, MREs, and cured meats. If you get lost, you may need to replenish your food stocks by hunting small game or fishing. Apart from that, knowing with that do with it is as vital as getting it. Venison can be easily turned into beef jerky with salt, wind, and a little sun. The same goes for fish or plants like seaweed. No matter where you are, you must always remember to have a 72-hour food supply.

Shelter

Shelter comes in all shapes and sizes – makeshift ones like those constructed from scavenged materials or retrofitted rooms as in those used to hunker in during a natural disaster. Remember that a shelter’s role is to protect you against the elements and any threats that may be in your area. Anything can be a shelter as long as it protects your body and keeps you warm.

Security

I kid you not when I say that entire books have been written on the topic of defense and security. To make a long story short, security refers to two things: how you keep your property safe and defend yourself in case of an attack. Security bars, alarms, motion-triggered sensors, VoIP cameras are all great security measures for your house. As for yourself, try to squeeze some self-defense classes into your schedule or learn how to take down opponents using non-lethal weapons such as tasers, pepper sprays or security batons. The choice is entirely up to you.

If prepping was as art, which it is, then it would definitely be the art of teaching yourself how to listen to your instincts. In some cases, it may be the defense you have. Logic may be great, but nothing beats a tad of hindsight.

If someone shows you a trick, even a small one like I don’t know, turning a poncho into a rainwater collector, pay attention and learn. You’ll never know when that

Nowadays, I found myself having more of those “Dear, Lizzie” moments. Here’s what one of our readers asked me:

Hey, Eddie,

Kick-ass articles, by the way. You always were a good marksman. Here’s a quick one for you: what’s the difference between bugging out and hunkering down? I mean, why should I bother moving out when I have everything I need in my home? Can someone make me evacuate? Would be nice to read about this in your upcoming article. – J.”

Well, J., after giving it some thought, I believe that you’re not the only prepper who has trouble figuring out what to do in case of an SHTF situation. To put it bluntly, it all depends on the context and you “then” and “there.” Each countermeasure has its pros and cons, and, as true preppers and survivalists, it befalls on us to figure out which is the best choice.

Now, it’s not my place to create more confusions than it already is, so I’ll try my best to give you some advice on what course of action would be best depending on your situation.

First of all, in an SHTF situation, assessing the threat is crucial. I can’t say enough times. Take earthquakes, for instance. Since FEMA always advises us that it’s best to remain indoors during a quake, then the obvious choice of action would be to hunker down. Running out the door, even with your Go Bag on can only result in injury or worse.

On the other hand, if the threat comes in the guise of a, let’s say a tsunami, then bugging out would be the better choice. So, you know the first factor that will help you in figuring out an appropriate course of action – the threat itself.

The second one would be your location. As you probably know by now, every geographical area is prone to some sort of natural or man-made disaster. During one of my trips through Eastern Europe, I have come upon a most startling fact – people willing to live in buildings that could collapse at even the smallest earthquake.

Apparently, in former communist countries such as Romania, in case of an earthquake, you would be safer outside than inside even though this fact goes against everything you have learned about prepping!

So, it’s safe to assume that what works in the States doesn’t work in other parts of the globe. Another thing you should keep in mind is that geography plays a key role in survival. For instance, if you’re in an area that’s prone to flooding, high rises, like hills or large rock formations, can provide you with more cover than, let’s say a two-story building. Obviously, in this case, the best course of action would be to bug out instead of staying put.

There are, however, instances, when a course of action becomes unclear. If the authorities don’t provide you with instructions about what must be done, then your best bet would be to rely on instincts. Your risk assessment skills will come in very handy at this point. Ask yourself questions like:

  1. Where I am?
  2. How safe is my location?
  3. Can I find adequate shelter?
  4. Do I have enough supplies to stay indoors until the danger passes?
  5. Has thing kind of thing happened before? If so, what was the aftermath in terms of property damages and human loses?

Think before you act! That’s the crux of our philosophy. Don’t take everything you read in manuals for granted. There are cases when those tips can be put to use and other times when those can put your life at risk.

The last factor you should consider in making your decision is your overall level of prepping. There’s no shame in admitting that you we’re not prepared to face a kind of threat. Hell, none of us can be truly ready for everything nature or our peers can throw our way. However, you should not see this as a handicap, but as a way of figuring out what you do with what little you have at your disposal.

For instance, outrunning a flood may be difficult for preppers who spent more time reading about stuff than training. In this case, hunkering down would be the best course of action. Everything about yourself will affect the odds of survival – fitness level, attitude, creativity, and how great you handle under pressure.

Just because you’ve read about stuff or trained it doesn’t necessarily mean that you’re ready for it. Keep this in mind the next time you’re having trouble figuring out if you should bug out or hunker down.

So, to wrap up things, there’s no sure-fire recipe for this. Your decision should be based on things like:

  1. Location. This also includes geography.
  2. Threat. Type and level.
  3. Prepping leve.

One more thing I forgot to mention – don’t discard the expert’s advice. If a police officer or firefighter told you to leave the area or to hunker down, then do it. Don’t try to be a hero or a know-it-all. They are highly-trained professionals who knows how to deal with this sort of stuff. You may later find out that the course of action you wanted to take could have gotten you killed.

Wrap-up

Hope I managed to answer your question J. As for the rest of you, stay safe, and do write to us in case you have a question about prepping. I may not be a master prepper, but I least I know that I don’t have to take everything for granted, and, most importantly, I always find a way to nail my boots to the floor when everything goes to shit. If you have the right attitude, the rest’s a piece of cake.

To put it bluntly, it all depends on the context. Each countermeasure has its pros and cons, and, as true preppers and survivalists, it befalls on us to figure out

Many people have asked me about what’s the hardest thing I had to deal with since I’ve started writing about prepping and survival. Of course, most of you would say that hitting the books or reviewing survival gear are the trickiest parts, but no – it’s convincing others why prepping is essential. Sure, it’s easy to speak in front of a group of people who either do this for a living or are interested in the topic. Here’s one for you – how likely are you to convince your mom, dad, grandparents or in-laws to create a household emergency kit or to take a first-aid class? Let me answer this one on your behalf: too hard and, at times, downright impossible.

A while back, I was sitting on the patio with mom, dad, and my in-laws. We were chatting about humdrum stuff like the weather, dad’s diabetes, father-in-law’s arthritis, mom’s cooking. At one point, my mother-in-law turned towards me, looked me straight in the eye with that steely gaze of hers and said: “And what exactly did you say you’re doing, Eddie? Hiking? Backpacking?”.

Have to confess that her tone irked me a bit, but I kept calm and explained again about my prepping editorship. Slowly, but surely, I magically managed to turn around the entire conversation. So instead of chatting about nonsensical stuff, I got to explain a bit to everyone what prepping is and why is so important.

Of course, I couldn’t avoid questions like: “do I need a tinfoil hat or something to join this religion of yours?” I didn’t mind. It’s only natural to be suspicious about this sort of thing, especially when bias comes into play. Fast-forwarding a bit in time, I am now proud to share with you guys that mom, dad, and in-laws have joined our prepping community. More than that, they are very active members on our website, and I would often catch them reading STHF articles.

Can you really have the talk with your folks?

Anyway, to broach today’s topic, there are a lot of very good reasons why you should openly discuss prepping with your parents, their health and wellbeing counting among them. Far too many times, I’ve seen active individuals turn into couch potatoes after retirement. Take my dad, for instance. He would hit the gym at least three times a week after work and cycle every other Sunday.

After he retired, dad’s best friend became the remote control, and the only kind of activity that would even come close to exercising was opening the fridge’s door to get another beer. Yes, I know it’s sad, but you can’t actually argue with them.

Tried that and each time I would hit the same brick wall: “Son, I earned the rest. You’ll understand this when you’ll be my age.” You’re probably familiar with this kind of phrasing. All of us are. And, it’s very difficult to try to convince someone who’s twice your age or more than you know what you’re talking about – yes, the generation gap exists, and that old man stubbornness is the worst enemy a caring person could face.

Which brings us to the first argument on our list – waving your magic want to turn your parents into active people once more. As most of you know, most adults after the age of 50 find themselves in the positions of dealing with all manner of chronic illnesses: heart disease, arthritis, diabetes, bladder issues, kidney afflictions, enlarged prostate in men, osteoporosis. And the list goes on. Help your parents live a better and healthier senior life by showing them a couple of simple activities that involves prepping. Here are a couple of ideas to get you started.

  • Teach them how to build home emergency kits and go with them to the store for supplies. Keep their minds busy by asking them to draw up shopping lists. Don’t give in to their pleas: “Son, I’m not feeling like prepping today. Would you mind going out for some shopping?” There will be none of that from now on.
  • Practice emergency drills with them. Take your pick: drop-roll-and-hold, drop-and-hold, home evacuation via pre-established emergency routes, hunkering down in the basement or the safety room. Don’t overdo it, though, and do not try to up the pace. Keep in mind that your parents are not as spry as they once had been. You should also take their health into account – some of them might have illnesses that could put too much strain on the body.
  • Convince them to learn new skills. For instance, my folks had no clue how stuff around the housework. If something broke down, they would either call in a pro or buy a new one. Making them take some repair lesson is good for the brain. In fact, each medical article you would read on dementia and Alzheimer’s states the positive effects of learning new skills all the time.
  • Ask them to tag along during one of your Go Bag training sessions. A great exercise for cardiovascular disease prevention is jogging. Us preppers usually build endurance and back strength by talking long walks with our Go Bags. You can skip the backpack part if their doctor says otherwise. Keep a steady pace and don’t let them fall behind. You can even show them how far they’ve progressed by sharing results from your Fitbit watch or smartphone application.

Mom, Dad! Are you in on this?

The second reason why prepping’s good for your folks has very much to do with their way of thinking. Most of our parents and grandparents, were down-to-earth, hardworking people, which means that value common sense above anything else.

And since prepping is deep-rooted in it, learning to get ready for anything is only a natural extension. Keep in mind that you will no doubt encounter this sort of suspicion regarding prepping. This can easily be countered by offering a couple of simple examples based on everyday scenarios.

For instance, my dad always had to use his lighter or anything he had on hand to inspect the underside of the family van. This would mostly happen during trips across rocky terrain. One way of explaining prepping to a person like my dad would be to point out that a fully charged flashlight tucked inside the glove box would have helped him more in case of such emergencies than fumbling around with lighters, matches or other light sources. See? It’s that easy.

Let me point out a couple of more scenarios which you can use to describe prepping to your folks:

  • Emergency generators.Tell your folks that the most logical approach to living in a blackout-prone zone (check out the news on the Venezuelan power grid failure) would be to buy a gas-powered generator. That way, you won’t have to worry about food spoiling in the fridge or breaking into the water supplies became the electric pump in the basement went out with the light.
  • Losing the bus. Imagine that you have to take the bus each time you need to get into town. If you miss that bus, the next would be to call someone at home and say that you’re going to be late. I know it’s a stupid example, but it’s how prepping works – by calling that person you let him, or she knows your location, the reason of your delay, and what to tell the authorities in case you fail to show up at home.
  • Emergency evacuation. In case you are told to leave the house, the first thing you should take is your Go Bag. Apart from knowing the escape routes, your folks should also know how to prepare an emergency backpack. Ask them to draw up a list of things they cannot do without hearing aids, canes, whistles, BP monitor, prescription glasses. Be sure to point out that the Go Bag has limited space, which means that they need to carefully consider the items. More than that, do not forget to remind them of the golden rule: everything you take, you’ll have to carry.

Wrap-up

My giveaway to you is this: don’t try to impose your lifestyle and choices upon your parents or loved ones. You should point out to your folks that prepping is more of a mind-conditioning kind of thing, rather than a set of actions based on hindsight or SHTF way of thinking.

Baby-step it, explain everything as many times as necessary, and always keep in mind that they’re your parents, not some bored students who dropped by your class for extra credits. It’s much difficult to change one’s mindset, but everything can be accomplished with the right attitude and, of course, as much prepping as possible.

Here’s one question for you – how likely are you to convince your mom, dad, grandparents or in-laws to create a household emergency kit or to take a first-aid class?

“She lit wildfires inside my soul and fanned them with hurricanes.”
― Morris R. Gates

“The whole world was on fire.” These are the exact words of Brian R., a Magalia resident, who only minutes before his statement has experienced first-hand the horrors of Camp Fire, one of the deadliest and most extensive wildfires in Californian history. I can’t say for certain if it was Brian’s statement or the news reports that prompted me to write this article. Don’t even care, come to think of it.

Every prepper out there should know just how wild wildfire can get. And believe me, you haven’t seen anything yet. If you’re faint of heart, then you should quit while you still can. I have to warn you though that the article you see here before your very eyes will be pretty graphic and explicit. Be warned and welcome on board!

I can literally stay here an entire day and talk about the reasons behind wildfires. Some say that they are undeniable proof of climate change (nope, I ain’t going to touch that, not even with a ten-foot pole), while some cling to a more sordid theory – that each and every one of them is the work of guy or girl with too much time on his\her hands and too many matches. Can’t say for sure which one of them is more far-fetched. I’m going to go along with saying that wildfires are real and very deadly, at that. FIY, according to the guys over at the Insurance Information Institute, a staggering 90 percent of all wildfire are made by humans.

Pretty neat, isn’t it? What’s that got to say about forest fire prevention – in your face, Smokey! BTW, your hat is stupid. Anyway, wildfires tend to envelop entire acres of vegetation, which means that putting out the flames is a very difficult and time-consuming task. More than that, those toxic fumes are usually carried by strong winds, turning the entire area into a lung-killing trap. Wildfires closer to major cities like the 2018 Camp Fire can be far more dangerous compared to those limited to unsettled areas since most of injuries and deaths are not fire-related! Yes, you read that right.

Wildfires and natural disasters, in general, can make everyone lose their noggins. Think that this is something out of an Orwellian novel? Nope, it’s a fact. If the fire or smoke don’t kill you then maybe a crowd of scared-to-shit people will. And that’s another thing I want to address in this article. But more on that later. Remember – all good things come to those who wait!

It’s a wild world out there!

Back in ’16, Fort MacMurray in Canada had experienced the most devastating wildfires of the last two decades. I was back home that day, watching TV with my wife. There was this special bulletin on CNN saying that thousands of people were trying to get out of the city – some on foot, others by car, and there was even this young lady who got out of Dodge on horseback.

Anyway, the anchorman said that there was so much confusion going around that day, that entire family got separated just because they didn’t have any actionable means of staying in touch. As I later understood, the officials planned two separate evacuation routes – one was in the north of the city and the other one in the south.

The only thing was that the northern evac route was not designed to sustain that much outgoing traffic and people simply abandoned their cars and proceeded on foot. There was this one family who ended up in separate parts of the city because one member went to fetch the kids and took the northern route, while the other one returned home, and had taken the southern route, convinced that the other one made the same choice. Crazy, am I right?

The truth of the matter is that crazy doesn’t even begin to cover it when it comes to panic induced by natural disasters, not to mention the sheer stupidity which caused some of them in the first place. Ever heard about the catch-phrase “Like my fire”? If your first thoughts were “attention-seeker” and “social media”, then you’re right. Back in 2013, a teen by the name of Sadie Renee Johnson set a whole forest on fire just because she wanted to put to work two of her friends who happened to be firefighters.

Long story short, Sadie drove to one of the largest forest surrounding Portland and set fire to a firecracker. After the entire forest was on fire, the teen took a picture, posted it on social media with the message “Do you like my fire?” Her stunt led one hell of a wildfire, which burned down 51,000 acres and caused damages amounting to $8 million. You go, girl! The saddest part is that Johnson is not the only person to have caused a wildfire.

Getting back to the matter at hand, wildfires can be prevented. How you ask? By using a thing called common sense. Put out those fire pits before leaving the forest. Better yet, use a portable fire device like a Bunsen burner or something to cook your food or to get smoochy with that chick you picked up from Tinder. Also, if you’re a smoker, my advice for you would be to quit. Still, if you’re hiking in a heavily forested area, it would be a good idea to extinguish that butt with water, sand, gravel, dirt or anything. A portable ashtray would also be a major improvement.

Now, after getting these out of the way, let’s have a little chat about some of the things you could do in order to prevent a wildfire. While at it, I will share with you my kick-ass wildfire prevention evil scheme (insert Doctor Evil laughing with pinky in his mouth meme here).

Wildfire prepping and prevention

I’ll just say this once: if you’re in the city, you’re royally screwed. If you’re in the countryside, guess what? You’re also in danger! No matter where you go if the wildfire will eventually catch up to you.

Let’s talk a bit about a little thing called wildfire prevention. I’ve already given you one example. Putting out a fire pit is not only your way of saying “thanks” to the forest but the most efficient way of preventing a wildfire.

On that note, you should always keep a close watch on that fire, especially if you plan on spending the night in the forest or something. It’s always a good idea to keep a bucket of water or dirt or sand near the fire pit in case something goes wrong. You should also wall your fire (placing rocks around the fire pit) to prevent it from expanding. Simple and common-sense stuff.

Of course, I guess it would also help not to set fire to firecrackers by the side of the road so that your friends may have work cut out for them. Anyway, this just about covers the stuff you can do to prevent wildfires while you’re outdoors. Still, if you’re living off-grid, say a small hunting cabin, like yours truly right there, things get a little more complicated. See, when you’re smack in the middle of something that can at any time turn into a searing oven, your prepping must take on a more active role.

The idea of dropping off the grid is neat, and nothing beats that fresh mountain air in the morning. However, as I later came to find out, having such a place puts you a bit in harm’s way, wildfire-wise.

In respect to all you wonderful crazy guys and girls out there, I’ve whipped out a small to-do wildfire prevention and prepping checklist. I haven’t got around to solving all of them since I still have a 9-to-5 and this here editorial gig, but I’ll eventually come around to it. So, here’s what I was thinking about fireproofing an off-grid home.

  • Keep cordwood and fuel as far away from home as possible. One spark and everything goes to shift (damned autocorrect). What I did was to bundle all my firewood and wheelbarrow them to a small outcrop, some hundred feet away from the house.

Would be neat if the place is upwind. If you’re Gung-Ho about fuel storage, you can always build a small shack for them. You can find everything you need for the job at your local hardware store (bought everything I need from Costco). If you have a gas-powered generator, store the canisters inside this shack, and always under lock and key.


  • Trimming. Since I’m smack in the middle of the forest, obviously I need to do a little more pruning than usual. Great for the heart, but not that okay when you have other stuff to tend to. Anyway, take all the time to trim bushes, tall trees with low-lying branches, shrubs, and any kind of vegetation close to your house. See, when the wildfire hits, all of those things turn into fuel.

Spare yourself the trouble of racking and buy a leaf blower. They’re not that expensive. Start with the roof – see if there are branches hanging over it and use a hacksaw or gas chainsaw to cut them off. You may either dispose of this stuff or do I did – dry them up and turn them into fuel for your stoves, fire pits or whatever floats your boat. Having so much vegetation around spared me a lot of firewood money.


  • Sprinkler system. Gotta make sure that sprinkler system is up and running. My advice to you would be to buy the non-automatic version and to outfit it with a mechanical timer – they’re far more reliant and endearing compared to their electronic peers.

Here’s what I did to make sure that my house doesn’t get scorched from a wildfire. I went ahead and installed two separated sprinkling systems – one for the lawn and one for the roof and the front side of the house. That way, if a wildfire sprouts nearby, I can use the system closer to my home to water down the roof and walls.


  • Trash the trash. Get rid of another wildfire danger by burning your trash and burring the ash pile far from your house. I know it’s a thankless and smelly job, but, hey, it certainly beat the alternative. Sure, that doesn’t mean you can’t have some fun while doing it.

See, when I moved in with my wife and kids, I discovered I had this charming guy who claimed that the cabin is his and wants us off his property. After a couple of lovely chats with the local sheriff and idle threats, I managed to prove to him that the cabin was mine and mine alone. Still, he would hang around, waiting for a chance to call the cops on me for whatever reason.

So, this one night, me and a couple of buds, after drinking one too many suds, decided to pull a fast one of the peeping Tom. We grabbed all the garbage we could find around the house, placed inside one of those black, heavy-duty bags, and arrange everything so that it would look like a body bag with a corpse inside. And, while he was watching, we took out the faux body to the yard, lit up this big fire pit, and threw it over the flaming pile. From that day on, I haven’t seen him around.

So, this is the end of part one of my take on wildfires. Stay tuned for more misadventures from the prepping world. Stay frosty guys, and see you in part two of my wildfire series.

Every prepper out there should know just how wild wildfire can get. I have to warn you though that the article you see here before your very eyes will be

You’ve probably heard plenty of horror stories about people being caught under tons of debris from a falling building, the golden triangle, and other pleasant stuff about quakes. Let me tell you something – it ain’t pretty. Far from it! A quake can level entire cities in just a matter of seconds.

Remember that little Japanese garden you always enjoyed on the other side of town? Gone! Your favorite pub? Kaput! I kid you not when I say the earthquakes are, by far, the nastiest thing you can experience in terms of natural disasters. During one of my stays in Europe, I’ve heard this one particular tale told by a guy whom I imagined to be a paramedic or something.

Anyway, this guy said that during the 70s, a massive earthquake took an entire East European country by surprise. I’m talking here about entire neighborhoods razed to the ground, landlines disrupted, the works.

So, this guy tells me that it was not the collapsed buildings, nor the deafening sirens that got to him – it was the smell. Everywhere he went, he was followed by the same pungent aroma that turned his insides into mush: rotting flesh. It was so bad that the smell was still there weeks after firefighters and police officers managed to remove all the corpses. What do you do when you’re staring true horror in the face? Prepare and survive!

So with that in mind, I wanted to pull together this earthquake safety checklist which hopefully will point out any areas in your preps that you might need to work on. You can also find more information from FEMA’s Earthquake Safety Checklist downloadable as a PDF file and all the Earthquake information you can shake a stick at (no pun intended) on the USGS Earthquake hazard site.

How to prepare for an earthquake?

  • Know where you are at all times and how to get out of the building. This is more important if you are in a strange place like a hotel in another city.
  • Select a safe place in your home for everyone to wait out the earthquake if needed
  • Practice earthquake drills with your family
  • Keep flashlights and sturdy shoes available.
  • Bolt gas appliances to walls (water heater, oven, dryers)
  • Know how to shut off the gas in your house and have the proper tools on hand if you need to do this.
  • Keep emergency supplies/bug out bags in a safe location.
  • Have a plan for power outages before you are faced with one.

What should I do during an earthquake?

If you are indoors

  • Move to your safe place as quickly as possible; make sure your head is protected from falling debris.
  • Stay away from windows and glass.
  • Stay indoors until the shaking stops.
  • Use stairs instead of an elevator in case of structural damage or power outage.

If you are outside

  • Find a clear spot away from any buildings, power lines, trees or streetlights.
  • If you are in a vehicle (and notice the shaking in the first place) pull over to a clear spot and stop. Don’t pull under an overpass or anything that could fall and trap you.
  • If any power lines are down stay away even if the power appears off. Especially if there are power lines on vehicles, do not touch the vehicle.
  • If you are in the mountains or near cliffs watch out for rock-slides or unstable features. Landslides and avalanches can be triggered by earthquakes.

What do I do after an earthquake?

  • The initial shock-waves may only be the first of many that could still cause injuries. Expect aftershocks and use the time between instances to get to a safer place. If you are anywhere near the coast Tsunamis could occur so immediately seek higher ground.
  • Check your family or group for injuries and move injured people to a safe location.
  • Make sure you are wearing appropriate clothing, footwear, and protection for your hands if there is a lot of debris.
  • Make sure any fires are extinguished as quickly as possible.
  • Check radios for the extent of the damage and any emergency notifications.
  • You should already have stored water, but if not and the water is still working, it may make sense to fill your bathtubs (providing your house is safe) to use the water for hygiene if the water is cut off.
  • Stay away from power lines and out of damaged buildings as much as possible.
  • Contact your loved ones if possible and let them know you are OK.
  • Go to your prearranged rally point if you are able to do this.

There you have it. Let me know what you think. Or if you any stories to share that we can all learn from.

You’ve probably heard plenty of horror stories about people being caught under tons of debris from a falling building, the golden triangle, and other pleasant stuff about quakes. It ain’t

Back when I was in college, I needed money so bad, that I was forced to take quite a lot of odd jobs. Who wasn’t, right? One of the oddest, if I can call that, was working as a book salesman in my home town. You’re probably asking yourself right what kind of person would complain about selling books. I, for one, of course, and probably most of my former co-workers.

See, recommending a title to someone or arranging them on the shelves were the easy parts – you still had to haul them by hand or cart from the back. So, right before I told my manager that we could take his job, wrap it in barbed wire and shove in the place where the sun doesn’t and won’t shine, we had a really busy week.

Long story short, I had to haul quite a lot of book-filled crates. The next morning, my back felt so sore, that I could hardly get out of bed. From there it got progressively worse: numbness in the feet, cringy back pain, stuff like that. My doc told me that I had something called lumbar discopathy, a very fancy word for your spinal column being broken.

Although I’ve tried my best to take it easy, sometimes, I can still feel pain shooting down my back. Thanks, college-me for this marvelous gift! I hope you get psoriasis or something. Anyway, many years later, I’ve tried almost any type of back treatment, short of surgery, for my raging back pain – physical therapy, diets, more exercising, less straining, you know, the usual. For a while, I was okay-ish, but when the weather went sore, so did my back.

Finally, after reading tons of stuff on this subject, I happened about a quaint little recipe which, according to the author, can relieve any kind of join, back or knee pain. Sure, I always preferred witchdoctors over MDs, but why the Hell not, I said to myself.

I kid you not when I’m saying as this stuff smells nasty, and it tastes even worse. But, by God, it really does what’s it supposed to do – take away the pain (wish it could do the same to memories).

Now, the recipe I’m about to show you involves three types of seeds and raisins. I know that it sounds like a stomach-churning combo, but give it a chance. Apart from being great at dealing with all sorts of pains and pangs, you can use leftovers to create survival energy bars. You can also eat it for breakfast instead of cereals, poached eggs, pancakes or whatever.

So, here’s the wonder-med I’ve been talking about.

“Dead leaves, seaweed, rotten eggs, too, stir them in my witch’s brew.”

As I’ve mentioned, this recipe calls for three types of seeds: pumpkin, flax, and sesame. The first is held in very high regard among docs and dieticians since they’re packed with an omega-3 fatty acid, known for its anti-inflammatory effect, zinc, copper, and other essential minerals. As for pumpkin seed, they do contain a fair among of omega-3 fatty acids, along with vitamin B1, phosphorus, and selenium.

Sesame seeds are highly recommended for people with brittle bones, and it’s very effective against any type of inflammation. Word of warning though – curb your sesame seeds intake during pregnancy, as high levels can induce preeclampsia.

Raisins, on the other hand, can aid digestion, since their packed with vitamins, fibers, and a shit-load of minerals. You should consider eating more raising if you have an iron deficiency.

Anyway, this is the basis for this wonder cure. You’re still going to need a couple of more stuff though like honey and gelatin. Let’s get cooking!

Ingredients:

  • Honey (two squirts or 200 grams).
  • Gelatin (no more than three tablespoons).
  • Sesame seeds (4 or 5 tablespoons).
  • Flax seeds (8 tablespoons).
  • Pumpkin seeds (a small pack or 40 grams).

How to prepare

I should warn you that this recipe is very challenging. You’ll have to be at a chef’s aide to pull this one-off. It calls for extreme concentration, precision, finesse, and a knack for balancing the ingredients. Are you for this challenge? Good! Here’s what to do, young padawan.

Step 1. Gather up all your ingredients.

Step 2. Plug in your food processor or blender.

Step 3. Toss everything inside and hit the “pulse” button a couple of times.

Step 4. When the food processor\blender finished chopping the big chunks, switch it to low, and leave the thing alone for a couple of minutes.

Step 5. Switch off the blender, pour the contents inside a bowl, and mix with a spoon or something.

Step 6. Enjoy (or not)!

That’s it! You now know how to prepare the most complicated natural remedy for pains or pangs in the world. About the aspect part – yes, I’m painfully aware of the fact that it looks disgusting, but with the added honey it should taste more or less like semolina pudding. You can eat for breakfast or as an after-dinner dessert; it’s entirely up to you. If there are any leftovers, you can always turn them into survival bars.

It’s super easy: keep your moist ingredients aside and use the dry ones as the basis for your MREs. Add a little bit of milk powder or sugar, mix the batter, add the moist ingredients, and put the batter in the oven. You may want to check my article on how to prepare home-made MREs for additional ingredients and instructions.

So, this simple recipe will help you deal with any kind of pains, back or otherwise. I can’t say for sure how long before it kicks in – can be a couple of days, weeks or even months. In my case, I started feeling a whole lot better after eating this pudding for an entire month.

Anyway, hope you liked my recipe, guys. Hit the comment section to tell me how things turned out for you.

Now, the recipe I’m about to show you is great at dealing with all sorts of pains. It involves 3 types of seeds and raisins. I know that it sounds

A couple of days ago, I took my wife and kids for a ride to our hunting cabin. The weather was holding and, I said, why not? Four hours later, we arrived only to find out that someone nicked the power transformer from one of the nearby electricity poles.

Long story short, our weekend was doomed because the electricity company representative said that a replacement should arrive in a couple of weeks. Back when we furnished the place, we didn’t consider that something like this could happen, and so we went ahead and bought all the electrical appliances we could find at a discount.

Here’s where things get interesting. My grandma gave me this old and battered chest. Told me that inside it I’d find anything a chef needs to whip up a quick dinner, power or not. Because that thing was heavy and smelly, I figured that the best place to store it would be the hunting cabin.

Seeing that the power won’t come any time soon, I took a peek inside the chest to see if there’s anything of use there. I am not exaggerating when I’m saying that I struck gold. Inside, were indeed all the kitchen tools one could need to live a totally electricity-free life. And I would be lying if I didn’t admit that we had some trouble figuring out what goes where or how to use those thingies.

Anyway, seeing that more and more of you guys are asking about powerless appliances, I figured showing you my list of 8 most useful kitchen stuff. Dunno if you have chest inherited from your grandparents or not, but, surprisingly enough, most of this stuff can be bought from just any kitchen appliances store, and, yes, they don’t cost a fortune. So, without further ado, here are my choices in powerless kitchen gadgets.

  1. Hand-operated coffee grinder

Because I’m a coffee junkie I’m going to start by saying just how awesome and handy a cordless coffee grinder is. I mean, nothing compares to that subtle, yet flamboyant, freshly-ground coffee aroma – way better than sex (hope my wife doesn’t read this article).

Anyway, if you get ahold of one of these gadgets, be sure to hit your local gourmet coffee store for some great beans. While you’re at it, learn how to make Turkish-style coffee – beats espresso any time of the week. Be sure to clean your grinder every now and then and oil those parts to prevent blockages.

2. Meat grinder

If we’re talking of couldn’t-do-without kitchen items, the meat grinder’s is out there with the big shots. Nearly every recipe that calls for minced meat, whether it’s lasagna, moussaka or meatballs, will taste even better with freshly-minced meat. For a while, I used to buy minced pork from my local supermarket.

Gave it up for Lent after I discovered that I could make it at home, with the cuts of choice. More that than, I simply abhor the fact that even the most expensive minced meat is filled with so much water that you mostly end up boiling your meat instead of searing it. Great little gadget, very low maintenance, but now so great when it comes to cleaning it. Pros and cons, man. Pros and cons.

3. Hand-cranked food processor

I like preparing salad dressing as much as the next person, but doing so without an electrical blender is quite difficult. Wrong! The hand-cranked food processor will chop down your veggies or meats in a matter of seconds just like any over glorified electric blender. Just make sure to give those blades a quick sharpening from time to time and to apply some oil or WD 40 on the moving parts.

4. Kitchen scale

My wife’s madly in love with making all sorts of cakes and cookies and pastry. However, most of the time, she needs a scale to measure the ingredients – sometimes I feel like I’m stepping into a meth lab or something.

My take on the electronic scale is the old and moderately precise mechanical scale – a cup, a platform, and several weights. Might not work that well if you need to measure with Swiss precision, but other than that it’s a very dependable kitchen item.

5. Tea kettle

Not much of a tea drinker myself (usually do that when I’m nursing a cold). But I have to admit that a tea kettle is pretty useful around the house, especially when the power goes out.  More than that, if properly maintained, a kettle can last for decades if not more (mom said granny got her tea kettle from her mom). It’s also a very fast and low-gas consuming way of warming up water for other necessities.

6. Eggbeater

Forget the mixer! If you really want to step up your kitchen game, learn how to tame the egg beater. IT’s a really simple item, but one that helps you prepare far more stuff than omelets (I like to use it to prepare the bather for my MRE survival bars).

7. Can opener

Those electrical gadgets are shinny and new but much too unreliable to be kept around the house. If the power doesn’t go out on you, that thing will break down faster than you can say “preparedness.” I had to fix two of those blasted things and buy three others. So, my solution was simple – out with the bad and in with the good, the good being the mechanical can opener. Solid piece of work, capable of breaking into just about any can out there.

8. Water filter

Water comes, and water goes. No matter where you’re from, you must always ensure that the water you drink is, well, drinkable. That’s why a water filter is a must around any house, hunting cabin or duplex. It may be a little expensive compared to the other items on this list, especially the spare carbon filters, but it’s an investment worth making.

That’s my list. Do you have some other mechanical gadgets on your mind or in your off grid house? Share it here.

Dunno if you have chest inherited from your grandparents or not, but, surprisingly enough, most of this stuff can be bought from just any kitchen appliances store, and, yes, they