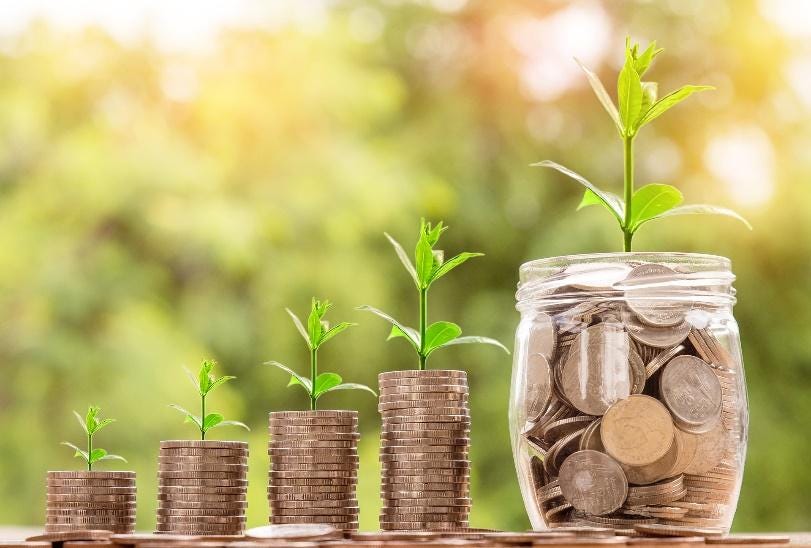
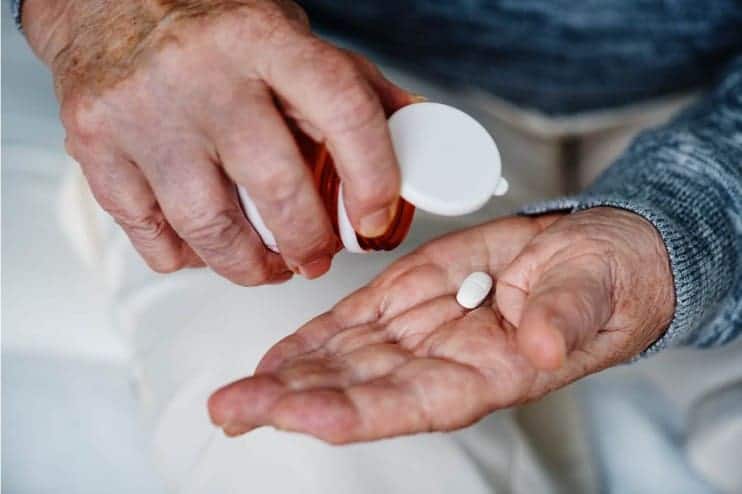
Home2019May (Page 2)

The quest for preparedness often rubs up against the realities of our monthly budgets. When you come to realize that the earth and its people are threatened by so many different things that could just crumbled society, you are driven to prepare.

The drive is real and its often governed by some degree of fear. However, no matter your passion you need money to keep climbing the rungs.

You can make more money by working at your job more. Things like overtime and part time gigs can help you make more money. However, you are left with even less time for enjoying life. It’s a descending loss that only fills your bank account.

What if you could make money off your prepping skills?

Imagine using the skills that line up with prepping and survival to make money. Effectively, you turn your practice time into money making time. Does it sound like a dream?

If you already got the skills, you might just need a few modifications to get the ball rolling and see some income from it all.

Hunting and Guiding

No one would deny hunting, fishing and trapping as being serious preparedness skills. There are some people out there who are good at these things.

If you are one such person you might think that this is a skill that only helps you enjoy your weekends. However, you can make some money off being a good hunter or fisherman. You can start to guide people and teach them how to hunt and fish successfully.

Maybe this is right up your alley. If so, you can make a good chunk of money on a weekend of guiding a group of guys on something like a turkey hunt.

Being able to catch or kill your own food is already incredibly valuable but it’s becoming much more important and more desired. Get out there and make some money.

Fitness and Training

Are you the type of person who likes to work out? Maybe you are an exceptional athlete or someone who has a long history of lifting weights and getting in shape. Whether you realize it or not you have worked up a repertoire of exercises and fitness methods.

Its hard to remember all the work you have put in because fitness is a daily thing.

There are people out there looking for you, who are just the opposite. These people have no idea how to get into shape. You could become the personal trainer of a small group of people who will pay you for your skills.

This can be very lucrative depending on the size of your group and the amount of money you charge them.

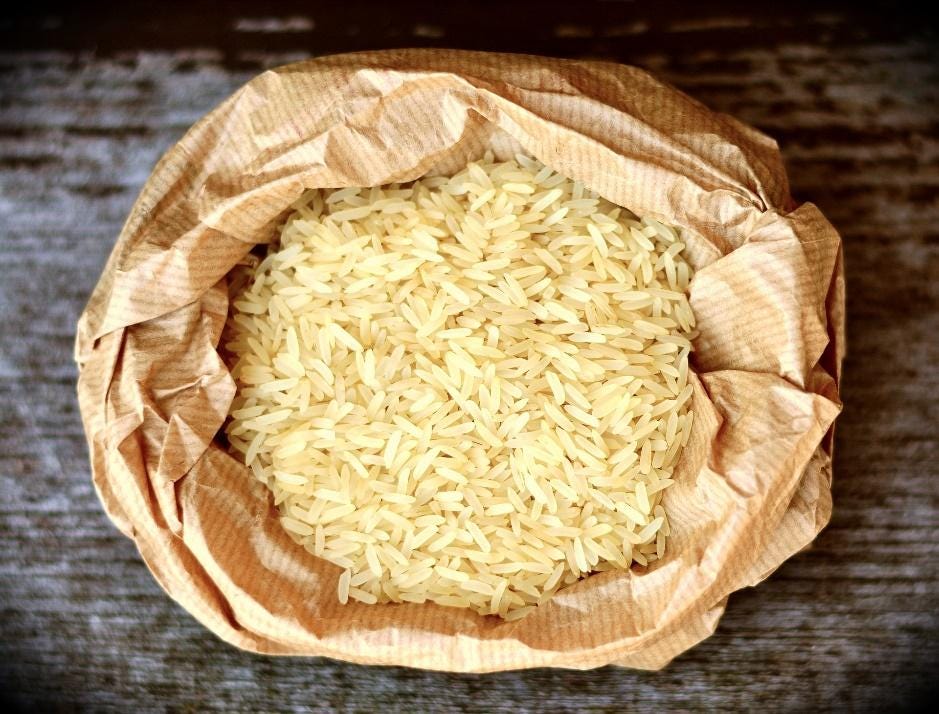
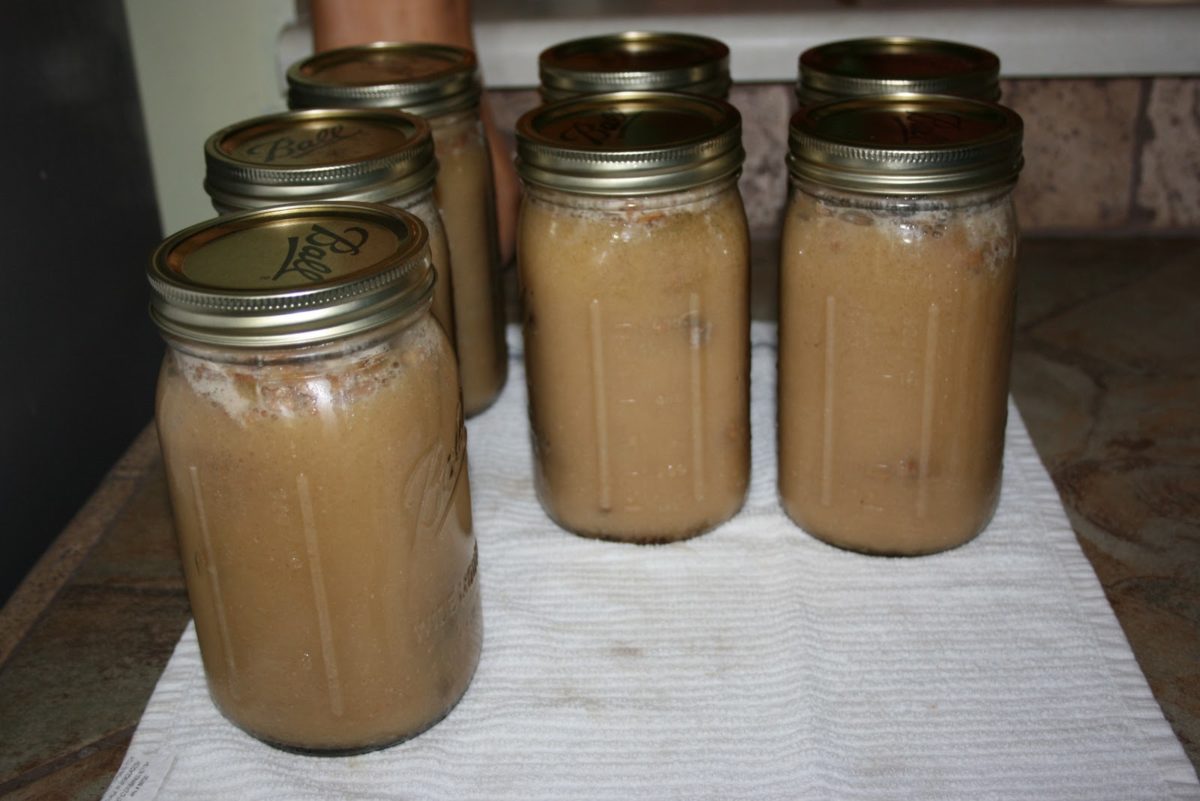
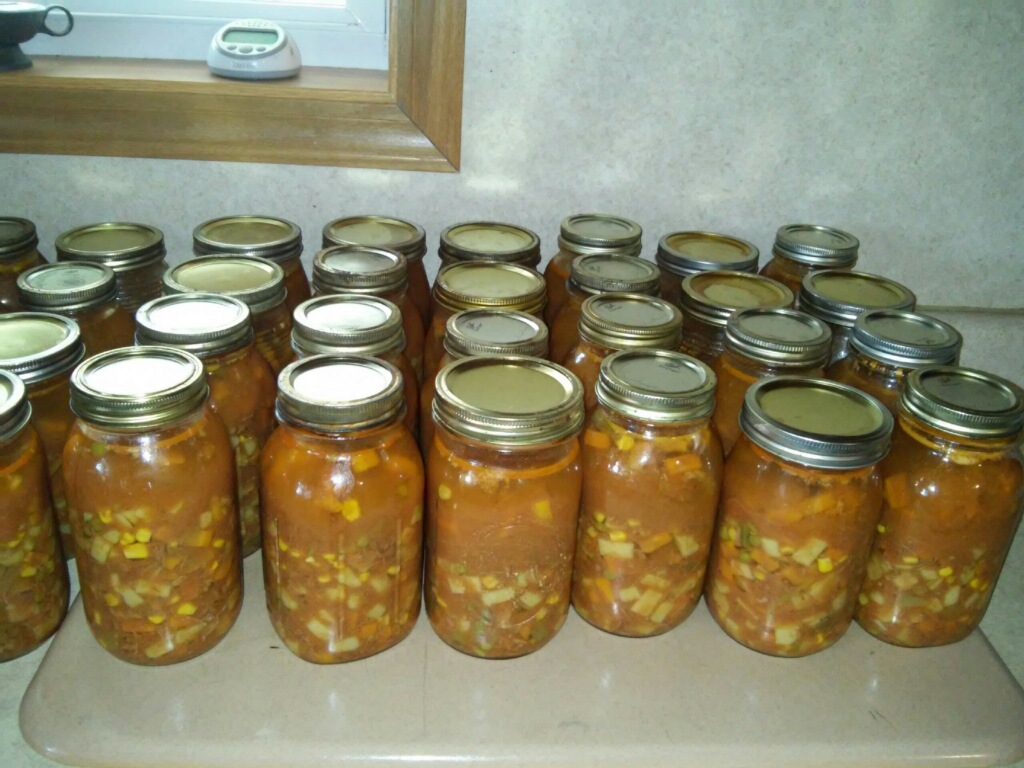
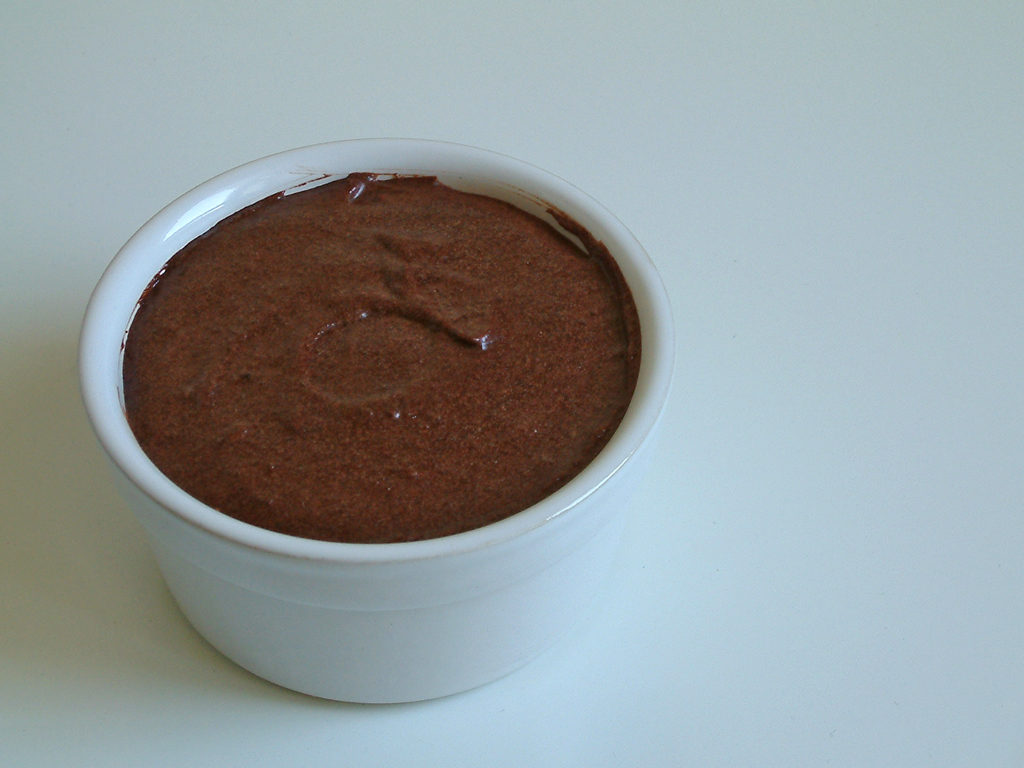
Gardening and Canning Treats

With the explosion of farmer’s markets there are all different types of way to make money.

Many people who frequent these markets are green thumbs and some even sell their produce. It’s a very impressive little economy that has grown out of these markets.

If you garden and grow lots of food, you might think about canning up some interesting relishes, pickles and sauce that can be sold at the local farmer’s market. There are people who make a killing on selling things as simple as a can of local pickle relish.

If you come up with a simple name and recipe you might be able to make some side cash at the local farmers market with a table, tent and your new line of canned goods.

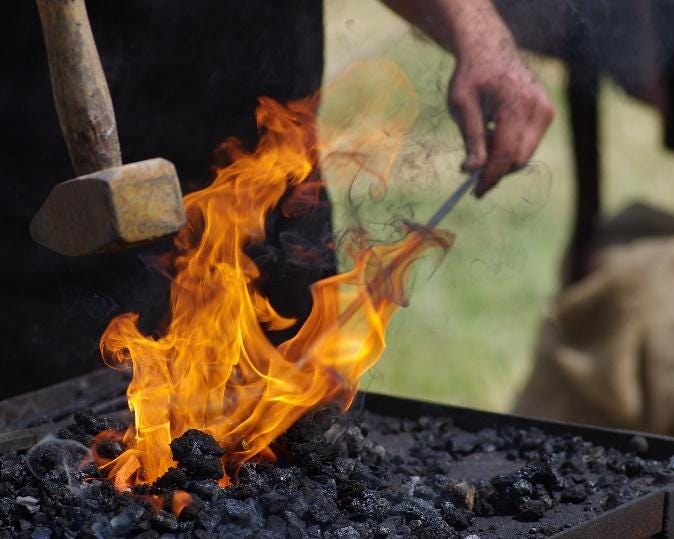
Bushcraft and Skills Schools

If you’ve already got the skills, you are going to have a very effective means of teaching others those skills. When you develop a group of bushcrafting skills you will always be able to find people who are interested in learning those things.

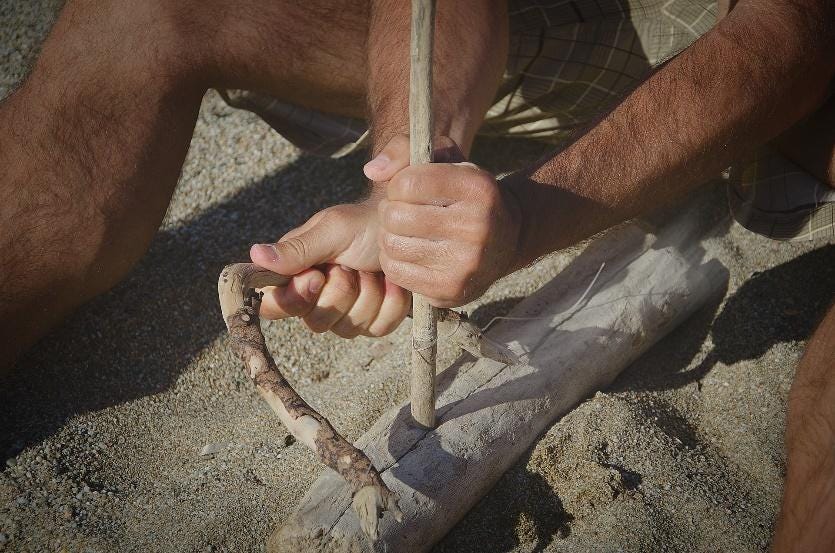
You are going to want to be sure that you are proficient in some things.

  • Fire
  • Water Sanitization
  • Shelter Making
  • Wood Carving
  • Foraging

Established survival school teachers charge hundreds of dollars per person in for these classes. This could be a considerable source of income for you if you know the people who want to learn these skills.

Prepping and Blogging

Maybe you are less of a hands on entrepreneur. If that’s the case, you might do better to turn your entire prepping process into a blog. Prepping is a deep world and there is a whole lot to explore and discuss. A blog might be a perfect vehicle for you.

From talking about survival scenarios to reviewing gear, you will find it hard to run out of things to show your blogging audience. If prepping is your bread and butter and you don’t mind sitting behind a keyboard this can not only become incredibly rewarding but also highly effective at pulling in income.

  • Affiliate Links
  • Sell your own products
  • Advertisers
  • Sponsored Posts

Not only is a prepping blog a great means of making money but it’s also a great tool to reaffirm your beliefs and find holes in your preparedness game.

Conclusion

You might feel like you are cornered by your budget. Maybe you are stuck in a dead end job and you don’t want to be there, but you have bills to pay. There are millions of Americans in that position.

Maybe these side hustles can help you make more money and take your prepping to the next level. There is one thing we cannot deny; we must have money to buy some of the things we need to be prepared.

Here is one more consideration for you.

Imagine a life where you do all 5 of these things. Perhaps you create a consistent income that not only allows you to prepare better but also to leave that job of yours and become your own boss. Its 2019. These things happen to people every day!

What if you can create a consistent income that not only allows you to prepare better but also to leave that job of yours and become your own boss. Its

Money is the lynchpin to all prepping. There are several things out there that you can do for free but that has serious limits. The reality of prepping is that you are going to need some money to get things done.

The good news is that most preps don’t cost a ton of money. Things like food storage can be built up over time. The same could be said for things like ammunition, first aid and even a garden. However, there are some things that could run you a couple to a few hundred dollars.

Things like generators, firearms, outfitting a family with reliable gear for a bugout. Communications can be very expensive.

For many preppers this investment is a huge problem. So many people are living paycheck to paycheck. That doesn’t mean that they are maximizing their money but the idea of setting aside $50 a week for prepping just doesn’t make any sense.

There are many things that you can do to be better with your money. They aren’t easy, because we are set in our ways. However, we are going to look at several ways that you can start saving money for prepping.

Free Preps

Yea, earlier I said there are some free preps. I am sure you didn’t miss that. Here are a handful of preps that can seriously be accomplished at zero dollars and zero cents.

  • Write Plans
  • Take a CERT Course
  • Talk to Your Neighbors About Natural Disasters
  • Organize the Preps You Have
  • Join an Online Community
  • Practice Skills

Cut Your Bad Habits

We have a lot of habits here in the nation. You know, its not uncommon for a large percentage of our weekly income to go towards habits and pleasure. We get so you to it that we believe we NEED those things.

One thing you can do is sit down and consider what you could cut out of your life.

Most people have a tremendous amount money sunk into things like alcohol, cigarettes or drugs. These things become part of your weekly budget.

Another big one can be video games. With the introduction of IN GAME PURCHASES people are spending thousands of dollars on a single video game.

Stop Eating Out

It’s so easy to eat out at a restaurant. Who wants to make food every night of the week?

Most people don’t really know how to cook. That’s the problem. What kind of system have we set up where people grow up to adulthood and don’t know how to feed themselves?

You spend exponential amounts of money when you decide to eat out. It might seem cheap but when you really do your math it’s killing your wallet and you will never have money to prepare.

One of the most popular quick service restaurants is Chipotle. They serve chicken, beans and rice. Let’s put this in perspective. You are going to spend about $10 per person at a place like chipotle. If you go to Sam’s Club, you can buy 50lbs or white rice for $20!

Think about that. You get one burrito for $10 or 50lbs of uncooked rice for $20.

50lbs of rice is 30,000 calories! That’s a serious prep.

Get Up Early and Go to Bed Early

When you get up early you are more productive. Its pretty much that simple. If you wake up early you have time to make money before work. You can write books, sell products, push a website and make that side hustle viable.

After work we are all exhausted and we have other responsibilities. However, if you can get up two hours earlier you have some serious time to sit down and really play things out.

The opposite side of the coin is that by going to bed early you spend less money. Think about it. Think about that last monster bar tab you ran up. What about that last huge restaurant bill you ran up? Those things don’t happen if you wake up early and get to bed early.

Practicing a frugal life where you are up early and in bed early is about as safe as it gets. You will see the money start to stack just from this lifestyle change.

Side Hustle

Lots of Americans are working overtime or working a side hustle altogether. Whether that is something like an internet business or doing side jobs in your trade or profession, there is a lot of money to be made out there.

The economy favors the person who hustles. Those who work 5 more hours a week, per week make roughly 30% more a year.

You should decide if you are the type of person who wants to operate a side hustle you own and operate.

In other words, do you want to start a side business?

OR

Do you want to hop under someone else’s umbrella and make money through things like network marketing or even just getting a part time gig?

No matter which side hustle you choose, you will be making more money and that money can be diverted to your prepping goals and plans.

Conclusion

While everyone lives on a budget there is always a way to change that. For some, we can simply cut out some unnecessary spending and divert that towards prepping. Things like vices and going out to restaurants on a regular basis can be paired back. There are also health benefits to this, as well.

If you are stretched to the max and cannot cut anything out of your life, well, you need to get back on your hustle. You need to work more, on a side hustle, and get more income for prepping.

The great news is that you have options. No, it’s not going to come for nothing. 

Of course, there is also the chance that you start a simple side hustle and it becomes your main business. Maybe its even something you love. For the blessed few this happens but it can never happen to you if you don’t give it a shot!

For the ones who have no clue how to make the extra buck, make sure you read our next email.


On a different note, here’s some other self-sufficiency and preparedness solutions recommended for you:

The Lost Ways (The vital self-sufficiency lessons our great grand-fathers left us)
Survival MD (Knowledge to survive any medical crisis situation)
Backyard Liberty (Liberal’s hidden agenda: more than just your guns…)
Alive After the Fall (Build yourself the only unlimited water source you’ll ever need)
The Lost ways II (4 Important Forgotten Skills used by our Ancestors that can help you in any crisis)
The Patriot Privacy Kit (Secure your privacy in just 10 simple steps)

There are many things that you can do to be better with your money. They aren’t easy, however, we are going to look at several ways that you can start


The World’s Greatest Lament

There is one cry in the prepping community that sounds above the rest. In this world of manic convenience, we spend our money, mostly, before it even arrives in our bank account. This leads many people to the strange conclusion that they do not have the money to prep.

In most cases these people are holding onto some paid convenience that could be cut away to free up some funding for preps.

Now, that is not the answer for everyone. There is another way.

It’s a way that you can have the best of both worlds but, you are going to have to work for it. Yes, I am talking about a side hustle. However, this is not so you can go out to eat at nice restaurants. This side hustle is so you can afford to stay on the prepared path.

The beautiful thing about all this is that you only need a little extra money to make a big difference in the world of preparedness.

The Simple Way Of Making Side Money

Most people are already making money. They have some sort of profession and means to take advantage of that profession and make a, somewhat, livable income. In other words, they have a skill that holds some value.

No matter how meager that value, you can use that skill to pick up a side hustle. Even a simple cashier can make extra money by picking up more shifts or part time work as a cashier at another location.

While you are considering your side hustle, I want you to remember that there is no shame in a hard day’s work and the pay that comes with it. In other words, you might sell insurance during the day and make a good living but picking up a couple nights a week washing dishes or waiting tables is no reason to feel bad.

Many people don’t pursue a small, simple side hustle because their ego is too big. They cannot imagine leaving their high paying job for the day and doing menial job 16 hours a week to make extra cash for prepping. Again, no shame in making extra cash, if it’s legal.

Here are some ways of making money that anyone can take on.

  • Retail
  • Food Service Jobs
  • Sales
  • Dog Walking
  • Tradesman Help
  • Personal Assistance
  • Customer Services

All these jobs have tremendous turnover and employers are almost always looking for reliable people who can get the job done. If you are already that kind of worker, you should be able to swoop down into one of these positions part time.

You might even improve the work environment in the location.

Hyper Efficient Prepper Ways To Make An Extra Buck

While having a simple side hustle is good and it will produce money for your preps, there are ways to optimize that. Let’s talk about a simple example. I guess you could call it force multiplication.

You can make a lot of money selling small, handmade, blacksmith metal pieces and decorations. You can even make things like knives from simple railroad spikes. Something as simple as a hook that can be hung on a wall can go for between $5–10. Hand forged and with a high quality design you can get top dollar for these items.

Now blacksmithing is a unique side hustle that allows you to practice a skill that is pertinent to self-reliance and prepping while making money doing it!

Many women take advantage of a similar confluence through knitting and crocheting.

You should investigate your own life and find what types of side hustles you could engage in that would both help you make a little extra money and improve your preparedness skills. Here are some other examples of hyper efficient prepper side hustles.

  • Firewood Cutting
  • Home Repairman
  • Pest Removal
  • Farming
  • Livestock and Meat Production
  • Small Survival Group Instruction
  • Refurbishing Things

How to Spend Your Extra Money

After having earned money from your side hustle you come to the point where you have to decide on how to use it. It might be exciting to use that stowed away money to buy an expensive piece of gear. Maybe you are eying up a Leopold scope for your firearm.

Maybe you think about a new high speed backpack that looks tactiCOOL and has more storage space than your current one.

It might be worth considering the boring basics first.

Food is a universal preparedness item. Naturally, it can be used to feed yourself and your family. It can be used to feed others. It can be used to barter with, and it can be used to negotiate positions of power. If you have the food, you make the rules.

A 50lb bag of rice is going to run you $20 at Sam’s Club. If you can bucket that up with mylar bags and oxygen absorbers, you are going to be creating your own long term food storage and saving money off pre packaged versions.

Another great item to spend that side hustle money on is skill training. You can attend some great classes for a couple hundred dollars and get real, hands on prepping and survival experience. That can go a long way. You will quickly find that hands on survival is much different compared to YouTube survival.

Conclusion

The reality is that most preppers are not as hard up for cash as they might think. Most of the time some simple lifestyle changes can make a huge difference.

Even if that’s not the case, you can add extra money to the coffers if you are willing to go and get it. If you can work hard you will always have money. If you don’t wanna work than you will likely never have money.

Get your ego in check and hop into a side hustle to take your prepping to the next level!


This article is powered by finalprepper.com.

It’s a way that you can have the best of both worlds but, you are going to have to work for it. Yes, I am talking about a side hustle

The modern medical system is built on “just in time” shipping methods. The ability to get meds, resources and people where they need to be in 24-48 hours is the main reason, we have blooming populations of human beings on this planet.

We have had glimpses of what it would look like to lose our trucking fleet because of disaster. Even a moderate natural disaster can make roads impassable for days on end. Imagine what a nationwide collapse would do to trucking and shipping of medicines.

You know someone, right now, who would find themselves on deaths door without medications for 72 hours. We all know at least one person. Whether that be something like insulin, dialysis or even a simple blood pressure medication.  

Grid Down Medicine Shortage

In something like a grid down collapse, brought on by terrorists attacking our power grid, the disruptions would be cataclysmic and in a matter of days you would find yourself looking for medicine, food and likely water. Medicine and food would be affected by the lack of shipping. As store shelves go dry there would be no more shipments to refill them. The water system and water processing facilities would also be offline without electricity.

You might have access to water, but you might not want to risk drinking it for fear of serious contamination. A simple infection from a waterborne pathogen could result in death without access to a doctors or modern antibiotics.

Disease and Death Will Return

Everything changes and without preparations you and your loved ones will be at extreme risk. Without our modern shipping and medical system, people will get sick and die on a regular basis. Things like the flu and other viruses will kill people, when they used to be cured by a quick trip to the doctors.

Doctors will be gone.

We have seen similar situations like this play out in warzones all over the world. In Syria, today, people are facing these situations as the embattled nation has been reduced to near rubble. This from Doctorsoftheworld.org:

According to the U.N., one-third of Syrian hospitals have been shuttered since the conflict began and a staggering two-thirds of medical personnel have either fled or been unable to continue working. The repercussions of this breakdown on the health of the population are impossible to overestimate, and cannot be dealt with effectively until safe access for medical and public health personnel can be assured.
https://doctorsoftheworld.org/blog/op-ed-by-board-president-dr-ron-waldman-healthcare-in-syria/


Medical Prepping is Essential

While things like food, water and security through firearms often take the highest tiers in prepping, its clear medical prepping deserves its day in the sun. Its hard to understand how preppers can put such an emphasis on high powered rifles for gunfights but not consider the aftermath of a gunfight. Things like trauma kits and tourniquets are how people will keep from bleeding to death in these scenarios.

Of course, we are not even talking about post combat infections

DO YOU KNOW WHAT STEPS YOU NEED TO TAKE TO GET YOUR FAMILY PREPARED FOR A TIME WHEN DOCTORS HAVE GONE INTO HIDING?

Top Medical Prepping Mistakes to Avoid

With food storage you can put up calories and as long as your family likes the food you are storing you will have some answers for hunger. With medical preps its very different. There are particular things that need to be stored and many of them you have NEVER used before!

WHAT ABOUT FIRST AID SKILLS?

Without the right training and resources to turn to, you will never know the full extent of what you might need in a collapse of the medical system. Retailers offer us very basic first aid solutions that address limited situations.

Here are some of the most common medical prepping mistakes to avoid.

  • Depending on a store bought first aid kit
  • Stockpiling medications, you don’t know how to dose safely
  • Not training skills to compliment your medical preps
  • Assuming there is someone out there who can help you
  • Not training family, as well (who will treat you?)

These mistakes are very common and mostly come from a place of ignorance. With so much information out there its hard to know where to look and what to learn first. When it comes to medical prepping its much easier to have a manual to turn to.

The breadth of knowledge is so vast its nearly impossible to commit much of it to memory. Having a reliable resource that you can turn to in these times of collapse and disaster will make all the difference.

DO YOU KNOW THE RESOURCES YOU NEED WHEN MEDICINE AND MEDICAL HELP ARE NO LONGER AN OPTIONS?

Conclusion

More and more people are realizing that our society and our civility are hardly as stable as we once thought. The foundations are cracked and in many places on our planet, full scale collapse has already taken hold.

You need only look to Syria and Venezuela to see the most news worthy cases of this. They are just the beginning.

Whether it come from despotic governments, mother nature, the heavens or something we haven’t considered, we will be tested, and this age of excess will come to an end.

In that time, you are going to want to have a resource at your side. You are going to want a manual for preparing for these dark times. The Doomsday Book Of Medicine is our answer to those looking for such a resource.

This is not a fly by night 20-page eBook on prepping. The Doomsday Book Of Medicine is a 800+ page guide to preparing for disaster and addressing situations during a collapse or a simple blackout. Having a tangible resource that you can hold, feel and use on demand is going to make all the difference in the future.

We all feel vulnerable and limited by budgets and commitments. Preparing for disaster seems like an impossible task but the right resources can help. Now is the time to move prepping to the forefront.

The darkness is coming, and it will take each of us to shine a little light if we are going to survive it.

In something like a grid down collapse, or a simple local blackout, the disruptions would be cataclysmic and in a matter of days you would find yourself looking for medicine,

I don’t need to remind just how darn important it is to know what to cook when the power goes out. There are so many recipes on the grand world-wide-web that you need only type in “gimme food” in Google to figure out your next step.

The trouble with these “whip-up” dishes, as I like to call them, is that they have a very limited shelf life, despite being bagged and refrigerated. In my searches for the next cannable superstar (be sure to check out my article on canning and pickling pork meat), I’ve stumbled upon a most interesting recipe – the so-called Poor Man’s Hamburger. According to its description, it should be an Amish dish, although I find it very hard to make a connection.

Anyway, the recipe’s pretty straightforward and if you have a good pressure canner, you can keep this stuff in your pantry for at least three months if not more. The weird part about preparing this recipe is who or rather what gets the spotlight – though it’s a meat-based dish, the gravy’s actually the one who steps into the limelight.

Crazy, right? Not in the very least! As you’re about to see, the gravy you get is what you might consider a great SHTF asset – it can very easily be combined with the meat of all sorts (chicken, beef jerky, spam) but it can also be eaten, well, plain, as a sort of early-morning broth.

Before we get to the cooking part, I should warn you that this recipe takes time. If you have something big planned that day, I will leave it for another day, preferably a lazy Sunday. So, without further ado, here’s what you’ll need to do in order to prepare Cannish, aka the canned version of the Amish Poor Man’s burger.

Gathering your utensils and ingredients

For this recipe, you’ll need the following tools:

  • Canning jar (the bigger, the better).
  • Plastic container (I would go for a 35 quart because you’ll have a lot of stuff to mix)
  • Food processor.
  • Oven grill (if you don’t have one, you can always use the top part of an old BBQ which you can place it over a tray).
  • Mouth rim (you’ll need this to shape your burger patties).
  • Skillet (for cooking the gravy).
  • Aluminum foil.
  • Lots and lots of patients.

As for the ingredients, go raid the pantry or the local farmer’s market of the following supplies:

  • Celery (around five cups).
  • Onions (five cups will do).
  • Saltines (I used one and a half pounds of saltine or six packs).
  • Eggs (two dozen).
  • Milk (five cups).
  • Lots of salt and pepper.
  • Ground beef (this recipe calls for at least 30 pounds. That’s around two or three big-ass rolls).
  • Canned mushrooms (five cans).
  • All-purpose flour.

Yes, I know it’s a very long list, but as I’ve told you, this is the kind of recipe that kind of makes you spend the entire day in the kitchen. Still, do bear in mind that will also be some waiting time, which would be right after you stick those burger patties into the over. All done with the tools and ingredients? Great! Let’s get right down to business.

How to prepare Cannish

Step 1. Grab a cutting board, a sharp knife, and get to chopping. Have your food processor ready, because everything you’ll chop or crush from this point forward will require a little bit of mixing.

Step 2. Leave the chopped onions and celery aside for the moment. As for the saltines, you can either use a mortar and pestle to crush them or place everything inside a zip-lock bag and use a rolling pin to beat the living daylights out of it. When you’re done, add them to the food processor, and give them a good mix (I scrambled them for 10 or 15 seconds to make sure that there are no chunks left).

Step 3. Grab yourself a large bowl and crack open two dozen eggs. Whisk the shit out of them.

Step 4. Measure five cups of milk.

Step 5. It’s now time to put everything together. Place the plastic container on your work table and add your chopped celery & onions, saltines, whisked eggs, and milk.

Step 6. Get dirty! You have two choices for the mixing part – wooden spoon or hands. I personally prefer the latter (make sure you’ve washed your hands before dipping them in the mix).

Step 7. Add some salt and pepper to the container (I used two tablespoons of rock salt and one and a half tablespoon of grounded black pepper) and continue mixing.

Step 8. Stick the container in the mix in the fridge for 30 minutes. It will be easier to handle once you get to the patty-making part.

Step 9. Get your ground beef out of the freezer and use a knife to remove the membranes. Add the meat to your plastic container and use your hands or a wooden spoon to bind the mixture. FYI, it’s easier to do this if you dip your hands in ice-cold water. Fill a small bowl with cold tap water and keep it next to your container.

Step 10. Start making patties. Take a handful of meat and stick in the metal rim. If you’re skilled patty—maker, you can ditch the ring, and form them by hand. Don’t make them too big or thick. Remember that your goal will be to place each cooked patty inside the canning jars. You shouldn’t also take into account that this type of meat is packed with fat, which will kind of end up in the oven tray.

Step 11. Stick the formed patties in the fridge for 15 or 20 minutes. To prevent them from sticking to each other, create patty layers separated by baking parchment.

Step 12. Get the patties out of the fridge and arrange them on your grill. If you use the exact amount of ingredients, you’ll end up with 28 or 29 burger patties.

Step 13. Preheat your over to 375 degrees Fahrenheit.

Step 14. Place the BBQ grill with a tray in the oven and bake for 35 minutes. Don’t forget to flip the patties after 15 minutes. Depending on your rig, this step can take anything from 2 to 6 hours. In my case, it took about three and a half hours to bake all the burger patties. When they’re done, place them in a large roasting pan. Cover it with two layers of aluminum foil. Allow the burgers to cool down.

Step 15. In the meantime, get a skillet and prepare the gravy. Here’s how to do it. Get one and a half cup of fat from the patties and add it to the skillet. Set your heat to medium-low. After the fat begins to warm up, and half a cup of all-purpose flour.

Use a spoon to stir. Don’t rush it! Gravy’s something that takes a lot of patience. If you see that the mix is about to go up in flames, lift the pan off the stove, and put it back again. You’ll know that the gravy base is done when it turns light brown.

Step 16. It’s time to prepare the mushroom soup. In a big pot, pour the contents of five mushroom soups cans. Using an empty can as a measuring cup, add five cups to the shroom soup and bring it to a boil.

Step 17. While the shroom soup’s still hot, grab a ladle and carefully add it to the browned flour mixture. The secret to not ending up with burned gravy is to stir while pouring shroom soup with the ladle. It may take a while longer, but it’s worth it. If you feel that the mix is too thick for the spoon, use a whisk instead.

Step 18. When you’re done adding every last drop of shroom soup, give the mix a good whisk, and let it bubble for five more minutes before killing the flame.

Step 19. Take a breather. Smoke if you have them. After the gravy cools down a bit, it’s time to put everything together.

Step 20. Give those canning jars a good wash. You can either submerge them in a tub filled with water and dish detergent or boil the Hell out of them before using. Your call.

Step 21. Place five burger patties in each canning jar and cover with gravy. Put the lid on, tighten it, and allow the jars to cool down overnight before placing them in the fridge or pantry.

Congratulations! You’ve just made your first batch of canned Amish Poor Man’s burgers. Your kitchen probably looks like a scene from WW2 or something, but who cares when you have delish marinated burgers. If stored probably, you won’t have to worry about running of food, at least for a couple of months. Although the canning part allows you to store this stuff in any place outside of the fridge, I would strongly advise you to keep your jars refrigerated and to consume it in two months’ time.

Another thing about this recipe is that it will take a while to figure out how to make the gravy base. For my part, I had to discard the contents of two skillets and ended up using more than three cups of fat before I was able to make a ‘stable’ base. As I’ve mentioned, the trick is to gently stir the mix and to lift the skillet every now and then. If the weather’s nice, you can always skip the oven part and cook your patties over a charcoal barbeque.

As for the mix, if you can’t find any saltines, you can always replace them with other types of crackers. Just make sure that they’re salty. The dish can be eaten hot off the oven but, if you want to get more kicks out of it, stick in the fridge and leave it overnight. By morning, the patties would have sucked in all that delicious gravy. You can heat them up in your microwave or in a pan with boiling water.

That’s it for my Cannish recipe! What do you guys think about this SHTF dish? Hit the comments section and let me know your thoughts.

Before you go, you may also like:

This is more than just about your guns…
How to survive any medical crisis situation with ease
10 Easy Steps to Secure your privacy
Secret Military Solution For Power Independence

DIY Unlimited water source
Why a food reserve is way better than the Federal Reserve
Lost Skills of our Ancestors that still work today

Anyway, the recipe’s pretty straightforward and if you have a good pressure canner, you can keep this stuff in your pantry for at least three months if not more.

The world around us has increasingly become one of pills and of potions. We have highly regulated pharmaceutical practices that require nearly 1 billion dollars to bring a new medicine to market. That is an astounding amount of money for healing.

The efficacy of these drugs, medicines, antibiotics and narcotics have done a lot of good and a lot of harm. Somehow, we began living a life that was wholly dependent on these man-made drugs. There was no thought given to how we survived for so many thousands of years.

Now, its obvious that the explosion of healthy populations across the planet is largely due to food production and medical advancements. Still, we don’t need to turn to powerful over the counter medicines for everything.

Boosting Immunity Naturally

There are many naturally occurring plants and foods that will boost immunity just by consuming them. These are the remedies used we have used for a long time to stay healthy.

We didn’t always have pain medicine or fever reducer, but we learned that willow bark could affect these things.

Most of the illness we deal with today has to do with a compromised immune system. We don’t eat enough high-quality foods to boost our immune system and we eat too many processed foods that hurt our immunity.

Some of these immune boosters stand out above others and we are going to look at 7 of these powerful natural immune boosters. There are 7 of these that have made our natural immune boosting Hall of Fame!

Natural Immune Booster Hall of Fame


  • Crystalized Vitamin C

For a long time, people have been seeking out Vitamin C. Whether through the orange juice or the vitamins, people want plenty of Vitamin C in their diet.

Where many people fall short in their quest to maximize Vitamin C and immunity is that they depend on pill form Vitamin C. You cannot maximize your immunity this way. The best answer is the use of crystalized vitamin C. This dissolvable vitamin C is going to penetrate your body and you can dose much higher.

You want about 1000mg of vitamin C or one flat teaspoon per day. This is the king of natural immune boosters.


  • Pine Needle Tea

If you are looking to source powerful immune boosting Vitamin C in the wild you can make a hot cup of pine needle tea. What most people don’t know about pine needle tea is that each cup of pine needle tea has about 350mg of Vitamin C.

There may be no better answer for simple immune boosting properties in a survival situation or when you are out in the wild.


  • Echinacea

Also known as cone flower, this plant can be grown in backyards all cross the nation. Not only is it an immune booster it is also a beautiful flower. The flower and stems can be used to make a simple immune boosting tea.

This flower can also be dried and stored to have the properties and the tea for later use.


  • Ginger

There is something about the taste of ginger, it just feels like its good for you! Ginger has been shown to activate T Cells which will fight off viruses. Ginger is a powerful healer that is a necessity when it comes to boosting immunity.


  • Garlic

Another biting root, like ginger, garlic is a powerful and offers up many properties that protect you against viral and fungal infections. Garlic can be used topically as well as internally. It’s a powerful little root.

It’s an ancient healer that has been used for millennia.


  • Elderberry

The powerful active ingredient in Elderberry, regarding immunity, are flavonoids. These have been shown to help with things like inflammation and immunity.

One of the most popular natural remedies for the fighting flu symptoms is elderberry syrup. Its been shown that if you start taking this syrup at the earliest sign of flu like symptoms it can substantially decrease the effects of the flu.


  • Probiotics

We have learned that gut health has so much to do with immunity and overall health. The best way to nurture that gut bacteria is to put the right things in there. Stay away from processed foods and add some fermented foods to your diet.

These contain the helpful probiotics, and this makes a huge difference in how your body operates.


Integrating These into Your Life

Its one thing to know about these powerful healers but its another thing to put them into practice in your daily life. This requires that you change your lifestyle. You might want to take on a lifestyle that is more focused on preparedness and holistic, simple, purposeful living.

While preppers have been looked at through a strange lens in the past its clear that there is a lot more to it than just putting up food and ammunition. If you want to know more about natural immunity and healing remedies check out The Doomsday Book Of Medicine which is a comprehensive guide to preparedness in the modern age.  Why would you need such a guide with all the technology and meds around? Follow this link and read about how a simple blackout can disrupt all of our lives. Especially of those who need and seek treatment everyday. 

If you are looking to integrate natural remedies and healing into your lifestyle, this might be the answer for you. And having a great resource on your side can make all the difference. 

Conclusion

Are there other immune boosters on the market and in the wild? Sure. These 7 are the very best. If we had to mention one more it would be the fragrant oregano plant. It has powerful antibacterial properties.

This hall of fame selection can have a positive affect on your daily life, and you can also combine some of these in order to create powerful healers to call upon when you are sick or just as supplementation daily.

Your health does not have to exist in pill form.

If you are looking to integrate natural remedies and healing into your lifestyle, this might be the answer for you. And having a great resource on your side can make

Diatomaceous Earth – the best thing to have around the house for some, and a thing loosely associated with alchemy, black magic or natural healing to others. As for yours truly, D.E. is probably the best eye-opener I had since discovered that bread could be made from anything, including wild herb-like dandelions. In today’s article, I’m gonna talk about how my life has changed after discovering this off-white powder.

Now, for those of you who don’t know or simply don’t care D.E is a powdery substance made from fossilized diatoms, which are microscopical algae-like organisms. This stuff’s been around since the dawn of the 19th century when it was discovered by mistake by a German peasant who was trying to sink a well near his home.

Ever since then, D.E. has been studied and used for various purposes. In fact, Alfred Nobel aka the Dynamite Dad had been experimenting with diatoms for the purpose of stabilizing nitroglycerin. D.E.’s also used in the beauty industry for manufacturing toothpaste. Farmers also used a refined form of D.E to prevent caulking and to keep pests bay.

Anyway, my interest in D.E. began when I was doing a bit of research on ways to purify water in the field. A couple of clicks later, I ended up reading tons of material about D.E. being used to clean pools and that most water purification tablets are made from this stuff.

From that day forward, I have tried using diatomaceous earth for more than just water filtration. It’s true that baking soda’s the most versatile household ingredient, but that’s before I discovered D.E. Here are a couple of ways I managed to use this powdery delight around the house.

  1. Saving a shit-load of money on kitty litter

I’ve already told you that I’m the proud owner\slave of two wonderful cats, which means that I usually have to stock up on kitty litter as often as I can. The trouble is that you can’t just make two cats share a litter and you really can’t leave them uncleaned for more than two days.

Anyway, after spending literally hundreds of bucks on jumbo kitty litter bags, I stumbled upon this great way of using D.E. as a substitute for silica shards. What I do is make my own cat litter using wood shaving and sawdust, which I sprinkle with D.E. Since the stuff’s great at sucking out every bit of moisture, it entirely eliminates the smell as well as clutter.

  1. Making deodorizers

Yes, I know you can probably get rid of all the foul smells around the house using vinegar, but D.E. is much cheaper. More than that, it doesn’t leave behind that stingy odor, especially when you use it on stuff like carpets, drapes or upholstery. To make your own D.E. deodorizer, grab a canning jar, fill it with water, and dissolve one tablespoon of diatomaceous earth. Place inside the fridge and use it when necessary. It really works wonders on those garbage pails and the back of the refrigerator.

  1. Helping my chicken lay better eggs

It may sound far-fetched, but this stuff’s actually very beneficial to chickens and poultry, in general. If you want to up the nutritional value of your eggs, mix D.E. with chicken feed. They’ll taste better, look great, and have a harder shell. You can also spray some D.E. around the chicken coop to get rid of the smells and to keep away pests.

  1. Being able to make my own cosmetic products

I have to admit that being able to make my own cosmetic stuff was something I’ve been dreaming since my college days. Still, have to say that the perspective of getting caught up in that New Age BS was not my kind of gig, neither was setting up a lab in the basement. Well, after learning a bit about D.E. I’ve managed to get my hands on a couple of great recipes for stuff like toothpaste, deodorant, and facial mask (yes, I use those because my pores refuse to close).

Anyway, with a handful of D.E., a drop or two a peppermint oil, and some vegetable glycerin, you can make one Hell of a toothpaste. Apart from being a great antibacterial agent, D.E also has a scrubbing effect. If you want to add some extra kick to your toothpaste, consider putting some baking soda into the mixture. As for deodorant, you can whip up a good batch by mixing D.E with cornstarch, arrowroot powder, and coconut oil. For facial masks, just add a couple of tablespoons to a glass of water and stir until you get a thick paste. Have fun!

  1.  Removing just about any stain

In a previous article, I’ve told you a bit of how great salt is when it comes to removing stains and smudges. Well, that stuff got nothing on D.E. – this thing can get rid of any stain or dirt, no matter how stubborn it is. From experience, I’ve learned to rely on D.E., especially in dealing with oily stains. So, if the washing machine is of no help, just use a mixture of water and D.E. on the stain. Rub it in, allow it to work its magic and wash.

  1. Great for removing scale and grime from the bathroom

If my wife’s really mad at me, she doesn’t have to yell or anything. She just tells me that the bathroom could use a bit of cleaning. And nothing’s more frustrating for me than having to deal with scale and grime, especially around the bathtub. Tried every cleaning product there is. Didn’t solve anything apart from the fact of sparring me a trip to the gym that day.

Well, since D.E. is very abrasive, I figured that maybe it would help me get rid of the scale. And it did! So, if you want an efficient abrasive cleaning solution, mix two tablespoons of D.E. with some water and use a sponge to spread it around. Give it a good rubdown, and you’re good to go.

That’s if for how D.E. changed my homesteading life. What do you think about this off-white magical powder? Let me know your thoughts in the comments section.

Before you go, you may also like:

This is more than just about your guns…
How to survive any medical crisis situation with ease
10 Easy Steps to Secure your privacy
Secret Military Solution For Power Independence

DIY Unlimited water source
Why a food reserve is way better than the Federal Reserve
Lost Skills of our Ancestors that still work today

Diatomaceous Earth – the best thing to have around the house for some, and a thing loosely associated with alchemy, black magic or natural healing to others.

Probably most of you have included some kind of wound cleaning substance in your first-aid kits. Sure, hydrogen peroxide’s the way to go for getting dirt and other stuff out of the wound, but it’s hardly the only antiseptic out there.

Anticipating that some of you can get a little freaky like me when it comes to having a complete medical kit, I’ve decided to use this opportunity to write about potassium permanganate – prince and pauper, at the same time, among antiseptics. What’s even more interesting is the fact that knowing what this stuff is will allow you to use for stuff other than cleaning wounds.

Before I start talking about the many uses of potassium permanganate, here’s a historical tidbit. During the latter years of the Korean War, the North was so desperate to gain a foothold that it began deploying unconventional weaponry. White phosphorus rounds were one of the weapons used against the South Korean soldiers and friendly American GIs. I won’t go into many details as to what kinds of wounds these devilish contraptions inflicted; suffice to say that it wasn’t a welcoming sight.

Anyway, the trouble with phosphorus rounds was they continued to burn inside the would long after leaving the gun’s barrel. Almost invisible to the naked eye, the Army surgeons had to improvise. And here’s where potassium permanganate comes into play – phosphorus reacts to potassium permanganate; quite violently I might add.

However, if used in small amounts the compound makes phosphorus light up like a Christmas tree. So, in order to operate, surgeons would dunk wounded patients in tubs filled with water, pour in some potassium permanganate, switch off the lights, and operate.

Outside of surgery, this compound can be used for tons of other stuff, most of them having to do with our favorite topic – getting out of SHTF situation. So, after probably boring you half to death with my little historical detour, here’s how potassium permanganate can serve you in a survival-type situation.

  1. Wound managed and various life-threatening scenarios

Let’s start by stating the obvious – potassium permanganate is a very effective antibacterial agent and just the thing you’ll need to keep infection at bay. However, the thing with this compound is knowing what forms works best depending on the nature of your emergency. For instance, in the case of wound management, the liquid solution would be the best approach. However, the powdered form can be successfully employed when having to deal with stuff like snake bites or poisoning.

By the way, if you or someone close to you has ingested poison, you can induce vomiting by using a 0.2 percent permanganate solution. Doctors would often order stomach washes using this compound. Conditions of the skins like irritations, sores or eczema may also be treated using potassium permanganate. Still, if you consider including this compound into your B.O.B or household emergency kit, I wouldn’t use it for more than wound washing.

  1. Getting rid of the dreaded morning breath

Although it’s far trickier to use than baking soda\salt with others, it may be possible to use potassium permanganate to 86 the dreaded morning breath. To prepare a mouthwash, dissolve one gram of powdery potassium permanganate in two gallons of water. This stuff will burn your esophagus and stomach, so be sure you spit it out. By the way, since potassium permanganate is known for its astringent effect (making the skin cells contract), you can use the mouthwash mix to get rid of stinky feet. Use this in conjunction with purified water and soap, and you won’t need another foot spray ever.

  1. Water filtration

If you’re all out of water filtration tablets or can’t lay your hands on charcoal, it may be possible to use powdered potassium permanganate to remove bacteria from the water. According to the FDA’s safety guidelines, the concentration should be around one unit of potassium permanganate to 10,000 units of water.

To figure out what this means, imagine you have a well with very dirty water. By applying the dilution ratio, it means that you will need to use around 7 grams of powdered potassium permanganate to purify one gallon of water. Do the math if you plan to sterilize smaller amounts of liquid.

  1. Fire-starter and probably self-defense weapon

Here’s my favorite way of using this stuff outside medical emergencies – to start a quick fire. For this, you will need around 10 grams of potassium permanganate and one-quarter of a teaspoon of glycerin (if you can’t find glycerin, use a water and sugar mixture). Place the permanganate on a small plate. For extra safety, you should do this experiment outside, as far away from flammable sources as possible. It would also be wise to put the plate on a hard surface like concrete slab or brick.

Now grab a pipette, draw a bit of glycerin and put a few drops in the middle of your permanganate mound. Stand back because the fumes are highly toxic. In a matter of seconds, you’ll see smoke rising from the mound, followed closely by purplish flame. When it’s safe to approach, grab yourself a handful of kindling and longs, move the place to your firepit (don’t forget those safety gloves) and, voila! You now have a cozy fire.

As for the weapon part, I guess you can create makeshift pipe bombs using potassium permanganate and phosphorus. I don’t know for sure if phosphorus is an over-the-counter compound or not, but in SHTF situation, you may be able to combine these two in order to make defensive weapons.

Be extremely careful when mixing potassium permanganate with other compounds. As you’ve seen from the above-mentioned experiment, permanganate doesn’t behave like an English gentleman when combined with stuff like glycerin. Always wear protective gear when working with volatile compounds.

Well, that above covers my take on using potassium permanganate outside the medical field. I hope you’ve enjoyed my article. As always, if you feel that I’ve missed anything, don’t be a stranger and leave a comment.

Outside of surgery, this compound can be used for tons of other stuff, most of them having to do with our favorite topic – getting out of SHTF situation.

The American pioneers had to be very clever about food. The United States government was offering up 160 acres to the brave souls that migrated out west. That is a massive expanse of free land that took a lot of work to manage.

The important thing to remember is that there were no supermarkets or anything else out west in 1862, when the Homesteading Act written into law. That meant the pioneers had to get the most out of every scrap of food they raised.

One of the tools they used to achieve this goal was the root cellar. The root cellar is an underground storage area used for storing things like garlic, potatoes, dried grains and even fresh vegetables. The temperature is regulated by the dirt that surrounds the small space. This means you have a storage space that doesn’t freeze in the winter or rot food in the hot summer.

Should you consider your own small root cellar?

Store Fresh Produce for Months

By layering sand and fresh produce in wooden barrels the pioneers were able to keep that produce for months after it was picked. This worked best with root vegetables like carrots, turnips, rutabaga, beets and sweet potatoes.

The temperature in the root cellar and the insulation from the sand meant that these vegetables could be kept moist and cool for most, if not all, the time.

The modern root cellar could be used in just the same way. However, we could even store backup long term food storage in a modern root cellar. This is important because it takes up less space in our home and offers us that security of having food on hand.

Having extra food on hand is not about paranoia. We are experience devastating floods in the Midwest lately. Nations around the world are at war and places like Venezuela are experiencing the realities of an imploded economy.

But storing food does not have to be about serious disaster either. What happens if you lose your job or get sick? These things happen everyday in our nation. You have life insurance, but many don’t have things like water and food insurance. That is where long term food storage comes in to play.

DIY Root Cellar

Building your own root cellar is well within your scope. We are going to look at two ways to get this done on your own property.

No matter which method you choose you are going to do some serious digging. It’s probably worth considering your method for that up front. This could be something you suffer through by hand or you might be interested in renting machines to make it easier.

In most cases you are going to want to go 15’ down! But it depends on your area so do the research on your local area.

Wood Framed Root Cellar

The wood framed root cellar is the classic version and its basically like building a shed underground. Your build will have a wood roof and wood frame. But the wall will be dirt and the room can either be tiled or you can reinforce it and bury it entirely.

You can keep a dirt floor in your root cellar. There is really no reason to pour concrete or do anything but just keep the natural ground.

Earthbag Root Cellar

Earthbags are an extremely cost-effective method for building. Some people live in earthbag homes! The earth bag is basically a sandbag and these bags are stacked on barbed wire, in rows, to create layers. Each layer is built upon another with barbed wire in between and these layers can be stacked into all sorts of shapes for several different structures.

The bags are coated and smoothed with a stucco finish and there you have it! Earthbags are very cool!

To build a basic rectangular earthbag root cellar would be very simple and would cost less than using wood and nails.

Covert Root Cellar?

As we mentioned earlier, you can bury a root cellar completely. In terms of security and privacy a covert root cellar might be just what you are looking for. Fortified, it could also double as a storm shelter.

I must imagine that if you are considering a root cellar you must also be thinking about living a more prepared and self-sufficient lifestyle. If you want to explore these topics even further The Doomsday Book Of Medicine is the reference on preparedness.

The Doomsday Book Of Medicine covers all the basics of preparedness including growing and storing your own food. It lays the base and you will get a comprehensive look at self-reliance and independence.

Don’t be fooled, The Doomsday Book Of Medicine is a guide to a better life, it’s not a guide to surviving the end of the world. Growing food, learning first aid and home security are tools to use each day.

No matter your motivation behind this root cellar it’s a step in the right direction. And before you start digging, you should check out this offer coming straight from our Easy Cellar partners. Read about the benefits of building one the Easy Cellar way, and then decide for yourself. That’s all I’m saying.   

Conclusion

Right now, we live in an age of excess. We have food everywhere and we waste about 50% of it!

What is the quality of that food? We all shudder at the thought of pesticides and other contaminants in our foods. It seems like we see a new rash of recalls each day!

Now is the time to seek out food independence and you can do this with your own actions, like building a root cellar, as well as, getting a little help from a resource like The Doomsday Book Of Medicine. The beautiful thing about self-reliance and independence is, its all up to you.

The important thing to remember is that there were no supermarkets in 1862, when the Homesteading Act written into law. That meant the pioneers had to get the most out

Everyone simply adores it and, truth be told, a meal would never be the same without it. I was, of course, referring to salt or, as I like to call it the uncrowned king of spices (that’s because salt is not actually a spice nor a condiment, but a mineral). Anyway, no matter how bad the food tastes, a pinch of salt can make all the difference in the world.

Of course, without this wonder mineral, we wouldn’t have yummy stuff like beef jerky, jerk-style chicken or the wondrous pickled meat. Come to think of it; our own body would have a hard time coping with, well, like it didn’t have enough sodium chloride. Lest not forget about the marvelous sayings this mineral inspired such as “take everything with a pinch of salt” or “being the salt of the Earth.”

Entire books and stories could be written on the topic of salt and for a darn good reason. As for the subject at hand, yes, it is true that sodium chloride can be of help in many SHTF situations, and not just for curing meat or making pickled veggies. Because I’m such a big fan of salt and salty stuff (though my doc told me I should use less) I’ve decided to write this wonderful piece on survival uses of salt.

Little Black book 2

Call it my tribute to the spice that crowns every dish, regardless if it’s a stove-cooked meal or a fancy plateau whipped up by a chef with two Michelin-stars. Now, if you thought that salt’s only useful for brining, pickling or putting taste back into food, you’re dead wrong. After doing a bit of research, I can wholeheartedly say that I’ve stepped into a whole new salt-using dimension. Don’t believe me? Check it out for yourself. Here are 12 ways salt can save your sorry can a shit hits the fan situation.

  1. Gum-massaging early in the A.M.

Fact check – no matter how hard you try or what toothpaste use, you can never get that great shade of dentist white- that’s mostly because they use stuff like hydrogen peroxide and light-accelerated bleach. Great if you want to get rid of tobacco stains or plaque, but wouldn’t be recommended it in the long-run since all teeth whitening agents are notorious for weakening the enamel.

Anyway, a very quick, easy, and all-out natural way of getting in a couple of shades of white is by using salt in combination with baking soda and your favorite toothpaste. There are many to do this, the most straightforward one being garbling a mixture of water and equal parts baking soda and salt. If you want to make your own teeth-whitening substance, take a bell-glass and add one tablespoon of salt (aim for the fine grain variety) and one tablespoon of baking soda. Put a bit of water on your toothbrush and sprinkle some of this one top. Wash, rinse, and finish off with regular toothpaste. You’re welcome!

  1. Removing clingy stains

There’s nothing more frustrating than having to toss a T-shirt back into the washing machine just because that pesky stain didn’t come off. Leave the washing machine alone! Here’s the prepper’s way of removing any kind of smudge – while the stain’s still fresh, sprinkle some salt over it. Take a paper towel, dip it in water, and start rubbing. After a couple of seconds, you’ll see that the stain is gone. Works for all kind of smudges – ketchup, blood, dirt, mayo, blueberries. If you have chunky salt, you can try throwing one inside the washing machine for extra cleaning power.

  1. Putting out a fire

Sodium chlorine is held in very high regards not just for its food-rejuvenation properties, but also for being a great fire retardant. If you get yourself lost in some neck of the woods and need to put out a fire fast, forget about sand, dirt or water. Just toss a handful of salt, and everything will be over faster than you realize (I was talking about the camping fire, of course).

  1. Making the itch go away

Stung by poison ivy? Can’t resist scratching that mosquito bite? No problem. Just rub a bit of salt on the sore spot, rinse with a bit of water, and it all goes away. By the way, salt and water can also be used for throat soreness – just garble a bit of salted water two or three times a day and you’ll be on your feet before you know it.

  1. Removing fish scales

In an SHTF situation, fishing can become your only food source. Sure, mostly anyone can reel in a fish with the right tools, but removing the scales – now that’s an art. I managed to cut myself more than a few times while attempting to scale a fish. That’s until I’ve learned this nifty trick – fill a bowl with ice-cold water and add two tablespoons of regular salt. Put the fish inside and allow it to soak overnight. When it’s cooking time, take the fish out, give it a good rinse, and peel off the scales (yes, the scales peel off like snakeskin or something).

  1. Preventing candles from dripping

At some point, probably each of you had to wait out a blackout by the light of a candle. Have no problem with using them, especially in cases that call for this sort of approach (wink-wink), but no matter what I do, I can’t seem to stop that irritating hot wax from reaching my pants. So, if you’re a candle-yes, wax-no kind of a person, you may try soaking the candles in salted water. Leave them overnight, take out, rinse, allow to dry, and that’s basically it. You will have noticed that there’s no more dripping. Awesome!

  1. Patching up plaster or sheet-rock walls

Though it’s safer to call in a pro for this kind of job, you can patch them up yourself in the meantime using water, salt, and corn starch. Do keep in mind that this neat trick works only on plaster or sheet-rock walls (wouldn’t try it on carpentry or heavy masonry). Get yourself a bucket, add some water, and equal parts salt and corn starch. Mix until it becomes pasty. Use a trowel to spread the mix over the wax and cover with a thin layer of paint. Easy-peasy!

  1. Dealing with mosquitos and other pests

And because I’ve mentioned something about mosquito stings and itches, here’s a great way to keep them at bay. Get yourself one of those spray cans and pour inside a water and salt mix. Spray yourself with this mix and around your campsite. Works for ants too. On that note, if you want to keep ants outside your tent, draw a thin salt line around the sleeping area. Will keep out ants, bugs, and even mischievous ghosts.

  1. Open wound management

Yes, I know that the last thing you’ll want to do is to put salt on a wound, especially a nasty one, but this is exactly what you will need to do order to keep infection at bay. Put that salt shaker aside, because that’s not how this thing works. Let’s backtrack a bit. Your blood serum contains sodium chloride, which is used to maintain vital organs like the liver, heart, and kidney in working order.

Docs use so-called isotonic salt solutions (sodium chloride concentration equal to that of your blood serum) to flush out wounds and, if necessary, replace lost levels. And because bacteria abhor salt, a water and salt mix is very useful in the treatment of severe wounds. Here’s what you will need to do in order to flush out an open wound in the field: grab a plastic bottle and fill it with clean water. Add a teaspoon of rock salt and shake the bottle until the salt dissolves. Put on the cap and use your survival knife to make a small hole in the middle of the cap. When you’re done removing any debris from the wound, flush it with this saline mixture before applying sterile gauze, clean cloth or anything you have on hand.

Little Black Book

  1. Removing nasty smells from shoes

If you’re just like me (thanks mom for the awesome glands!) then you know just how difficult it is to remove nasty smells from your shoes. Tried every footcare products out there – all of them are worth zilch! Do you know what removes pungent smells from your favorite blue suede shoes, apart from not wearing them in the first place? Yup, you’ve guessed it – water and salt. Here’s what you need to do. Dissolve one tablespoon of salt in half a liter of water.

Fill up a spray can with this mix. Spray the inside of your shoes and allow the water to evaporate. You can do the same with new shoes. One other advantage of using salt in footcare – it severely cuts back on blistering. Just use the same solution to spray your soles before wearing those shoes. Might be a good idea to do is if you’re planning on breaking new shoes any time soon.

  1. Whacking driveway weeds

I really lost track of all the times I had to get down on my knees to pick up those f-ing weeds that seem to sprout out of every crack in the driveway. What’s even worse is that, if you wait too long before rooting them out, those things can make a hole in the driveway. So, to prevent those weed from growing, grab a little salt from the kitchen and put some in every crack you see. You should also consider mixing up some mortar to patch up those cracks.

  1. Extend milk’s shelf life

I know that the fridge is milk’s BFF, but even this cookie refrigeration contraption can’t keep milk fresh forever. Nothing can, by the way, but there’s a clever trick that can help you extend the milk’s life by at least a couple of days – putting some salt inside the container. Yes, I know it sounds strange, but salt does have this kick-ass property of preventing milk from getting sour. Just be sure you don’t use too much. Otherwise, you’ll probably end up with something that can hardly be called palatable.

So, that’s about it about using salt in a shit hits the fan situations. I’m aware of the fact that some of tips and tricks I’ve shown can hardly be associated with disasters, natural or otherwise, but hey you don’t need a nuke or EMP to be up your neck in crap. Anyway, hope you’ve enjoyed my article on how great salt is (I can never seem to stop praising it). As always, if you feel that something’s missing from the list, be sure to hit the comments section and let me know.

Before you go, you should check out these 7 most wanted goods this month:

Book of Income (Get an extra $6,840 per year out of your Social Security benefits) [Complementary Book Inside]
Cash for Patriots (Trump’s shocking new plan to help distribute cash to American Patriots)
Cancer Curing Vaccine (U.S. Government Document Admits We’ve Had It Since 1962)
Secret “$50 Marijuana Stock Blueprint” (Turn a single $50 bill into a massive fortune)

Little Black Book (46 Ways to Collect Consistent, Work-Free Income) 
Klebsi Plague (If you were born before 1961 you are at immediate risk)
Marijuana Millionaire Playbook (Now is the time to bet big on Marijuana) [Complementary Book Inside]

Call it my tribute to the spice that crowns every dish, regardless if it’s a stove-cooked meal or a fancy plateau whipped up by a chef with two Michelin-stars.

Back when I was in college, I needed money so bad, that I was forced to take quite a lot of odd jobs. Who wasn’t, right? One of the oddest, if I can call that, was working as a book salesman in my home town. You’re probably asking yourself right what kind of person would complain about selling books. I, for one, of course, and probably most of my former co-workers.

See, recommending a title to someone or arranging them on the shelves were the easy parts – you still had to haul them by hand or cart from the back. So, right before I told my manager that we could take his job, wrap it in barbed wire and shove in the place where the sun doesn’t and won’t shine, we had a really busy week.

Long story short, I had to haul quite a lot of book-filled crates. Next morning, my back felt so sore, that I could hardly get out of bed. From there it got progressively worse: numbness in the feet, cringy back pain, stuff like that. My doc told me that I had something called lumbar discopathy, a very fancy word for your spinal column being broken.

Although I’ve tried my best to take it easy, sometimes, I can still feel pain shooting down my back. Thanks, college-me for this marvellous gift! I hope you get psoriasis or something. Anyway, many years later, I’ve tried almost any type of back treatment, short of surgery, for my raging back pain – physical therapy, diets, more exercising, less straining, you know, the usual. For a while, I was okay-ish, but when the weather went sore, so did my back.

Finally, after reading tons of stuff on this subject, I happened about a quaint little recipe which, according to the author, can relieve any kind of join, back or knee pain. Sure, I always preferred witchdoctors over MDs, but why the Hell not, I said to myself.

I kid you not when I’m saying as this stuff smells nasty, and it tastes even worse. But, by God, it really does what’s it supposed to do – take away the pain (wish it could do the same to memories).

Now, the recipe I’m about to show you involves three types of seeds and raisins. I know that it sounds like a stomach-churning combo, but give it a chance. Apart from being great at dealing with all sorts of pains and pangs, you can use leftovers to create survival energy bars. You can also eat it for breakfast instead of cereals, poached eggs, pancakes or whatever.

So, here’s the wonder-med I’ve been talking about.

“Dead leaves, seaweed, rotten eggs, too, stir them in my witch’s brew.”

As I’ve mentioned, this recipe calls for three types of seeds: pumpkin, flax, and sesame. The first is held in very high regard among docs and dieticians since they’re packed with an omega-3 fatty acid, known for its anti-inflammatory effect, zinc, copper, and other essential minerals. As for pumpkin seed, they do contain a fair among of omega-3 fatty acids, along with vitamin B1, phosphorus, and selenium.

Sesame seeds are highly recommended for people with brittle bones, and it’s very effective against any type of inflammation. Word of warning though – curb your sesame seeds intake during pregnancy, as high levels can induce preeclampsia.

Raisins, on the other hand, can aid digestion, since their packed with vitamins, fibers, and a shit-load of minerals. You should consider eating more raising if you have an iron deficiency.

Anyway, this is the basis for this wonder cure. You’re still going to need a couple of more stuff though like honey and gelatin. Let’s get cooking!

Ingredients:

  • Honey (two squirts or 200 grams).
  • Gelatin (no more than three tablespoons).
  • Sesame seeds (4 or 5 tablespoons).
  • Flax seeds (8 tablespoons).
  • Pumpkin seeds (a small pack or 40 grams).

How to prepare

I should warn you that this recipe is very challenging. You’ll have to be at a chef’s aide to pull this one off. It calls for extreme concentration, precision, finesse, and knack for balancing the ingredients. Are you for this challenge? Good! Here’s what to do, young padawan.

Step 1. Gather up all your ingredients.

Step 2. Plug in your food processor or blender.

Step 3. Toss everything inside and hit the “pulse” button a couple of times.

Step 4. When the food processor\blender finished chopping the big chunks, switch it to low, and leave the thing alone for a couple of minutes.

Step 5. Switch off the blender, pour the contents inside a bowl, and mix with a spoon or something.

Step 6. Enjoy (or not)!

That’s it! You now know how to prepare the most complicated natural remedy for pains or pangs in the world. About the aspect part – yes, I’m painfully aware of the fact that it looks disgusting, but with the added honey it should taste more or less like semolina pudding. You can eat for breakfast or as an after-dinner dessert; it’s entirely up to you. If there are any leftovers, you can always turn them into survival bars.

It’s super easy: keep your moist ingredients aside and use the dry ones as the basis for your MREs. Add a little bit of milk powder or sugar, mix the batter, add the moist ingredients, and put the bather in the oven. You may want to check my article on how to prepare home-made MREs for additional ingredients and instructions.

So, this simple recipe will help you deal with any kind of pains, back or otherwise. I can’t say for sure how long before it kicks in – can be a couple of days, weeks or even months. In my case, I started feeling a whole lot better after eating this pudding for an entire month.

Anyway, hope you liked my recipe, guys. Hit the comment section to tell me how things turned out for you.

Now, the recipe I’m about to show you is great at dealing with all sorts of pains. It involves 3 types of seeds and raisins. I know that it sounds

I have so much coffee in my system that each time I go to the doctor for tests, the nurse asks me if I have any blood left to give. Indeed, I could write novels about my lifelong relationship with coffee, but today I’m going stick to a topic which is more on the lines of prepping and SHTF – how to use coffee filters in a survival-type situation. Let me just grab a quick cup of Joe before I tell you about the most ingenious ways to repurpose those lovely paper filters. Yes, I know I shouldn’t drink that much coffee, but I can’t help myself. So, what were we talking about? Oh, yes – coffee filters.

Without further ado, here are 15 creative ways to make use of plain filters during a shit hits the fan situation.

To wipe your bum

You need to go number two but have no TP left in that fancy bug out bag of yours? No problem! Grab a handful of coffee filters and let nature take its course.

To dine like a hopeless ‘romantic.’

Each time I go hiking, I always forget to bring my portable eating set. Well, there’s nothing wrong in eating with your hands, but what about plates? Grab a coffee filter, cut it along the edge with a pair of scissors or survival knife, and voila, you have a disposable plate.

Keeping your glasses clean

There’s nothing worse than fogged or dirty glasses. Yes, I know that you know where all the things are and that you don’t need to clean those specs, but, hey, we live in a world of conventions. If you lost your cleaning rag or have nothing else on hand, just use a coffee filter to give them glasses a good wipe.

Making an ice-pack

If you need to apply ice to something, grab some from the freezer, place in a couple of coffee filters and tie around the neck using your cordage of choice.

Improv Band-Aid

No more Band-Aids in your first-aid kit? Grab a coffee filter from the kitchen or backpack and place it on the wound. Keep that pressure steady to stop the bleeding.

Improv funnel

If you have to transfer liquids from one bottle to another, take a coffee filter, and snip the tip. Place over the opening and pour the liquid.

Water filtration

Water filtration tables may be cheap, but those things are worth their weight in gold during a shit hits the fan situation. If you ever run out of purification tablets, stack a couple of coffee filters, and use them to sort of strain the water.

Remove persistent stain from clothes

A quick and headache-free way of removing nasty stain from clothes would be to apply some baking soda or hydrogen peroxide and to scrub clean with a small piece of the coffee filter.

Use them as food wrappers

In the wilderness, there is no corner store to buy food wrappers such as plastic or aluminum foil. If you haven’t got any of those in your bug out bag, put your food inside coffee filters and tie them using a piece of dental floss.

Improv feeding bowl for pet

The trouble with food bowls is that you have to search far and wide to find high-quality items. In my experience, ceramic bowls are the best – resilient, cheap, and the pet’s food won’t have a metallic taste to it as in the case of aluminum. In the meantime, you can use coffee filters to feed your pets. Just stack a couple of them, fill them with wet or dry food and keep hitting those pet shop for better feeding bowls.

No more poison ivy itching

If you tiptoe through the wrong vegetation, you may end up with some nasty poison ivy rashes. There’s no need to hit the drug store for this one. Run a hot bath. Meanwhile, get some coffee filters and stack them. Fill them with dry oatmeal and tie with string or dental floss. Toss this satchel in the bathtub and get in. After a couple of minutes, you won’t feel any kind of itches. You’re welcome!

Freshen up your linen closet

If there’s too much stink in the linen closet or wardrobe, you can make an air freshener using a couple of stacked coffee filters and some dried-up lavender flowers. Place the flowers inside, make a knot, and toss inside the closet\wardrobe. You can also make a similar satchel for your car or living room. If you cannot stand the smell of lavender, grab one of those potpourri mixes from the supermarket and replace.

Keep your toolbox neat and tidy

It usually takes me at least a couple of hours to fix stuff around the house. Well, most of this time is spent searching for the right screws or nails, which end up at the bottom of my toolbox. To keep that bag of tools organized, place smaller items like nails, screws, pins or bolts inside coffee filters. You can either use a small piece of dental floss to tie each satchel or some duct tape.

Keeping those nasty insects away from your food

Yes, I know this is the third time I’m complaining about insects on my food, but I just can’t help myself. If you’re having trouble keeping those nasty buggers away from your yum-yums, take a coffee filter, cut it along the edge, and use it to cover your food. By the way, in case you lose the wine cork, you can stick a couple of coffee filters inside the bottle.

Drying your hair and body

Towels are a must-have for every B.O.B, but sometimes they’re more useful for other stuff than drying your body. If you want to take a quick shower but have nothing to dry yourself with, use a couple of coffee filters.

That’s it for my article on ways to use coffee filters in an SHTF situation. What’s your take on this? Hit the comments section and let me know.

Before you go, you may also like:

This is more than just about your guns…
How to survive any medical crisis situation with ease
10 Easy Steps to Secure your privacy
Secret Military Solution For Power Independence

DIY Unlimited water source
Why a food reserve is way better than the Federal Reserve
Lost Skills of our Ancestors that still work today

So, what were we talking about? Oh, yes – coffee filters.Without further ado, here are 15 creative ways to make use of plain filters during a shit hits the fan