Home2019 (Page 12)

There’s nothing aspirin can’t solve. Headache? Take an aspirin. Fever? Take an aspirin. For everything else, there’s MasterCard. Joke aside, this little pharmacological jewel is not only a great remedy for all sorts of pains and pangs but also a great helper around the house. Last I heard, some people use common aspirin to make pot plants stay green for a long amount of time.

And, quite recently, I’ve discovered that this wonder pill can really do amazing thing around the veggie garden. Not only that, but it also works on life stock (my father-in-law uses aspirin to treat whooping cough in cows and sheet).

Anyway, getting back to the subject at hand, aspirin’s really great for your veggie and flower gardens. Wouldn’t have believed that the same thing used to cure anything from fevers to hangovers could do them plants so much good. So, after getting some kickass results with my cabbage patch, I thought that the most sensible thing to do would be to share some of the reasons why I’ve decided to use the stuff in the first place.

So, without further ado, here are 4 reasons why you should stockpile and use aspirin in your veggie garden.

  1. No more fungus

No, I was talking about foot or nail fungus, but about that greenish stuff that chokes plants and makes gardeners cry. I’ve literally tried every damned anti-fungal solution on the market, but nothing seemed to work. That’s when a good friend of mine, who’s also a pharmacist, told me that I should add one or two aspirin tablets to the watering can. Apparently, salicylic acid is fungi’s number one enemy (has something to do with how the acid disrupts cells inside the fungal growth).

Anywho, if you want to get rid of all the fungus from your veggie garden, use aspirin in conjunction with water. Do keep in mind that the results are not instantaneous – in my case, I had to wait around two and a half weeks to see the results.

  1. Cut flowers will last even longer

I have to admit that I have a thing for freshly-picked flowers. Ever since I can remember, our family always had at least one vase with pretty flowers around the house – mom likes roses, just like my grandma. Still, the only trouble with cut flowers is that whatever you do, they will eventually wilt and day. And this happens faster than most of us realize.

Even that Valentine’s Day bouquet doesn’t last longer that one, maybe two days, provided that you don’t drown it. I read somewhere that flower dealers (yes, I know exactly how it sounds), use a sugar and salt combo to prevent wildflowers from wilting too fast.

I think that’s a load of crap – I’ve tried on many different types of flowers: roses, orchids, tulips, lilies. It doesn’t work. And no, it’s not about balancing the ingredients. Sure, among other things plants take from the soil is salt and glucose. But they also need plenty of other stuff to survive and thrive.

In searching for a better alternative, I tried adding a tablet of aspirin to a vase halfway filled with water. This time, my flowers of choice were Carson roses.  One week later, lo and behold, the roses were still clinging to life, more alive and greener and red than ever before.

  1. More veggies in the garden

In my opinion, starting your own garden is a gamble – you’ll never know what that land will yield or if anything will grow at all. Yes, I know that there are some veggies like potatoes or onions that can be grown anywhere, but this is not always the case.

After harvesting my very first crop, I’ve discovered, much to my dissatisfaction, that I ended up with a basket filled to the brim with nice and round onions, and another with some things that looked like Area 51 experiments. However, the thing that puzzled me the most is that the crops were two weeks late, although I followed the instructions to the letter.

The main issue was, of course, the soil. It needed a little bit of help to yield a better crop. After doing a little bit of online research, I’ve discovered that a surefire way to turn any kind of soil into a veggie-making mean machine was to add some aspirin. So, if you’re having the same problems, try this nifty little trick: dissolve four aspirin tablets in approximately four gallons of water.

Use this mixture to water your plants daily for at least two weeks. It may strike you as a little odd, but apparently, aspirin has a way of encouraging plant growth better than any chemical or organic fertilizer. According to the big and scary book of science, salicylic acids stimulate the soil to generate more vitamin C. And, wouldn’t you know it, even plants like a vitamin C infusion, not only human bones.

  1. Makes for stronger roots

Roots are everything to plants – strong and long one means that the plant will go to get all moisture and nutrients it needs in order to survive and thrive. Unfortunately, with all the chemicals used to stimulate plant growth, roots have become brittle, weak, and unable to properly feed the plant. And that’s bad news for you if decided to ditch supermarket veggies.

Apart from using only organic stuff, you can try and give those roots a little nudge. Yup, you’ve guessed it – aspirin is that swift kick in the keister each plant needs to develop stronger roots. Here’s what you will need to do. Head to the drug store and get some uncoated aspirin (the variety that doesn’t offer gastric protection). Before planting the seeds, dissolve one tablet in one gallon of water and pour the mixture into the hole. Allow the soil to absorb the mix. After that, you can plant whatever your heart desires.

So, what are your thoughts on using aspirin in the garden? Hit the comments section and let me know.

There’s nothing aspirin can’t solve. Headache? Take an aspirin. Fever? Take an aspirin. For everything else, there’s aspirin.

What do climate change, an asteroid attack, and a pathogenic pandemic have in common? Aside from each having it’s place within at least one doomsday movie? They are also the first three on a list of nine ways the world could actually end provided by CBN.

The list goes on to include fatal fungus, an engineered disease, nuclear war, a robot takeover, and overpopulation.

While all of these events are possibilities, many scientists believe that number nine on the list, a snowball effect, is most plausible. If two or three of these things happen in accordance with each other, the effects would be devastating. And that is why being prepared is of the utmost importance.

A Basic Bug Out Bag

In the event of any of these situations perhaps the most important item you will want to have with you is a Bug Out Bag. In case you don’t know what this is, think of it as a large backpack full of everything you might possibly need in a survival situation. While what you pack depends entirely on your own personal needs, there are some essentials that should be in every bag.

  • food and water
  • shelter
  • bedding
  • a heat source
  • personal hygiene essentials
  • survival and self defense tools
  • a communication devise
  • multiple light sources
  • traveling essentials
  • a first aid kit

Bug Out Bag Academy provides a list of 75 items fitting into these categories that can help in building a basic bag; however there is one area where this list is lacking, and that is in medicinal supplies. Having weapons, shelter and food won’t do you much good if you get sick and have no way to treat illness. While there are many modern medicines that can be of aid, there are also ancient Chinese Herbal remedies that can come in handy.

A Brief History of Chinese Medicine

The Chinese began studying natural remedies, as early as the 2 century B.C.E. and by the 12th century A.D. they were experts in everything from acupuncture to herbology. As the years have gone by Chinese scholars have continued to improve upon these ancient methods, bringing us what is today known as Chinese Medicine. This time-tested practice is perfect for a doomsday situation because it focuses on using natural ingredients that can be more easily obtained than western medicine should disaster strike. According to Final Prepper there are seven essential Chinese remedies you should include in your doomsday first aid kit.

7 Chinese Remedies for Preppers

agastache_cana_lg

Giant Hyssop

Giant Hyssop – Commonly found in pill form, this herb is a fantastic remedy for any stomach ailment. It can help relieve diarrhea, vomiting, and abdominal pain. In some cases it has also been used to treat headaches and heat stroke.

White and Red Flower Oils – These two herbal concoctions are useful in soothing a wide range of aches and pains. White flower oil is traditional seen in a balm form, made up of wintergreen, eucalyptus, menthol, peppermint, camphor, and lavender. Its soothing smell helps relieve headache pain and clear the sinuses. Red flower oil consists of menthol and camphor oils and can help ease the pain of arthritis, sore muscles, and seasonal aches and pains.

Jujube Seeds – These seeds come from the delectable jujube fruit, a historically valuable medicinal source as well as a loved part of traditional Chinese cuisine. They can be purchased at any store that specializes in traditional Chinese remedies. When ground into a fine powder over a heat source they are a fantastic cure for insomnia. Already prepared powder can be purchased as well.

Loquat Syrup – This herbal remedy comes in the form of a thick ointment made up of an array of ingredients including apricot seed extract, loquat leaf, licorice root, honey, and white olives. It is commonly used to sooth a sore throat resulting from a cough, cold, or bronchitis. This remedy is especially valuable because it is considered to be safe for children.

yunnan-baiyao-capsules

Yunnan Baiyao

Ching Wan Hung – This red ointment is made of a variety of herbs, including myrrh, lobelia, frankincense, dong quai, quince fruit, beeswax, and sesame oil. It is commonly used to treat skin irritation resulting from first, second, and third degree burns, rashes, bedsores, poison ivy, poison oak, and sunburns. Its distinctive color can stain clothing, so it is important to keep the treated area covered with gauze or some other barrier that is changed daily.

Yunnan Baiyao – Sometimes known as Yunnan paiyao, this powdered herbal combination is fantastic to help stop bleeding and encourage immediate healing. It can also be combined with a small amount of alcohol to treat bruises. The various companies that make this remedy guard their recipes faithfully, however this concoction is known to contain Chinese yam and ginseng.


Conclusion

These 7 basic herbal remedies store longer than modern medicine, and are often easier to come by than their western counterparts. They can all be ordered through Solstice Medicine Company along with many other traditional Chinese supplements, remedies and medicines. By including them in your But Out Bag you will ensure that you are prepared for most any first aid situations that may arise.

This time-tested practice is perfect for a doomsday situation because it focuses on using natural ingredients that can be more easily obtained should disaster strike.

For every season there is beauty. Its something that comes to mind immediately at the thought of that season. Even the cold of winter is highlighted by warm drinks, roaring fires and the holidays. Maybe it’s a means of making the mundane a little more magic or maybe its an appreciation for this life.

If you are a person that lives a prepared lifestyle chances are these seasons mean other things, too. Vital tasks and responsibilities must be handled throughout the year and many are season specific.

What helps more than anything is a schedule for it all! How on earth are we supposed to keep up with all the stuff that we need to keep up with. Its just so much and when you add a full time LIFE on top of that, it gets overwhelming.

Let’s have a high level look at the four seasons and what responsibilities you should prioritize for each.

Spring

1. Home Maintenance and Inspection

After a long winter of being trapped in the house its time to get out, under and around the home. Now is the time to inspect your home for things like:

  • Pests
  • Damage
  • Leaky Pipes
  • Missing Property
  • Fencing
  • Drainage

2. Planting

Of course, spring is a time for planting! This is when the ornery gardener can finally get out and put seeds and seedlings into the soil. Its an exciting time and most gardeners are hungry for that first taste of fresh produce from the garden.

Things like English peas and radish are great candidates to get in the soil early.

3. Fishing

Spring is also a time for fishing. A great skill to practice, fishing is both fun and a great way to fill your bell with protein! The big bass come out in spring, when the water is warm enough, but it can be just as fun to spend the day catching bluegills.

4. Baby Animals

Depending on what you have on your property you might also be dealing with chicks, kids, calves and piglets. The spring is a special time that might require extra work for baby animal care.


Summer

5. Hunting Prep

The summer is a good time to spread out your hunting gear and get ready for the coming fall season. Its also a great time to get out and scout hunting areas. Find out where the deer are going to be and where you are going to set up to take that shot!

6. Processing Wood

Its never too early to start splitting wood for the fireplace. The winter will be upon you before you know it and cool summer nights are also great for burning wood. Splitting wood is also a great workout!

7. Managing Pests

If you keep chickens or other small animals, you might find that this time of year you are managing larger and more dangerous pests. Things like opossum and racoon can wreak havoc on your flock. It might be worth investing in some steel traps or a good .22 rifle to keep your chickens safe.

Fall

8. Insulation

Fall is the time to check home insulation. You are going to be combating the cold and you want to be sure your home is up to the task. Good insulation makes all the difference in this. Consider things like pipes doors and windows.

9. Cold Gear

You will also want to bring out cold weather gear like sweaters, boots and coats. Don’t forget your gloves and hats. Get them out and ready because the cold is on its way. This will also give you time to react if you find you need something new.

10. Harvest/Canning

By this point you are going to be consistently harvesting food. You have probably already been canning and preserving at this point, too!

When it comes to this game you might also be thinking about extra storage. Have you ever considered the old root cellar as a means of increasing storage? It could be just what you are looking for. These root cellars are simple to build and if you know how, you can make them very cheap!

Timothy Griffith created a book called The Easy Cellar that describes the whole process from start to finish using affordable earthbags as the base. It’s a must read if you are interested in an underground shelter or root cellar.

11. Hunting

Winter

12. Deep Food Storage

Winter always seems like a good time to put up more food. Long term food storage, in particular. You need a good place with a consistent temperature. This is another perk of having a root cellar. You can get that kind of consistent temp underground and it takes some of the food storage out of your home!

13. Organizational Preps

The cold winter days can be depressing. However, organizational projects are a great way to pass the time. Maybe you want to store things differently or in a new area. Its also a great time to clean out old space for new items.

14. Prepare Garden Areas (late winter)

Removing debris and waste from growing areas is one of those late winter tasks that can give you a jump on the growing season. Don’t leave this out of your plans.

Conclusion

A little bit of organization can go a long way. In the wide world of prepping, homesteading and the self-reliant lifestyle, there is a lot to consider. Hopefully we have offered you a few seasonal tasks that will make a difference in what you can accomplish.

You don’t wanna wind up funneling all the hard stuff to the end of the year and must rush through it all.

Also, consider adding a root cellar to your property. Even something small can go a long way. I really like the earthbag design laid out in The Easy Cellar. It might be just the storage answer you have been dreaming of!

If you are a person that lives a prepared lifestyle chances are these seasons mean other things, too. Many vital tasks and responsibilities are season specific.

This article was written by guest contributor Amanda Suazo, a copywriter and food blogger from northern California.

CBD oil recipes are the easiest way to incorporate CBD oil into your routine. Since it can blend easily into sweet and savory dishes, you can collect all the benefits no matter what food you crave.

Since CBD doesn’t contain the psychoactive properties of THC, CBD oil recipes won’t make you “high.” Instead, you might collect a host of other benefits, from reduced anxiety to better sleep.

If you’re new to cooking recipes with CBD oil, start small — make half batches to avoid wasting oil, and use small quantities to test how you feel. Using more refined oils when you want less bitterness and aftertaste, and less-refined oils when cooking with strong flavors that can mask their taste. Most importantly, cook at low temperatures to ensure you preserve all the benefits of the oil.

From drinks to sweet treats, use these CBD oil recipes to keep your cool:

CBD oil drink recipes

1. CBD Oil Golden Milk

Fill up and calm down: These CBD oil recipes are the perfect way to enjoy sweet and savory food with the unique benefits of CBD.

Image via Real Nutritious Living

With a golden touch from turmeric and fresh ginger, this spiced golden milk gets extra benefits from a dose of CBD oil. Make it more Bulletproof and choose full-fat canned coconut milk and raw honey in the recipe, and skip the black pepper and nutmeg.

2. CBD Rooibos Tea Latte

This is the perfect CBD oil recipe to enjoy before bed. Naturally caffeine-free rooibos tea gets a boost with healthy fats from grass-fed ghee and Brain Octane Oil, plus a dropper full of CBD to help you wind down and power your sleep.

3. CBD Chocolate Latte

Fill up and calm down: These CBD oil recipes are the perfect way to enjoy sweet and savory food with the unique benefits of CBD.

Image via mindbodygreen

When you don’t need the stimulating effects of coffee, use this drink as a low-caffeine alternative. A sweetened milk base simmers away with raw cacao powder and CBD oil for a warm and frothy treat. Use full-fat canned coconut milk for your dairy and swap maple syrup with non-GMO erythritol to stay Bulletproof on this recipe.

4. Dairy Free Green Tea Matcha Latte

Fill up and calm down: These CBD oil recipes are the perfect way to enjoy sweet and savory food with the unique benefits of CBD.

Image via Clean Eating Kitchen

This warm paleo latte is packed with antioxidant benefits from matcha powder, plus healthy fats from creamy coconut butter. To keep this CBD oil recipe Bulletproof, simply swap the coconut sugar with non-GMO erythritol, stevia, or birch xylitol.

5. CBD Fresh Mint Tea

Fill up and calm down: These CBD oil recipes are the perfect way to enjoy sweet and savory food with the unique benefits of CBD.

Image via Mowellens

Tea brewed with fresh mint leaves gets a sweet upgrade from CBD-infused honey, then poured over ice for a relaxing refresher. Use a raw CBD-infused honey to keep this sweet recipe Bulletproof.

6. CBD Pumpkin Golden Milk

Fill up and calm down: These CBD oil recipes are the perfect way to enjoy sweet and savory food with the unique benefits of CBD.

Image via GanjapreneurGal

Switch up your pumpkin spice latte routine with this orange-tinted golden milk recipe. Pumpkin pie spices blend with smooth pumpkin puree and coconut milk for a drink bursting with fall flavors. Keep it Bulletproof with full-fat canned coconut milk and ceylon cinnamon, then skip the nutmeg.

CBD oil snacks

1. CBD Chocolate Coconut Fat Bombs

Fill up and calm down: These CBD oil recipes are the perfect way to enjoy sweet and savory food with the unique benefits of CBD.

Sink your teeth into these rich fat bombs that take just 10 minutes to prep. With a coconutty CBD-infused layer and a smooth chocolate layer, they’re the perfect way to tide you over until your next meal.

2. CBD Bliss Balls

Fill up and calm down: These CBD oil recipes are the perfect way to enjoy sweet and savory food with the unique benefits of CBD.

Image via Hello Glow

This snack ball mixes up a satisfying blend of almond flour, shredded coconut, cacao nibs, and spices, all with a healthy dose of CBD. Use raw nuts and ceylon cinnamon to keep this CBD oil recipe Bulletproof-friendly.

3. CBD Peppermint Chocolate Cups

Fill up and calm down: These CBD oil recipes are the perfect way to enjoy sweet and savory food with the unique benefits of CBD.

Image via Fragrant Vanilla Cake

This CBD oil recipe creates layers of flavor with a chocolatey bottom and matcha cacao butter top. Swap maple syrup with liquid stevia to taste, use matcha powder instead of spinach powder, and get a high-quality dark chocolate to keep this recipe Bulletproof.

4. Two-Ingredient CBD Coconut Fat Bombs

Fill up and calm down: These CBD oil recipes are the perfect way to enjoy sweet and savory food with the unique benefits of CBD.

Image via Balanced-Life Leslie

Simplify your CBD intake with this ultra-easy recipe. Melt down coconut butter with coconut oil, then add CBD and pour into molds for a quick snack that you can even blend into coffee and tea. Make it Bulletproof and gently warm your ingredients on the stovetop instead of the microwave.

CBD oil spreads and dips

1. CBD-Infused Butter

Fill up and calm down: These CBD oil recipes are the perfect way to enjoy sweet and savory food with the unique benefits of CBD.

Image via The Joyce of Cooking

Make this CBD oil recipe ahead of time, and you can swap it in for any low-temperature recipe that calls for butter! Simply heat your butter with oil and water, cool, then store in a container when you’re ready to use it. Make sure you use grass-fed butter to make this recipe Bulletproof.

2. CBD-Infused Guacamole

Fill up and calm down: These CBD oil recipes are the perfect way to enjoy sweet and savory food with the unique benefits of CBD.

Image via Creating Better Days

CBD oil adds a low-profile upgrade to everyone’s favorite high-fat dip. If you’re sensitive to nightshades, skip the tomatoes and peppers. Otherwise, make this CBD oil recipe Bulletproof and skip the garlic and onion.

CBD oil recipes: Desserts

1. Cookies and Cream Cheesecake CBD Bites

Fill up and calm down: These CBD oil recipes are the perfect way to enjoy sweet and savory food with the unique benefits of CBD.

Image via My Tiny Laguna Kitchen

This sugar-free CBD oil recipe gets creamy texture from almond milk cream cheese and a cookie crunch from and almond flour and cacao mixture. Enjoy but milk cream cheeses in moderation to stay Bulletproof, since nuts are a suspect ingredient and cream cheese can contain additives that can irritate your gut.

2. CBD Oil Gummies for Sleep

Fill up and calm down: These CBD oil recipes are the perfect way to enjoy sweet and savory food with the unique benefits of CBD.

Image via Real Nutritious Living

With raw honey and CBD oil, this recipe supports better sleep and creates a perfectly chewy texture in every bite. Instead of tart cherry juice, use a lower-fructose fruit juice such as lemon or lime to make this recipe more Bulletproof.

3. Pumpkin Spice Latte Loaf with CBD Icing

Fill up and calm down: These CBD oil recipes are the perfect way to enjoy sweet and savory food with the unique benefits of CBD.

Image via Lil Sipper

Instead of altering CBD oil by baking it into this paleo-friendly pumpkin loaf, this recipe mixes it into a sweet sugar-free icing. Use coffee from mold-free beansinstead of standard espresso powder to make this one a little more Bulletproof.

4. CBD Homemade Butter Mints

Fill up and calm down: These CBD oil recipes are the perfect way to enjoy sweet and savory food with the unique benefits of CBD.

Image via Desserts With Benefits

Creamy butter mints get an upgrade from real grass-fed butter and vanilla, plus CBD isolate powder — all ready in 20 minutes. Use powdered vanilla bean instead of vanilla bean paste to make this CBD oil recipe Bulletproof.

5. CBD Paleo Chocolate Chip Cookie Bars

Fill up and calm down: These CBD oil recipes are the perfect way to enjoy sweet and savory food with the unique benefits of CBD.

Image via Kalejunkie

Instead of straight CBD oil, these classic cookies get a high-fat boost from CBD-infused coconut oil, grain-free flours, and creamy almond butter. Use a high-quality raw almond butter, swap coconut sugar with non-GMO erythritol or xylitol, and use very dark chocolate to make this one more Bulletproof-friendly.

6. Chocolate Lavender CBD Truffles

Fill up and calm down: These CBD oil recipes are the perfect way to enjoy sweet and savory food with the unique benefits of CBD.

Image via Whitespace + Wellness

These striking little gems are fat bombs with benefits. With a layer of lavender-infused coconut butter and a layer of sweetened chocolate and coconut oil, these high-fat bites will help you find your calm. To keep it all Bulletproof, skip the food coloring and swap the maple syrup with liquid stevia or monk fruit extract.


Pretty crazy I must say. Which one are you going to start with? Any other ideas? Other recipes that didn’t make it to the list?

Make sure you give us a shout in the comments section or on our social platforms. If you’re able to still move after eating some of these goodies.


And a sweet weekend it is.

Enjoy yours.

P.S. – This was just another insight on the finally recognised benefits of cannabis, in all of its forms. It was Weed Week here at Final Prepper, so we hope there was something new to learn each day. We know we did. Especially how we can also profit from this booming business by investing in cannabis stocks while it’s still affordable for the common prepper.


Since CBD Oil can blend easily into sweet and savory dishes, you can collect all the benefits no matter what food you crave.

Since we don’t usually deal with this kind of themes for our articles, we had to call out our guest contributors. So is the case with today’s article, courtesy of Premium Jane. This is part of our Weed Week saga into the various uses of pot. And its pot friend – hemp. So, anyone has a lighter?

Without trying to sound too corny or cliche, we are lucky to live in a time where hemp is legal. Hemp used to suffer from an unfortunate case of “mistaken identity” where it was lumped in with marijuana, making it completely illegal to grow throughout the United States. Hemp products could still be imported from other countries for certain uses, but for all intents and purposes, it could not be grown in the US.

Nowadays, hemp has been removed from its position as a Schedule 1 controlled substance and can be grown throughout the country (with the proper licensing) under the newly updated U.S. Farm Bill. This is great news as it will surely increase the availability of domestic hemp, as well as remove some of the negative stigma that was traditionally attached to the plant.

But now that hemp is legal to grow, what can we actually do with it? It turns out that the possibilities are truly endless; hemp is an extremely versatile plant that has a lot to offer, so let’s check out the top 10 uses for hemp and how they can be practically applied right here in the USA.

WHAT CAN HEMP BE USED FOR?

In a historical sense, hemp used to be described as the “billion dollar crop,” with Popular Mechanics magazine claiming way back in 1938 that it could be used to “…produce more than 25,000 products, ranging from dynamite to Cellophane.”

Furthermore, in a Perdue University article titled “Hemp: A New Crop with New Uses for North America,” researchers cited some of the most promising products that hemp could be used for, with things like cigarette paper, bank notes, hygiene products, construction and insulation materials, and automobile composites (door panels, etc) ranking in as the most practical.

While we’re not quite going to list all of the 25,000+ things that hemp can be used for, here are ten very practical things that we can use it for today:

1 | HEMP AS AN ALTERNATIVE TO PLASTIC

It’s obvious that we use way too much plastic, and we should definitely be turning away from it. From using reusable grocery bags to investing in a portable metal straw, there are plenty of ways we can cut down on plastic use. One of these ways is hemp.

Some of the earliest plastics were made from non-petroleum-based sources, including hemp. Since hemp contains around 65-70% cellulose, it is a great source for making plastic. Hemp-based plastic is certainly a possibility, and composite bioplastics – that is, those made using a combination of hemp and other plants – are already entering use. They are incredibly strong and rigid, meaning they can be used in anything right up to building ships and cars.

If this is the case, then why aren’t we converting all our plastic items to hemp plastics? Unfortunately, the amount of hemp farming that would need to take place to support the earth’s plastic needs would harm the environment by destroying natural habitats.

But it’s not all pessimistic.

In the future, turning even partially to hemp plastics will make a difference. Hopefully, governments and manufacturers will see the use in using more and more bioplastic alternatives.

2 | HEMP AS A TEXTILE (USED TO MAKE FABRICS)

Hemp textiles have long been a in usage. Nowadays, hemp fabrics are less common than things like cotton – but this makes no sense!

Hemp fabric is just as soft as cotton, perhaps even softer. In fact, it is reported to become even softer over time. It’s naturally resistant to bacteria (gets rid of BO!), and it can provide protection against UV rays. It even retains colour better than other fabrics.

Another bonus is that hemp requires about 5% of the water used to grow cotton. Often, it can just be rain-fed. Plus, it grows so densely that it saves room, and its hardiness reduces the need for pesticides and insecticides, as well as fertilizers.

The list goes on and on as to why hemp beats out cotton and other fabrics. Why it’s not in wider usage, we just don’t know.

3 | HEMP AS AN ALTERNATIVE TO PAPER

Once again, the fibers of the hemp plant come in handy. Paper can be made from either the long bast fiber (hurd) or the short bast fiber (pulp). Hemp hurds are preferred for their strength, whereas pulp paper is easier to make.

Believe it or not, the first hemp paper was made in China, during the Western Han Dynasty in 200-150 BC. It has been used for centuries since. In fact, the first and second drafts of the US Declaration of Independence were written on Dutch hemp paper in 1776.

Unfortunately, hemp paper was all but abandoned in the 1930s, when cannabis was outlawed. With hemp sadly falling under the cannabis categorization, it too became illegal. Initially, the cannabis prohibition movement was centered around immigration, with Mexican immigrants stereotyped for using the drug. However, large synthetic textiles companies began to back the movement, too – we can’t help but wonder if they had hidden agendas regarding getting rid of hemp.

But it’s not too late. Just 1 acre of hemp could produce as much paper as 4-10 acres of trees over a 20-year cycle. This is because hemp grows so much faster than trees, as well as the higher concentration of cellulose. Furthermore, hemp paper is more durable; it does not yellow or deteriorate.

Switching to hemp paper could help in the deforestation crisis. If you can, then try getting your hands on hemp paper where possible – it’s a huge benefit to the environment.

4 | HEMP MILK!

Veganism is a popular movement nowadays, with many people citing their personal health and the impact that animal farming has on the environment as reasons for turning to the diet. For people who haven’t always been vegans, it can be hard to find enjoyable foods at first. You might find yourself missing certain foods.

If milk is something you miss – or even if you like to whip up a yummy latte – then you’re in luck. There are plenty of plant-based milk, common ones including almond milk and soy. Did you know that you can also make milk from hemp seeds?

Hemp milk is made by blending water with the seeds of the hemp plant and straining the mixture, similar to how nut milks are made. It has an earthy, nutty flavor and is surprisingly creamy in its consistency. You can buy sweetened or unsweetened varieties.

Plus, hemp milk is really nutritious. It is filled with more protein and healthy fats than almond milk, and is less calorific than cow’s milk. Hemp milk also contains calcium and iron.

It has a number of other health benefits that make it a wonderful plant-based alternative to cow’s milk, too.

5 | COOKING WITH HEMP SEED OIL

Hemp seed oil is made by cold pressing the seeds of the hemp plant to produce an oil. It has a translucent green color when unrefined.

Hemp oil has a fuller flavor than some other oils like vegetable oil. It tastes more nutty and earthy, which is why it is often used as a salad dressing or drizzled over bread. Because of its unique flavor, hemp oil should not be used in sweet dishes where the more bitter taste of it might become overpowering. However, it can still be used in plenty of dishes.

If you want to cook with hemp oil, it can be really good for you. It contains plenty of nutrients that are great for your health, including proteins and essential fatty acids. However, remember that hemp oil has a low smoke point and thus cannot be used in cooking in the same way olive oil is. You can warm it up a little, but too much heat will burn the oil and change the flavor.

6 | USING HEMP FOR PLANT-BASED PROTEIN INTAKE

Like we said, veganism is becoming increasingly popular. Often, new vegans struggle to find sources of plant-based protein, but hemp could come to the rescue here.

Hemp is now a popular supplement used in creating plant-based protein powders, used by athletes and dieticians alike. Hemp protein powder is made by grinding pressed hemp seeds down into a powder. It is earthy and nutty in flavor, just like the hemp seed oil.

One of the best things about hemp protein is that it’s considered a complete protein. This means that it contains all nine essential amino acids, similar to egg whites and soy. Complete protein sources are rare in plants, which is part of what makes hemp a superfood.

Just ¼ cup (30g) of hemp protein can contain around 15mg of protein.

Moreover, 91-98% of the protein in hemp powders is easily digestible. This is not the case with a lot of plant proteins, which is why hemp could make a great addition to a plant-based diet.

7 | USING HEMP TO UP YOUR BEAUTY REGIME

Hemp is actually one of the latest trends in the beauty world. It is part of the eco-friendly beauty movement; since hemp is four times more effective at capturing CO2 than trees and it is a zero-waste crop, hemp can go into creating guilt-free beauty serums.

The natural fatty acids provide a wonderful skincare ingredient that can help keep your skin healthy. Furthermore, hemp products can hydrate, moisturize, and reduce swelling.

If you’re into environmentally friendly beauty, then you should really be checking out hemp products.

8 | HEMP FOR CLEAN SOIL

Did you know that hemp can clean toxic soil? This hardy plant can survive in extreme conditions, even growing in areas where the soil is considered to be toxic.

Back in 2001, it was shown in a study that hemp could extract lead, cadmium and nickel from a plot of land contaminated by sewage. It’s possible that hemp could be planted in polluted soil in order to suck out the intoxicants, cleaning up the soil so that it can be used once again in the future. This is a fantastic use of hemp, as it improves the environment by reducing pollution, and also frees up space for agricultural use, meaning that we don’t have to cut down existing areas of forest.

We might see more of these initiatives in the future.

9 | HEMP FOR PET FOOD AND BEDDING

Hemp-based pet products are the latest trend in all things involving animal pampering. Us humans just adore our furry friends, and we always want to give them the best possible. It just turns out that the ‘best’ nowadays is hemp!

You can now get your hands on anything from treats and food toppers to oils, salves, and bedding made using hemp. It is certainly possible to get your hands on hemp pet foods, but we don’t recommend feeding pets a vegetarian diet. Animals should be given a diet that is suited to their species, and so it is important to give them meat, too. This is not to say that hemp foods are bad, only that you should mix them with other pet foods.

A larger area of interest for hemp-enthusiast pet owners is CBD. Since CBD is reported to calm and create balance, people are wanting to give it to their pets in order to help them thrive. It turns out that you can do just that! Various CBD-infused treats and CBD oils flavoured like your pet’s favorite food are appearing in the market. Just make sure you buy a product specifically aimed at cats and dogs so that you don’t accidentally harm your pet when you’re trying to make them better.

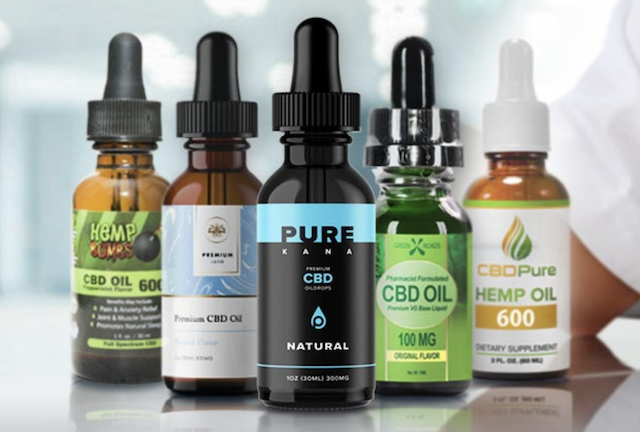
10 | HEMP-BASED CBD OIL!

This is perhaps the most predictable item on the list, but we wanted to save the best for last! Cannabidiol, better known as CBD, is the popular health supplement that has taken the world by storm. It is used for a vast number of different reasons and by a huge range of people, and for good reason.

It is thought that CBD could promote a healthy immune system and promote overall wellbeing by interacting with the endocannabinoid system, a biological system that exists throughout the whole body. For this reason, CBD products have seen an enormous upturn in popularity.

Since CBD is a cannabinoid, it can be found in all members of the cannabis plant family. This includes marijuana. While marijuana is enjoying legalization for either MMJ or recreational use in several states, it remains federally illegal. Some might think this unfortunate, because it denies people access to CBD.

But no need to fear, hemp is here! Since hemp contains very few psychoactive compounds and can’t produce a high, it has recently been made legal to grow. This means that people all across the country will be able to get their hands on 100% legal CBD without having to worry whatsoever about legal repercussions. At last!

WHAT CAN HEMP BE USED FOR? A GENERAL SUMMARY…

So there you have it – just 10 of hemp’s many uses. As you can see, hemp is an absolutely amazing plant, and frankly it’s shocking that we aren’t utilizing it to its full potential.

Of course, growing acres upon acres of hemp may be damaging to the environment if it gets out of hand, but the fact that it can be grown so easily and in short a small space suggests that it definitely has potential to be our saving grace in the future.

Now that the Hemp Farming Act has arrived on the scene, we might be able to make better use of this wonder plant in the years to come. Same goes for its bigger sister. Mary Jane.

Until then,

God Bless,

Charles

Finally, we might be able to make better use of this wonder plant in the years to come. Same goes for its bigger sister. Mary Jane. 

CBD oil has been studied for its potential role in treating many common health issues, including anxiety, depression, acne and heart disease. For those with cancer, it may even provide a natural alternative for pain and symptom relief.

Unlike tetrahydrocannabinol (THC), another type of cannabinoid, CBD doesn’t cause any feelings of intoxication or the “high” you may associate with cannabis.

I tried CBD, but it didn’t do anything for me.

Why isn’t CBD working for me?

Is all this CBD hype just a scam?

Sound familiar? If you’ve tried CBD products without any results, you’re not the only one — but that doesn’t mean the whole industry is a scam.

Cannabidiol, or CBD, is a nonpsychoactive component found in the Cannabis sativa plant. It’s being researched for many possible medical benefits, and unlike tetrahydrocannabinol (THC), this active compound doesn’t get you “high.”

People are using it to help manage a number of ailments, including:

  • chronic pain
  • inflammation
  • anxiety
  • insomnia
  • seizures

Before treating a medical condition, speak to your doctor to determine whether CBD is the right option for you, especially if you’re taking other medications.

You may have heard some folks with chronic conditions raving about good results — and that’s because for them, it’s one of the only few options that works.

That said, there are also some legitimate reasons why CBD might not be working for you.

So before you give up on it and tell your CBD-obsessed friends that they’re full of it, check to see if any of the following reasons apply to you.

1. Your CBD product isn’t from a reputable source

Where did you buy your CBD oil?

As it grows in popularity, it seems like CBD is popping up everywhere — from online companies to over-the-counter shops. You might have even tried a free sample to see if it works without investing anything more than the cost of shipping.

Unfortunately, some of these products don’t have high-quality CBD. The Food and Drug Administration (FDA) doesn’t regulate the industry, and some scammers take full advantage of that fact by selling low-quality products that aren’t as potentTrusted Source as they claim to be.

Some have even been found to contain no CBD at all.

So the next time you’re looking to invest in a new CBD product, use these three tips to make sure the product lives up to its promises:

  • Look for evidence of third-party lab tests. Lab testing can reveal exactly how much CBD is in the product, and the test results should be available for you to see for yourself.
  • Read consumer reviews. Websites like CannaInsiderLeafly, and CBD Oil Users provide reviews on brand effectiveness, delivery time, and customer service.
  • Pick from a list of well-established brands. Read enough lists of favorite CBD products and you’ll see some of the same companies pop up over and over again. Popular brands such as Charlotte’s Web, Lazarus Naturals, and CBDistillery have firmly established themselves as quality sources. You can also pick a brand from a list like this one and you won’t have to worry about the guesswork of figuring out if the brand you’re buying is trustworthy.

Many CBD users have reported trying several different brands before settling on one that works for them, so keep searching if your first try doesn’t produce the results you’re looking for.

2. You need to build it up in your system

Finding the right dosage of CBD can be a tricky endeavor. The appropriate amount varies for each individual, as every person has a unique biology that results in a different reaction.

So how do you figure out what’s right for you?

Experts recommend starting with a low dose — 20 to 40 milligrams daily, according to Healthline’s Medical Network (HMN) — and slowly increasing dosage over time until you find your “sweet spot.”

Some folks find that taking a daily dose can help sustain a level of CBD in your body, which might stimulate your endocannabinoid system (more on what this is, below) to make it react more to cannabinoids like CBD.

And many people use a microdosing technique to find their personal dosage and adjust it as needed over time.

You may find it helpful to use a journal to log your results. Keep track of how much you’ve taken, how you feel before dosing and at several time intervals afterward, and any changes in symptoms that you notice.

Over time, this info can help paint a picture of how CBD affects you.

BUILDING UP A TOLERANCE Keep in mind that it’s possible to build up a tolerance to CBD, like many other drugs and chemicals. So if you find that it’s not working as well after a while, try taking a few days’ break to reset your system before starting with a low dose again.

3. You need to give it more time

The first time I tried CBD, I wondered if I’d wasted my money on some overhyped trend. I put some drops of an oil tincture under my tongue, expected near-instant relief from my chronic pain, and got… nothing.

My experience isn’t at all unusual, because immediate results aren’t all that common.

In fact, many people take CBD for several weeks or even several months before they see a difference.

Exploring the effects of CBD isn’t as simple as taking a couple of Tylenol and calling it a day. It actually requires a certain level of commitment to put time and thought into your process of uncovering the long-term effects.

If you’re still not seeing results after a while (think a few months), then it may be time to move on and try a different brand. Your CBD journal can help you keep track of how long it’s been and whether or not you’ve experienced any changes.

Patience is key, and while it can be frustrating to keep trying with no results, you may end up feeling super grateful that you didn’t give up.

4. You need a different delivery system

It seems like I’m hearing about a new CBD product just about every week. You can find everything from CBD coffee to bath salts and lube.

Common forms of CBD

  • tinctures
  • topical creams
  • vape oils
  • capsules or suppositories
  • edible treats like gummies and chocolate

So if you’ve been trying one delivery system with no luck, it’s possible that a different form would work better for you.

One factor to consider is bioavailability, which essentially refers to how much of the CBD actually gets into your bloodstream.

For example, if you eat CBD gummies, they have to go through your digestive tract before you can absorb them, and the amount that ends up in your system may be relatively low.

On the other hand, if you take a tincture sublingually — which means under the tongue — you’re absorbing it directly into your bloodstream. So you could get quicker, more noticeable results than you would from waiting for your digestive system to process it.

In addition, your most effective method may vary depending on what type of relief you’re looking for.

For example, a topical balm won’t help you with your panic attacks. But it can offer potential relief for, say, sore muscles, if you zero in on that particular area.


5. It’s just not for you

CBD may be popular, but that doesn’t mean it’s a miracle drug that will work for everyone. After all of your efforts, it’s possible that you’ll find that CBD simply doesn’t work for you.

Your level of absorption and reaction to CBD depends on a variety of factors including your:

  • metabolism
  • biochemistry
  • genetics

Your endocannabinoid system is the system in your body that interacts with the active compounds in cannabis, and each person’s operates a little differently.

In fact, a professor of clinical psychiatry noted 20 percent of Americans may have a genetic mutationTrusted Source that makes them naturally produce more endocannabinoids — similar to cannabinoids but produced by your body.

If you have that mutation, you might be prone to lower levels of anxiety, but because you already have extra endocannabinoids you might not see much of a difference when you take CBD.

Check with your doctor about other options that may work for you.

And if you have persistent friends, don’t be afraid to tell them to stop bugging you about giving CBD a try. After all, there’s no such thing as a one-size-fits-all treatment!

Getting CBD to work takes time, patience, and research

CBD isn’t as well-researched or regulated as many other treatment options like prescription medications, and people within the industry are still trying to narrow down the best practices for taking it.

But one thing’s for sure: It’s not as simple as taking some standard dosage and seeing immediate results. It takes time, patience, and ongoing research to find the right brand, dosage, and delivery method for you.

Which means the process can also get pricey — as you might have to buy products from several different companies over the course of several months before you find what works.

TIP – Before you go all-in on a full-sized product from a reputable company that may cost a lot of money but might not work for you, check to see if you can buy sample packs of the product.

So before you give up on CBD altogether, use the above reasons as a check list to figure out why CBD isn’t working for you.


Today’s article is by guest contributor M. Z. Johnson, writer and advocate for survivors of violence, who lives with chronic illness and believes in honoring each person’s unique path to healing. 

God Bless and good luck with finding yours!

CBD oil has been studied for its potential role in treating many common health issues, including anxiety, depression, acne and heart disease. For those with cancer, it may even provide

Hoping you had a great weekend. And that you are prepared for an even greater week.

First, let us remember why we gathered here today. To prep like no one has prepped before, right?

So what is prepping? The internet says it’s the practice of making active preparations for a possible catastrophic disaster or emergency, typically by stockpiling food, ammunition, and other supplies. So far so good. What the internet is not telling us is how to make these active preparations with the same money we struggle to make a living with.

Because all of our prepping efforts, besides a few DIY ideas, cost money.

So it’s time to talk money. And how do we make some extra for our prepping efforts.

Let’s go through some of the ways to achieving this goal, even if you might not find these ideas very attractive.

1. Sell some of the items you bought for your stockpile.

This is one of those ways of making money I think is a lot harder to do en-masse, but if you’re looking to make a few extra dollars on the side here and there, it’s an excellent way to go, especially if you’re particularly good at couponing, or getting items for free for your stockpile.

Have too much of a certain thing? I suggest bartering or trading these items, but you can also use these items to sell to friends and family and others who may want them as well. Cheaper for them to get them through you, and a little extra padding for your own wallet as well.

2. Learn a labor-related self-sufficiency skill and find work using that skill.

There are so many self-sufficiency skills you could teach yourself that would be beneficial for you to know as a prepper.

Some of these skills are more profitable to teach yourself than others. If you end up being interested in the right one, your knowledge could earn you a healthy side income if it’s something you’re interested in pursuing for money on the side. Eventually, your side gig can even replace your day job entirely, if that’s the direction you want to head in, or if you’d prefer – become a part or full-time gig during your retirement.

Examples of these self-sufficiency skills: carpentry and woodworking, electrical and plumbing, car repair. Knife sharpening is also a great one for transforming into a side business.

3. Learn a crafty or creative self-sufficiency skill and sell your creations.

Think this is ridiculous? It’s not! In this day and age where everybody and their mother loves looking up DIY posts, staring enviously at the result, and yet never doing anything of the sort themselves, there’s plenty to be made from a crafty self-sufficiency hobby that you picked up from your grandmother or originally learned to be more prepared.

Some examples of these types of self-sufficiency skills that translate into lovely creations that can be sold for a good sum on sites like Etsy: knitting, soap making, clothes making, leather working, and yet again – carpentry.

Even if you didn’t originally learn your skill to make money, doesn’t mean you can’t capitalize on your skill. You could even end up with a healthy small business on your hands in a few years time.

4. Sell hunted or fished meat to friends, family, and neighbors who are interested.

Meat you can grab at the grocery store just doesn’t taste the same as hunted meat – it’s not even half as good at the grocery store, at least not to me. There’s a quality about the taste of hunted meat that makes it worth so much more in my, and many other people’s, eyes. Same with fish you’ve fished yourself – rather than the farmed fish you often find at the grocery store.

If you have friends, family, neighbours, or acquaintances who don’t hunt and fish themselves, but love the taste of hunted and fished meat – you can stand to gain if they’re willing to pay you for what you’ve snagged in your spare time. With enough people interested, and going out often enough, you can really make a healthy side income doing this.

5. Sell excess fruits and veggies from your prepper garden to anyone interested.

Just the same as hunted and fished meat is infinitely more delicious to many than anything you can grab in a grocery store, home-grown organic fruits and vegetables are ridiculously better tasting when compared to their non-organic supermarket counterparts. I don’t think anyone in their right mind would deny this.

If you’ve already got a prepper garden started, you can try selling your fruits and veggies as is, or if you can or jar the fruits and vegetables yourself, can try selling them that way for extra as well. Make jams? Same as if you made homemade soaps – your handy DIY creations up for sale could result in you having a very healthy side income, or even a booming small business. All depends on what you want and how far you’d like to take things.

If you’re not comfortable selling these home-grown foods to friends, family, or neighbours, you can always try trading or bartering them for items they have that you need. It won’t help you make money prepping, but it sure will help you save money, since you save yourself the bill of paying for the items you traded for.

That’s it. But remember it’s only Monday. We’re just getting started.


Even if it doesn’t seem like it, this is Weed Week at Final Prepper. We will make sure we cover all the benefits of embracing this incredible new lucrative all American business, that not only helps its end users, but also the ones investing in it. Especially if they do it now.

Want to Save Money (for) Prepping? Make sure you read our articles this week. 


Don’t forget to also send us your comments, ideas, or a story on your experience as a prepper so far.

It’s the only way for all of us to move forward.

God Bless,

Charles

It's time to talk money. And how do we make some extra for our prepping efforts. Let's go through some of the ways to achieving this goal.

I’m painfully aware of the fact that smartphones and prepping don’t mix, but part of being a prepper means using anything you have on hand in order to survive. Smartphones themselves make for an interesting case study – for some, it’s a big no-no, because the battery, unreliability in case of an EMP attack, cheap components that make them very fragile, but I urge you to reconsider. In all aspects, smartphones are the epitome of communication technology and, as a result, they have a lot to offer.

Sure, I won’t stake my life on one single piece of plastic with a display and a camera that makes the most awesome pictures period, but in checking out the mobile applications market, I’ve discovered a very interesting aspect. If you know where to go, what to download, and use, your smartphone can be turned into a tool as versatile and dependable as a survival knife.

So, for today’s article, I have compiled a small list of my favorite ‘survival’ apps for smartphones. Enjoy!

Facebook

Yes, I know that most of you would hardly associate duck faces, food pics or check-ins with survival. However, Zuckerberg’s wunderkind does have its merits. If you still have an active Internet connection, you’ll be able to find out in a jiffy where you are.

Moreover, in case of a natural or man-made disaster, Facebook allows its users to mark themselves “safe” which basically discloses the location, as to allow their loved ones to know that they’re out of harm’s way. Careful about permissions – data mining’s real and hardly a trifle. Still, a very good survival app.

Red Cross First Aid

A great cross-platform app (means it’s available for Android, iPhones, and Windows phones) which boasts two types of first-aid modules: one for learning which teaches you useful stuff like performing CPR, treating wounds or dealing with allergic reactions and a second one that kind of synthesizes all teaching modules. The latter can be very helpful in case you need to render first-aid since you won’t have time to scroll through pages of text.

Compass Steel 3D

As everyone needs a compass and this smartphone delivers. Compass Steel 3D is a lightweight compass app with tons of features like calibration, sun and moon direction, sunset and sunrise time. Given the fact that it relies solely on your phone’s accelerometer (the sensor that changes the screen’s orientation based on position) means that you really don’t need an active Internet connection.

Offline Survival Manual

Everything you need to know about survival in lieu of an Internet connection. Offline Survival Manual is what a like to call an encyclopedia – it covers a lot of common prepping topics like first-aid, food, water, but also offers unique content such as mental preparedness tricks and basic med guides.

Scanner Radio

What’s the use of having a short-range communication device like a walkie-talkie if there’s no one to speak to? This is where his nifty app comes into play – using GPS, Wi-Fi or mobile data; Scanner Radio will snoop around the area for active radio stations. It can also pick up radio chatter from the authorities or from people using this device.

Battery Doctor

Every smartphone out there has a built-in application that keeps an eye on battery level. Most target notorious battery drainers such as screen brightness, applications running in the background or the Internet connection. Battery Doctor takes this to an entirely different level – it now only kills redundant apps, but it also boasts a super power-saving mode that can extend the life of your battery by several days at least. This would come in handy for phones that drain batteries like there’s no tomorrow or for situations which call for an amp of juice in your smartphone.

Flashlight

A simple name to serve a simple purpose – illumination. Indeed, your phones come with its own flashlight options, but apps such as this one can improve the brightness by a factor of ten. Careful about that battery life, though. You should only use Flashlight in case you run out of matches, lighters, light sticks, flares or tac light batteries.

Wild Edibles

Now, this is what I call a must-have for preppers. Wild Edibles has a database of over 200 edible wild plants. It also comes with useful information about location, how to identify, harvest, and what to do in case you eat the wrong ones. If that wasn’t enough for you, Wild Edibles also has a plant recognition algorithm that uses your smartphone’s camera to identify the plant in front of you.

Guardly Mobile Safety

This is the cheapest alternative to a personal emergency beacon. Let’s assume for the fact that you missed a call or a message. In case this happens a couple more times, this application will relay your GPS location to the authorities or to your emergency contacts.

Knots 3D

How can you not know how to knot? Well, apparently there are many people who get even their shoelaces wrong. That’s why Knots 3D is a very handy survival app – its large database shows you how to tie even the most intricate know, using a step-by-step video approach.

Smart Tools

Every prepper needs a toolbox, but a real one would be a little impractical to carry around. This is where Smart Tools comes into play – need to measure something? Fire up the ‘meter’ option and get crazy. The app has tons of other features such as mirror, flashlight magnifier, compass, GPS, and even a sound meter.

OpenSignal

This app is very similar to Scanner Radio, with one small difference – instead of picking up local radio chatter, OpenSignal scans for nearby radio or Wi-Fi towers. It also has a smart built-in tool that boosts your phone’s signal in case the radio tower is out of reach. Sorry, iPhone people – this one is for Android users only.

That’s about it for my top 12 favorite survival apps for smartphones. Think anything’s missing from the list? Let me know in the comments section.

If you know where to go, what to download, and use, your smartphone can be turned into a tool as versatile and dependable as a survival knife.

Editor’s Note: Today’s article is courtesy of Alex Ramsey. 

The best way to increase your chances of surviving a venomous snake bite is to have a contingency plan in place. Remember, that your end goal should be to receive anti-venom because without a dose of anti-venom you have almost zero chances of surviving a poisonous snake bite. Today we discuss steps you can take to act quickly to survive a venomous snake bite. As a bonus, at the end of this article you’ll also learn how to get rid of Copperhead Snakes.

Call emergency services immediately

Don’t make the mistake of trying to drive yourself to a hospital or waiting to see whether or not you’ll display any symptoms of being poisoned. If you plan to survive a snake bite and live to tell the tale, time is of the essence. Instead, call 911 as soon as you’ve been bitten.

Better yet, if you’re with a family member or friend, direct them to call emergency services right away. Ideally, have your companion stay on the line with emergency services as they may be able to give your friend instructions on how to best look after you. If your symptoms worsen, while your companion is on the phone, emergency services may choose to send a helicopter to transport you to the nearest hospital, which will have anti-venom in stock.

Describe The snake that bit you

An accurate description of the snake that bit you will help emergency services locate the appropriate type of anti venom.

Make sure that either you or your companion gives emergency services an accurate description of the snake that bit you. That way, emergency services will be able to ascertain what type of snake bit you and will be able to select the appropriate type of anti venom.

If possible, disclose how long the snake was, how thick the snake’s body was, the color of the snake and whether or not the snake had round eyes or slit style eyes. If a snake has a triangle-shaped head beware as venomous snakes often have triangular heads. If the offending snake is still around, try to get your companion, if you have on to take a photo of the snake which bit you. Either that or kill it and there will be no question of the species.

If you live in an area that is frequented by snakes, it’s well worth learning how to identify the different types of poisonous snakes in your area. That way, if you’re ever bitten by a venomous snake, you’ll have a far better chance of correctly identifying the offending snake.

Stay as still as possible

Did you know that the faster you move, the faster the snake’s venom will be absorbed by your body and the faster the venom will affect your body? That’s why if you’re in an area with phone coverage, it’s far wiser to get emergency services to rescue you, rather than attempting to walk back to your car.

Leave your snake bite alone

Some research suggests that an ice pack will reduce your body’s circulation and will decrease the spread of venom, throughout your body.

While you may be tempted to suck the venom out of your leg or cut your wound open, in order to try to remove as much venom as you can, doing so will only worsen your condition. Also avoiding crafting a tourniquet as a tourniquet will only speed up the symptoms of your snake bite.

However, if you have an ice pack handy, it is a good idea to hold the ice pack against your bite. As some research suggests that cold from an ice pack will reduce your body’s circulation and will decrease the spread of venom throughout your body. Remember that you’ll significantly increase your chances of survival by keeping calm and waiting for emergency services to reach you.

What if you’re unsure of whether you’ve been bitten by a venomous snake or not? If you can’t tell the difference between a venomous snake and a non venomous snake it’s still wisest to call emergency services. As emergency services should be able to ascertain whether or not the snake that bit you is venomous.

Remember that you’ve got nothing to lose by contacting emergency services but if you fail to make the phone call, it could cost you your life.

How To Get Rid Of Copperhead Snakes

If you live in an area that is rife with dangerous Copperhead snakes, simply continue reading to discover how to prevent snakes from exploring your property, as well as how to safely remove any Copperhead snakes that have already invaded your property.

Make sure your property isn’t attractive to Copperheads

Make sure that your lawn is cut short and that there is no garbage in your yard. Copperhead snakes are known to hide in long grass and are attracted to garbage as it is a possible food source for hungry snakes. It’s also worth cutting down or trimming any bushes that are on your property. As they are also attractive to snakes who are looking for a safe hiding place. Also make sure to seal any possible entry points to your home, to prevent snakes from making their way into your home itself.

Invest in a non-lethal snake trap

By far the safest way to get rid of a Copperhead snake on your own, is to place non lethal snake traps around your property. Such traps are a humane way to catch any snakes which are hiding on your property. Once caught, call your local council to find out how you should dispose of the live snake that you’ve caught.

Alternatively, you may want to call a snake removal specialist to remove of the snake which you’ve caught for you. If you do choose to release a Copperhead on your own, it’s worth driving to a remote area, so that the snake you release won’t make its way to another family’s property.

Call a snake removal specialist

If you don’t want to run the risk of being bitten by a venomous Copperhead, don’t hesitate to call a snake removal specialist. Who has the appropriate skills to safely catch and release a Copperhead. Keep in mind that the sooner you call a specialist, the less likely the snake on your property is likely to breed.

After all the last thing you need is a pregnant Copperhead residing on your property.

About the author: Alex Ramsey – Work hard & live to hunt! Countryman Hunter, Archery, shooter, Freelance outdoor writer and loves the USA. Founder of Thebigdeer.com where he shares his hunting experiences with all. Alex’s site is all about guns, showcases real gear & real reviews to help you become more prepared.

Your end goal should be to receive anti-venom because without a dose of anti-venom you have almost zero chances of surviving a poisonous snake bite.

During the last couple of days I came to realize that I’m kind of hooked on technology – if I want to search for anything like a recipe or the answer to any kind of question, I usually end up using my smartphone or laptop.

Sure, there’s nothing wrong about taking full advantage of modern tech. I mean, without my PC and Internet I wouldn’t be able to share my thoughts with you people. Still, the idea of being surrounded by too much tech should be a reason for concern considering that it takes one blackout to witness firsthand what life B.E. (before electricity) felt like.

In one of my articles (can’t remember exactly which one), I talked about how awesome it is to have powerless tools around the house. Of course, you can always use a manual food processor when the power’s out or a manual drill over an electric one, but some things just cannot be replaced. However upsetting this though may be, we kind of need out smartphones for a lot of things, not just taking pictures or playing Candy Crush while riding the subway.

Okay, so we established that mobile tech is one of those things that we can’t do without. The question at hand here is what in the Hell are we going to do when there are a power outage and our phone’s close to dying? In a previous article, I’ve shown you a clever way of charging your phone using a 9V battery and a car charger. That is, indeed, a neat trick, but hardly the only way to juice up your phone without using the outlet.

Well, after doing a bit of research, I’ve stumbled upon more flaky ways to recharge that smartphone of yours. Think the 9V battery hack was weird? Get of a load of these.

Harnessing the power of…cranks!

A hand-cranked flashlight is, without a doubt, one of the most useful items to be had in case shit hits the fan. Still, a flashlight is not enough. In general, those gadgets come with all sort of wicked options: AM\FM radio, music player, photovoltaic cells, USB ports, all of them sucking up that precious juice generated by the owner who has nothing better to do than to spin that lever.

Yes, I know that this might come off as a no-brainer, but many who own a hand-cranked gizmo overlook this option for some reason.

So, is the power out? Not a problem if you’re phone on the brink of death. Just plug your USB cable into your hand-cranked gizmo and start, well, cranking. It’s possible to use such a device to fully charge your phone’s battery, but I don’t see how you’ll be able to reach 50 percent without your arms going numb.

There’s another trick you can trick to boost the efficiency of your hand-cranked device. As many of these gizmos pack solar cells and capacitors, it would be wise to leave it in the sun before attempting to use the crank. Sure, it won’t fully charge your phone, but at least it will spare you a couple of hours of cranking.

Hack your landlines!

If prepping was a patient with OCD, I would say that he had a thing for landlines. Don’t get me wrong; landlines are a great way of staying in contact with the outside in case of a natural or man-made disaster. In case of a power outage, landlines will still have some juice inside. Why not take advantage of this?

Here’s a clever trick of how to get some of those amps inside your dying phone. Keep in mind that this project requires a bit of tinkering. However, when you’re done, that phone box of yours will double up as an emergency phone charger. Now, for this project you will need:

  • Phone cord.
  • USB cable.
  • 5V voltage regulator. There are usually 52V inside that phone box, so you will need this regulator in order to make the outlet compatible with your smartphone’s battery. Otherwise, you’ll end up frying your phone. Voltage regulator looks, more or less, like TV or computer chips, only a lot bigger. They have three prongs for input, output, and grounding. You can probably find them at your local hardware store, in the electronics section (the one you need is labeled ‘7805’).
  • Knife.
  • Soldering iron.
  • Electrical tape (optional).


Here’s what to do in order to hack your phone box

Step 1. Start by exposing the cables of your phone cord. Leave a plug on the other end, because that one will go in the phone box. There should be two wires: red one (this will be your input) and a green one (grounding).

Step 2. Next, expose the wires of your USB cable using the knife. You’ll see four cables: red, blue, green, and black.

Step 3. Put the voltage regulator on your work table. To ensure that you solder the wires to the correct prongs, flip the chip (the ‘7805’ should be facing you).

Step 4.  Solder the phone cord’s red wire to the first prong (that’s the left one).

Step 5. Solder the phone cord’s green wire to the regulator’s grounding prong (that’s the middle one). You’re doing great! Halfway there.

Step 6. Solder the USB cable’s black wire to the regulator’s middle prong. Yes, you can solder it on top of the phone cord’s green wire.

Step 7. Solder the USB cable’s red wire to the regulator’s output prong (that would be the one on your right).

(Optional) Use some electrical tape to cover the soldering points on the regular.

Step 8. Plug the phone cord into the box and the USB cable in your smartphone. Congrats! You now have an emergency phone charger outlet.

When life gives you lemons, make electricity.

Lemonade is not the only thing that you can make out of lemons. In case of a major emergency – say you want to send out of short message or call the authorities, it may be possible to reboot your phone using fruit-generated electricity.

Yes, I know exactly how it sounds, but it works. Don’t expect to get a full charge on a single lemon (you’ll need at least 1,000 of them to get your phone’s power cell to 100 percent). Anyway, here’s how to boot up your phone by harnessing the power of electrochemical reaction. Start by gathering your materials. For this project you will need:

  • Zinc or galvanized nails.
  • Copper nails (you can replace them with coin or paper clips).
  • Copper wires.
  • Mini-USB cable.
  • Six lemons.

Here’s how to piece together your lemony phone charger

Step 1. Expose the USB cable’s wires using a knife. Leave the mini-USB plug on the other end. You should see a red and a black wire with orange strips.

Step 2. Arrange your lemons in a circle.

Step 3. Insert zinc nail on the left side of the lemon.

Step 4. Insert a copper nail\paper clip\coin on the right side of the lemon.

Step 5. Connect or solder the USB cable’s red wire to the zinc nail inserted in the lemon on the left side.

Step 6. Connect or solder the USB cable’s black wire with orange strips to the zinc nail inserted in the lemon on the right side.

Step 7. Connect or solder the copper wire of the left lemon with zinc nail inserted in the lemon behind it. Repeat this operation to close the circuit.

Step 8. Plug the mini-USB into your phone and wait for the magic to happen.

(Advice) If you don’t have lemons around the house, you can try with oranges or other acidic fruits.

Onions make me cry, but at least I have a full battery

Because I’m madly in love with these strange science projects, I found another way to charge my phone using stuff found in the fridge. In this case, the one giving away its life so your phone might live to tell the tale is the onion. Don’t cry for me, Duracell. As in the case of the lemon charger, the onion one relies on electrochemistry. Here’s what you’ll need to whip up an onion-based electricity generator:

  • One onion (the bigger, the better).
  • Any kind of beverage containing electrolytes (I used a bottle of Gatorade for this project, but you can use anything you like or have around the house).
  • One large bowl.
  • One phone charger.

Sounds delightful, doesn’t it? Here’s how to make your first onion charger.

Step 1. Using a Philips screwdriver or an awl, poke two holes on either side of the onion.

Step 2. Fill your bowl with Gatorade or your favorite electrolytic beverage.

Step 3. Place the onion in the bowl and allow it to soak for at least 15 minutes. The holes you’ve just poked will allow the Gatorade to get inside that onion fast.

Step 4. Once the time has passed, take the onion out of the bowl and place it on a clean towel.

Step 5. Use the towel to dry your onion.

Step 6. Stick the USB end of your charging cable into the onion. Doesn’t matter where you insert it.

Step 7. Connect the mini-USB end to your phone and let the magic happen. If you’re still not convinced, drain your battery completely and connect to the Gatorade-soaked onion to see what happens.

Wrap Up

I feel compelled to stress out once more that these should not be, under any circumstances, considered permanent solutions. The only thing that comes close to an outlet is one of those portable batteries.  If you don’t have one, you should consider making a small investment. Check out your local auto stores for those jumper packs – great for starting your car when the battery’s dead, but can also help you charge other devices such as laptops, smartphones, radios or tablets.

I strongly advise you to exercise extra caution when crafting those onion or lemon-based generators. Technically speaking, they should work. However, don’t be surprised if your phone suddenly goes up in flames. If you don’t have other means of charging your smartphone, better get a meter in there to see if the voltage is fine.

Another thing to keep in mind is that phone box chargers are very tricky. Well, you don’t need a Ph.D. in astrophysics to solder a couple of wires, but it is rather difficult to get ahold of that voltage regulator.

Sure, there are plenty of websites that sell them by the dozen, yet in case of a blackout, this is not really a viable option. If you can’t find any at your local store, it may be possible to salvage one or two working ones from an old VCR or a tape recorder. I wouldn’t go tinkering around TVs because they use entirely different regulators. You can also try your luck with an electrical-powered short-wave radio.

That’s about it on alternative ways to juice up your smartphones during a blackout. What’s your take on this? Hit the comments section and let me know.


On a different note, here’s some other self-sufficiency and preparedness solutions recommended for you:

The Lost Ways (The vital self-sufficiency lessons our great grand-fathers left us)
Survival MD (Knowledge to survive any medical crisis situation)
Backyard Liberty (Liberal’s hidden agenda: more than just your guns…)
Alive After the Fall (Build yourself the only unlimited water source you’ll ever need)
The Lost ways II (4 Important Forgotten Skills used by our Ancestors that can help you in any crisis)
The Patriot Privacy Kit (Secure your privacy in just 10 simple steps)

Being surrounded by too much tech should be a reason for concern considering that it takes one blackout to witness firsthand what life B.E. (before electricity) felt like.

The big and bad books of prepping say that every mistake, no matter how small it is, can cost you your life. Well, even though I’m going into my five years of prepping, I’ve discovered that even in our cozy corner of the Internet there’s room for exaggeration.

Sure, getting snowbound with no food, water, or communication device can kill you, but, c’mon, who’s stupid enough to brave the elements without even taking the smallest safety measures? As my grandma used to say, nobody’s born knowing, and, like it or not, at some point you’re going to make some mistakes. No, it’s not the end of the line, but you should give it your best to learn from them before venturing out into the world again.

Anyway, for today’s article, I was thinking about making a small list of big and small prepping mistakes. Most of them are, of course, the fruits of my own experiences and misadventures, while others are stuff I’ve heard throughout the years from friends, family members, and prepping forums. So, without further ado, here are some of the most common prepping slipups and how to fix them in a jiffy.

Playing the Lone Wolf part

Over the past couple of years, I’ve noticed that most preppers tend to use the first-person singular when they talk about their prepping habits: “I went to the military surplus store and bought X item.”, “I create a B.O.B for each family member.” This shows that a good deal of preppers is way too comfortable playing the Lone Wolf part, making no efforts to involve their family members. I can understand that to some degree – some of them may be too busy or simply don’t care.

Others are far too young to partake in the discussion that revolves around disasters, death, disease, and whatnots. However hard this might be for you, stop what you’re doing. It’s in everyone’s benefit to know what to do in case of an emergency.

You should also stress out the idea that prepping’s is never about digging fallout bunkers or arming yourself to the teeth whenever the East passes a fart. It’s about using your noggins to deal with everyday issues like changing a light bulb, replacing some electrical wires, reaching your workplace in time if you miss the bus or making a light source when you’ve run out of candles, matches, lighters, and batteries for your tac flashlight.

Being too comfortable around one water source

Tap and bottled water are great. Still, you shouldn’t take either one for granted. If you have an electrical pump in the basement, one chink in the power grid and its buh-bye water. Of course, you can always run out of bottled water, and it happens a lot faster than you think.

You really don’t need to be facing a life-threatening situation to realize just how quickly those bottles disappear from your household emergency kit – baby formula, for instance, has to be prepared by bottled or otherwise sterilized water. Wound cleaning requires the same kind of water.

And when the shit really hits the fan, it will be hard to replenish your stock considering that others will do the same; or you may be stuck in the wilderness with no access to a store or supermarket. That’s why it’s important to learn how to conserve and, if necessary, stockpile water from other sources.

Common household items like the toilet tank, pipes, and water heater can be great water sources during an emergency. Collecting rainwater or siphoning the clear liquid from tree holes are valuable skills.

Apart from finding water, you should also learn how to make it safe to it – boiling, adding water purification tablets, distillation.

Being too cocky or overly-cautious

In my opinion, life’s more about finding the middle ground, rather than being bias. Dunno if it’s healthy or right or wrong or moral, but it did offer me some measure of accomplishment.

You really don’t need to be standing in front of a tornado to realize that there’s a time for caution and a time to take charge. In our humble abode, being too cocky or overly-confident about your survival skills is stupid. Why? Because you’ll end up making mistakes that even a newbie avoids.

I believe the same thing can be said about being way too cautious in a situation, always overanalyzing things when you’re supposed to do it. There’s a surefire remedy for this – assessment. Yes, I know it’s one of the most boring things you learn as a prepper, but it’s one of the building bricks of survival. Assessing a situation allows you to understand it and to find suitable solutions.

Long-term vs. short-term prepping

Let me put it this way – what’s the use of preparing for a snowstorm when you don’t even have a complete first-aid around the house? Or, better yet, why bother building a safe room in the house when you don’t even an emergency supplies stockpile? Of course, long-term prepping is very important, but we shouldn’t lose track of the things we must do right and now. Once you’ve checked everything off the short-term prepping list, you can move out to other stuff. Remember your priorities!

Home cooking

For someone who usually ends up ordering things online just because he’s not in the mood to cook, I have to say that homemade meals are the best. And yes, from-scratch cooking is a very valuable skill, especially if you’re stuck somewhere where there’s no access to the Internet or phone signals (or don’t have anyone around to cook your meals).

For some, cooking’s right there next to rocket science. Believe me; it’s not that hard. If you follow the recipe to the letter, nothing can go wrong. More than that, if you have someone around the house who really knows how to cook, you should do well and stick around. You might learn a thing or two. Always start small and work your way towards more refined dishes.

That’s about it for my list of common prepping mistakes. What do you think? Hit the comments section and let me know.

The big and bad books of prepping says that every mistake, no matter how small it is, can cost you your life.

Everybody has his guilty pleasure – mine is powdered eggs. Yes, I know that nothing beats fresh-laid chicken eggs, because they’re packed with calcium, albumin, and so on and so forth. But what can you do? The heart asks pleasure first, as the saying goes, and I wouldn’t even consider coming down for breakfast if I’m all out of powdered eggs for my killer omelet.

There are very good reasons why I chose this instead of regular eggs, apart from the fact that they tout more or less the same nutritional values as their ‘living’ counterparts – they can be stockpiled for months if not years; can fit into any B.O.B, no matter how big or small it is and, most importantly, powdered eggs will be worth their weight in gold during an SHTF situation when all supermarkets will run out of the fresh variety.

Now, before showing you how I managed to make my first few jars of powdered eggs, I should warn you that this recipe will require a small investment because you’ll need a contraption called a dehydrator.

Wait! Don’t close this article yet. I was talking about a maybe a few tens (bought mine from Costco for $30). That’s about it as far as the financial part is concerned. Trust me when I say that this investment will pay off – imagine not having to hunt online discounts on survival foods such as powdered eggs. And, most importantly, if you know how to cook ‘em, you won’t notice any difference in taste.

Anyway, here’s what you will need to do in order to obtain a near-endless supply of powdered eggs.

Gathering your ingredients and kitchen supplies

To pull this off, you will need the following:

  • Eggs (I used two dozen for my first batch).
  • A teaspoon of vegetable cooking oil or butter.
  • The dehydrator.
  • A food processor.
  • A blender or fork for whipping up the eggs.
  • Canning jars.
  • Skillet.

Done gathering the ingredients? Great! Here’s what you’ll need to do next.

How to prepare powdered eggs

Step 1. Start by cracking open the eggs in a large bowl.

Step 2. Whip up the eggs using a mixer or a fork. I would advise you to use a blender since it’s quite tricky to whip up that many eggs using a simple fork and takes less time.

Step 3. Put the skillet on the cooking machine and add a little bit of veggie oil or butter. If you don’t have a non-stick pan, use both or stick to butter.

Step 4. Set the heat to medium-low and wait for the oil to heat up. If you’re using butter, you should put the whipped eggs inside when the butter’s all melted.

Step 5. Add the whipped eggs.

Step 6. Wait until the eggs begin to bind, then use a wooden spoon or spatula to sort of shred the omelet mass. Keep stirring and separating the eggs. It takes about 10 minutes or so. Yup, basically it’s like doing scrambled eggs. Now, if you want your eggs to be extra puffy, you can add a splash of milk to the bowl while you’re whisking them.

Step 6. Move the scrambled eggs to a clean plate with a bit of paper tissue underneath and allow them to cool.

Step 7. Once the eggs have cooled down, transfer them to your food processor and set it on “pulse.” Give your scrambled eggs a couple of spins. After a couple of seconds, you should have a puffy mass of diced eggs.

Step 8. Turn on your dehydrator and set it to 125 degrees Fahrenheit. Wait for it to reach the desired temperature (mine has a green LED bulb in the front which sort of lights up when the device reaches the right temp). Don’t forget to remove the dehydrator’s lid before heating it up.

Step 9. Transfer the eggs from your food processor to the dehydrator. Put on the lid and wait. It takes about four or five hours for the machinery to remove all the moisture from the eggs. Once they’re done, the eggs will have a brittle aspect.

Step 10.  Put the eggs back into the food processor and give them a spin or two to turn them into powder. Enjoy!

There’s another way of making powdered eggs. Works great if you’re on the run or not in the mood of going through all the steps. As you will see, the dehydrator you’re just bought comes with a fruit roll sheet (yup, you can use it to get the moisture out of fruits and make your own trail mix).

Now, get half a dozen eggs and whisk them. Put the fruit roll sheet on top of your dehydrator and set it to 145 degrees Fahrenheit. When the thing’s beginning to heat you, dip a paper towel in some veggie oil and grease the surface of your fruit roll sheet.

Add the whisked eggs (careful not to spill your mix inside the device). You don’t need to put the lid on. Leave it like this for 14 to 16 hours. Swing by from time to time to see if everything’s okay. When they’re done, they’ll have the same brittle texture as in the steps described above. All you need to do now is to transfer them to your food processor (don’t bother waiting for them to cool down), give them a good shake, and that’s it.

As for storing, you can use regular canning jars or zip-lock bags. If you want to make survival packs for your bug out bag or household survival kit, you can try using a vacuum sealer.

For the cooking part, all you’ll need to do would be to rehydrate them – I personally like to add them to a small pan with boiled water and sort of make poached, scrambled eggs. Yes, I know it sounds unappetizing, but nothing a little bit of salt, pepper, and a slice of homemade spam can’t fix.

Hope you’ve liked my article on how to make powdered eggs at home. If there’s anything more to add, be sure to hit me up in the comments section.

Powdered eggs will be worth their weight in gold during an SHTF situation when all supermarkets will run out of the fresh variety.