Home2019 (Page 13)

Oh, what wouldn’t I give to be young again. Braving the wild, feasting like a mountain king on shrooms and berries, being the firebird, drinking ice-cold water from clear streams and…. getting intestinal parasites. Lovely perspective, ain’t it?

Well, I don’t want to spoil your upcoming summer vacation or anything, but that’s basically what happens when you drink spring water without using purification tablets. To say that today’s subject is shitty would be a major understatement – giardia, pinworms, and tapeworms. Yup, we’re going to talk about intestinal parasites.

Yes, I know they’re kind of a turn-off, but you can’t always rely on the help of a doctor whenever your butt starts itching or your stool changes color; actually you really need to see a doc in both cases, but considering that you’re lost in some neck of the woods, waltzing in the ER no longer becomes a viable option.

So, without further ado, here’s how to recognize intestinal parasites and how to get rid of them when there’s no doc to see you.

Intestinal parasites – signs and symptoms

As you might have guessed by now, intestinal parasites come in all shapes and sizes. In fact, according to doctors, there are over 300,000 species of parasites that feed upon vertebrae, but only 300 of them can jump into humans. I know that it’s not much to go on when the symptoms start to emerge, but the good news is that with the proper care and treatment, you can get rid of them fast.

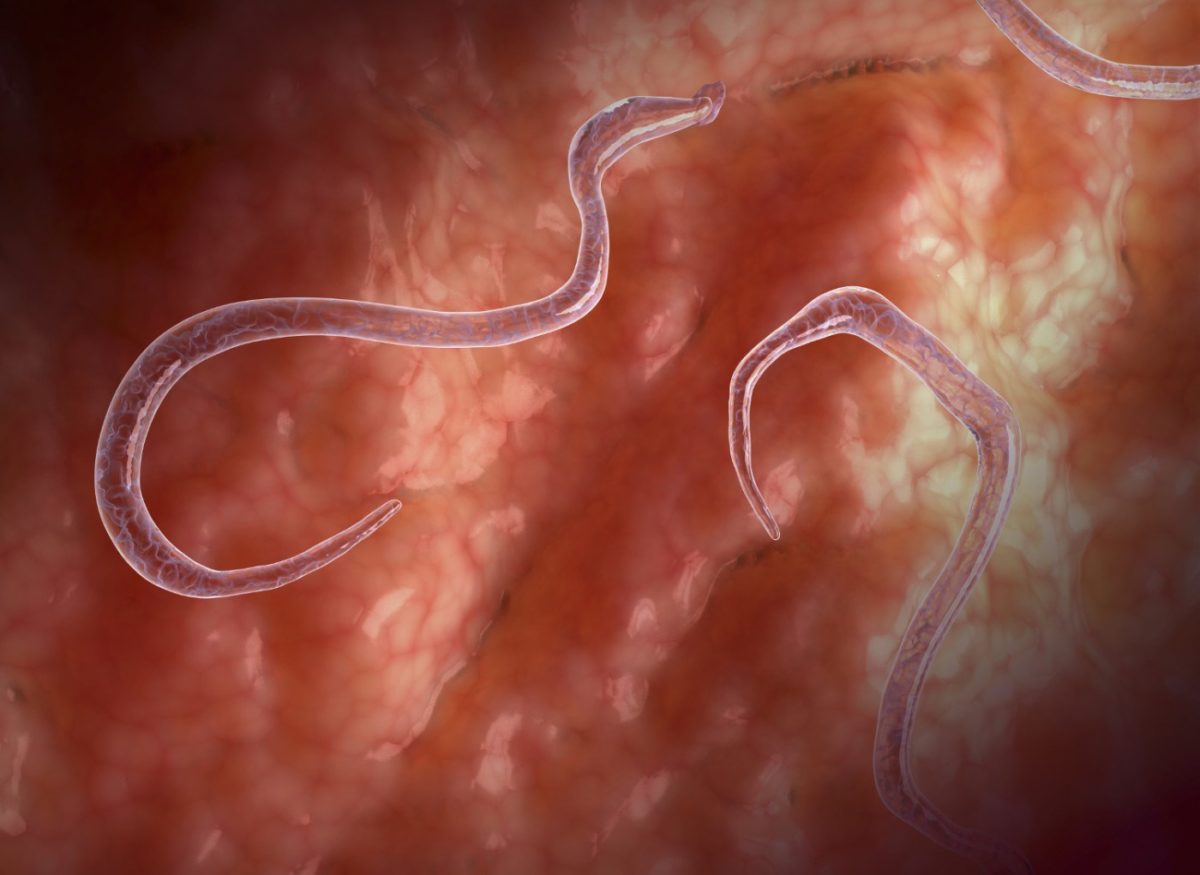
Unfortunately, we have neither the time nor the space to go over every intestinal parasite that can affect humans. However, most parasitical infections occur when one of these five ‘guys’ get inside your icky stuff: tapeworm, flukes, hookworm, pinworm (also called the threadworm), and the trichinosis worm.

Quite a list, isn’t it? But how to find the perpetrator if lack medical knowledge or can’t get ahold of a doctor? Let’s consider the big picture – intestinal worms live and thrive in your gut mostly because of our hygienic habits.

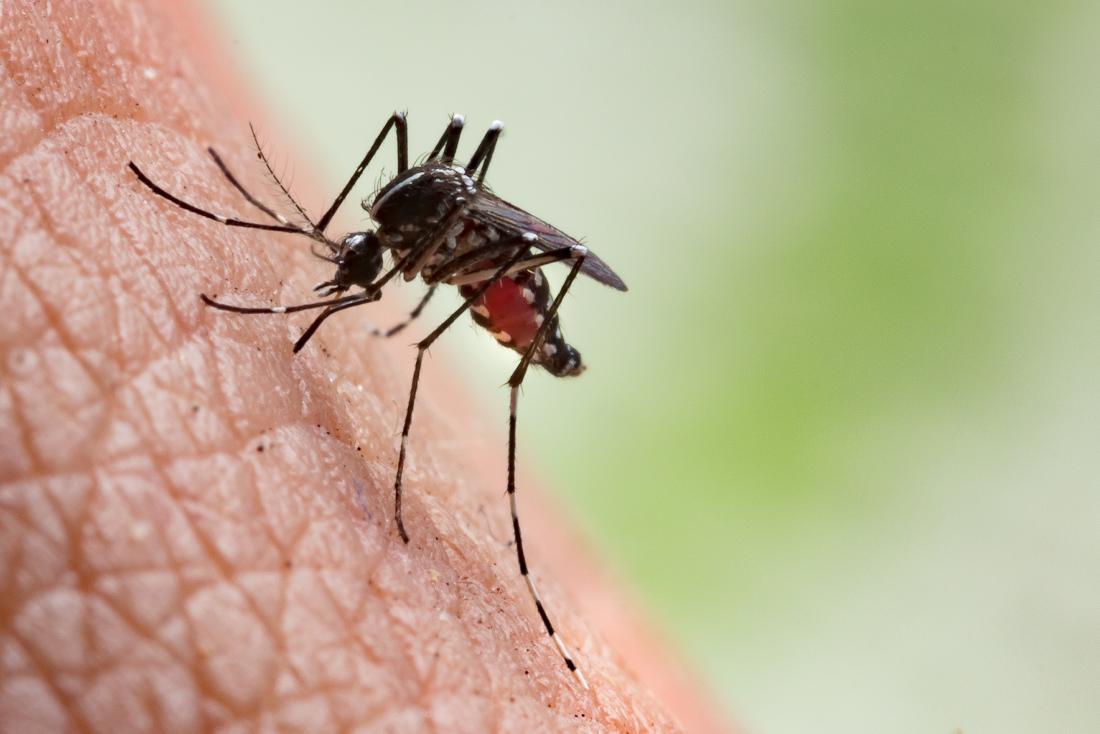
For instance, living in squalor, eating tainted meat or getting too close to animals that carry these parasites are surefire ways of getting yourself infected with intestinal parasites. But wait! There’s even more – intestinal parasites often spread through the so-called fecal-oral route. What does that mean? Well, if you shake hands with someone who’s infected and neglected to wash his hands after popping, then the parasites will jump into you.

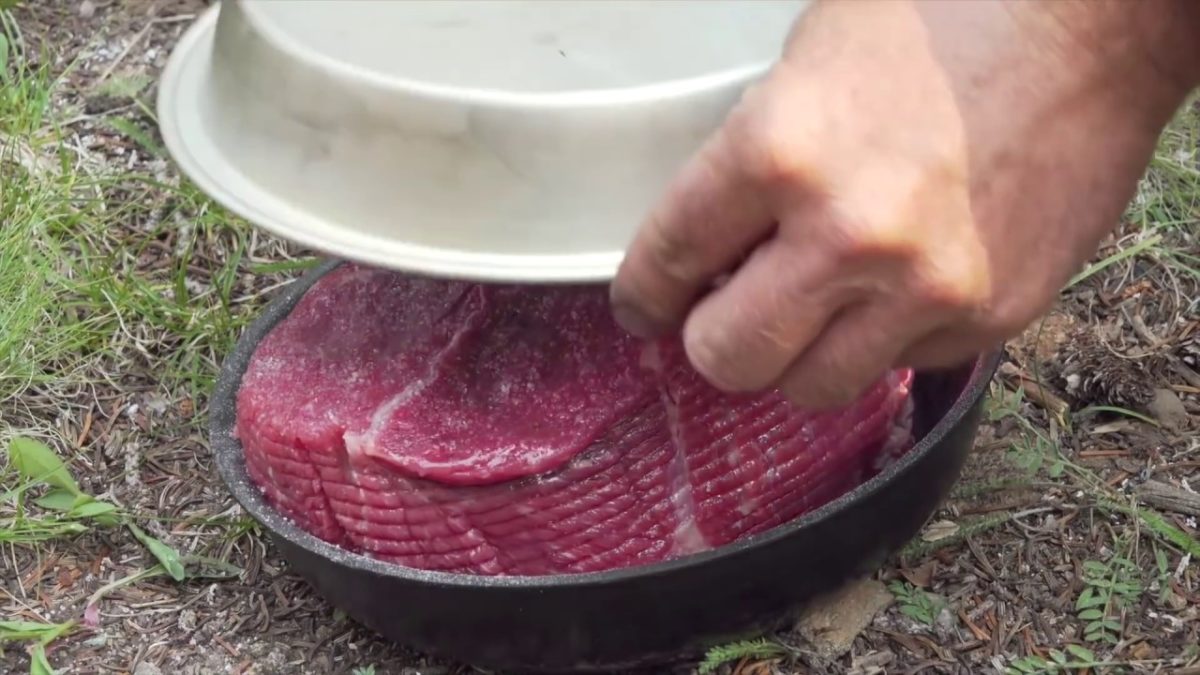
The same thing can happen if you eat severely undercooked food. Pork meat, for instance, carries the trichinosis worm. That’s why docs always recommend to thoroughly cook it before eating. Be extra careful when buying pork cuts from sources other than farmer’s markets or supermarkets. Sure, nothing beats the meat quality of a homestead-grown hog, but you this doesn’t make it safe to eat. In fact, if the pork meat hasn’t been taken to a vet, you should avoid buying altogether.

Anyway, getting back to intestinal parasites – although all of them induce different symptoms, all have a common denominator: diarrhea. It’s not much to go on taking into account that even the flu shares the same symptom.

However, you should keep in mind that intestinal parasites giardia, apart from diarrhea also induce abdominal cramping and severe dehydration. Furthermore, in the case of pinworms, the only symptoms more annoying that shitting water would be a butt itch. All things considered, if you have abdominal cramps, rectal itching, abnormal stool, diarrhea, and feel that drinking half of the Pacific Ocean won’t quench your thirst, it’s highly likely you have intestinal parasites.

You should also take into account your lifestyle choice and the people you’ve been in contact with. Remember that it only takes a handshake for the parasite to jump into you. Another thing you will need to take into account is the fact that intestinal parasites can move from host to host through vomiting. I don’t think I need to elaborate.

Anyway, taking into account both symptoms and history, it’s now time to see how we can deal with intestinal parasites when there are no doctors around.

How to treat intestinal parasites

The first and line last of defense are antiparasitic meds. I don’t know about your household emergency kit, but your bug out bag’s med kit should include one or more antiparasitic drugs. The most common med used to treat intestinal infection is Metronidazole (also called Flagyl).

Still, it’s hardly the only one. Mebendazole is recommended for treating Giardia, Thiabendazole for roundworm infections, and Niclosamide for tapeworm infection. The best news is that all of them are over-the-counter meds, which means that you can stock up on them whenever you like. Have at least two of this meds in your B.O.B’s med kit. I would also recommend grabbing some Albendazole since it covers a larger array of parasites (broad-spectrum).

Keep in mind that medication is only part of the treatment. You will also need to drink plenty of clear liquids (water, tea or broth) to replenish lost ones. Moreover, your electrolytic balance will also take a beating which means that you will need to find some way to restore it – Gatorade or Pedialyte are great for this job.

If you don’t have any, you can prepare such a concoction by mixing water, half a tablespoon of salt, and two teaspoons of honey.

Final thoughts

One more thing – if you plan on taking antiparasitic meds, don’t drink any booze. Sure, the drug will do its job, but booze plus antiparasitic equals vomiting. You should also ensure that you get plenty of sack time, lay off fat foods, and see a doctor as soon as possible.

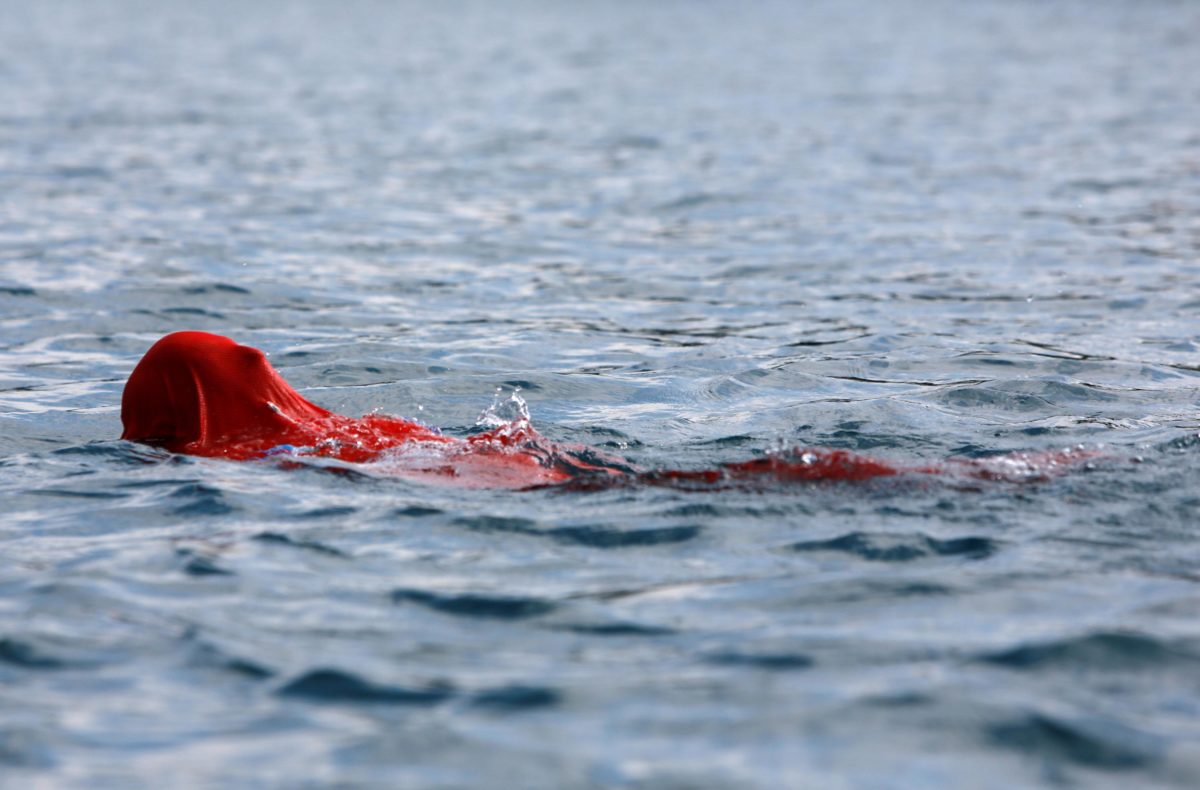
And because I’ve already offered you a hint in the intro – you should avoid drinking water from rivers, puddles or mountain springs. I know that nothing beats that cool and crystal-clear water, but it’s safer this way. However, if you run out of bottled water, drop a purification tablet inside a canteen filled with spring water before you drink it.

That’s it on how to identify and treat intestinal parasites. What’s your take on this? Head to the comments section and let me know.


You should avoid drinking water from rivers, puddles or mountain springs. I know that nothing beats that cool and crystal-clear water, but it’s safer this way.

You know that the flame’s gone in your love light when your wife gives you a lighter for your birthday. Just pulling your leg. Anyway, the real reason why I got a lighter for B-day is rather much more banal than that. Last year, during our Amazon holiday, I lost mine while touring the jungle. Couldn’t recover the damned thing, despite retracing my every step.

It didn’t feel like losing a lighter; it was like witnessing the end of a great friendship. Hell, I have so much of those things that I can probably open up my own tobacco shop; but that lighter was the first thing I bought after getting my very first paycheck. The Tin Man, as I liked to call my Zippo, never left my pocket for 20 odd years – it was there for my first kiss, first breakup, and even on that day when I said “Yes” to my ‘lovely’ wife.

Oh, well, que sera, sera, as the song goes. Now, the reason why I’ve decided to write this article is that this new gadget my wife got me for my B-Day is very neat. And because I’m such a grateful S.O.B, I just had to find out just how much money would my wife be willing to spend on my happiness and well-being.

While messing around on Amazon looking for my gift, I stumbled upon several neat survival lighters. So I figured to share with you people a couple of tips on how to choose the best lighter for your bug out bag or car’s emergency kit.

Why should I look for in a survival lighter?

At the end of the day, there’s not much difference between a survival lighter and a regular one – you can use both of them to light up your morning or after-sex cigarette and to whip out a campfire. However, the major difference between them is the amount of damage one can take before keeling over.

For instance, most Bic or corner store light will fall apart if you step on them or drop in a body of water. Moreover, all survival lighters have some sort of weatherproofing – some have water-resistant cases which can take the same pressure as a capsulated watch, while others have grates that prevent wind from putting out the flame.

Anyway, choosing a reliable survival lighter is much harder than you realize. Keep in mind that your fire-starter is part of that inner-circle of survival items called stuff to stake your like on. Would you spend $20 on a survival knife knowing that the blade might shatter during the first use? Of course, you wouldn’t. The same thing goes for survival lighters. Now, to make things easier for you, I have prepared a small list of, let’s say, purchasing criteria.

Reliability

There’s no point in spending $200 or $300 on a lighter if you know that you’re going to use it only once. On the other hand, if you really want to purchase something you can stake your life on any day of the week, money shouldn’t be an issue. Yes, there are fancy lighters which can go as high as $500.

However, those are more what I want to call a bourgeois gratification, rather than an item that can save your ass in a shit hits the fan situation. You should also know that design and construction materials also dictate a survival lighter’s reliability. Of course, the ones made from steel can take more punishment compared to one made from plastic, aluminum or alloy, but they tend to heavier.

Bottom line: if you want a lighter to stake your life on, don’t be a cheapskate or send for smelling salts after seeing the price tag. Remember that items will be with you for at least 10 years, if not for life.

Type

You know the saying: there’s more than one way to skin a cat and to start a fire. Survival lighters come in many shapes and sizes – the most common ones use an electric arc, butane, and flit to produce a flame. Zippo lighters, for instance, have no need for an electric spark since they rely on flint and highly-flammable fuel. If you want a more interesting gadget, you can always try out a plasm survival lighter, which use electricity to produce well, a plasma bolt capable of melting anything in mere seconds.

There are also the so-called windproof lighters that use electricity to produce a flame. The latter variety has been designed to operate in various conditions: heavy rain, snow blizzards, strong winds. Moreover, even a low-cost windproof lighter can light up at a max elevation of 80,000 feet.

Bottom line: there are four kinds of survival lighters – butane, Zippo-types, plasma, and windproof lighters. Some use fuel, while others rely on electricity. Each have their pros and cons; for instance, Zippos have a very long lifespan but require a bit of maintenance.

Plasma survival lighters are extremely useful in setting ablaze even soaked wood, but require a USB or outlet for recharging. As for butane lighters, they’re cheap, can be found literally anywhere, but they do tend to jam a lot.

Portability

Not all lighters are the same – some are flat, others are odd-shaped. The lighter’s design will ultimately dictate the gadget’s portability; of course, it’s easier to pocket a Zippo or similar model since the shape allows for it. You should also keep in mind that the lighter’s additions will also affect portability – remove weatherproofing, the lighter’s more, well light. On the other hand, you can end up with a survival lighter that’s heavier than a brick.

Bottom line: survival lighters should feel comfortable in your pocket, where they belong.

Direct flame

It refers, more or less, to the height of the flame. Some survival lighters, like Zippos, can produce a two or even three-inch flame, depending on how much of the wick sticks out. This can come in handy in situations where you will need more light or a source of heat for cooking purposes. Bear in mind that lighters producing this kind of flame are not weatherproofed.

Bottom line: figure out what works best for you – a lighter that doubles up as a torch\heater during an emergency or something else.

Water resistance

For me, this is a very important factor in choosing a survival lighter. Though most lighters, ever butane ones, can take a little bit of water, they really can withstand being completely submerged. When I was 20 something, I remember going on a hiking trip with this chick from work. Later that day, I tripped and fell, obviously because I was paying more attention to her than to the road.

Long story short, my Zippo fell into a stream and had to chase it around for a mile or so. Even though it remained below the water for at least 10 minutes, it came back to life after I left it out to dry. Plasma-based survival lighters are also water-resistant, and so are the electricity-based weatherproof lighters.

My choices in awesome survival lighters

Of course, no article on survival lighters should be without a couple of nifty gadgets. So, here are my choices in awesome lighters.

  1. Zippo Emergency Fire Starter

This is the mother of all Zippos out there. Apart from the fact that the body is weatherproofed, the Emergency Fire Starter also comes with four or five tinder sticks which can be used to start a fire just about anywhere. As for shape and weight, I would have to say that it’s bulkier than a regular Zippo on account of the extra protection layer; weight is about the same.

Don’t worry too much about extra supplies like flints, wicks, cotton or fuel – you can buy everything you need from Amazon or whatever tobacco e-shop you have in the area. The tinder sticks, on the other hand, are kind of harder to come by. If you run out, you’ll need to search for a military surplus store that has Zippo products. Other than that, I can’t really say anything bad about Zippo’s take on SHTF.

  1. UCO Stormproof Torch and Utility Tape

Though I’m not really a big fan of butane lighters, I have to say that I was really impressed by UCO’s torch. This electric, butane-powered lighter has three outlets, all of them covered by weatherproofing grates. It’s very small – basically fits in that tiny penny pocket. On a single charge, it can be ignited up to 700 times. Moreover, given the fact that this is more of a torch than a lighter, it has a ludicrously long lifespan: 30,000+ uses.

It also comes with a small safety cap that packs a mini carabiner, which you can use to attach this little sucker to your belt or B.O.B. The body of UCO’s torch is wrapped in heavy-duty utility tape; if you need to patch up something really fast, you have at least 3 feet of tape at your disposal.

  1. Xikar 9660BK Stratosphere II Lighter

The Stratosphere II Lighter is as close you’re ever going to get to a plasma gun just like in the movies. There’s nothing this bad boy can’t do- the flame’s at least two inches in height, which means that it can compete with Zippo’s survival lighter without breaking a sweat. This model, in particular, is very interesting because it has an armor – yup a stainless-steel cover that protects the mechanism from mechanical shock or water.

If that wasn’t enough to convince you, get him: The Stratosphere II Lighter has a built-in blade, which can be used for chopping or self-defense. As for fuel, this survival lighter goes along splendidly with Zippo fuel or any kind of lighter fluid. When the electrical ignitor no longer works, you can always charge it up from a USB port.

  1. Electric Lighter Dual Arc Flameless Windproof Eco-Friendly Lighter

Now that’s a mouthful if I ever saw one. The Dual Arc Flameless is an all-out electrical lighter capable of producing a powerful flame via its two electrodes. On a single charge, the Dual Arc can produce 300 sparks which means that you can probably use it to light up even soaking-wet wood. This is one of those lighters for tech addicts since it doesn’t have a spark wheel, but an infrared switch. The only caveat is that you will need to bring along a power bank or seek out an outlet for recharging.

  1. Blazer CG-001 Refillable Torch

This piezoelectric beauty is more than enough to start a fire, burn paper or illuminate a small room. The flame is tall enough to burn just though anything. This particular model comes with a stainless-steel cover, which means that it can take any amount of punishment.

You can recharge it using any kind of lighter fluid. Don’t worry about running out of fuel because it comes with a small window on the side which shows just how much fuel you have left. It may not be as famous as the Zippo, but, apparently, Japan’s take on survival lighters doesn’t disappoint.

That’s about it on how to choose the best survival lighter. Don’t be a stranger and hit the comment to let me know what kind of lighter you purchased.

While messing around on Amazon looking for my gift, I stumbled upon several neat survival lighters.

Charles here,

It was my turn this year to write a little piece on Memorial Day. And all I could think of was my veteran friend, and what he told me about the war in Afghanistan. We lost 2531 souls in that war alone. Some were his friends.  

There’s nothing one can say to take away the pain of losing someone dear. All we can do in days like this is to come together to honor and remember our men and women who answered America’s call to service and paid the ultimate price.

If you have friends who lost someone, I encourage you to give them a call. Because Memorial Day is the time for Americans as one body to stand up and say, “Thank you. We remember you.”

Each year on Memorial Day a national moment of remembrance takes place at 3:00 p.m. local time.

For those of you who can’t make it, or just don’t remember the historical significance of this day, enjoy this one minute guide to Memorial Day.

God Bless,

Charles

Memorial Day is the time for Americans as one body to stand up and say, “Thank you. We remember you."

Yup, you read the headline right – today we’re going to have a nice and cozy chat about how lady supplies can very well save your ass one day. As someone who has bought more tampons than he could ever care to remember, I always wondered if those things can be used for other purposes then, well… you know.

Anyway, after digging around for a while, a stumbled upon this nice prepping forum where the topic was tampons. Although everything could have gone to shit, the people there were surprisingly very open about sharing their opinions on how to use feminine supplies in a shit hits the fan situation.

So, without further ado, here are 15 ways to use tampons for survival.

Bandage Replacement

Since most tampons are made from pure cotton, obviously they can be used as bandages in case of a medical emergency. I would venture to say that they’re more efficient in stopping bleeding compared to regular gauze since they’re manufactured to, well, suck out every drop of blood.

Don’t forget to keep the pressure on that wound and to stack as many tampons as necessary to stop the bleeding.

Tinder

If you run out of char cloth, you could make some more using a tampon. Unwrap the thing and pour some lighter fluid on it before setting it on fire. Alternatively, you apply a thin layer of petroleum jelly.

Ear mufflers

Neighbors too loud? Mosquitos won’t stop buzzing around? No problem. Take a tampon out of its wrapper, rip it in half, and stuff the pieces in your ears. Now you’re all set for nap time.

Dry-clean yourself

If you forgot to pack a towel, use a couple of tampons to dry yourself. As most of them pack some kind of perfume, you could very well end up smelling like the proverbial rose. They’re also very useful for wiping your forehead of sweat.

Patch up tent holes

A hole in the tent’s tarp is no laughing matter, especially if you plan on camping during mosquito season. If you don’t have anything else, you could use to repair the hole, take a tampon out of its wrapper, strip some cotton, cover the hole, and apply some duct tape.

Craft an emergency candle

If your tac light’s out of juice, it’s possible to make an emergency candle out of a tampon. Get a bell or mason jar, fill with oil, fat, wax or petroleum jelly and stick a tampon in it. Allow it to soak the fuel and set it ablaze. Haven’t tested this out yet, but, apparently, the flame from burning a tampon is powerful enough for cooking. Let me know if it works.

Bait

As gory as this may sound, a blood-soaked tampon can be used to bait fish. And no, it doesn’t have to be human blood – you can use some from a freshly-gutted game or a smaller fish.

Self-defense\offensive weapon

Well, when shit really hits the fan, you’ll want to do everything to get your ass to safety, even if that includes torching someone or something with a tampon Molotov cocktail.

To craft one, get yourself an empty glass bottle and fill it with lamp or gas. Take a tampon out of its wrapper and dip it in some petroleum jelly (you can also soak it in lighter fluid). Place the tampon inside the bottle but leave a bit dangling outside. Flip the bottle a couple of times to soak the tampon in oil or gas. Set fire to the part sticking out and let it rip.

A waterproof carrier for tinder and matches

Lost your tinder box? No problem. To avoid getting those matches and tinder soaking-wet, place them in a tampon wrapper and store them in your bug out bag. As many tampons come with a small, metallic case, you may be able to use that in order to craft a new Tinder box.

Extra cordage

Don’t panic if you run out of cordage. If there are tampons left in your backpack, take them out of their wrapper and cut them into smaller stripes using your multi-tool or survival knife. Tie the heads together, and voila, you have an extra piece of rope.

Figuring out the wind direction

If ever in doubt as to the wind direction, use a tampon. Take a small pole, attach a tampon to one of the ends and stick it in the ground. You’re welcome!

Corking a bottle

Should you lose your bottle’s cork or have to use it for any purpose, use a tampon to cork your wine bottle or whatever.

Making an emergency potty

You can make your own portable toilet by using a couple of tampons and a large zip-lock bag. Here’s what to do. First of all, ensure that there are no holes in the bag. Next, unwrap a couple of tampons, and get them inside the zip-lock bag.

That’s it! You now have a pocket-size emergency toilet- great for number one, though I’m too sure about the other one (would be stupid to carry your own crap in a plastic bag, but survival makes us do ‘amazing’ things).

Water filtration

If you run out of water purification tablets or have no other means of sterilizing water, use a tampon and a plastic bottle. Put as many tampons as possible inside the bottle and pour water. The process will take a while, but the water collected at the bottom is safe to drink.

Treat blisters

I don’t think there’s any universe where blisters are embraced. Doesn’t matter if you’re hiking or running for your life, those blisters will slow you down.

Now, if you have one on your foot, it may be possible to reduce the friction between the skin and boot and, at the same time, protect the area by duct taping a tampon over the blister. Yes, it looks awful, but it works.

Well, that’s about it on how to use tampons in a shit hit the fan situation. What’s your take on this? Hit the comments section and let me know.

Yup, you read the headline right – today we’re going to have a nice and cozy chat about how lady supplies can very well save your ass one day.

In my opinion, every prepper needs to know how to cook. More than that, he or she must become acquainted with the intricacies of preparing the game. Since it’s nearly impossible for me to cover every kind of game out there, I’m going to stick with something smaller and found in almost every corner of the globe – the rabbit.

Yup, you’ve guessed; in today’s article, I’m gonna show you how to deep-fry Bugs Bunny. Yes, I am well aware of the fact that they are cute and friendly and make great house pets, but do keep in mind that in SHTF situation, there’s no room for bias or, in this case, for mercy.

Anyway, you should know that in many countries, the rabbit is considered a delicacy, especially the wild one. Not that there’s anything wrong with domesticated bunnies, but those with ‘freedom to roam’ have an entirely different taste – it’s exactly the same thing between eating domesticated and wild hogs.

Now, the recipe I’m about to show you is very easy to prepare and, as the headline suggests, it involves plenty of oil. Consider this dish a prepper’s take on Colonel Sanders’ iconic fried chicken. So, without further ado, here’s how to prepare a Kentucky-style fried rabbit.

Gathering the ingredients

For this dish, you will need to following ingredients:

  • One young rabbit. Regarding the meat, you can use almost any part. I prefer the cottontails because they’re easier to prepare and far juicier compared to the other cuts.
  • Two cups of buttermilk.
  • Two tablespoons of Italian seasoning or your favorite spice mix. Just make sure it contains oregano, thyme, and dried parsley.
  • One tablespoon or paprika.
  • One tablespoon of powdered garlic.
  • Two or three tablespoons of black or cayenne pepper.
  • One and a half cups of all-purpose flour.
  • One teaspoon of salt.
  • Two cups of vegetable oil or tallow.

You done gathering the ingredients? Great. Let’s get to the fun part.

How to prepare Kentucky-style fried rabbit

Before seasoning your rabbit, you may want to brine it. The thing about using wild rabbit for this recipe is that it comes out all dry. Brining the rabbit beforehand ensures that the, well, nuggets will be moist and crispy at the same time.

To do that, grab a zip-lock back an add a ¼ tablespoon of rock salt and four cups of water. Put the cottontails inside and leave in the fridge for four to 8 hours. After that, take the rabbit out of the bag and start cooking.

Step 1. In a large bowl, put your buttermilk, paprika garlic powder, pepper, and Italian seasoning. Whisk the ingredients.

Step 2. Coat the cottontails with this mixture, stick in a zip-lock bag, and place in the fridge for a couple of hours or overnight.

Step 3. When you’re ready, take a skillet or frying pan and fill it with oil or tallow. Ensure that the oil completely covers the cottontails. Otherwise, you will need to flip it more times than necessary.

Step 4. Take the rabbit out of the zip-lock bag and place it into a strainer. Allow your cuts to drain for 15 or 20 minutes.

Step 5. While the rabbit’s sitting in the strainer, prepare the crust. Normally, you would have to put flour in a deep plate or something and sort of roll over your cottontails in it. However, there’s a faster way, one that does not involve getting your hands too dirty. Take a large zip-lock bag, add all-purpose flour and the salt.

Place your rabbit cuts inside, seal the bag, and shake. That’s it! All you have to do now is to use some thongs to take out the flour-coated rabbit and to place on a plate while waiting for your cooking oil to reach the desired temperature.

(Optional) If want a crunchier crust, follow the Viennese schnitzel recipe. Put some all-flour in a plate, some breadcrumbs in another one, followed by a third plate which contains one whisked egg, two tablespoons of milk, a dash of salt and pepper. First, roll the cottontail through the flour, dip in the eggs and milk mixture, and finally roll through breadcrumbs.

Step 6. Set the heat to medium-high. You’ll need a temperature of at least 325 degrees Fahrenheit to deep-fry those rabbit cuts.

Step 7. When the oil gets hot, add the cottontails. Deep-fry them for 8 to 12 minutes. Keep in mind that rabbit tends to suck a lot of oil, so be ready to pour some more if the oil level drops.

Step 8. When they’re done, place on a piece of paper towel. It will absorb the excess oil. That’s it! Serve while it’s still hot. Rabbit cottontails is a very versatile food since it can be paired with almost any kind of side-dish. I personally like to serve them with mashed or blanched potatoes and some green lettuce. Since it’s a deep-fried dish, you can always serve it with garlic sauce and a cold beer.

Wrap up

Preparing the rabbit is not that difficult. Of course, there are other ways to prepare this sort of game, but those recipes call for a lot more steps and ingredients. The best thing about this dish is that you can prepare it in any kind of setting. I personally like to prepare this recipe during a family camping trick. All you need are the right spices, a survival knife, a medium-sized cast-iron pot, and a source of the fire.

If you can’t afford to carry a pot, you can always use your canteen. As for frying the cuts, you can replace oil with tallow if you’ve got some of you. Always remember that domestic rabbits don’t need brining. Moreover, while keeping the wild rabbit cuts in the salt and water solution, you would do well to set a timer. If it stays longer than 8 hours, it will get all mushy during the deep-frying process.

That about covers it for my mouthwatering Kentucky-style fried rabbit. What do you think about this recipe? Hit the comments section and let me know.

Every prepper needs to know how to cook. More than that, he or she must become acquainted with the intricacies of preparing the game.

Do you wanna know the secret behind a great camping trip? Well, apart from flying solo or going with you SO, there’s also that sprinkle of magic called food. Yes, I know that most of you prefer a quick snack (MREs, poached eggs, may a couple of veggies), but what if I told you that you could actually enjoy a meal fit for a king’s table while backpacking?

Granted, it sounds like a contradiction in terms since camping has always been about leaving behind the hustle and bustle of the big city, which, incidentally includes fancy eateries and heavy cooking gear.

Well, the recipe I’m about to show you will not only blow your mind but will surely make the question the ways you chose to cook your Sunday roast. Anyway, as the title suggests, the only cooking tools you’ll need are the ones that should be included in your backpack or bug out bag.

Now, for those of you who are wondering about the cooking machine, I would recommend a simple and, if possible, firebox. Of course, you can always try your luck with a gas-powered stove.

For my part, I went with option A, since nothing beats that smoky flavor that only charcoal can provide. Moreover, since this is a 7-hour roast, I don’t think it would be a good idea to pack extra gas tanks just to cook one hunk of meat.

So, without further ado, here’s how to prepare your first 7-hour roast beef.

Gathering the ingredients

A simple dish calls for basic ingredients: salt, pepper, a bit of vegetable oil, and a dash of thyme (pairs divinely with beef). As for the cut, T-bone’s good, but a chuck steak’s better. As I said – simple stuff.

Now, for the rest of the stuff: one firebox filled with charcoal, one firestarter, and your camping pan (make sure that it’s one of those models that come with clamps). If you don’t have such a pan, you can always take a regular one from home and use a metallic bowl as a lid – clamp it in place using regular paper clips.

So, did you gather your stuff? Great! Now find a good spot and let’s work some magic.

How to prepare a 7-hour beef roast

Step 1. Find a good spot to set up your firebox.

Remember your grills safety training. We don’t wildfires now, do we? Best would be to pick a barren spot, away from trees or any vegetation. When you’re done, place a piece of paper on the bottom of the firebox and stack some tinder.

Fire it up and start shoveling coals once the fire picks up in speed. I wouldn’t recommend using lighter fluid or whatever, because your roast is going to end up tasting like gasoline.

Step 2.  Prepare the roast beef.

If you’re not in a hurry, you can marinate the roast beef for a couple of hours before the cooking part. I would venture to say that two-and-a-half hours are more than enough for the marinade to get into the beef. Regarding the latter, don’t overcomplicate things; in a zip-lock bag, add water, sugar, salt, pepper, some chili flakes for a kick, a couple of crushed garlic cloves, and two tablespoons of veggie oil.

Bag the meat, give it a couple of shakes, and store in the shade, away from insects. Now, if you want to skip this extra step, you can go ahead and start preparing the meat for pan-frying.  To do that, unpack your meat, season on all sides with salt and pepper. Don’t forget to rub the chunk with a little bit of veggie oil.

Step 3. Pan-frying the meat.

Once the fire has started to gain momentum, drizzle some oil in your frying pan and place on top. When the oil reaches the cooking temp, take the beef chuck, and place in the pan (fat part down). You only need to sear the meat – two minutes on each side is more than enough. When it’s done, take it out of the frying pan.

Step 4. Oven-roasting

In the same frying pan, add some more oil, and a splash of water. Make sure that there are still coals in your firebox. Next, you will need to place the meat in the pan, pop the lid, secure it with paper clips, if you have any, and to place it over your firebox.

Leave for 30 minutes to cook. After that, grab some hot coals from the firebox and place them on top of the frying pan’s lid – this will ensure that your beef will be cooked on both sides.

Now, there’s not much left to do but to sit and wait. Keep an eye on the coals and add some more if you feel like the fire’s ‘losing its touch.’ The first time I made this dish, I was with the whole gang: wife, kids, best friend, his SO, dogs, and, yes, even the cat (taught it how to walk on a leash). Our pastime of choice was obviously cracking open a few cold ones and reminiscing.

Well, if you really want to make more out of your camping trip, you can spend this time looking for side-dishes that pairs well with the beef like wild mushrooms or even fish.

Anyway, do keep in mind that this is going to take a while, so, there’s no point to guarding the firebox.

Step 5. Twist and turn.

After about four-and-a-half hours, remove the coals from the lid. Pop it open and flip your roast. Careful not to drop it or it’s bye-bye dinner. When you’re done, put the lid back again and continue cooking it for about two-and-a-half hours. Don’t forget about the coals.

Advice: if you want to add a crunchy crust to your meat, you can ditch the lid after six-and-a-half hours. Flip the meat every now and then. If you run out of the liquid, add a little bit of water. Otherwise, the meat will dry up and, eventually, turn into ashes (true story!).

Step 6. Gravy all around!

When the beef’s done the cooking, don’t throw away the liquid in the frying pan. Use it instead to prepare a mouthwatering gravy that will everyone a run for their money. Yeah, I know that this qualifies as an extra step, far from the simple dish – simple tools ideal, but trust me when I say that the gravy made from beef feet is the best thing that ever happened to your mouth.

So, here’s what you’ll need to do in order to prepare a simple gravy:

  1. Pour your beef stock in a separate container.
  2. Add a little bit of butter to the same pan.
  3. Wait for the butter to melt then add the stock.
  4. Let it simmer for a couple of minutes.
  5. Add half a cup of all-purpose flour and whisk the mixture.
  6. When the composition becomes silky-smooth, add another half a cup of all-purpose flour.
  7. Give a few more whisks and allow it to cook for another minute or so.
  8. Add salt and pepper.

Advice: if you prefer smoother gravy, you can strain it a couple of times through a sieve or a piece of gauze.

That’s it! You now have a nice cup of gravy which pairs wonderfully with the 7-hour beef.

Additional considerations on the 7-hour beef roast

As you see, preparing this dish is easy, and you only need a handful of tools to get the job done. Now, you’re probably wondering about how to serve this ginormous beef roast. It’s all up to you, of course, but it would be a shame not to make some pulled meat sandwiches. Yes, I know that you usually prepare those with pork, but, hey, beef’s good too. So, here’s what to do in order to prepare some juicy pulled beef sandwiches from your roast.

Step 1. Get yourself a couple of bread slices.

Step 2. Put a metal plate over your firebox and drizzle it with some cold water. You can also add some veggie oil.

Step 3. Grill the slices on both sides. Don’t burn them, though.

Step 4. Put some of that gravy on each slice.

Step 5. Place your roast in a small tray and use two forks to pull the meat apart. Better you do this while the meat’s still hot.

Step 6.  Take some meat shreds and place on each bread slice. Add more gravy if you like. Now, if you fancy carrying around more veggies and ingredients, you can garnish the sandwich with onion rings and a piece of cedar cheese.

Well, campers, that’s about it for my 7-hour roast beef recipe. Hope you’ve enjoyed it as much as I did cooking it. Sorry for not posting any clips or anything, but there was hardly anything left to be shot after everyone dug in (beer will do that for you). Anyway, if you have any questions or think that the recipe can be improved in any way, don’t be a stranger and hit the comments section.

I know that most of you prefer a quick snack, but what if I told you that you could actually enjoy a meal fit for a king’s table while backpacking?

Ever wondered what it’s like to pull a Houdini in real life? I have; not because of some flight of fancy or whatever, but because it’s something that it may happen to you. I like overseas holiday trips just like the next persons, yet I’m not very comfortable with the idea of visiting a country labeled as ‘dangerous.’

Last year, my wife booked us a vacation to Caracas, Venezuela (said it was a dream of hers to visit Caracas). Anyway, for those of you who don’t know, this year, Venezuela’s capital got first place in the ‘most dangerous cities in the world’ top (120 homicides per 100,000 citizens). Yeah, you can very well imagine that I was on edge the whole time.

Now, from what I gathered, guerillas have this method of getting rid of ‘evidence’ by binding the victim’s hands and tossing the unfortunate soul in a deep body of water. Charming, isn’t it? Well, after doing a little bit of research, I stumbled across a former SEAL Navy instructor’s interview in which he explained how special forces prepare for capture and execution.

I won’t bother you with the details, but he did indeed broach a subject which, to my opinion, may prove to be invaluable in an SHTF situation: not drowning when your hands and feet are tied. Sounds very far-fetched; I know. Still, this is the extreme survival series, which means one thing: very low prob, but good to know.

So, without further ado, here’s how to survive a tied and drowning scenario.

Step 1. Consider the bigger picture

Say you were captured by some guys that want to use you as fish bait. Forget about what you’ve seen in the movies about cement shoes or Chicago overcoats – ain’t nobody got time for that! More than likely, your hands and feet will be tied with some sort of cordage (rope or zip ties).

According to the former SEAL instructor, the first thing you will need to do is to feign death by drowning -yes, acting is probably not your forte, but do keep in mind that your captors are packing a lot of firepower; emerge too soon, and you will probably wind up with a piece of hot lead between your eyes. So, the best thing to do would be to hold your breath for as long as you can.

There’s no guarantee that they will leave immediately after tossing in the water – it’s a gamble and, like it or not, your life is on the line. You should also consider the fact that your body can hit bottom in an awkward position.

Now, you should keep in mind that the biggest challenge, in this case, is panic. I know that it’s easier said than done, but be aware of the fact that is panicking leads to hyperventilation which, in turn, leads to getting more water in those lungs. So, keep calm, wait for the danger to pass, and then act!

Step 2. Getting a breath of fresh air

You may be able to hold your breath for a long time but, eventually, you’ll still need to grab some fresh O two. Here’s what you will need to do. First of all, make ensure that you’re in the right position (water surface on top and bottom on, well, the bottom, guess). You may need to do a couple of spins in order to reposition yourself. When you’re done, follow this sequence:

  1. Get all of the remaining air out of your lungs.
  2. Thrust to the bottom.
  3. When you reach the bottom, assume a crouch position.
  4. Push as hard as you can to get topside.
  5. Take a breath of fresh air before getting back underwater.

Bear in mind that you may need to repeat these steps at least a couple of times; the goal is to swim back to safety, not to stay underwater – talk about a no brainer!

Step 3. Keeping your head above water

Swimming is very easy – I mean, your body knows what needs to be done in order to stay above water. However, it may be trickier this time, considering that your hands and feet are tied. Indeed, it’s harder, but not impossible. Here’s what you will need to do in order to float:

  1. Use the above-mentioned steps to reach the water’s surface.
  2. Just before hitting the edge, bend your knees, while keeping your head in the water.
  3. Kick back and arch your back.
  4. Repeat the process to obtain buoyancy.

Step 4. Getting to shore

Now that you’ve mastered the flotation technique, it’s time to ‘swim’ back to safety. First of all, pop your head out of the water a couple of times to scout a safe patch of land. You should also make sure that there’s no one there. Otherwise, all your efforts would have been in vain. Once you’ve identified a safe spot, repeat the step 2 sequence to replenish your air supply. To travel back to shore, follow these steps:

  1. Assume the floating position (head below water, bend knees, and exhale).
  2. Kick backward and propel forward by straightening your back
  3. Repeat these steps to travel to safety.

Note: during your trip to the shore, you will need to stop a couple of times from getting more air. To do that without losing speed, when you’re at the top, flip over and inhale. After that, flip back to the initial position (head down). Repeat this a couple of times. This trick allows you to maintain travel speed while replenishing lost oxygen.

That’s about it on how to survive being tied and tossed to the bottom of the water. A little tidbit before I go: this method is part of a SEAL’s examination. As these units operate far behind enemy lines, the chances of capture are quite high. So, as part of their training, they are literally tied, gagged, and tossed in the water (talk about a rough school day!). What’re your thoughts on this? Hit the comments section and let me know.


Ever wondered what it’s like to pull a Houdini in real life? I have; not because of some flight of fancy or whatever, but because it’s something that it may

I know for a fact that no man has ever seen coconut oil being used for other stuff than scrubs, facial masks, and the occasional fancy dinner with an Asian twist. If I had been called to write an article a couple of years ago, I would have dismissed the task, arguing that I and beauty just don’t mix (keep thinking why my wife picked me in the first place; lost wager, I gather).

Anyway, since I turned to prep, I discovered that coconut oil could be used for tons of other stuff. And no, it’s no unmanly to go and stock up on this stuff.

Need more convincing? No problem there. Here are 13 ways to use coconut oil in those situations when your ass is on the line.

First-aid

Because coconut oil’s packed with nutrients and more good stuff, it can successfully be used to treat all sorts of medical emergencies. For instance, when applied to a limb with edema, it will reduce inflammation and enhance tissue regenerations. In its watered-down form, coconut oil can be used to deal with yeast infections and common viruses.

Moreover, since study has shown that oil extracted from coconut shell has a strong anti-protozoa effect, it can be employed to treat giardia, a parasite known to lurk in untreated waters. Fever? No problem. Just use a coconut oil extract, and you’re good to go. The same substance’s good against viral infections and various skin conditions produced by bacteria.

Get rid of that beard

Sure, there’s nothing manlier than a beard, but, man, that thing itches like Hell. Well, if you decide on getting rid of that beard and have no shaving cream on hand, you can always use a bit of coconut oil. Yes, yes, I know that it sounds like I’m giving you beauty advice or something, but the truth of the matter is that this stuff’s way better than regular cream.

Apart from the fact that it moisturizes your face, it makes the blade slide across your face like it was an Olympic skater. Best of all, you won’t cut yourself.

No more stuffy nose from allergies

Feel like your nose just doubled in size on account of your allergy? No problem. Take a big bowl, pour hot water, and add some coconut oil. Put a towel over your head and inhale. After a couple of minutes, you’ll feel like a newborn.

Foot care

Sore feet? Blisters? Wash the area thoroughly and apply a thin layer of coconut oil.

Repel nasty smells

If you ever run out of deodorant, you can always use a little bit of coco oil. Rub a little bit under your armpits, and you’re good to go. Since it has a great anti-microbial effect, it will effectively kill all bacteria that produce that foul smell. Just don’t coconut oil instead of showers.

Give those gums a good massage

Commercial toothpaste can easily be replaced with a homemade concoction made of equal parts coconut oil and baking soda. Might not taste that good, but at least it gets the job done.

For when the tummy starts growling

I really don’t care that much about carrying veggie oil or butter during hiking. Still, as the beast has to be fed, a stove-cooked meal would be just the thing to put the twinkle back in those peepers. So, if you don’t want to burden yourself with oil or a loaf of butter, grab a small can of coconut oil. Yes, I know exactly how it sounds, but coco oil is an excellent substitute for the regular variety.

Get the juices going

Ever felt like you’re about to fall off your feet but you can’t because you still have tons of shit to do? Well, you can now rest easily because I have just the thing you need to replenish that lost energy: coconut oil. Take a teaspoon of this stuff on an empty stomach, and you’ll have enough juju to move mountains (don’t know about splitting the sea in half, though).

For when Nature doesn’t come calling

Constipation’s perhaps the nastiest thing that could happen to you. Sure, there is other bad stuff out there, but believe me, there’s nothing worse than feeling that you’re more stuffed than a pinata. So, in order to get rid of constipation, just take two teaspoons of coconut oil. Since it’s packed with fibers, it will help your tummy eliminate that nasty stuff in no time.

Use as lubricant

No, not that kind of lubricant, but hey I’m not judging. If you have to deal with bolts that won’t budge or with stuck machine parts, just use a little bit of coconut oil. Of course, this is pricier compared to WD40 or Vaseline but helps if you don’t have anything else.

Waterproofing hiking gear

Thinking about wasting some more money on expensive waterproofing solutions? You may not need to. If you have a box of coconut oil lying around the house, use a little bit to waterproof your boots and coats. Works wonders on hiking boots, by the way.

Clean your eating utensils

Water’s a precious resource, no matter if you’re in the woods or the big city. So, if you’re in a situation where you have to use clean water for other purposes, know that you can use coconut oil to clean your eating utensils. And yes, it’s way better than water and dish detergent.

No more rust!

Think that vinegar’s the only thing that knows how to deal with rust? Then you haven’t seen coconut oil in action. Now, if you have stuff covered in rust, rub a little bit of coconut oil and let it sit for an hour or so. After that, rinse with plenty of water, dry with a paper towel, and you’re good to go.

Well, that about covers my favorite bushcraft uses of coconut oil. What’s your take on this? Don’t be a stranger and hit the comments section.

I know for a fact that no man has ever seen coconut oil being used for other stuff than scrubs, facial masks, and the occasional fancy dinner with an Asian

Now, before you hit that ‘close’ button, hear me out. Yes, I am keenly aware of the fact that most of you don’t use baby wipes for other purposes than, well, wiping your behind. True for the most part, but there’s more to them than just another picture of a baby smiling to his momma.

Remember the story about my old college roommate, who considered that the shower is just another room and not a place to wash? Well, what can I say? I’m a softie when it comes to my college days, and in recounting those days of yore, I have decided to piece together a short and sweet list about other ways to use baby wipes.

So, without further ado or other stinky stories from the author, here are 18 ways you can use baby wipes in an SHTF situation. Enjoy and try not to cringe.

Hemorrhoid buster

Well, since they are obviously designed to be used in that part where the sun doesn’t shine, let’s go along with that. As the proud father of one, I can state for a fact that there’s no surefire way to relieve pain or make them go away. It’s more of a trial-and-error thing. Anyway, baby wipes are great for treating bursting hemorrhoids, but not on their own.

As Mom Nature never ceases to amaze when it comes to healing stuff, the secret to getting rid of hemorrhoids for good is witch hazel. Nope, doesn’t have anything to do with an actual witch or bubbling cauldrons. It’s a shrub-like plant that grows like crazy in America – bet you have one in your backyard and you didn’t even know (you went around back to check, didn’t you?).

So, to give them hemorrhoids a run for the money, pack some fresh witch hazel in a baby wipe and apply. ‘Twould be best to use witch hazel essence, but that stuff’s hard to come across. Be sure to wash the stems thoroughly before placing it on your tushie.

Great for Making Go-Loos

Got nowhere to go when the tummy mambo begins? No problem there. You can easily piece together a makeshift toilet by using some paper tissues or plain paper or cloth and some baby wipes. Here’s how to do it – look around for a discarded container: tin can, plastic bottle, old bin, a box, anything. I would go with a can, but anything helps in this case.

Just stick as much tissue as you can inside and put some baby wipes on top. And that’s how you get rid of the nasty smell. You can also use this portable loo to discard any used tissues along the way. Just be sure to keep it as far away from your body parts as possible.

Extra TP!

No more TP around the house? There’s no need to run to the store if you have a pack of baby wipes lying around. Get them out of the pack and let them dry out. There you go – you know have a week’s worth supply of TP. Sorry, no double or triple layer this time.

Get rid of that foul pillow smell

If you’re too busy to change pillowcases, you can use baby wipes to improve the smell. I wouldn’t recommend using this trick too often as nasty smells are always accompanied by bacteria.

So, to make the smell go away, grab a baby wipe, and pour a couple of drops of essential oil. Stick in the pillowcase and enjoy a good night’s rest. I usually use this trick when I go out camping; one-day trips are okay, but after the second day, the smell will be off-putting, to say the least. So, keep them baby wipes coming.

Temporary face mask

Though the dust mask shouldn’t be missing from your bug out bag, there are cases where it can be out of reach. If you really must cross an area filled with toxic fumes, grab a baby wipe, and cover your nose and mouth. Works as long as the tissue remains moist. So, this will give you five to ten minutes, at best.

On that note, I would like to state for the fact that it’s always a good idea to carry a small pack of the baby pack. Yes, I know that there aren’t enough pockets to go around, but they’re great for all kind of odd jobs.

Escape from a snowbank

Of course, I have a pack of baby wipes in my glove compartment. Why shouldn’t I? Now, if your car gets trapped in the snow, you can sort of rock your way out of the snowbank by using the baby wipes package. Just stick it under the back wheel, and hit the gas pedal. It works even better than kitty litter and sand! The good part is that you’re out of the snowbank. The bad news is that you’re short of one pack of baby wipes.

Clean gym gear

As someone who NEEDS to hit the gym at least twice a week (that would be my doc calling the shots, not me), I really want to know that all the things I’ll be using are squeaky-clean. So, if you’re a clean freak like me, use a couple of baby wipes to clean things like dumbbell handles, bars, or whatever. Use a paper tissue afterward to dry them before use. Otherwise, you may end up with shitty traction.

Get rid of bird poop from your windshield

I swear to God that those rats with wings can fit a whole fridge in their stomachs. Dunno what to do about them though, but I do have a surefire way to remove the crap from the windshield. Yup, it’s baby wipes. Don’t need to scrub or use extra fluid – scrub the shit stains with one or two wipes, and you’re good to go. Also works magic on the other car parts.

Insta-cooling!

When you feel that the heat’s just too much, just use a couple of them to wipe your eyebrows and forehead. Yes, I know it sounds stupid, but you’ll thank me afterward. While you’re at it, you can use baby wipes on your chest and armpits to reduce sweating rate. On top of that, you literally come out of this one smelling like the proverbial rose.

What’s with the dirty feet, Fido?

As a pet owner, I can easily say that the only downside of owning one, especially a dog, is to try and convince the pooch to hit the bath after going outside. Well, the Hell with quick baths – use a couple of wipes to clean the dirt off their paws. They’re also great for relieving sores.

Get rid of dust and spiderwebs

I can’t even fathom just how much I hate cleaning the ceiling and those corners. And, I don’t really know what to say about this one, but every time I get to this part, I usually end on the floor or with a nasty bump on my head. Anyway, if really must perform this task, forget the ladder or the vacuum cleaner. Just get a broom or a long stick, wrap a baby wipe on one end, and clean. Those spiderwebs will never know what hit them!

Rejuvenate leather upholstery

Fact: leather upholstery’s expensive as Hell. Yes, I know this would qualify as a wrong call in prepper’s terms, but, hey, trying arguing with my wife. Now, I have to admit that they look very nice, yet they’re so hard to maintain. Well, if you’re all out of leather care lotion, you can use a couple of baby wipes. Works great for the cleaning part and also gives the leather a shine.

Remove grease from frying pans

If you’re on kitchen duty, use this cheat: grab a couple of baby wipes if you need to clean greasy frying pans. Works better than dish detergent.

First-aid

Since they have trace amounts of antibacterial solutions, baby wipes are great for minor medical emergencies: cuts, bruises, sunburns, and windburns. If you ever run out of gauze, you can use a couple of wipes to control the bleeding. Now, I wouldn’t use them for big bleeder, ‘because that would be like using gasoline to put out a fire.

Car emergencies

Since I might have mentioned something about cars and becoming snowbound, here’s another reason why you should keep a box or two of wipes in your car: emergencies. Need to fix something? There’s a fair chance that you’ll end up with slime, dirt, or grease on your hands. Grab a couple of wipes get yourself cleaned up. Don’t forget to toss those wipes in the trash, not on the road like some morons I saw a couple of days ago.

Best travel companion ever

I can say for the fact that I can’t even consider crashing anywhere, no matter if it’s a sleazy motel or a five-star resort, without at least one pack of baby wipes. Granted, it’s a little bit excessive to start cleaning a whole hotel room using baby wipes, but the toilet will need a good scrubbing before you can sit on it. If you’re not a germ freak, do bear in mind that uncleaned toilets are like a breeding pool for disease such as hepatitis.

Wipe phone screens

Did you know that there are at least five types of bacteria on your phone screen? Sure, tell me that I’m a clean freak, but you won’t be so cheerful after the doc says that you got cauliflower ear from your phone’s screen. Yeah, do yourself a favor and clean your smartphone’s screen as frequent as possible to reduce the chances of an infection.

Taking a shower without taking a shower

Of course, I couldn’t conclude this piece without saying a few words about my former college roommate who used baby wipes instead of a shower. Now, if you find yourself in a situation where you either have to hold on to every ounce of water, you can use baby wipes to clean yourself.

Yes, I know that it’s not the same thing as sitting in the shower, pondering about the meaning of life, but what can I say? Shit happens! As someone who tried this a couple of times, I would like to say one thing: don’t use baby wipes on your schlong – it stings and leaves behind one Hell of a sore.

That’s about it on clever ways to use baby wipes in a shit hits the fan situation. Think something’s missing from the list? Hit the comments section and let me know.

Before you go, you may also like:

This is more than just about your guns…
How to survive any medical crisis situation with ease
10 Easy Steps to Secure your privacy
Secret Military Solution For Power Independence

DIY Unlimited water source
Why a food reserve is way better than the Federal Reserve
Lost Skills of our Ancestors that still work today

So, without further ado or other stinky stories from the author, here are 18 ways you can use baby wipes in an SHTF situation. Enjoy and try not to cringe.

There’s no better nor frustrating way of knowing that it’s six in the A.M and you need to go to work then having to waddle all the way to the bathroom in order to massage those gums.

Have you seen The Green Mile? No matter how hard I try, I still end up crying like a toddler at that scene where Paul and the others escort Coffey to the electric chair. Well, that’s how all of my mornings fell, more or less – dead man walking the walk just to have his brain zapped by yet another glorious 9-to-5 bull session.

Anyway, rant aside, during one of the tedious morns, while shining my chicklets, a thought crossed my mind – is there any other way of using toothpaste besides, well, brushing your teeth?

As always, yours faithfully hoped on the computer and did a little bit of snooping. Of course, as you’re probably painfully aware by now, not everything you find on the Internet should be taken for granted (there was this guy who wrote this ginormous article on how common toothpaste brands such as Colgate or Lacalut can magically heal anything from brain cancer to athlete’s food).

So, after weighing in the facts and laughing my can off in the process, I’ve discovered a couple of nifty and very real ways of using toothpaste outside the bathroom.

Because talk’s cheap and so is the author, let’s get down to business. Here are 10 ingenious ways you can use toothpaste in any SHTF situation.

Acne buster

Do you think that only pre-pubescent guys and girls have to deal with acne? Dead wrong! Acne is a long-term skin condition. Very long-termed, I might add, and this is not coming from a guy who wrestled with acne until his late 30s. Anyway, besides taking your prescription meds (which is a must), you can try rubbing a bit of toothpaste on some of the more problematic areas.

You don’t need much; just a squirt the size of a pea. Gently massage the area, rinse with cold water, and you’re all set to go. It won’t make acne vanish overnight but, in a couple of weeks, you’ll see fewer whiteheads and pimples on your face. This trick is also great for people with oily skin – rub a bit of toothpaste, and your skin will become smoother than a baby’s bottom.

Getting rid of mosquito bites

If it’s one thing I hate more than doing taxes, it’s mosquitos. Summer comes, those dreaded seem to pop out of the ground to spread their reign of terror. Sure, a can of bug repellant will do the trick, but I usually find myself covered in tens of mosquito bites, long before I get around to using the bug spray. A mosquito bite shouldn’t be a reason for concern (unless you live near the Nile area), but there’s nothing you can do about the itching.

Probably most of you end up with bites ten times their original sizes because you can’t simply stop scratching yourself. Well, after trying everything from soothing sprays to medicinal alcohol, I’ve discovered that you can get rid of the itching if put a pea-sized amount of toothpaste on the bite area. I would go with the peppermint variety because it has that cool feeling to it. Works just fine on other types of insect bites.

Treat burns

A great way to relieve pain and to prevent blistering is by putting a little bit of toothpaste on the scorch mark. Before applying sterile gauze, submerge the burn area in cold water and apply a tiny amount of toothpaste. Since the stuff has powerful antibacterial properties, it will keep the nasty germs at bay and, in addition, create a waterproof barrier.

What can I say? It’s a win-win situation. Word of caution, though – this works for minor burns (a drop of hot oil or wax on hand, applying too much pressure on cigarette butt). For more severe burns, ditch the toothpaste, and get your can to the hospital.

Plugging empty nail holes

For me and my family, spring is more about redecorating than actually doing any cleaning. So, old pictures end up in the attic, and new ones take their place. However, there are instances when the pic we choose for a room really doesn’t match the décor. The result – we end up with one more empty spot and a nail sticking out of the wall.

Most times, I let them nails alone because pulling them would not solve anything except ending up another hole in the wall. If you have the same problem, try this simple hack – get a little bit of toothpaste and plug the hole. Use a hair dryer or something to harden up the paste. You can leave it like this if your rooms painted in hospital-white or take a brush an apply a coat of paint. Easy-peasy!

Poison Ivy treatment

Because mosquito bites are the least of your worries when you’re out camping or hiking. Two words: poison ivy. Apart from the fact that you feel that your entire skin’s on fire or something, not even the best cream will make the itching go away. Now, if you want to skip the step whereupon you’re forced to wear gloves or something as not to upset those pustules, try applying a little bit of toothpaste on the sting area. Of course, the skin sores won’t go away overnight, but you would feel less itchy.

Defog your goggles and windshield

Having to wear prescription glasses since adolescence sort of made me come up with cookie solutions to the cleaning and defogging issues. Back in my days, lenses were made from regular glass. Sure, they were heavy as shit, but at least there was no fogging. Fast-forwarding a bit, nowadays prescriptions are lighter, cheaper, more resilient to scratches, but they do tend to fog out more frequently compared to their glassy counterparts.

Anyway, if you want to prevent fogging, which becomes particularly dangerous when you’re behind the wheel, rub a little toothpaste on the lenses and rinse before leaving the house. I wouldn’t recommend doing this more than a couple of times per month since excessive use of water, and other stuff can wipe away the anti-glare and blue light coatings.

No more bruising

Bruising’s the inevitable denouement of any kind of sudden pressure exerted on the tissues. Remember when we were kids, and we used to come home covered in scrapes and bruises after a whole day of biking?

Well, times might have changed, but habits have not. I for one can’t let the week go by without a brownish patch on my arms and legs. A quick fix for bruises – making a thick paste out of water and toothpaste and applying it to the future bruise area.

The ingredients inside the toothpaste will restore circulation, preventing major discolorations and cutting down on recovery time.

Word of caution though – if you see more of those bruises on your body and know for a fact that you haven’t hit yourself within the last couple of hours, you should ditch the toothpaste remedy and go see a doctor. It may be the beginning of a simple iron deficiency or something life-threatening.

Makes for stronger nails

Brittle nails can be solved by dunking your hands in a bowl of water mixed with toothpaste. Yes, I know it sounds a little bit far-fetched, but do keep in mind that nail brittleness has all sorts of causes, one of them being germs. Since toothpaste contains quite a bit of that stuff, it will eliminate most bacteria, leaving your nails stronger, longer and shinier (was kidding about the longer part).

If you’re that kind of person whose nails tend to exfoliate no matter what you do, I would advise taking some calcium supplements or eating calcium-rich foods. Of course, you should also use this at least twice a week.

Revive your CD and DVD collection

Growing up in the era of computers and laptops, I managed to amass a collection of CDs, DVDs, Blue-Rays, and, yes, even floppy disks. Although most youngers don’t even know what a floppy was or how hard it was to store docs and games on them, from my experience I found them to be more resilient compared to optical storage devices such as CDs or DVDs.

Not even keeping them inside their original cases doesn’t seem to safeguard them from scratches. Sure, losing a CD or two is no big deal, considering that most of them are probably filled with all kind of crap we don’t need.

Still, it becomes truly tragic when we lose stuff like those CDs\DVDs where we stored family vacation photos or the holy wedding DVD (guilty!). It’s a gamble, but there may be a way to access that CD or DVD long enough to copy the data to your laptop or computer.

Take a closer look on the back side of the recording device and notice where the scratches are. Put a little bit of toothpaste on that area and wipe thoroughly with a clean cloth. As I’ve said, it may or may not work, but what have you got to lose?

Remove ink and tobacco stains from hands

Since everybody’s now bonkers about working on the computer, the ink has become less and less popular. Still, for those of you for who the fountain pen still means anything, ink spots from the fingers can be very difficult to remove.

A quick workaround would be to run some toothpaste on the stain and rinse with clean water. Works for clothes too. As for tobacco stains, you will need to prepare a mixture consisting of water, toothpaste, and baking soda. Stir and use a toothbrush to put the stuff on your fingers. Give it a good scrub and, voila – no more stains.

That about wraps it up on my cookie 10 alternative uses of toothpaste. If you were still in doubts about toothpaste should be stockpiled or not, here’s the answer to your question. As always, if you feel that I’ve missed anything, don’t be shy and hit the comment section. Would also love to hear about more how you people use toothpaste in the field.

Before you go, you may also like:

This is more than just about your guns…
How to survive any medical crisis situation with ease
10 Easy Steps to Secure your privacy
Secret Military Solution For Power Independence

DIY Unlimited water source
Why a food reserve is way better than the Federal Reserve
Lost Skills of our Ancestors that still work today

A thought crossed my mind – is there any other way of using toothpaste besides, well, brushing your teeth? I found not one, but ten.

Under the spring sun amid a cool breeze you are probably looking over your garden at the many small sprouts or purchased plants that are in the ground. It might seem like you are years away from harvest. The truth is Spring is the time of rapid harvest.

Spring plants come up quick and they can be very prolific. When you start to think about it you might start considering a simple easy cellar for your spring harvest.

Some of the first plants to harvest are things like English peas and radish. They are both unique because they do not can or preserve well. If you have a generous harvest of these, you might be interested in a means of storing them long term. Radish being a root vegetable means they are great stored in a root cellar.

Garlic, new potatoes, asparagus and turnip greens are all things that have very short season to harvest. If you planted your garlic in the fall you are gonna be into a serious harvest of garlic in a hurry. Sure, you can store that harvest in your cabinets, or you can create a simple root cellar to store that garlic for months.

How Much Space for this Cellar?

The best part about building a cellar is that you can do it any way you’d like. Basically, you can build your root cellar the size you need to be effective. Are you going to use this cellar just for food storage, that’s a great idea!

Roots like carrots, potatoes and turnips can last over 6 months if you have built your root cellar properly. They are that effective.

Even small urban homesteads can section off enough land to make an easy root cellar. It also doesn’t have to be incredibly expensive.

If you have a harvest to store its in your best interest to consider a root cellar.

Don’t forget, you have summer harvest right around the corner.

What About That Summer Harvest?

Maybe you’re not intimidated by that spring harvest. Perhaps you just eat all that fresh food and you don’t have much left. That could be the case. Some people are wild about those baby greens like arugula.

That said, once those zucchinis, squash, pumpkins, tomatoes and cucumbers start popping up things get crazy in a hurry. We are all guilty of leaving the zucchini plant for too long and then returning to find a blimp of a vegetable waiting for you.

The summer gets out of hand in a hurry. Before you know it, you are giving bags of produce away and you are sick of eating all that great food you grew.

That is because you haven’t a place to store that food long term or even a place to store all that canned ratatouille and tomato sauce.

Don’t forget, a root cellar is not only a great place to store root vegetables but also canned foods. Storing your canned tomato sauce and pickles in the root cellar will both save you space inside and give a new space for storing other things.

How About Even More Storage?

Don’t just start digging a hole. Get yourself some proper instruction. This guide is filled with tips on how to build an underground root cellar and even an emergency bunker!

This resource is designed for those of you who are looking to take the first steps in building and managing their own root cellar. There are also some other perks.

  • How to effectively store your food supply for 3 months to prevent them from spoiling.
  • How to effectively store water to enable your family to have access to clean water for months.

Don’t forget, this storage situation also means that you are going to be able to store even more things in your root cellar. If you are considering a root cellar maybe you also have dried food storage. Well, no one has room for all that dried food storage.

A root cellar keeps a nice consistent temperature and is a great way to store that long term food storage. What other preps can you store in a root cellar? Well, its up to you.

Now is the time to take action and get these building projects under way. The beauty of this root cellar is that your walls and floor is made for you already. Aside from some framing you have most of the cellar built for you by nature!

Conclusion

We all know that there are several reasons to grow more of your own food. From price to pesticide there has never been a better time to expand your food sourcing efforts. You will be amazed at the difference a few fruit trees; 6 chickens and an expansion of that garden can have on your life.

But what’s the point of all that if you don’t have a means to store all that extra food? Learning how to can, preserve and having a place to store that extra food is a crucial part of the process. That is where this root cellar comes in.

Even if you don’t live on 20 acres it doesn’t mean you wouldn’t benefit from a little more climate controlled storage space. With a little help on the DIY build you can make that happen in your own yard or on your property.

Once you get the go ahead, you are going to be on your way to some serious storage space and a more self-reliant lifestyle.

Let me know how that worked for you.

A root cellar keeps a nice consistent temperature and is a great way to store that long term food storage. What other preps can you store in a root cellar?

There are tons of people making money from simple videos on YouTube. It helps if you are an expert, but you do not have to be. In fact, it seems that viewers tend to fall in love with a particular YouTuber and it doesn’t matter what they do once that connection is established.

You can find your following, as well, with your prepping or survival channel.

There are some things you are going to do if you want to stand out but its well within the realm of possibilities. The best part about YouTube is that you can make money from your channel in a few different ways.

These funds can be funneled towards other preparedness projects. That is the beauty of your money making YouTube channel.

The Competition is Thick

Before we go off into the possibilities you must understand that building an audience on YouTube can be tough. There are lots of people out there trying to do just the same thing. You will experience stiff competition.

Its not to say its impossible but just understand you are in for a struggle. We will talk about how to overcome that struggle in this article.

Consider Your Topic

You might be confused at this point. Yes, we are talking about making a prepping YouTube channel, but you need to get more specific. What you talk about is going to define much about your channel. Here are some channel topics that are basically about prepping but are topic driven.

  • Wilderness Survival
  • Urban Survival
  • Prepping on a Budget
  • Prepping Gear
  • Prepping for Seniors
  • Survival DIY

As you can see there are several topics that a channel can focus on. This focus will help people find you and it will keep them coming back.

Your viewers will want to know what they are going to hear about when they come to your channel. You can also add value by bringing others who focus on your topic to appear on your channel. Or you can read from other resources that relate to your topic.

Quality Over All

If you are going to compete in the YouTube landscape, you are going to need to consider quality over all. That means you are going to need to have videos that are organized and add value to the viewer. Remember, there must be a reason for a person to watch a video.

When it comes to the prepping and survival niche this often comes down to a few things in particular:

  • Skills
  • Gear
  • Scenarios
  • Loadouts
  • Plans

Quality also means you should film with an up to date smart phone at the least. You can invest in some cheap lighting and audio that will really make your videos stand above everyone who is just recording videos on their phone.

The other thing to consider is consistency.

Consistency is another winning trait amongst YouTubers. Those channels that post daily are some of the most successful. Just be sure you have a reason to post. Again, its quality first.

Making Money with YouTube

So, this is where the rubber hits the road. Once you have created a YouTube channel. Through your channel you are going to be able to make money in a few different ways. Most people think that you can only make money by having tremendous amounts of viewers and getting ad money from YouTube. That is one way, but you need lots of viewers.

Let’s talk about how you can make money right off the bat. There are a couple ways that you can make money off your first video.

Sell Your Own Products or Services

Without having a bunch of subscribers or even viewers you can make money by promoting your own products or services. Maybe you do preparedness consulting. Well, after a high quality video about a certain prepping topic you could plug your service.

Maybe you have a book on survival. You can use the same method to basically advertise to the YouTube community for free! Not a bad deal.

Link to Affiliate Products

Another way you can start making money, immediately, from YouTube is to link to affiliate products in your video descriptions. To understand this, you must understand affiliate commissions.

Affiliate Commission — This is a percentage of a sale that you make on another seller’s product. If you are part of an affiliate program you will get special links that can be clicked by your viewers. These links will lead them to products that you choose.

If the person who clicked that link buys one of the products you will receive an affiliate commission. Its usually under 10% but it adds up if you start putting out a few videos with links each week.

To best leverage these affiliate links, you are going to want to make videos about certain products that are linked below. Gear reviews are a great example. You review a top tier survival knife and then you link to it in the description below so your viewer can buy it and you can get the commission.

Most companies offer these types of commissions these days and you can also join Amazon’s affiliate program that gives you access to millions of products.

Bonus Tip — The VR or Virtual Response

A quick way to power up your channel is to create what are called VRs or virtual responses. These can be critical or congratulatory of other videos on YouTube.

If you watch a video from another larger channel and they butcher a topic, that you are very informed on, you can create a VR response and tell the YouTube audience about it. This is a great way to get the attention of others who are fans of a larger channel.

The virtual response is basically a piggy back on a resource that is much greater than your own in hopes to shave some listeners from there channel to yours. Maybe you just get people to watch your videos and the other channels videos, too. You need a means to break through so others can find out about you.

Either way, its an effective tip for building your channel.

There are tons of people making money from simple videos on YouTube. It helps if you are an expert, but you do not have to be.