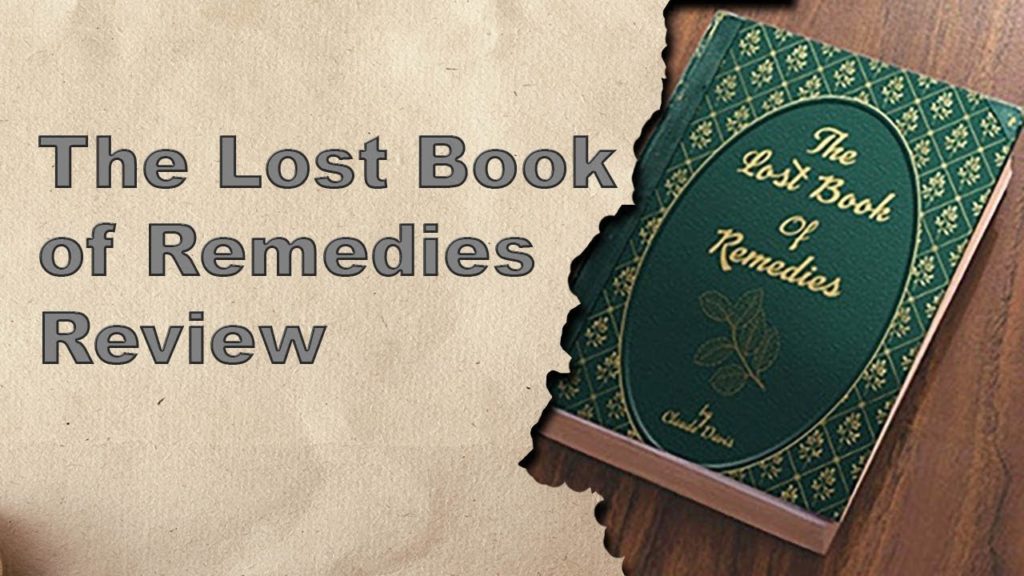
Home2019 (Page 16)

The Lost Book Of Remedies Review – Looking for a full review of The Lost Book Of Remedies? Does It Work? Find all about this The Lost Book Of Remedies Program by Claude Davis now!

Product Name: The Lost Book Of Remedies

Author Name: Claude Davis

Bonus: Yes

Official Website: CLICK HERE


The Lost Book Of Remedies Review:

Thanks to technology, luxury, and progress of the schedule, we are involved in our world that we completely forget to admire nature and all the good that it gives us. Even in difficult times and times of illness, we can go directly to doctors and professional, and voluntarily take costly treatment claim that harm our bodies more harm than good. These treatments can help you solve the problem on time, but they will not help you solve the problem completely.

So if you’re awestruck what options you’ll have to optimize your overall health, except for those expensive therapies, then nature is what you need. Yes, in nature there are hidden stones with herbs and herbs that many people do not know. And there is no better way to get to know all these great solutions than with this lost book on treatment. The Lost Book Of Remedies e-book is a great guide introducing you to the world of nature conservation. The Lost Book Of Remedies best thing about this book is that it was developed a few years later Claude Davis Research, which has all the wonderful medicines that have been used since antique times.

What is The Lost Book Of Remedies?

The Lost Book Of Remedies is a subversive e-book that suits one of the developer’s toolkits to survive the many benefits of herbs and natural ingredients that have been contacted to give a sense of security that your health is stored and protected from the crisis. Even you can grow a garden to grow effective herbs to save everyday life without spending time and money. The Lost Book Of Remedies e-book will guide you to the right path to ensure safety, shelter, water, food and all medications to save your life or your children at any time. The Lost Book Of Remedies guide describes plants grown in your garden. But you do not know the benefits of this plan, which can help you overcome important things. Sometimes it can replace antibiotic pills, reduce inflammation, stop bleeding, reduce arthritis, lower cholesterol, regulate blood sugar, overcome regressive brain diseases and much more.

The Lost Book Of Remedies Does It Works?How does The Lost Book Of Remedies work?

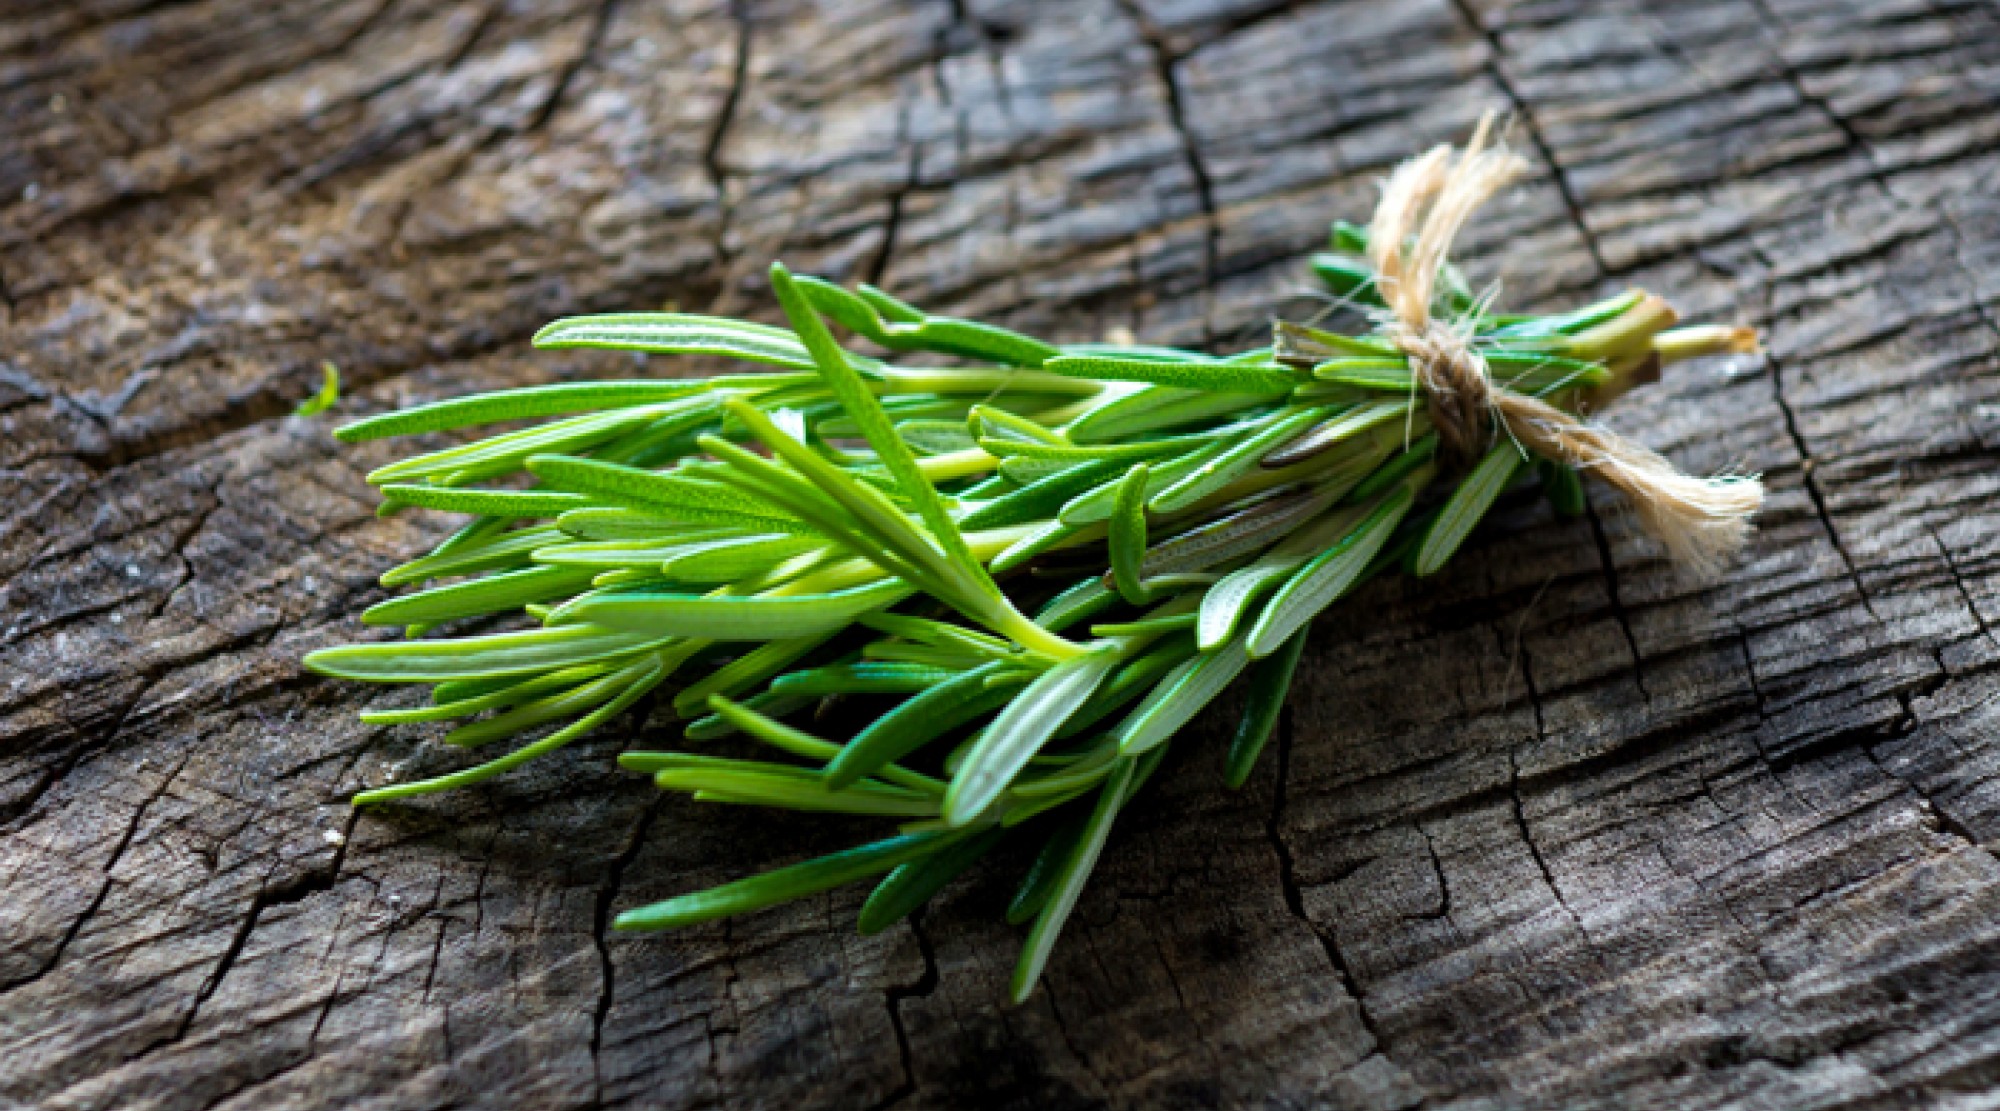
The Lost Book Of Remedies explains the use of natural elements such as angry Bear Paw, Bear Pelt log, beak One red powder, hawthorn or grape trees and more beneficial. In this guide, we show you how to grow step by step in a herb garden to solve health problems without leaving any symptoms. Here is a list of dominant anti-inflammatory plants that help heal wounds faster and effectively remove pain.

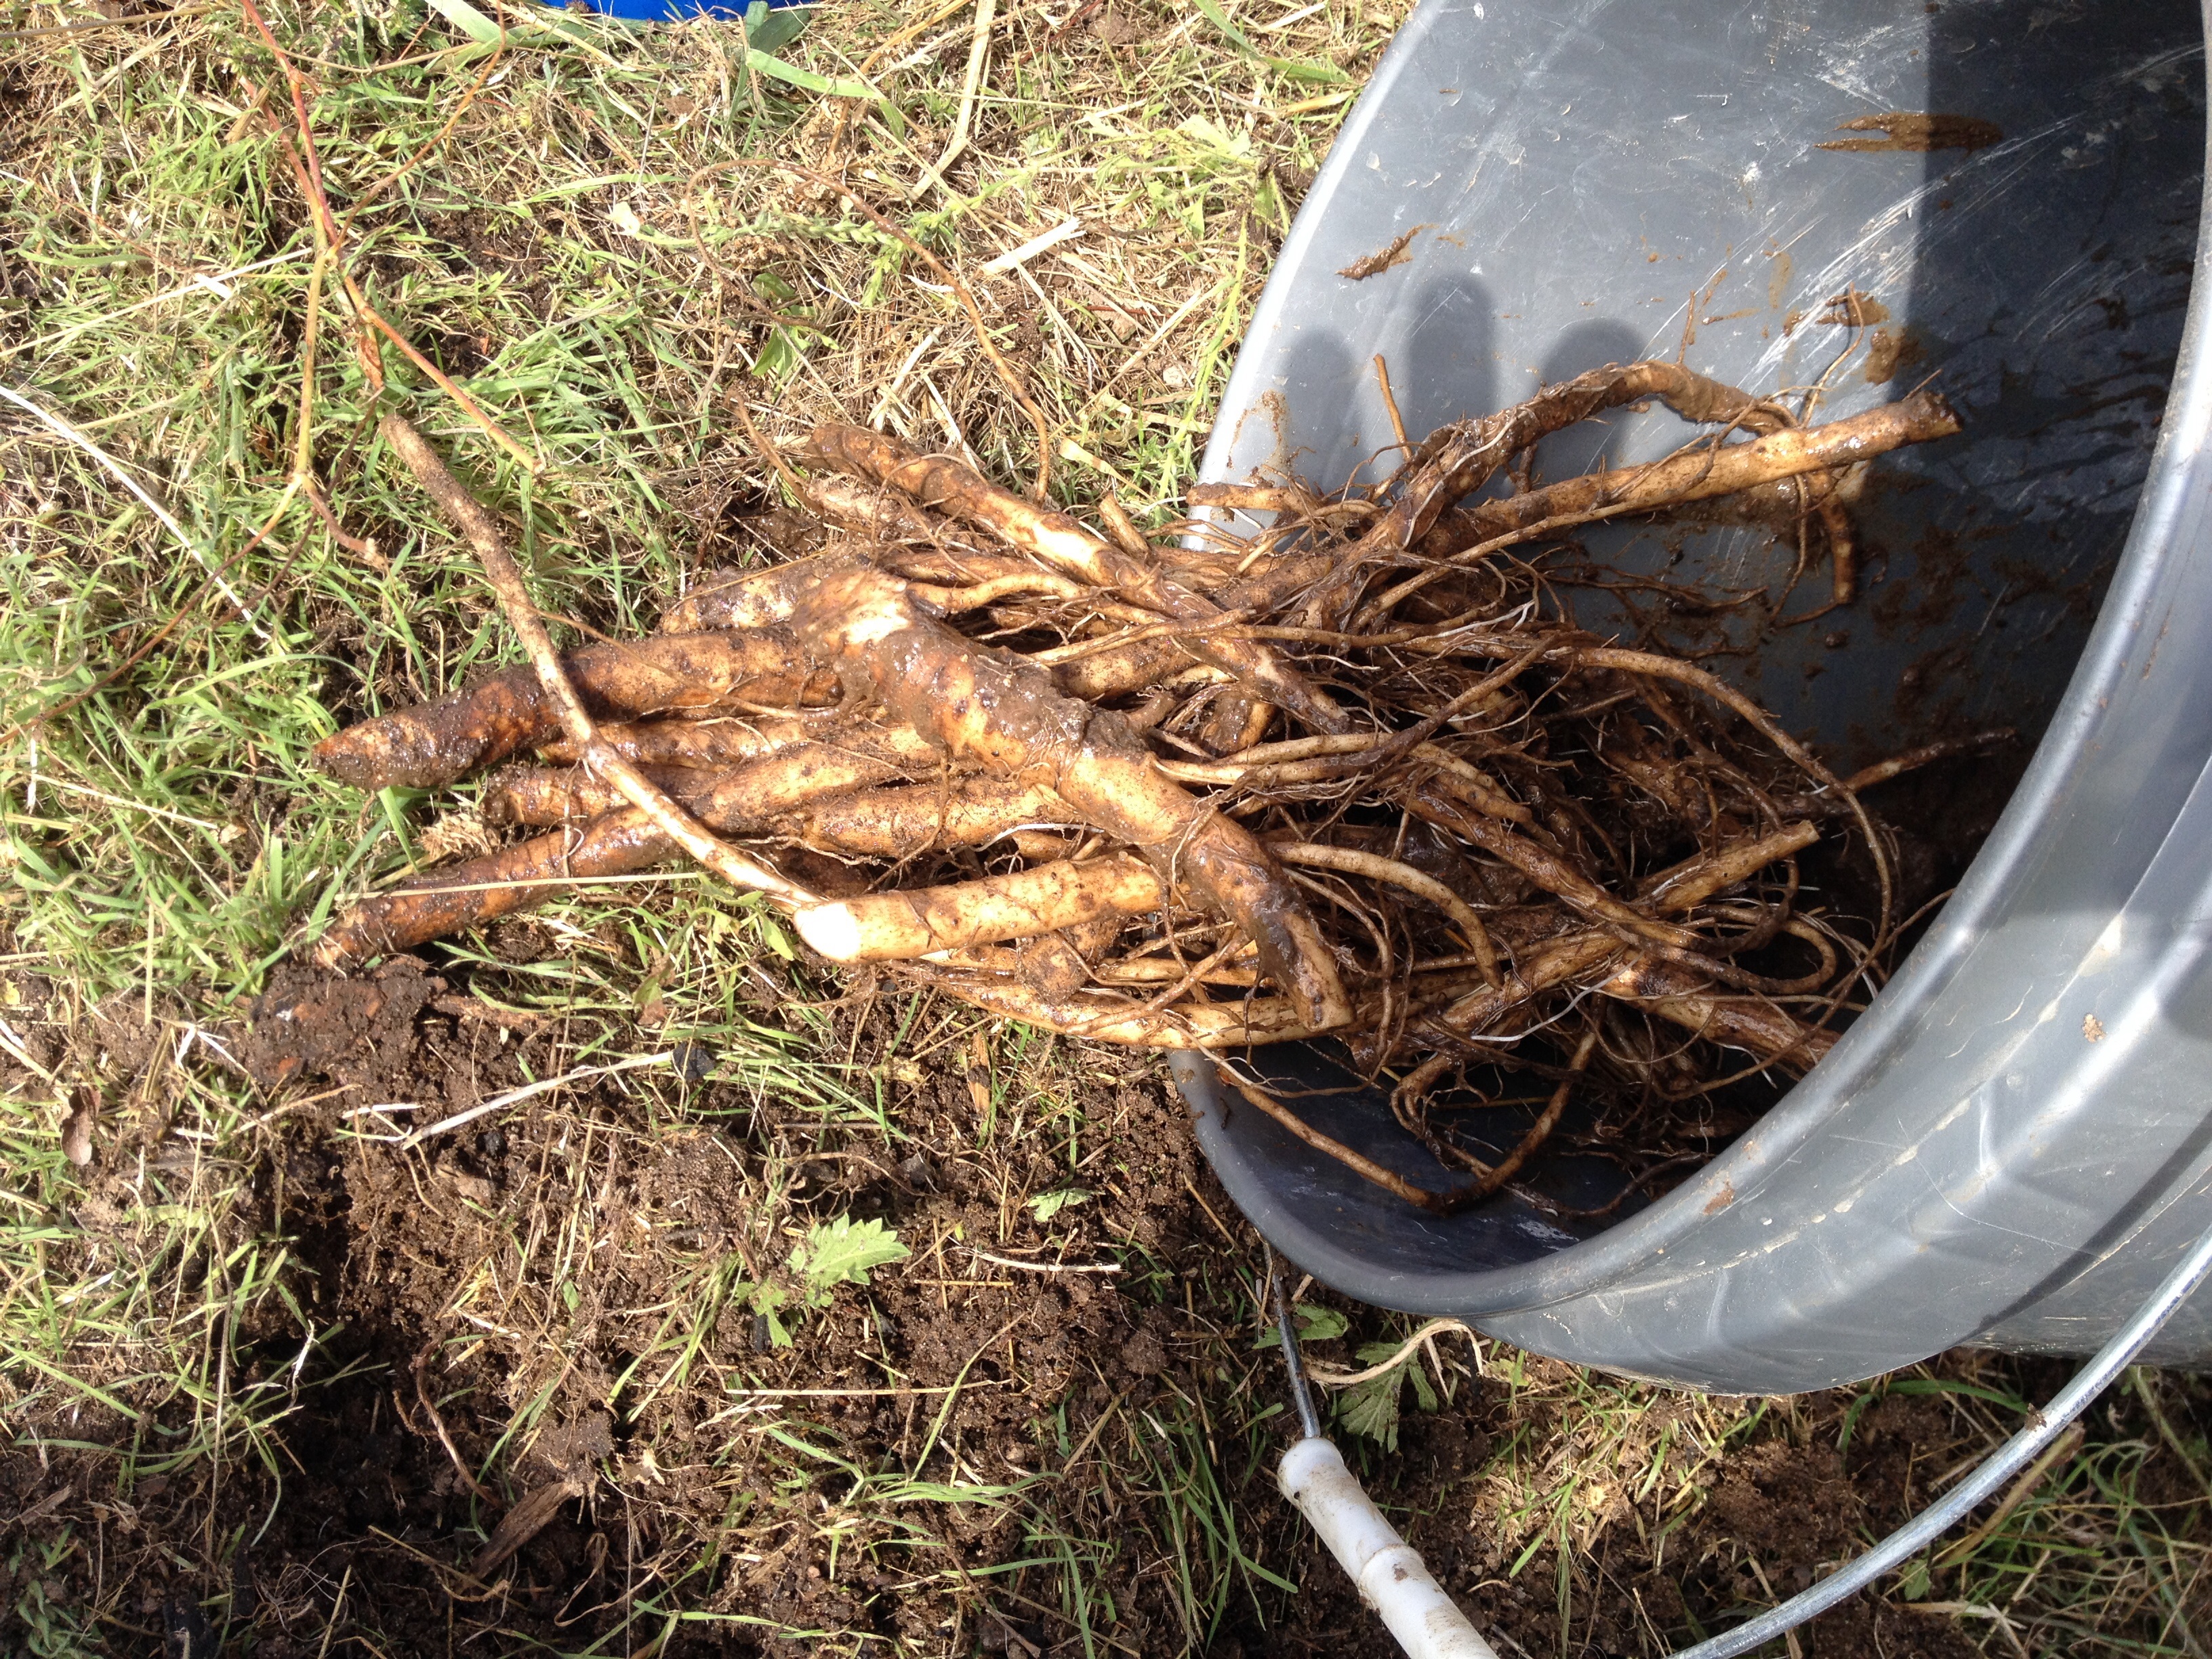
She noted that the required planting of cannabis plants with flowers that release strong antiviral properties, hidden in their roots, to overcome disease and disease. Get a chance to protect against infections caused by viruses such as influenza, herpes, hepatitis A, B, C, slowing down the causes and fighting all free profound.

The Lost Book Of Remedies productWhat will you learn from The Lost Book Of Remedies:

  • Yes, the eBook has clear and consistent instructions that will help you create your own medications. All instructions in this book are easy to follow and can be easily created.
  • Not many people know this, but using some herbs in your daily diet can make your health a miracle. A list of useful herbs that you can add to your daily recipe. The Lost Book Of Remedies book also contains a list of herbs that you can add to your daily recipes. Spices detoxify your body and protect it from viral and parasitic problems.
  • Ways of maintaining health – in addition to solving problems related to health care eBook also offers ways to maintain health at regular intervals. All you need to do is use the herbs and medicines listed in the instructions.

Bonuses:

  1. Everyday Disaster Medicine Guidebook
  2. An Awesome 80 square feet SHTF Medicinal Garden

The Lost Book Of Remedies bonus

Pros:

  • The Lost Book Of Remedies helps to balance health with natural ingredients and herbs to get a better result.
  • You can quickly remove toxins with side effects from your body.
  • The Lost Book Of Remedies is popular, available and there is no risk of using herbs and the mentioned ingredients.
  • Indicated self-control methods have been well tested and clinically proven to solve the cause of the problems.
  • The Lost Book Of Remedies e-book provides customer satisfaction guarantee options.

Cons:

  • If you take action or avoid a statement, you can be sure that you will receive a delay to get a better result.
  • Without an internet connection, you can not open this application because it is only available on the Internet.

Conclusion:

Overall, The Lost Book Of Remedies is highly recommended for all people. If you belong to people bored with these expensive medicines; then discard all useless things and use the natural gift given in the e-book The Lost Book Of Remedies. Of course, this is the right time to save lives and your loved ones, and The Lost Book Of Remedies is the best tool to eliminate the consequences of disasters or crisis. Many people already have access to this program and will be happy to recommend people to solve important problems. So do not miss this opportunity. Catch it before completing the offer.

Download-Now-Button-Yellow-PNG

>>>Click Here To Know More About The Lost Book Of Remedies<<<

The Lost Book Of Remedies Review – Looking for a full review of The Lost Book Of Remedies? Does It Work? Find all about this The Lost Book Of Remedies

‘Couple of days ago I was at home watching this movie about Cowboys and Indians. Great flick (Dances with wolves, it’s called), great actors – all in all, two hours well spent.

Why cowboys, Indians, and frontiersmen, you ask? Well, without getting into many details, the image of the tobacco-spitting, gun-slinging, man-of-fortune, which Hollywood was kind enough to sear into our retinae, it’s not quite what you would call representative.

In fact, life in the Wild West was not that wild – the village fool wasn’t made Marshall and trains weren’t robbed on a daily basis. Still, papa Hollywood did get one thing straight; life was pretty rough, meaning that the man had to do what a man had to do in order to pull through and to make a name for himself.

And then it struck me – cowboys weren’t those guys in goofy hats and chaffing pants, but the first preppers. The same thing could also be said about all those great and brave men who wore the shoes or rather the hat of David Crockett. Yes, those gun-toting maniacs were, indeed very knowledgeable when it came to surviving; you had no choice back then. One mistake, and it was curtains for you.

Anyway, in doing a bit of research on cowboys and frontiersmen, I stumbled upon something very curious – those guys were packing, and I’m not talking about guns here. Imagine that those goofy outfits had a reason for being that way; more pockets and satchels means more space to store things.

And, let me tell you – those guys really knew a thing or two about what I like to call carrying smart. So, history lesson aside, let me show you what I learned about packing from cowboys and frontiersmen. Without further ado, here are 7 objects 19th-century preppers carried in their pockets to survive.

  1. Knife

You thought I was going to start my list with the old six-iron, didn’t you?. So, about the knife – everybody was carrying one, regardless if he was Marshall, bank robber, saloon keeper or the town’s drunkard. Why? Because it was very useful for a lot of stuff like skinning game, splitting wood, cutting leather, and, of course, self-defense. Most 19th-century cowboy knives had a six-inch blade and were made from steel, not the stainless variety though.

Still, they were quite sturdy, mostly because all of them were made in a smithy and from cast steel. I even read somewhere that the WW1 bayonet design (the one with the groove running along the blade’s length) was mostly inspired by the bush knives carried by cowboys and frontiersmen alike.

One of the things I liked about these types of knives is the sheath – made from tanned skin and looks awfully cool. Tried making one for one of my SOG knives. I’ll tell you all about in another article.

2. Bedroll

Now, this is an interesting piece of history. For most people, bedrolls are just pieces of cloth filled with hay or something. But they’re actually more than that. In doing a bit of research into Wild West survival items, I found out that bedrolls were, in fact, multi-layered.

So, you had two outer layers, which were made from rubberized tarpaulin. These were the ones that prevented direct contact with the ground. And, when rolled up, they also prevented the inside layers from getting wet. But wait, there’s more. Apart from the exterior tarpaulin layers, the bedroll had three or four inner layers made from the quilt.  They were also called sougans. As I came to understand, all four inner layers added padding and extra insulation, especially during those cold, windy nights.

Yes, you can say that the bedroll, which was, by the way, carried on the back of the saddle or tied up to a rucksack, is, in fact, the ancestor of the sleeping bag. Possibly not as comfortable or easy to carry as nowadays bags, but hey, at least they didn’t have to sleep on the bare ground.

If you go thinking that this went out of fashion along with cowboys, you would be mistaken. Seeing that there are so many people out there ready to pay a fortune to live like a true 19th-century outdoorsman, some companies have actually rebooted the bedroll (check out Smith & Edwards Co. if you’re interested in going retro).

3. Canteen

Times may change, but canteens stay the same. There’s no denying in the fact that a canteen is one of the most important pieces of survival gear, regardless if your Crockett’s disciple or someone with an acquired taste for off-grid living.

I remember the stories my grandma used to tell me about how the French soldiers used canteens for virtually anything during WWI. There’s this one that always makes me chuckle. Apparently, during the battle of Somme, considered to one of the bloodiest in the history of modern warfare, one of those clunky Mark V tanks froze shut one night. Neither the engineers nor the crew could get the thing open.

And so, to prevent the guys inside from dying of thirst, some soldiers came up with the idea of getting water and wine through the tank’s main gun barrel. Long story short, they’ve raised the barrel high enough for them to pour water through it.

The soldiers at the other end just had to hold their canteens in front of the loading hole until they filled up. According to grandma, they kept doing this thing for a couple of days straight, until someone came up with the genius idea of blasting open the hatch with a hand grenade.

Anyway, long before WW1, canteens were in very high, mostly because they doubled up as booze holders. Interestingly enough, back then, the canteens were much bigger compared to the ones used today and made from tough materials such as steel or cast iron.

Apparently, most of them were able to hold a gallon of water or liquid. Ingenious and resourceful as they were, they even came up with a way of cooling down the water even in the scorching sun. Before blazing the trail, the Cowboys would soak a cloth, which they would wrap around the canteen. The evaporation process would prevent the water’s temp from going up. Neat, right?

4. Tinder Box

There’s something that will give just about any prepper a run for his money. Let’s get one thing straight, though – there were matches back then, but were so expensive that most outdoorsmen would often save them for trading.

However, they did have a nifty way to start a fire – the so-called tinder box. Basically, it was a weather-proof box which contained several dry pieces of wood or thin steel wool and a flint. To start a fire back then, you would have had to use your knife on the flint for sparks. Yes, I know – simple, stupid, yet very effective.

You can create a cowboy-style tinder box using char cloth and a little piece of flint. I made one at home using an old tin matchbox found in grandma’s chest of wonders. And, because I’m kind of a nutcase when it comes to B.O. Bs, I placed this one in my heavy-duty bug out bag, along with a magnesium rod, weather-proof matches, and a Zippo lighter.

5. Slickers

Yes, I know they look cool as shit, but that’s hardly the point. Back then, there were no water-repellant ponchos or raincoats. So, cowboys had to rely on the so-called slickers, which were basically, a long coat made from rubberized or tarred canvas.

Some models even came with hoods, but they were not that sought out since our outdoorsmen relied on them hats most of the time. Slickers were great at keeping the water as far away from the skin as possible, but they also doubled-up as winter clothing. And, of course, it was far easier to pack a lever-action under a slicker that on your back.

6. Bandannas

Also called wild rags or mascadas, the long pieces of cloth were useful for a lot of things, not just to conceal one’s face during a brazen heist. During the cold months of the winter, outdoorsmen would use their bandannas as scarves.

If the firefight got out of control, the brave desperado could use the bandana to spot the bleeding. Also, quite handy when it came to manual labor. For instance, farmhands would wrap their wild rags around the hands to prevent sores or even bleeding when working with the plow or pulling on ropes.

Since water filtration gadgets came long after the Wild West era, our frontiersmen had to improvise. The bandana, albeit ineffective, was sometimes used to remove chunks of dirt or rocks from puddles or other water sources. And because smelling like the insides of a dead horse would have gotten you thrown out even from the most decrepit watering hole, these bandanas would have been used as sponges or washcloths.

7. Coffee Pot

Of course, I can’t help myself from saying a thing or two about coffee and caffeine. Back in the days of the Old West, a cowboy’s most treasured possession besides his shooting iron was the coffee pot. You may laugh now, but back then a coffee pot was somewhat of a luxury. Being made from steel or cast iron meant that it was quite hard to carry in a backpack or something.

Chuckwagon drivers would usually carry one or two pots for trade or personal use. As for the lone ranger, a good morning wouldn’t have been complete with beans, bacon, cornbread, and a mug of coffee. Of course, carrying a coffee pot would be for naught if you’re missing the key ingredient which is, coffee.

Life in the Wild West was very basic, even by 19th century standards. People wanted to make a living and, at times, that was more dangerous and life-threatening than one could imagine – if the outlaws or warring Indian tribes didn’t get you, the disease would.

We do tend to have this romanticised idea of the dare devilish stranger who participates in high-noon gun duels, with a crooked smile on his face, and his teeth brighter than peals. It was never like that, and those of you who took the time to do a little bit of research about the Wild West came to realize that life, indeed, was pretty quiet.

Sure, there were bar fights and shootings at the OK Corral but those were what I like to call history’s little whims.

Hope you’ve enjoyed my article on cowboy survival gear. Don’t forget to hit the comment section and let me know what your thoughts are.

The image of the tobacco-spitting, gun-slinging, man-of-fortune, which Hollywood was kind enough to sear into our retinae, it’s not quite what you would call representative. This is.

“There’s almost nothing you can’t can!”, answered the dashing and well-prepped prepper from behind the screen. Since yours truly has been up to no good recently, I thought I would entertain you once more with yet another ‘masterpiece’ on food-preserving methods.

Why the title? Well, as you know, there are some things which go along marvellously with the canning process and some things that do not. Or so they’ve told me. Anyway, quite recently I learned that with a little bit of patience and thorough research, anything kind of prepping food could be, well, canned.

This time, I’ve set upon doing a really wild experiment – attempting to can cheese. Yes, you’re probably asking yourself right now why would I bother doing that when I can probably find the same product in the supermarket at a super-low price?

Because I can do without spending extra money on something I can do in the comfort of my own home. More than that, Velveeta cheese, aka the guinea pig of my first attempt at canning cheese, is an all-time favorite for both myself and my family.

Although I always make sure that there’s at least one unopened pack inside the fridge, I can’t keep up the pace with the rest of the family. What I like about Velveeta is its silky and smooth texture which reminds me of Cheddar. Actually, it’s sort of a cross-over between Cheddar and mozzarella – goes along great with pasta dishes, but can also be eaten plain, with some nuts and grapes on the side.

Anywho, for my first attempt at canning cheese, I’ve used a 16 oz block I got from my corner store. My aim was not only to prologue its shelf life but also to add even more variety to the pantry of emergency foods. And so, after a little bit of experimental kitchen time, I came up with this easy cheese-canning method. I can’t say for sure, but I think you can replace Velveeta with mozzarella or another soft cheese. So, here’s what you’ll need to do in order to get canned Velveeta.

Ingredients

  • One block of Velveeta or a similar soft cheese (aim for family packs).
  • Pressure canner.
  • Old-school grater or electric food processor.
  • Canning jars.

Have you done gathering all the necessary gear and ingredients? Neat! Let’s make some canned cheese then. FIY, although in the US the closest thing we have to canned is string cheese, in other corners of the globe, canned cheese is very common (think about Feta or cottage cheese). Anyway, here’s how you turn a block of regular Velveeta into a canned delight.

Step 1. Get all your ingredients together and put some water in the pressure canner. Don’t forget to set your electric canner to 10 PSI for the best results.

Step 2. Take a soft cheese knife and cut the block into manageable pieces.

Step 3. Carefully grate each piece. Don’t apply to much pressure, though. Remember that you’re working with Velveeta which can become mushy if you squeeze it too hard. On the other hand, if you choose mozzarella over Velveeta, you can skip the grating part and sort of make thin stripes with a fork or something.

Step 4. Prepare your canning jars. While making the recipe, I’ve learned that warming up the jars a bit goes a long way instead of waiting for them to cool down as you normally do when canning various other stuff. So, after washing the jar with liquid soap and water or boiling them, while they’re still warm, place them inside your pressure canner.

Step 5. Grab the bowl or plate of shredded cheese and fill each jar. Don’t forget to leave a small space between the jar and the lid (at least 2 inches). As the cheese melts, it will leave behind a tiny amount of oil.

Step 6. After filling each jar with cheese, place the lids, and tighten them gently. As always, don’t apply too much force because the canner will do that on your behalf. A word of caution before putting on the lids – make sure the jars’ mouths are clean and that there’s no extra moisture. To make sure the lids create an airtight seal, I would recommend submerging them in hot water before putting them on the canning jars.

Step 7. Bring the water inside the canner to a boil and cover. Leave the jars to simmer for about 40 to 45 minutes.  Remove the jars from the canning machine and allow them to cool on their own. A solid piece of advice would be not to force-cool the jars. You’ll end up smashing them. The spread’s ready to be eaten right after the jars feel cool to the touch.

That’s basically it! Now, this recipe will get you about four or five regular canning jars of chunky Velveeta. If you like a smoother spread, try boiling the cheese beforehand. Take a big pot and toss the cheese inside. Use a spoon to stir the mixture.

When the cheese has melted, and one tablespoon of apple cider vinegar. Continue to stir. After the mix begins to thicken, kill the flame, and place the pot aside for five minutes. Don’t allow the melted cheese to cool down completely, as you will not be able to can it. Repeat the process above in order to can this batch of cheese.

Well, I hope this answers your question on the fine and very subtle art of canning. Yes, we can, and yes, we will do it, because our household emergency stashes will thank up from the bottom of their heart. Hope you’ve enjoyed my piece on canned cheese and do hope that you will try to prepare at least one batch. Let me know in the comment section how this experiment turned out for you.

Well, as you know, there are some things which go along marvellously with the canning process and some things that do not. Or so they’ve told me.

Welcome back. I hope you’ve enjoyed my first piece on wildfires safety and prevention. Without a doubt, it’s a force of nature you don’t want to reckon with; not that you can for that matter. One of the things I’ve been trying to say over these odd years was that preppers are neither gods nor immortals. Realizing that you’re knee-deep in trouble is the first step of your journey.

Try to deny it, and you’re dead as a doorknob. So, what’s the point of prepping and buying stuff if the end-point’s the same? Well, I’m not here to wax poetics or discuss philosophy, but I am going to say this – you need to keep it together, stay focused, and get into the game before the game becomes the death of you. Surviving’s not enough; you need to thrive and continue to live like a boss even though you’ve seen and experienced some nasty stuff. Some wildfire survivors cannot even look at an open flame, let alone use it for warmth or cooking. It’s essential you put everything away so that you can go on with your life.

Anyway, to broach today’s topic which deals in how to live through a wildfire and learn to tell the tale, I want to turn towards a twisty story I’ve heard several years after moving into my newly-furbished hunting cabin. So, there I was – new house, new emergency kit, lots of open space, a little garden; we even had a small white picket fence just like in the movies.

I was very well acquainted with the ranger. And the stories he told me; Geez, talk about human stupidity and carelessness. This one time, the entire regional fire brigade was called not too far away from my cabin because some kids decided to reenact some kind of chapter house initiation ritual. Long story short, several acres of forest went up in flames, leaving those poor idiots trapped inside.

As the ranger’s story went, the EMTs and firefighters couldn’t get to where they were, but they did manage to get them on the cell. As you know, the best way to escape a chocking death is to go low and slow. And that’s what they did. The trouble is, they had to crawl through 2 miles of heavy forest, with the fire on their tails. Miraculously enough, all of them made it through. Why? Because they used their noggins for once and paid close attention to what others had to say. That’s some great piece of advice, no matter the circumstance.

This inspired me to reach out to you guys to let you know that wildfires are out there and they are, as its name suggests, pretty wild. That’s why it’s always a good idea to know what do to if you get caught in the flames. Here’s what I had in mind.

Wildfire routine, as explained by the ranger.

  • Keep calm. Panicking won’t do you any good and, chances are, you will wind up in a ditch with a “smoking-hot” tag on your toes.
  • Forest shelter. If you’re in the forest during the wildfire, your best bet would be to find an area with little to no vegetation. A ditch, a dried-up river bank, an outcrop – anything that doesn’t have leaves, branches, twigs or fuel.
  • Duck and cover. Protect your head and hands by hitting the dirt and using your Go Bag for cover.
  • Wait. Don’t assume for a moment that the danger has passed just because you can’t see the flames. Wait around for a bit. In the meantime, try to get ahold of the authorities with you CB or cell.
  • Move only if necessary. If there’s danger nearby, leg it! Don’t run through as that will force your lungs to inhale more of those poisonous fumes. Steady your pace and keep your head down. If the smoke cloud’s too thick hit the deck and crawl to a safe spot.
  • House fight. If you have a little hunting cabin just like I have, stay indoors with all windows and doors locked and sealed. Before heading inside, don’t forget to turn on all your sprinklers and to aim them at the roof and outer walls. That should keep the masonry from reaching critical temperatures. If you have dust or hazard masks, use them. They’re not Halloween accessories, you know.
  • Cannonball! One nifty trick I’ve learned from the ranger is that you can seek shelter from wildfire by taking a skinny dip. Yup, if you happen to come across a body of water during a wildfire, jump in and stay there until it’s safe. Don’t forget to keep your head out of the water for as long as possible. If the flames extend over the water’s surface, take a quick look around for a safe place to get out, submerge, swim, and get away. Don’t take the skinny dip part too literally. Keep your clothes on.

Feels like I’m reliving a chapter from Emerson’s Self-Reliance. Well, when you’re a prepper, that’s what you basically do – become the character of your own survival book. I can’t say for sure what scares me the worst; the fact that wildfires exist and they cause a lot of damage, or that one of my peers is very likely to start one out of sheer stupidity. I’ll leave that one up to you, for the time being.

But think about this – what are the odds of a wildfire springing up in my neighborhood? Don’t go out there thinking that city folks are more protected from Mom Nature’s wrath just because they hide behind concrete and iron walls.

One more thing – have plenty of cash on hand. Doesn’t matter if it’s a wildfire or another natural disaster. Cash is king at any given time. That’s why I always like to put some money in my glove compartment and my Go Bag. See you around, guys, and stay safe.

Some wildfire survivors cannot even look at an open flame, let alone use it for warmth or cooking. It’s essential you put everything away and start prepping so that you

One thing you learn as a prepper is that any new skill you acquire will come handy one the day, cooking including. Sure, not all of us have the talent of whipping up a terrine or a souffle, but at least we learn to go by without actually having to starve to death or wasting away money on takeaways.

For my part, I actually managed to pick up a thing or two about the art of preparing delish and nutritious meals during one of those long blackouts. Yes, I’m still here, and no, the city council hasn’t gotten around to fixing the problem yet.

Now, for most of us, cooking’s not that big of a deal – get online, pick a recipe, follow the steps, and, Shazam, dinner’s ready! Still, the rules of engagement tend to change a bit if you’re forced to do the same thing during a power outage.

No electricity means that you will not be able to use the mixer, microwave, electric oven, toaster, and whatever cooking appliance running on electricity. Such a situation calls for some serious improv and, in today’s article, I’m going to show you my favorite blackout dishes and how to cook ‘em.

So, without further ado, here are my top 7 choices in no-power food.

  1. Oats

Yes, I know they’re not palatable, but they do wonder for the body. Most importantly, you can prepare anywhere and at any time, power or no power. Just let them soak overnight in a bowl of water. You can serve them for breakfast or dinner with assorted nuts, honey, and dehydrated fruits.


2. Gazpacho

Great Spanish dish and stupidly easy to make. I personally like to have fresh gazpacho year-round, since it’s packed with vitamins and minerals. More than that, this over glorified tomato soup is a wonderful thirst quencher during those hot summer days.

So, grab yourself a couple of diced tomatoes cans and empty them inside a large bowl (don’t forget to drain all of the juice). All that remains is to add one chopped onion, a thinly-sliced cucumber, a dash of cayenne pepper, salt, and pepper. If you’re looking for a bit a hit, you can add one teaspoon of Tabasco. Finish the dish by adding a little bit of olive oil, chopped parsley, and some lemon juice. That’s it!

3. Corn salad

This is what I like to call the lazy man’s easy way out of the kitchen. I usually like to prepare this dish when my wife’s away – kids love it, and it takes me about five minutes to get everything ready. So, it’s a win-win. Take a can of corn, drain the excess liquid, and put the contents inside a large bowl.

Chop any veggies you have left in the fridge (I like to add onions, red and yellow bell peppers, and tomatoes to my salad). For extra flavor, you can add a can of black beans. Toss it around a little, add a sprinkle of olive oil, and serve. If you fancy a bit of dressing, you can quickly make one by combining apple cider vinegar, olive oil, dried basil, pepper, and salt in a bowl.

4. A simple salad with apples and white beans

By far, my wife’s favorite Sunday morning salad. Super easy to make: pour the contents of white beans can in a large bowl and add some apple chunks. To finish the dish, you need only add some olive oil, fresh thyme, a handful of walnuts, salt, pepper, and scallions. Give it a good mix and serve.


5. Good, old grains and beans salad

This is one of the first recipes I learned during the first bout of blackouts. It’s very handy to know since anyone has at least one can of beans and a grain sack around the house. Take out your portable stove from the B.O.B and boil water in a small pan. Add the grains and let them cook for about 10 minutes.

Drain the grains and allow them to cool down. In a large bowl, combine one can of beans (works great with both black and grain beans) and the pre-cooked grains. Add salt, pepper, and a sprinkle of olive oil. If you wanna add consistency to your dish, throw in a couple of diced veggies, and chickpeas.

6. Chickpea or white beans spread

If you ever get tired of PB & J sandwiches, you might want to give this recipe a try. Empty the contents of a chickpea or white beans jar inside a bowl. Use a fork or potato masher to make them into a coarse paste.

Add some olive oil, parleys, a little bit of mint, half a tablespoon of garlic powder, and some oregano. You can serve this spread with white bread, toast, and even crackers. I personally like to serve it with oven-baked white bread – if you want to get all fancy, take a clove of garlic and smear each slice of bread before adding the spread.


7. Tuna salad with canned corn and green lettuce

Personally, I prefer this recipe over all those BS, new age stuff with salmon or whatever. Grab yourself green lettuce and wash it thoroughly with cold water. Using your hands, rip it into big chunks. Add a can of tuna over the salad (don’t drain the oil inside) and a can of sweet corn.

To finish this dish, pour half a tablespoon of olive or sunflower seed oil, salt, and lemon juice. Toss it around and serve. This is what I like to call the ultimate detox dish – very healthy and tuna being packed with omega-3 fatty acids and all that, it’s a breath of fresh air after eating spare ribs and burgers.

Hope you’ve enjoyed my list of blackout dishes. Think I’ve missed something? Hit the comment section and let me know.

No electricity means that you will not be able to use the mixer, microwave, electric oven, toaster, and whatever cooking appliance running on electricity. Such a situation calls for some

You know ‘em, love ‘em, and, most of the time, you buy them by the pallet. No wonder MREs are so popular since they make excellent snacks while providing your body with all the proteins and fats it needs to keep on rolling. But let me ask you a question here – is it really necessary to go to the military supplies store to buy MREs every time you run out? The answer’s “no” because these delish treats can be baked in the comfort of your kitchen. What’s even great is that you already have all the ingredients this recipe requires.

When I was doing my research for the first piece on pickling meat (be sure to check it if you haven’t done so already), I discovered, much to my bemusement, that there are lots of preppers out there who wanna know the best places from where one can buy Meals Ready to Eat. Can’t say that I wasn’t tempted in pulling a fast one by doing a piece on top 10 places that offer great bargains on MREs, but, then again, I really wouldn’t want you guys to spend more of that hard-earned cash.

I came to realize that my folks were baking MREs, long before the stuff hit the market. So, is this a family recipe? Yes, it is! An old one, at that. Mom told me she picked it up from my great-grandmother’s recipe book, who was a sister of mercy back in WW1. Apparently, this stuff would sell like hot cakes during the Great Depression, mostly because they go along so well with a glass of beer or moonshine or whatever (that raised a couple of eyebrows, back in the time).

After baking the first batch, my wife and I did the math: we spend somewhere around 20 on the ingredients for 8 jumbo-size MREs (although we could have made more if yours truly wouldn’t have sampled the mix too many times). That kind of money will probably get you around 4 or 5, and we still got enough left for another batch.

Still not convinced? Keep on reading for our killer survival ration baton recipe.

Why should I bother baking when I can always hop on the Internet to buy some more?

Because, contrary to popular belief, knowing your way around the kitchen is as important as learning how to swim or perform CPR. And we’re not talking here about whipping a quick breakfast or curing meat for long-term storage.

Nope, far from it! Cooking’s a no-brainer if you know how to follow a couple of simple steps.  And by that, I mean that you’ll be able to whip up a delicious and nutritious dish in no time, even if you’re that kind of person who sees the kitchen as just a room. Since I know most of you guys enjoy a good survival ration baton every now and then, I’m going to show you that it’s easy-peasy.

As I’ve said, the recipe involves ingredients found around the house – honey, assorted nuts, sugar, oats; stuff like that. There’s nothing fancy about this recipe, and it will only take you a quarter of an hour, tops. The result – 8 crunchy and sweet energy bars, each of them packing at least 3,000 calories. Check out it for yourself.

Get ready to ruuuuuumble!

As I’ve told you, all the ingredients for this recipe will cost you around 20 bucks, at most.  If you’re not too keen about going shopping, you can always order them online. Now, for 8 survival ration bars you’re going to need:

  • 5 cups of dry milk powder.
  • 3 tablespoons of honey.
  • 3 tablespoons of water.
  • 1 cup of granulated or white sugar.
  • 1 pack of gelatin (at least 3 oz)
  • 1 cup of peanuts or assorted nuts.
  • 2 cups of dry oats (you can also use normal oats).
  • 1 cup of dried cranberries (if you’re not too fond of cranberries, you can replace them with trail mix or assorted dried fruits of your choice).

Managed to grab all the ingredients? Neat! Let’s start making some survival bars.

Step 1. Preheat you over. Aim for 350 degrees.

Step 2. Grab a large bowl from your pantry and mix the following ingredients in order: milk, oats, nuts, and sugar.

Advice: use a wooden spoon or spatula to mix the ingredients (avoid using metal because the resulting mixt will have a bitter taste to it). Don’t stir too fast. You’ll want your mix to be a little chunky. What I like to do is to sort of dip the spatula and bring everything from the ground up top. Do this for a couple of minutes to make sure that there are no air bubbles left.

Step 3. Time to prepare the gelatin for the bars.

  • Grab a small pan and empty the gelatin pack’s contents inside.
  •  Add three tablespoons of water (don’t add more otherwise you would end up with mush).
  • Add three tablespoons of honey to the pan.
  • Crank up the heat and bring the mixture to a boil.

If you want to add a dash of color to your energy bars, try using some edible paint. Go crazy with them.

Step 4. It’s now time to put together everything – the dry and the moist ingredients. One thing you shouldn’t do would be to let the gelatin and honey mixture cool down completely. If you do that, you won’t be able to mix them with the dry ingredients.

So, toss the spatula aside, and ready your hands. Yes, you’re going to use the hands for this part. It’s much easier and, why not, fun. Don’t forget to wash them hands before messing with the mix.

Just like before, stick your hands inside the mix and bring the stuff on the bottom right to the top. Do this for a couple of time to make sure your dry ingredients are thoroughly mixed.

When you’re done, grab the gelatin pan. Pour a little over the mixture and use your hands to knead the stuff. Continue pouring and kneading until there’s no more gelatin.

Advice: the first time I tried doing this one on my own, the dough turned out to be way too dry even after pouring the entire contents of the pan. To make is moister (wipe that smirk off your face), add a little bit of lukewarm water or even a tablespoon of milk.

Knead, knead, and knead again, until everything’s hunky-dory. If you want your batons to be extra puffy, cover with a clean cloth and it aside to rest for around half an hour. Plastic wrap also works if you don’t have a cloth.

Step 5. Place some baking paper on an oven tray and pour the mix right in the middle. Then, using a spatula or your hands, spread it around as to cover the entire surface of the tray. Over should have reached the desired temperature by now.

Step 6. Use a pizza knife or the other end of a wooden spoon to separate your energy bars. I like to make them rectangular, but you’re free to try out any shape you like (next time, I think I’ll make them in the shape of hearts or Christmas trees just because I can).

Step 7. Stick the tray into the pre-heated oven and bake for 20 to 25 minutes (might takes less if you have one of those convection ovens). Here’s what I like to do in order to see if the bars are ready to be taken out of the oven.

FYI, this trick works for all your baking needs (cake, cookies, pastry). So, what I do is take a toothpick or small piece of wood (grandma used a clean straw from the broom), and sort of poke a small hole in the middle of the dough. Take out the toothpick and look at it – if the dough’s still clinging to the toothpick, it means that it’s not yet ready. On the other hand, if the toothpick’s clean, take it out of the oven before it hardens.

Step 8. Take the tray out of the oven and allow the power bars to cool down before bagging them. You can store them in zip-lock bags or airtight plastic container.

More on home-made MREs

That’s about it for the baking part. It’s exactly what I’ve been telling you – simplicity itself. Now, some of you are probably wondering about shelf life.

Well, since this recipe calls only for ingredients with very long shelf life, in theory, they should last for quite a while if you’re careful enough to store them in a proper environment. Still, if I were you, I would bake a fresh batch every couple of months or so just to be that the B.O. Bs are up to speed.

For those of you with peanut allergy, I would advise you to replace them with dehydrated fruits. You can also use more oats if you like that stuff.

Also, if the good, old doc told you to cut back on the sugar, you can always 86 the sugar from the recipe and stick to honey, pun intended. I wouldn’t use artificial sweeteners like stevia because that would give the bars and unpleasant, metallic-like taste.

The best thing about this recipe is that no matter how clumsy you are in the kitchen, you’ll still be able to make it to the finish line. First time I tried baking MREs, I poured the mixture from the side, instead of putting it in the middle of the tray. Yeah, I ended up doing more cleaning than actual baking.

If the power goes out, which tends to happen of a weekly basis where I live, you can still bake these thingies if you have a gas oven, a thing I highly recommend.

Another thing you can try out is to try an all-nut version (without fruits). Of course, that would definitely make the calorie count go through the roof..

So, have fun with your baking and don’t forget to hit the comment section to show me how your MREs turned out. Ta-da, guys!

Is it really necessary to go to the military supplies store to buy MREs every time you run out? The answer’s “no” because these delish treats can be baked in

Power’s out; car won’t start, pantry’s empty – anything can happen. You either need to learn how to make do without or to take the high road which, in this case, means making it yourself. I’ve spent many sleepless nights thinking about how to be even more self-sufficient. Sure, learning how to whip up a quick dinner or to repair stuff around the house helps, but something was missing.

Then it hit me: what if took a breather from shopping and instead tried to make my own things at home? “How hard can it be?”, I told myself. Well, everything’s hard if don’t know what you’re doing. Luckily, I have this magic lamp called Google which revealed a couple of very handy instructions on how to make day-to-day items.

So, for my first no-shop month, I started with one of the most common things found around the house: soap. Yes, I stopped stockpiling it for a while and instead I tried a quick and easy recipe I got off the Internet. Have to say that I’m quite impressed with how it turned out, considering that I had no clue as to how soap-making works.

Pity that my great-grandmother passed away. Mom always used to talk about how she spent hours toiling in the shed, making soap and all kind of cosmetic stuff. Apparently, the bars my great-granny made were so good, that you could hardly make any difference between her home-stuff and supermarket soap.

Anyway, because I know that most of you people would rather make than buy, I’ve decided to share with you the recipe I’ve uncovered. As I’ve told you, it’s super easy to make, and with a couple of other ingredients, you won’t even know the difference. So, enough chit-chat! Let’s get cooking.

Materials needed

  • An old newspaper (to cover your work area)
  • Canning jar (I used a quart jar for this project).
  • Gloves and goggles.
  • Spoon.
  • Thermometer.

As for ingredients, you will need:

  • Coconut oil (about 2/3 of a cup).
  • Olive oil (2/3 of a cup).
  • Liquid oil of choice (you can use sunflower, almond or grapeseed oil; aim for 2/3 of a cup).
  • Lye (around ¼ of a cup).
  • Distilled water (2/3 of a cup).

How to make

Step 1. Cover the table with the newspaper and put on your protective gear.

Step 2. Put the canning jar on your work area.

Step 3. Pour the water into the canning jar.

Step 4. Slowly pour the lye over the water, while stirring with your spoon. Don’t get too close, as the fumes resulting from the reaction are toxic.

Step 5. Wait for the mixture to settle. You can proceed with the next step when the water clears up.

Step 6. In a pan or bowl, mix your coconut oil, olive oil, and the third oil of your choice (I used sunflower for this recipe).

Step 7. Stick the pan of mixed oils in a microwave for about one or two minutes. When it’s done, stick the thermometer in and check the temperature. It should be between 95 and 105 degrees. This is the sweet spot of soap-making – it the temp’s lower, you’ll end up with mush.

Step 8. After the oil mixture reached the right temp, pour it in the canning jar over the lye and water. You may want to add an extra ¼ cup of lye to ensure consistency. Slowly add the lye while stirring with your spoon.

Step 9. Stir the mixture for about five minutes. It should have a nice, vanilla-like color. You know it’s done when it starts to thicken.

Step 10. Add herbs or oil of your choice. Stir until they’re incorporated.

Step 11. Place the mixture into molds (I used an old baking tray for this experiment).

Step 12. Cover with plastic wrap and store in a dry and dark place.

Step 13. Check the mold every 24 hours.

I should warn you though that home-made soap is not something that magically appears overnight. In fact, the curing process takes about two to four weeks depending on environmental factors such as moisture and heat. So, if I were you, I wouldn’t hold my breath. Another thing you should know is that your kitchen or garage will end up smelling like a funeral home after doing this, mostly because of the lye.

Last, but not least, always remember to measure your stuff before adding them to the canning jar. If you pour too much or too little, you’ll end up with a mushy thing that won’t cure. As for the aesthetic part, you’re free to choose the shape of your soap.

Sure, the rectangular part would be the most obvious choice since it’s easier to handle, but you can opt for any shape that comes to mind. Just be sure to make hand-size bars. What I did after the soap has cured was to drill a hole near one of the edges and draw a string through it. That way, I don’t have to worry about dropping the soap while bathing (no, it’s not what you think).

As for the storage bit, once you’ve cut them into shape, you can store them in an airtight container. Make sure that the place you’ll be keeping your bars of home-made soap is dry.

Now, if you want to add a bar of soap into your B.O.B or household survival kit, wrap it in food foil before tossing it inside. It may be a good idea to throw in a desiccant pack or two to prevent the soap from drawing too much moisture from the air.

See how easy it is to make your own hygiene products? Well, this turned out rather well, if I can say so myself. In fact, this project gave me enough confidence to try out some other stuff. I have this buddy of mine who uses natural glycerin and herbs to make ointments and beauty cream. Maybe I’ll try a recipe or two and let you know how it turned up.

Power’s out; car won’t start, pantry’s empty – anything can happen. You either need to learn how to make do without or to take the high road which, in this

I recently found out that you really don’t need to hit the drug store or dip into your stash of meds each time the ouchie rolls your way. As unlikely as this may sound, nature does have its ways of healing the body, even though some concoctions and decoctions might look like something you would usually find in a witch’s hut.

If you have a backyard, then you must know how annoying weed-whacking can become. You really don’t need to have a degree in herbology to figure out that most of them are harmful to your garden, regardless if you planted veggies or roses.

Anyway, a couple of weeks ago, my wife asked me to help my in-laws with the garden. Yes, that included a lot of mowing, weed-whacking, pruning, and other stuff. It’s a thankless job, but somebody’s got to do it. Put my overalls on, grabbed my tools, and went out back to see what was growing there.

I kid you not when I tell you that I’ve stepped in treasure. Well, weed to some, riches to people like us. And so, instead of gathering everything and setting them on fire, I asked my father-in-law for garbage back. As you would imagine, I got back home with a bunch of casseroles and a trunk filled with weeds.

I chuckled a couple of times while driving, thinking what a police officer might say if he pulled me over and saw the trunk filled to the brim with some weird-looking weed.

So, after doing a little bit of chopping, cleaning, and cooking, I’ve decided to write this short and sweet piece about the herbs I’ve picked up from my in-law’s yard. All of them are top-notch plants. Some can be eaten, as in diced, mashed, and stuck in a broth, but most are used for medicinal purposes. No, they can’t heal every pain and pang in the world, but they’re very helpful in relieving some of them.

The best thing about the plants on my list is that you don’t even need to bother tending them – they literally spring up from the ground and, in fall, you would get yourself a nice backyard natural pharmacy. Here’s what I was thinking in terms of backyard plants used for preparing healing decoctions.

  1. Dandelion roots

Dandelions are there to remind us of the good things in life – a child’s laughter (unless it’s midnight and you don’t have a kid), the first romance, reading my awesome article. Anyways, probably most of you have picked up and blown on dandelion until all those tiny little flowers flew away. Fun fact: one of my best buds, who’s from Romania, told me that in his country this flower is called the hog’s fart.

Don’t know much about them, but can’t seem to find any association. Anyway, dandelion roots are what you’re really looking for – once you’ve plucked them from the ground and gave them a washing, they kinda resemble parsley roots. As for medicinal purposes, the roots of these plant can be dried up and use as a coffee replacement or made into tea.

It’s very healthy for those who like everything about coffee, except the caffeine (noticed no difference in taste either). Teas made from dandelion roots are great for stomach aches and for stimulating appetite. Don’t drink too much, though because it tends to have a powerful laxative.

2. Nettle

Remember what your mother used to say? Don’t go number two in the nettles because you’re going to get one Hell of a keister ache. True for the most part, but the things you can do with nettles.

For instance, the juice left behind by nettle roots after boiling them can be used to counter iron deficiencies. Moreover, teas made from this plant can help in reducing prostate swelling. The only annoying thing about preparing anything form nettle is the cleaning part. I for one use surgical gloves to clean them.

3. Raspberry leaves

Nothing beats the subtle and fragrant aroma of freshly-picked raspberry. Unfortunately, the leaves of this plant are often overlooked. Pity, because they’re great for a lot of things. For instance, I like to prepare my own teas by picking up an assortment of plant parts such as blueberry stems, raspberry leaves, mint, and elderberry.

You just leave them to dry for a couple of weeks, bag and tag and you have yourself a nearly endless supply of tea. As far as the health benefits are concerned, decoctions made from the leaves of raspberry work wonders on the digestive system. Also, according to the docs, teas made from the green part of this plant are known to boost fertility in women.

4. Jewelweed

Also known as the Koh-I-Noor of plants due to its very distinct jewel-like aspect, jewelweed is an efficient poison buster.  Tinctures made from the plant’s flower are used to treat sumac and oak poisonings. Moreover, if you have irritation after tiptoeing through nettles or getting too physical with ivy, a poultice made from jewelweed will quickly bring down the swelling.


5. Rosemary

I know that I covered rosemary in a previous article, but I forgot to tell you about its medicinal values. Apart from getting along splendidly with any meat, rosemary is a great antibacterial agent. Rosemary teas can be used to clear up a throat infection. More than that, you can use dried rosemary to wish away awful smells from the room; yeah, just like incense.


6. Comfrey roots

Have to admit that this one’s a doozie. On the one hand, this plant’s stems, root, and flowers are very toxic, but only when taken internally. However, comfrey roots can be successfully employed in the treatment of laryngitis or other throat conditions, if they’re made into gargle. Moreover, some studies have shown that purified extracts from comfrey roots can enhance recovery in case of a bone injury.

That’s it for my backyard herbal apothecary. Hope you’ve enjoyed my article. Don’t forget to hit the comment to let me know your thoughts on medicinal herbs.

The best thing about these plants is that you don’t even need to bother tending them – they literally spring up from the ground and, in fall, you would get

There are many signs and symptoms of serious disaster. Natural or manmade disasters that affect large populations come together in many of the same ways.

We need only look at places like Syria and Venezuela to see the signs and symptoms. These nations are nearly on opposite sides of the world, but they are experiencing some very similar collapse symptoms.

One of the most alarming of all is when the doctors and nurses disappear. The medical establishment of an area takes huge hits the moment resources cannot be shipped in any longer.

What sort of position would you be in if the medical centers in your area began to implode?

Do you have any background in first aid or medical training?

Many of us do not and we need a serious resource to be there for us when everything else is gone. There is one prepper medical resource that is truly the master class. It’s called The Doomsday Book of Medicine.

Its 800+ pages of prevention, detection, natural remedies, nutrition and true medical response to a long list of injuries and ailments!

The Basics You Need to Know

The Doomsday Book of Medicine is separated into 5 sections. Each section is made up of several chapters and each chapter has a clear table of contents. The information density is such that it requires this kind of organization.

Navigating sections is also a breeze because of this layout.

The Basics You Need to Know is also the title of section one and offers up the most comprehensive look at preventative medicine that you are going to find in a volume of this type. This section focuses on the core elements that modern practitioners are just catching up with today.

You are going to see a focus on personal hygiene, nutrition, healthy foods from healthy soil and even eating fermented foods for gut health.

Some Essential Tools

This book hooked me in Section 2. When you read a title like essential tools you are expecting to see some OTC meds and things of that nature. You are going to find healing profiles on things like baking soda, honey, a variety of herbs, wood ash and activated charcoal, to name a few.

Doctor La Guardia explores health from a holistic point of view rather than the traditional “burn, cut and poison” methodology that many doctors are mocked for these days.

This section offers up real-life solutions for the average person. That’s where the power lies.

What’s Your Problem?

The third section of this book makes up half of its content and is a full discourse on various injuries and ailment stools and how to deal with them. You are often given several methods for dealing with a single ailment. You have options and that is important in austere environments.

Entire chapters on The Eye and The Ear put an emphasis on things that can happen to these body parts and how they would be drastically affected in a survival situation.

You also get great chapters on things like diabetes and wound care and hypertension.

Odds and Ends

Section 4 is a three chapter breakdown on a variety of medical supplies that people will want to have in a long term disaster. There is also a great conversation about Ebola and dealing with the frightening virus.

Section 4 also features an entire chapter on the importance and methods of sterilisation which is critical when you are living in a world that might be devoid of common antibiotics and full of ways to garner infection.

Your Survival Medicine Chest  

This incredible section is more of an appendix and a checklist than a chapter. Don’t let that fool you. It’s a well thought out and alphabetical breakdown of what you should include in your own survival medicine chest.

In this list you will find everything from tools to OTC meds and beyond. The list spans everything from A – Z and has an inclusion for each. If you are truly interested in building an effective medical supply this chapter is worth the whole price of the book!

The choice to store or not store certain items is completely up to you but you should review them all. These are not recommendations made by doomsday bloggers. Dr. La Guardia has taken his training and practice into account, as well as his own personal health, to create this list of items.


The Doomsday Book of Medicine is a massive resource that should be the cornerstone of your medical preparedness. It deserves a home in the library of anyone who has a mind for preparedness and wants to do more than cower in a disaster.

There are hidden gems all throughout this book. Here is a short list of what else hides within these 800+ pages.

  • Learn what is 8 times more affective at preventing flu than the flu vaccine
  • The Antioxidant that is 6000 times more powerful than Vitamin C
  • Learn about the amino acid that not only treats anxiety and depression but also eliminates cravings for drugs and alcohol.
  • The weed that is not only the perfect food for your body, but also can be used to produce biofuel for your vehicles
  • The common cleaning product that will not only control your arthritis but will also make your bones rock hard

In every serious disaster there are a few things that happen. Supply chain is disrupted, and medical supplies start to disappear. What will you do when the doctors are no longer around and someone in your home has an injury or illness?

Are you prepared to be the family physician?

With 800+ pages of medical information and your survival medicine chest, you will feel well more confident at what must be done.


Are you prepared to be the family physician?With 800+ pages of medical information and your survival medicine chest, you will feel well more confident at what must be done.

I can’t remember the first time I heard the word “prepping.” Probably back during those school camping trips when our PE teacher tried to show us how the Native Americans used to whip up a fire, long before matches and lighters were ever invented. Of course, what child was taken far away from home with his friends would have the energy or the attention span of listening to a man rubbing two sticks together?

That’s one of the things I tried showing to my students – if someone shows you a trick, even a small one like I don’t know, turning a poncho into a rainwater collector, pay attention and learn. You’ll never know when that stuff will come in handy.

Anyway, on to the topic du jour – what is prepping and when should we start, well, doing it, I suppose? This isn’t Merriam-Webster, nor the “P” volume of Encyclopedia Britannica. Don’t know any fancy definitions and never needed one, for that matter. For me, prepping is like knowing you will receive a slap for somebody and doing things in order to prevent it to the best of your powers. Something like that, I suppose.

Come to the prepping side! We have MREs

We don’t prep because we’re members of the tinfoil brigade or strongly believe that the world’s coming to an end and survival of the strongest and all that BS. We do it because it makes sense. I remember reading in a magazine (yes, I’m that old!) that prepping is like having your own crystal ball and being able to see into possible futures.

Leaving the mystical mumbo-jumbo aside, this sentence does raise a very good point – being able to predict something and act in accordance. For instance, if your car’s bulbs would burn out while you’re on the road, the most sensible thing to do would be to go to the nearest auto shop and get them replaced.

However, a good prepper would have the hindsight of carrying a box of extra in his glove box or vehicular emergency kit. A seasoned one would, however, get his car a good going-over before hitting the road, in addition to making sure that he has everything he needs to deal with this sort of emergencies.

This is just one example. There are countless more out there, and neither one spells out crazy or paranoia. Do you consider yourself “having bats in your belfry” just because you have a stockpile of canned food around the house or an extra pack of bottled water? No, you’re not, my friend. It’s, in fact, the other way around – it would be foolish not to have those around the house. All it takes is something as ‘harmless’ as a blackout to realize just how much you would have needed those stuff.

I tend to get this question a lot: when do you start prepping? Well, let me put it to you this way. This is not the sort of thing you only do when it’s convenient or fits into your agenda. You just start doing it and never stop. Still, anything has to start somewhere, and a good starting step would be the news. Have you tried reading them lately? One thing you’ll realize is that no matter where you live, there’s always something happening – a blackout, earthquakes, tsunamis, snow blizzards, rioting, active shooter.

The world’s littered with danger, and you can’t always rely on the authorities to keep you safe. Remember the Christchurch mosque shooting, the event that ended with the death of over 50 people? Well, as it happens, New Zealand was and is still considered one of the safest countries in the world, even though it has the same gun regulations as the United States.

The last event of this magnitude occurred in the early 50s, and even then, the country was still considered a safe one. Don’t make the mistake of assuming that you live in this glass menagerie, where everything is pink, fluffy, and happy. Shit happens, and when it does, it brings along all its friends.

Congrats! You have just taken the first step of your prepping journey. It’s called risk assessment and, in my opinion, the most important aspect. Knowing the name of the demon gives you power over it, the guy from The Exorcist used to say. The same goes for natural and man-made disasters.

The next steps are fairly easy, and all of them have, more or less, to do with your little incursion in the realm of danger. As a future master prepper, you will have to focus on the following areas: food, water, shelter, and security. Let’s take this one step at a time.

Water

Fact: the human body needs water for, well, everything. You need water to digest the food, and your brain needs water to keep the lights on. Remember the rule of threes? You may go for three weeks without food, but no more than three days without water. That’s how important water is. And no, chugging energy drinks, soft beverages, coffee or booze does not replenish your body’s water supply. In any survival-type situation, find a source of water is crucial.

More than that, you will need to know how to make water drinkable and maybe palatable. For instance, in heavily wooded areas, there are plenty of ways to get water: springs, tree holes, puddles, rivers. Some of that water’s safe to drink, but, in most cases, you will need some sort of filtration like water purification tablets. Even tap water can sometimes become unsafe to drink, especially in the aftermath of a disaster. Water purification is an essential skill, one that you will need to master.

Food

Food for the belly, food for thought, and food for the soul. No matter your choice, you should also have a well-stocked pantry at home. This includes emergency rations such as canned or easy-to-prepare food, MREs, and cured meats. If you get lost, you may need to replenish your food stocks by hunting small game or fishing. Apart from that, knowing with that do with it is as vital as getting it. Venison can be easily turned into beef jerky with salt, wind, and a little sun. The same goes for fish or plants like seaweed. No matter where you are, you must always remember to have a 72-hour food supply.

Shelter

Shelter comes in all shapes and sizes – makeshift ones like those constructed from scavenged materials or retrofitted rooms as in those used to hunker in during a natural disaster. Remember that a shelter’s role is to protect you against the elements and any threats that may be in your area. Anything can be a shelter as long as it protects your body and keeps you warm.

Security

I kid you not when I say that entire books have been written on the topic of defense and security. To make a long story short, security refers to two things: how you keep your property safe and defend yourself in case of an attack. Security bars, alarms, motion-triggered sensors, VoIP cameras are all great security measures for your house. As for yourself, try to squeeze some self-defense classes into your schedule or learn how to take down opponents using non-lethal weapons such as tasers, pepper sprays or security batons. The choice is entirely up to you.

If prepping was as art, which it is, then it would definitely be the art of teaching yourself how to listen to your instincts. In some cases, it may be the defense you have. Logic may be great, but nothing beats a tad of hindsight.

If someone shows you a trick, even a small one like I don’t know, turning a poncho into a rainwater collector, pay attention and learn. You’ll never know when that

Nowadays, I found myself having more of those “Dear, Lizzie” moments. Here’s what one of our readers asked me:

Hey, Eddie,

Kick-ass articles, by the way. You always were a good marksman. Here’s a quick one for you: what’s the difference between bugging out and hunkering down? I mean, why should I bother moving out when I have everything I need in my home? Can someone make me evacuate? Would be nice to read about this in your upcoming article. – J.”

Well, J., after giving it some thought, I believe that you’re not the only prepper who has trouble figuring out what to do in case of an SHTF situation. To put it bluntly, it all depends on the context and you “then” and “there.” Each countermeasure has its pros and cons, and, as true preppers and survivalists, it befalls on us to figure out which is the best choice.

Now, it’s not my place to create more confusions than it already is, so I’ll try my best to give you some advice on what course of action would be best depending on your situation.

First of all, in an SHTF situation, assessing the threat is crucial. I can’t say enough times. Take earthquakes, for instance. Since FEMA always advises us that it’s best to remain indoors during a quake, then the obvious choice of action would be to hunker down. Running out the door, even with your Go Bag on can only result in injury or worse.

On the other hand, if the threat comes in the guise of a, let’s say a tsunami, then bugging out would be the better choice. So, you know the first factor that will help you in figuring out an appropriate course of action – the threat itself.

The second one would be your location. As you probably know by now, every geographical area is prone to some sort of natural or man-made disaster. During one of my trips through Eastern Europe, I have come upon a most startling fact – people willing to live in buildings that could collapse at even the smallest earthquake.

Apparently, in former communist countries such as Romania, in case of an earthquake, you would be safer outside than inside even though this fact goes against everything you have learned about prepping!

So, it’s safe to assume that what works in the States doesn’t work in other parts of the globe. Another thing you should keep in mind is that geography plays a key role in survival. For instance, if you’re in an area that’s prone to flooding, high rises, like hills or large rock formations, can provide you with more cover than, let’s say a two-story building. Obviously, in this case, the best course of action would be to bug out instead of staying put.

There are, however, instances, when a course of action becomes unclear. If the authorities don’t provide you with instructions about what must be done, then your best bet would be to rely on instincts. Your risk assessment skills will come in very handy at this point. Ask yourself questions like:

  1. Where I am?
  2. How safe is my location?
  3. Can I find adequate shelter?
  4. Do I have enough supplies to stay indoors until the danger passes?
  5. Has thing kind of thing happened before? If so, what was the aftermath in terms of property damages and human loses?

Think before you act! That’s the crux of our philosophy. Don’t take everything you read in manuals for granted. There are cases when those tips can be put to use and other times when those can put your life at risk.

The last factor you should consider in making your decision is your overall level of prepping. There’s no shame in admitting that you we’re not prepared to face a kind of threat. Hell, none of us can be truly ready for everything nature or our peers can throw our way. However, you should not see this as a handicap, but as a way of figuring out what you do with what little you have at your disposal.

For instance, outrunning a flood may be difficult for preppers who spent more time reading about stuff than training. In this case, hunkering down would be the best course of action. Everything about yourself will affect the odds of survival – fitness level, attitude, creativity, and how great you handle under pressure.

Just because you’ve read about stuff or trained it doesn’t necessarily mean that you’re ready for it. Keep this in mind the next time you’re having trouble figuring out if you should bug out or hunker down.

So, to wrap up things, there’s no sure-fire recipe for this. Your decision should be based on things like:

  1. Location. This also includes geography.
  2. Threat. Type and level.
  3. Prepping leve.

One more thing I forgot to mention – don’t discard the expert’s advice. If a police officer or firefighter told you to leave the area or to hunker down, then do it. Don’t try to be a hero or a know-it-all. They are highly-trained professionals who knows how to deal with this sort of stuff. You may later find out that the course of action you wanted to take could have gotten you killed.

Wrap-up

Hope I managed to answer your question J. As for the rest of you, stay safe, and do write to us in case you have a question about prepping. I may not be a master prepper, but I least I know that I don’t have to take everything for granted, and, most importantly, I always find a way to nail my boots to the floor when everything goes to shit. If you have the right attitude, the rest’s a piece of cake.

To put it bluntly, it all depends on the context. Each countermeasure has its pros and cons, and, as true preppers and survivalists, it befalls on us to figure out

Many people have asked me about what’s the hardest thing I had to deal with since I’ve started writing about prepping and survival. Of course, most of you would say that hitting the books or reviewing survival gear are the trickiest parts, but no – it’s convincing others why prepping is essential. Sure, it’s easy to speak in front of a group of people who either do this for a living or are interested in the topic. Here’s one for you – how likely are you to convince your mom, dad, grandparents or in-laws to create a household emergency kit or to take a first-aid class? Let me answer this one on your behalf: too hard and, at times, downright impossible.

A while back, I was sitting on the patio with mom, dad, and my in-laws. We were chatting about humdrum stuff like the weather, dad’s diabetes, father-in-law’s arthritis, mom’s cooking. At one point, my mother-in-law turned towards me, looked me straight in the eye with that steely gaze of hers and said: “And what exactly did you say you’re doing, Eddie? Hiking? Backpacking?”.

Have to confess that her tone irked me a bit, but I kept calm and explained again about my prepping editorship. Slowly, but surely, I magically managed to turn around the entire conversation. So instead of chatting about nonsensical stuff, I got to explain a bit to everyone what prepping is and why is so important.

Of course, I couldn’t avoid questions like: “do I need a tinfoil hat or something to join this religion of yours?” I didn’t mind. It’s only natural to be suspicious about this sort of thing, especially when bias comes into play. Fast-forwarding a bit in time, I am now proud to share with you guys that mom, dad, and in-laws have joined our prepping community. More than that, they are very active members on our website, and I would often catch them reading STHF articles.

Can you really have the talk with your folks?

Anyway, to broach today’s topic, there are a lot of very good reasons why you should openly discuss prepping with your parents, their health and wellbeing counting among them. Far too many times, I’ve seen active individuals turn into couch potatoes after retirement. Take my dad, for instance. He would hit the gym at least three times a week after work and cycle every other Sunday.

After he retired, dad’s best friend became the remote control, and the only kind of activity that would even come close to exercising was opening the fridge’s door to get another beer. Yes, I know it’s sad, but you can’t actually argue with them.

Tried that and each time I would hit the same brick wall: “Son, I earned the rest. You’ll understand this when you’ll be my age.” You’re probably familiar with this kind of phrasing. All of us are. And, it’s very difficult to try to convince someone who’s twice your age or more than you know what you’re talking about – yes, the generation gap exists, and that old man stubbornness is the worst enemy a caring person could face.

Which brings us to the first argument on our list – waving your magic want to turn your parents into active people once more. As most of you know, most adults after the age of 50 find themselves in the positions of dealing with all manner of chronic illnesses: heart disease, arthritis, diabetes, bladder issues, kidney afflictions, enlarged prostate in men, osteoporosis. And the list goes on. Help your parents live a better and healthier senior life by showing them a couple of simple activities that involves prepping. Here are a couple of ideas to get you started.

  • Teach them how to build home emergency kits and go with them to the store for supplies. Keep their minds busy by asking them to draw up shopping lists. Don’t give in to their pleas: “Son, I’m not feeling like prepping today. Would you mind going out for some shopping?” There will be none of that from now on.
  • Practice emergency drills with them. Take your pick: drop-roll-and-hold, drop-and-hold, home evacuation via pre-established emergency routes, hunkering down in the basement or the safety room. Don’t overdo it, though, and do not try to up the pace. Keep in mind that your parents are not as spry as they once had been. You should also take their health into account – some of them might have illnesses that could put too much strain on the body.
  • Convince them to learn new skills. For instance, my folks had no clue how stuff around the housework. If something broke down, they would either call in a pro or buy a new one. Making them take some repair lesson is good for the brain. In fact, each medical article you would read on dementia and Alzheimer’s states the positive effects of learning new skills all the time.
  • Ask them to tag along during one of your Go Bag training sessions. A great exercise for cardiovascular disease prevention is jogging. Us preppers usually build endurance and back strength by talking long walks with our Go Bags. You can skip the backpack part if their doctor says otherwise. Keep a steady pace and don’t let them fall behind. You can even show them how far they’ve progressed by sharing results from your Fitbit watch or smartphone application.

Mom, Dad! Are you in on this?

The second reason why prepping’s good for your folks has very much to do with their way of thinking. Most of our parents and grandparents, were down-to-earth, hardworking people, which means that value common sense above anything else.

And since prepping is deep-rooted in it, learning to get ready for anything is only a natural extension. Keep in mind that you will no doubt encounter this sort of suspicion regarding prepping. This can easily be countered by offering a couple of simple examples based on everyday scenarios.

For instance, my dad always had to use his lighter or anything he had on hand to inspect the underside of the family van. This would mostly happen during trips across rocky terrain. One way of explaining prepping to a person like my dad would be to point out that a fully charged flashlight tucked inside the glove box would have helped him more in case of such emergencies than fumbling around with lighters, matches or other light sources. See? It’s that easy.

Let me point out a couple of more scenarios which you can use to describe prepping to your folks:

  • Emergency generators.Tell your folks that the most logical approach to living in a blackout-prone zone (check out the news on the Venezuelan power grid failure) would be to buy a gas-powered generator. That way, you won’t have to worry about food spoiling in the fridge or breaking into the water supplies became the electric pump in the basement went out with the light.
  • Losing the bus. Imagine that you have to take the bus each time you need to get into town. If you miss that bus, the next would be to call someone at home and say that you’re going to be late. I know it’s a stupid example, but it’s how prepping works – by calling that person you let him, or she knows your location, the reason of your delay, and what to tell the authorities in case you fail to show up at home.
  • Emergency evacuation. In case you are told to leave the house, the first thing you should take is your Go Bag. Apart from knowing the escape routes, your folks should also know how to prepare an emergency backpack. Ask them to draw up a list of things they cannot do without hearing aids, canes, whistles, BP monitor, prescription glasses. Be sure to point out that the Go Bag has limited space, which means that they need to carefully consider the items. More than that, do not forget to remind them of the golden rule: everything you take, you’ll have to carry.

Wrap-up

My giveaway to you is this: don’t try to impose your lifestyle and choices upon your parents or loved ones. You should point out to your folks that prepping is more of a mind-conditioning kind of thing, rather than a set of actions based on hindsight or SHTF way of thinking.

Baby-step it, explain everything as many times as necessary, and always keep in mind that they’re your parents, not some bored students who dropped by your class for extra credits. It’s much difficult to change one’s mindset, but everything can be accomplished with the right attitude and, of course, as much prepping as possible.

Here’s one question for you – how likely are you to convince your mom, dad, grandparents or in-laws to create a household emergency kit or to take a first-aid class?