Home2019 (Page 17)

“She lit wildfires inside my soul and fanned them with hurricanes.”
― Morris R. Gates

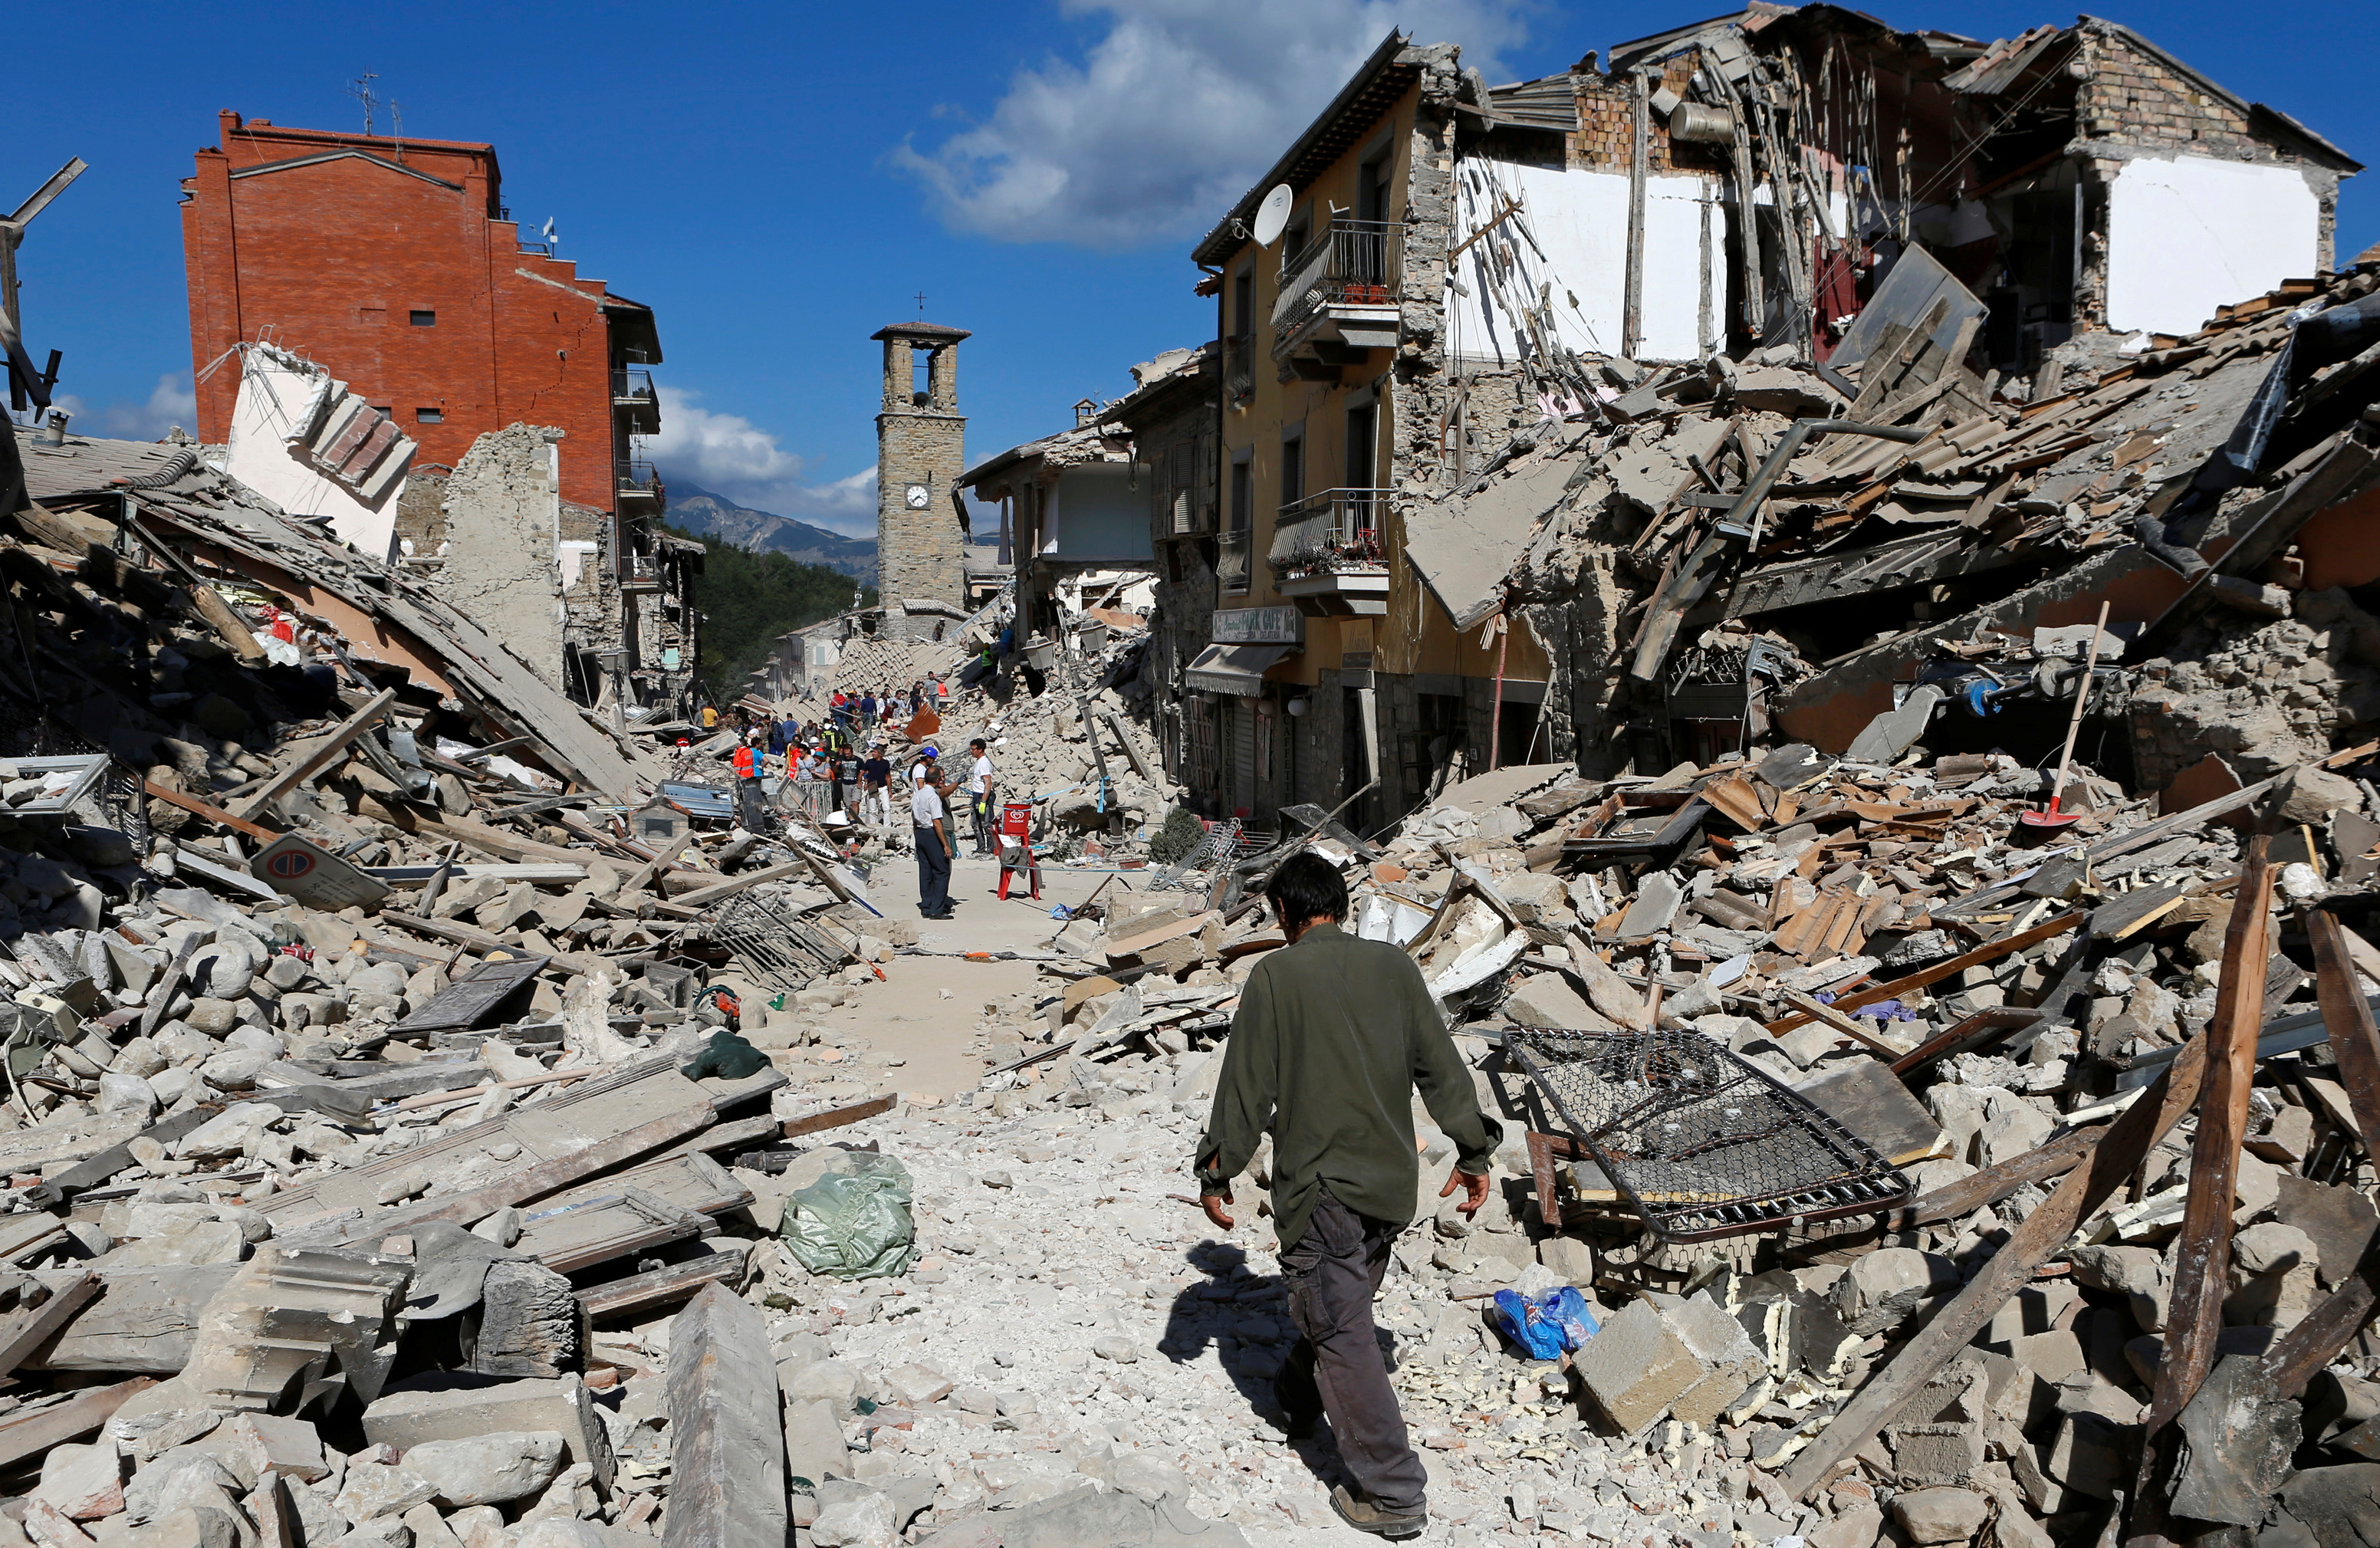
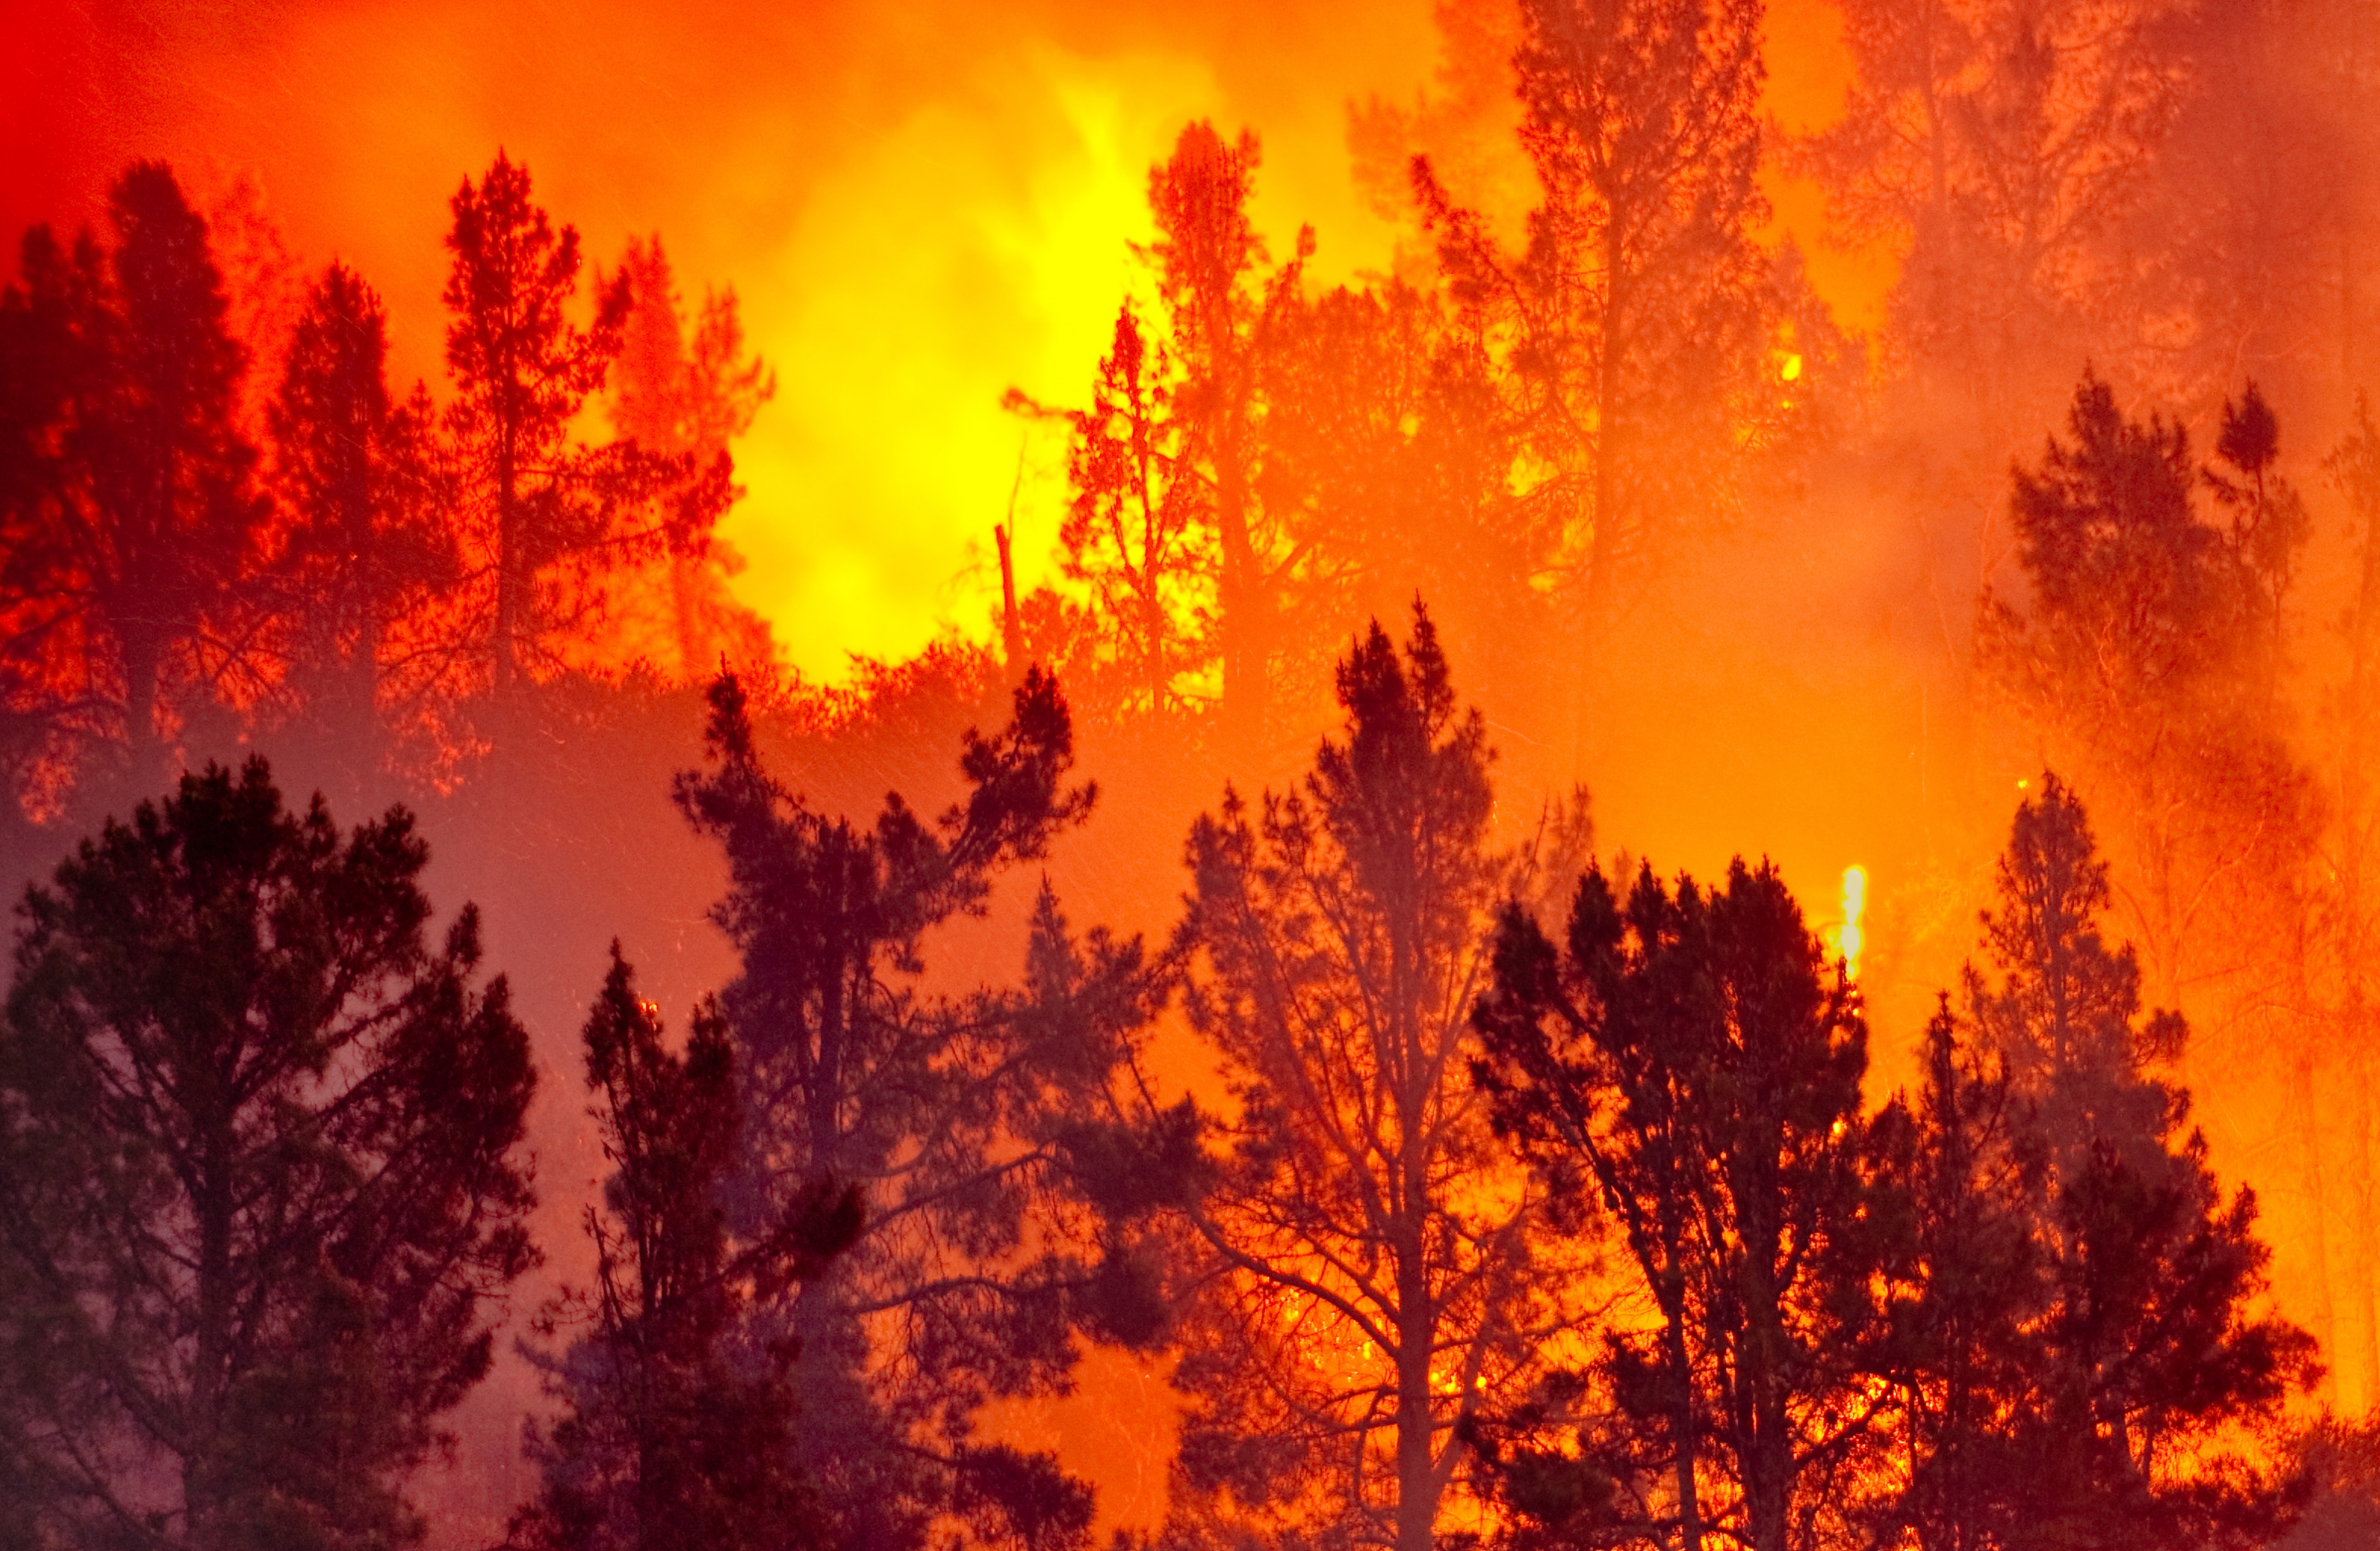
“The whole world was on fire.” These are the exact words of Brian R., a Magalia resident, who only minutes before his statement has experienced first-hand the horrors of Camp Fire, one of the deadliest and most extensive wildfires in Californian history. I can’t say for certain if it was Brian’s statement or the news reports that prompted me to write this article. Don’t even care, come to think of it.

Every prepper out there should know just how wild wildfire can get. And believe me, you haven’t seen anything yet. If you’re faint of heart, then you should quit while you still can. I have to warn you though that the article you see here before your very eyes will be pretty graphic and explicit. Be warned and welcome on board!

I can literally stay here an entire day and talk about the reasons behind wildfires. Some say that they are undeniable proof of climate change (nope, I ain’t going to touch that, not even with a ten-foot pole), while some cling to a more sordid theory – that each and every one of them is the work of guy or girl with too much time on his\her hands and too many matches. Can’t say for sure which one of them is more far-fetched. I’m going to go along with saying that wildfires are real and very deadly, at that. FIY, according to the guys over at the Insurance Information Institute, a staggering 90 percent of all wildfire are made by humans.

Pretty neat, isn’t it? What’s that got to say about forest fire prevention – in your face, Smokey! BTW, your hat is stupid. Anyway, wildfires tend to envelop entire acres of vegetation, which means that putting out the flames is a very difficult and time-consuming task. More than that, those toxic fumes are usually carried by strong winds, turning the entire area into a lung-killing trap. Wildfires closer to major cities like the 2018 Camp Fire can be far more dangerous compared to those limited to unsettled areas since most of injuries and deaths are not fire-related! Yes, you read that right.

Wildfires and natural disasters, in general, can make everyone lose their noggins. Think that this is something out of an Orwellian novel? Nope, it’s a fact. If the fire or smoke don’t kill you then maybe a crowd of scared-to-shit people will. And that’s another thing I want to address in this article. But more on that later. Remember – all good things come to those who wait!

It’s a wild world out there!

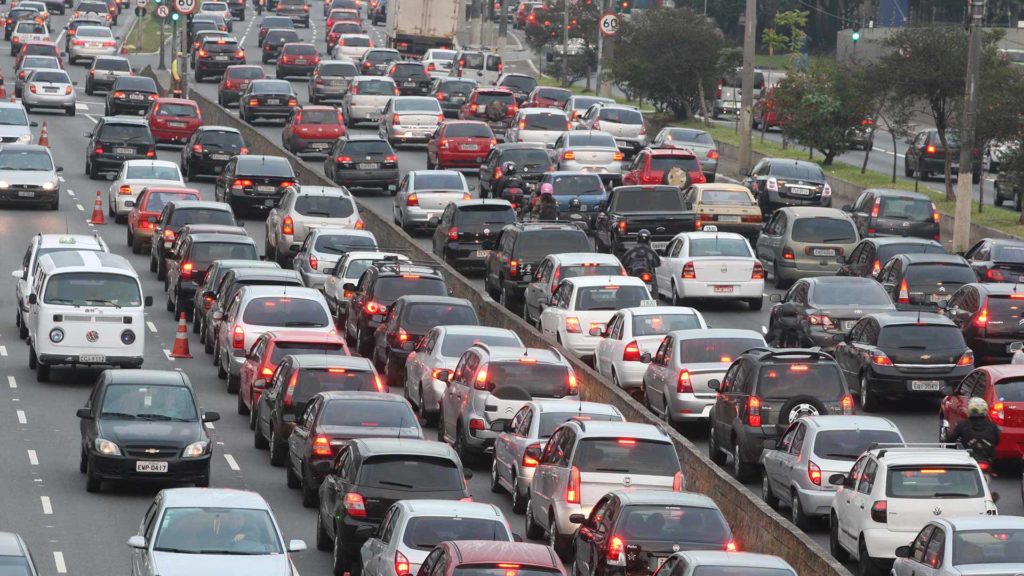
Back in ’16, Fort MacMurray in Canada had experienced the most devastating wildfires of the last two decades. I was back home that day, watching TV with my wife. There was this special bulletin on CNN saying that thousands of people were trying to get out of the city – some on foot, others by car, and there was even this young lady who got out of Dodge on horseback.

Anyway, the anchorman said that there was so much confusion going around that day, that entire family got separated just because they didn’t have any actionable means of staying in touch. As I later understood, the officials planned two separate evacuation routes – one was in the north of the city and the other one in the south.

The only thing was that the northern evac route was not designed to sustain that much outgoing traffic and people simply abandoned their cars and proceeded on foot. There was this one family who ended up in separate parts of the city because one member went to fetch the kids and took the northern route, while the other one returned home, and had taken the southern route, convinced that the other one made the same choice. Crazy, am I right?

The truth of the matter is that crazy doesn’t even begin to cover it when it comes to panic induced by natural disasters, not to mention the sheer stupidity which caused some of them in the first place. Ever heard about the catch-phrase “Like my fire”? If your first thoughts were “attention-seeker” and “social media”, then you’re right. Back in 2013, a teen by the name of Sadie Renee Johnson set a whole forest on fire just because she wanted to put to work two of her friends who happened to be firefighters.

Long story short, Sadie drove to one of the largest forest surrounding Portland and set fire to a firecracker. After the entire forest was on fire, the teen took a picture, posted it on social media with the message “Do you like my fire?” Her stunt led one hell of a wildfire, which burned down 51,000 acres and caused damages amounting to $8 million. You go, girl! The saddest part is that Johnson is not the only person to have caused a wildfire.

Getting back to the matter at hand, wildfires can be prevented. How you ask? By using a thing called common sense. Put out those fire pits before leaving the forest. Better yet, use a portable fire device like a Bunsen burner or something to cook your food or to get smoochy with that chick you picked up from Tinder. Also, if you’re a smoker, my advice for you would be to quit. Still, if you’re hiking in a heavily forested area, it would be a good idea to extinguish that butt with water, sand, gravel, dirt or anything. A portable ashtray would also be a major improvement.

Now, after getting these out of the way, let’s have a little chat about some of the things you could do in order to prevent a wildfire. While at it, I will share with you my kick-ass wildfire prevention evil scheme (insert Doctor Evil laughing with pinky in his mouth meme here).

Wildfire prepping and prevention

I’ll just say this once: if you’re in the city, you’re royally screwed. If you’re in the countryside, guess what? You’re also in danger! No matter where you go if the wildfire will eventually catch up to you.

Let’s talk a bit about a little thing called wildfire prevention. I’ve already given you one example. Putting out a fire pit is not only your way of saying “thanks” to the forest but the most efficient way of preventing a wildfire.

On that note, you should always keep a close watch on that fire, especially if you plan on spending the night in the forest or something. It’s always a good idea to keep a bucket of water or dirt or sand near the fire pit in case something goes wrong. You should also wall your fire (placing rocks around the fire pit) to prevent it from expanding. Simple and common-sense stuff.

Of course, I guess it would also help not to set fire to firecrackers by the side of the road so that your friends may have work cut out for them. Anyway, this just about covers the stuff you can do to prevent wildfires while you’re outdoors. Still, if you’re living off-grid, say a small hunting cabin, like yours truly right there, things get a little more complicated. See, when you’re smack in the middle of something that can at any time turn into a searing oven, your prepping must take on a more active role.

The idea of dropping off the grid is neat, and nothing beats that fresh mountain air in the morning. However, as I later came to find out, having such a place puts you a bit in harm’s way, wildfire-wise.

In respect to all you wonderful crazy guys and girls out there, I’ve whipped out a small to-do wildfire prevention and prepping checklist. I haven’t got around to solving all of them since I still have a 9-to-5 and this here editorial gig, but I’ll eventually come around to it. So, here’s what I was thinking about fireproofing an off-grid home.

  • Keep cordwood and fuel as far away from home as possible. One spark and everything goes to shift (damned autocorrect). What I did was to bundle all my firewood and wheelbarrow them to a small outcrop, some hundred feet away from the house.

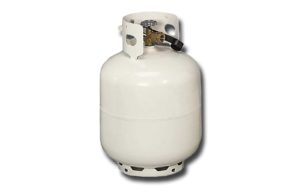
Would be neat if the place is upwind. If you’re Gung-Ho about fuel storage, you can always build a small shack for them. You can find everything you need for the job at your local hardware store (bought everything I need from Costco). If you have a gas-powered generator, store the canisters inside this shack, and always under lock and key.


  • Trimming. Since I’m smack in the middle of the forest, obviously I need to do a little more pruning than usual. Great for the heart, but not that okay when you have other stuff to tend to. Anyway, take all the time to trim bushes, tall trees with low-lying branches, shrubs, and any kind of vegetation close to your house. See, when the wildfire hits, all of those things turn into fuel.

Spare yourself the trouble of racking and buy a leaf blower. They’re not that expensive. Start with the roof – see if there are branches hanging over it and use a hacksaw or gas chainsaw to cut them off. You may either dispose of this stuff or do I did – dry them up and turn them into fuel for your stoves, fire pits or whatever floats your boat. Having so much vegetation around spared me a lot of firewood money.


  • Sprinkler system. Gotta make sure that sprinkler system is up and running. My advice to you would be to buy the non-automatic version and to outfit it with a mechanical timer – they’re far more reliant and endearing compared to their electronic peers.

Here’s what I did to make sure that my house doesn’t get scorched from a wildfire. I went ahead and installed two separated sprinkling systems – one for the lawn and one for the roof and the front side of the house. That way, if a wildfire sprouts nearby, I can use the system closer to my home to water down the roof and walls.


  • Trash the trash. Get rid of another wildfire danger by burning your trash and burring the ash pile far from your house. I know it’s a thankless and smelly job, but, hey, it certainly beat the alternative. Sure, that doesn’t mean you can’t have some fun while doing it.

See, when I moved in with my wife and kids, I discovered I had this charming guy who claimed that the cabin is his and wants us off his property. After a couple of lovely chats with the local sheriff and idle threats, I managed to prove to him that the cabin was mine and mine alone. Still, he would hang around, waiting for a chance to call the cops on me for whatever reason.

So, this one night, me and a couple of buds, after drinking one too many suds, decided to pull a fast one of the peeping Tom. We grabbed all the garbage we could find around the house, placed inside one of those black, heavy-duty bags, and arrange everything so that it would look like a body bag with a corpse inside. And, while he was watching, we took out the faux body to the yard, lit up this big fire pit, and threw it over the flaming pile. From that day on, I haven’t seen him around.

So, this is the end of part one of my take on wildfires. Stay tuned for more misadventures from the prepping world. Stay frosty guys, and see you in part two of my wildfire series.

Every prepper out there should know just how wild wildfire can get. I have to warn you though that the article you see here before your very eyes will be

You’ve probably heard plenty of horror stories about people being caught under tons of debris from a falling building, the golden triangle, and other pleasant stuff about quakes. Let me tell you something – it ain’t pretty. Far from it! A quake can level entire cities in just a matter of seconds.

Remember that little Japanese garden you always enjoyed on the other side of town? Gone! Your favorite pub? Kaput! I kid you not when I say the earthquakes are, by far, the nastiest thing you can experience in terms of natural disasters. During one of my stays in Europe, I’ve heard this one particular tale told by a guy whom I imagined to be a paramedic or something.

Anyway, this guy said that during the 70s, a massive earthquake took an entire East European country by surprise. I’m talking here about entire neighborhoods razed to the ground, landlines disrupted, the works.

So, this guy tells me that it was not the collapsed buildings, nor the deafening sirens that got to him – it was the smell. Everywhere he went, he was followed by the same pungent aroma that turned his insides into mush: rotting flesh. It was so bad that the smell was still there weeks after firefighters and police officers managed to remove all the corpses. What do you do when you’re staring true horror in the face? Prepare and survive!

So with that in mind, I wanted to pull together this earthquake safety checklist which hopefully will point out any areas in your preps that you might need to work on. You can also find more information from FEMA’s Earthquake Safety Checklist downloadable as a PDF file and all the Earthquake information you can shake a stick at (no pun intended) on the USGS Earthquake hazard site.

How to prepare for an earthquake?

  • Know where you are at all times and how to get out of the building. This is more important if you are in a strange place like a hotel in another city.
  • Select a safe place in your home for everyone to wait out the earthquake if needed
  • Practice earthquake drills with your family
  • Keep flashlights and sturdy shoes available.
  • Bolt gas appliances to walls (water heater, oven, dryers)
  • Know how to shut off the gas in your house and have the proper tools on hand if you need to do this.
  • Keep emergency supplies/bug out bags in a safe location.
  • Have a plan for power outages before you are faced with one.

What should I do during an earthquake?

If you are indoors

  • Move to your safe place as quickly as possible; make sure your head is protected from falling debris.
  • Stay away from windows and glass.
  • Stay indoors until the shaking stops.
  • Use stairs instead of an elevator in case of structural damage or power outage.

If you are outside

  • Find a clear spot away from any buildings, power lines, trees or streetlights.
  • If you are in a vehicle (and notice the shaking in the first place) pull over to a clear spot and stop. Don’t pull under an overpass or anything that could fall and trap you.
  • If any power lines are down stay away even if the power appears off. Especially if there are power lines on vehicles, do not touch the vehicle.
  • If you are in the mountains or near cliffs watch out for rock-slides or unstable features. Landslides and avalanches can be triggered by earthquakes.

What do I do after an earthquake?

  • The initial shock-waves may only be the first of many that could still cause injuries. Expect aftershocks and use the time between instances to get to a safer place. If you are anywhere near the coast Tsunamis could occur so immediately seek higher ground.
  • Check your family or group for injuries and move injured people to a safe location.
  • Make sure you are wearing appropriate clothing, footwear, and protection for your hands if there is a lot of debris.
  • Make sure any fires are extinguished as quickly as possible.
  • Check radios for the extent of the damage and any emergency notifications.
  • You should already have stored water, but if not and the water is still working, it may make sense to fill your bathtubs (providing your house is safe) to use the water for hygiene if the water is cut off.
  • Stay away from power lines and out of damaged buildings as much as possible.
  • Contact your loved ones if possible and let them know you are OK.
  • Go to your prearranged rally point if you are able to do this.

There you have it. Let me know what you think. Or if you any stories to share that we can all learn from.

You’ve probably heard plenty of horror stories about people being caught under tons of debris from a falling building, the golden triangle, and other pleasant stuff about quakes. It ain’t

Back when I was in college, I needed money so bad, that I was forced to take quite a lot of odd jobs. Who wasn’t, right? One of the oddest, if I can call that, was working as a book salesman in my home town. You’re probably asking yourself right what kind of person would complain about selling books. I, for one, of course, and probably most of my former co-workers.

See, recommending a title to someone or arranging them on the shelves were the easy parts – you still had to haul them by hand or cart from the back. So, right before I told my manager that we could take his job, wrap it in barbed wire and shove in the place where the sun doesn’t and won’t shine, we had a really busy week.

Long story short, I had to haul quite a lot of book-filled crates. The next morning, my back felt so sore, that I could hardly get out of bed. From there it got progressively worse: numbness in the feet, cringy back pain, stuff like that. My doc told me that I had something called lumbar discopathy, a very fancy word for your spinal column being broken.

Although I’ve tried my best to take it easy, sometimes, I can still feel pain shooting down my back. Thanks, college-me for this marvelous gift! I hope you get psoriasis or something. Anyway, many years later, I’ve tried almost any type of back treatment, short of surgery, for my raging back pain – physical therapy, diets, more exercising, less straining, you know, the usual. For a while, I was okay-ish, but when the weather went sore, so did my back.

Finally, after reading tons of stuff on this subject, I happened about a quaint little recipe which, according to the author, can relieve any kind of join, back or knee pain. Sure, I always preferred witchdoctors over MDs, but why the Hell not, I said to myself.

I kid you not when I’m saying as this stuff smells nasty, and it tastes even worse. But, by God, it really does what’s it supposed to do – take away the pain (wish it could do the same to memories).

Now, the recipe I’m about to show you involves three types of seeds and raisins. I know that it sounds like a stomach-churning combo, but give it a chance. Apart from being great at dealing with all sorts of pains and pangs, you can use leftovers to create survival energy bars. You can also eat it for breakfast instead of cereals, poached eggs, pancakes or whatever.

So, here’s the wonder-med I’ve been talking about.

“Dead leaves, seaweed, rotten eggs, too, stir them in my witch’s brew.”

As I’ve mentioned, this recipe calls for three types of seeds: pumpkin, flax, and sesame. The first is held in very high regard among docs and dieticians since they’re packed with an omega-3 fatty acid, known for its anti-inflammatory effect, zinc, copper, and other essential minerals. As for pumpkin seed, they do contain a fair among of omega-3 fatty acids, along with vitamin B1, phosphorus, and selenium.

Sesame seeds are highly recommended for people with brittle bones, and it’s very effective against any type of inflammation. Word of warning though – curb your sesame seeds intake during pregnancy, as high levels can induce preeclampsia.

Raisins, on the other hand, can aid digestion, since their packed with vitamins, fibers, and a shit-load of minerals. You should consider eating more raising if you have an iron deficiency.

Anyway, this is the basis for this wonder cure. You’re still going to need a couple of more stuff though like honey and gelatin. Let’s get cooking!

Ingredients:

  • Honey (two squirts or 200 grams).
  • Gelatin (no more than three tablespoons).
  • Sesame seeds (4 or 5 tablespoons).
  • Flax seeds (8 tablespoons).
  • Pumpkin seeds (a small pack or 40 grams).

How to prepare

I should warn you that this recipe is very challenging. You’ll have to be at a chef’s aide to pull this one-off. It calls for extreme concentration, precision, finesse, and a knack for balancing the ingredients. Are you for this challenge? Good! Here’s what to do, young padawan.

Step 1. Gather up all your ingredients.

Step 2. Plug in your food processor or blender.

Step 3. Toss everything inside and hit the “pulse” button a couple of times.

Step 4. When the food processor\blender finished chopping the big chunks, switch it to low, and leave the thing alone for a couple of minutes.

Step 5. Switch off the blender, pour the contents inside a bowl, and mix with a spoon or something.

Step 6. Enjoy (or not)!

That’s it! You now know how to prepare the most complicated natural remedy for pains or pangs in the world. About the aspect part – yes, I’m painfully aware of the fact that it looks disgusting, but with the added honey it should taste more or less like semolina pudding. You can eat for breakfast or as an after-dinner dessert; it’s entirely up to you. If there are any leftovers, you can always turn them into survival bars.

It’s super easy: keep your moist ingredients aside and use the dry ones as the basis for your MREs. Add a little bit of milk powder or sugar, mix the batter, add the moist ingredients, and put the batter in the oven. You may want to check my article on how to prepare home-made MREs for additional ingredients and instructions.

So, this simple recipe will help you deal with any kind of pains, back or otherwise. I can’t say for sure how long before it kicks in – can be a couple of days, weeks or even months. In my case, I started feeling a whole lot better after eating this pudding for an entire month.

Anyway, hope you liked my recipe, guys. Hit the comment section to tell me how things turned out for you.

Now, the recipe I’m about to show you is great at dealing with all sorts of pains. It involves 3 types of seeds and raisins. I know that it sounds

A couple of days ago, I took my wife and kids for a ride to our hunting cabin. The weather was holding and, I said, why not? Four hours later, we arrived only to find out that someone nicked the power transformer from one of the nearby electricity poles.

Long story short, our weekend was doomed because the electricity company representative said that a replacement should arrive in a couple of weeks. Back when we furnished the place, we didn’t consider that something like this could happen, and so we went ahead and bought all the electrical appliances we could find at a discount.

Here’s where things get interesting. My grandma gave me this old and battered chest. Told me that inside it I’d find anything a chef needs to whip up a quick dinner, power or not. Because that thing was heavy and smelly, I figured that the best place to store it would be the hunting cabin.

Seeing that the power won’t come any time soon, I took a peek inside the chest to see if there’s anything of use there. I am not exaggerating when I’m saying that I struck gold. Inside, were indeed all the kitchen tools one could need to live a totally electricity-free life. And I would be lying if I didn’t admit that we had some trouble figuring out what goes where or how to use those thingies.

Anyway, seeing that more and more of you guys are asking about powerless appliances, I figured showing you my list of 8 most useful kitchen stuff. Dunno if you have chest inherited from your grandparents or not, but, surprisingly enough, most of this stuff can be bought from just any kitchen appliances store, and, yes, they don’t cost a fortune. So, without further ado, here are my choices in powerless kitchen gadgets.

  1. Hand-operated coffee grinder

Because I’m a coffee junkie I’m going to start by saying just how awesome and handy a cordless coffee grinder is. I mean, nothing compares to that subtle, yet flamboyant, freshly-ground coffee aroma – way better than sex (hope my wife doesn’t read this article).

Anyway, if you get ahold of one of these gadgets, be sure to hit your local gourmet coffee store for some great beans. While you’re at it, learn how to make Turkish-style coffee – beats espresso any time of the week. Be sure to clean your grinder every now and then and oil those parts to prevent blockages.

2. Meat grinder

If we’re talking of couldn’t-do-without kitchen items, the meat grinder’s is out there with the big shots. Nearly every recipe that calls for minced meat, whether it’s lasagna, moussaka or meatballs, will taste even better with freshly-minced meat. For a while, I used to buy minced pork from my local supermarket.

Gave it up for Lent after I discovered that I could make it at home, with the cuts of choice. More that than, I simply abhor the fact that even the most expensive minced meat is filled with so much water that you mostly end up boiling your meat instead of searing it. Great little gadget, very low maintenance, but now so great when it comes to cleaning it. Pros and cons, man. Pros and cons.

3. Hand-cranked food processor

I like preparing salad dressing as much as the next person, but doing so without an electrical blender is quite difficult. Wrong! The hand-cranked food processor will chop down your veggies or meats in a matter of seconds just like any over glorified electric blender. Just make sure to give those blades a quick sharpening from time to time and to apply some oil or WD 40 on the moving parts.

4. Kitchen scale

My wife’s madly in love with making all sorts of cakes and cookies and pastry. However, most of the time, she needs a scale to measure the ingredients – sometimes I feel like I’m stepping into a meth lab or something.

My take on the electronic scale is the old and moderately precise mechanical scale – a cup, a platform, and several weights. Might not work that well if you need to measure with Swiss precision, but other than that it’s a very dependable kitchen item.

5. Tea kettle

Not much of a tea drinker myself (usually do that when I’m nursing a cold). But I have to admit that a tea kettle is pretty useful around the house, especially when the power goes out.  More than that, if properly maintained, a kettle can last for decades if not more (mom said granny got her tea kettle from her mom). It’s also a very fast and low-gas consuming way of warming up water for other necessities.

6. Eggbeater

Forget the mixer! If you really want to step up your kitchen game, learn how to tame the egg beater. IT’s a really simple item, but one that helps you prepare far more stuff than omelets (I like to use it to prepare the bather for my MRE survival bars).

7. Can opener

Those electrical gadgets are shinny and new but much too unreliable to be kept around the house. If the power doesn’t go out on you, that thing will break down faster than you can say “preparedness.” I had to fix two of those blasted things and buy three others. So, my solution was simple – out with the bad and in with the good, the good being the mechanical can opener. Solid piece of work, capable of breaking into just about any can out there.

8. Water filter

Water comes, and water goes. No matter where you’re from, you must always ensure that the water you drink is, well, drinkable. That’s why a water filter is a must around any house, hunting cabin or duplex. It may be a little expensive compared to the other items on this list, especially the spare carbon filters, but it’s an investment worth making.

That’s my list. Do you have some other mechanical gadgets on your mind or in your off grid house? Share it here.

Dunno if you have chest inherited from your grandparents or not, but, surprisingly enough, most of this stuff can be bought from just any kitchen appliances store, and, yes, they

Any SHTF story begins like this: “so, there I was, once upon a time (in December), in the wild, no water, no food, and with wolves on my ass.” Well, not exactly like that, but you get the picture. What I meant to say was that in every survival-type situation, water becomes denominator. And for good reasons – you need water for digestion, heat regulation, breathing, living, stuff like that.

Today, I’m going to hit you with my very best FUBAR story – how I converted my heater and toilet into open bars. See, when you’re at home, in the city, you fail to realize just how important water is. Sure, tune on the tap, and, voila, you have water. The nasty part comes soon after there’s no more water coming from the taps and you have no idea what to do next. Keep calm, my friend! Water can be siphoned from any area of the house, and I’m going to show you how I did it. Let’s start with the heater first.

Sucking Water out of the Heater, Dracula Style

“Listen to them (water heaters). They’re the children of the night”, and what music they make when you plug a hose in them to suck out that water. Backtracking a bit, a couple of months ago, there was a power outage in Fresno. A big one at that – must have at least 2 days, if not more. Anyway, I was at home, thinking about going out to buy a couple of stuff for my household emergency kit.

Ironically, we’ve just the last drop of bottled water to prepare formula for the tyke (bundle of joy that little monster is). I need to say that some time ago, at father-in-law’s bequest, I swapped the old electrical water pump for a brand-new, computer-controlled one. Yes, I know it’s the stupidest thing a prepper can do, but, hey, it’s hard to talk your way out of the wishes of a retired Marine.

So, the power goes out. Naturally, I went for the breakers. Nothing! Tried everything I could think of but to no avail. Soon enough, I came to realize that I didn’t have a drop of water left in the house. Okay, so what do I do? And then it hit me – I recalled reading in a book or something about using the water heater’s contents to augment my non-existing water sources.

So, after some careful deliberation, I grabbed my toolbox, a hose, and a bucket and got to work. Here’s what I did. One short disclaimer though: my heater is electric. This means that the things I’m about to show may not apply to you if it’s running on gas or an older model.

  1. Turn off the heater

You can’t just siphon water from the thing while it’s still running. For once, the thing has a lot of fail safeties in place to prevent leakages. And two – the water inside has around 104 degrees Fahrenheit, which means that you’ll wind up with a nasty second-degree burn if you try anything. What I did was to unplug the thing completely (could still have had some juice in the system, so I took no chances) and let it be for the next 12 hours.

Naturally, I had to make do without the water from the heater. I’ll tell you in a sec, what I did in the meantime. While searching online for my water heater model, I’ve discovered, much to my amusement, that the damned thing had a sort of blanket around it to help keep the water hot. If you want the water inside to cool off faster, I would advise removing the heater’s “coat.” This will cut back on the cooking time by at least a couple of hours, if not more.

Now, in case you have a propane water heater, don’t forget to close the gas intake valve before cutting the electrical power. It should be somewhere at the bottom of the heater. Best thing to do would be to read the heater’s manual for more info. Same thing as before – allow the heater to cool down before attempting to siphon the water inside.

2. Figuring out where the drain valve is

Okay, after allowing the heater to cool down, next on the list is to identify the drain valve. In my case, it was way in the back (had to move the water heater to gain access to it; hard to since the support was nailed to the floor). Most heater models have plastic drain valves. However, some of them have metallic taps. Whatever the case may be, rotate the heater, until the valve’s facing you. If your heater is on a rack just like mine is, don’t take it down. The slope will allow the water to drain faster.

3. The old hose-and-bucket switcheroo

Take a hose (I’ve used an old sprinkler hose which I was keeping in the shed) and attach it to the drain valve. Place the other end in an empty and clean bucket. Don’t forget that some of this water will be used for stuff like cooking, washing, and drinking.

So, storing it in a clean container is a must. One thinks to keep in mind – water heaters are not that great at water filtration as other appliances. You may have to sterilize the water before drinking it. There are plenty of ways to do that: boiling, distillation, chlorination, tossing in a couple of water purification tablets. The choice is up to you. I, for one, boiled the living hell out of that water before I poured it into clean bottles.

4. Open the valve and let it rain!

Before attempting anything, open a sink faucet anywhere in the house but the place where your heater is. Once you’ve placed the hose inside the bucket, open the drain valve halfway. When the water’s starting to come out of the hose, you can fully open the valve. Keep an eye out on that bucket because it’s going to fill up pretty fast.

Be sure to change buckets once the hose starts to resurface. You can store the water from the heater in the bathtub, collapsible water carrier or inflatable kiddie pool. On average, there should be at least 50 gallons of water inside the heater at all times. Just don’t let that water go to waste. Once you’ve siphoned every last drop of water from the thingamajig, don’t forget to close the tap.

Finding even more water around the house

Do keep in mind that the heater is not the only emergency water source around the house. Even though the pump may be out of commission, there’s still water in the pipes. The quickest way to get some extra water would be to find a low-lying outlet like the one connecting the toilet tank to the pipes and to remove the part that goes into the tank.

Get a bucket or a plastic bowl and put the disconnected pipe inside. Gravity will do its magic, and the remaining pipe water will slowly appear in you basic. Of course, there are always at least 2 gallons of water inside the water tanks which can be used for stuff like washing dishes or cleaning.

Just remember that neither the water inside the heater nor that drained from the toilet tank or pipes is entirely safe to drink. As always, if it’s intended for long-term use, although I do not recommend it, use one or more water purification methods to remove harmful bacteria.

This concludes my mission with this article. If you have anything to share about it, please feel free to comment or send us an email. Have a good one.

So, the power goes out. No water! Tried everything I could think of but to no avail. Soon enough, I came to realize that I didn’t have a drop of

You know ‘em, you buy them by the dozen, and they usually end up in the washing machine along with the rest of the clothes. Yup, you’ve guessed it – the chapstick, the only thing that shouldn’t be missing from your pocket, especially during the cold weather, regardless of sex. Sure, it’s funny to see a 7-foot-something mountain of a man using a chapstick because of cracked lips, but still, the thing has its uses.

A couple of days ago, I was at home watching this guy on TV who kept on repeating that all everyday items can be used in an SHTF situation. This guy did say that ALL EVERYDAY ITEMS, including the ones found in pockets and purses, can be used for survival. He managed to cover everything from lipstick, hand sanitizer, credit cards, and pens, but he missed out on one item that can do that all of that stuff put together.

And, after doing a bit of snooping around on the Internet, I’ve discovered some of the most ingenious uses for these objects which, as I earlier said, ends up on the clothesline after a good wash. So, without further ado, here are 9 awesome ways to use chapsticks in and SHTF situation.

  1. Blister buster

If you’re the kind of person who gets blister each time he wears a new pair of shoes, then chapstick is the answer you were seeking. Since the stick contains a small amount of antibacterial substance, applying a little bit on the area predisposed to chaffing and blistering will go a very long way. Give it a go and see how it works.

  1. Fixing small cuts

In case you find yourself without disinfectant or bandage, you can apply a thin layer of chapstick on the cut. Bear in mind though that this only works for small cuts (wouldn’t try using it on larger wounds). If you really want to speed up healing, you can use a combo of chapstick and clean cloth on the cut.

  1. Cleaning glasses

As the very proud owner of prescription glasses since the age of 12, I can tell you that nothing cleans lens better than chapstick. First, wipe both lenses with a clean cloth and then apply a very thin layer of chapstick. You can use the same cloth to wipe off the chapstick, or you can rinse the glasses with plain tap water (don’t do this too often, as water can erode the lens). Sure, this may not qualify as a run-of-the-mill SHTF situation, but do bear in mind that many car accidents have occurred because the drivers simply forgot to wipe off their glasses before getting behind the wheel.

  1. Hiding money

If you live in a rough neighborhood, then your kind of forced to improvise when it comes to money. Sure, keeping them on credit cards or a virtual account like PayPal usually works, but with cash being king you simply cannot step out of the house with a couple of greens on you.

A very clever way to conceal money is by using an empty chapstick tube. Pocket the thing and in case trouble find you the only thing your wannabee robber will see is a regular chapstick tube. You can also use the same method to save some cash for stuff – that’s how my wife bought me an amazing B.O.B for my birthday.

  1. Crafting emergency candles

For when the lights go out, that’s when all the hidden treasures of the world reveal themselves. The nigh may be dark and filled with dangers, but nothing a little light can’t solve. If you’re all out of 24-hour candles or flashlight died out on you, it’s possible to make an emergency candle out of a chapstick. Get a Q-tip and pop the top of your chapstick. Fluff the cotton on one end and dip it into the chapstick. After that, simply stick the other end in the stick, use your favorite fire-starting method on the fluffed end, and, voila, let there be light!

  1. Blocking sun glare

Summer’s great – except for that f-ing glare which makes you feel like somebody used your eyes for Voodoo practice. Of course, nothing beats sunglasses, but in case you lose or break them you can block some of the glare by using a combination of soot and chapstick. On a clean surface, put the contents of a chapstick. Grab a handful of soot and use a stick or something to mix them. Smear this under your eyelids, and you’re good to go.

  1. Setting up snares

If you’re trapped in the wild with no food, you can use chapsticks to bait small animals. Rabbits, for instance, are suckers for anything that’s sweet (no, you can’t use your engagement photo to lure the critter into your trap). Set up a trap and instead of food, place an opened chapstick (would be great if you have one with fruit-flavored one).

  1. Leather care

There is plenty of stuff on the market for leather care. However, I found out that nothing makes a leathery surface shine better than a chapstick. It’s very similar to using the cream for your shoes or boots: wipe off the dirt and dust with a clean cloth and then apply a thin layer of chapstick. For a great shine, use a fine brush after the chapstick has dried.

  1. Lubricant

First of all, wipe that smirk off your face. I was talking about things that need a little extra something to get moving like screws or a machinery’s moving part. If something’s stuck and won’t budge, you can always replace the famous WD40 squirt with chapstick. It works wonder on rusty things as well.

Hope you’ve enjoyed my piece. As always, if you have any questions, wanna say ‘hi’ or add something to the list, hit the comment section.

After doing a bit of snooping around on the Internet, I’ve discovered some of the most ingenious uses for these objects which, as I earlier said, ends up on the

I know this is not the first time I’ve written about flea markets and garage sales. Probably won’t be the last time either. Do you want to know the secret behind a successful flea market shopping spree? – never expecting to find anything of use. It really works, and I’ve tested it a couple of times.

See, when you go with a shopping list in hand, chances are you find zilch or end up buying crap you really didn’t need. That’s the beauty of browsing without purchasing I guess – expecting nothing, but, boy, when you do finally find that one item you were looking for, it’s as if the skies themselves opened up to you (with trumpeting angels and everything).

Anyway, as I’ve said it countless times, the flea market is treasure troves, especially to us preppers who are always on the lookout for more stuff to enhance our survival kits or B.O.Bs. And since “old is the new, well, new,” in today’s article I’m going to talk about some neat vintage items I picked off from my last trip to the flea market.

Why vintage? Because they’re cool and, of course, most of them have no need for electricity or whatever to work, which makes them invaluable in just about SHTF situation. If you’re interested in visiting this flea market, I was talking about, come to Bozeman, Montana, and check at the corner of S. Wilson and W. Main Street. If the weather holds out, the chances are that those wonderful guys will probably stay for a couple of days more.

Now, before I bore you to death, here’s my list of retro\vintage things I bought from the flea market.

  1. Adze

No, it’s some kind of STD or ad on someone of those websites with a lot of onomatopoeia, it’s actually a very useful wood-working tool. See, if you’re into carpentry and would like, say, to make the surface of a log smoother, you need this bad boy to scoop out the excess wood.


It kinda resembles a pickaxe or a garden hoe, except for the top part which is shaped like a cone or scoop instead of being pointy. I guess you can buy one from any hardware store but, in my experience, special tools like the adze are very hard to come by – a friend of mine had one custom-made ‘cause he was unable to find one for sale. Picked up mine for $10. ‘Twas a little out of shape; the scoop needed to be straightened, but there’s nothing a little hammering can’t solve.

  1. Apple slicing implement

How about them apples? Everybody loves ‘em (except for docs, of course, who tend to cower in the corner like Nosferatu or something) and for darn good reasons. Still, the most annoying thing about them is having to peel and remove the core. Well, for me, that’s kind of a thing of the past, since I’ve managed to get one of those apple slicing and coring gadget. Nothing too fancy about it: just a squid-like metal ring with several tiny jagged strings in the middle.

Handy to have around the house, especially if you like (or are forced) to prepare stuff like baby purees, salads or are plain lazy. I got mine for two bucks, and I can wholeheartedly say that it was money well spent. Dunno why it’s considered a vintage item though. Sure, compared to a food processor, nearly every kitchen tool can be considered obsolete. However, sometimes, simple is better. Doctor, it’s safe to come out now! Finished talking about apples.

  1. French press

Of course, brother Eddie is going to write about another nifty coffee gadget he bought from the yard sale. This time, it’s an awesome and, why not, a peculiar contraption called the French press. No, it’s not used to print newspapers or counterfeit money, but for making coffee. I really can’t figure out why people stick to coffeemakers instead of using one of these bad boys. Anyways, the French press is basically a glass jar with a little flat piece in the middle that can be moved with a lever.

All you have to do in order to make a great cup of coffee is to add water, coffee, and wait a couple of minutes. Then you simply press the lever all the way down – coffee ground remains on the bottom, and you’re free to serve. The one I got from the flea market is made out of the tin, which means I can also use it to boil water. If I’m not mistaken, there’s even a tea version of the French press – works the same, but the strainer is thinner.

  1. Cameras

Time and time again, I’ve been trying to convince myself to go digital. Sure, nothing beats the 35mm for a mirrorless or 8mm for one of those vintage cam records, but the thing is, they’re very hard to come by these days. In fact, the last 8mm dozen I bought came from an online auction on eBay.

If you really don’t want to spend hundreds of bucks on something you may or may not use (if you’re not into photography, selfies or whatever, you should at least have a digital with you for insurance purposes), you should definitely take a closer look around the flea market.

My wife managed to get ahead of me this time, and, oh boy, the stunt she pulled! We managed to get ourselves a brand-new Canon EOS (thing was literally inside its original packaging). For this jewel, we forked over 25 bucks. Now that’s what I call a great bargain!

  1. Electric bum warmer

Before there were self-heating chairs and portable heaters, there were the so-called electric bum warmer. Basically, it’s a blanket with heating elements placed on some kind of support. These things sold like hot cakes during the early 50s and were very much appreciated by the ladies, especially during those not-so-pleasant-days of the months.

If you happen to come across one of these babies during one of your trips, do yourself a world of good and buy one. I purchased two of them for my hunting cabin – beats cranking up the heat and it comes really handy when it’s cold outside, and I have to do some tinkering in the garage.

  1. Keyhole saw

Also called the jab or alligator saw, this nifty little tool is great for jobs that call for precision cutting. Yes, I know that you can probably find one in every hardware store, but do keep in mind that the manufacturing tech has changed quite a bit.

In other words, you might end up doing more stuff with the one you found in your grandpa’s toolbox than a brand-new one. You should also know that the first batch of alligators ever produced had their blades made from stainless steel, and the handles from sterling oak – not that’s what I call solid, all-American craftsmanship!

  1. Goosewing axes

And because we like to enjoy the little things in life like splitting a fire log evenly, here’s on an item that shouldn’t be missing from your tool shed – the goosewing ax. For those of you who are unfamiliar with the terms, goosewings resemble those broad axes Vikings used during their raiding parties.

The ‘civilian’ version, if we can call it that, has a smaller head, shorter handle, but preserves the same curvature. As for the answer to our Friday night trivia: “what the Hell can I do with the midget version of the executioner’s blade?” (dramatic pause). Busting knots. Plain and simple. No matter how much strength you put in that swing, the blasted thing will not keel.

That’s where the goosewing comes into play – the blade chops and, at the same time, splits the wood. Careful though, because this ax version is heavier than most. And yes, you can find goosewings at any flea market. Just give it a good sharpening after you bring it home (handle might need some polishing too).

  1. Stanley’s Zig-Zag Rule

No, it’s nothing like Occam’s blade or Murphy’s rules which should, by the way, be taught in prepping school, if there ever will be such a thing. Stanley’ Zig-zag is a foldable measuring device that can fit inside any pocket. Shorter than a tape measure, but far sturdier, it’s the kind of tool carried around by engineers and constructors ever since the late 19th century.

The most common Stanleys had 15 folding points and a total length of 35 inches. Now, this is the kind of tool you would want in your shed, especially if you’re into carpeting or metalworking. I found one at a flea market in Toronto last year. Think I must have paid 2 bucks or something. Ka-Ching!

  1. Plumb bob

Sometimes it’s hard to guess whether the thing you’re working on is straight or will turn out crooked. This is why it’s always a great idea to have a plumb bob nearby – a nifty and very basic tool that lets you determine the true vertical faster than you can say “preparedness.” Of course, if have the right materials, you can build one at home. Still, if you come across a flea marketeer selling one of these thingies, you should definitely go in for the kill.

  1. Vise clamps

I very much like wood-working, but I always had trouble gluing pieces together, especially when I have to use fast-setting epoxy. Vise clamps are great for this kind of job and, if you’re lucky, you can probably walk off with a whole bunch of them.

That about wraps it for my list of 10 retro items bought from flea markets. Before going away, I should give you a bit of a heads up – don’t expect everything you buy to be in tip-top shape. Sure, there’s always a chance you can end up with a mint-edition item, but those are very rare instances.

In fact, in most cases, the items have some kind of defect – missing screws, paint scratched, faulty wiring, extensive warping, and the list goes on. My advice to you is this: don’t blow a gasket and don’t throw the object in the trash. Yes, I know it’s very frustrating to end up buying a big nothing, but do keep in mind that with a bit of love, care, tenderness, and the right Philips screwdriver, everything can be fixed.

So, what are your thoughts on this list? Think something’s missing from it? Then hit the comment section and let me know. I would very much also like to hear some of you more “unusual” experiences from trips to the flea market. Who knows? Maybe some of you managed to find a missing Rembrandt or perhaps other treasures from the past.

Do you want to know the secret behind a successful flea market shopping spree? – never expecting to find anything of use. It really works, and I’ve tested it a

In modern times we have become accustomed to medication and healing being only a phone call away. It wasn’t that long ago that we were much more vulnerable to disease. In 1800 43% of children died before their 5th birthday. Its a staggering stat.

This should act as a reminder that without modern medicine the elderly and the young suffer and die on a regular basis. The young and healthy are also subject to the same fate. We have seen modern medicine come to a screeching halt after major hurricanes and other powerful natural disasters.

Of course, these are temporary issues but imagine a world where the medicine runs out, the doctors leave, and you are left to fend for yourself. Could you become the physician and healer in your own family?

Medical Preparedness

Our powerful and effective pharmaceutical and medical industries have extended lifespan and created incredible advancements. However, that power is something of a double-edged sword. Its has also created dependency.

Most Americans have a box of band aids and some OTC medicines in their cabinets. That is the extent of medical preparations. This can be a big problem if we see a time of long-term calamity. Most people think about empty shelves and they get hungry.

Food isn’t the only thing that will go away. All medications, bandages, ointments and other first aid related materials will be gone, as well. Everything must be shipped into your community by trucks and if those roads are obstructed or trucks left inoperable you will literally have to get by with what you have on hand right now.

Can you imagine cutting yourself and worrying about dying from infection?

This will be the situation in a world where waste management is offline, and plumbing is compromised. To be blunt there will be trash and feces in the streets! Next come the pests and they bring disease and viruses.

You need a serious stockpile of medical and first aid preps to assure you are ready for the worst-case scenario.

Natural Healing

You can also leverage the world of natural healing to help with the trials of serious disaster.

Medicinal Herbs

Many plants have powerful healing benefits. Therefore, many preppers dedicate large spaces in their garden to growing herbs. Many herbs have culinary and medicinal uses. Things like oregano have powerful antibacterial properties.

Essential Oils

By taking many of these powerful herbs and pulling the essence out of those herbs and plants you get powerful medicines that can be used and blended in all sorts of ways. Essential oils are a tough thing to recreate but a small stockpile can address everything from allergies to wound healing and even boost immunity.

Trees

The secret of the survival world are the trees. Trees are an incredible resource, but they take some time to learn. Some trees are even painkillers and fever reducers! The best part about these trees is that they are around for all four seasons. That is big!

While gardens die off and wild plants get buried by snow, trees carry on. You can drink the immune boosting pine needle tea 365 days a year and get those benefits.

Learning about the healing powers of trees is essential.

Medical Library

Having the right books on hand to create a medical library can also make a huge difference if the medical system is compromised. Having some high-quality medical resources will give you a tangible resource that you are going to turn to in the worst-case scenario.

If you are looking to get the full preparedness spectrum covered, The Doomsday Book Of Medicine is available now and has one of the most extensive and well researched healthy nutrition system on the market!

You will learn the natural healing methods as well as which medical preps to stockpile.

There are many books out there and the more extensive your library the better.

First Aid Skills

Even with a stockpile of resources and a medical library, practiced skills are what truly makes a difference. Your medical library can teach you about procedures and processes but that can never be a substitute for hands on experience with things like CPR and dealing with real medical emergencies in real time.

Most people don’t go to this level because it takes physical work and dedication. However, we are moving into a time when skills like these are no longer going to be options. State agencies offer up free classes on first aid under the CERT program.

These are 8-hour courses and though they are a time investment, you will come away with some serious skills. Of course, it will be up to you to keep those skills sharp.

Trauma classes are also popping up all over the nation. If you decide to jump into one of these, they often cost money and you must be careful about your instructors. Get to know their background and why they are an instructor.

Conclusion

There is a reason medical doctors are in school for so long. There is a lot to learn! There is a lot of practice to be had and experience to gain. If we face a serious collapse of basic services and critical infrastructure its going to disrupt our medical system and you are going to become the family physician.

What will you do when they look to you for answers? Are you prepared to act, are you informed enough to act?

If not, you should consider resources listed above. You should invest in a sturdy medical library and a stockpile of first aid supplies and OTC medications. You could also check out The Doomsday Book Of Medicine and add that powerful prepping resource to your library, as well.

Surviving a serious disaster is about gaining every advantage you can.


In modern times we have become accustomed to medication and healing being only a phone call away. It wasn’t that long ago that we were much more vulnerable to disease.

Knees are weak; palms are sweaty… Just one of those passing migraines that have the habit of ruining a perfectly good day. As one who had to deal with migraines for the past couple of years, popping pills has become something of a hobby for yours truly.

And even my prescription meds, I can’t seem to shake loose those annoying and throbbing aches.

Anyway, after seeing that marvelous piece on the effects of garlic inside the ear ! I’ve decided to let you on a little prepping secret: salt cures migraines! What? You can’t be serious.

Yes, I am. You mean the same stuff that makes our ticker go haywire can actually cure a frigging migraine? Yup, that’s right. Wouldn’t have written about it if I had even the slightest doubt about it. Even tried it out me to see if works, and it does. Dunno if its placebo or the real McCoy, but the thing is that my migraines are getting less, well, migrainy.

Still, before showing you this neat little trick, let’s get sciency a bit and talk about the connection between sodium (salt) and migraines.

Salt and Migraines Don’t Click! Or do They?

Let’s consider the basics – we need electrolytes in order to live, breath, and thrive; no, you’re going to drink Gatorade instead of water because it contains electrolytes. Think of these substances as the body’s electricity conductors. Their job is to balance the fluids that flow between the outside and the inside of our cells.

As you’ve probably guessed it, sodium is an electrolyte. The most important one at the that. Potassium is also an electrolyte. Now, the interaction between sodium and potassium creates what it’s called an action potential, which is another fancy word for electrical stimulation. This prompts our cells to wake up and do what they’re supposed to do. More or less, it’s like prodding a stubborn cow with one of those electrical batons to make it move.

Our bodies, like the perfect little machines they are, have this innate ability to auto-balance sodium level, but only to a certain degree. Too little sodium and you get kick-ass symptoms like fatigue, hallucinations, headaches, and, yes migraines. On the other hand, low levels of sodium lead to more debilitating symptoms like seizures, coma, and, of course, meeting Lady Scythe. Lovely, isn’t it? Well, that’s it for sodium. But what about migraines?

Well, if you had one before, then you know that it’s something much worse then a headache. For the others, migraine is the, let’s say, the lovechild of headaches and extreme nausea.

Migraines end in throbbing headaches, but they’re usually accompanied by symptoms such as nausea, vomiting, change of vision (your eyes are unable to focus that well), and numbness in the arms, legs, and feet. In some people, migraines can cause hypersensitivity to light (master, don’t come out! The sun’s still up), irritability, and loss of appetite.

I usually end up spending the rest of the day in my attic, listening to some tunes, each time the migraine hits.

Great info, but what’s the connection? Hold your britches. Here’s what you need to know. Among the most common causes of migraines is lack of sleep, dehydration, too much salt, stress, food additives, weather changes, and, bam, electrolyte imbalance.

Though the exact relationship between sodium and migraines has yet to be determined, the guys in cool lab coats, tend to think that it has very much to do with our diet and how our body processes vits, minerals, and nutrients. Our body cannot produce salt, so we need to get it from somewhere else (food and drinks).

The sad part is that although we try our best to curb our salt intake since it’s known to lead to cardiovascular disease, we end up eating more salt than the recommended daily dose. Why? Because our f-ing food is riddled with it. Everything from meat to dairy, sweets, and processed food contains more salt than a saline quarry.

You know what’s the recommended salt intake? 2300 mg – that’s about three-quarters of a teaspoon. Still, with all this wondrous food around, we end up eating one and a half teaspoons of salt per day, if not more.

So how does this amount to salt being good for migraines? Well, some researchers have found out that patients who consumed a small amount of salt were less likely to experience debilitating migraine symptoms compared to those on low sodium diets or no salt. Again, they don’t know for sure why it happens, but it seems to pay off. I tried this cure a couple of times, and it worked like magic.

My take on pain meds

So, to get rid of those migraines here’s what you will need to do. Grab an empty glass, a lemon, salt, and a jug of water. Squeeze the lemon juice, pour it in the glass, then add one tablespoon of salt and water. Stir and shake. Drink it, and that’s basically it. In 30 minutes, tops, you’ll feel like a new man or woman. That’s it – simplicity itself laid out in front of you.

One word of caution, though. If you have heart or kidney issues, I wouldn’t advise using this trick, since it can lead to other nasty entanglements.

You can also use the same mixture of other hygienic purposes. For instance, if you eliminate the lemon, the water-and-salt mix is great for reducing throat swelling. Also, those who have gland problems (another fancy word for smelly feet or armpits), try washing the aforementioned body parts in water with a little bit of Epsom salts. Stay safe!

Well, if you had one before, then you know that it’s something much worse then a headache. For the others, migraine is the, let’s say, the lovechild of headaches and

You’re looking at a man who is 50 bucks richer than yesterday. Why? Because I just won myself a bet, that’s why. See, a while back, I got into an argument with a prepper friend of mine – great guy, but a bit of a shrewd when it comes to buying survival equipment. His theory is nothing can beat first-hand, mint, hot-off-the-press items (yup, he’s that kind of dude who believes in the power of new, I’m not talking about religion here).

Anyway, we were out talking about the finer points of pre-EMP prepping (meaning that we cracked open a couple of cold ones and watching the game), when he got around to telling us how he spent this $1,000 monthly bonus on gear.

Can’t say that I was too impressed about the sum, and neither were the other guys. Now, a couple of minutes later, I wagered him that I could probably get the same items he got for $20 if not less. Of course, no wager’s complete without something to sweeten the pot – our bet was 50 bucks. Kind of have to admit that it was like taking candy for a tyke because I knew that the yard sale season was coming (sorry, dude, but you kind of asked for it).

And so, at the crack of dawn, I got up, put on my awesome lumberjack jacket and went around the neighborhood to see what’s cooking.

Living in the suburbs does have its perks – neighbors are annoyingly friendly and, with a bit of luck and, of course, a wide smile painted on your face, you can probably end up buying everything you need from the house without having to spend more dough than necessary.

And wouldn’t you know it, I managed to spend no more and no less than 20 bucks. Needless to say, my wife gave me the death stare when I got home with all that stuff because I knew too well that we have a major storage issue. But, a bet’s a bet.

So, after my glory dance and in-your-face-loser moment, I thought I should let you guys on the spoils. Now, I know that most of you are not quite taken aback by the perspective of buying survival stuff from an old man’s garage, but if you know what you’re looking for and know how to haggle a bit, you can even walk out with stuff you usually find in antique stores (a friend of mine bought a fully functional pair of WW2 field binoculars from a guy with a “$5 everything” sign on his table).

Now, without further ado, here’s what 20 bucks got me from yard sales.

  1. Radio

I was planning on buying myself a CB radio for the family van, but never really got around to it. Luckily, while doing a bit of snooping at the yard sale, I managed to find a fully functional one.

The owner, who was a cab driver in NY before retirement said he bought the thing back in the ’70s for his pickup but never used it. After a bit of haggling, I’ve managed to convince him to sell me the thing for five bucks.

Apparently, he was so grateful for getting rid of that thing, that he even gave me the matching antenna and car dongle. Neat!

2. Hiking pack and frame

One does not have to be a mountain junkie to get a hiking pack. Those things are great for most any job that requires some serious lifting.

Can’t say I needed a pack, but seeing that this dude was selling and an army-style pack with a metallic frame – those things are so old-school, that even pops said he hadn’t seen one of those since his days in the Army. The pack was in a pretty good condition, considering the price (paid $4 for it).

Still, I had to sew back one of the straps which probably came lose some time ago and reinforce the metal frame with some pieces of sheet iron. Other than that, I think I got a pretty good deal if I say so myself.

3. Propane tank

Propane tanks aren’t that pricey, but hauling them can give anyone nightmares. I personally abhor to go and refill the propane canisters for our generator, that’s why I always avoid using it till the very last moment.

In searching the yard sale, I came upon a nice lady who said that she no longer has a use for a BBQ propane tank since the thing broke down years ago. Scored one full propane tank for a couple of bucks. Great! Now I got to figure out what to use it on.

4. Suturing kits and medical instruments

One of the biggest frustrations is not being able to get into pre-med. Don’t quite recall exactly what happened, but it doesn’t really matter. Anyway, I’m sort of a freak when it comes to med stuff (even got my own CPR dummy in the garage), which means I’m always on the lookout for a way to make my super-duper first-aid kit even more awesome.

In searching for stuff, I came upon this elderly gent who used to be a gynecologist back in the day. We chatted for a while about the med, disease, pills, aches, and things like that. Didn’t leave empty-handed, though – got a couple of sealed 3.0 silk suturing kit, forceps, and a pair of pickups for $6 (of course I’ll sterilize them before use!). He was nice enough to throw in a scalpel, as a bonus (love you, gramps!).

5. Gold and silver coins

You don’t know a thing about swindling if you’ve never been to a yard sale. One of the guys living next to my house was offering for sale a small chest which he claimed to contain golden and silver coins from Napoleon’s time. Was a bit skeptical at first, but I soon came to realize that the man was right.

What follows is a “don’t try this at home, kids” moment – took a bit off one and told the man that all of them were tin replicas of Napoleonic coins. Yes, I know I should be ashamed, but that’s how it went down. I bought the chest and lot for $8. The things you find at yard sales nowadays!

6. Hand-cranked lantern

Remember those oil-powered lanterns you see in any Victorian movie? I managed to get myself a pretty decent electrically-powered replica of one for $3. Still, I think it needs a little bit of work – the bulb flickers from time to time, and the reflector dish is smudged.

The crank could also use a bit of oiling. Other than that, the lantern’s pretty good, and I can’t wait to try it out the next time I go camping with my wife.

7. Shit-ton of books

You can never have enough books. Yes, I admit to being a true-blooded book hoarder, and f-ing proud of it. Now, I’m painfully aware of the fact that electronic gadgets such as Kindles are great for the environment and all that, but I wouldn’t trade the smell of old books for anything. Not even at gunpoint.

Anyway, this time I managed to restock my poetry shelves with some classics – Tennyson, Whitman, Coleridge, and a little bit of Edgar Allan Poe. Some of them are in a deplorable state; the complete poetical works of Tennyson is covered in childish doodles, and even Poe’s not in very good shape. Still, two bucks are two bucks.

8. Canning jars

Whether it’s for pickling meat, stock, bouillon or storing MREs, canning jar are always a sight for sore eyes. Yeah, I know you can buy them by the dozen from any supermarket, but why bother when your neighbor is selling them at ludicrously low prices? I picked three jumbo pickling jars for 20 cents, each. Wife won’t be thrilled to find out that I’ll soon pickle more stuff, but, hey, can’t a man have fun around the kitchen?

9. Weathering stones

If you’re just as obsessed about keeping your knives razor-sharp, you know that weathering stones are a must around the house. Each time I go out shopping, I never forget to bag at least two or three. My yard sale tour was quite fruitful in this regard – managed to buy several sharpening stones of various smoothness for 10 cents each.

10. Intact tarps

Tarps are the Tom Mix pocket knife of B.O.B prepping, meaning that you can do just about anything with them – collect rainwater, use them for cover, make them into rain ponchos.

They’re also quite useful for keeping firewood dry and covering swimming pools during fall. The trouble with buying tarps from yard sales is that most of them are either warped or have small holes in them.

Yes, I know that you can fix those in the jiffy, but what’s the point of paying for a tarp if you have to patch it afterward? I got lucky on this one – my next-door neighbor sold me a couple of military-grade tarps for 2 bucks each. Quite a bargain and after getting them home, I realized that they were in pristine state.

11. Sleeping bag

It’s not what you might call hygienical, but who cares about germs and all that when you’re in an SHTF situation – probably the man with an infected wound.

Anyway, I really didn’t need another sleeping bag. Still, who can resist those granny eyes telling you that you’re as sweet as her grandson? A couple of minutes later and minus five bucks, I had a brand-new old sleeping bag.

12. Vacuum cleaner

You know what irks me the most about today’s electronics? They’re so fragile. Two years ago, I had an argument with my wife about what kind of vacuum cleaner we should buy. I may be stingy, but compared to her, I’m a spendthrift. So, we got this cheap-ass vacuum from the electronics store. Fast-forward in time, just before the bet, the wife called me to say that the motor burned out.

Great! More money on electronics, I told myself. But that yard sale really managed to sort this one out. There was this man who was selling a brand-new, no-sack, water filtration Samsung vacuum. The thing was in perfect condition – he didn’t even open the box. After haggling for a bit, I managed to convince him to sell it to me for $25 (yes, I know that I didn’t play fair, but the vacuum wasn’t even on the list).

13. WWI gas mask (I shit you not!)

On the topic of curious picked up from flea markets, sometimes, I have to admit, that these things are veritable treasure troves. During one of my raids (yeah, that’s what I like to call them) I actually managed to get my grimy paws on an authentic WWI gas mask.

Sure, it had no filter, and the bag was a little warped, but other than that the mask was in pretty good condition. I spend around $7 or $8 (can’t remember) for this piece of war memorabilia.

Dunno for sure what I’m going to do with it, though. It’s obvious that it can’t be used in this state, and spare WW1 gas masks filters are pretty expensive. Anyway, if you know someone who refurbished infantry equipment, do give me a holler. Beer will be on me!

14. Portable ashtray

Yes, I know I should give smoking for Lent – easier said than done. Meanwhile, I have had some issues over what to do with those butts while hiking.  Lucky for my local yard sale, because I managed to pick up some sets of three portable ashtrays (they even come with a lanyard hole in case you want to attach it to your backpack). The set was 2 bucks a piece. I bought three of them!

15. Spare ammo

Well, if you’re missing a couple of ammo boxes, you can always call upon your neighbors’ stocks. Haven’t picked up ammo from yard sales, but I’ve seen a guy who sold shotgun shells and AR ammo for $5 apiece. So, whenever in doubt, check your local flea market.

I know that most of you are not into buying survival stuff from a yard sale, but if you know what you’re looking for you can even walk out with

Food will always be king and the reason we have enjoyed the prosperity we have is because of easy access to food. In America, we waste 50% of the food we produce. That is astounding and gross. To those who survived the great depression of the 30’s the idea that any food could be wasted would be unbelievable.

So, how do we go from food being wasted to experiencing something like a global famine?

We have pressed the soil, resources, and planet itself, to a point where all are ready to break. The breadbasket of America and other massive agricultural areas are operating on soils depleted of nutrients and as the worlds, demand continues to grow there is massive pressure to achieve big yields year over year.

Let’s look at 4 factors that are going to affect a famine that starves billions.

Disease

There are some dangerous diseases affecting crops all over the world. UG99 Wheat Rust is a disease with no known cure that is affecting grain populations in America and Mexico. This disease could affect nearly 20% of all wheat crop is in danger of being infected but nearly all wheat crops could be infected by the disease.

There are other’s out there like Mad Soy Disease which is affecting soy crops in Brazil but has been isolated to the northern regions of the nation. We live in a world where people and commodities spread and diseases with them.

It would seem like its only a matter of time before big cash crops are leveled by disease

Soil Quality

The condition of the Earth’s topsoil is abysmal. It is estimated that 1/3 of all growing areas are losing topsoil faster than it can be reproduced. This means that every year farmers must pump loads of fertilizer and other nutrients into the soil in hopes that the plants will have enough to survive.

This drastically affects the quality of the produce and grains that are grown each year. Ideally, you want soil that is full of nutrition and it will impart that nutrition into your food. Instead, we are left with food that is mass produced but exponentially less nutritious than the food being produced in the past.

Before long, our foods will be more chemical and less nutrient or, worse yet, the crop yields will suffer dramatically.

This will lead to worldwide malnutrition and human disease.

Natural Disasters

We pull hundreds of millions of gallons of water from the ground to water these crops. Around the farmland, we decimate the trees and wild-lands. This land is then paved and is no longer capable of absorbing water.

Massive flooding is the outcome and it’s now affecting our growing areas. Without expansive wild areas to absorb the water from large storms, the water rushed to agricultural areas and worst of all it stays there.

The Earth’s natural disasters and our drainage limitations are putting us at a huge risk. The last bomb cyclone in Nebraska left 1,000,000 acres of land underwater and killed almost the same amount of calves.

With spring rains coming this could have lasting and devastating effects on food production. It only takes a few of these large-scale agricultural areas to be disrupted, plantings reduced or eliminated altogether, before the world has to tighten up on supply and people start going hungry.

Personal Food Security

With these three issues potentially having drastic effects on the food system, its safe to say you need a backup. In fact, you need a few. You want to buy, store and grow your way to personal food security. Of course, this is going to take planning and knowledge.

  • Gardening

Whether you go the route of building a food forest, hydroponically growing food, green housing or traditional food growing.

  • Livestock

From things as complicated and as expensive as raising cattle to simply raising chickens for eggs, you need to consider what you can do in terms of raising food-producing animals

  • Food Storage

Food storage is all about planning and rotation. In order to excel at this, you need to know the basics and remember, store what you eat!

  • Preservation

From dehydrating to canning, you will also want to know the majority of these skills and use them to both extend your harvest in the garden and build food storage

  • Foraging

There are food growing all around us, but you need to understand when and where to find them. These will be ancillary calories, but they will help.

  • Hunting

Though season dependent, hunting and trapping can both be impressive ways to put meat on the table or in the freezer.

Getting Started

There is a bit of a knowledge barrier and a lot of practice that goes into all of these. You need a trusted resource that will offer you information on these topics. You could peruse the internet and read various websites to get information on these topics.

A better move is to have a tangible resource that has all of this information in it. This puts a reference tool at your fingertips whether the lights are out or not!

Wouldn’t it be great if something like this existed? Well, you may want to look for The Doomsday Book Of Medicine. This book includes information about the above info and all the info you will need to reach a level of personal food security.

Oh yea, this is also packed with other information about prepping beyond food. You can find it all HERE.

I am not saying it’s the only resource but it’s damn sure a good one!

Conclusion

As the population grows, we are going to face a greater strain on the food system. Nature is hitting back against our modified mono-cultured crop systems and things like wheat, corn and soy production will be disrupted.

This time of excess cannot go on forever. We simply cannot pull out naturally occurring nutrients and replace them with chemicals as a long-term solution. Its time to take control of your own food production. You can do this.

With the right resource, you will find yourself escaping the coming famine and building your own personal food security. The Doomsday Book Of Medicine helps you all the way.


In America we waste 50% of the food we produce. That is astounding and gross. To those who survived the great depression of the 30’s the idea that any food

As a seasoned driver, I have to admit that there were times when someone would search the dictionary for the word “stupid,” he would have found my picture right underneath. This one time, I was driving through a blizzard and, all of a sudden, the engine stalled. Instead of using a flashlight to check under the hood as right-in-the-mind prepper would do, I got out my lighter because, hey, why would I need a flashlight in my car in the first place? In our cozy prepping world, if you don’t step up your game, you’ll probably end up dead or worse.

Anyway, after realizing just how stupid can stupid get, I told myself that if I ever got out this alive, I would make it my point to tell other fellow drivers and preppers about how far-reaching is a fully stocked and killer vehicle emergency kit.

I would like to start by pointing out that one should never hit the road without the essentials. Of course, it all depends on your state’s regulation, but mostly it all boils down to:

  • Jumper cables.
  • Toolkit for small patch-up jobs and repairs.
  • Spare tire (make sure the pressure is between 30 and 35 PSI).
  • First-aid kit.
  • Fire extinguisher (for those moments when everything goes up in flames, including your hopes and dreams).
  • Reflective or battery-powered emergency beacon.
  • Reflective Vest.
  • Jack.
  • Lug wrench.

So, these would be your basics. Ready to head into the advanced class? Best to warn you that a complete car emergency kit can and will make a dent in your budget. Here’s what I had in mind in terms of the ultimate vehicle emergency kit.

Mr. Fix-it-Al’ Has the Answer to All Your Issues

The first thing you should consider long before hitting the store for more supplies is where the road might take you. Snowy mountain peaks? Heavy rain? Muddy country roads? War zones? This is, without a doubt, the easiest way to figure out what supplies you’re missing. I, for one, ended up spending 400 bucks at Costco since the flashlight story painfully reminded me that I am in dire need for other stuff. Remember that your car’s emergency kit is intended for more scenarios, some of them going far beyond a flat or burnt bulb.

For instance, if you get caught in a blizzard, your emergency kit should have enough supplies for sheltering-in-place. Remember the news bulleting about the Swedish man who survived two months in extreme cold because he SO kicked him out of the house? How do you think he survived? Not wishful thinking, to be certain. He made it out alive because he had a shit-load of supplies inside the car.

So, to build a survival kit capable of catering your every need, take a quick look at my awesomely-drawn list.

  • Cat litter

No, you’re not going to adopt a cat, just yet. Kitty litter is very useful for a lot of stuff. Some drivers use it for defogging. I personally use it for traction – if your car gets snowbound, put some kitty litter underneath them wheels, and you’ll be out there in no time.

  • CB Radio

Obsolete technology, for sure, but still comes in handy when your phone loses signal. Tried it once on a country road. The phone had no signal, but I could still pick up chatter from police and passing truck drivers.

  • Foldable shovel

Great for a lot of stuff like de-snowing tires or burying the bodies of your slain enemies. The choice is yours.

  • Toilet paper

No comment!

  • Flashlight

Yes, genius, at least you got this one right. Don’t forget extra batteries. You should consider buying a tactical flashlight instead of a regular one – more battery, more fun!

  • Extra food and water
  • Mylar blanket

If you have a family car, you should buy one for each family member.

  • Tow Strap

Not that kind of strap, but I like the way you think. Was referring to that cord used to pull another car. While you’re at it, you should consider buying a hand winch – great for getting out if you get stuck in the mud.

  • Tire patch and repair kit.
  • Coolant hose repair kit.

Fantastic for getting out of Dodge when the radiator’s coolant hose has snapped. Saved me a lot of money and another trip to the auto shop.

  • Weather-dependent gear

Stock up on warm, winter clothes if you intend to brave the elements during cold weather. During the summer, you should have one extra cap, T-shirt, pants, some insect repellant, and sunscreen.

  • Insurance-claiming tools

This includes a disposable camera, which you can use to take pics of the damages or at least some awesome selfies, pen, paper, and a copy of your car’s insurance card.

  • Battery Rejuvenator

This baby can start up a car in no time even if the battery’s more dead that Burton’s corpse bride. Seen one a while back – it’s as light as a tablet but powerful enough to juice up a car. In addition, these gadgets can also recharge devices such as smartphones, laptops, and GPSs.

  • Extra phone

Get one of those older models with a button. You may want to buy one with extra battery life. I would recommend CAT’s unbreakable series. Make sure that the extra phone is fully charged at all times.

  • Rescue tool

This little thingamajig has so much spunk in it. Normally, it can be used to break the car’s windshield if you take a dive in the river or any other body of water. However, it can also double up as a weapon, in case there are bad guys nearby.

  • Multi-tool.
  • Spare parts and supplies.

Be sure to have at least one extra box of fuses, bulbs, some braking, and windshield wiper fluids.

Bottom Line

Ours not to question why, but to prep and not die – that’s my motto in life. So, fellow prepper, if you want that comfy and fuzzy safety feeling while on the road, considering revamping your car’s emergency supply kit. Got more stuff I can add to the list? Hit the comment section and let me know.

Remember the news bulleting about the Swedish man who survived two months in extreme cold because he SO kicked him out of the house? How do you think he survived?