Home2019 (Page 8)

With plenty of clean drinking water and shelter to sleep, the average adult can survive for several weeks or longer without food. This means that in a short-term survival situation, any kind of food, even unhealthy food or “junk food’ will be comforting.

This is fine for a short-term situation where the goal is to satisfy your rumbling stomach and hang on until help arrives that you know is on the way. But in a long-term survival situation where “help” is likely not coming, proper nutrition becomes critical to survival from day one.

Proper nutrition is important from day one in a survival situation because without the right vitamins, minerals, and other nutrients your body needs, your body begins to be negatively affected in multiple ways. Lack of proper nutrition over time of course can negatively impact anyone. But lack of proper nutrition in a long-term survival or SHTF situation means your physical strength and mental clarity can diminish rapidly. This is detrimental to your long-term survival because chances are, you will be expending a lot more energy on a daily basis than in your normal routine which means your body begins to fall apart much faster.

​Want to learn about essential health practices, the right way to take vitamins, and why they currently aren’t working for you? Find out more HERE.

Most people know that staying well hydrated is of the utmost priority but make sure you’ve planned for multiple ways to have access to fresh drinking water. Stockpile sports drinks that are low in sugar but packed with electrolytes to replace those that are lost while hiking to your BOL, hauling water, chopping wood for a fire, or foraging for wild edibles.

Following a SHTF situation, you will have innumerous tasks you must accomplish just to survive. Even for those people whose normal days are active and can barely find time to sit down, the strenuous tasks needed for basic survival will be challenging. In a survival situation, a lapse in mental focus for just a few moments can cost you your life or the life of a family member. You must be on alert nearly constantly for dangers that could be lurking. Adrenaline may get you through the first couple days, but only a well-balanced diet can combat the mental and physical fatigue that will set in quickly following a SHTF event. A lack of physical strength and stamina can seriously hamper your ability to rejuvenate for the next day’s tasks, heal quickly from injuries, and ward off illness and diseases.

Some of the effects of inadequate nutrition that can be detrimental in a survival situation include:

  • Poor mental focus and clarity
  • Physical weakness
  • Fatigue or Lack of Energy
  • Drowsiness
  • Depression

All of these issues can really have a negative impact on how well you can get strenuous tasks completed and make you more likely to be injured or get sick. In addition to some of the effects above, a SHTF or other survival situation comes with additional stress, inadequate sleep and relaxation time, and increased threats from outside sources. In a SHTF situation, professional medical help and pharmaceutical medicines will be in short supply if they are available at all. It’s critical that you work proactively to prevent any illness, injury, or diseases if you’re going to survive.

Want to learn about ​essential tools for treating most diseases you are likely to encounter? Details HERE.

Survival Food Needs

Carbohydrates

These are starches, sugars, and fiber that is contained in foods. They can be complex or simple. Natural sugars like those found in vegetables, fruits, milk, and some added sugars are simple. Whole-grain breads, starchy vegetables, cereals, and legumes are good sources for complex carbohydrates. You need a balance of simple and complex carbohydrates in your diet. Carbohydrates assist in providing the body with energy and help guard protein stored in the body.

Without sufficient carbohydrates in your daily diet, metabolism of fatty acid suffers and the body becomes weaker. Carbohydrates should make up approximately half of your caloric intake for a normal day, no less than 60 grams minimum. So, for the average adult during a SHTF situation, you’ll want to be much higher and get as close to half your caloric intake as possible.

Carbohydrates come from:

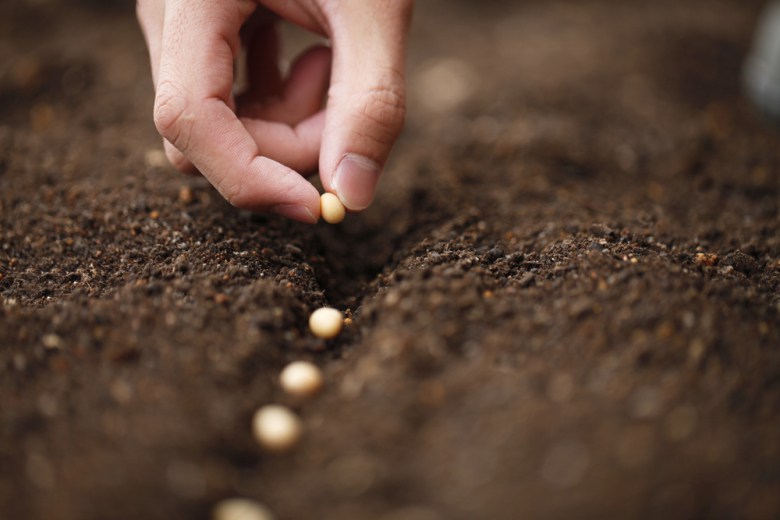
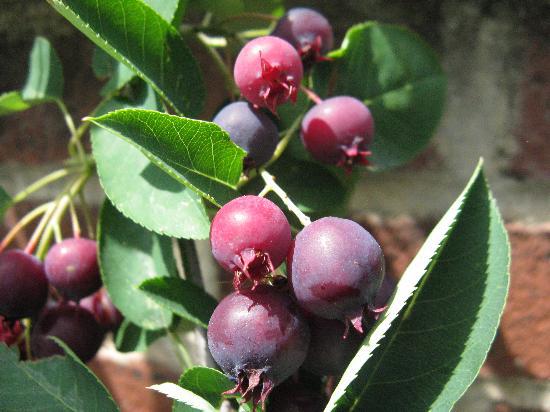
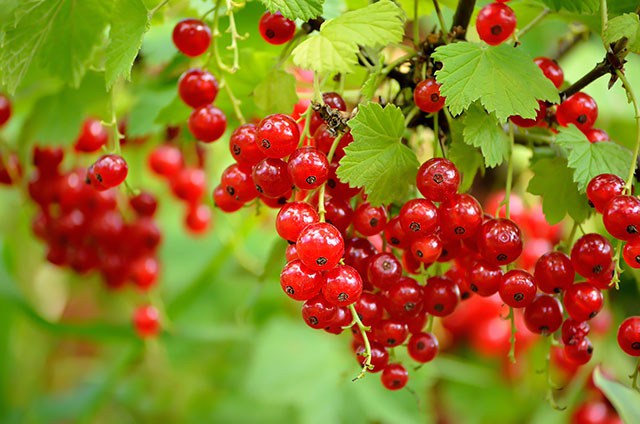
  • edible plants are easily accessible if you know how to identify them properly
  • white rice
  • grains like wheat and oats
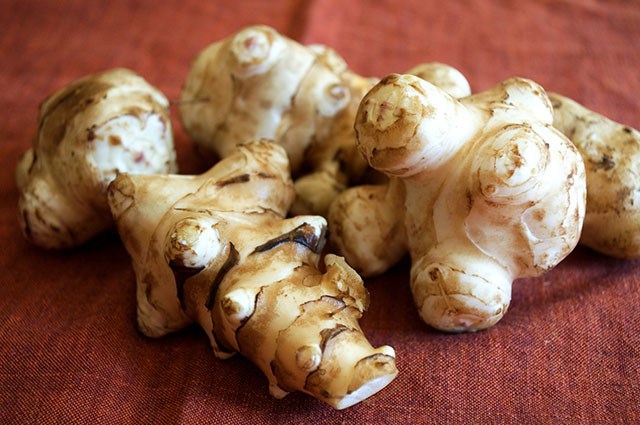
  • root and tuber vegetables
  • cereals
  • honey
  • fruits
  • sugars

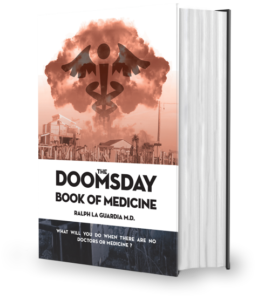
This book teaches you what to do when your doctor is not around. Follow this link for details.

Protein & Healthy Fats

Protein is found in foods such as eggs, meats, and beans. Proteins are important because your body breaks these down into amino acids which are distributed through your body. It’s also important for a wide variety of essential things including provision of nitrogen you can’t get from lipids or carbs. They also help balance pH and are vital for the immune system. Recommended daily protein intake is 20 to 25% normally and more during strenuous activity.

Healthy fats are critical because they are an energy source but also because they help the body to properly absorb vitamins. Omega 3s are healthy fats found in fatty fish and in plant oils such as corn oil, olive oil, and sunflower oil. Healthy fats are vital for creating fatty acids and glycerol. Fatty acids help to regulate inflammation in the body and glycerol is a naturally occurring carbohydrate that serves as a source of fuel for the body. Recommended amount of healthy fats is around 10 to 30% of total calories per “normal” day so for a SHTF situation you’ll want to be closer to 30% most days.

Protein comes from:

  • many different insects if the situation is dire
  • fresh meat such as rabbits, chickens or other poultry (start raising them now)
  • peanut butter, legumes, and nuts
  • eggs
  • canned fish and meat
  • grains like quinoa and wheat
  • Oatmeal
  • MREs

Healthy Fats come from:

  • Avocado or Avocado Oil
  • Whole eggs
  • Cheese
  • Fatty fish like salmon, sardines, mackerel, trout, and herring
  • Chia Seeds
  • Dark chocolate
  • Fatty cuts of lamb, pork, beef, and lard

Critical Vitamins

Vitamins are classified as water soluble or fat soluble. Vitamin C (helps with iron absorption) and all the B vitamins are considered water soluble vitamins and each has a different function within the body. Water soluble vitamins are not easily stored within the body and extra is flushed during urination which means these vitamins need to be replenished frequently. Keep this in mind when planning your survival meals and snacks. These vitamins are critical to helping your body use the energy in the food you eat.

Water Soluble Vitamins come from:

  • Citrus fruits
  • Dark green leafy veggies like kale and spinach or broccoli
  • Meat, poultry, dairy products, shellfish, fish, and eggs
  • Tropical fruits and oranges
  • Peanuts and peanut butter
  • Nuts, peas, soybeans
  • Bananas

Your body needs these essential vitamins to continue to function by producing energy, building cells, and making collagen for wound healing (Vitamin E), healthy teeth, and bones (Vitamin D).

Fat soluble vitamins, like Vitamins K, E, A, and D are stored in the fatty tissues and liver and distributed as needed by the body. Fat soluble vitamins are critical for building bones, healthy vision, and to help store other essential vitamins. Getting and maintaining sufficient levels of vitamins also helps to prevent diseases that can occur when certain vitamins are deficient or in short supply such as:

  • Blindness (Vitamin A deficiency)
  • Rickets (lack of Vitamin D)
  • Scurvy (Vitamin C deficiency)

Fat Soluble vitamins come from:

  • Veggies like carrots, spinach, sweet potatoes, butternut squash, asparagus, cabbage
  • Eggs, milk, yogurt
  • Nuts like almonds and sunflower seeds
  • Fruits such as cantaloupe and apricots
  • Fatty fish like sardines and salmon, shrimp, and trout
  • Olive oil, coconut oil

Vital Minerals

The minerals your body needs work similarly to the critical vitamins in that some of them circulate more like water soluble vitamins and should be replenished frequently and others are more like fat soluble vitamins because they need to be absorbed and transported through the body by a carrier. The reason it’s important to know how these minerals work is so that you can plan your survival meal plan in a way that replenishes those that don’t get stored and to not overindulge on those that are naturally stored in the body.

  • Calcium
  • Sodium
  • Phosphorus
  • Potassium
  • Magnesium
  • Trace Minerals

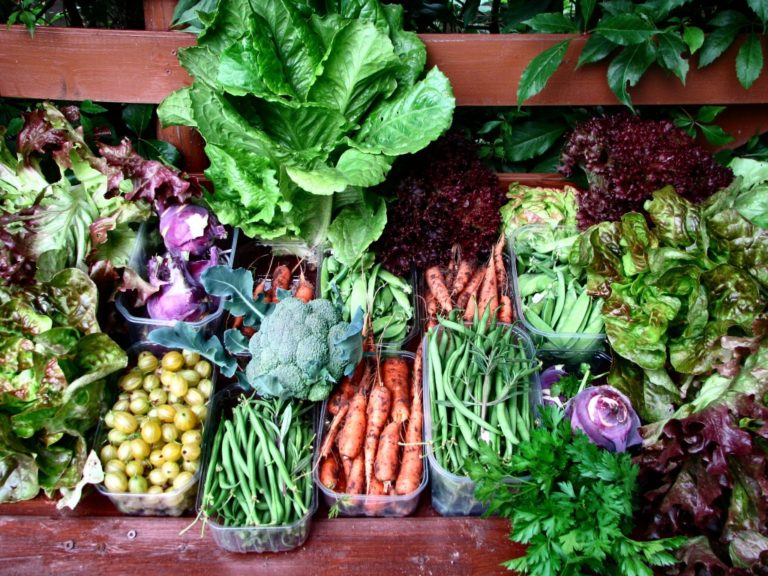
Healthy Survival Food Options

Okay, so now that we know what kinds of nutritional ingredients will be critical to keeping our energy, strength, and mental clarity intact during and in the aftermath of a SHTF event. But what kinds of foods are good options?

Ten Super Nutritious Survival Foods:

  1. Dark Chocolate (Antioxidants, fiber, copper, iron, magnesium, manganese, improves brain function, protects skin from sun damage)
  2. Brown rice or Brown rice hot cereal (high calorie, protein packed, and good source of minerals such as iron. Store airtight container for 3-6 months.
  3. Whole Eggs (nutrient dense contains a bit of every single nutrient we need plus antioxidants)
  4. Cheese (calcium, B12, selenium, protein, Vitamin B12, fatty acids)
  5. Dried Beans especially split peas. (high calorie, good protein source, some vitamins and minerals) Long shelf-life
  6. Chia Seeds (high fat-9 grams in 1 ounce of seeds, fiber, Omega-3, loaded with minerals, can lower blood pressure and are anti-inflammatory.
  7. Avocado or Avocado Oil (contains oleic acid, high in potassium, high fat)
  8. Nuts and Peanut Butter (good source of protein, high in healthy fats, Vitamin E, and magnesium) Store airtight, lightweight for easy carry during bug out.
  9. Extra Virgin Olive Oil (good source of healthy fats, stores open 3-6 months, unopened up to 2 years or until it begins to smell “sweet”.)
  10. Powdered Sea vegetables or greens (vitamin and nutrient dense, can boost immunity, antifungal and anti-bacterial properties, can make up for lack of fresh produce)

MREs

We’ve all heard about MREs for survival food. One of the benefits of MREs (Meals Ready to Eat) is that they are just that, ready to eat. For most of these, you can simply open them and eat them cold. They are lightweight and provide an average of 1,200 to 1,500 calories. MREs have a long shelf life, and are easy to carry in a bug out bag or get home bag if needed. For the average adult, two MREs daily will give you the recommended calories needed to keep you alive. Many of them come with beverages, snacks, and even utensils in the package. One thing to be careful of with MREs is that although they often are a good source of carbohydrates, protein, and other essential nutrients, they can be high in salt or sugar.

Freeze Dried Foods

The advantage to some of these packaged “freeze dried” meals, from companies like Wise and Mountain House, are that they are lightweight and pre-calculated for you to help ensure balanced nutrition. And in most cases when bought in bulk they have enough variety to combat “food fatigue”.

They are typically more difficult to use on the go because you need to at least have the ability and time to boil water to rehydrate them and some can take up to 30 minutes to fully cook. Another issue some have found with these meals is that they aren’t as tasty as one would hope and can be expensive to purchase. But in a pinch, they can be handy to have as part of your survival food stockpile.

Eggs

  • can be cooked multiple ways
  • freshly laid eggs (unwashed) can have a long shelf life if properly stored
  • fragile in a bug out situation but most bird eggs are safe to eat in the wild as a last resort

Canned Chicken

  • Comes canned, in foil pouches, or mini pull tab cans
  • packed with protein
  • can be heated quickly or eaten cold if needed
  • Long shelf life

Tuna Fish (Albacore)

  • comes canned or in foil pouches
  • can be eaten cold right out of can or pouch if necessary
  • foil pouches are lightweight
  • long shelf life
  • water in canned tuna helps with hydration if needed

Canned Alaskan Wild Salmon

Inuit people (native to Alaska and Northern Canada) have low stroke and heart attack rates. This low rate is attributed to a long-term diet of fish.

  • high in protein
  • good source of healthy fats
  • minimal contaminants
  • can be eaten if necessary right out of the can

Trail Mix

  • simple sugars for quick mood boost
  • protein from seeds and nuts
  • Decent shelf life if stored properly

Beef Jerky or Pemmican

  • go with natural when possible to limit harmful preservatives
  • high in protein
  • long shelf life
  • lightweight and non-bulky
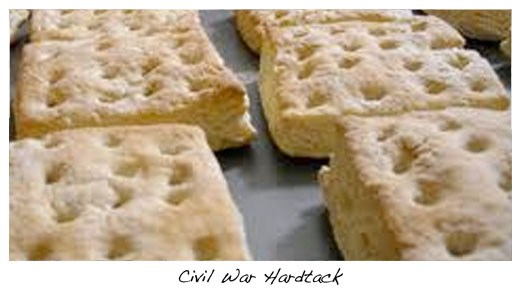
Hardtack

  • Made from flour, salt, and water
  • Stored in airtight containers
  • Long shelf life
  • Easy to carry
  • Must be soaked first to soften enough to eat

Basic Cooking Grains

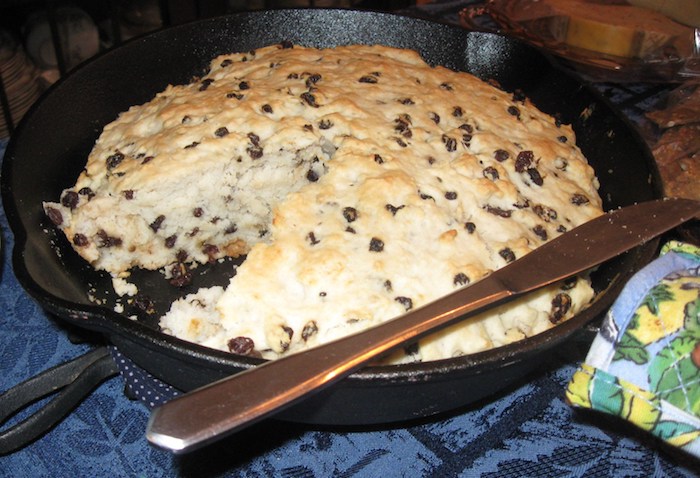
If your long-term survival plan for food includes being able to make your own breads and other tasty meals, you’ll want to include flours and pastas in your survival food stockpile. When frozen first and then stored in airtight containers, white flour, cornmeal, whole wheat flour, pasta, and cornmeal will last five years or more. These are all great to have in your stockpile for making things tortillas, cornbread, biscuits, muffins, etc. that you can combine with sauces and gravies to make delicious and hearty meals.

Properly sealed and kept away from heat, the following grains can last nearly a decade:

  • Quinoa
  • Buckwheat
  • Barley
  • Rye
  • Millet
  • Spelt
  • Kamut
  • Hard Red Wheat
  • Soft White Wheat

Freeze Dried or Instant Coffee

  • mood booster
  • warm beverage in colder weather
  • Decent shelf life
  • extend shelf life by storing frozen as long as possible

Emergency Food for Diabetics

If you have diabetes stick to food low in potassium and limit your portion sizes. Below are some good foods to have on hand:

  • Raw honey and cinnamon can help with blood sugar management
  • Instant glucose tablets
  • Low potassium juices (grape, apple, or berry)
  • Dried cranberries not raisins
  • Dried or Fresh Plums, pineapple, or peaches not mango or papaya
  • Dry cereal (unsweetened and unsalted)
  • Vanilla wafers or Graham crackers
  • Sugar free drinks such as ginger ale or sugar free drink mix
  • Distilled water
  • Unsalted peanut butter
  • Low sodium canned salmon, chicken, tuna, turkey
  • Corn syrup
  • Evaporated milk
  • Unsalted Crackers

Gluten Free Emergency Food

  • Jerky (beef, salmon, pork, turkey)
  • Rice
  • Quinoa
  • Organic dried fruit (no sulfites)
  • Bone broth (cooked and frozen)
  • Dehydrated vegetables (snap peas, etc.)
  • Great Lakes Unflavored Gelatin
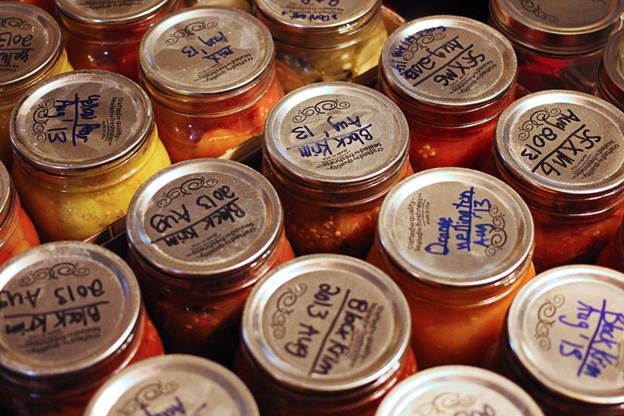
  • Homemade Canned Foods
  • Gluten-Free Granola
  • Dried beans
  • Gluten-free crackers

Additional Survival Foods That Won’t Spoil

There are several foods that you can add to your survival stockpile to not only help prevent “food fatigue” by adding flavor but to also boost nutritional value. Some of these foods are considered basic staples which will are great to have on hand to create meals or enhance flavor. Store these ingredients in airtight containers and add desiccants to dry ingredients to combat moisture and humidity.

Seasonings

  • Pepper
  • Salt
  • Sugar
  • Cinnamon Sticks (antimicrobial, antioxidants, anti-diabetic, anti-inflammatory, boosts immune system to protect against diseases like cancer and heart disease)

Honey

  • Contains B6, niacin, thiamin, pantothenic acid, riboflavin, and amino acids
  • High in minerals like iron, manganese, copper, calcium, sodium, potassium, zinc,
  • and phosphorous.
  • Local wildflower honey can help prevent allergy symptoms
  • Great source of natural energy
  • Packed with antioxidants to boost immune system by increasing polyphenols in the blood that fight disease.
  • Can be used for wound healing and burn treatment
  • Natural cough remedy
  • Indefinite shelf life

Molasses

  • Contains essential minerals and vitamins like calcium, potassium, iron, vitamin B6, selenium and magnesium.
  • Use as a sweetener in coffee, oatmeal, etc.
  • Can help alleviate PMS symptoms
  • Can relieve constipation, stress, headaches
  • Improves immune system
  • Good source of energy
  • Store in cool place. Shelf life up to 6 months opened or 1 year or more unopened

Instant Jello

  • Easily digestible form of collagen
  • Contains all but 1 of the 20 amino acids needed
  • Inexpensive
  • Shelf life 3 years to life of packaging
  • Just add boiling water and let gel or drink as a liquid
  • One packet can serve up to 4 people
  • Can be used to make homemade Pedialyte

Maple Syrup

  • Stores unopened in glass containers for decades
  • if mold grows once opened, boil and skim the surface and store in clean container

Regular Corn Syrup

  • Can mold once opened if not stored properly
  • Karo Syrup has fewer calories and no high fructose corn syrup

Jaw Breakers

This one doesn’t add much nutritional value except perhaps a quick sugar boost but it can do wonders for your morale, especially for children who might be hungrier than they are used to during normal times.

Providing an older child with a jaw breaker during a long walk or during periods of turmoil can take their mind off what’s going on. It can also help them to stay quiet during times when stealth is critical.

Prevent Food Fatigue

During and following a SHTF event, stress can be overwhelming. Mental and physical fatigue can have a huge effect on your motivation to keep going day after day. Believe it or not, food can become a source of comfort and a huge morale booster during times of crisis. When the day has been long and stressful, the ability to quickly prepare a tasty meal that has all the essential vitamins and minerals your body needs to maintain itself will be critical.

Imagine the difference in your mental state between knowing you’re stuck eating the same dried beef jerky and coffee or knowing that you have what you need to prepare a warm chilli or tasty stew later that night. This is what “food fatigue” is about. Plan your survival food stockpile so that you can prepare healthy meals with enough variety to keep “food fatigue” from being detrimental to your mood and morale. One important way to prevent “food fatigue” is to stockpile “treat” foods as well even if they don’t have much nutritional value. This includes foods such as hard candy, chocolate, and even some soda or other tasty beverages.

Enhance Meals with Pure Flavor Extracts

When it comes to long-term survival after a SHTF event, you’re going to eventually want to return to a menu that is as close to normal as possible. Baking and cooking meals may difficult for months or even years after the chaos has receded. Manufacturing and shipping will affect supply and availability or traditional baking and cooking ingredients. Having pure flavor extracts included in your survival food stockpile can help you create healthy and tasty meals and desserts.

Imagine the morale boosts you can provide several months into a survival situation if you can add a dash of your favorite fruit flavor to oatmeal, add hazelnut to your coffee, or even a dash of lemon flavor to water.

  • Almond
  • Vanilla
  • Maple
  • Strawberry
  • Hazelnut
  • Black Walnut
  • Orange
  • Lemon
  • Chocolate
  • Coconut

You’ll find survival food lists on other sites but our list specifically takes into consideration the requirements of the human body for survival and to thrive. Pick and choose from the above list according to your daily caloric intake and try to balance your survival diet to compensate for your increased activity and stress levels.

Surviving long-term following a SHTF situation will be fraught with dangers and obstacles. It’s up to you to plan ahead to make sure your survival food stockpile includes the healthiest foods to prevent the effects of malnutrition from being one of those obstacles.


Other self-sufficiency and preparedness solutions recommended for you:

The Lost Ways (The vital self-sufficiency lessons our great grand-fathers left us)

Survival MD (Knowledge to survive any medical crisis situation)

Backyard Liberty (Liberal’s hidden agenda: more than just your guns…)

Alive After the Fall (Build yourself the only unlimited water source you’ll ever need)

The Lost ways II (4 Important Forgotten Skills used by our Ancestors that can help you in any crisis)

The Patriot Privacy Kit (Secure your privacy in just 10 simple steps)

With plenty of clean drinking water and shelter to sleep, the average adult can survive for several weeks or longer without food. This means that in a short-term survival situation,

Welcome to the jungle! We ain’t got any fun, games, plants or even swinging vines. What we do have is concrete, iffy back alleys, and lots of ways for you to lose your wallet and, perhaps, even your very life. Charming perspective, ain’t it?

Well, that’s more or less what it feels like living in the big city; nature may be wrathful, but not even her can hope to emulate our fellow man when devotes his entire energy to darker things. Urban survival has gained a lot of traction over the past couple of year and, I, for one, agree that you don’t need to become in the middle of nowhere in order to exercise those survival skills.

Anything can happen when you’re on the street – and that’s not fear-mongering, that’s a reality. If you don’t believe me, just hop on the Internet and do a quick search on crime in your area. You’ll be surprised to find out that your seemingly-quiet neighborhood becomes a minefield at night.

Anyway, after these cheerful little thoughts, let’s get acquainted with today’s topic – urban survival. Prepping means being ready for anything and at any time.

This also covers things like taking a stroll around the park or visiting another part of the city. Can’t say I got into too much trouble around the city, but then again, I’ve always tried my best to avoid some areas, especially at night.

No, it doesn’t have anything to do with mystical mumbo-jumbo, but anyone can get a little jumpy when having to traverse a poorly-lit area with tons of dark corner and who knows what else.

Ever since I got bit by the prepping love bug, I’ve always done my business to carry around a downscale version of my B.O.B. Well, on the outside it looks like a regular backpack (nothing too fancy about it), but in the inside, I have all the tools I need to get out of just about urban SHTF situation. So, without further ado, here are my choice of X items that shouldn’t be missing from your urban survival kit.

  1. Tactical flashlight

I truly believe that entire books can be written on the topic of tactical flashlights, and for a darn good reason – they have many other uses, some of them going well beyond their original purpose. Now, this is the kind of item you really wouldn’t want to buy from a thrift or yard sale.

A high-quality tac light can cost anywhere from $100 to $1,000, depending on things like construction and add-ons. I found it best to carry around one of the tac lights that come with a built-in taser (the electrodes are built into the flashlight’s butt, so be careful not to fool around with it).

Apart from the fact that most tac lights are LED-powered, meaning that they offer thrice as much battery life and light compared to those using incandescent bulbs, it can also serve other purposes. For instance, if someone wants to mug you, use the back end to zap him.

Or, if you prefer something more hardcore, you can always use that tac light as a club. A high-quality tactical comes with various gadgets which you can use to attach them anywhere – suction cup for walls or glass surfaces, strap, and socket for headwear, and even a lanyard hole. They are very robust but, at the same time, very light (mine weighs a little over 200 grams). So, get yourself a tac light and toss it in your urban survival kit.

  1. First-aid kit

No matter where the winding road takes me, I always carry around a downscaled version of my B.O.B’s medical kit. If you’re going to stroll around the city, you won’t need stuff like straight scissors, suturing kits, syringes, saline solution or whatnots.

For a basic urban first-aid, toss in a couple of Band-Aids, sterile pad, a small bottle of disinfectant, hand gel, and a couple of safety pins or some tape. That’s it! Still, if you live in a rough neighborhood, you should remember to pack extra supplies in case you have to deal with a more severe injury.

Moreover, if you have any allergies, you should always carry an EpiPen and a box of antihistamines in case you experience an allergic reaction. Before I met my wife, I used to hang around another part of the city where – how should I say this? – was not for those faints of heart. Since the opioid crisis’ on the rise, I made sure to carry a Narcan pen with me at all times.

No, it wasn’t for me, if that’s the question on your mind, but on several occasions, I found myself standing in front of various individuals who ODed on God knows what. Why not spend a couple of bucks each month to save a life? Chance are that you will never need to use a Narcan pen or someone, but wouldn’t it be neat to have one close when someone’s life hangs in the balance?

  1. Small pry bar

No, I really don’t fancy myself a burglar, but I always remember to carry a small prybar in my urban survival backpack in case I need to get off the street really fast and need to break down a door or something.

That thing’s really very useful in you to live in old condos where the elevator tends to break down on a daily basis. So, no matter the circumstance, a pry bar is always a valuable asset. Just don’t go waving it around like crazy, unless you want to wind up in the cooler on purpose.

  1. Face mask

Living in a big city means sucking in all kinds of toxic fumes and gases. I am very grateful to all those wonderful people for getting hybrids because I can still feel the smoke coming from the exhaust pipes during a traffic jam. Anyway, you really don’t need to face a chemical attack in order to make use of a face mask – there are some areas of the city where the fumes are thick enough that you can probably cut them with a blunt butter knife.

  1. Emergency potty

There’s nothing worse than having to go number two, only to realize that the toilet’s clogged or the water pump has stopped working. Well, I have to admit that this is a little strange, even for a prepper, but I always carry one of those foldable potties in my backpack.

Yes, yes, I know that most of you are picturing me know to get out my portable potty to “spend a penny” on a crowded subway, but it’s not like that. You may never know when the shit hits the fan, and you wind up having to cross half of the city for a working toilet. No, I will not expose myself on a bus full of people, but I will find a secluded place for when Nature calls in those moments when there’s nothing available nearby.

  1. Multi-tool

I always like to carry around Ol’ Vicky (that’s how I named by Victorinox Swiss Multi-tool). Why? I don’t know for certain, but I usually find a way or two to use my multi-tool before the day’s over. I found very handy for those Saturday afternoon bike trips of mine – I should seriously consider buying a new bike since I tend to spend more time making repairs than actually riding it.

Anyway, the multi-tool’s a very useful asset, no matter where you go and do. Broken zipper? No problem! Key broke in the lock? Just use the multi-tool to get it out. Locks are cheap; doors aren’t!

  1. Work or hiking boots

Wearing heavy-duty work or hiking may not much of a fashion statement, but they can help a bunch during an SHTF situation. Of course, being in the city means that you won’t have to do too much mountain climbing. Still, in certain situations, you’re going to need that extra traction offered by a pair of hiking boots.

For instance, there’s no guarantee that during one of the walks you won’t wind up stuck in an elevator or inside a subway tunnel. Both situations call for hiking, climbing, and maybe running. Sure, you can always wait for the repair team to arrive and fix the thing or you can get out and lend them a hand. Remember that in some cases, like a tunnel collapse or whatever, it may take the emergency response team hours to get to you.

That wouldn’t be much of a problem if you didn’t have a limited oxygen supply or surrounded by injured or scared to death people.  Anyway, weather permitting, you should do yourself a favor and tour the city in hiking boots. Of course, not every social call allows for this type of footwear, but I’ll let you figure that one out yourself.

  1. Solar charger

I find nowadays smartphones very irritating. Yes, I know you can take lots of pretty pictures with them, shoot 4K videos, surf the Internet, buy stuff online or play games, but that battery life though. Had this Samsung Galaxy Whatever-Model smartphone – great gadget.

The only thing wrong with it was the blasted battery – 6 hours on a full charge. That’s how long my battery lasted, no matter the circumstance. Tried changing the battery, tinkering around the apps; nothing worked. So, I’ve decided to carry around one of those portable solar chargers.

They work great, and if there’s enough sun, you can probably get a full charge in 4 hours or less. However, the best thing about these solar chargers is that you don’t have to stop in order to charge your phone or whatever. The solar cell can be taped to your backpack and the cable’s long enough to reach your pocket. Try it out! You won’t regret it.

And so, we come to the end of yet another article in which I glorify the well-made bug out bag. Well, it’s not exactly your run-of-the-mill backpack, but you get the idea. I know that most of you don’t feel comfortable carrying zero hour items while going shopping, strolling in the park or going to propose to your SO, but do bear in mind that shit happens everywhere, regardless if you’re a big city dweller or the king of your own mountain.


Other self-sufficiency and preparedness solutions recommended for you:

The Lost Ways (The vital self-sufficiency lessons our great grand-fathers left us)

Survival MD (Knowledge to survive any medical crisis situation)

Backyard Liberty (Liberal’s hidden agenda: more than just your guns…)

Alive After the Fall (Build yourself the only unlimited water source you’ll ever need)

The Lost ways II (4 Important Forgotten Skills used by our Ancestors that can help you in any crisis)

The Patriot Privacy Kit (Secure your privacy in just 10 simple steps)

Welcome to the jungle! We ain’t got any fun, games, plants or even swinging vines. What we do have is concrete, iffy back alleys, and lots of ways for you

Boosting Our Garden Productivity

Our practices can affect our garden productivity hugely. Sometimes that’s as easy as changing our mindsets, so that the time and labor it takes to garden is lowered, which allows us to do more. Sometimes it’s embracing “Semper Gumby” and accepting the feedback our gardens and yards offer us, and sometimes it’s looking at our home and yard spaces differently. Sometimes it’s letting the Johnson’s be the Johnson’s and contenting ourselves with being us – with our needs and abilities the measuring standard we use. In some cases, the practices we apply might be hugely unconventional.

In other cases, they’re tiny things only in our minds. They can all make a difference when it comes to successful growing. Here are a few ways we can cut down on the labor and time of gardening and increase our yields, whether we’re just getting started with some pots or whether we’re ready to expand our production in times of crisis when food production has stopped.

This book can be used as a reference for everything imaginable. For everyday remedies to any ailment, click HERE.

Pick the Right Plants

Sometimes if we’re after heirlooms and open-pollinated plants so we can collect seed, it can be tough, but whenever possible, selecting local or regional plants and seeds will boost our success. They’re adapted to if not developed specifically for our climate, so there’s a better chance of them performing for us than something that was produced across the country, even of the same cultivar.

If we can’t find our choices locally, we can do some research. There are some proven winners that work across multiple USDA growing zones for most types of veggies and even most of the field crops we’ll grow.

Most of our county extension, state Ag department, and the Master Gardener’s programs will have stock lists of varieties that perform well regionally within the state and county. Remember that the Big Ag guys are going to most likely be spraying and irrigating, so look for and ask about dryland farming varieties and varieties that are resistant to pests.

We can also improve our gardens by selecting disease-resistant varieties whenever possible. Not dealing with a crop illness at all is far easier on the labor, pocketbook, and productivity of a garden.

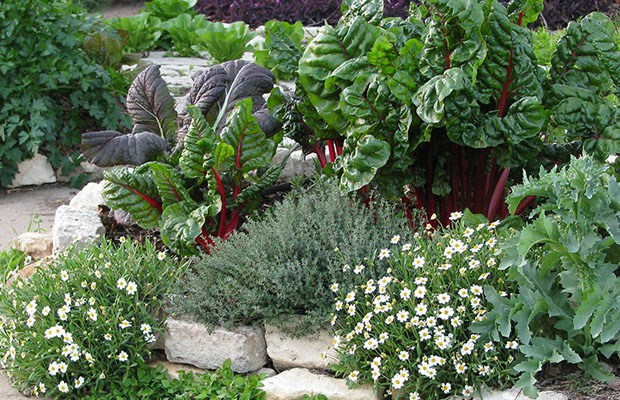
We also want to pick the right plants for us, and the right number of plants.

An apple a day keeps the doctor away. But only if it comes from a healthy soil. Learn here how “dead” soil affects your health.

Ten or twenty tomatoes take a lot of work, and a lot of resources. On the other hand, ten or twenty pea or bean plants is likely to only yield enough for a couple of meals at once. Four-square-feet of corn is nearly nothing – one, maybe two meals for 4-5. Four-square-feet of spinach could be salads and greens for a whole season, depending on family size.

Determinate plants dump the majority of their produce all at once, which can lead to a glut we have to deal with, and then they die. That can be good or bad.

If we want to go with determinates, for some things like squash and tomatoes, maybe we stagger two to four plants at a time for a small family or a beginner. It makes less to deal with at one time, and it lets us re-plant after them at a reasonable pace for busy people as well.

Alternatively, maybe we go with a longer-lived set of indeterminate plants that trickle in produce at a rate we can consume or process easily.

Proximity – Plan garden plots along paths we already take, and near the resources they’ll need.

Proximity

Location, location, location – we hear it all the time when finding property, but it’s just as important once we have our space to play with. The closer we can put our gardens to our homes, the more attention they’re going to get and the less time we’re going to spend crossing ground to go weed, water, fetch tools, and harvest.

Once we’re hitting about fifty-percent of our veggie consumption, it’s tough to keep the whole garden close at hand, but we can still keep rotations plants that require a lot of water, that get harvested from regularly, and our problem-prone plants near at hand.

Healthy Soil+Healthy Plants = Healthy You Your key to a healthy nutrition is HERE

The closer we can put our gardens to our homes, the more attention they’re going to get

We also want to be mindful of proximity to water. Since rooflines are going to be our most common rain catchment points (using our free salvaged buckets and totes), we can check both those boxes keeping at least some of our beds along our common walkways to and from the house and garage or sheds, or establishing beds near doorways and outdoor water faucets.

With our beds near the house, we’ll then also want to keep some of the maintenance basics like hand tools and maybe a watering can right there handy as well. The most regularly used items are fairly compact, so they should fit right in with our porch broom or a bucket or deck box near the door.

Eliminate Ego

Right up there with making our life easier by picking out plants that are proven winners and producers, is giving ourselves a break. The neighbors might have a bare earth garden without a speck of a weed. Martha Stewart and the Neeleys might have awesome, bountiful beds with expensive chipped mulch or thick mats of straw.

Good for them. They’re not us.

We can take advice from them if we want – and if their advice falls in line with our growing style, and the desire to be more self-sufficient, which means cutting some of the umbilical cords to Lowe’s and Tractor Supply. We can ask what varieties they use, maybe even trade some seeds. We need to not compare ourselves – or our gardens – to them and theirs.

Every person and family is different, and soil changes step by step. The extra time being cultivated, a reliance on outside fertilizers, different wind and sun patterns, and a devotion to watering can all have effects.

We also need to just be nice to ourselves. If the weeds aren’t big enough to bother the plants, they’re not hurting anything; take a few minutes to enjoy family or a book now and then. If we have to pick between having cardboard between rows and beds, or running a tiller or weed-eater or hoe, go with the time and fuel and labor-saving ugly.

All our garden should be about is our yield and our health and our abilities, compared only to our past.

The rest of it, that’s just ego. Hubris is how mere mortals take down the gods and giants in all the good stories. Stick with humble and happy.

Slow, Steady Solutions

This is actually a permaculture principle. What it means is that we add things at a pace where we can handle them, where they will thrive, and where we can accept feedback from them – and adjust accordingly. It goes hand-in-hand with that ego point above. But also, it’s about learning, and not getting overwhelmed.

Whether we’re just starting or expanding, it can be tempting to go for broke. And sometimes, we break. Then we get discouraged, either by a method and we write it off, or by this whole gardening thing in general.

We can also break the bank trying to do it all at once, either getting started or making changes or trying to keep up with others’ results.

Deciding on our pace should include a look at our financials. Sometimes it’s more economical to buy or rent a machine and get lots done in a few hours, but sometimes we’re better served with a shovel and a post-hole auger and working by inches over days and weeks.

We do need to get started with gardening, but make changes and expand at a pace we can maintain. In the end, we’ll have a better situation than if we rushed around and ended up unhappy or worn out later.

Leave Room to Renovate

When we eke out our plots and expansions, we can benefit from leaving ourselves some elbow room through and around them. Especially if we’re new, we might also want to use a more temporary “build” for the first few rounds.

Container gardens, lasagna beds, using established flower and ornamental beds for veggies, expanding at the base of trees or hedges just a foot or two, and inexpensive beds made from things like shelving units can help with that. So can doing an unbounded, free-form bed instead of starting off with brick or timbers.

That way we have a chance to test out our water solutions, placement around our homes and placement of our tools, our composting systems, make sure it’s not too dry or too sodden or in a frost pocket or heavily shaded come June, exposed to winds, or affected by our livestock locations, and then actually apply the feedback that our plants themselves will give us.

Then we can go around and reinforce our beds with timbers and CMU if we’re happy, or reassemble them somewhere else if we’re not, or go whole-hog with our in-ground, tilled-out methods.

Having extra elbow room also allows us to try out new methods as we become aware of them, and have space to maneuver or change focus as we lose mobility due to injury or age, or as our family situation changes.

In the end, our gardens and our time in them will be far more productive if we leave ourselves room to adjust for better efficiency or economy down the line.

Bed Down Beds

Cover vegetable beds with leaves in the winter.

At the end of the season, cover garden soil with something, no matter what it is – tilled plots eked out of the yard, actual built raised beds, unbounded lasagna beds, pots and planters.

Maybe it’s newspaper you soak and then weigh down with loose sticks and rocks and the brick/CMU for a later project, or cardboard that gets screwed into timbers. Maybe it’s a tarp, some old shower curtains, or a patchwork of trash bags and duct tape. Maybe it’s a layer of mown leaves and pine needles. In some cases, you might actually plant a cover crop that will grow for a bit and then get killed off in winter’s cold, forming a mat.

Do whatever it takes, but cover gardens for the non-growing seasons.

It’ll reduce the amount of work necessary to start all over in spring, because it’ll prevent or limit weeds – especially from trees that have long, hard-to-kill roots and the most prolific annuals – and in some cases, it will deprive any that are already in the soil of light come spring.

In most cases, covers of all kinds will also help prevent compaction from winter and early spring rains, so it’ll take less work to loosen soil for planting again.

Even piles of unused mulch can benefit from being covered.

Mulch is there to help us prevent weeds on top of the benefits of reducing compaction and creating a slow-breakdown feed for our beds. If it sits open to the sky, weed seeds can blow in, and some of those weeds will get roots going all the way through the pile, a foot or more deep. We don’t really want to be moving weeds into our garden beds, especially not when there’s a fast, easy way to prevent it.

Garden Management Practices

How we manage our gardens, and even the mentalities we adopt as we plot them out and watch them over the season, has major effects on how much yield they return.

Siting and plant selection in particular is crucial, no more so than for busy people. It’s also crucial that we be realistic with ourselves and with our goals – because every style of gardening requires at least some labor and inputs from us to be successful.

Veggie gardening can be rewarding, but it can also be frustrating. Using practices that make it a little easier to get started now and that leave room for improvements in the future can limit some of the frustrations, and can let us work out the kinks while there are still grocery stores filled with cheap produce to cover our gaps.


Other self-sufficiency and preparedness solutions recommended for you:

The Lost Ways (The vital self-sufficiency lessons our great grand-fathers left us)

Survival MD (Knowledge to survive any medical crisis situation)

Backyard Liberty (Liberal’s hidden agenda: more than just your guns…)

Alive After the Fall (Build yourself the only unlimited water source you’ll ever need)

The Lost ways II (4 Important Forgotten Skills used by our Ancestors that can help you in any crisis)

The Patriot Privacy Kit (Secure your privacy in just 10 simple steps)

Boosting Our Garden Productivity Our practices can affect our garden productivity hugely. Sometimes that’s as easy as changing our mindsets, so that the time and labor it takes to garden is

How do you know if your canned food has gone bad? If only it were as simple as checking the expiration date! Sorry friends, but that expiration date is just a recommendation. In truth, canned food can spoil due to many factors other than time spent on the shelf. For example…

  • Dropping your canned food can create a hole or leak that allows bacteria to grow.
  • Storing your cans at the wrong temperature can cause metals to start seeping into your food.
  • Using the wrong methods or improper hygiene while canning will doom your food from the start!

This isn’t to scare you into thinking that all canned food is out to give you Botulism. Rather, we want to remind you to inspect your food before taking a bite!

This book could have been called The Pioneer’s Book of Medicine. Learn here why.

Once we run through the telltale signs that canned food has spoiled, you’ll always know what to look for.

1. Bulging

Press on the lid of your can. Do you sense pressure or swelling? Or does the lid top “pop” or move up and down? These could all be signs of a serious food hazard! When bacteria breed, they release harmful toxins which cause the tin can to bulge.

From these toxins, humans can contract some nasty strains of food poisoning including the most lethal form of food poisoning called Botulism.

2. Loud Hissing

A soft, brief hissing sound when opening a can is fine–this is just the vacuum seal being released. However, a loud hissing sound is another sign of toxic gas caused by bacteria.

If you experience this hissing, stop – do not proceed. If you continue, you risk spreading the bacteria around your kitchen.

3. Spurting Liquid When Opened

When you open a can of green beans or tuna, there is always some liquid that pools at the top and spills out just a little bit. That’s natural. What isn’t natural, however, is spurting liquid that erupts like a geyser. This is a red flag that there has been an abnormal build up of pressure inside the can, likely caused by bacteria.

This Book Is The Noah’s Ark Of Prepping and it’s making Americans healthier by the day. Learn more here.

4. Corrosion

When metal cans corrode, metallic chemicals like Bisphenol A (BPA) start seeping into your food while also creating holes that allow bacteria to grow. Corrosion can be caused by improper temperature storage or being covered in soot or ash that moistens the cans. To spot corrosion, look for small rusty holes on the can.

5. Dents

When a dent is made on a can, it’s like a mini explosion going off on the inside. The air distribution is suddenly shifted and this can result in the can’s seal becoming compromised. If the seal is loosened, then air can escape and bacteria can enter, affecting both the taste and safety of the food inside.

6. Leaks

Leaks are the easiest way to tell if your can has been compromised! Don’t just look for liquid seeping out, also check for sticky areas which might be a clue that there was once a leak.

If there are holes, cracks, or issues with the seal that are big enough to cause a leak, then your food has been exposed to air, bacteria, and possibly egg-laying bugs that are attracted to the can’s contents.

7. Bad Smell

Smell your food every time you open a can. Obviously, rotten smells will gross you out and stop you from eating the potentially spoiled food. But also, acidic or metallic smells will strike you as unnatural. On an evolutionary level, your body is designed to detect “off” smells. Trust your senses!

You are as healthy as the soil feeding your plants. This book teaches you everything from the soil up. Get your printed copy here.

8. Bubbles

One or two small bubbles on the surface of canned food might just be from the agitation of opening the can. But if you find a light to moderate layer of foamy bubbles, then your food has spoiled.

These bubbles are caused by the release of waste or gas from the bacteria that has been partying inside the can. Treat this food like toxic waste and don’t even attempt to taste it.

9. Strange Colors

Your food should be the same color going in the can as it is coming out of the can–that’s the whole point of preserving in a can! Discoloration is a clear sign of contamination whether it be from metals, bacteria, or air. You don’t want to ingest that!

10. Mushy or Moldy Looking

If there is mold in or on your canned food, it means that your food wasn’t canned properly. The wrong tools or the wrong methods were used which resulted in the growth of mold that has begun to turn your food into mush.

In this case, it’s not enough just to scrape the mold off the top because you don’t know what other hygienic or handling issues occurred during canning.

How to Keep your Food from Spoiling

Store your cans in a dry, cool, dark place – Ideally, you want a clean storage shed, pantry or a basement that maintains a temperature between 40-60 degrees F. Most homes are around 70 degrees–which is okay–but in general, the lower the temperature, the longer your food will last.

Store your cans off the ground – Leaving your canned food on the ground exposes them to condensation, floods, and temperature changes. Shelves are your friend.

Physically rotate your food as often as possible – In other words, crack open the older cans first and replace them with newer cans. Don’t let cans of food go forgotten in the back.

If you want to learn more about home canning, check out these 9 things to know before you start.

Conclusion

Whether you’re stockpiling for the apocalypse, canning for winter, or eating from cans on a regular basis, make sure you really ingrain these signs into your brain!

Teach your partner and teach your kids these signs, too. They are survival skills that could save you and your family from enduring a serious illness.


Other self-sufficiency and preparedness solutions recommended for you:

The Lost Ways (The vital self-sufficiency lessons our great grand-fathers left us)

Survival MD (Knowledge to survive any medical crisis situation)

Backyard Liberty (Liberal’s hidden agenda: more than just your guns…)

Alive After the Fall (Build yourself the only unlimited water source you’ll ever need)

The Lost ways II (4 Important Forgotten Skills used by our Ancestors that can help you in any crisis)

The Patriot Privacy Kit (Secure your privacy in just 10 simple steps)

How do you know if your canned food has gone bad? If only it were as simple as checking the expiration date! Sorry friends, but that expiration date is just

Getting yourself noticed should be an important life goal, but there are times when screaming at the top of your lungs could mean the difference between getting back to safety and kicking the bucket. In an SHTF situation, apart from making sure you have food, plenty of water, and some shelter, you’ve got to make sure that the rescuers know where you are.

Sure, that fancy smartphone of yours seems like the most obvious choice, but what happens if you run out of battery or you lose it? Anything can happen out there, that’s why you should think about including other means of signaling for help. In today’s article, I’m going to show some neat trinkets that could save your neck should you ever find yourself in a life-threatening situation.

This book teaches you about the secrets of a healthy soil that will make your body impregnable to disease. Get your copy here

So, without further ado here are 10 signaling device you should definitely think about including in your B.O.B.

Whistle

Remember that irritating whistle your P.E. teacher used to make you run faster? Well, you should consider getting one, but not for the same reason, of course. If you’re stuck in some neck of the woods with nothing to make your rescuers aware of your presence that piece of plastic could indeed save your life. And, c’mon – even in a crowded intersection, you can still hear someone blowing on a whistle.

Roll of surveyor tape

Those flashy rolls road worker or surveyors use to mark off a path will come in handy if you get lost. Just rip a small piece, write something on it like where you are or where you’re head, and tie to a tree or pole. I would recommend getting something in a flashy color like electric blue, flash pink or even jaundice yellow. Even if you’ve never been in the woods before, you would still notice a piece of tape tied to a tree.

Personal locator beacon

This is one of the personal favorites. It works just like in the movies – you hit a button, and the thingamajig will notify the authorities of your location. Compared to the other stuff you’ll read about in this list, a P.E.B is a bit pricier (between $250 and $400, depending on the manufacturer and options), but a very useful item in case you get lost.

Most P.E. Bs operate over a short-wave frequency (125 – 405 MHz), which means that the signal can be picked up by anyone screwing around with a short-wave radio.  Now, apart from the fact that you must be willing to dig deep into your pockets to purchase one, you will also be required to register your PLB with the local authorities. Otherwise, they won’t recognize your signal and can’t provide aid.

Chisel tip marker

When I was in school, we used these types of markers for our calligraphy class – they’re great for painting gothic letter if you’re interested in that sort of thing. Anyway, in case you have no other means of letting your rescuers know where you are, take one of these babies out and start making drawings on trees. You can write to them on any surface. More than that, neither snow nor rain could wipe them away.

Compact emergency survival mirror

I know that in case of an emergency any kind of reflective surface would do, but it’s rather impractical to carry around a real glass mirror since it might shatter. That’s why I find these compact emergency survival mirror very fast – they have a smooth and clear surface, which means that they can reflect anything from sunlight to a flashlight, and given the fact that they’re made from plastic, the only thing capable of breaking them would be to actually step on them. Some of these mirrors can also be used to focus sunlight onto tinder or char cloth in order to start a fire.

Rescue Lasers

Yup, the same stuff a teacher would use to point out various things on the blackboard can be used in case of an emergency. Rescue lasers are compact, sturdy, and consume less battery than any LED bulb. You can choose whatever color you like, but I would stick to the flashy ones like neon green or bright blue. Bear in mind that this handy tool comes with a price to match – the cheapest one I saw was around 100 bucks.

ELSs (Emergency Light Strobes)

ELSs look just like a P.E.B, except for the fact that they do not transmit your location over short radio. However, the light from one of these thingamajigs is so intense that you would have to be blind or something to ignore it. If you’re into beacons, you might consider and ELS over a PEB, since they’re much cheaper (around 20 bucks).

Compact emergency signal panels

Remember those disposable rain ponchos from the sports store? Well, here’s the signaling version of the poncho – an expandable signal panel that can fit inside your pocket. If you’re lost, lay it in the sun to let the rescuers know that you’re there and still breathing.

Emergency flares

I personally try my best to stay away from those things after my son broke one in the living room and set the carpet on fire. However, except for this rather unsavory experience, flares are great for marking your location. Since most of them are weatherproof, you can use them in various scenarios: daytime, nighttime, heavy rain, snow storms. You can also start a fire with one of those thingies if you don’t have any matches or a lighter.

Light sticks

Need some light? Pop open one of these things and the darkness will literally melt away. Great for cave explorations or getting some light on that path during a storm. You can also use them to signal for help. They’re ludicrously cheap (I purchased a 12-hour light stick with multiple colors for two bucks).

Well, that about covers my 10 most favorite signaling devices. Think something’s missing from the list? Get to the comment section and let me know.


Other self-sufficiency and preparedness solutions recommended for you:

The Doomsday Book Of Medicine (Everything from the soil up and from head to toe)

The Lost Ways (The vital self-sufficiency lessons our great grand-fathers left us)

Survival MD (Knowledge to survive any medical crisis situation)

Backyard Liberty (Liberal’s hidden agenda: more than just your guns…)

Alive After the Fall (Build yourself the only unlimited water source you’ll ever need)

The Lost ways II (4 Important Forgotten Skills used by our Ancestors that can help you in any crisis)

The Patriot Privacy Kit (Secure your privacy in just 10 simple steps)

Getting yourself noticed should be an important life goal, but there are times when screaming at the top of your lungs could mean the difference between getting back to safety

The number of concealed carry permits in America has exploded over the last few years. According to data from the Crime Prevention Research Center, as of May 2017, over 15 million people have their license to carry. Up from 11 million in 2014. The world is volatile, people feel unsafe and more than ever, they are stepping up and taking the responsibilities of protecting themselves and their families.

The world as we know it, may not ever end. I know, I know, but it is a reality. Some call prepping a lifestyle, we like to be prepared for emergency situations, whether it be an event Mother Nature throws at us, like hurricanes or earthquakes. Or something the politicians throw at us like causing an economic disaster.

Are you prepared for something like an active shooter event or terrorist attack? How about an armed robbery? You should be, as it is something I believe is more apt to happen than most of the other SHTF situations. It could be the heroin junkie sitting in the dark part of the parking lot waiting for you because he has no money and has scoped out your nice car believing he now has a source to get the cash for his next fix.

Get this book now and learn such facts as: The Plant You Can Use as a Diuretic But Also To Make a Great Wine! Good news? It grows all over the place. Details here

I applaud everyone that has taken the steps to acquire their carry permits. Right now there are also 13 states that do not require its residents to have a permit to carry concealed. This is referred to as Constitutional carry, and it is catching on. I believe more states will be joining the others adopting Constitutional carry in the near future. Concealed carry IS a lifestyle, much like prepping. It shouldn’t be something taken as lightly “a hobby”. If you are going to carry around a loaded weapon everywhere you go and you have to have the skill to effectively use it and that will require some sacrifice.

Ok, you have your permit or your state adopted Concealed carry before you decide to go out and buy a Desert Eagle .50AE, I highly recommend you get some training under your belt. If you have never owned a handgun, or have owned them, but never carried one concealed, you NEED to get educated. A basic pistol class will educate the novice in perhaps the most important topic in the handling of pistols, safety. It will go into the basics of marksmanship. It will also give the critical information needed to point the first time buyer in the right direction in terms of what to start looking for in a weapon to suit them, given the myriad of choices.

If your class is a more comprehensive one, the instructor may have some different actions and calibers for the students to try so as to give an individual first-hand experience on what a 12-pound double-action trigger feels like on a revolver as opposed to a 5-pound trigger on a striker-fired pistol. The difference in recoil between a .357 mag and a 9mm.

Buying and carrying a weapon you feel comfortable with is a very individual thing. I hate it when I’m in a gun store and a small framed woman walks up to the counter and says she’s looking for a gun for home defense. Something that’s easy to use because she has no experience. And the salesman says,”oh you need this 12 gauge pump action with 00 buck”. There is nothing more moronic and sales people like that should be fired. That’s why it’s important to have an educated idea of what you want before you walk into a gun store. It would be ideal for you to try as many different models of guns as possible as it is a very personal choice.

If You Are Diabetic THIS Book teaches you what Is Essential For Your Survival Medicine Chest. Get your copy here.

Your purchase doesn’t end with the gun.

The next critical piece of equipment is a good holster. This will take into account lots of different things. Your body type. Are you in shape or do you have a spare tire around your waist? How’s your mobility? Can you access your weapon quickly and smoothly where you plan to carry it? How do you dress? If you decide this is the lifestyle you want to have, you will find that your wardrobe choices will have to change. You will have to dress around your gun, not the other way around. Concealed means concealed. You shouldn’t have to worry about moving certain ways for fear of either exposing your weapon or printing your weapon through your clothes. Unfortunately, it is a trial and error thing. Everybody is built different and what works for your buddy may not work for you. Which leads me to the next point.

Where do you plan to carry?

There are numerous places on the body to carry, but as a NRA instructor and over 20 years concealed carry person myself, I recommend two places over others and I do have my preference as to which I think is better. For starters let’s begin with small of the back. Terrible. I don’t recommend this position to carry concealed no matter how many times you see it in the movies. You have almost zero control of your weapon. It’s not conducive to a fast draw. Its retention properties are terrible. You can’t even tell if your shirt pulled up over it and there it is for everyone to see while you’re walking around the department store. If you happen to either slip or get pushed down in a scuffle and land on the ground with a gun in the small of your back, you could suffer serious damage and even take yourself out of the fight.

 Shoulder holster.

Not a huge fan but I can see some small instances where one could be the right choice. Those instances are someone that uses a wheelchair. Or someone who spends lots of time driving. The things I don’t like about them are that you generally cover yourself with the muzzle when you draw from them. Especially with a horizontal shoulder carry. You can only use them with open front garments. Which really limits what you can wear to conceal it. Handgun hunting is another activity where I could see a shoulder holster being used. Usually, the handguns used to hunt with are large and lots of times even wear an optic. Holsters that lay the gun across the chest are the typical variety of shoulder rigs you see here. However, during hunting activities, one is not usually concerned with concealment.

Get this book now and learn such facts as: The type of salt that can be used for Sprains, Muscle Pain, Muscle Spasm, Constipation, Cardiac Conditions, and even as a Sedative. Find more details here

Ankle carry.

Good for carrying a backup only. Very slow to draw. Somewhat uncomfortable. This is where wardrobe choices are important, the type of pants will come into play. The leg opening will have to be large enough to pull up and over the gun. The type of gun is also limited with carrying in this position in that you won’t be able to carry full sized or even compact sized pistols. Subcompact and micro pistols will be the extent of what could be carried on the ankle.

Strong side hip.

This is one of the two positions I recommend. The majority of holsters made are designed for this position of carry. There is outside the waistband and inside the waistband. That is up to the individual. Although inside the waistband generally conceals the pistol better than outside because it hugs the body tighter.

Advantages to this carry position are that it’s fast. You can also wear closed front garments as well as ones that open from the front. Strong side hip also allows the user to have some retention ability. Meaning if someone tried to take the gun from the holster, the user has a fighting chance to retain it, unlike small of the back. If you carry inside the waistband you may have to buy your pants one size larger depending on the size of the weapon you want to carry.

Appendix inside the waistband.

This is my preferred method of carry. There are lots of detractors on the internet regarding appendix carry. However, I doubt most of those people carry on a regular basis. The popular saying is, you’ll shoot your junk off. Well sure, if you are untrained, it’s a possibility to shoot yourself drawing a gun from any position! I’ve been carrying this way over 20 years.

I have drawn and fired hundreds of thousands of rounds and I have never shot myself. I prefer this method because it is the best way to conceal a larger pistol. It is the fastest draw. Open or closed front garments can be worn. It provides the best in terms of retention abilities. If you happen to wind up on the ground, you can still access your gun. And you can access your weapon with either hand. If you are exploring this option, don’t let what others say to persuade you.

Try it for yourself, give it a fair chance and you will most likely carry this way. It, however, doesn’t work with all body types. If you are somewhat thick in the middle, this method may be uncomfortable for you. There are other methods of concealment like shirts and belly bands etc. I’ve decided to cover the most popular methods because others are more niche type methods and represent only a very small portion of the market. However, I encourage you to research alternate methods of concealing a pistol because you may have a unique situation.

The two most popular types of holster materials are leather and Kydex. Both have advantages and disadvantages. I personally prefer kydex because there is no break-in period, they are virtually maintenance-free, they are impervious to cleaning chemicals, sweat, and moisture. They can have an adjustable retention and remain open for re-holstering with one hand. Some things against kydex are it generally doesn’t feel good against the skin. Depending on where it’s worn they are notorious for hot spots. Some say they are bulky. They can be noisy when drawing or re-holstering.

Leather holsters are comfortable.

They are ninja silent when drawing or re-holstering. After the holster is broke in, it wears on the gun like a glove, usually providing adequate retention. You can get, depending on how much you want to spend, exotic type leathers from stingrays and sharks to ostrich and alligator. Some cons are that they do require a break-in period. During this period the gun will not draw as smoothly. You will have to maintain the leather. Just like a good pair of boots, you will have to apply conditioner and even waterproofing agents to them from time to time so they will last.

You also have to take into consideration what you use for the leather treatment because it could ruin the finish of the firearm. Some leather holsters collapse when the weapon is drawn, requiring your other hand to open it to re-holster.

Ammo.

The ammo you decide to load in your everyday carry weapon should have as much thought put into it as did the weapon and holster. Don’t take the time and spend the money to buy the best equipment and then get cheap and buy a box of Tula ammo to load in your carry gun. Every ammo shoots different in every gun. If you had two of the same pistols and shot the same ammo out of both of them, there still may be variations in the accuracy. So like the guns and holsters, it is a trial and error thing.

Buy premium defensive ammo, which means hollow points, and shoot enough of it to make sure it is reliable in your chosen gun and it is accurate. Hollow points are a type of bullet that when it enters its target, the design of the bullet causes it to expand, slow down, and stop. Thereby leaving all of its energy inside of its target, which increases its effectiveness. This also prevents shooting through your targets, which could be dangerous to innocent bystanders or family.

When you buy training ammo, buy decent stuff, I stick with American brass cased ammo. Federal, Winchester, and Remington are all good choices. Other good ones are PMC, Speer, and Hornady. Some of the better-imported training ammo is Privi partisan, IMI, Magtech, Seller Bellot. Stay away from the Russian steel cased crap. It is not accurate, I’ve seen it both under-powered and overpowered. I also recommend staying away from aluminum cased ammo as I’ve had a case rupture and it fire scored the chamber of a $1,200 dollar handgun. I was not a happy camper!

Getting a basic pistol class under your belt is a great start but it will not get you prepared to draw and effectively use your pistol in a deadly encounter. You will have to take the next step after learning how to safely handle and operate firearms, learning a basic understanding of the types of firearms and getting a basic foundation in marksmanship. Then the next step would be a class like a concealed carry 101. You will have to maintain your skills even after taking these classes. Shooting is a perishable skill. If something happened years after you have taken the classes but you haven’t maintained your skills, chances are you won’t be able to perform the way you want. To maintain a level of competency, I recommend 15 minutes of dry fire 3 days a week, and live fire at the range at a minimum once per month.

One more topic I’ll briefly touch on in closing, even if you have the best weapon and ammo and all the skill of a modern gunfighter if you aren’t willing to pull the trigger on another human being, concealed carry or gun ownership, may not be for you. You must get your mind right before a deadly encounter. You must be willing to accept the fact that you might kill someone if they are trying to kill you or your family. That is also the reason why we train. You want to be able to perform your techniques without thinking about them. During a deadly encounter you have tons of other information to process without thinking, am I drawing the pistol correctly? Is my grip right? You will have to make small sacrifices of time to maintain a level of competence. It will be time well spent.


Other self-sufficiency and preparedness solutions recommended for you:

The Lost Ways (The vital self-sufficiency lessons our great grand-fathers left us)

Survival MD (Knowledge to survive any medical crisis situation)

Backyard Liberty (Liberal’s hidden agenda: more than just your guns…)

Alive After the Fall (Build yourself the only unlimited water source you’ll ever need)

The Lost ways II (4 Important Forgotten Skills used by our Ancestors that can help you in any crisis)

The Patriot Privacy Kit (Secure your privacy in just 10 simple steps)

The number of concealed carry permits in America has exploded over the last few years. According to data from the Crime Prevention Research Center, as of May 2017, over 15

In preparing for what may come, big and small, we tend to focus on two things first: food and defense. Some of us do plan out our resupply and restocking – which means growing – but maybe we’re stuck in a rut because of the things we read about seeds, and maybe aren’t really and truly understanding seed types and some of the terms we see. I’d like to dig into some of those terms so we know what we do and don’t want to buy, and why.

Seed Terms

We see a few plant terms pretty commonly in our day-to-day life, especially if we’re of a certain mindset. The biggies we see when we’re researching and buying seeds are: hybrid, heirloom, OP (Open Pollinated), GMO (Genetically Modified Organism), and organic. So let’s look at them a little closer, because they’re pretty significant and tend to be rife with crazy advertising and misconceptions.

Organic

This isn’t actually a seed term. It speaks to the culture of plants, the way we treat a plant, how we grow it. States have differing requirements for what it takes to be labeled organic, but the upshot is that it limits the amount of chemicals used. GMO seeds are not considered organic, even when the modification is something that is considered an organic compound, like some of the cold-resistance genes from fish, Bt that is a naturally-occurring microbe, or genes that allow resistance to Roundup (AKA, RR-Roundup Ready). However, seeds do not have to be grown organically to be either heirloom or OP crops. Likewise, hybrid seeds can be grown organically.

The most comprehensive look at preventative medicine out there. Click on it for details.

Genetically Modified Organisms

Contain genes from something that did not start off in a particular genetic line. Genes that are implanted could be from another class of plant or algae, from a frog, or from a fish. Sometimes the modification is removing a gene that would normally suppress or create a reaction. It’s a wide field.

GMO plants are mostly capable of successfully breeding, just to clear up that myth. Plants are more resilient in the face of uneven chromosome matching than animals. That uneven number of chromosomes in offspring (seeds) are what make fertile mule mares newsworthy, but the ability to cope with genetic inequality is actually responsible for some varieties and eventually speciation within plants, totally naturally. However, since most GMO plants are hybrids, it’s like rolling a 10-sided die in hopes of a 6, just like breeding two mutt dogs to each other. Because of that – and because of contracts – farmers don’t collect seed from their GMO crops.

Another pervading myth is that you have to work hard to avoid GMO plants. Yes, in U.S. supermarkets. Unless otherwise marked, almost everything in the center aisles, dairy section, and meat department has likely been fed or contains GMO corn or soy.

You want to survive tomorrow? Start today.

However, GMO variants don’t exist for every type of crop, and few are readily available. Wheat, corn, squash, canola, beets, alfalfa, soybeans, and oil cotton are the most common GMO seeds sold by Monsanto, with sweet potatoes and papaya available in Asia. Tomatoes, rice and potatoes have been approved but are not yet available commercially. GMO seeds are actually pretty expensive, too, especially in small scale. It’s unlikely – unless we’re buying big bulk farm-cropping seeds from a supply store – that we will even see GMO products available to us.

So why do we see so many “GMO-free” and “organic” banners on seed packets? Because we’re more inclined to buy them – or pay more for them.

It’s a case of the tail wagging the dog – when we’re interested in something, companies strive to meet that interest. Even good sellers and producers need to eat and thus develop marketing strategies, but it’s something we can be aware of to save our own hard-earned cash. If we’re buying OP or heritage seeds, paying extra for a “GMO-free” label is like paying more for “cow-free” labeling on soy milk. How the seed parents were raised (organic or inorganic) is really only of political or moral interest. We’ll inhale more toxins in a day than that single seed will convey to the adult plant and its fruit. Therefore paying more for “organic” labels is more personal preference.

That’s not to say a certain pack of seeds is not worth more than another. I may be motivated to support independent farm-to-sale seed production, small companies, organic growing methods, landrace projects, or heirlooms. I might be paying for packaging, uniqueness, or to support some organization in conjunction with the supplier or retailer. Just be aware of what you’re really paying for.

Everything from the soil up. Seeds included. Click the book for details. 

Heirloom seeds

Also sold as heritage crops, have been around for a while, somewhat unchanged. I say “somewhat” because things change. Look up the evolution in AKC standards, especially for things like Airedales and German shepherds.

You can also look at vehicle tag standards. The 1991 F150 and the 1930 Model A are both older Ford pickups that qualify for the same classic or antique plate, but they’re very different vehicles with very different capabilities. Heirloom seeds are kind of like that. Some are fifty years old, some are centuries old. They may follow a basic form, but the 1850’s cultivar will likely demonstrate more changes from the original than the fifty-year-old seeds.

That’s okay. All our crops have changed significantly, usually for the milder and sweeter, sometimes getting bigger and sometimes yielding more fruit per plant. In other cases, plants have gotten smaller, like an heirloom wheat bred by human selection over about 300 years to produce seed at 2-3’ instead of taking half the season just to grow to 5-6’.

All heirloom is going to be open-pollinated, but not all OP seeds are heirloom, and that’s okay, too.

OP/Open-pollinated

This means that seeds will breed true, beagle + beagle = beagle, pepper to pepper.

Some plants (corn, wheat) use wind to pollinate them from another plant of the same species (two or more plants are necessary for pollination or for fertile seeds). Some plants (squash) need a thin paintbrush or a bug to get coated in pollen from a male flower and then coat the important parts of a female flower, but the flowers can be from a single plant. Peas could use wind or a bug, but will usually bear fruit just fine from the pollen and eggs within a single flower. Tomatoes could bear fruit from just one flower without any assistance, but will be more successful if the flower gets shaken by us or by insects, dropping more pollen onto the petioles.

Spacing-concepts-congestion-planting-marigolds-and-cabbage-www_welldonelandscaping

So long as our spaghetti squash does not begat-begat with acorn squash and our bantam sweet corn does not make time with our strawberry popcorn, all will be well. That’s how OP and breeding true impacts us: We can collect our seeds, plant them again, and make future generations of the same squashes and corns into infinity.

It does not require a particularly long genetic line to produce those results. OP seeds have regularly been refined over years, but they may only be a few years old, relatively, especially fast-growing plants that can produce multiple generations in a year.

OP’s are commonly tailored the same way hybrids are, breeding more and more for cold and heat and drought tolerance, expanding the range that a plant can be successfully grown in, or making it resistant to the introduced and stagnant-soil diseases we fight. We also breed for more produce per plant, either same-size plants or larger plants. Sometimes OP’s go the opposite way and are bred to be smaller and more compact, so they fit in more places, or so they spend less time on foliage and can be harvested earlier and easier.

OP’s can be had both determinate (most production in a narrow window) to aid in efficient harvest and succession or rotation cropping, or indeterminate (production spread out across a longer range) so that we can stagger harvest and processing.

OP is how all heirlooms start. They’re no less reliable than an heirloom or heritage crop seed. They’re just younger, 1991 F150 instead of 1948 F150.

Hybrids

Are what result from promiscuous plants or deliberate cross-pollination. The problem is that they don’t necessarily breed true to a parent hybrid.

Look at Labradoodles (Labrador + Poodle). If I breed Labradors for fifty years, I might get some slight variations but I’m getting Labs. However, if I breed two Labradoodles, I start gambling. I may get some pups that throw back to Labs, some pups that throw back to poodles, and some pups that do present as Labradoodles. There may also be some pups that look like maybe there was a milkman involved, because neither parents nor grandparents have upright, pointy ears or spots.

Genetics are funny that way. “Hybrid vigor” is awesome, I love my mutt livestock and pets, but it’s also a gambling game. When we want to eat, we don’t like to gamble on what’s going to show up with more than a year invested in the seeds.

Hybrids have their purposes, especially since a lot of heirlooms and some OP’s are indeterminate. A lot of hybrids are also faster than their heirloom fore-bearers. Although there are heirlooms and newer OP’s that are resistant to diseases, hybrids can usually be found already tailored for our exact growing conditions. They shouldn’t represent the whole stock for somebody worried about losing their supply line, but there are arguments that can be made for including them in planting and storage.

gardening-1117866_640

Bonus: Landrace

We sometimes see the term “landrace” in homesteading circles. That’s its own separate cookie, too. Landrace lines – plant or animal – represent the idea that regionally produced specimens are better than “generic” heirlooms and heritage crops.

They are being developed much the way our crops and livestock started and why we have so many breeds of chickens, pigs, goats and so many cultivars of plants: they stay in pockets. It’s not necessarily bottle-necking and inbreeding, although there is some – purposefully done and carefully controlled. It’s about a belief small, slow solutions, and in local products. It’s making a pig and a dent corn for Arizona that fits Arizona better than it does Alabama or Alaska. Some landrace programs are also working on livestock with native pasture and forage, to decrease the amount of reseeding and grain feeding we have to do.

We already apply some landrace principles when we give advice. I may suggest certain apple trees and chicken breeds for a pasture orchard, but I will also tell you to try to find a local nursery with a local or regional grower, and a local or regional breeder. The chances of you having success with something that’s intended for your area, that has come from healthy parents that are already thriving in your area, are much higher than if you order in a plant or livestock from two USDA growing zones away, even if it’s the same breed or cultivar.

Landrace initiatives are working to make those kinds of local-to-local sources more available, increasing local success.

Selecting Seeds

“One Size Fits All” is largely a myth. There are always exceptions. Needs and goals differ, so one specific seed type isn’t necessarily better or worse across the board.

Somebody might stock some 45-50 day hybrid squashes so that they can see returns if a tornado, rogue truck, fire, animal or torrential downpour takes out their garden 60 days before the average first frost. Somebody may want a hybrid cover that more effectively chokes out weeds for the first couple of years. Alternatively, some may be dedicated to saving towering heritage wheat, or may see good reason to cultivate tepary beans even though they don’t match their current climate.

That’s as it should be. We’re all different with different motivations, so we seek out our best fit.

Additionally, sometimes we can save a little money or increase our options by understanding how important a specific seed term is to us, and how important it is to us to have our heirloom or OP seeds also marked with the words “organic” or “GMO-free”.

The goal is to be aware of what those terms in seed descriptions really mean so that we can make the best purchasing decisions for our situations and expectations.


Other self-sufficiency and preparedness solutions recommended for you:

The Lost Ways (The vital self-sufficiency lessons our great grand-fathers left us)

Survival MD (Knowledge to survive any medical crisis situation)

Backyard Liberty (Liberal’s hidden agenda: more than just your guns…)

Alive After the Fall (Build yourself the only unlimited water source you’ll ever need)

The Lost ways II (4 Important Forgotten Skills used by our Ancestors that can help you in any crisis)

The Patriot Privacy Kit (Secure your privacy in just 10 simple steps)

In preparing for what may come, big and small, we tend to focus on two things first: food and defense. Some of us do plan out our resupply and restocking

How do you like having POWER?

Electric power. The one we all have access to.

Most people in the US aren’t ready for life without electricity and what it really means to be without essentials like a functioning toilet or clean running water. Or were you just thnking that your Netflix account will be the only thing affected by this?

Those living off the grid are living proof it is possible that you can live without electricity, it just takes a few adjustments.

Now, you don’t have to leave town to prove you have hero material. Not without the proper knowledge to do so. Ready for a quick question? Try to be honest. With yourself. I’m not really there with you.

How long do you think would it take for commerce, food supply, and societal order to collapse?

This is not my way of ruining your day. This is also no fear mongering. This is just a very interesting and possible scenario since it shows how fragile modern society is. Without a single resource the infrastructure falls to pieces. Electricity is the lifeblood of modern civilization. Without it, your cars, TV’s, phones, and radios can’t work. And just as your house would be suddenly quiet, so will the city be. And the shops. And the doctor’s office. And yes, you name it. It’s not even an exercise of imagination. It’s simple math.

We all know America’s electrical grid is our Achilles heel.

The good news? It serves us all.

The bad news? If it goes down, we all do.

Not convinced you can only count on yourself if there were no more electricity?

Let’s see the aftermath of a grid down scenario for the first week. It should be enough for you to realize you need all the help you can get.

Here we go.

  • Anything with a transistor would be fried.
  • The power and telecommunications infrastructure would completely be compromised.
  • The general public would be confused at first, but some would realize what happened right away and start looting and stockpiling supplies.
  • Urban areas would completely break down.
  • The suburbs would be spared for as much as a week in certain places before disorder came there too.
  • Agricultural areas would fair the best as they are fairly self sufficient, chances are they would be fine or at least better off than the rest of the country.
  • the death toll would rise significantly due to starvation, violence, and disease.
  • Urban areas would become split up between factions and gangs bent on controlling the last resources in the city.
  • The suburbs would most likely form into small groups focused primarily on resource gathering.
  • Agricultural areas would probably focus on deals between starving survivors and their selling their own food crops to affected areas.
  • Depending on the scenario, after a month foreign military intervention would come from Mexico and possibly Canada.
  • Cities like Los Angeles and Houston could fall under military occupation as the US military would be unable to do anything.
  • Canada would most likely occupy Washington and New England.
  • Most urban areas would be destroyed and unlivable.
  • The people from the suburbs depending on where they live, might attempt to emigrate to Canada or Mexico.
  • People in the agricultural areas may do the same.
  • Attempts would be made to restore parts of the electrical grid, these efforts could be made by foreign powers or citizens.
  • If they are successful, agricultural areas as well as some suburban areas would be serviced again.
  • The process would take many years though.

It’s pretty clear. But where to start preparing for such an event?

In order to survive tomorrow, we need to prepare today! Get this book now.

Everywhere you go on the internet you are bombarded with endless videos and boring presentations that do not reveal anything worthy in the end.

Welcome to my world, before i finally found what I was looking for. What if I just want a good book that will teach me how be self-sufficient? Is that too much to ask? Isn’t it weird that we are surrounded by so much informations and still, it’s becoming harder and harder to spot the real valuable ones?

Anyone facing a ton of incorrect or incomplete information about prepping OR sick and tired to watch another 45 min video about “The End Of The World” just to buy a worthless product? You NEED to pay close attention to this.

Because this Prepper’s Ark of a book will allow you to never search for another book on how to able to provide food, water, medicine and shelter to keep your family alive.

Not if you’re armed with what you’re about to learn:

  • There’s no doomsdayism here.
  • The key to leading a healthy and disease-free life
  • What to do you do when there are no doctors or medicine
  • Master the forgotten practice called “healthy nutrition,”
  • Everything you need to know to grow your own nutritious food,
  • The essentials of survival nutrition and gardening
  • How to build good soil and how that in turn leads to healthy plants that will nourish you and your family, keeping you robustly healthy and impervious to infections and chronic diseases.
  • All about vitamins, enzymes, minerals, and trace elements and why they are so essential to maintaining good health.

And this is just the first part of this book.

If you wish to finally get complete information on what to expect and to do when emergency medical system will be overwhelmed during a disaster, give this book your whole attention.  The EMTs are unable to reach patients stranded in remote or extremely hazardous locations. There is never enough medicine to treat all cases, lack of manpower, loss of electricity…

Are you willing to stay at the mercy of someone else, even if it is the establishment itself, when your life and your family’s life is at stake? I wasn’t. And I have a hunch no one is.

Study this book like it’s the bible and start using it to slowly replace your prescription pills with natural remedies tested by a doctor who wanted to save lives, not Big Pharma.

Check the facts. For example, a study published by Mayo Clinic a few years back reveals that 70% of Americans take at least one prescription medication. The same study shows that 20% of Americans are on five or more medications.

What will all these people do when there will be no more medical supplies? Because you cannot stockpile prescription drugs. The system won’t allow it. So? What then? You really need to learn and adopt a natural alternative to your drugs. And guess what? It will be way, way, way cheaper.

What’s keeping you?

Your book is HERE!

Use The Doomsday Book Of Medicine as a tool to replace current drugs and you'll end up saving a lot more..

Americans like to spend money on their landscapes – a LOT of money. According to the National Gardening Association, the amount invested in lawns and landscapes in this country has ranged from $29 billion to almost $45 billion annually over the last few years.

Research has shown that there’s some practical value to well-planned and maintained landscaping, including an increase in appraised real estate value and a significant reduction in utility costs, but whenever I see someone spending their Saturday installing expensive rolls of turf grass or hundreds of impatiens, I’m tempted to ask the question my grandfather asked my grandmother about her houseplants: “Why would you grow something you can’t eat?”

I’m not anti-lawn (not totally anyway; the kids DO need a place to play football), but as a vegetable gardener and someone with an interest in preparedness, it troubles my spirit to see so much time, energy and cash going to pretty specimen plants and yard grasses and so little going to food crops for a particular household.

The information in this book can be used immediately to improve your health, and expand your treatment options in many areas even if there is never a crisis event for you and your loved ones. Click on it for details.

Imagine a food garden that you only have to plant once in your life-time, that takes up very little space, that will provide food for you and your family for the next 30 years

But is it possible to have the best of both worlds? And even if you already have a large vegetable garden and orchards, the diversity of edible landscapes can help fill in the gaps in your food security. For instance, think about what would happen if an insect or disease problem wiped out your apples or corn. Plus, plants worked into a landscape are more covert. The average person wouldn’t likely be able to identify a berry- or nut-producing shrub in a landscape bed unless they actually laid eyes on the berries or nuts.

Creating your Edible Landscape

Below are twelve plants to consider for your home environment that are both attractive and edible. Depending on where you’re located, some of these may not grow well in your particular USDA hardiness zone, so do your homework. Your local extension service can recommend other alternatives. Many of these can slip nicely into traditional landscapes, too, in case you have a homeowner association critiquing your every move.

Blueberries

Blueberries have appeal in all four seasons. The white blossoms of spring, the summer fruits, the red fall foliage and the bark texture visible in winter all make this plant a good fit for your landscape, and a healthy blueberry bush will bear for up to 50 years!

You’ll need cross-pollination, so select at least two different varieties that bloom at the same time. And as with all crops, know the pH of the site you’ve chosen before planting. Blueberries prefer an acidic pH of 4.5 to 5.3, so if it’s higher than this, you can adjust by adding a small amount of sulfur.

YOU DON’T HAVE TO WAIT FOR A CRISIS TO USE THIS BOOK. Click above for details.

Serviceberry

When I was a child, my grandmother always sang the praises of the “sarvis” tree, also know regionally as shadbush or Juneberry. The fruits look similar to a blueberry, although the two aren’t related. The serviceberry is a tree, not a shrub, and can reach heights in the landscape of up to 25 feet tall (and even taller in a natural environment).

serviceberryripecloseup

Bake them into pies, puddings or muffins. Dehydrate them like raisins.

I had to attend a conference this past summer, and I discovered that serviceberry had been used quite effectively in the inn’s formal, manicured landscape, and it was bearing prolifically among the more conventional ornamental choices.

Kousa dogwood

This Asian dogwood looks similar to the flowering dogwood native to the eastern U.S., but it’s more disease-resistant, it performs better in full sun, and it has edible fruits the size of a small plum. These can be eaten raw or used to make jams or jellies.

Cornelian cherry

Not actually a cherry at all, but another species of dogwood, the fruits from this tree are tart and versatile. In the U.S., they’re typically used to make jam, but in parts of Europe or the Middle East where this species is native, the fruits might be used in the distillation of vodka or served as a salted summertime snack.

Passionflower

Nine species of passionflower are native to the U.S., and other species are commercially produced in tropical climates for juice, which can be found on the shelves of most larger supermarkets. Juice can be produced from most of our native species as well, but the maypop or purple passionflower (Passiflora incarnata) is considered the best.

PassionFlower

New research suggests that passionflower may treat insomnia and anxiety as well as prescription drugs, but without the side effects.

Where you may typically have ornamental vines like clematis running up a mailbox or trellis, consider passionflower instead.

Currants

Currants are related to gooseberries but have no thorns. Currants are one of the few fruits that perform well in partial shade, so if you have a corner of your yard that doesn’t get solid sunlight from morning until evening, consider these.

Currants

From early June through August, this bright, tangy fruit is at its flavorful peak. Enjoy it in recipes that are sweetly irresistible.

Currants come in a range of colors, from black to red to pink to white, but be mindful that some types could be illegal in your state. This is a carryover from the early 20th Century, when it was discovered that black currants were an alternate host for white pine blister rust, a disease which negatively impacted the timber industry.

Rhubarb

With its large leaves and red stalks, rhubarb can fit nicely into an ornamental bed, serving as an effective groundcover. Once established, a rhubarb patch can be productive for more than 15 years, and it’s very winter hardy.

rhubarb

Rhubarb is often dubbed the “pie plant,” and the stalks, soft and delectable when baked, do make a divine pie filling.

The stalks are an acquired taste, but many folks like to mix them with strawberries in pies and cobblers. In Asia, they’re used as a vegetable and added to stews. More unusual methods of using rhubarb would include dried and candied stalks, and some folks even like to eat them raw.

Sunchokes

Native-to-the-U.S. sunchokes grow aggressively, and they’re difficult to eradicate once established, so never plant them where you might want to grow something else down the road. The tubers can be used like potatoes, and they’re often promoted as a potato substitute for diabetics, since their storage carbohydrate is inulin instead of starch. Inulin converts to fructose rather than glucose in the digestive system.

Sunchokes

Jerusalem artichokes, or sunchokes, are starchy tubers like potatoes and turnips.

Sunchokes are also known as Jerusalem artichokes, but they’re no relation to the actual artichokes found in the supermarket. Since it’s technically a native sunflower, the mature plants will produce dozens of small, yellow flowers on four- to nine-foot plants.

Amaranth

Glancing through the catalog of a company that carries amaranth will give you an idea of the diversity of varieties. Amaranth can be grown as a grain, a forage, a leafy vegetable or as an ornamental. The colors and seed head shapes vary wildly. For flour production, amaranth is naturally gluten-free.

Be wary if saving seeds from amaranth, because they’ll cross-pollinate with weedy cousins like lamb’s quarters or pigweed.

Build Your Own Medicine Chest. Click above for more details on this book.

Bamboo

There are two warnings that go along with a desire to establish bamboo in a landscape. The first is that bamboo can be extremely invasive. If planting the running varieties in particular – as opposed to clumping varieties – be sure to use a subterranean barrier, or else your neighbor’s hay field may soon become a bamboo forest.

The other warning concerns the use of bamboo shoots as a food source. While the shoots are popular and high quality, there exists a slight possibility of infection by the fungal pathogen ergot. Ergot affects other grass species such as rye, wheat and barley, too. Ingestion of ergot can cause hallucinations and death.

However, you can learn to identify the presence of ergot easily, and it’s more likely to occur in wet weather.

Once you’ve dealt with the invasiveness and the potential for ergot, bamboo can be an excellent plant for the homestead. In addition to the shoots, it can be a perpetual source of material for structures, furniture, fencing and trellising, and it’s an effective privacy screen.

I’m tempted to ask the question my grandfather asked my grandmother about her houseplants: “Why would you grow something you can’t eat?”

A crisis of any scale is a tough time to either have to learn to do without, or create a lot of work for ourselves. With a little practice and planning, we can still have things that make our next dish of soup or pinto beans or squirrel a little happier, and give us some versatility in how we use flour and mixes for baked goods. We can do it without adding a ton of steps, mess, and in most cases a lot of ingredients to our daily tasks. Whether we’re at home or on the trail, that can save some sanity as well as time and labor.

This is me, so you’re mostly going to see 5 ingredients or less through here, and a focus on cleanup. I’m just not Martha Stewart. But I do like my breads and I do like something sweet now and again, so here’s half a dozen ways we can still get them, even without a working oven or supermarket.

Ash Cakes & Bannock 

What would a soup be without some sort of bread? Not as happy, that’s what. Any flour will work for either an ash cake or bannock bread, even purchased mixes like the dinner rolls Augason Farms apparently figures I’ll be making – ever, but especially in a disaster. Even when it’s got extra stuff in there, I go ahead and follow the cup-tablespoon-teaspoon ratio for bannock, or just drizzle in water or milk for an ash cake.

Those ash cakes and bannock can also be augmented by rolled oats, rolled wheat, or instant rolled barley, although you need to let those sit for 10-20 minutes to make sure they have a chance to soak up some liquid, and you’ll probably need to add more liquid than usual. It’s a way to both add some texture and variety to diets, as well as use up some of the cheaper ingredients like oatmeal that are in our storage even when we haven’t planned for no-bake cookies.

Any cornbread or cornmeal can also be turned into ash cakes or pseudo-Johnny cakes, to go beside a soup or under a stew, or to add variety to our breakfast meals.

Drop biscuits & dumplings

Most pancake and dinner roll mixes have the potential to turn into nice, easy biscuits; and anything that’s a biscuit (or bannock bread) can be dropped by mounded tablespoons into a simmering pot of broth, gravy or soup, simmered for 10 minutes, flipped, simmered another 10-12 minutes, and whala – we have a fluffy(ish) bread right there in our soups.

Head’s up: Biscuit dumplings will regularly turn your clear, light broth into something thicker and more gravy like. That is not a bad thing, just a point.

Something that can be a bad thing, is that if you completely cover the top of your soup with dumplings, it gets really hard to stir the bottom.

Both of those factors go away if you opt to make your meal in a solar oven or similar. You can do it one of two ways, just like a regular biscuit bake – stick the biscuits/dumplings on the bottom to slowly rise and fluff, or space them out on top from the get-go or after part of the bake time has elapsed.

An advantage to dumplings over other ways of getting a breading into our soup meal is that it’s still only one cooking pot.

Drop biscuits have advantages in clean-up, too, and in time and waste. When we mix a batter and then spoon biscuits out onto a sheet pan, we don’t even have to dip our fingers in flour for molding them. We sure don’t have to flour a counter and a rolling-pin or drinking glass (which is also what I usually use for a cutter).

When I make drop biscuits, they’re ingredients to oven in 5 minutes or less, and my cleanup involves a bowl and two spoons. When Mr. P makes *real* biscuits, I consider just torching the kitchen and starting over.

In a life with limited water, limited resources, and a lot of labor involved with every aspect of survival, the differences can matter. The same holds true for the drop biscuit dumplings instead of rolling out and cutting even more to make flat drop dumplings.

Hardtack

Hardtack is definitely an option to go with our soups, just like it was in colonial and pioneer days. There are lots of recipes online for baking it.

There are not as many as I’d have expected where people actually eat this stuff, and discover that it’s best soaked for a few hours first, then simmered right along with broth, tea, or soup, anywhere from 10 minutes to an hour depending on the alignment of the stars*.

*Snicker; but not entirely kidding on the predictability front.

That veers it away from a convenience food, but if you’re using a crock pot or equivalent, or are simmering soup for a few hours anyway, heating the house anyway, it’s pretty handy to be able to pop open a bucket of these things 2-5 years after you made them and have a nice, portable, calorie-dense portion to pick up and eat or saw with a fork and knife. We can even sub in some of our crazy flours like ground dry beans, acorn, and barley if we’re so inclined.

Just be aware that real hardtack is not Mountain House pilot bread or a cracker, and that 5-20 minutes under gravy or in a fry pan goes nowhere without a pre-soak once it’s hard and dry.

Beer bread

I am lazy, if it was not obvious from the articles about bed sheets, laundry, and gardening. I’m also not big into babysitting food at timed intervals.

Beer bread fits me to a T.

Price out some inexpensive light beer, and don’t neglect the option of a local store ordering a couple flats of forties for you. They’re actually the cheapest option for me, both bottles and cans, because I’m not willing to buy Natty Ice even for a disaster, even though there’s boxed wine in case I decide a wine IV or camelback is necessary for my sanity.

There are many recipes online. I like this one, although I sometimes just omit the butter entirely or use oil instead. This one skips the salt and goes straight to self-rising flour. We can sub in a dinner roll mix or Bisquick for either.

And the sifting … I call it optional.

We can use a beer bread recipe in any kind of cooker, from a crock pot or facsimile to a solar oven. We can make it in little cans around a campfire or rocket stove, too, or atop a clay pot candle heater.

Spread out in a pie plate or frying pan instead of a loaf pan, or separated into muffin pans, it’ll cook faster and be easy to portion out.

That can save arguments over who does or doesn’t get the heels (there are freaks out there who consider that a lesser slice). It can also just make it faster and less messy to serve, while also saving cooking fuel and time.

If you want more flavor to your bread, you can go with heavier and darker ales as you like. While I’m happy sipping a well-built Guinness or Killian’s Red, I don’t actually like them in my bread and that bread is no good for PBJ.

Griddle Cakes 

Another cheat I learned for backpacking is that you can make any baked good into a griddle cake. For those of us who want fast and easy in a disaster, or who aren’t *ready* yet and are dying for a quick and easy treat, bag and box mixes I have successfully made into little rounds of goodness with a pan or on the greased top of a canteen mug and any heat source include:

  • Oatmeal cookies
  • Brownies
  • Muffin mixes
  • Cake mixes
  • Scone mixes
  • Cornbread & corn muffin mixes
  • Hushpuppy batter

You can follow the directions (or portion them, depending on how easy fresh or powdered eggs and oil are to divide) or cut some of the liquids, and they come out about like puffy pancakes.

Thin them down a fair bit, and, boy oh boy, we’re starting to look into the gourmet side with crepes.

They can be eaten as-is like a soft cookie or roll-up, or topped with powdered sugar, cinnamon sugar, ice cream and milk flavoring syrups, nuts in syrup, honey, tree syrup, Karo, and jelly.

Frosting in a Ziploc bag offers the ability to make cute spirals and grids or fluffy artistic mounds. Pudding can be reserved and mixed thick to do the same, or used as a filling for crepes.

They can also be topped or filled with canned or rehydrated fruits, cannoli filling, pie filling, cream cheese, or peanut butter. You can also play with adding shredded coconut and nuts (and chocolate) to German chocolate frosting, or use sweetened condensed milk and shredded coconut as a super-sweet filler.

Fun note: They can also be baked in a skillet to cut like wedges of cornbread. I regularly bake muffin mixes in a pie pan to create thin little slices that are usually drizzled with something. Tuna cans and soup cans can also be used for any batter, as can small Pyrex bowls or ramekins. Those containers are also all options for baked pancakes, such as this one .

Off-Grid Cooking

Even when we’re not as prepared as we’d like to be, or when we like convenience and we want to continue to have convenient options in a disaster, we can still get the feel-good foods that bread and even “baked” sweet treats can be.

Whether it opens up options for us, just provides some extra backups, or becomes part of our daily habits, keeping an open mind about what we can accomplish – and how much effort it has to take – can only benefit us in the future.

This focused on my weakness: Breads. (And laziness, okay.) I totally endorse knowing how to do and make things from scratch. There are preservatives and cost issues with some of my cheats. However, from things like ash cakes and bannock that truly need few ingredients, to new ways to make and use mixes we might already have around, we don’t want to pigeonhole ourselves, especially if our disaster plans involve holing up in summertime or a lot more physical labor year-round.

Other things to consider when we look at these lists are the amount of fuel some of the treatments take, the amount of pan scrubbing and kitchen cleanup involved, and even the cookware we have at our disposal.

We also might want to look at some of our guilty pleasures when it comes to eating. Even if we don’t stock our cupboards to make it a daily or even weekly staple, we might consider stashing some premade mixes, hiding away some beer, and holding onto some tin cans so we can pop them out now and then for special occasions.

A crisis of any scale is a tough time to either have to learn to do without, or create a lot of work for ourselves. With a little practice and

When I started my own prepping journey, a bug out bag was high on my list of priorities. I read a lot of articles and watched a ton of YouTube videos about this subject and as you can imagine, there are as many bug out bag ideas as there are grains of sand at the beach. The bags all share a common goal in that they are supposed to keep you alive if you have to leave your house for some period of time.  I think where the line gets blurred however is what your own idea of the duties of your bag are for. What do you really “need” in order to “live”? If your Bug Out Bag contents look more like what you would pack in a suitcase for a vacation, you may want to reconsider your options.

smp

What is the purpose of a Bug Out Bag?

OK, let’s start with what a Bug Out bag is most typically used for and go from there. A 72-hour bag or kit is usually listed as the standard we as preppers should aspire to and is actually what FEMA recommends on their website. Again, this means that your bug out bag should have enough supplies to get you through 72 hours. What you put in here though should vary by person and need. If you have considered whether you will bug out or hunker down, preparing a bug out bag could be the next step in the process.

Your bag is meant to be something that you can quickly grab and run out the door. Your bug out bag should be pre-packed with the appropriate supplies and ready at a moment’s notice. Ideally, you would have practice with your bug out bag and lugging it around through various terrain and experience actually living off the supplies that you have stored in there. A bug out bag is different in scope from a Get Home Bag, but you may have some of the same types of contents in both.

A good bug out bag doesn’t have to weigh a ton, or cost a fortune to do the job.

At a minimum, your bug out bag should cover the 3 basic necessities you need to live; food, clothing, and shelter. After that, we look at supplies to make your life more comfortable or more secure.

Do I need a Bug Out Bag?

Great question! The answer depends on what you are going to use it for I think to a large extent. Bug Out Bags come in two main flavors or types. The first type is the bag that you plan to strap on and head out into the woods or use to hike to a remote location. This might be your retreat hidden away in the woods in a small town somewhere away from your home. This could also be for those who figure they are just going to hike deep into a national forest and live off the land until whatever crisis they are avoiding has passed.

For most people, I think a Bug Out Bag is more along the lines of a pre-packed suitcase so they can get out of dodge quickly without having to stop and pack. These types of bug out bags are very useful for people who may live in a wildfire, flooding or hurricane areas although I would hazard to guess that not many people in today’s society would be able to have a wildfire, flood or hurricane sneak upon them. If you are completely unaware of what is going on around you then you most likely won’t have any bag packed and ready to go in the first place. For the rest of us, fires, hurricanes, and floods are generally forecast and announced with more than ample time to prepare, pack and get out of the way. Are there circumstances where this is not the case? Of course, but we are talking in general terms here for the most average prepper scenario.

How can my bag get me killed?

There are two main ways I can see how not thinking logically about your Bug Out Bag can end up hurting you. The first is weight. Let’s assume that your bug out bag’s purpose of use is that you plan to walk out of town with it strapped to your back before the zombie hordes can breach the city. This will be your bedroom dresser, kitchen pantry, shelter, entertainment center and medicine cabinet all rolled into one tidy package. The average weight guidelines for a fully loaded backpack are no more than 25% of your overall body weight. For a 200 pound person (in good health) that is 50 pounds.

How many of you are used to walking with 50 pounds of weight on your back for 20 miles? How many of you think your bag would actually weigh more than 50 pounds? Do you know how much 3 gallons of water, the recommended amount you need for each person – for 3 days, weighs?

Having a bug out bag that is too heavy can cause injury very easily. Not only that, but it can wear you out much faster and make running, something you may have to do when the zombies are hungry, very difficult to do. Unless your bag is packed the right way, your center of balance will be off and you can just about forget doing any type of tactical movement with a heavy pack like this.

Am I talking about trained Navy Seals? No, I am talking about Mr. and Mrs. Joe Public who are probably just like most of us. We have jobs where we sit at a desk most days and aren’t training daily with 50-pound packs like the 10thMountain division. What about your children? Will they be able to carry all of the supplies needed on their backs as well? Probably not in all cases.

The second way I can see having a large pack could be dangerous is from the standpoint of a total collapse scenario where massive amounts of society are displaced, scared, hurting and desperate. With a large pack, you are a greater target. If there are truly desperate people and they see you with a big pack full of supplies and goodies they may be more inclined to relieve you of that extra weight. If their children are freezing or starving and you are walking around with the WalMart camping section attached in a big bright orange pack, they may decide that you need that less than they do.

How can we avoid this problem?

Pack Smarter – A bug out bag should be viewed as a life preserver in most situations, not a convenience store. When I see lists out there that have as their contents miscellaneous hardware and tools, saws and fishing gear I have to wonder what these people are going to do. Most of us, if there is really some type of disaster won’t have any place to fish at all. You aren’t going to likely be fixing a radiator hose on your car either. If you were, that is a different pack for a different purpose. Think smart about your bag and what needs to go in there.  If all hell breaks loose in your town, what will you really need to survive? Will a change of clothes, something to shelter you from the elements and a means to make a fire be most of what you need? Add in some food and a little water with a backup to get filtered water elsewhere, simple first aid and you have the basics covered. Will all of this weigh significantly less than 50 pounds? It should.

There are ultra-light hiking fanatics that try to scrounge every single ounce of weight out of their packs in order to have a much lower weight pack and thus a happier hiking experience.  Think about what your bag is for, how you will be using it and pack accordingly. Remember, this is just to save your life. If you have a bug out bag and you are leaving your world behind, you won’t be staying at the Ritz. Some discomfort should be anticipated so I would plan on leaving the Kindle behind.

Blend In – Packing lighter can certainly help with weight and with less weight should come less bulk. With less bulk, you should have a smaller footprint for your supplies and may be able to pack everything you need to stay alive in a smaller backpack. This will help you look like everyone else out there and not like you are hiking the Appalachian Trail. Just for the record, I am not recommending that all you need is one seriously packed survival Altoids can, but we can think about the bag that we are using to save our lives in a logical way.

Hopefully, this gives you some ideas on packing your Bug Out Bag. I would love to hear your ideas and perspectives in the comments below.

On a different note, here are some other self-sufficiency and preparedness solutions recommended for you:

The Lost Ways (The vital self-sufficiency lessons our great grand-fathers left us)
Survival MD (Knowledge to survive any medical crisis situation)
Backyard Liberty (Liberal’s hidden agenda: more than just your guns…)
Alive After the Fall (Build yourself the only unlimited water source you’ll ever need)
The Lost ways II (4 Important Forgotten Skills used by our Ancestors that can help you in any crisis)
The Patriot Privacy Kit (Secure your privacy in just 10 simple steps)

A bug out bag is designed in theory to give you everything you may need to live for at least 72 hours outside of your home and should be considered

Remember!

  1. Moving targets are harder to shoot than stationary targets!
  2. Smaller targets are harder to shoot than the large target!

When I ask my students what is the most important thing they must do in a hostile incident, most reply that they should simply shoot the bad guys, get access to their weapons, shoot for the head, carry a big gun and so on.  The answer I am looking for is not to get shot by the terrorists!

You should first of all work out a plan of action that you will take in the case of an active shooter or terrorist attack.  Do this for your home, business and for when you are out and about in public. Things that need to be considered are means communication, safe areas, when to fight and when to flee and so forth. Planning is what sorts the professionals from the amateurs, if you plan how to deal with a hostile situation if it happens, you’ll know what to and how to react to it and not be confused and panic!

GET THIS BOOK NOW AND BEGIN TO LEARN SUCH SECRETS AS: The Antioxidant 550 times stronger than vitamin E and 6,000 x More Powerful Than vitamin C

Plan your reaction to being shot at!

As I just mentioned, you NEED to put together a plan of action on how you will react to a shooting or a hostile incident. Over the years I have spoken to many security contractors, police and former non-British military personnel and find it amazing that when talking about their reaction fire drills most just say they would draw their weapon, if they have one and return fire…  That’s OK if you have a gun or are on a gun range but you need to take a few other things into consideration if someone is shooting at you!

This is an adaptation of the British Army individual reaction to fire drill. Some of this may apply to you and some might not- use this as a basic format. If you are serious about your security, you must put together a plan that is specifically designed for your personal situation and then practice it until it is second nature.

  • Preparation: If you have a gun it must be clean, serviceable and well-oiled. Ammunition must be of good quality, clean and your magazines full. You must be properly trained and ready to deal with the incident.
  • Reacting to fire: The immediate reaction at close quarters is to identify the threat, move to cover as you are deploying your weapon, if you have one and returning fire. If you are being shot at from a distance or do not know where the shots are coming from, you should:
    • Dash– a moving target is harder to hit than a stationary target.
    • Down– keep low and present a smaller target.
    • Cover– Get into cover from fire.
    • Locate – Observe where the threat is.
    • Return fire– if you have a firearm.
    • Winning the fire-fight, if you have a firearm: As soon as the threat has been firmly located, you must bring down sufficient accurate fire on the terrorist to incapacitate them or force them into cover so you can extract yourself from the situation.
    • Re-organizing: As soon as you have incapacitated the terrorist or are in a safe area, you must reorganize yourself as quickly as possible in order to be ready for other possible threats. You need to re-load your firearm if you have one, make sure that you or anyone with you is not injured and inform law enforcement and emergency services immediately.

406378856_640_bigger

There are two types of cover: 1.) Cover from view 2.) Cover from fire (bullets and shrapnel), you always want to locate the latter.

Moving targets are harder to shoot than stationary targets. It’s a fact, it’s harder to shoot a target that is moving than one that is stationary. So, if someone is shooting at you, do not stand still, run. Smaller targets are harder to shoot than large targets! If there is no cover for you, make yourself a smaller target and drop to a kneeling position. I do not recommend prone position, as it takes too much time for most people to stand up. From a kneeling position, you can quickly run and get to cover.

If You Are Diabetic THIS Book Is Essential For Your Survival Medicine Chest.

Use of cover

This is a very important and basic subject! In your home, business or when you are walking around, you should always be looking out for positions that you could use for cover in the event of a shooting incident. There are two types of cover: 1.) Cover from view 2.) Cover from fire (bullets and shrapnel), you always want to locate the latter. You also may want to consider which type of rounds the cover will stop. A table might be able to stop a .32 fired from a handgun, but a 7.62X39mm fired from an AK-47 would go through both the table and you. Also consider will you want to be able to shoot through the cover, such as at a criminal in your house through dry wall etc.

619gmsnjhvl-_sl1000

Guard Dog Security ProShield 2 Bulletproof Backpack

Cover from view includes:

  • Cardboard boxes and empty rubbish bins
  • Bushes
  • Thin walls and fences
  • Thin tabletops
  • Doors
  • Shadows

Cover from fire (depending on the firearm used):

  • Thick tabletops
  • Heavy furniture
  • Stone and concrete walls
  • Dead ground
  • Thick trees
  • Various areas of a car
  • Curb stones

One of the best-publicized examples of good use of cover happened in St. Petersburg, Russia on February 26, 1996. At 4:25 pm, two mafia gunmen in long coats entered a fashionable café. Under their coats, each man had a AKS-74. They were there to kill an opposing mafia boss, who was in the cafe with his two off duty police bodyguards. The mafia gunmen fired 60 rounds at close quarters from the AKS-74s and killed both the police bodyguards. The criminal boss tipped over a thick marble table he was sitting at and hid behind it; although wounded he was well enough to walk out the cafe making phone calls, after the gunmen had escaped. A Scottish lawyer was killed; he was just sitting drinking coffee in the café when he was hit by three stray bullets. The attack took about 40 seconds from the gunmen entering to leaving the café. The Scottish lawyer was in the wrong place at the wrong time.

When you get into cover, you should always try to have an escape route and try not to get pinned down. When using cover as a shield, always keep low and fire or look around cover- not over it. When you are in cover and need to move, first select the next piece of cover that you will move to and move fast and keep low. Keep the distances between cover positions short. When you get behind the cover, assess your situation, where the threat is, etc. Keep moving this way until you are out of danger.

active_shooter

Remember!

  • Always looking for and make maximum use of available cover and concealment.
  • Avoid firing or looking over cover; when possible, fire or look around it.
  • Avoid silhouetting yourself against light-colored buildings, backgrounds and lights.
  • Always carefully select a new piece of cover before leaving the cover your in.
  • Make sure you always have an escape route planned.
  • Avoid setting patterns in your movement, for example, shooting or looking from the same position at the same level.
  • Keep exposure time to a minimum; don’t look over or around cover for an extended period of time.
  • Always look up and behind you remember that positions which provide cover at ground level may not provide cover on higher floors.

Camouflage yourself

It makes me laugh when I see a lot of SWAT Teams and PSD guys wearing Tactical Black and other colors that look cool but do nothing bit make them stand out. In reality black is one of the worse colors to wear, what is black in nature, look around you now and what in your surroundings are black? I expect very little… In urban areas most walls are white, gray or cream… Light colors! The colors you wear should blend in with your background whether its day or night. Even at night dark clothes stand out when moving past light backgrounds. In the country or bush when moving through low bushes or fields the silhouettes of people in dark colors are easy to see at a distance…

Learn How to treat each problem without prescription pharmaceuticals, often with everyday items already in your pantry or medicine cabinet.

Moving Through a Building

If you have to evacuate your home or business, for whatever reason, it should be done quickly, quietly and with the minimum of fuss. You should also have already worked out your escape routes and exits. If there is an incident, get as much information as possible to what the threat is, where and what the threat is. I recommend you never use obvious evacuation routes and exits, the criminals or terrorists could have blocked, booby trapped, ambushed or manned them.

If you have to walk down corridors keep low and move fast, do not walk down the center and do not walk next to the walls. Stay a couple of feet off the walls to avoid being hit by any ricochets and wall fragments if you come under fire. Doorways and frames can make good cover, even in an apparently empty corridor look for things that could be used as cover. Remember to continuously check behind you, and if you must stop, do not stand up, stay in a kneeling position. Always be aware of where you are casting shadows, you do not want this to give away your position, such as before you go around a corner. You should always keep staggered spacing from anyone who is with you; you do not want to bunch up. Remember; one bullet can go through two people; large group of people make an easier target than a lone individual. Also if you are dealing with criminals or terrorists who are using improvised pipe bombs or hand grenades, one of these devices could take out your whole group if you are close together.

With the rise of active shooter incidents in the United States, students and faculty members are highly encouraged to be aware of the policies to follow in order to promote safety precautions in case of an active shooter incident were to take place. (Photo Illustration by Cassandra Nguyen | The Collegian)

With the rise of active shooter incidents in the United States, students and faculty members are highly encouraged to be aware of the policies to follow in order to promote safety precautions in case of an active shooter incident were to take place. (Photo Illustration by Cassandra Nguyen | The Collegian)

Going through doorways is very dangerous, especially if the room or area on the other side could contain a criminal or terrorist. If you must go through a doorway, try to determine if there are any threats on the other side before you enter. Use your senses of smell and hearing, in addition to sight; take a quick look into to room at a low level before entering. If you have to open a door, do so quickly, quietly and then back away from the door and listen. You want to back away from the door because if there is a terrorist in the room they will be shooting at the now opened door or moving if startled. Also consider if the wall around the door could stop a bullet; the criminal or terrorist could shoot through the wall and hit you, especially if they are armed with hunting or assault rifles. When you go through a doorway, again keep low and move fast, check the corners, when though the door move away from it and get behind cover.

You must keep a cool head as you might not be the only person evacuating the building. When you are clear of the building, get out of the area and summon support and law enforcement, ASAP.

Remember!

  • Never use obvious escape routes.
  • Use your senses of smell and hearing not just sight!
  • Move quietly, cautiously and quickly.
  • Corridors are areas of extreme danger- avoid whenever possible.
  • If you need to use a corridor, NEVER walk down the center stay a couple of feet off the wall.
  • If you must walk past an open door keep low and move fast.
  • Always check around corners before you go around them and expose yourself.
  • Continuously check behind you.
  • If you must stop do not stand up, stay in a kneeling position.
  • Avoid offering a silhouette for your opposition to shoot at.
  • Lights behind you should be extinguished.
  • Always keep a space between you and others; one bullet can go through several people.

After a Shooting Incident

You should do all that you can to avoid getting involved in any hostile situations, even indirectly. If you are somewhere where a hostile situation is developing, leave the area quickly and not by an obvious route. You do not want to be in the wrong place at the wrong time and to catch a stray bullet. So, if you see a hostile incident developing and it has nothing to with you, mind your own business and leave the area, ASAP! If you are unfortunate enough to get involved in a shooting incident, when you believe the incident is over, you should reload your weapon if you have one, prepare to deal with any other threats, give first aid to anyone with you who is injured and evacuate to a safe location. You should also call for support and police etc. as soon as is safely possible.

Learn How to both diagnose and treat any medical problem you are going to encounter.

In developed countries, even if you believe others have already called the police, do so yourself and identify yourself to the dispatcher as the victim and you should do as the dispatcher tells you, as long as it does not compromise your safety. You must ensure that the police officers responding to the incident know that you are the victim and not the attacker. For their own safety, the police officers will assume that anyone at the scene of the incident is a threat. You should never point your gun at the police and should comply with their every request. Remember the responding police will be scared and most are not that well trained and will shoot with minimum excuse. Try to remain calm and do not argue with them- do as you are told. Make no fast movements and keep your hands where they can be seen. It would be unfortunate to survive a lethal encounter with a criminal, only to end up being shot by the police.

If you get into a hostile shooting in a country where the police cannot be trusted and going to prison would most probably mean you would catch an incurable decease to say the least, you should have pre-planned on how to deal with the situation. My advice; leave the country as quickly as possible if you are a non-resident of that country!

The Tactical Use of Lights

In my opinion, many people are over-enthusiastic in the use of flashlights. There is a big market in tactical flashlights and the companies making them wants everyone to buy one, thus making them a must have item. Flashlights have an application in hostile situations but you should remember that any light will give away your position and draw fire. Light should be used sparingly and tactically. I tell my students to get used to training in the dark and using their senses of hearing and smell in addition to sight. At night there is more chance you will hear someone before you see them! When moving in a dark environment, do so slowly and cautiously and try to make minimum noise. Try finding your way around your house or business in the dark, before you start moving around give your eyes a few minutes to adjust to the dark.

If you must use a flashlight, keep it at arm’s length and keep it on for no longer than necessary, then move quickly or get behind cover. If you want to check a room or a corridor, one option is to roll the flashlight across the doorway, corridor or into the room. Light can be used as a distraction and help to cover your movement, shine it in their general direction of your opponent and move. This will mess up their night vision and if you leave the light pointing in their direction, it will be difficult for them to see what is happening behind the light.

If possible, use remote lights, as this is more of an application for your home or business. For example, place powerful spotlights that illuminate corridors to safe rooms, stairways or doorways. If your home is broken into at night, you could move your family to your safe room and take up a position in cover behind the lights. If you hear or identify movement to your front, you turn on the spotlights; this will surprise, blind and illuminate anyone in the corridor. This will also help you to confirm that the people in your house are criminals or terrorists and give you good targets to shoot at if you have a firearm.

Remember! Moving targets are harder to shoot than stationary targets! Smaller targets are harder to shoot than the large target! When I ask my students what is the most important thing