NEVER! If there is one “miracle” survival product it is paracord. It can handle so many jobs, it can be packed efficiently, it can be used, reused, re-purposed, reconfigured, and depended upon in almost any situation, it is the friend-zone of materials – always there, always ready, expects (and gets) nothing in return.
No matter how many ways one lists to use paracord they will be as far short of all its uses as a politician is of getting something, anything done.
If you see a bug-out bag without paracord in it walk away, disown or unfriend the bags owner, and put some distance between you and them. At some point, they will be the comic-relief in the horror movie who surly gets eaten and you do not want to be in their “collateral damage” zone. You could try and correct their ways but this might take hundreds of years and cost millions of dollars, though, seeing that light bulb light up in their brain, realizing you may have, perhaps for the first time, made two of their contiguous brain cells work together, could be rewarding. Your call.
Cinching together lean-to or shelter materials, securing a Mylar blanket to a shelter to reflect back campfire heat and light and not depending on dumb luck and no wind to not bring things crashing down. And don’t get me started on “making stuff” – a belt, a bullwhip, a lanyard, a rifle sling, a monkey fist (ouch!), snowshoes, hammock, trap ring/snare (varmints roasting on an open fire), bow sling, bottle harness, knife handle, dog collar, survival donut (we LOVE efficiency), grab handles (for a vehicle, for bags, for water jugs, for panicking people), the list is endless.
Learn how to cut and cap it off properly with a lighter. As a sailor I like to also duct tape (aka combat tape, safety tape, field-medical tape, keep-grandma-in camp tape, and all its other names) the end but it really isn’t necessary for paracord, while it is for larger nylon ropes. If you do “duct tape” go for dull as opposed to shiny, though with the variety of colors available in both paracord and duct tape, one could get creative.
Is color important? Bright orange can easily be seen. A plus when taking down a camp, a negative if you don’t want to draw attention to yourself. Black, or any of its variant, great for camouflage, not so great for taking down tree branches and such lashed together and used for a shelter, in the rain, in the dark, at midnight.
For the purist, I always recommend the Mil-Spec (C-5040H) for the tough jobs as you usually don’t need a lot, the price difference isn’t that big, and you know what you are getting, if you read the spec. Also, the 4 simple visual tests to verify Mil-Spec are easy to perform. Cut off an end, and push back the sheath and count 7, 8, or 9 inner strands. Good. Less than 7, not Mil-Spec. On the inner strands unravel one, if it is NOT 3 strands wound together it is not Mil-Spec. If the inner strand is NOT even twisted strands then again, not Mil-Spec. Finally, if one of the inner strands is not colored, it is not Mil-Spec. These colored ID strands, called “Manufacturer’s ID Strand” are required and a registered marker of compliance.
Just one more point, I said I was a purist, but I am also rational to a fault, so, to be clear, 550 Type III Commercial Nylon Paracord, not Mil-Spec, is an excellent product. It is excellent for building all the things mentioned above, and readily available from multiple sources and it will meet all your needs. This is rated with a tensile strength of 550 pounds, so unless you are trying to air-lift Michael Moore out of Krispy Kreme, you are good!
NEVER! If there is one “miracle” survival product it is paracord. It can handle so many jobs, it can be packed efficiently, it can be used, reused, re-purposed, reconfigured, and depended
The list of items to pack in your bug out bag (BOB) can seem limitless. However, you cannot afford to pack all of them due to limited space available and the fact that you must keep the weight of the BOB down. This leaves you with very few options if you must carry all the essential items to help you with successful bugging out.
Put another way, you must come up with ingenious ways to ensure you pack the vital items. One of the best options is to pack multipurpose items. Wouldn’t it be great to pack a single item that can perform many tasks? This will eliminate the need to pack specialized items for each of these tasks. So, what are these multipurpose items for your BOB?
A Multi-Tool
A multi-tool to handymen or repairmen is like what a stethoscope is to a doctor. Soon after a multi-tool was invented, preppers developed a special liking for it because of its versatility. Just as the name sounds, a multi-tool is a single unit that has most tools attached to it. Each of the components tools is designed to perform specific functions.
A good quality multi-tool is a great replacement for a knife, can opener and even a saw. Imagine using a single tool to cut wood, prepare a game for food, build shelter, harvest forage and cut ropes/cordage. You can even use it for defense. This is a just a fraction of what a multi-tool can do.
A Survival Knife
All preppers know the importance of a survival knife. Bugging out without a survival knife is an impossibility. It comes handy in almost all your survival needs. You’ll need a knife when preparing food, for First Aid in medical emergencies, for bush crafting, for preparing firewood and many more.
A survival knife is important if you need to start a fire but you have no matches or lighter. Simply use the knife with a Ferro rod to start a fire. It also offers a great way to secure you and your companions from potential attack in the wilderness. You need to choose the best knife that can handle multiple tasks.
Duct Tape
You may not think of a duct tape as a multipurpose item for your bug out bag. That couldn’t be further from the truth. You can use a duct tape to fix literally anything. You can use it to repair ripped jeans and even cover open wounds. The material used to make a duct tape is highly flammable. It is very good tinder for starting a fire.
An entire roll of duct tape can be several meters long. It can also be bulky. Amazingly, you can increase its versatility by simply rolling a small portion onto another item such as a flashlight. Thus you’ll not need to pack tinder and a whole roll of a duct tape.
Dental Floss
A dental floss, really? You could be wondering how a dental care item could serve as a multipurpose tool in a survival situation. The secret to its versatility is the material used in its construction. In most cases, the material used is nylon. Nylon is strong, lustrous, resilient, elastic and resistant to abrasion. Theseproperties make it ideal for many applications.
It can act as a dependable fishing line. You can use it as a cutting tool to cut soft material such as cheese blocks. It is also a good item for repairing torn clothes. Dental floss takes very little space. It is also extremely light. It is impossible to underestimate the versatility of a dental floss.
Cordage
Pack good quality cordage such as 550 Paracord if you want to unlock the potential of the item as a multipurpose item for a BOB. The 550 Paracords are so called because they have a minimum of 550 pounds of tensile strength. With such strength, this particular cordage can handle some of the heaviest tasks you will have to accomplish in a survival situation.
It will act as a reliable replacement for heavy and bulky ropes as well as some First Aid items. You can use a paracord to set a trap for a game, build shelter, make a clothesline, climb up or down a steep slope and tie things together.
Garbage or Plastic Bags
Garbage or plastic bags are annoying clutter all over our kitchens. Instead of disposing of such bags, use them as multipurpose items for bugging out. How can a garbage bag be of help in a survival situation? Well, you can use them as leak-proof water containers or carrying containers. You can also use it as a poncho.
Wrap a plastic bag around your water-sensitive items such as tinder and firewood. This is because plastic provides excellent insulation to protect such items against water and dampness. Interestingly, you can stuff things such as plant leaves inside a garbage bag to serve as a makeshift pillow.
A Hammock
The obvious use of a hammock is for relaxation. However, it can become a great multipurpose item for bugging out. In a survival situation, you can use a hammock for sleeping. It will keep you off the ground and therefore protect you from elements such as wet, dusty or cold ground.
If you have a cloth type hammock, you can use it a carrying bag for extra items you collect on the way such as tinder or firewood. If you happen to find yourself close to a water body, a netting type hammock can serve as a reliable gill net for fishing.
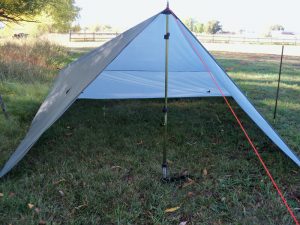
A Tarp
A tarp is a lighter and more compact alternative to a tent. Unlike a tent, a tarp has many more applications. As a shelter, it will provide you with a dependable protection against the environmental elements. I would recommend you go for a brightly colored tarp. It will act as a good signaling device in the wilderness.
Most tarps are made of waterproof material. This means you can also use it to cover your sensitive items. Also, use a tarp as a makeshift hammock to keep you off the ground if the conditions on the ground are not favorable.
Final Verdict
This list may not be exhaustive if we must list all the multipurpose items for BOB. However, at the bare minimum, you need to pack these eight items. This information is invaluable if you are serious at your prospects of becoming a successful prepper. Going by the tips, you can pack the maximum number of items for bugging out without having to carry a very heavy bag.
The list of items to pack in your bug out bag (BOB) can seem limitless. However, you cannot afford to pack all of them due to limited space available and
We already wrote on Final Prepper of batteries for electric devices, the value of rechargeable, assuming a reliable power source, as well as home generators, something to the benefit of every survival enthusiast. Along those lines why not consider portable energy storage systems as a part of your prepper planning? Useful for a bug-out scenario or in a hunker down situation, the sizes and versatility of the systems out there offer some reasonable options for the short-term, and they can readily support some longer-term situations, should you find yourself and yours in one.
Here in the USA, being from a big city, I believed we are “blessed” with a steady-state of power, if we pay the bills in a timely manner. Then I spent a weekend on the Navajo Reservation in Northeastern Arizona. Two to three power losses a day. Well, there are many places where this is normal. On my half-dozen trips to India power is lost multiple times a day at the local businesses. The big “campus” call-centers have their own dedicated power stations just to keep your favorite 24/7/365 Customer Service Centers up and running. Bottom line, we are spoiled.
Other than tracking down a tripped GFI circuit, to find the tripped receptacle behind a garage cabinet, which you had bolted to the floor, not much thought is put into these “givens”, until a storm or accident put us in the dark. Switch on, lights on. And, you must admit, even after you deal with these you do let what you learned get pushed out of your head after a while because, you know, switch on, light on.
Having a reliable power energy storage system already on-line, ready to go, is never a bad thing. As small as a tablet, weighing less than a pound, to units that are only portable by crane and permanently affixed to your home, and ranging in price from a family meal out to a new family car, there is a right solution for us all.
Think of these systems as bigger rechargeable systems that you can use to recharge your smaller rechargeable batteries, as well as direct connect devices like tablets, and GPS receivers, and ham radios, always standing “at the ready” like good soldiers.
Knowing the underlying technologies used will assist you in making good choices. Solar – it has come a long way. A great alternative, but some days the sun just doesn’t shine – May Gray, June Gloom, the sun has exploded July, Michigan and Minnesota ALL winter long, Alaska a year ago. Anyone living near an ocean, or The Great Lakes knows low-pressure on-shore, high pressure off-shore produces a marine layer that can block out most if not all the suns energy. However, as long as photons are present solar cells charge, diffused light and reflective light are less efficient, but they still allow solar cells to collect power. The drawback is size, weight and time. While there are some light, portable systems, they can have a large footprint when deployed and they will tie you to a stationary location during charging. We are a fan of these but suggest you check out the footprint and charging times to make the best selection for your situation.
Solid State Batteries use a range of electro-chemical storage solutions, including advanced chemistry batteries and capacitors. Caution should one of these be ruptured. Flow Batteries store energy directly in an electrolyte solution (i.e., a car battery) for a longer cycle life, and quick response times, but again, caution should one rupture, and when they are done, they are truly done.
While we can’t forget the other stored energy systems, which include Flywheels, mechanical devices that harness rotational energy to deliver instantaneous electricity. These get complex, large, and expensive to obtain and to “keep on-line”. Other systems available include Compressed Air Energy Storage, Thermal and Pumped Hydro-Power (everyone has their own lake with a dam, right?) Interesting technology but perhaps not practical for “home”, or “away from home” use.
Bottom line, portable energy cells, readily available that can easily be transported, that can be used and reused repeatedly, are a great addition to any survival plan, hunker down plan, bug-out or go bag and should be a part of your disaster planning.
We recently wrote of batteries for electric devices, the value of rechargeable, assuming a reliable power source, as well as home generators, something to the benefit of every survival enthusiast.
One of the wisest things you can do with any aspect of prepping is to have direct first-hand knowledge of how to use whatever skill, tool or gear you are counting on to save your life. This applies to so many things, but it bears repeating. If you purchase a generator to keep the lights on for your family, you should start that puppy up once a year at least. Make sure you know that it works first of all, that you have the proper fuels and lubricants and know how to make it run. If you don’t know all of that, your generator might be worthless.
Its similar with food and long-term food storage. If you are like so many others that have purchased large bags of Hard Red Winter wheat, have you ever eaten any of this? Do you have a grain grinder? Have you ever taken a turn at grinding enough grain to make a single loaf of bread? If not, it is so much better to do this while the grocery stores are still open. Better to find out now that you don’t have something vital to your food preparations than after the world has collapsed around your ears. It is so much more advantageous to know what works and what doesn’t while you still have options to make changes.
I found myself with the same opportunity a couple of weeks ago with what I plan to use as my Bug Out Bag.
Our family decided to go on a backpacking trip for a few days into the wilderness. For this trip we would be staying overnight in the woods obviously and had to carry almost everything to keep us alive for a couple of days, possibly more on our backs. This scenario mirrors almost identically a bug out situation where you are forced to evacuate your home with nothing but what you can carry. A traditional Bug Out Bag is designed to contain enough supplies (food, shelter) to keep you alive for 72 hours. As it so happened, that was about the length of time we were in the woods.
My pack weighed about 45-50 pounds and some of that was due to my taking on weight that my wife couldn’t carry. This could happen to you if someone becomes injured or unable to continue. Even at my initial load it would have been about 40 pounds. That is fine, but not ideal for me I don’t think. Can I carry more weight? Of course. Do I want to be carrying more weight if I am running and potentially hiding for my life? No. What did I have in my pack? Here’s my list below:
I am sure there were other little knickknacks but the point is that I wasn’t bringing what I would consider to be a lot of useless stuff. I also had a .45 strapped to my side.
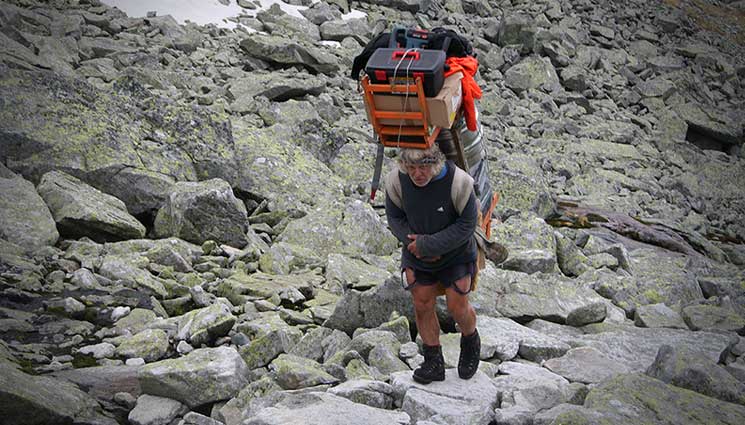
I have discussed this topic before in our post “Is your Bug Out Bag Going to Get You Killed?” where I cautioned anyone who thinks that they can strap on 50 pounds let alone hauling a load like the Sherpa in the picture above of gear and run out into the woods . This trip gave me some additional ideas as I reflected on my pack for the duration of our hiking. I started to think about this weight on my back being both all I could depend on as well as something that could easily be my downfall.
Weight A Minute!
Now, there are a lot of people out there who reacted pretty strongly to my post and thought that weight = security. The most important thing they said was to take everything you need and if it got to be too heavy, or if you had to abandon anything that was a choice you could make on the road. I agree with that concept as a last resort to some extent, but I don’t think that should guide your initial load out decisions. Weight is probably the single most dangerous aspect about any bug out bag for a couple of reasons.
Real World Bug Out Bag
First off, weight over time can slow you down. This isn’t anything surprising to most people I know but you would not believe how many of you out there (I was like this too) will fall for the trap that says if I am in a serious enough situation, I can carry more weight because my life will depend on it. That sounds good as you sit in your house and read this post on your computer or your smart phone. 50 pounds doesn’t sound like much does it? When is the last time you strapped 50 pounds on your back and tried hiking up a mountain? It is different from walking out your driveway.
The “conventional” hiker/backpacker wisdom I hear all of the time is that the average person should not plan on carrying more than 25% of your overall body weight. Let’s assume for the sake of this discussion that you weigh 200 lbs. 25% of 200 is 50 lbs, right? Ta Da! There is that magic number! So, according to conventional wisdom, anyone who weighs 200 pounds or more should be able easily lug around 50 pounds on their back. While this is technically possible (I know because I have done it on many occasions) that doesn’t make it the wisest thing you can do.
I have also heard the argument that a military load out is heavier than that and this is certainly true however; do you want to start out carrying the most weight you possibly can? Now that we mention it, are you in the same physical shape as a 19 or 20-year-old soldier? I know there are 60-year-old men who do this all of the time, but the average person isn’t like that.
Weight in your pack slows you down and wears you out. Can you physically handle the weight? Maybe, but should you? Do you need to? Will that weight be on your back when you are trying to run? Will your bug out route take you up hills or mountainous terrain?
Take a look at professional hikers. For instance, the people who hike the Appalachian trail or the Pacific Crest trail in one long stretch are called thru hikers. They have taken hiking to a new level because if you’re expecting to put your body through that kind of stress (2,160 miles), you seriously have to consider each and every piece of gear. Their average pack load for the essentials, not counting food is around 14-16 pounds. Do you think you could hike further, faster and more comfortably if you lost 30 pounds from your bug out bag? I know that I certainly could have. Does that mean you make sacrifices? I am certain you do and a 16 pound pack is made with the goal of arriving at a resupply point many times along your route. It does consider fatigue and injury though which are two other factors you will have to address at some point with a larger pack unless you are a super hero.
Can you dance with that thing?
On our trip I was hiking up and down mountains on very narrow trails gaining over 1000 feet in elevation each way. We frequently encountered downed trees that we either had to go over or under. This same pack I was wearing wasn’t only heavy but it threw off my balance and added to my silhouette. When I tried to scramble over logs, I had to make sure I had a good hand-hold or else the pack weight might pull me back down the mountain. Simply ducking under a tree wasn’t so simple anymore and frequently I had to get down on my hands and knees to just clear a log. Normally, I wouldn’t have broken stride because I could just dip, go under and back out. My big pack added almost two additional feet of clearance obstacles at points behind me and would catch on a lot more than I normally would.
Getting back to the injury topic, with the extra weight and loss of balance I was less sure-footed so I had to go much slower to prevent getting hurt. The nimble hoping over rocks was replaced with carefully treading and watching each foot fall. If we are out day hiking I keep a steady pace, but with the big bag my kids were lapping me. All things to consider.
Walk the walk
It is so important that you get out somewhere and try out your bug out bag for 72 hours. This is a simple weekend camping trip and will show you so much about your pack that you simply don’t consider when you are throwing stuff in there. My mistake when I first started to pack my bug out bag was to list all of the gear I could possibly use, find the gear I could afford and throw it into a pack that was reasonably priced. This led me to a pack I didn’t really want to lug around and if I had to in a high-stress environment I can see bad things happening.
Remember, this hiking trip you are taking to practice with your bug out bag should be fun. You won’t be running for your life, fleeing your home and weighed down with guns and ammo. Making informed decisions about your bug out bag now will save you when you truly do have to Bug out. Could I work out more, get stronger and carry that bag more easily? Absolutely and that would help, but the average person has the grab and go plan for their bug out bag. Are you able to grab what you have and thrive or will you be dragging butt quickly after you walk out the door with your world on your back?
Our family decided to go on a backpacking trip for a few days into the wilderness. For this trip we would be staying overnight in the woods obviously and had
In just a couple of weeks a lot of you are going to be making New Year’s resolutions and according to our good old government (not sure why they have to have a webpage to tell us this) the most common resolution is to lose weight. This is a great goal for a lot of people but as preppers we can look at this another way too. Maybe it’s time to trim some pounds off your Bug Out Bag and save your back in the process. For a lot of us, the mythical – perfect bug out bag is one part Swiss army knife, one part hardware store and one part supermarket with a dash of your favorite clothing outfitter thrown in for good measure. Over time in our efforts to be prepared for anything, we have lost sight of what this bag is meant for and traded common sense for comfort, at the expense of weight.
What choo talkin bout Willis?
In my research as a prepper I have watched a lot of YouTube videos about Bug out bags from people all over the world and in many of them you get very well-meaning people who put together pages of items that you simply don’t need. Others have items that could be lighter or who carry too much of a single item when that isn’t necessary. I myself am a well-meaning person so here is my take on some simple steps you can take to lighten your bug out bag but before I get into that, I want to give you my opinion on what a bug out bag should be in the first place.
What is a bug out bag for?
A bug out bag has been called by a lot of names. I have heard I.N.C.H bag (I’m Never Coming Home). G.O.O.D bag (Get Out Of Dodge), the 72-Hour bag, Go Bag and others that crop up from time to time when I think people are just trying to create something new and trendy (S.N.A.P – Seriously Need Another Plan). Whatever you call it, the bug out bag concept was envisioned as a bag to carry everything you will need to LIVE for 72 hours if you only have that bag on your back and nothing else in the world. Why did I put the emphasis on live? That is because a lot of people start throwing everything but the kitchen sink in their packs and it is one of the reasons why I wrote the post “Is your bug out bag going to get you killed?”
When you start adding items with minimal practical use or perhaps less likelihood of keeping you alive then you start adding weight. Do this enough times and your bug out bag becomes an unwieldy mess that can cause injuries or worse, get you killed. So what are some ways we can prevent that from happening?
Don’t carry too much water
Unless you live in the desert and I know that some of you do, water should be something that you know how to find and can easily disinfect to make it drinkable. For the large majority of us, packing 3 days’ worth of water is suicide in terms of size and weight and it is really unnecessary. Again, if you live in a desert I am not talking to you, but you really need to evaluate your plans also.
Sawyer Mini is a lightweight hero when it comes to water filtration.
Water sources are everywhere and you only need a good water filter to make all but the nastiest water perfectly safe for drinking. I like pump filters like the MSR Miniworks EX Microfilter and have taken this on several backpacking trips because they are simple and filter water very quickly. In terms of sheer weight and even space reduction, the Sawyer Mini Water Filtration System is a real champ though and in those respects it kicks even decently sized filters like the Miniworks to the curb. The Miniworks weighs 1 pound. The Sawyer mini weighs 2 ounces.
For water I would carry one full litter bottle and have one plastic bladder that I would use to collect water that I need to filter with my Sawyer. Nalgene water bladders weigh almost nothing empty and can roll up to fit in tiny spaces. My plan is to find and filter water as I need it along the way. Could you boil your water instead and maybe save these few ounces or use water treatment tablets? Of course, but you have to have a fire, keep something to boil it in, wait for it to boil, then cool down, lather rinse repeat or deal with the weird taste of those tablets. The filter is the easiest fastest way to go for me and the Sawyer will filter over 100,000 gallons! That is enough to keep you alive for over 200 years if my math is right.
Don’t pack like you are going on vacation
Too many bug out bag lists will contain a spare pair of boots and another change of clothes. Do you need more clothes to live? Maybe if you are bugging out from a nudist colony and you don’t have any on, but you should already have some clothes on. Maybe you need to adjust your wardrobe and put on a good pair of boots before you bug out, but packing another set of clothes takes up space and adds weight; especially if you are packing heavy winter clothes.
Dress in layers and take items that will compensate for a lot of additional items. I would bring a pair of socks so you always have a dry pair, set of clean underwear and not much else. If it was cold I would have a base layer(s) and maybe a fleece, but I might have that on my body anyway. Clothes shouldn’t be packed in place of shelter; you should deal with that separately.
What about my camping towel, deck of cards, favorite coffee cup and my travel pillow? Leave all of that stuff at home. This pack should only have the essentials if your goal is truly to have the least amount of weight you can. If you are running from everything you know for some reason you have bigger problems than a pillow and you will never pack everything you need in all scenarios for all situations so why try?
Use a tarp instead of a tent
Tents can easily weigh 5 pounds so they are prime opportunities for reducing weight. One of the simplest alternatives to packing a tent is to pack either a rain fly or tarp. Tents do not offer much in the way of protection from the elements unless you have a serious mosquito problem and primarily they are for keeping the rain off of you while you sleep and maybe affording some degree of privacy.
For a really nice option that also gives you camouflage, you could go with the Aqua-Quest Heavy duty tarp. This will string up easily between two trees, keep the rain off of you and as long as you were in a wooded area, this could prevent your location from being noticed by passersby. This tarp weighs 3.4 pounds so there are some savings but it rolls up much smaller than a regular tent and you don’t have to worry about those stupid poles and stakes that are always lost. Breaking down and setting up will go much faster as well once you have a simple tarp rigging system down and memorized.
Pack a tarp instead of a tent.
Rain fly’s for hammocks are a similar option but usually weigh a little bit less. It’s the same concept as a tarp but with a slightly different footprint and coverage area. The ENO Pro Fly Rain Tarp only weighs 22 ounces and that is a huge difference from that 5 pound tent.
Look at the weight of your bag itself
Sometimes we can save weight simply by looking at our bug out bag that we are carrying all of this lifesaving gear in. Take just two common bags out there, the Rush 72 by 5.11 Tactical and the Maxpedition Pygmy Falcon II. These bags are not without their differences, but the Rush 72 weighs 4.8 pounds and the Maxpedition Pygmy weighs 2 pounds 1 ounce.
Now I don’t have both of these bags in front of me so the 5.11 could be twice as large as the Pygmy, and with a name like Pygmy, you know it isn’t Super Grande, but the point is your bag also contributes to the overall weight. Maybe if you are looking to shave some pounds and you make some of the changes above you won’t need as large of a bag in the first place. Something to consider.
Lighten your food load
Food is a great place to reduce weight. On one of our first backpacking trips into the woods we didn’t think about weight at all, we thought about pigging out after long days hiking with heavy packs. We had foil packets of tuna, summer sausage, cheese and crackers, whole bags of trail mix, pop tarts and cookies. We never even made it through all of our food that we packed in and in the process of that first backpacking trip learned a valuable lesson. Some foods weigh more than others and you don’t really need to pig out that much to have more than enough to keep you alive.
For a bug out scenario I am looking for a great calorie to weight ratio and one option is G.O.R.P which is simply good old raisins and peanuts. One problem with G.O.R.P is it’s shelf life and ability to handle storage extremes. If your bug out bag is always located in the hall closet or down in the basement where it’s always 62 degrees then G.O.R.P is a great option. The trick is to only eat as much as you need based upon the caloric content. You can’t just eat until you are full or else all your G.O.R.P will be gone the first day.
Other options which are more heat tolerant and long lasting when we look at from a storage perspective are emergency ration bars (my current Get Home Bag option) and freeze-dried food like Mountain House. These are lighter than bringing 6 cans of spam in your pack and can take the heat of a car parked in the summer without spoiling.
Also, these options don’t require you to bring your own mess kit which is another item that isn’t necessary. Just bring a spoon like the Titanium Spork or even an old plastic spoon from an MRE and you are good to go. The Emergency Rations don’t even need that.
Reconsider One Is None
A prepping mantra is “One is none and two is one.” That simply means that stuff happens. Murphy will appear when you least expect him and anything you have can be lost or broken. That single water filter you have could roll down the hill, into the river and out to the ocean. The survival knife you have could be lodged in that great big bear you were forced to scare away from your camp and they might run off into the woods never to be seen again.
The temptation to pack two of everything sounds like great advice but it isn’t necessary or practical in a bug out bag. Could you find a use for two fire starting kits? Maybe. Could you need a back-up rain poncho? You could, but all of your redundancy is adding weight. Think carefully about whether you need this weight or maybe you should just be more careful. If we were talking about prepping supplies for the home I definitely agree that having two is a good idea, but when it comes to hiking through the woods, trying to survive I am less likely to adhere to that advice. I know I could regret it, but we are talking about weight reduction here.
Maybe there are certain items that you could have two of like a knife or a way to start a fire. I have a multi-tool as part of my EDC which has a knife that could be my backup. Also, I have a fire steel and a Bic lighter, but I am not going to carry two tarps in case I lose one.
Sleeping bag Options
Sleeping bags are another item that can weigh a lot and take up a bunch of space. I have a military sleep system that I purchased at a gun show that I love but would never put this in my bug out bag if I was trying to save space or weight. It is huge and heavy. I also have sleeping bags from Wiggy’s that are very warm, but they also take up a lot of space.
You can spend hundreds on very expensive bags that pack down small or you can spend a lot less money, dress in layers and maybe use your survival bivvy to supplement that system. The Recon 3 from Elite Systems is easily half the size and weight of my Wiggy’s and costs a heck of a lot less. Will it last as long as the other bags or keep me warm down to -20? No, but if it is -20 my butt is looking for shelter and a heat source.
So there are 7 ideas for reducing the weight of your bug out bag. What ideas do you have?
A Bug Out Bag is something that most of us are familiar with even if most of us do not have one loaded by the door or in the trunk of your car, ready to go at all times. For the uninitiated, the Bug Out Bag’s purpose is to give you everything you should need to live for 72 hours if you are forced to evacuate your location suddenly. A bug out bag should be pre-packed with all of your supplies so that you can grab it, throw it on your back and walk or run out your car, or head for the hills.
I have written a couple of other posts about Bug Out Bags and one dealt specifically on the subject of the contents of your bug out bag or BOB. My contention is that there are too many people that are throwing everything but the kitchen sink in their packs and I feel that there is something of an insane rush to get everything humanly possible into your BOB without much thought as to the why or the weight.
A bug out bag is not a U-Haul. It is not a Bug Out Suitcase even though I swear some people pack more into a Bug Out Bag than they do for a week down in Cancun. I have another post lined up to rehash this concept under a different theme, but I have heard others talk about packing 50 to 70 pounds in their Bug Out Bag and they plan to walk for hundreds of miles if necessary. 70 pounds???
I won’t get into weight or the absolute foolishness (in my opinion) of packing anything remotely that heavy in this post. I will talk about intelligently packing what you do have because regardless of whether you have an ultra-light pack or some behemoth weighing as much as a 4th grade boy, you need to pack this in a way that will make it as comfortable as possible to carry. We are going to talk about how to pack your bug out bag to take the most advantages of weight distribution and tried and true backpacking tips as possible. Backpackers have been bugging out for a long time and it pays to take a lesson or two from people who have more experience than the average Doomsday Prepper fan when it comes to packing everything they need for 72 hours on their back and living to talk about it.
Packing a backpack and packing a bug out bag are virtually identical. I would argue that you could just as easily bug out with a back pack as you could with any military looking pack from Blackhawk, maybe even easier. There are 4 simple rules to packing any pack you are going to carry on your back.
Heaviest gear goes close to your back
Light gear away from your back
Frequently used items go on top
Less used items go on bottom
The Basics of Pack Loading
Packing a backpack or packing your bug out bag are pretty similar. To be successful, you want to pack the right gear, but you need to pack it the right way too and that means keeping your center of gravity as close to you as possible. The last thing you need is a big pack that keeps you off balance and puts unneeded stress on your back.
Sample Bug Out Bag loading diagram.
Items like water and food usually weigh the most unless you have some really heavy gear in your bug out bag. A lot of people have moved to carrying water bladders like a Camelbak and most new packs have a place right inside the back next to your spine for carrying this. Keep the heavy stuff as close to you as possible and low as opposed to above your shoulders.
The Bottom of the Pack
Using the guidelines above, I pack the items I am going to need to get to least, at the bottom of the pack. My pack has a compartment in the bottom for my sleeping bag so that goes in first. Additionally, having your sleeping bag on the bottom gives you a nice soft cushion when you set your pack down. I have my sleeping bag in a compression sack, but if I have any fear of rain I would add a waterproof bag instead. Running out the door isn’t the time to worry about this, so it may make more sense for you to pack your sleeping bag in a waterproof sack regardless.
Next, I add my tent or hammock gear. I still prefer the tent and it is one of the last items I need so It goes in the bottom of the bag. Depending on the trip I also have a tarp that is attached at the bottom.
The Core of the Pack
Once I have my sleeping bag and tent in the bug out bag, I pack most of my spare clothes, then food and cooking gear. I say most of my clothes because depending on the weather I will carry a fleece or windbreaker too and I want this where I can get to it easily. My main food isn’t going to be eaten until I am at camp or stopped most likely.
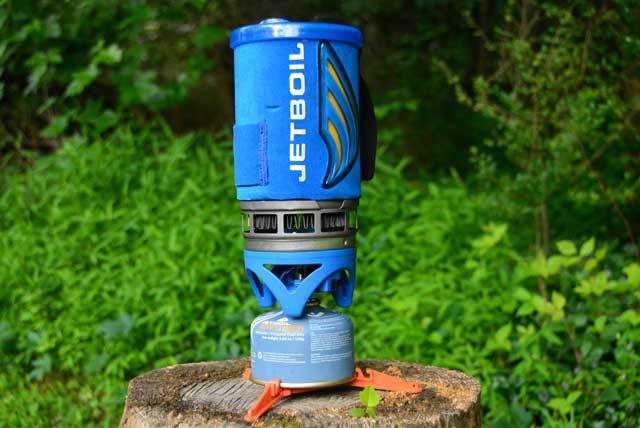
I also carry a JetBoil that takes up about as much room as my food and I have my fuel in that same container. My jetboil can boil water for drinking, cook food or quickly heat my water for coffee in the mornings.
The Top of the pack
The top of your bug out bag or the pockets on the outside depending on what you are using should have the gear or equipment you are going to need the most. My pack has a compartment that is waterproof and that is where the lighters and fire kit go along with my headlamp and snacks. This way if I get hungry, I don’t have to dig in my bug out bag, just unzip the top compartment. On the backside of my pack, I have a zippered pocket for tp and spare cordage. I will also carry maps and maybe a camera.
What’s on the sides?
The sides usually hold the water filter, maybe some additional items depending on what I am carrying like spare water bladders. I carry two spares so that when I get to camp I can pump plenty of water for washing up, cooking and even breakfast in the morning. When they are empty they weigh nothing. My pack also has side pockets for my water bottles too and those work nicely because I can easily reach water while I am walking. One of these days I am going to pull the trigger and get a Camelbak so that I don’t have to carry it, but I still think the good old bottle is easier in some aspects.
That’s how I do it. How do you pack your bug out bag?
As preppers we all spend a lot of time looking at, revamping and assessing our bug out bags (BOBs). Even once you think you have a great setup a new idea comes along and gives you a whole new perspective.
So why do we use bags, granted they can carry a lot of our gear and supplies and can be very comfortable but do they offer the best option for both urban and wilderness preppers?
In this article we will be looking at the pros and cons of using a combined tactical vest and bug out bag system to offer maximum comfort, optimization, safety and conserve the maximum amount of energy possible when on the move.
So, first things first, why have a survival vest at all? Wearing a vest can give you better personal protection from knives, gunshots and physical trauma. They can also aid in distributing the weight of your gear over your body and allowing you to carry more (if you need/want to) and have instant access to certain pieces of kit.
On the other hand a vest will add additional weight to your setup and can be difficult to move around in / wear with a pack. The next thing you will need to think about it what are you using it for?
Here are some points that you should consider before buying a vest:
Does the maximum storage allow you to carry more gear in weight than the vest itself?
Have you optimized access to important gear in your pack already? Once you have, will moving that equipment to a vest make things easier?
What are you putting in it?
Is it worth it compared to just storing everything in your bag?
Are you carrying weapons? Where will you be storing munitions? Do you need quick access to shells, magazines or loose rounds?
So You Decided To Suit Up
So, you are getting a vest. Which one do you want? There are many different types of tactical vest available designed for a range of climates, objectives and load outs. If you are going to buy a vest make sure you try it on first with your pack, check that it is breathable and adaptable. By adaptable I mean, can the pockets be removed, replaced or upgraded? Can the vest have a tactical belt attached or detached? Does the vest have additional webbing or facilities for attaching
UTG 547 Law Enforcement Tactical Vest
further gear? Do you want a built-in pistol holster or will you be using a hip or drop leg holster?
A good vest to start out with for maximum customization would be a basic Molle web vest. This allows you to attach your own pockets and facilities where ever you want and what ever size you want. The downside here is the webbing itself. The pockets can detach, be ripped off or the webbing itself tear and come loose.
To avoid this a basic commando vest could be a better way to go. This kind of vest allows the best of both worlds by having built-in pockets around the midsection about the size of an AR-15 single stack magazine, a medium sized dump pocket on one side of the chest and pistol magazine sized pockets on the other side. This type of vest can also come with a pistol holster and radio pocket depending on the brand. These vests usually also have molly webbing along the sides and back for carrying additional gear when not wearing your pack. Certain grenadier vests will also have a tactical belt laden with pockets that could be used for a variety of gear. A kind of prepper Bat-belt. Just remember what is in each compartment.
The down side to these vests is that they can limit maneuverability and get very hot when fully stocked with equipment. Finding one with mesh padding as opposed to leather or thick material is preferred.
The last type of vest we will look at is a heavy protection vest such as the U.S. army`s Interceptor body armor. These usually have a crotch guard and padded shoulder and arm plates that come down to the elbow joints. These vests have limited storage space and a significantly heavier and hotter than other types of vest. As they are built for heavy combat they can withstand gunfire and knife blows so they do offer the most protection of the three. The Interceptor vest, for example, was tested to stop a 9×19mm 124-grain FMJ bullet at 1,400 ft/s with minimal back face deformation, and it has a V-50 of roughly 1,525 ft/s. This means that the bullet in question must travel faster than 1,525 ft/s for it to have more than a 50% chance of penetration. (An unlikely prospect, given the muzzle velocity of a typical 9mm handgun or sub-machine gun) This vest weighs up to 33.1 pounds (15kgs) unloaded.
What are you packing?
A flashlight or headlamp. The contents of every prepper’s BOB will be different, so it makes perfect sense that the contents of the vest would also be different. But what do you choose to keep on your person at all times? A simple and easy way to decide what gear you should choose is to play out a survival scenario and what ever gear you will need as a bare minimum is. Here is a basic example of items you could store in your vest.
Keeping a miniaturized survival kit on your person at all times may also be worth putting together or spreading over the space of the vest compartments.
In conclusion…
A vest can be either a great help or a great hindrance. The best way to find out if it is going to help you or not is to test out a range of configurations and scenarios. Above all, remember that your setup will have to be suited to all the yearly conditions that you will be faced with.
A Bug Out Bag, Survival Vest or Both
As preppers we all spend a lot of time looking at, revamping and assessing our bug out bags (BOBs). Even once you think
In Prepper circles there are a myriad of opinions on gear selection. From the best survival knife to the best caliber of handgun to purchase all the way down to paracord differences. The good thing for preppers is that there are so many suppliers of quality gear out there and we get the benefit of competition.
We also get the job of making decisions and in some cases; with the large number of choices you have, finding that one “perfect” thing can be elusive. I myself have purchased more than one of several items in my prepping supplies trying out new options or searching for a better solution. Bug Out Bags are another item in which preppers have options. Some might say too many options to make a good determination, right or wrong about the bag they are going to count on when you need to go mobile and survive.
I was fortunate enough to be contacted by the good folks at 3V Gear. 3V Gear came into being based on the owner, Daniel Beck, trying to find a bug out bag. In Daniels experience, most of the packs out there were very expensive or ill-equipped for the general 72-hour time frame. As with most entrepreneurs he decided to create his own bag. What came from that inspiration was the Paratus (based on Semper Paratus) meaning Always Ready. 3V Gear asked me if I wanted to review one of their Paratus bags for the readers of the Prepper Journal.
Any long-time readers of this blog know that Final Prepper is not a “review” website typically but I do on occasion review products that I feel would be of significant value to preppers out there. Bug Out Bags fit into a category of gear that isn’t usually cheap either so the less purchases one can make trying to find the perfect bag, the better.
The Paratus 3 Day Operator’s Pack
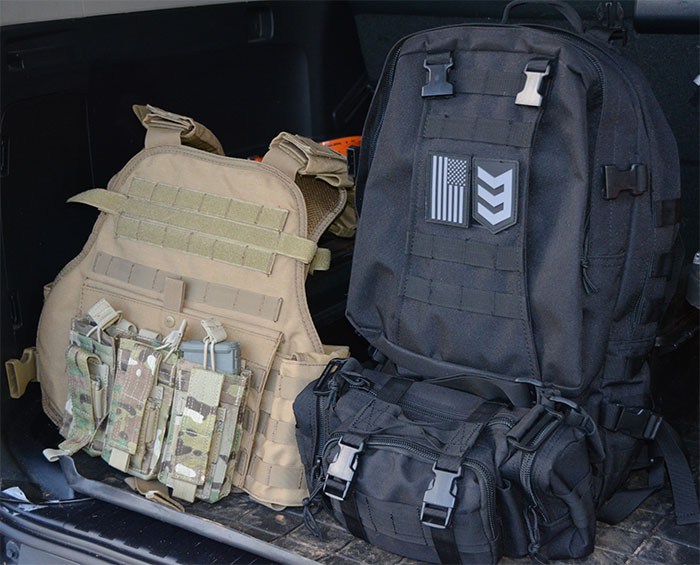
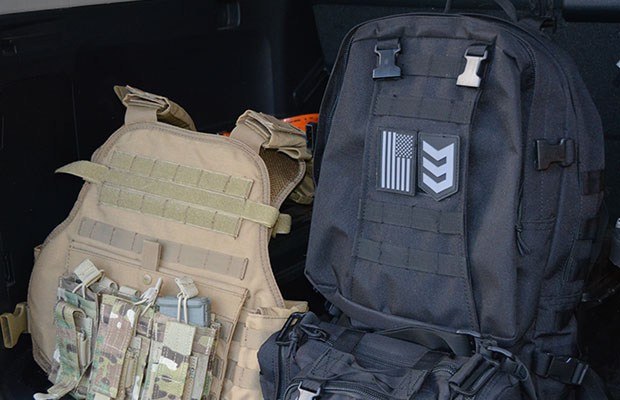
The Paratus 3 Day Operator’s Pack loaded in the back of the Bug Out Vehicle. The pack itself is generously sized and can easily accommodate a lot of gear or supplies.
Quality
The Paratus 3 Day Operators pack is designed to be a bug out bag. It has double stitched seams, self-healing zippers, 600D PVC backed nylon and almost 3000 cubic inches of internal capacity. It is covered in just enough Military spec MOLLE to give you a wide array of options for attachments and arrangements. The two outer pouches give you extra capacity and are the perfect size for an IFAK. They wobble slightly but it isn’t anything that bothers me. I removed one of them.
From everything I can tell on this bag it is constructed very well. I took this with me on a trip out-of-town and it served as my luggage for a week-long trip perfectly. I even threw my laptop in there in the main compartment and it fit perfectly. The compartment I put it in was likely made for a water bladder as there is a flap in the top of the Paratus that would allow a drinking tube to come out.
The front compartment has a mesh divider about half-way up the back for throwing loose items in there. You don’t have mini-pockets and internal places for pens and paper, but I never use those things anyway. Actually, I feel like I need to search around for items to put in those mini pockets and dividers…
All of the stitching seems to be quality and the zippers operate with ease. I received the black model so it looks more tactical that some of the other colors, but they all look suited to some form of combat.
Function
According to 3V Gear, the Paratus is designed to be fully adjustable to the users needs. It comes with an accessory pouch, the removable pack and all of the MOLLE you need to customize the pack to suit your needs.
The removable Deployment pack is the perfect size for some extra rations, spare magazines and blow out kit items. Optionally you could use it for your tactical shower kit to impress all the guys.
The Paratus also comes with a Deployment Pack that is fully MOLLE compatible and will attach to any MOLLE pack, vest or other gear. This compact pack has a convenient grab handle or it can be carried with the concealable waist belt. Perfect for when you need to grab your kit and go or for 100 other possible uses, i.e. first aid kits, ammo bags, for climbing harnesses, survival kits, even video camera bags.
The Paratus’ dimensions are the maximum allowable for airline carry-on requirements. I had this in the back of my car, but it would make a perfect bag for a three-day trip, or bugging out on short notice.
Main compartment: 20” H x 12″W x 5.5″D (1320 cubic inches) with internal organization
Top front: 13″ H x 12″ W x 3″ D (468 cubic inches) pleated w/ internal organization
Two large MOLLE pouches attached to each side, (5″x 2.5″x 8″, 100 cubic inches)
Overall Size: 2890 cubic inches
Body contoured shoulder straps with D-Ring for equipment attachment
Adjustable padded waist belt
Waist belt measures 52″
External side compression straps
Heavy-duty carry and drag handle
Molded EVA back panel
Two double zipper pulls on the main compartment for easy access
All zipper pulls threaded with para-cord for durability and noise reduction
MOLLE and PALs attachment points throughout
Includes 3V Gear Rapid Deployment pack
3″ x 5″ Velcro ID panel with 3V Gear 3D PVC Logo patch
Hydration compatible
Sternum strap
Available in: Olive Drab, Black, and Coyote Tan
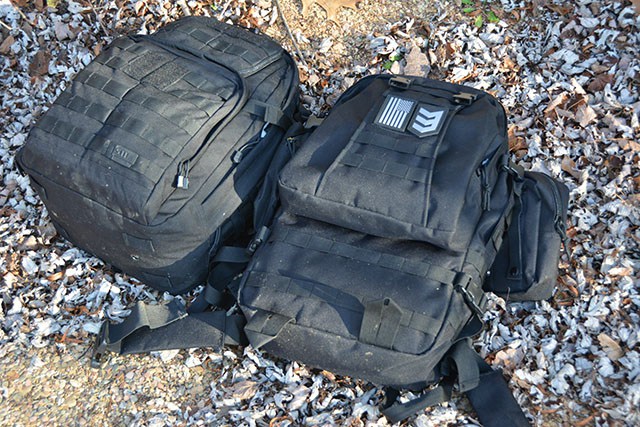
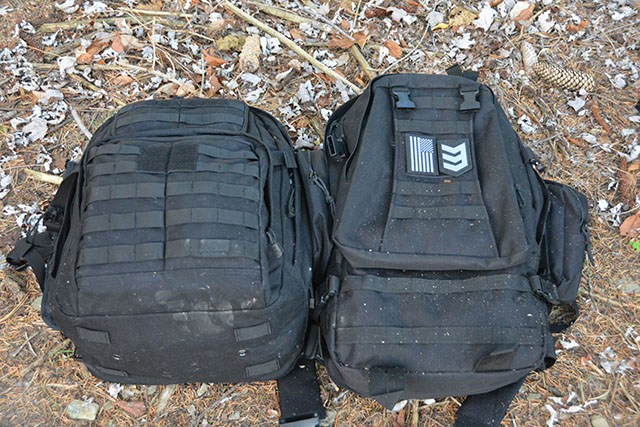
Comparing the Paratus the 5.11 Rush 24
One of the things I wanted to look into were how the Paratus from 3V Gear compared to my trusty Rush 24 from 5.11 Tactical. For starters the price, when I bought the Rush 24 was about $175. Rush is also made out of 1050D nylon as opposed to 600D for the Paratus. What does that mean? The 1050D Nylon has a higher tear strength but to my untrained eyes and fingers it was basically the same fabric. For sitting in the back of my car waiting on an emergency, the fabric of the Paratus seemed more than adequate.
You can see below how the profile of the two packs is different with the Paratus appearing slightly thinner, but they both have almost the same capacity with all added features.
Rush 24 – 2070 cubic inch capacity
Paratus – Main compartment + Top Front = 1788 cubic inches. Add the Deployment pack (not shown below) and you get another 432 for a total of 2220. The side pouches add another 100 cubic inches.
Overall Impressions of the Paratus 3 Day Pack
The Paratus pack is priced competitively at $80 on Amazon.com and to be perfectly honest, the price is what made me take notice. At the time, the Rush Bags, well anything from Maxpedition or 5.11 to be sure were well in excess of that price so I had discounted the Paratus as being inferior. Surely, they could not offer comparable quality with that much of a price difference could they?
I am happy say that while it isn’t the exact same thing, I think the Paratus makes for a perfectly acceptable alternative to the Rush 24 series bags. We can quibble around the details – does the Rush 24 have more features? Maybe, but at the end of the day, it is a pack you throw on your back that holds stuff. The Paratus, at well under $100 is a great value and I am sure you will agree if you purchase one for yourself.
I just checked and even the Rush 24 price has come down to about $110. Perhaps Paratus is giving 5.11 a run for their money?
In Prepper circles there are a myriad of opinions on gear selection. From the best survival knife to the best caliber of handgun to purchase all the way down to
When it comes to long term food storage, there are several obvious candidates. In Prepper and Survival circles, we talk about storing grains in Mylar bags packed in 5 gallon buckets with oxygen absorbers, creating a pantry and canning fresh foods from your garden, MRE’s and freeze-dried foods. I have some of all of these options stored for our family, but some foods are great for other reasons, not just surviving doomsday.
You can probably take your 5 gallon buckets of rice, beans and grains to your survival retreat with you provided you have a car and aren’t walking on foot, but you can’t hike cross country with them. Canned food is great for storing and preserving fresh fruits and vegetables without the need for refrigeration, but you don’t want to take them camping with you. MRE’s are designed to feed troops in combat, but they aren’t the tastiest meals and are much heavier than other options. Freeze Dried foods excel both in storage life and they are incredibly light-weight. Not to mention, they won’t break if you drop them. Sorry canned tomatoes.
I was sent several packets of Mountain House Freeze Dried foods. I had meant to write a review last month, but life has a way of throwing obstacles in my way some times and in the chaos, I completely forgot.
Jetboil Flash Personal Cooking System
Freeze-dried food usually comes in meal form although you can get Mountain House individual foods if you are looking at making your own meals. When it comes to camping or a bug out bag, I want simplicity and like I said, light weight. Taste and nutritional value are definitely important too, but if they can’t meet the first two requirements, the last two don’t matter to me. My family has carried Mountain House freeze dried foods with us on several backpacking trips and they are usually my go-to meal when I am camping during hunting season.
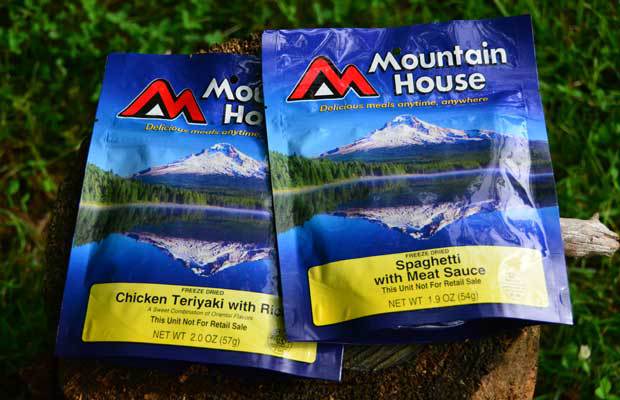
The two meals I started cooking up were Spaghetti with Meat sauce and Chicken Teriyaki with Rice. Both meals as tested have 230 calories and are designed to feed one person.
The only thing that is required to make these dusty granules into a warm meal is hot water. You can either boil some over your fire, or use a camp stove. My favorite so far is the Jetboil Flash personal cooking system. This can cook larger meals with a bigger pot, but since I primarily use it for coffee and freeze-dried foods, it’s main duty is boiling water. I tried cooking an apple dumpling type meal one time for my daughter and failed to judge how quickly it would get hot, then burn… That is what I get for not reading the directions. The last thing you want to do on a backpacking trip miles from civilization is try to get burnt apple turnover mess off the interior of your main water boiling device.
Mountain House Spaghetti with Meat Sauce – before water.
Another great thing about Mountain House meals (and probably all the other vendors), is that you don’t really need any cookware either, except for a spoon. You can eat the meals, once rehydrated right out of the bag. Preparation is so simple that anyone can do this. Just open the package, remove the bag of desiccant, add the required amount of hot water, stir and close the bag up. For these two meals, I only had to wait 8-9 minutes which gave me time to work on boiling the water for my coffee.
How do they taste?
The question everyone wants to ask, is But how do they taste? I’ll be honest and tell you two things. First is that I was in the Army for a long time and didn’t meet too many meals (if any) that I could not eat. Secondly, I am not a food snob. Now, that being said, I won’t eat just anything and I am not afraid to say something doesn’t taste right, but you will never find me gagging if the leftovers are a few days too old if you know what I mean.
Cooked and ready to eat.
Every one of the Mountain House meals I have tasted have been great considering what they are. The Spaghetti had plenty of flavor and I really only wished I had about two packets instead of the one. Of course, I should probably only have that much food for a single meal, but if you are hiking all day and need to replenish calories, one of the other meals or a larger packet might work better. It is also the case that I received samples, so the real meal might include more food. Actually, it only stands to reason they would.
The Chicken Teriyaki was not as good (personal taste) as the Spaghetti, but as food goes, it tasted perfectly fine and I wouldn’t ever turn my nose up to either meal if I was offered them. Are they beautiful to look at? No they aren’t but this isn’t fresh food prepared by a chef. This is freeze dried food that tastes much better than it looks and can last on a shelf for up to 25 years. One of the great things about Mountain House is there is so much variety so if you have some favorites, stock up on those and leave the less desirable ones to someone else. My favorite breakfast meal from Mountain House is the Breakfast skillet. Loaded with potatoes, eggs, sausages and onions, it is my choice for cold mornings around the campfire.
I like Mountain House for camping but like I said, they are in my Bug Out Bag too because they are light and only require hot water. Some people will say, you may not have time to boil water so you need to take foods that don’t require anything to eat. I can see that point, but I say if you don’t have time to boil water, maybe you shouldn’t be eating either. Throw a snack bar in your pocket and go, but if you are being chased through the woods by the zombie hordes food is probably the last thing on your mind anyway.
If you are looking for a tasty freeze-dried vendor for your next camping trip, long term storage plans or Bug Out Bag, Mountain House gets my vote.
When it comes to long term food storage, there are several obvious candidates. In Prepper and Survival circles, we talk about storing grains in Mylar bags packed in 5 gallon
I do hunt, and I do fish, and I don’t apologize to anybody for hunting and fishing.
I went hunting for the first time this year. I have been waiting for deer season to open up in my neck of the woods and finally got my chance to get out there and try my luck at bringing home some meat to fill my family’s freezer. The weather didn’t want to cooperate, never does really, but regardless of the conditions not being ideal to the deer hunting experts, I decided to trudge out to the stand anyway and see what I could get.
Over the course of the next few days I had several experiences that seemed designed to humble me first and to point back to the often discussed scenario of bugging out into the woods, which reinforced for me anyway how this might not be as great of an idea after TEOTWAWKI as you hope. For those of you who plan on grabbing your overly equipped bug out bag when the next crisis or SHTF event happens and walking into the forest, let me share a couple of lessons learned while hunting that happened to me.
Your pack is heavy and noisy
Starting out, I needed to refill my feeders. Where I live it is legal to bait deer and this is usually done by putting corn in feeders that the deer can nibble on whenever they like. This gets them in the habit of coming to your location repeatedly. You can optionally hook up a good game camera and see who is visiting your feeders. For me, at this stand the only things I caught on the camera were raccoons who I am sure appreciated the free meals.
I had been filling my feeder up for a few weeks before hunting season began and wanted to top it off. This involves me walking with a 50 pound sack of deer corn approximately 1 mile into the woods next to my stand. I accomplish this by putting the bag in an old Army Alice pack I have because the large middle compartment holds the heavy bag nicely.
The Alice pack itself is actually pretty light and this was my very first bug out bag due to the cost. You can find military surplus packs on E-Bay for around $60. Rothco makes a new knock off of the bag that will set you back closer to $95 on Amazon. When I filled my pack up the first time with all my gear and took it for a hike I immediately started to rethink my bug out bag, but for hiking the occasional bag of deer corn down the trail it is perfect.
What I remembered again after walking with it is that 50 pounds is not light but that isn’t as heavy of an amount many preppers plan on hauling. On top of that, the pack itself squeaks when I walk. The pad that goes on your lower back rubs against you with that weight and makes a squeaking sound. Almost like someone with cheap shoe inserts or a mild but persistent case of gas. Granted, the noise probably wasn’t so loud that I would alert anyone further than several hundred feet but it was a consideration with the Alice pack.
When you bug out into the woods, you will likely want to keep as low of a profile as humanly possible and the last things you need are to be encumbered by so much weight that you can’t exit the area quickly or worse, making farting sounds as you run off through the woods with your cheap military surplus pack.
Lesson Learned:Don’t put too much gear in your pack that carrying it is a burden. Sound check your pack by using it on a real world hiking trip. Does it make noise or are you silent but deadly? Sorry, couldn’t resist.
You aren’t guaranteed that big game you plan on eating
This next lesson is very embarrassing to relate but for the sake of sharing information I will. I had an opportunity to shoot deer the other day. Two actually, but I didn’t bring home any meat. How is that possible?
I had just sighted my rifle in so I was pretty confident with zero, but there were two other factors that I think worked against me. Both issues in retrospect were completely my fault. I shot the first deer after three walked into my clearing. This deer didn’t fall; she walked around and eventually lay down. I thought OK, I hit her but it must not have been a good shot placement. I assumed she would die relatively quickly and didn’t go down to dispatch her humanely because there were still two other deer down there.
I took a second shot (yes the other two deer stood there while I reloaded my muzzle loader) and the same thing happened. The deer ran just a few feet, but didn’t fall, just walked around for a while and eventually took to lying down. By now I am thinking I am the worst shot in the world but soon another buck came in and ran them all off.
I climbed down and found two blood trails proving that I did hit them both, but obviously not well. I followed the first trail until it ended. I looked around for a long time but couldn’t find where it went. The second trail I followed led me to the deer lying in a creek bed. I had shot it exactly behind the front leg but just a few inches too low missing the heart. I pulled my pistol to finish it quickly but the deer was lying on large rocks which I was afraid my shot would ricochet. Thinking the deer was too weak to move, I grabbed it by its legs and pulled it onto the bank where the ground was better suited for a backstop or so I thought. When this happened, the deer jumped up, bolted out of the creek and ran off through a thicket like its butt was on fire. I never picked up another blood trail or found it again.
Dense woods seem to provide cover, but they also conceal others too.
I was shooting a black powder rifle and had shot this maybe half a dozen times the weekend previous. I put the rifle away without cleaning it because I thought I would just be using it again to hunt in a couple of days and a thorough cleaning could wait. I remember loading the rifle and not being able to seat my round down as far as I thought it should go. It seemed to stop though and I guessed I must be imagining things. Later I learned that my powder and sabot were about 6 inches higher up the barrel from where they should be. This most likely impacted the velocity of the round as my shot hit lower than needed to cleanly kill the animal humanely.
Now, you can say I should have performed better maintenance on my weapon and that is certainly true. You can also say I should have practiced shooting more to be a better shot and of course that is also true, but here is just one example of how I missed what I was shooting at and what could have been dinner, disappeared forever. It can happen to anyone. Even if my weapon was clean and I hit a better shot, deer can still run off and you might not be able to find them no matter how hard you look.
Lesson Learned:Cleaning my weapon might not have been the culprit but I am sure it didn’t help. Make sure you have the supplies you need to clean your weapons and the discipline to clean them after every trip to the range. More so if you know you will be shooting them again and accuracy is important. Accuracy is always important.
Noise travels far
Another lesson is that noise travels pretty far in the woods. As I wait for deer to magically appear in front of me, I hear shots all around me at various intervals. I know that the shots are more than a mile away at least, but if you were trying to keep a low profile, shooting a rifle could easily draw someone to your location.
In addition to gunshots, we hear cars, trains, chain saws, squirrels and just about anything for at least a mile out there in the woods as I sit quietly in a tree. The leaves render almost any movement impossible without creating a lot of noise. If you were in a similar situation, noise discipline would be important and still hard to maintain perfectly. Other environments like the desert or mountains that have less leafy foliage would be easier to contain noise at least when you are walking, but you still have that as a consideration.
The further you go away from civilization, the less likely you are to hear the ambient noises I do, but you are still able to pick up sounds around you. The less noise you have surrounding you the more you will hear.
Lesson Learned:I am not going to be able to sneak my family through the woods without being detected most likely.
You might not be as hidden as you think
My deer stand isn’t camouflaged. It is a ladder stand that sits up against a big poplar in woods that are reasonably thick with other trees. When I got down to follow the blood trail the first time, I left my daughter in the tree. I walked around for probably 20 minutes looking for tracks and got probably 500 yards away from her at the furthest point.
The further I got away from her, the harder she was to see. I know right were my stand is, but the cover of the forest made it very hard to make her out and eventually I couldn’t see her at all. She could see me though and watched me through the binoculars until I went over a ridge. She also saw (and heard) me coming all of the way back in and I didn’t see her until I got close enough that she could have hit me with a rock.
The same thing happened with deer. When I saw one approaching I would let her know but she wouldn’t see them until I pointed them out. Movement is what alerted me to their presence well before they ever made a sound. Just by sitting quietly and watching, I could see movement when it came into my field of view. Even the quietest person in the world will need to move and it is when they do that you can be spotted.
Lesson Learned:The saying can’t see the forest through the trees is applicable here. I couldn’t see one object because of the dense forest. Heavy wood cover can work for you and against you. Someone can spot you much faster than you can see them if they are moving and you are still.
That’s been my experience in the woods so far this week embarrassing as it is. Do you have any lessons for people who plan to bug out into the woods?
On a different note, here’s some other self-sufficiency and preparedness solutions recommended for you:
The Lost Ways (The vital self-sufficiency lessons our great grand-fathers left us) Survival MD (Knowledge to survive any medical crisis situation) Backyard Liberty (Liberal’s hidden agenda: more than just your guns…) Alive After the Fall (Build yourself the only unlimited water source you’ll ever need) The Lost ways II (4 Important Forgotten Skills used by our Ancestors that can help you in any crisis) The Patriot Privacy Kit (Secure your privacy in just 10 simple steps)
I am frequently asked questions around the subject of Bug Out Bags. There is certainly a lot of interest and for good reason. Seeing as how we are in the middle of Hurricane season (regardless of whether we have seen a significant one yet) it makes sense especially for those living near coastal areas to have a plan to evacuate. That plan will undoubtedly require packing supplies that you may be forced to live on of for an extended amount of time. Even if you live in the middle of the country and the closest coast is a thousand miles away, some emergency event might require that you pack up and leave with very little advance warning. This is when having a bug out bag will come in handy.
To those who are new to the concept of a Bug Out Bag, or Survival Bag it is simply a bag with food, water, clothing and shelter enough to last 72 hours on average. This bag is almost always in the form of a backpack because that is designed to be worn easily if you need to walk on foot. Also, this configuration is best for holding weight that all of that food clothing and shelter is going to incur on your back. Additionally, the bag is going to hold your entire bug out gear to accompany the rest of your supplies. There are a myriad of resources online and YouTube for bug out bag lists or you can read our post on the subject for more detailed information on what to pack in your bug out bag. A bug out bag is different from a Get Home Bag, but they serve similar needs. A Get Home Bag should give you what you need to make it home from wherever you are, usually work or school.
Do you need to worry about a Bug Out Bag? That’s a great question but it really comes down to the individual and the situation you are faced with. Do you live in a big city or in the country near a chemical plant? Do you have a place to go if you had to trek on foot away from everything you own? Is your health good enough that if you strapped 50 pounds of gear to your back, could you walk 3 days if needed? Do you know how to use anything you have spread out on the floor for your bag?
I talk about the reasons for and against the actual act of Bugging Out in the face of most scenarios but I like to say that reality always gets a vote. Regardless of whether you have any intention of leaving the safety of your home, circumstances you haven’t even thought about might compel you to ditch your plans and strap on that bug out bag to walk into the sunset. If that event happens, it is wise to be prepared.
Identify what you need the bag for
A great bag is easy to find for under $80
When I first started officially prepping back at the end of 2008 I was like so many other people and the overwhelming need to get a bug out bag packed and ready to go was an all-consuming thought. I researched a ton of blogs and forums, read books and watched dozens of videos until I knew or thought I knew everything about a bug out bag. I had my first bag all packed up and ready to go and then I tried it on. It was very shortly after that my plan started changing and it is with the hindsight of a few more instances like that that I want to share with you some of my mistakes so that it may help you avoid making them yourself.
I was overly focused on “the stuff” I needed to go into my Bug Out Bag and didn’t give as much thought as to what I needed the bag for in the first place. Knowing where you are going and what you are going to do is packing 101 stuff, right? If you want to pack for a business trip let’s say; you lay out everything if you are like me according to what you are going to do on the trip to make sure you are covered for every contingency. This makes packing anything easier.
I didn’t do that with my personal bug out bag. What I did do was make a list of everything I needed to have and then I went out and bought it or consolidated it into my bug out pile. My pile was larger than the pack I had chosen and when it came time to put everything into the bag I realized I needed to rethink some things.
Most of you are building a bug out bag as something you can grab and go out the door never to return again and this would be consistent with what the general consensus is for having a bag like this in the first place. However, we are almost never in any situation, flying out the door blindly running down alleys. That is unless you are Jason Bourne and well, that’s the movies.
If you are forced to pack up, you should know where you are going. This may be to a friend’s house or an old college roommate in another state or Aunt Bunny who lives an hour away. What does this bag need to hold in it to make your life bearable at Aunty Bunnies house? Do you need that entrenching shovel, hiking poles and a camp axe? Maybe not. Do you need 2 gallons of water and your winter snowshoes? Maybe you do. Knowing where you are most likely going is going to help you with the next decisions.
Once you know what you need the bug out bag for, you will know what type of bag is right for your needs.
Identify what you are going to carry in the bag
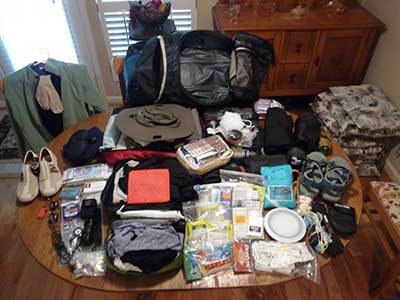
Lay everything you will need to pack out so you can inventory easily.
If I am being honest, one of the shallow pleasures of prepping for anything is getting new gear. Yes, I will admit that I like buying gear and trying it out. This has nothing to do with vanity, I like to consider myself a gear geek only to the point that trying out new and interesting items that have multiple purposes and could save your life appeals to me. In the beginning as I was getting my pile of gear together that would save our lives I thought more about what I was acquiring that thinking about what I needed. I found all sorts of bug out bag checklists, some of them pages and pages long. Sometimes, I would sit there and listen to YouTube videos and write down everything was said. When it was all said and done, I had a huge pile of gear and my bank account was a lot lighter.
Going camping was a huge eye opener for me and it taught me more about what I needed to pack than any YouTube video could. Well, in truth it put the lists I had been compiling into perspective. It’s funny how life has a habit of doing that when you are packing almost 70 pounds of gear on your back. I recommend that anyone who has plans for a bug out bag take this camping for two nights in the woods. You don’t have to go 50 miles in the wilderness, but take this bag with all of your stuff and hike (so you are forced to carry the bag) into the woods and set up camp. You will be surprised at how quickly you realize the items you have but don’t need and the items you wish you had.
Once you have a better idea of what you need to put into your bag, lay all of those items out on a table because the size of your bag is going to need to fit all of that gear. Can you get by with a day backpack or do you need a larger 4,150 cu size pack to fit everything. It may be helpful to try out a friends backpack first if you don’t have one yourself or go to the store and try them on in person.
Identify your price range
Military surplus gear is a cheap and rugged option.
This may sound like it shouldn’t be important. I mean how can you put a price on your survival? Well, it should be because if you are like most preppers I know (including me), this will not be your last bag. Take time to shop around for bags and don’t necessarily believe all of the hype that surrounds the mil-spec types of bags. By that I mean the bags that look like they are ready to go to war on the back of some soldier in Afghanistan. These routinely come with price tags over $200 and I don’t think that is necessary for a bug out bag.
Remember, if this is truly going to be a bug out bag that is ready for you, you should have it packed at all times and ready for you to grab and walk out the door. Do you want to spend upwards of $500 and then shove it in the closet for a year?
The opposite is true also because my first bag was very cheap. I purchased a used army Alice pack from Ebay for around $20. These were just like I remembered and are roomy enough to hold anything you can probably need. They aren’t the most comfortable though and if you are trying to stay discrete, having a military style backpack isn’t usually the first thing that comes to mind. I chose this bag because the use is perfect and the price was incredible. In the end I didn’t use it though. Instead, I take my alice pack with me when I go hunting and it is perfect for that. I just don’t want to lug it around if I am bugging out.
OK, now what?
So you are asking yourself, when is he going to get to the part about how I can find the perfect bug out bag? OK, here are the steps I would take in order to help you select your bug out bag.
Understand what you need the bag for. Is this to get to a neighbor’s house on the other side of town or family two states away? Are you going to be on the water with this bag? This will help you with size, features and function. Most bags simply hold varying amounts of stuff.
Knowing that, figure out how much gear you need to carry. Backpacking trips are excellent practice. You may need to buy some camping gear, but this will teach you what works and what doesn’t. It will additionally let you know how much room and weight you should plan for.
Choose your price range and shop within 20% plus or minus from that point. Craigslist and eBay have great deals, but you may end up spending more time (on Craigslist) or end up getting inferior product (eBay). I would stay away from higher end bags unless you find an unbelievable sale. LLBean for example makes great bags for very reasonable prices but you can find great closeout prices on last year’s models too.
Go into a store with backpacks and try them on before you buy. It is also important to measure yourself to get the right pack for your body.
Once you have your bag, pack it with all of your gear and go hike for a couple of miles. Doing this in the neighborhood might seem odd, although we have a lady here in our neighborhood who does much stranger stuff. If the neighborhood won’t work, take your pack to the closest hiking trail. Nobody will know you aren’t training for an extreme hiking trek and it will either show you that you need to lighten the pack or affirm that you have done this part correctly.
Plan for a dry run. Cut the power to your house and live out of the pack for 3 days. If you do all of the above successfully, you have a perfect pack. Now lock it in the closet and start some other preps!
I am frequently asked questions around the subject of Bug Out Bags. There is certainly a lot of interest and for good reason. Seeing as how we are in the
I’m sure both you and I have come to realize by now, a properly prepared bug out bag can be the difference between life and death in an emergency situation. A quick search in Google however will bring back numerous results, all with varying articles and suggestions. So what’s a beginner to do?
Simple. I went to the experts.
“What is the one thing every good bug out bag can’t be without?”
I asked them all this very basic question. What you’ll find below are the answers from experts behind some of the biggest and best survival and prepper sites online.
Now while a true bug out bag list might never be complete, I was simply looking for a place to start – a foundation to build upon. I believe this list provides a great jumping off point. I think we can both agree that if it is important enough to be listed as “the one thing” every bug out bag can’t be without, it should be in yours. Check it out:
“Water. You need to have some and have the ability to treat water for drinking, cleaning wounds, cooking and maintaining proper hygiene. You have two days of survival time without water, less if it’s hot out. Water borne illness are insidious and if infected, your survival time goes down to less than a day without clean water to maintain hydration.” – Mike from The Redneck Survivalist
“For its size, weight and usefulness a must have is Duct Tape. I prefer Gorilla Tape brand because it is so much stronger and can be used for repairs, makeshift bandage or millions of other creative uses. Duct tape is a must have for any respectable Bug Out Bag.”
“The one item that I think has to always be included in a bug out bag is a solid knife. Preferably a fixed blade, at least six inches in length. This can be used for security, to help build shelter, start fire, and to gather food to name a few uses for a good knife. If size or legal considerations are a problem, a suitable secondary option is a locking folder.” – Tom from The Prepared Ninja
“I think the obvious answer is that every bug-out bag should include a means of protection, such as a gun. If a given bug-out situation is just a short-term emergency such as fleeing a natural disaster, then the gun is useless, though comforting to have. In a long-term bug-out situation, without a gun, you are at the mercy of unprepared, and desperate folks who NEED your stuff. All your prepping is for naught, if anyone can come along and take it from you.” – Spencer fromAll About Preppers
“The best “can’t be without” item is the proper survival mindset. Recognize that bugging out is not going to be a lark nor is it going to be a cool way to test all of your gear. Grab onto a positive attitude to get you through the rough spots and you will do just fine.” – Gaye fromBackdoor Survival
“My number one bug out bag list item is a protein source. Carbohydrates and fat are easy to find and store but protein spoils and deficiency for any of the amino acids is nasty. My personal favourite right now is SurvivAMINO by Vitality Sciences (vitalitysci.com/products/survivamino).” – JP fromBug Out Nutrition
“My answer would have to be knowledge. This item weighs nothing and makes all the other stuff in your kit and environment useful. The more you know, the less you need.” -Todd fromThe Survival Sherpa
“The one thing that every bug out bag should have is a good quality water filter. The importance of clean drinking water is self evident, but having a good filter has definite advantages over other purification methods. There is no need to stop and make a fire or use a camp stove to boil, and there is no waiting time as is the case with chemical purification systems. With a personal water filter, one can simply fill a bottle with stream or pond water and consume as needed, keeping you on the move to your destination and without the need for fuel or lost time.” – Denob fromThe Canadian Preppers Network
“In my opinion, the number one thing in any bugout bag is the person carrying it. If that person has the knowledge, and has taken the time to prepare and practice his skills, that person is worth 1,000 time what any piece of gear is worth. Gear is great, and it sure can make things easier, but remember when everything else fails the one piece of gear that you can count on is yourself.” – Robert from Off Grid Survival
Now that you’ve heard from the experts make sure your bag is stocked with those items. If you’ve stuffed your bag full and come back for more, some other items to consider including are:
I’m sure both you and I have come to realize by now, a properly prepared bug out bag can be the difference between life and death in an emergency situation.

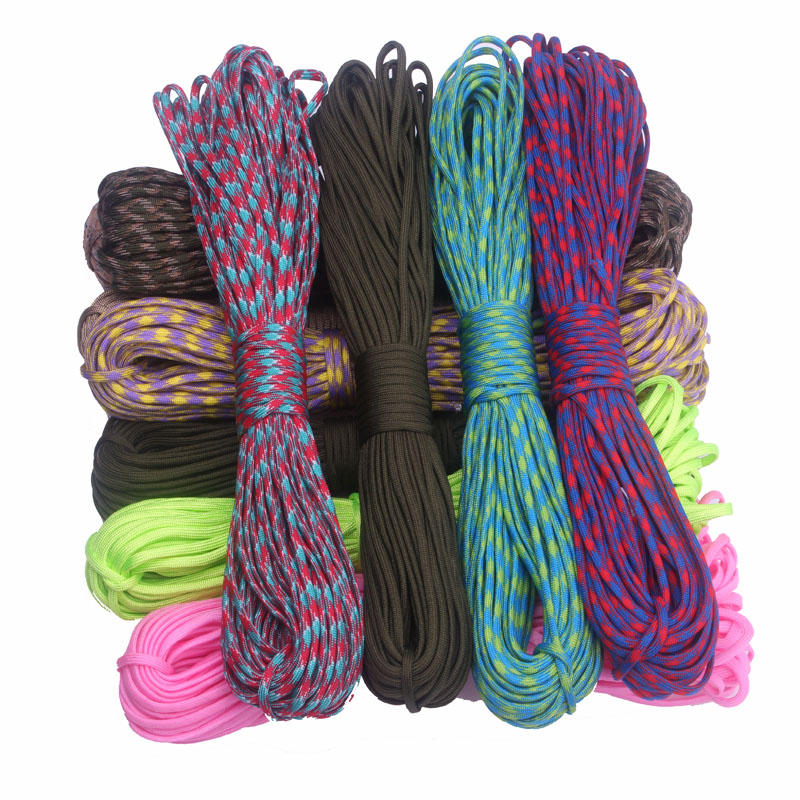
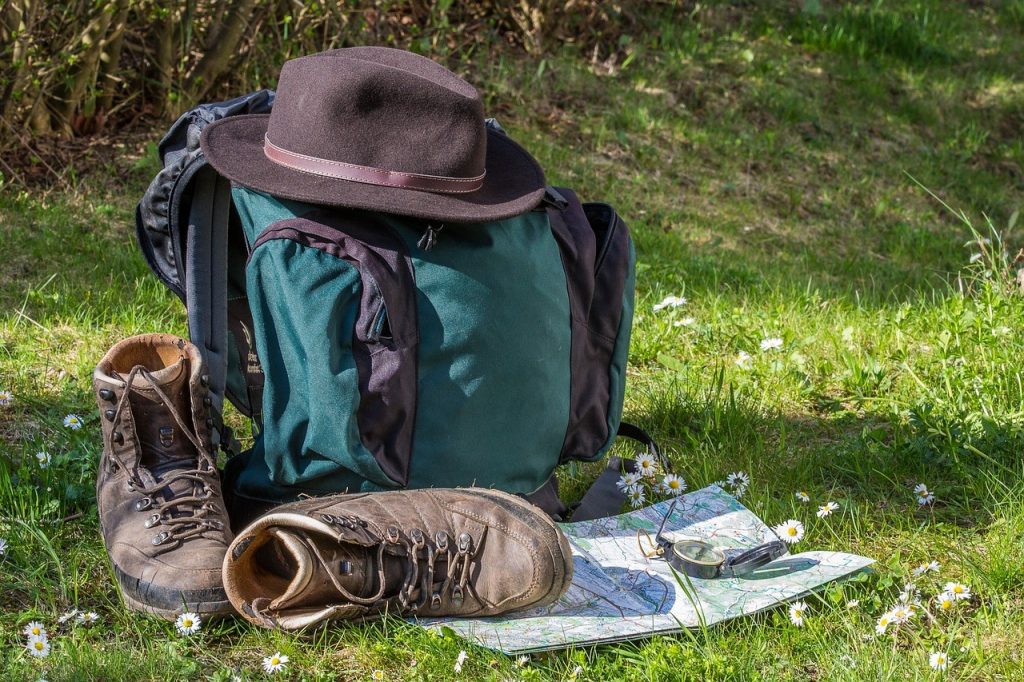
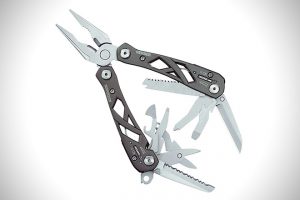
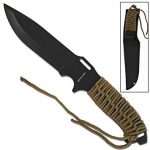
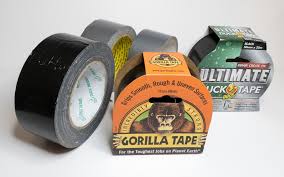 You may not think of a
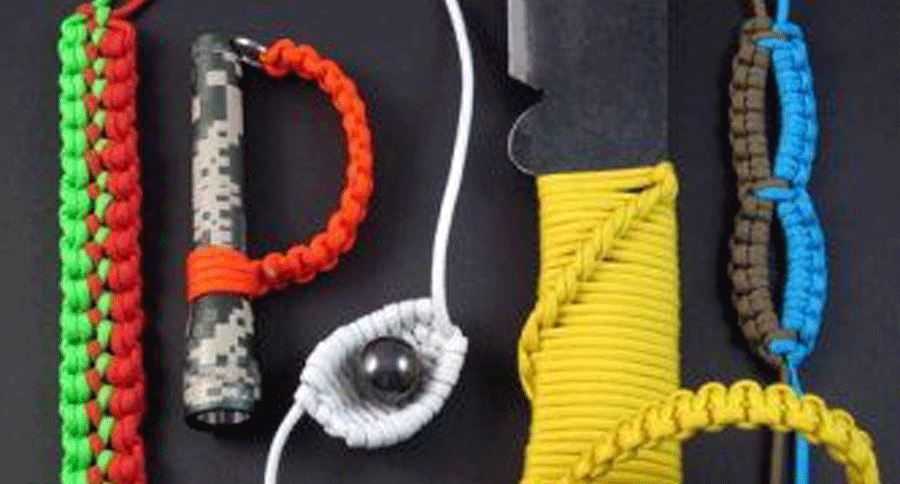 Pack good quality cordage such as