HomePosts Tagged "food storage" (Page 3)

Our last article; the first in this series of 5 things you need to go off grid now, began with the concept of preppers looking for an ideal life of untethering ourselves from “the grid” in an effort to enjoy a more self-sufficient life. To that end, many of us only consider moving to rural land and building homes that depend less on some of the interconnected systems we rely on today. But even if that isn’t possible for most of us currently, we might be wise to plan on going off grid anyway. In a disaster scenario, we might not have any other choice. If the grid goes down due to any one of dozens of possibilities and you aren’t at your perfect survival retreat in the woods, what do you need to consider now that could impact your family’s survival?

The last article covered water primarily because more than almost anything else, water is needed for survival. The average human person can only go for three days without water so in a grid down situation, this will need to be one of the top if not your first priority. If you have water taken care of, the next thing you will need if the grid goes down is food.

Food

After water, our bodies need food for energy and nourishment. When I started prepping; food and water were the first two items I began to consider for the obvious health related requirements, but unlike a survival bunker, stocking up on extra food is an easy thing to do. On top of that, not too many people look at you with a weird expression when you simply purchase a little extra food each trip. I just blamed my children for being pigs… “Man! You just won’t believe how much spaghetti my 6-year-old puts away.”

Each and every one of us eats food every day so it isn’t like we need to plan clandestine trips to the Army Navy store to avoid letting our neighbors know we are prepping. The concept you need to remember is planning for the Grid down scenario where you won’t be able to load up the car and drive over to the local supermarket. If the grid really does go down in a major way, you will need to already have a plan in place for taking care of your food needs both short and long-term. You will not be able to begin your food storage after a disaster.

Stocking up on groceries

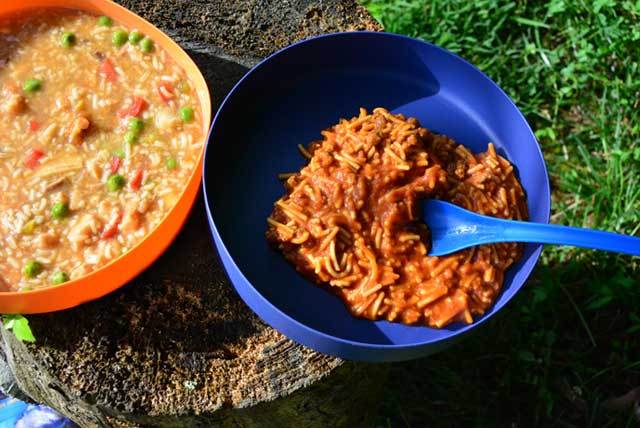
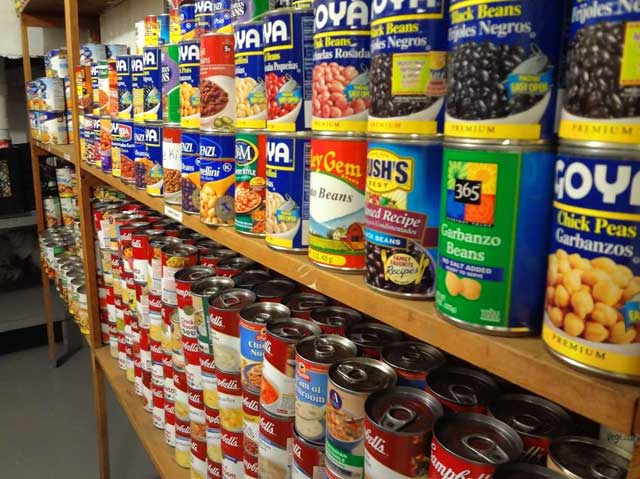
Easy food storage start is to simply buy a little more each week of what you already eat.

There are many ways you can begin to think about food after a collapse and the simplest short-term solution is to simply stock up on the foods your family already eats. When you go to the grocery store; if you buy 3 jars of spaghetti sauce normally for example, just buy one more. I won’t lie and say that purchasing extra groceries will not cost you more money, but it is the easiest way to build your supplies. For a lot of us, we have more money than time right now. In our imaginary grid-down scenario there will be no power so I would recommend against stocking the freezer only or buying dozens of microwave burritos. In addition to planning your food storage, you have to consider how you will cook this food if the power is no longer working, but I will deal with that in another article.

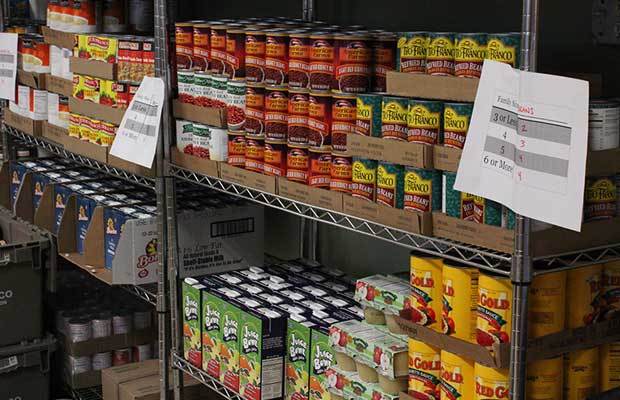
Long term food storage

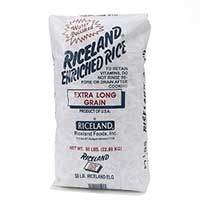
When we think about planning for long term food storage, we routinely consider canned foods or foods that have been sealed to prevent spoilage for a long time. You can purchase bulk items like rice and beans and seal them with oxygen absorbers in 5 gallon buckets. This will allow you to store a lot of food for a really long time. Optionally, there are dozens of companies that sell freeze-dried food where they have done the job of protecting the food for you. Of course, this food will cost you more than what you can spend if you do the work yourself, but there are some advantages. You can assume that most of these companies know what they are doing more so than you starting out which may give you comfort in knowing that when you need to use the food you are storing it will have been properly stored and you won’t open up a 5 gallon bucket of rotten rice.

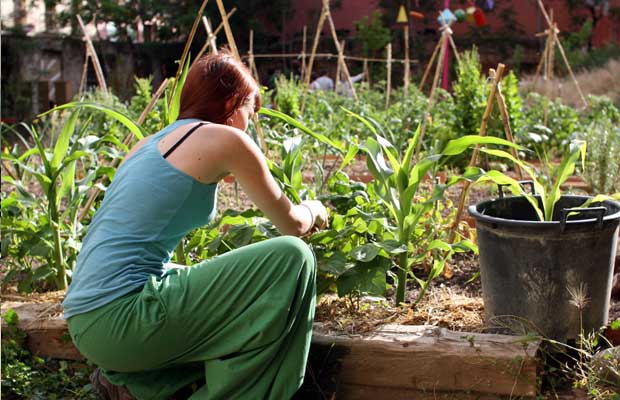
Growing a survival garden

Even if you spend $10,000 on food and you have it locked in your basement, eventually that food will run out. What if the grid is still down when all your food supplies are depleted? To really be in the best shape you can be in when the grid goes down you need to have your own source of renewable foods. The most obvious and understood option is to have a garden. Gardens are not a cure-all though and require a significant amount of up front work, planning and there is a learning curve.

A garden is simply a prepping must-have to live off-grid.

Many preppers I know plan to start their garden when the grid goes down and that is not a good strategy in my opinion for a few reasons. First, simply making a garden plot takes a lot more than a shovel and a rake unless you already have tilled soil that is ready. Most of us have a spot in our backyard where we imagine that beautiful little garden with nice neat, weed-free rows of fresh vegetables. That doesn’t happen overnight and it certainly doesn’t happen without some hard work.

Secret Garden gives excellent tips on growing your own camouflaged food forest to reduce the threat of anyone stealing your food.

Assuming you have a nice plot of land without any grass or weeds, you may need to amend your soil to give it the right nutrients. Composting and adding natural fertilizers help with this but again, that isn’t something you will have on day one. And, probably the best reason against this plan is that those beautiful vegetables take time to grow. You can’t wait until you are hungry and expect to go dig a hole and plant your survival seeds. You could be waiting months for the first fruits of your labor. I recommend starting a garden now. The Farmer’s Almanac says that a 16 x 10 foot garden will feed a family of four with a little left over for canning and freezing. What if your crops fail? I would plan on a much larger garden even though that is more work and the reality of it is you may be looking to convert every single square inch of dirt you have into food production. You will also need to plan on canning supplies and all that goes with that. Gardens do not provide food all winter so you will need to grow enough to eat and put away to last you during the winter months.

Something else to consider is your garden will be visible to anyone walking past your property. A really brilliant alternative would be to use the food forest concept to grow a camouflaged food forest so that your food supplies are less likely targets of wandering hungry people. Rick Austin has a book that introduces these concepts called “Secret Garden of Survival” and I think that is a great place to start.

Raising Livestock

OK, so you have a full pantry and even have a stash of freeze-dried foods under the beds and in the closets. Your garden is underway and you are already seeing the first fruits from your plot of dirt. What about protein?

Rabbits are a low footprint option for raising a lot of meat.


Assuming you aren’t a vegetarian, meat is on the menu or it would ideally be in a grid down scenario. Sure you could plan on hunting but you will be in competition with everyone else in this grid-down world that is hungry too. I believe in a massive collapse, any wildlife would be quickly depleted and the chances of getting wild game would be slim. Sure, legumes and some grains have protein, but for those of us who like to eat meat there are a couple of relatively simple options to consider in a grid-down world that you can even use now.

Chickens are incredibly easy to raise and take care of. They just need some basic protection from the elements, good quality food and water. In return you will get delicious fresh eggs. At our house I have fresh eggs every morning for breakfast. Raising rabbits is another great option for protein but they will need to be slaughtered and butchered. Rabbits are prolific breeders – a single female has on average 8 kits per litter and their gestational period is about a month. Assuming you start with three rabbits (2 females and one male) you could have well over a hundred rabbits in the first year.

Aquaponics is another option that I think lends itself to an off-grid lifestyle, but it does require power. Raising chickens and rabbits does not.

Tomorrow we will get into the third thing you need to go off grid. Water and food are checked off our list. Can you guess what is next?

Our last article; the first in this series of 5 things you need to go off grid now, began with the concept of preppers looking for an ideal life of

One of the biggest hurdles to actually doing something that can save your life is getting started. I know many people who research topics, watch movies, create lists and pages and pages of bookmarked websites that they can pull up at a moment’s notice. For every idea they have a source. For every plan, they have written information, sourced in binders with color coded tabs. This could be the same for you and your food supplies that are all written neatly in a binder or on a downloadable excel spreadsheet or parked on a DVD you bought online from a survival expert.

My question is what if the world as you know it ends tomorrow? What if the proverbial poop hits the fan and all your lists are just that; worthless words on pieces of paper. What if your highly organized blueprint for survival is nothing more than electrical impulses burned to a hard-drive that will never run again? What if in your efforts to be thorough, you didn’t actually do anything and now you family is looking to you for guidance? Since you have been talking about Prepping for 3 years, you have something prepared for this day, right?

I know that this isn’t the majority of people who read Final Prepper, but there are those out there that become overwhelmed by information and keep thinking over the details in their mind of what they want or need to do until it’s too late. We call this analysis paralysis and in the world of survival, this can get you killed. If you haven’t begun storing food for your family because you haven’t finished watching a DVD or your excel spreadsheet isn’t completely accurate with the quantities and current prices for all 1000 food items you need, you should try something else. What I want to give you is a simple food supply plan that can feed a family of 4 for a month, can be purchased in about one trip out and will cost you a few hundred dollars. Use this plan if you haven’t started anything yet or simply need a jump start on your emergency food supply list for your home. Trust me, your family will appreciate this if something terrible happens and you will be able to look them in the eye again.

What Foods to Buy?

Rice is a cheap and easy emergency food supply

Rice – Rice is one of my favorite storable foods because it is relatively easy to buy even in big quantities and I don’t know if I have ever met anyone who wouldn’t eat rice. Rice stores easily as long as you keep it cool and dry just in the bag. For longer storage you can seal your rice in Mylar bags, throw them in buckets and you are looking at years of shelf life. For your emergency needs though I would go to Sam’s or Costco and by a 50 lb. bag of rice or two. A 50 pound bag contains 504 servings of rice and will lay flat on your shelf for years. We use our rice though so it is always in rotation. Cost – Approximately $20

Beans – Beans, beans the magical fruit. Beans are another food that has a long storage life and is relatively cheap. Beans are the first part of Beans, Bullets and Band-Aids for a good reason. Beans don’t need too much care and like rice store easily for years. You can use them for a good source of fiber, but you should make plans to deal with excess gas if everyone is going to start eating beans once a day… A 10 lb. bag of beans costs around $7 and makes 126 servings. Buy several bags for your pantry and don’t forget the chili and soup mix.

Canned Meat – The best way to cheaply store meat is in cans and for a little variety and additional flavor for your meals, we stock up on canned tuna and chicken. Depending on the size you will need about 35 cans to cover your family for 30 days but these stack nicely and you can always work them into your weekly meals. Canned chicken will easily store for longer than a year so rotation shouldn’t be a problem.

Canned Veggies – 40 cans of your family’s favorite vegetables will give you the nutrition they need and something they will eat. Make sure you aren’t buying mushrooms or olives (unless your family loves them) if you don’t want to see turned up noses when the power has been out for a week and you are trying to get creative with dinner. 40 cans of vegetables will cost roughly $40 and like the meat will store for years.

Canned Fruit – Some people purchase other items for dessert, but canned fruit has a long shelf life and I have to recommend this for your sweet tooth over most other things outside of fresh fruit. I purchased 5 big #10 cans of pears, peaches, and mixed fruit. Each has about 25 servings and will be a nice addition to the rice, bean and chicken stew… 5 cans will cost around $25.

Oatmeal – Breakfast is served, unless that is you are raising chickens and already have fresh eggs everyday which I also highly recommend if you have the ability to do so. Oatmeal is great for breakfast cereal, its cheap and will store a pretty long time. Oatmeal needs a little more care than your rice or beans, but if you have this stored in Mylar you would have breakfast for years. The old cardboard tubes of Oatmeal has 30 servings, costs about $2 each. Buy 4 and you only need water to make this edible. Unless you have the next item.

Honey – Honey as you probably know has been called the perfect survival food. This is because it has an infinite shelf life. That isn’t something we usually have to worry about though because it gets used as a sweetener to replace sugar in tea, over that oatmeal above and you can even use honey to treat wounds. The normal 5 lb. jar of honey is about $15 right now and has 108 servings. Buy two of these.

Salt/Seasoning – Salt is another good storage item because if you keep it dry it will also last forever. Salt is needed by your body and in my opinion; it makes almost everything taste better. You can buy a case of salt in 4 lb. boxes for about $12. Buy a case and you will have enough for a year of seasoning. You can also purchase pepper and other spices you normally use to make that soup or chili above taste better.

Vitamins – The experts say vitamins don’t help you but I tend to believe that some nutrients even in vitamin form are better than nothing. If you aren’t able to maintain perfect nutrition, a simple multivitamin could keep you healthier than not. If you have kids get them some chewable gummy vitamins to keep their health up too. A bottle for each of you would cost about $8.

Water – I know this list was about emergency food supplies, but I will throw water in here too because if you are going to the trouble of taking care of food, you should knock out water at the same time. Each person needs about 1 gallon per day (assuming you aren’t working in the heat all day) for normal hydration and hygiene. A family of 4 would need 120 gallons of water to live for 30 days so you can either buy a whole bunch of bottled water or get 5 gallon plastic water storage containers. If you have the space, a fifty gallon water barrel would be easier, but you won’t be able to move that once it is in place.

What Next?

If you purchase all of the food supplies above it will set you back around $500 buy will cover your family as far as food and water for 30 days. Is this enough to weather any disaster? No, but it is that start you were looking for and you can really knock out all of these items in one day. One day of shopping and storing water would give you the peace of mind you need to ensure your family is taken care of. Can you go out and buy a 30 day supply of freeze-dried food just as easily? Maybe but the key is to do something now. Act before you need this food and take care of your family.

Next steps would be to work on medical supplies, and security. Once you have those, there is also other lists of prepper supplies you should consider. If you want to read a more comprehensive plan, you can also check out our Prepping 101 – Step by Step plan for How to get started Prepping.

One of the biggest hurdles to actually doing something that can save your life is getting started. I know many people who research topics, watch movies, create lists and pages

If you are reading this article, I would imagine that you have never eaten an MRE before. Why do I say that? Well, for anyone who has eaten MREs you probably already have a strong opinion about them or at the very least, your experience might be based upon military service years ago. I had eaten more than my fair share of MREs when I was in the Army, but things have changed as you would expect with the passage of more years than I want to think about so I decided to take them up on the offer and while I was at it, share my opinion on what if any place MREs have in the food storage plan for preppers.

My military experience was let’s just say in the last century and MREs have gone through some pretty decent changes and updates since the time I was chowing down. For those who don’t know what an MRE is, the Acronym stands for Meal Ready to Eat and this is what is given to our soldiers when they aren’t near a mess hall. When I was in the field we would usually get an MRE for lunch. Breakfast and dinners would be a hot meal, or it started out as hot when we crowded around the mess tent or the insulated containers they drove out to us on the back of a jeep. By the time you got somewhere to eat your meal it was usually cold. We would only go to the field in the winter time naturally.

MREs at the time were pretty much like they are now, but the menus have improved and some minor details have made this meal in a bag much more palatable if you can believe that. I served before they had things like M&M’s or skittles for dessert and hot sauce to flavor your food. We also didn’t have a built-in heater like they do now. If you wanted your MRE warm you were limited only by your creativity. MRE food packets are foil so they are both waterproof and allow you to heat them on almost anything. We would use the heater vents in our trucks, lay them on our stoves in the tent or on the block of our engines.

MREs come in boxes of 12 and each MRE is a different meal. You quickly learn which meals you like and which ones you don’t. If you were unfortunate enough to be the last one to the box you got what everyone else passed over. When I was in the service I think the worst meal was the beef patty. There are some similarities between the meals. They all come with an entrée, some side and a dessert. You get crackers and peanut butter or cheese, a condiment packet and usually a drink mix. We would even come up with our own names for meals that displayed our disdain for the contents. One meal, Meatballs with barbecue sauce was affectionately called ‘Meat nuts with Barf A Shoe’ sauce by myself and the guys in my unit. I am sure there are millions of other creative renames. I actually liked that MRE and I think it was pretty much my go-to meal as long as I could beat everyone to the box.

I opened up a box looking for some differences in the contents on the bag and searching for my old favorites because I was definitely getting the best MRE and I wouldn’t be stuck with the Beef patty. I was surprised at the options. For starters we didn’t have anything vegetarian when I was in the service, but this box had Vegetarian Ratatouille, Vegetarian Lasagna and Apple Maple Rolled Oats. Breakfast?? They also had the old standbys of Pork Sausage Patty and it looked like my Meatballs with Barbecue sauce was changed to Meatballs in Marinara sauce. That is what I decided to taste first.

What do MREs taste like?

Before I get into what the MREs from Meal Kit Supply tasted like, I wanted to set expectations here. When you tear open a bag like this, you aren’t getting fresh ingredients from the garden prepared by a classically trained French chef. You are getting food that was designed for the military to pack enough calories in there to keep them alive, be waterproof, tolerate being mistreated and last for 5 years sitting in a warehouse most likely. If you are expecting Ruth’s Chris here or maybe even Golden Corral, you might be in for a surprise.

Everything in the bag.

I opened my MRE and noticed that everything was still pretty much the same. You have food in foil packets although my packets weren’t in separate boxes. They did include the nutritional insert though and I never understood why they had the extra boxes anyway. Another thing we didn’t have when I was in was the handy ration heater. The ration heater is activated by placing a little water in a bag. The water mixes with an element and causes a chemical reaction that generates heat. You wrap your entrée in the bag,  and in 10 minutes you are supposed to have a hot meal. It didn’t work that way for me.

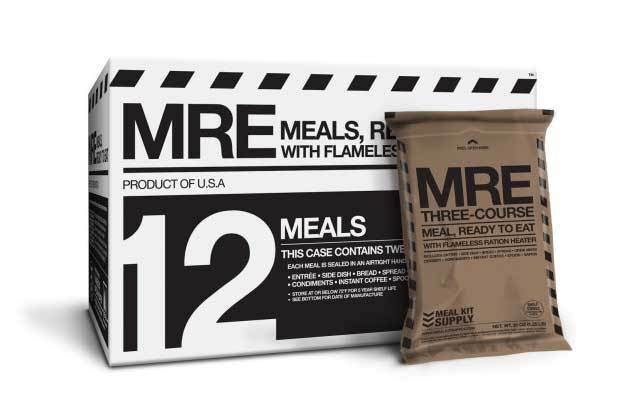
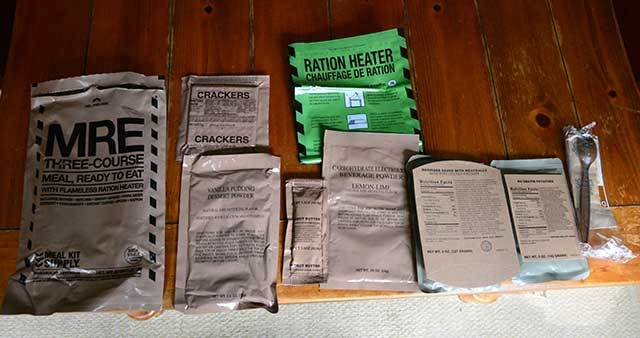
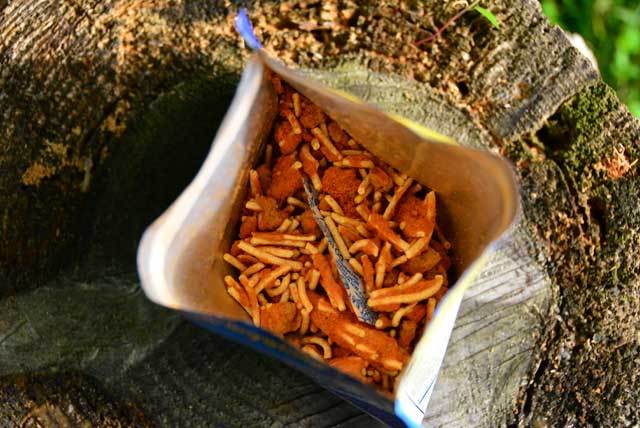
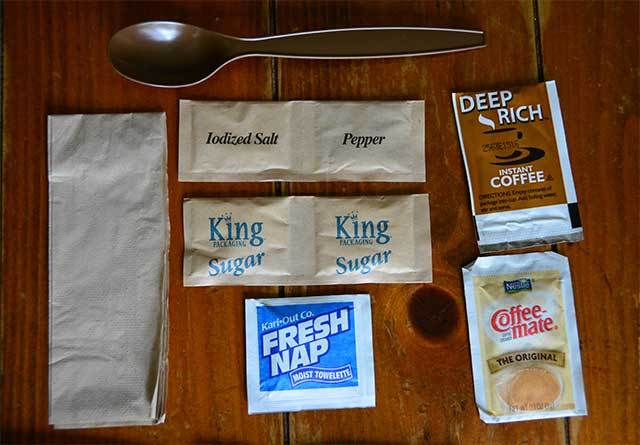
Everything you need plus a big long spoon to reach the bottom of the bag.

I followed the instructions or so I thought but my heater didn’t warm up. I waited the 10 minutes but finally decided to eat my meatballs cold. They weren’t bad at all, but I know they would have been so much better warm. My survival dog certainly loved the taste too when I gave her one of the small meatballs to taste. When I finished eating, I noticed that the warmer was finally getting warm so I placed my Au gratin potatoes in there. Yes, they had Au gratin potatoes and although they didn’t have the slightly burnt edges from being in the oven but they were cheesy and filling. They only needed a little salt and pepper to doctor them up. The heater worked just fine after-all.

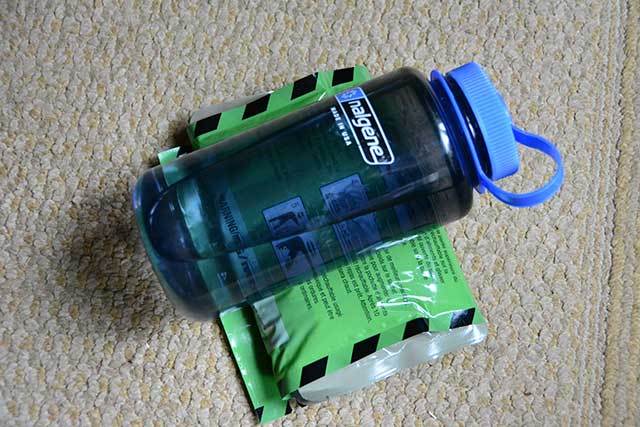
The Ration Heater instructions say that it works best if you place a heavy object on the packet.

So far so good. I broke out the crackers; literally because they came apart in my hands. This wasn’t the fault of the manufacturer I don’t think. I was just clumsy. Regardless, once I had my peanut butter on them they were great. I finished up with the dessert, Vanilla pudding which to prepare you needed to mix a little water in the bag and shake the bag for 60 seconds before it was ready. This was definitely good!

How do MRE’s fit into a Prepper Plan?

Any prepper plan has to take into consideration what food options will be best in various situations. Usually we recommend different types of food for different scenarios. If the power goes out you look for food that doesn’t need to be cooked. Canned tuna, MRE’s and snack bars fall into this category of course so do a lot of other foods. You want to store foods that your family will eat but there is also a need to have long-term storable food that you can take with you in a bug out bag. Frequently I will recommend freeze-dried foods for bug out bags, but those do require some preparation. For starters they need hot water or else you are eating rocks. MREs do not need water (except the pudding) and you don’t even need to heat them up.

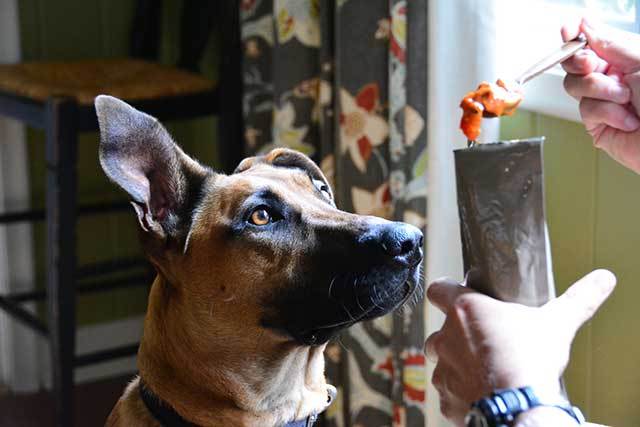
My dog was a big fan of the Meatballs.

There are some weight considerations in that MREs weigh more than freeze dried food but they do have their advantages. I have a few boxes stored as part of my food storage plan because they are an easy way to get the calories you need for survival. I also have food stored in buckets, canned food and freeze-dried food. I am an equal opportunity food storage person and there is something to be said for having variety. Are MREs the the best prepper food? I don’t think there is ever a single best food for all prepper situations, but MREs are proven reliable. If our military uses them you can bet that you could find reasons to use them too. They are more expensive than other options but you don’t have to prepare anything, they even throw in the salt, pepper and a little moist towelette to wipe your face and hands when you are done. They used to come with toilet paper and chewing gum but apparently that is not part of these MREs.

You can get a box of 12 MRE’s yourself and try them out or just place them aside for an emergency. MRE’s are another good food option that will store for a long time and could save your life.

If you are reading this article, I would imagine that you have never eaten an MRE before. Why do I say that? Well, for anyone who has eaten MREs you

When it comes to long term food storage, there are several obvious candidates. In Prepper and Survival circles, we talk about storing grains in Mylar bags packed in 5 gallon buckets with oxygen absorbers, creating a pantry and canning fresh foods from your garden, MRE’s and freeze-dried foods. I have some of all of these options stored for our family, but some foods are great for other reasons, not just surviving doomsday.

You can probably take your 5 gallon buckets of rice, beans and grains to your survival retreat with you provided you have a car and aren’t walking on foot, but you can’t hike cross country with them. Canned food is great for storing and preserving fresh fruits and vegetables without the need for refrigeration, but you don’t want to take them camping with you. MRE’s are designed to feed troops in combat, but they aren’t the tastiest meals and are much heavier than other options. Freeze Dried foods excel both in storage life and they are incredibly light-weight. Not to mention, they won’t break if you drop them. Sorry canned tomatoes.

I was sent several packets of Mountain House Freeze Dried foods. I had meant to write a review last month, but life has a way of throwing obstacles in my way some times and in the chaos, I completely forgot.

Jetboil Flash Personal Cooking System

Freeze-dried food usually comes in meal form although you can get Mountain House individual foods if you are looking at making your own meals. When it comes to camping or a bug out bag, I want simplicity and like I said, light weight. Taste and nutritional value are definitely important too, but if they can’t meet the first two requirements, the last two don’t matter to me. My family has carried Mountain House freeze dried foods with us on several backpacking trips and they are usually my go-to meal when I am camping during hunting season.

The two meals I started cooking up were Spaghetti with Meat sauce and Chicken Teriyaki with Rice. Both meals as tested have 230 calories and are designed to feed one person.

The only thing that is required to make these dusty granules into a warm meal is hot water. You can either boil some over your fire, or use a camp stove. My favorite so far is the Jetboil Flash personal cooking system. This can cook larger meals with a bigger pot, but since I primarily use it for coffee and freeze-dried foods, it’s main duty is boiling water. I tried cooking an apple dumpling type meal one time for my daughter and failed to judge how quickly it would get hot, then burn… That is what I get for not reading the directions. The last thing you want to do on a backpacking trip miles from civilization is try to get burnt apple turnover mess off the interior of your main water boiling device.

Mountain House Spaghetti with Meat Sauce – before water.

Another great thing about Mountain House meals (and probably all the other vendors), is that you don’t really need any cookware either, except for a spoon. You can eat the meals, once rehydrated right out of the bag. Preparation is so simple that anyone can do this. Just open the package, remove the bag of desiccant, add the required amount of hot water, stir and close the bag up. For these two meals, I only had to wait 8-9 minutes which gave me time to work on boiling the water for my coffee.

How do they taste?

The question everyone wants to ask, is But how do they taste? I’ll be honest and tell you two things. First is that I was in the Army for a long time and didn’t meet too many meals (if any) that I could not eat. Secondly, I am not a food snob. Now, that being said, I won’t eat just anything and I am not afraid to say something doesn’t taste right, but you will never find me gagging if the leftovers are a few days too old if you know what I mean.

Cooked and ready to eat.

Every one of the Mountain House meals I have tasted have been great considering what they are. The Spaghetti had plenty of flavor and I really only wished I had about two packets instead of the one. Of course, I should probably only have that much food for a single meal, but if you are hiking all day and need to replenish calories, one of the other meals or a larger packet might work better. It is also the case that I received samples, so the real meal might include more food. Actually, it only stands to reason they would.

The Chicken Teriyaki was not as good (personal taste) as the Spaghetti, but as food goes, it tasted perfectly fine and I wouldn’t ever turn my nose up to either meal if I was offered them. Are they beautiful to look at? No they aren’t but this isn’t fresh food prepared by a chef. This is freeze dried food that tastes much better than it looks and can last on a shelf for up to 25 years. One of the great things about Mountain House is there is so much variety so if you have some favorites, stock up on those and leave the less desirable ones to someone else. My favorite breakfast meal from Mountain House is the Breakfast skillet. Loaded with potatoes, eggs, sausages and onions, it is my choice for cold mornings around the campfire.

I like Mountain House for camping but like I said, they are in my Bug Out Bag too because they are light and only require hot water. Some people will say, you may not have time to boil water so you need to take foods that don’t require anything to eat. I can see that point, but I say if you don’t have time to boil water, maybe you shouldn’t be eating either. Throw a snack bar in your pocket and go, but if you are being chased through the woods by the zombie hordes food is probably the last thing on your mind anyway.

If you are looking for a tasty freeze-dried vendor for your next camping trip, long term storage plans or Bug Out Bag, Mountain House gets my vote.

When it comes to long term food storage, there are several obvious candidates. In Prepper and Survival circles, we talk about storing grains in Mylar bags packed in 5 gallon


A Colorful History

There is no excuse for starving, especially in Florida. We have citrus of all kinds (orange, tangerine, grapefruit, lemon, lime, cumquat, and loquat), mango, grape, guava, bamboo, banana, plantain, sugarcane, avocado, acorn, dandelion, purslane, podocarpus, papaya, lychee, lemon grass, garlic grass, hickory, chestnut, coconut, cattail, coontie, cactus, cassava, Jimaca, and cabbage palm. They are all edible, all delicious, and each can be found growing throughout much of the Sunshine State, if you just know where to look. Nope, there’s no excuse for starving in Florida.

I grew up in South West Florida, just below Tampa Bay, and all my life I’ve loved studying the rich history of our Sunshine State. Florida has been home to many colorful characters throughout its history, from the pre-Columbian Chatot, Timucua, Tocobaga, Tequesta, Ocali, Apalachee, Asi-Jeaga, and fierce Calusa tribes to formidable Spanish Conquistadores like Hernando de Soto and Ponce de León to blood thirsty pirates like Jose Gaspar and Caesaro Negro to the wily Seminole and Miccosukee warriors like Osceola and Holatta Micco to Confederate blockade runners like Captain Archibald McNeill.

For me, the most interesting aspect of Florida’s history has always been the Seminole Indian Wars, partly because the Seminole and Miccosukee tribes are the only Native American tribes to never lay down their arms in abject surrender to over whelming Federal forces. Even the indomitable Comanche and Apache ultimately surrendered, but not so the Florida tribes who melted into the Everglades where Federal troops dare not follow. These two tribes were part of the Civilized Nations; they wore spun calico shirts, smoked clay pipes and were fond of their smooth bore muskets. They survived forty years of warfare (1817-1819, 1835-1842, 1855-1858)1 against a modern and well equipped army, not because of any technological superiority—although the Seminole and Miccosukee were excellent marksmen with bow and musket—but because they were adaptable and were able to live off the land in the wilds of Florida’s untamed swamps, wetlands, mangroves, and hammocks. As it was for the Seminole and Miccosukee, living off-grid in a SHTF scenario means having to live off the land.

Long-Term Scenario

We all pray that SHTF events never happens in our lifetime, but we prepare for them anyway. The Seminole and Miccosukee survived their own SHTF; will we survive ours? Our SHTF, when it comes, may come upon us slowly or suddenly. Regardless of the cause, we owe it to our children to survive, so we pray for the best and prepare for the worst.
I don’t have a cabin in the mountains. I don’t own a cattle ranch. I don’t have a fortified bunker with motion sensors and early warning systems. I am forbidden by our home owners association from installing claymores in my yard. Heck, I don’t even own any night vision optics. I just a private citizen who wants to see his family to survive. Faced with a SHTF event, I know that the acquisition of security, shelter, food, and water will be imperative to ensuring my family’s survival.

Most coastal Floridians have already faced SHTF scenarios—we call them hurricanes, and we take our hurricane preparedness seriously. Since Hurricane Andrew destroyed the southern tip of Florida in 1992, many households have maintained a family sized “hurricane box” containing enough gear and supplies for the home team to survive for at least a few of days. That may not seem like a lot by Prepper standards, but the hurricane box is not part of our Prepper provisions. It’s just a seasonal precaution. We stock the hurricane box in spring, watch the Weather Channel from May (Caribbean hurricane season) through October (Atlantic hurricane season), consume our hurricane supplies through winter, and restock the following spring. This rotation keeps stock fresh and it beats having to run to Publix for a last-minute can of green beans so my wife can whip up one of her tasty casseroles.
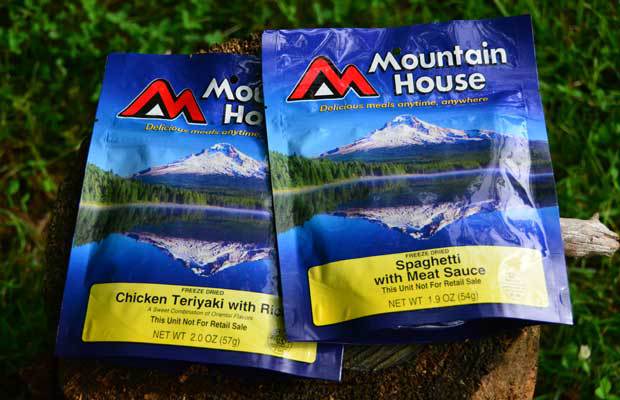
Preparing for the future requires forethought; the more you accomplish before an emergency event, the less you’ll need to accomplish during or after one. Stockpiling alone, however, can only carry you so far. You must be able to find renewable food sources. Once the SHTF, it will be too late to harvest Ramen at Walmart. Even if you could get your hands on that last brick of tasty noodles, fighting a gang of thugs for looting privileges is not sound tactical advice. If the gangs control your local Walmart, what then? Wouldn’t you rather be able to safely feed you’re your family from home than having to wander the means streets of some post-apocalyptic city scavenging for a nice clean dumpster? So, let’s assume you’ve already taken care of your short-term physical needs. You’ve got plenty of Evian and MRE’s on hand, your storm shutters are up, and everyone on your team who’s tall enough to ride the bog rollercoaster is strapped. No gun fight at the OK Walmart for you, but what about long-term survival? What about replenishable provisions? Have you considered that once your MRE’s run out, you will need to restock your larder with what you can hunt, fish, or grow?

Florida waters are teeming with fish, crabs, shrimp, crawdads, and turtles, not to mention the abundant squirrels, and various fowl that populate our area—with the notable exceptions of birds of prey and carrion eaters, pretty much most fowl are edible. For deer and hogs, we would need to go further afield. Barring a catastrophic decimation of wildlife, protein will most likely not be a problem for Floridians, especially for those of us living along the Coast. Carbs, however, will be much harder to come by.

The average healthy adult requires approximately 200-300 grams of carbohydrates daily.1 My favorite carb is rice, but what we’ve stored won’t last forever. We could try growing our own, but growing rice is a complete mystery involving paddies and some kind of water buffalo. We could try going native by harvesting acorns—a good source of carbs: 1 oz dried acorn (2-3 acorns) contains 14.6 gr. of carbs2—but the acorns in South Florida tend to be rather small, and harvesting them is labor intensive, requiring patience and lots of water for blanching out the tannic acid. Acorns are a great supplement—my wife makes a mean acorn-raisin cookie—but they are not a staple food.

The Lowly Sweet Potato

The sweet potato is not a magical cure-all food, but it does have many dietary and strategic qualities that American Preppers may find advantageous.

To resolve to the how-to-get-enough-carbs-so-I-don’t-starve dilemma, I would recommend the same carbohydrate-rich staple that was grown by the Seminole and Miccosukee and helped them survive as a people while they waged a forty-year long guerilla war. This same tuber was consumed by escaped slaves who filtered down from plantations in

15,000 Non GMO Heirloom Vegetable Seeds Survival Garden 32 Variety Pack

Georgia and Alabama to hide in the trackless Florida wilderness, and it was eaten by early white fishermen, farmers, and ranchers who settled Florida; the sweet potato (Boniato Rojo). The sweet potato has been a staple in Central America since about 8,000 B.C.2

It grows wild (and I do mean wild) in many parts of the South, not just in Florida. The sweet potato is not a magical cure-all food, but it does have many dietary and strategic qualities that American Preppers may find advantageous. A store-bought sweet potato weighing approximately 7 oz. contains about 3 gr. of carbs while the same amount of rice has almost three times as many carbs (11 gr.), rice is labor intensive. Have you ever tried hitching a water buffalo to a rice plow? Though it lacks the carbs of rice, an average-sized sweet potato does possess many other essential nutrients including: potassium (48 gr), Vitamin A (2,026 IU), and Beta-carotene (1,215 mcg).3


Even if you’re able to fight off the first wave of spam-starved zombies, a single-family dwelling can suffer an extensive amount of damage from a break-in, let alone a firefight. During a SHTF event, we must be able to survive off-grid inconspicuously. This means living under-the-radar. It’s your choice; you can hang a “Welcome” sign over your green house door, or you can hide your food source in plain sight. Because they are so well camouflaged, the only true enemies of these delicious uber tubers are mice, floods, and weed whackers (just ask my wife).

The Growing Process

Sweet potato vines can cover ground almost as quickly as kudzu and drop roots at the nodes their entire length.

When germinating sweet potatoes, I employ the “science project” method. It is the skin that produces the buds or “eyes” that become roots, so all you will need is the outer portion of the potato. Slice out one-inch wide slips of skin from the potato. Make them about as half as thick as a pencil (1/8 inch) to lend support to the skin. Suspend—do not submerge—the inch-wide slips of skin in cool tap water by using string to form a “hammock” or tooth picks spears to hold the slips at water level, skin side down. Each slip should have its own container; too many slips in a confined space can cause the delicate sprouting roots to tangle. Direct sunlight can quickly bake young sprouts, so store them in indirect sunlight.

In about two weeks, you should see several healthy root tendrils sprouting downward from the slips into the water. When the tendrils grow to about six inches in length, it’s time for planting. Gently remove the sprouted slips from their containers and plant them about 4-6 inches deep and about 12 inches apart.4 Much of the soil in South Florida tends to be sandy and poor, so you may need to prep your soil before planting. My property is sandy and wonderful for growing sandspurs—they are the reason Floridians don’t walk around bare-footed. I do not prepare my soil before planting sweet potatoes. The whole point of the exercise is to establish a renewable food source that will grow well without any help from me. After about three to four months—depending on the variety of sweet potato, rainfall, soil, soil prep, pests, etc.—the crop will be ready to harvest. You’ll know it’s time to harvest when the leaves turn yellow on the vine, and the growing tubers cause the ground to bulge as though there were moles tunneling beneath the soil. I live in Hardiness Zone 10 (South Florida); your results will definitely vary.

Suspend—do not submerge—the inch-wide slips of skin in cool tap water by using string to form a “hammock” or tooth picks spears to hold the slips at water level, skin side down.

Sweet potato vines can cover ground almost as quickly as kudzu and drop roots at the nodes their entire length. The potatoes grow close to the surface and can be harvested easily with bare hands. I don’t use my bare hands because Florida is home to the dreaded Brazilian Fire Ant, six different venomous serpents, and an ever-growing population of pythons. This is a genuine concern when weeding or harvesting because sweet potatoes attract rodents which in turn attract snakes, and the ground cover from the leaves can be so dense that you would never notice a coiled pygmy rattler until too late. All the prepping in the world won’t save you from a coral snake bite either—they are part of cobra family—with no way to refrigerate rare anti-venom serum during a SHTF scenario. “Don’t stick your hand in there!” is a good rule to live by in Florida, so use a little common sense and employ a small cultivator rake carefully to avoid damaging your crop.

For my first attempt at sweet potato gardening, I cut eight slips, but two failed to germinate. I planted the remaining six slips in a three-foot by five-foot patch of well-drained sandy soil. My little garden yielded 14 medium-to-large sweet taters. These were germinated from one store-bought potato. Not too bad for a first attempt considering the small size of the plot and the fact that I did not water at all. The Florida August monsoons did the watering for me. The rains come so regularly in late summer, between 3:00PM and 5:00PM, that you can practically set your watch by them. That particular crop of even survived a record-breaking three-day freeze just prior to harvest. A three-day freeze might not impress most Northerners, but it is big news in South Florida.

After my first crop, I let the vines continue to grow on their own, hoping for a second picking from the same planting. Unfortunately, the potatoes did not survive my wife’s attempt to clean up the back yard with the weed whacker. The best sweet potatoes are the large ones near the original slip planting. The further away from the original plant that the nodes take root and become potatoes, the smaller the tuber will be. The stunted golf ball-sized sweet potatoes, though still technically edible, are rough and not very tasty. These became seed crop for the next planting.

Another nice thing about the sweet potato is that it can be grown almost anywhere: apartment window boxes, small backyard gardens, empty lots downtown, power line easements, around the edges of county parks, or the woods behind your house. With their dramatic purple blossoms, the attractive broad-leafed vines are used as an ornamental plant. They make such great ground cover that they are regularly incorporated into landscaping around buildings, mailboxes, lakes, canals, trees, and other shrubbery.

There is a storm canal easement behind our property. Like Johnny Apple Seed, I’ve started planting germinated slips on this property. Several plantings have taken root and are growing well. When the summer rains begin, they should really take off. The early success of this off-property experiment has encouraged me to try other locations. I’ve germinated and planted sweet potatoes at my mom’s house, my brother’s house, and at a friend’s house. They’re going to enjoy the attractive ground cover around their shrubs, and I will enjoy helping them establish a prolific and renewable emergency food source.

I’ve started scouting other areas as well for strategic planting locations that will be self-sustaining. Anticipating future fuel shortages, I’ve kept my scouting to within bicycling distance from my property. There is a long tract of scrub woods along the river near our home which will make a good planting zone as the average non-agricultural zombie wouldn’t know the difference between potato vines and kudzu. My plan is to hide a strategic and productive potato pantry in plain sight. Nope, there’s no excuse for starving in Florida.

Resources

1. http://www.semtribe.com/
2. http://www.carb-counter.net/nuts-seeds/1027
3. https://en.wikipedia.org/wiki/Sweet_potato
4. http://www.organicgardeninfo.com/growing-sweet-potatoes.html

  A Colorful History There is no excuse for starving, especially in Florida. We have citrus of all kinds (orange, tangerine, grapefruit, lemon, lime, cumquat, and loquat), mango, grape, guava, bamboo, banana,