HomePosts Tagged "How To" (Page 2)

The pen may be mightier than the sword, but nothing beats the common pencil when it comes to shit hits the fan situations. Have you ever stopped to think for a second what would life be without that curious thing? Yes, I know that most of you have little need for pencils since there are computers and laptops and printers.

But what happens if there are no more PCs around? Do we stop writing? Nope. Anyway, I’m not here to wax philosophy. Today, I want to talk about some clever, dare I say witty ways to use pencils in a survival-type ballgame. So, without further ado, here’s what that the common pencil can do for you when your ass is on the line. Enjoy!

Fire-starter

This one’s a doozy – since pencils are made out of wood or, at least stuff that has the same properties as wood, it’s obvious that they can be used to start a fire in case of an emergency. I would advise salvaging the lead and use the pencil’s body. You can use that stuff to create a portable water filtration system. You can also add a couple of pencil splints to your tinder box – mine contains a piece of char cloth, a wad of steel wool, pencil splints, and a dash of sawdust.

Reveal hidden messages

Can’t really make out the writing on a surface? Use a pencil. Put a piece of paper on top and use the flat edge of your pencil to make a rubbing. FYI, that’s how I figured out that my son was doodling in school instead of taking actual notes.

Make those cloth moths skedaddle

Finding too many moths in your wardrobe? No problem. There’s a quick and cheap way to get rid of them. Use a pencil sharpener on at least three pencils. Grab a small satchel and place the shavings inside. Since most of them are made out of cedar wood, moths will not even dare to get close.

Getting a zipper unstuck

If you have zipper issues, use the gum on the other end of the pencil to get it, well unstuck. Just rub a bit of that stuff over the zipper’s teeth and give it a few tries. Works like a charm every time.

Magically open any lock or padlock

In a survival-type situation, there’s not much time for playing nice with a key that simply refuses to go inside the lock. You have two options: either use your 6-in-1 survival tool to break that lock or use a pencil. Here’s what you will need to do. Using your survival knife, shave a tiny amount of graphite over the keyhole. Now get that key inside and give it a twist.

Plugging holes

There’s nothing worse than spending minutes at an end trying to get a screw to fit inside a hole that’s just too big. A quick workaround would be to plug it using graphite shavings. You can also rip out a small piece of the gum and use in on the hole.

Replace cutlery

If you forgot to pack a fork, you could always replace it with two pencils. Yup, it’s just like eating Chinese food with chopsticks.

First-aid

If you need to improvise a small splint for a toe or a finger, use a small pencil or cut one to shape. I’ve heard that there’s a guy up in Nebraska that uses graphite on minor wounds. Don’t know if pencil leads have this kind of properties, but you’re welcome to try if you’ve got nothing else on hand.

Water filtration

Since I’ve already said something about using pencil lead to create a rudimentary water-filtration system, it’s only fair that I show you how to do it. Grab a plastic water bottle, sand, pebbles, two pieces of cloth, and as many pencils as you can find. Using your survival knife, get the graphite out of each pencil and ground it into a fine powder.

Now, cut the bottom part of the plastic bottle and add a thin layer of pebbles. Next, add some sand, followed by the graphite shaving, and a piece of cloth. To finish off your water filtration system, add one more layer of pebbles, sand, graphite shavings, a piece of cloth, and some pebbles. Make a small hole in the cap and hang the bottle from a branch. Get a canteen underneath and pour the dirty water in the upper part. That’s it!

Extend the life of rechargeable batteries

After a quick trip to the hardware store, I found it useful to add another gadget to my bug out bag: a portable battery charging station and a couple of rechargeable batteries. They’re very useful, especially if you have gadgets that eat through batteries like there’s no tomorrow. Anyway, if you want to extend the life of your rechargeable cells, rub the terminals with some pencil gum.

Get a pair of muddy boots squeaky clean

It doesn’t matter how thing shitty gets – clean clothes and boots are one of those small things that keep us going. If you’ve been traipsing through the mud, you can easily remove the dried-out mud from your boots using the tip of a pencil.

Keeping your fishing supplies and sewing kit organized

If you find it hard to keep your fishing hooks, safety pins, and needles organized, try using a pencil’s gum. You literally have to stick them in the gum, and that’s the end of the story. If you have a paracord grenade or other mini version of the B.O.B, you can use pencils to keep your cordage neat and organized.

Tweak your landline

In 9 out of 10 cases, the reception’s bad because there’s too much gunk on the phone cradle. To clean those metallic bits and improve reception, use the pencil’s gum. Are all done with the cleaning? Call someone to see if there’s any improvement.

That’s about it on creative ways to use a pencil in SHTF. Anything missing from the list? Let me know in the comments section.

The pen may be mightier than the sword, but nothing beats the common pencil when it comes to shit hits the fan situations.

As the saying goes, there are more ways to skin a <please insert name of an animal other than a cat, because Mr. Jynx is giving me the death stare while I’m writing this> and even more ways to use a pleasure rubber when the shit hits the fan. Yes, you’ve nailed it – today’s article will be about that one item that flushes out first-daters, being the embodiment of unbridled passion, lost nights, and broken hearts  – the condom.

With a history that spans at least one millennium, this STD prevention is, in some parts of the globe, standard equipment for infantry and other military branches. Did you know that during the Juno beach landing of 1944 US soldiers used natural rubber condoms to prevent sand and enter seeping into their weapons? Yes, it’s quite an ingenious trick which kind of proves to us that even an object wildly associated with bouncy-bouncy can have many uses, some of them even outside the bedroom.

Anyway, ever since writing that piece on survival uses of chapstick, I’ve been messing around the Internet searching for even more ‘odd’ objects that have a great SHTF potential. Of course, I could’ve gone with anything like bobby pins, household bleach, zip ties or whatever, but yours faithfully seemed to be more drawn to the wondrous world of bedroom games and ear-ripping onomatopoeia rather than shed-ware.

So, without further ado, here are 17 great ways of using pleasure rubbers in a shit hits the fan situation.

  1. Water carrier

Remember when we were kids, and we used to buy rubbers by the dozen only to use them as water balloons? Well, wouldn’t you know it, condoms can double up as water carriers in case of an emergency. And if you’re now wondering just how much water a condom can hold, let me clear that up for you – most of the ‘regular’ fit types can carry up to a gallon of water or even more.

If you’re looking to enhance your B.O.B with additional water-carrying items, you should consider throwing in a pack of ginormous condoms. Word of warning though – don’t rely too much on condoms when it comes to storing water. Making do with one on an emergency is okay, but in the long run, you may get off with a very bad taste in your mouth after drinking water (that would be the lubricant or the anesthetic, depending on the brand).

  1. Open wound management

Bandages may be hard to come by during an emergency (happens all that time). That’s why you need to be ready to improvise. Though odd, carrying a condom or two in the first-kit may be more beneficial than you realize.

If you run out of sterile gauze or pads, you can tape a condom over the cleaned and debrided wound. This acts as a water sealant and as a barrier for bugs, dirt, or anything in between. In case of light luxation, you may be able to use a condom as an icepack (just fill the thing with ice or ice-cold water and apply on the affected area).

  1. Food storage

Yikes! Condoms used as plastic bags for food storage! What has the world come to? Actually, it’s a far better idea to store food in such a container, since condoms do a great job at keeping moisture away.

More than that, because most respectable condom manufacturers add a trace amount of disinfectant inside the rubber, those bad boys can also whack germs away apart from keeping moisture away. Remember when we were kids and used to think that milk-filled rubber gloves are udders? Use your imagination on this one.

  1. Sterile gloves

Any wound management protocol dictates that any nick, cut or open wound should never be touched without sterile gloves. Sure, that’s true in a world with ample medical supplies, but may become something of luxury during an SHTF situation. If you run of gloves or, worse, you sterilize medical supplies have gone bad; you can pull a condom over your hand and use them as rubber gloves. Of course, it’s trickier to worth with stuff that has no fingers, but then again, who cares?

  1. Corking bottles

I’m the kind of person that always loses bottle caps. Yes, I know it’s frustrating, and in most cases, those darn caps disappear as if wished away by a trickster or something. Don’t panic! If you have a condom within reach, you can use it to cover the opening of a container.

I wouldn’t use on fizzy drink, because the surface is not good enough to prevent the gas from getting out. In case you were wondering, yes, I did, in fact, used an open condom to cover a milk bottle, which I later placed in the fridge. I imagine my wife was not too pleased to discover a pleasure rubber stuck in the bottle when she made breakfast.

  1. Fire-starter

There are always plenty of ways to start a fire, but it all depends on what kind of tinder or fuel you’re using. If you don’t have char cloth or whatever, you can always rip open a condom pack and use it as a fire-starter. Be careful about lighting it though – it’s going to get up in flames really fast so keep a safe distance to prevent breathing in those toxic fumes.


  1. Water-proofing gadgets

The rain in Spain may, indeed, stay mainly on the planes, but out here it tends to knock out everything that’s electronic in nature. I had to pay a whopping $1,000 for two new phones because of the rain- yes, I don’t always carry an umbrella or raincoat.

Anyway, if you’re caught in the rain and don’t have anything on hand to protect your smartphone or tablet, you can use a condom to create a water-repellent barrier around the device. Just make sure you tighten the other end of the condom. Might be a good idea to keep the case on, as many smartphones have jagged edges which can punch holes in the condom.

  1. Slingshot

If you’re out hunting for small game or just target practice, you may be able to use a condom to fashion a slingshot. All you have to do is to find a y-shaped piece of wood. Tie both ends of the condom, put some padding in the middle, and that’s basically it. Good huntin’!


  1. Tourniquet

Although the tourniquet should not be used outside the hospital or by people who have minimal medical training, some cases call for drastic measures. If you’re dealing with an arterial bleeder, you will need more than one pressure point to control the bleeding. Condoms are great for this job – since the outer surface is dry, you can be sure that the thing won’t slip when you’re tying it around a wound.


  1. Weather-proofing matches

Saw a movie once about two Canadian soldiers fighting in the mud-filled trenches of Passchendaele who were having a chat on crucial field-survival techniques. While the first one argued that keeping you gun dry or having a full canteen are the most important things to consider in a survival situation, the other said that keeping your matches dry is much more essential (having something to light a cig and soothe your nerves before the big push).

War aside, the weather-proofed match can take quite a beating, but in some situations (dropping the box in a river or stream), not even goodwill can make those matches come back to life. This is where the condom comes in – before setting out, place your matchbox inside a condom to add an extra water-proof layer. Of course, you can do the same for other fire-starting gadgets the tinderbox, lighter, and emergency candles.

  1. Flotation device

If you ever find yourself floating on the ocean or any body of water for that matter, you can always blow up a condom and use it as life preserver or vest. Keep in mind that condoms can usually hold one or two gallons of water, which means that they tend to displace the same volume of liquid.

  1. Trash bag


Whenever in doubt, use a condom. In case you don’t have anything on hand to dispose of trash, pop open a condom and use it as a garbage bag. Sure, it won’t look pretty, but at least it gets the job done.

  1. Opening jars

Have you ever heard about the expression “mom-sealed jars”? Those aren’t your regular sealed jars, but the doing of someone whose aim was for the jar to stay that way forever. Yes, my mom always had a fiendish delight in seeing me getting read in the face when I tried to open one of her canning jars. Fortunately, there’s a way to breaking the seal without using torch blowers, saws or hammers – wrapping a condom around the lid. That will give you more grip than usual.

  1. Footcare

I could never wear a new pair of shoes without ending up with tons of blisters on the soles. And, apparently, I’m not the only having this problem. Now, if you’re just like me when it comes to new shoes, I would advise placing a condom on each foot before trying them on. This will minimize friction, thus allowing your foot to get used to the new shoes. Try this one for size!


  1. Hand care during woodworking

Doing a little bit of carpentry in your spare time is great. Except for those damned splinters that somehow end up in your fingers. Fortunately, there’s a great workaround for that and, yes, it does not involve wearing padded gloves – wrapping condoms over the fingers holding the wood. I know it looks silly, but don’t judge it before you try it.

  1. Keeping away peeping Toms and animals

I shit you not when I say that those things can really leave a mark if you know how to throw them. Having a hunting cabin means I’m accustomed to dealing with the regular scavenger bear and other two-legged beasts. In case of bears, I like to fill a condom with water and to throw it as close to the critter as possible (don’t hit it though, because this will surely prompt an attack). You can always do the same for people hanging around your property or for pulling a prank on a family member.

  1. Defensive weapon

There’s nothing more manly than that feeling you get when holding or making a weapon. If you find yourself in a close encounter situation, you can always defend yourself using a condom filled with sand, dirt, rubble, small rock or anything you found nearby. Sure, it would awfully silly to smack someone over the yapper with pink condom stuffed with sand, but a man’s got to do what a man’s got to do to protect himself.

That’s it for my killer list of how to use a condom in a survival-type situation. Thought of any other uses for a condom in SHTF case? Let me know in the comments section.

Remember when we were kids, and we used to buy rubbers by the dozen only to use them as water balloons? Well, wouldn’t you know it, condoms can double up

Any SHTF story begins like this: “so, there I was, once upon a time (in December), in the wild, no water, no food, and with wolves on my ass.” Well, not exactly like that, but you get the picture. What I meant to say was that in every survival-type situation, water becomes denominator. And for good reasons – you need water for digestion, heat regulation, breathing, living, stuff like that.

Today, I’m going to hit you with my very best FUBAR story – how I converted my heater and toilet into open bars. See, when you’re at home, in the city, you fail to realize just how important water is. Sure, tune on the tap, and, voila, you have water. The nasty part comes soon after there’s no more water coming from the taps and you have no idea what to do next. Keep calm, my friend! Water can be siphoned from any area of the house, and I’m going to show you how I did it. Let’s start with the heater first.

Sucking Water out of the Heater, Dracula Style

“Listen to them (water heaters). They’re the children of the night”, and what music they make when you plug a hose in them to suck out that water. Backtracking a bit, a couple of months ago, there was a power outage in Fresno. A big one at that – must have at least 2 days, if not more. Anyway, I was at home, thinking about going out to buy a couple of stuff for my household emergency kit.

Ironically, we’ve just the last drop of bottled water to prepare formula for the tyke (bundle of joy that little monster is). I need to say that some time ago, at father-in-law’s bequest, I swapped the old electrical water pump for a brand-new, computer-controlled one. Yes, I know it’s the stupidest thing a prepper can do, but, hey, it’s hard to talk your way out of the wishes of a retired Marine.

So, the power goes out. Naturally, I went for the breakers. Nothing! Tried everything I could think of but to no avail. Soon enough, I came to realize that I didn’t have a drop of water left in the house. Okay, so what do I do? And then it hit me – I recalled reading in a book or something about using the water heater’s contents to augment my non-existing water sources.

So, after some careful deliberation, I grabbed my toolbox, a hose, and a bucket and got to work. Here’s what I did. One short disclaimer though: my heater is electric. This means that the things I’m about to show may not apply to you if it’s running on gas or an older model.

  1. Turn off the heater

You can’t just siphon water from the thing while it’s still running. For once, the thing has a lot of fail safeties in place to prevent leakages. And two – the water inside has around 104 degrees Fahrenheit, which means that you’ll wind up with a nasty second-degree burn if you try anything. What I did was to unplug the thing completely (could still have had some juice in the system, so I took no chances) and let it be for the next 12 hours.

Naturally, I had to make do without the water from the heater. I’ll tell you in a sec, what I did in the meantime. While searching online for my water heater model, I’ve discovered, much to my amusement, that the damned thing had a sort of blanket around it to help keep the water hot. If you want the water inside to cool off faster, I would advise removing the heater’s “coat.” This will cut back on the cooking time by at least a couple of hours, if not more.

Now, in case you have a propane water heater, don’t forget to close the gas intake valve before cutting the electrical power. It should be somewhere at the bottom of the heater. Best thing to do would be to read the heater’s manual for more info. Same thing as before – allow the heater to cool down before attempting to siphon the water inside.

2. Figuring out where the drain valve is

Okay, after allowing the heater to cool down, next on the list is to identify the drain valve. In my case, it was way in the back (had to move the water heater to gain access to it; hard to since the support was nailed to the floor). Most heater models have plastic drain valves. However, some of them have metallic taps. Whatever the case may be, rotate the heater, until the valve’s facing you. If your heater is on a rack just like mine is, don’t take it down. The slope will allow the water to drain faster.

3. The old hose-and-bucket switcheroo

Take a hose (I’ve used an old sprinkler hose which I was keeping in the shed) and attach it to the drain valve. Place the other end in an empty and clean bucket. Don’t forget that some of this water will be used for stuff like cooking, washing, and drinking.

So, storing it in a clean container is a must. One thinks to keep in mind – water heaters are not that great at water filtration as other appliances. You may have to sterilize the water before drinking it. There are plenty of ways to do that: boiling, distillation, chlorination, tossing in a couple of water purification tablets. The choice is up to you. I, for one, boiled the living hell out of that water before I poured it into clean bottles.

4. Open the valve and let it rain!

Before attempting anything, open a sink faucet anywhere in the house but the place where your heater is. Once you’ve placed the hose inside the bucket, open the drain valve halfway. When the water’s starting to come out of the hose, you can fully open the valve. Keep an eye out on that bucket because it’s going to fill up pretty fast.

Be sure to change buckets once the hose starts to resurface. You can store the water from the heater in the bathtub, collapsible water carrier or inflatable kiddie pool. On average, there should be at least 50 gallons of water inside the heater at all times. Just don’t let that water go to waste. Once you’ve siphoned every last drop of water from the thingamajig, don’t forget to close the tap.

Finding even more water around the house

Do keep in mind that the heater is not the only emergency water source around the house. Even though the pump may be out of commission, there’s still water in the pipes. The quickest way to get some extra water would be to find a low-lying outlet like the one connecting the toilet tank to the pipes and to remove the part that goes into the tank.

Get a bucket or a plastic bowl and put the disconnected pipe inside. Gravity will do its magic, and the remaining pipe water will slowly appear in you basic. Of course, there are always at least 2 gallons of water inside the water tanks which can be used for stuff like washing dishes or cleaning.

Just remember that neither the water inside the heater nor that drained from the toilet tank or pipes is entirely safe to drink. As always, if it’s intended for long-term use, although I do not recommend it, use one or more water purification methods to remove harmful bacteria.

This concludes my mission with this article. If you have anything to share about it, please feel free to comment or send us an email. Have a good one.

So, the power goes out. No water! Tried everything I could think of but to no avail. Soon enough, I came to realize that I didn’t have a drop of

There’s a reason why each shopping cart contains at least a bottle of bleach – this stuff’s good for a lot of odd jobs around the house, and some of them don’t have anything to do with cleaning. I being a computer geek have always kept an ample supply of bleach because it works wonders on yellow computer cases.

Anyway, ever since it became commercially available, bleach has been held in high regards, especially by those who had a rough time cleaning nearly-impossible to remove stains and for keeping germs away. In it’s watered down form, bleach can also be used as a room freshener and for giving shine to grandmamma’s white porcelain collection.

Beyond the mere household, bleach can also be successfully employed in survival-type situations. Hence today’s piece which will deal in the many uses and faces of survival bleach, this Jack-of-all-trades of the pantry.

Because I had time to look up more stuff while doing research on my pleasure rubber in SHTF article, I’ve somehow managed to stumble upon a treasure trove of info about the over glorified Clorox bleach. So, fellow preppers, prepare yourselves and feast your eye on the wonders of bleach in just about any SHTF situation.

  1. General sterilization

Of course, one would be very inconsiderate if not stating, well, the obvious – bleach is the ultimate germ buster, being successfully employed in virtually every cleaning job. Grime? No problem! Scale? Who cares? Smears? I have 99 problems, but Clorox makes all of them go away. The stuff is very handy for disinfecting tools used in minor surgery (a pair of pickup scissors or needle with surgical thread) when you don’t have other means of removing the germs. If you water it down a little, you can also remove stain and bacteria from small objects.

For instance, a solution containing one-part Clorox and three parts water may be used to clean and sterilize LED displays (always water down the bleach before using it). My grandma had the habit of spraying all the rugs and upholstery with a diluted bleach solution.

Apparently, this is the best way to remove bacteria, revive colors, and prevent warping. If you’re a fan of second-hand shopping, the above-mentioned bleach mix will help you get rid of lingering germs, while removing that old, musty smell that tends to follow every object bought from these sorts of establishments.

If you have a kid on the way, you may use spraying bleach to disinfect every item the kid may come in contact with – cradle, toys, clothes.

In the field, it may be possible to use trace amounts of chlorine bleach to purify water. Sure, it won’t have the same taste, but at least you won’t come down with dysentery, enterocolitis or any other tummy diseases.

Pet owners can use spray-based chlorine to remove animal smells from the furniture. I being the proud owner of two cats (a boy and a girl), I found relief in the fact that bleach’s able to remove that nasty odor tomcats tend to leave behind when establishing boundaries.

  1. Crafting an anchor

Though the idea of becoming adrift is akin to pure dread, there’s no reason why you can’t anchor down your raft if you have a bottle of bleach nearby. If the situation calls for immediate action, use the remaining bleach to sterilize your gear and water supplies, and salvage the bottle.

Wrap paracords or any dental floss around the bottle’s neck and fill it with anything heavy (concrete, sand, tiny rocks). Congrats! You’ve just made yourself an anchor worthy of any ship on its maiden voyage.

  1. Cleaning your veggies and fruits

Water’s the best way to clean fruits and veggies, isn’t that right? In most cases, yes, but there are some cases when using just purified water just won’t cut. Enters bleach, a marvelous disinfectant that can be used in case of an emergency to clean your veggies and fruits. Just be sure to use a watered-down mix. Otherwise, you will end up with bleach-soaked food, a thing which does not agree with your esophagus and stomach.

By the way – be very careful around the stuff, because the thing can burn through your skin like acid. In case you accidentally spilled some on your hands, or other parts of the body (I don’t judge) go and wash the area with plenty of soap and lukewarm water. As for the drinking part, don’t try to induce vomiting. Instead, dial CDC’s accidental poisoning hotline and await further instructions. In the meantime, drink water or a glass of milk. You should stop in case you’re experiencing convulsions or other changes.

  1. Weed-whacking

Without a doubt, every prepper’s turned gardener waking nightmare is seeing his crops wilting or, worse, eaten away by pests or overtaken by weed. Sure, you can try out all kind of artificial weed-whackers and whatnots, but you’ll probably end up poisoning the soil and making bad veggies.

A great and safe way of getting rid of pests and weeds is to spray your plants with a mixture of water and chlorine bleach. Like always, the recipe calls for one-part chlorine bleach and three parts water. Cover your garden using a hose with a fine mist. For the best results, you should do this at least once a week. Be careful about weed-whacking the wrong kind of weeds (see my article on healing herbs and weeds that grow around the house).

  1. Anti-rad countermeasure

Although it’s highly unlikely that we would have to deal with a nuclear detonation any time soon, it’s good to know that household bleach can be used for decontamination. Hypothetically speaking, if you find yourself stranded in an area with high radiation, take off your clothes and soak them in a tub filled with water and chlorine bleach.

As for body decon, wash all body parts with water and soap first, then used a watered-down bleach solution to rinse your body. Be careful when preparing the mix – for body decon, it should be one unit of bleach to 100 units of purified water.

  1. Self-defense

Pray it won’t come it, but when the spam hits the ham, a bottle of chlorine makes a great weapon of self-defense and distractionary device. If your opponent gains ground, uncork a Clorox bottle and toss it in his face. The results won’t be pretty, I guarantee that, but saving your can is sometimes more important than thinking about the interaction between skin and bleach.

  1. Outliving a contagion

Hold on to your britches there, because I wasn’t referring to the next Black Plague or Ebola. Even the flu season is considered an outbreak, and it should not be taken lightly. One way to purify the air is by bleach and water.

Hygiene is very important but becomes crucial when dealing with a contagion. To minimize exposure to the virus, make a 50-50 bleach and water mix. Pour it inside an empty and clean spray. Use a fine mist on things like clothes, upholstery, pet beds, bathroom tiles or any place that may hoard bacteria and deadly viruses.

  1. Getting rid of mold and mildew

Probably the most annoying part of being a homeowner is finding ways of removing mold and mildew from various objects. Since my son has a slight allergy to mold, I and my wife always try our best to removing as much as the stuff as possible.

One of its nesting places are the gaps between bathroom tiles (yeah, I real back-buster when it comes to spring cleaning). It is possible to hack away any mold and mildew from your home by mixing bleach and water in a bucket. Take a clean rag, soak it in the mix, and wipe. Not only will the mold come off on its own but it takes less scrubbing compared to using special cleaning supplies.

  1. Removing grime and dirt from trashcans

As you know, in case of an emergency, trashcans, especially the big ones, can be converted into portable water carriers. Still, that they are somewhat challenging considering the amount of grime, dirt, and sludge festering at the bottom. A quick way of removing that filth in a sinch is by using bleach in addition to detergent. Prepare a 50-50 bleach mixture and add some detergent. Don’t forget to wear protective gloves while cleaning the trashcan. Word of warning – while preparing the mix, fumes might emerge from inside the container.

Don’t breathe in those fumes as they are highly toxic. If you do, immediately stop what you’re doing, wash your face with plenty of water, and wipe with a clean cloth. You can try to flush out any lingering bleach from your nostrils with blood serum (you can find those bottles in any drug store or pharmacy, and they’re perfectly over-the-counter).

Fill up a small syringe with blood serum, tilt your head a bit, and slowly inject the stuff into your nostrils. Don’t breathe in the stuff!  Blow your nose in the sink and rinse with plenty of water.

  1. Field-sanitization of food plates and eating utensils

Just because one finds himself in the middle of shit hits the fan situation, it doesn’t mean that one should disregard basic hygiene rules and eat from whatever plate, no matter how dirty it is. If you were planning on adding one or more items to your B.O.B, my advice to you is to toss in a small bottle of Clorox. Combined with purified water, bleach can be used to clean and sterilize everything from plastic plates to cutlery.

I myself like to use the stuff in order to clean and remove any grime from my portable stove. The mix also works wonders on other objects used for cooking like cast-iron pots, stoves, ovens, and knives. Careful about using too much bleach on your chopping implements as the substance is known to reduce the life of stainless steel blades.

That about wraps it on ingenious ways to use bleach in an SHTF situation. Instead of a conclusion, I will leave you with a question: to bleach or not to bleach? As always, if you figure out another great way of using this stuff in a survival-type situation, don’t be shy and hit the comment section.

There’s a reason why each shopping cart contains at least a bottle of bleach – this stuff’s good for a lot of odd jobs around the house, and some of

Red raspberry leaf tea is especially popular due to its possible benefits for pregnant women. And not only.

Botanical Name: Rubus idaeus, Rubus strigosus

Family: Rosaceae

Other Common Names: Red raspberry, European raspberry, American raspberry

Parts Used: Leaf, berry, twigs, and roots (less common)

Energetics: Dry

Thermal Properties: Cool

Actions: Astringent, nutritive, tonic

Taste: Sour, astringent

Plant Uses: Uterine tonic, mineral concentrator, decreases PMS symptoms, reduces blood sugar, reduces high blood pressure, high in antioxidants and bioflavonoids, used as a mouthwash for gum health

Plant Preparations: Herbal infusion, tea, food (fresh, juice, dried), tincture, pills, herbal vinegar

Toxicities/Warnings: Raspberry is generally regarded as safe. Red raspberry leaf is one of the safest of all the uterine/pregnancy tonic herbs. Some sources claim that raspberry leaf can start uterine contractions, but this action is under scientific debate.

Introduction

Red raspberry is a beautiful perennial herb that is both food and medicine—worth having in every garden. While many people’s preferred method of using raspberry leaf is in a nourishing herbal infusion, this herb lends itself well to teas, tinctures, and even smoking blends. The leaves of this herb are quite prolific and are well suited to forested settings and the shady parts of the home garden. Another gift of the raspberry plant is the ease of its own reproduction (its spreads itself around your garden easily). It should be no surprise that this is one of the foremost herbs related to human reproduction systems, as well!

Red raspberry leaves

Raspberry has been used throughout the world, dating back to Palaeolithic times. Interestingly, historical data can be found that almost every part of this plant has been used for either food or medicine. Raspberry was used by many Native American tribes for toothaches (Cherokee), as an eyewash (Chippewa), and for kidney issues (Iroquois).

Other historical uses for raspberry include as a mouthwash for canker sores and gingivitis and, in Tibetan medicine, as a tea for emotional disturbances and exhaustion. Even the fruit, infused in vinegar, has been used medicinally for sore throats and coughs. By the European Middle Ages, raspberry became well known as a women’s tonic and was regularly used during the childbearing years.

The common thread connecting raspberry to these conditions, through history, has been its tonifying actions in the body.

In modern times, red raspberry leaf is one of the most widely used herbs for women of childbearing age.

Its reputation as a women’s herb is well founded, with a long history of usage in treating everything from heavy bleeding during menstruation to easing and assisting with childbirth and postpartum recovery.

While raspberry is commonly used by women, this is an herb that is valuable to men and children as well, due to its extremely high nutritional content. It boasts an array of vitamins and minerals such as iron, niacin, and magnesium. With its agreeable flavor, red raspberry leaf is commonly added to tea blends.

Red raspberry’s scientific name, Rubus idaeus,comes from the Latin word rubus meaning red and the species name ideaus,whichrefers to its occurrence on Mount Ida, near Troy in northwest Turkey.

Benefits

Red raspberry

L

Uterine Tonic: Raspberry leaf tones the uterus and muscles of the pelvic region, thus assisting in postpartum recovery. Its astringent nature also helps to minimize bleeding during menstruation. This effect is thought to be due to the active principle fragrine.

Highly Nutritive: Build up and nourish your body with this rich source of nutrients.

Eases Morning Sickness: This may be due to the astringent properties of the Rubus genus.

Eases Childbirth: Can reduce pain during labor and afterbirth by increasing blood flow to the uterus, thus increasing uterine efficiency.

Galactagogue: Assists in the production of breast milk.

Lower Blood Sugar Levels: Raspberry leaves can assist in blood sugar management for diabetics.

Soothing Mouthwash: Often used for a variety of oral inflammations.

Fruit

  • Heart Health: Improve heart health by improving cholesterol levels, thus reducing high blood pressure.
  • Diabetic Health: Helps to control blood sugar and reduces vascular inflammation in patients with pre-diabetes.

Medicinal Properties

Throughout history, red raspberry has been associated with pregnancy and childbirth. It nourishes and builds up a woman’s body as she takes on the epic task of growing a new life. For many people, morning sickness can also be managed with raspberry leaf infusions or tinctures. As childbirth draws near, raspberry leaf helps to strengthen the uterus and pelvic muscles. This lessens the mother’s pain and helps to facilitate an easier birth.

The astringent powers of the leaf also help to minimize bleeding. After the baby is born, raspberry leaf can continue to nourish the mother’s body and build her back up. It also helps to stimulate milk for the infant.

But let’s not make the mistake of thinking that red raspberry is only for mothers. Raspberry leaf is useful for men and women of all ages as a nutritive. It is also useful for those with heart disease or diabetes.

Nutritional Properties

Red raspberry leaves are a true nutrient herb, high in fiber; flavonoids; vitamins A, C, E; and several minerals (calcium, magnesium, manganese, iron, and potassium). Further, these nutrients are in forms that are readily absorbed by our bodies.

It’s good to know that red raspberry leaf is high in aluminum, as well. Aluminum is not a nutrient, and is actually quite dangerous to the body. However, aluminum from plants is very poorly absorbed. Virtually all of it will be expelled from the body.

Preparations and Typical Dosing 

One of the best ways to consume nutritive herbs is in a nourishing herbal infusion that is allowed to cool completely before straining. Mason jars and french presses are useful vessels for making these.

What is the difference between a regular herbal infusion and a nourishing herbal infusion? A nourishing herbal infusion is similar to a standard infusion (such as is used to make tea), but it is steeped much longer and uses a larger amount of the herb, thus creating a more medicinally potent beverage.

This long steep time is vitally important for extracting the minerals from our herbs. It has been found that a cup of nettle tea has 5-10 mg of calcium, but a nourishing herbal infusion of nettle can contain between 200-250 mg of calcium.

While a standard infusion is a sweet and beneficial way to consume herbs, a nourishing herbal infusion is the best choice when you want to extract as much benefit from your plants as possible.

Nourishing Herbal Infusion

Cover one once of dried raspberry leaf with a quart of boiling water. Allow it to steep for 4-8 hours. Drink 1-3 cups daily. Refrigerate any unused portion, and it will stay good for up to 3 days.Y

Tea

Measure out 1 teaspoon of crushed raspberry leaves into an 8 ounce glass. Cover with hot water and steep for at least 5 minutes. Longer is better! Drink 1-3 cups daily.

Herbal Vinegar

Place dried raspberry leaves into a glass jar and cover with vinegar at a weight-to-volume ratio of 1:5. This means that for every kilogram of herb, you would use 5 liters of vinegar. (Or, for a more manageable amount, that’s 200 grams of herb to 1 liter of vinegar.)

Tincture

A raspberry leaf tincture can be created using a 1:5 ratio, as above, but this time using 40% alcohol instead of vinegar. A common dosage is 2-4 ml 3 times a day.

Uses for Animals

Similar to the way it’s used for humans, red raspberry leaf can be used during pregnancy and during labor. Farm animals greatly benefit from the consumption of raspberry leaf tea after birthing, both to assist in postpartum recovery and to support milk production.

Precaution/Dangers/Contraindications

Red raspberry leaf is generally regarded as safe. However, it can be drying to the body when taken excessively and over long periods of time. You can mix it with demulcent herbs, such as marshmallow, to counter this effect.

While red raspberry leaf has been used extensively during pregnancy, some recommend using it sparingly until the third trimester. Its estrogenic effects may be a concern, as well. However, neither concern has been proven a problem through research. Speak to your health care practitioner before consuming large quantities of this herb during pregnancy. Similarly, if you have a condition that is exacerbated by exposure to estrogen—such as certain cancers, endometriosis, or uterine fibrosis—you should seek professional advice.

Due to red raspberry leaf’s ability to lower blood sugar, diabetics should monitor their blood sugar carefully and watch for signs of hypoglycemia.

Plant ID

American red raspberry is a native deciduous perennial shrub that grows up to 2 meters tall. The stems are biennial, covered with small thorns, and bend easily. The leaves are pinnately compound with 3 to 5 leaflets, rarely lobed, with silver undersides. Leaf margins are highly serrated. Their taste is weakly astringent and bitter.

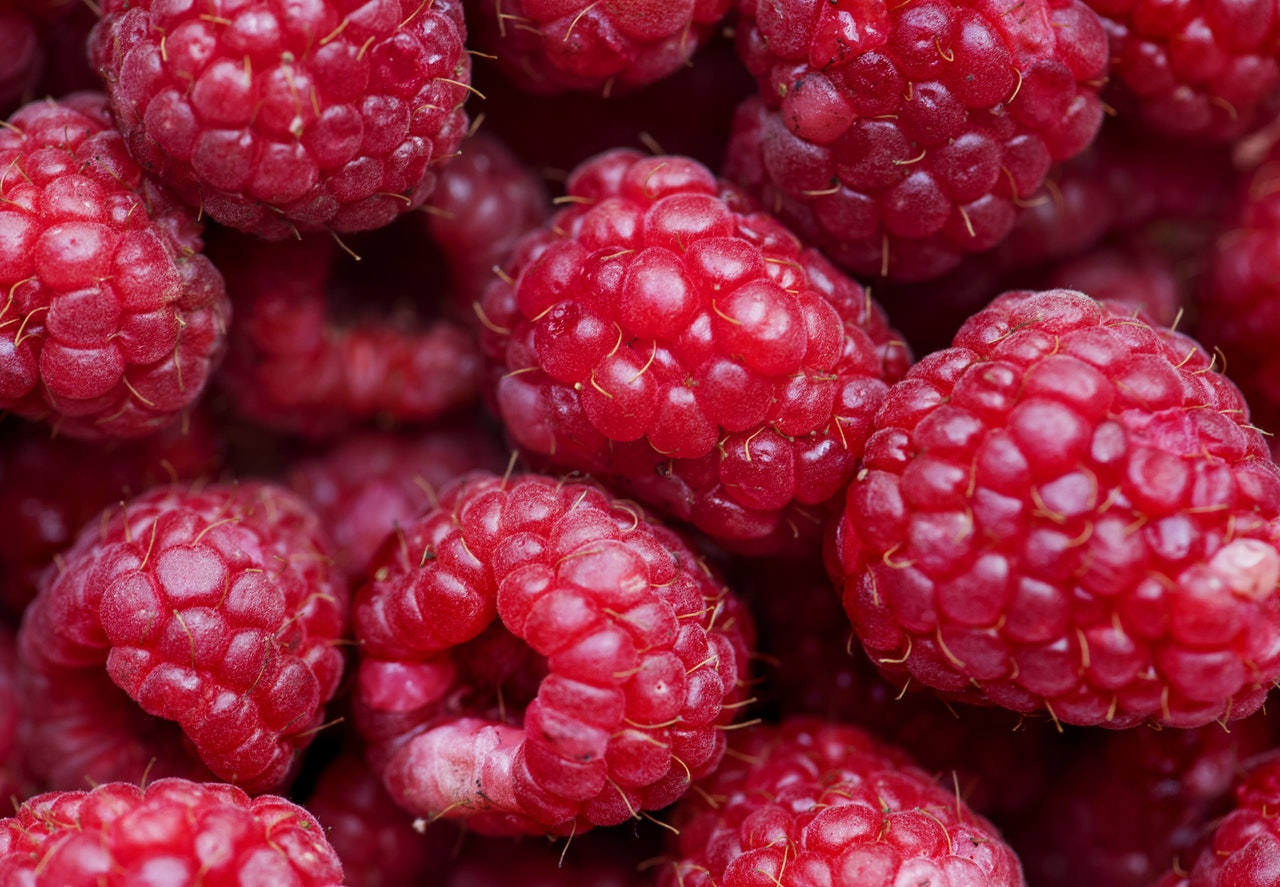
Raspberry flowers are white to greenish white and drooping. They can occur singly or in small, grape-like clusters. The fruits are red, rounded aggregates. They mature between July and September on second-year canes. Unlike other Rubus species, raspberries are hollow and thimble-like when picked.

Raspberries have no dangerous look-alikes. Still, you should always be sure that you have the right plant before using it for food or medicine.

Where It Grows and Where to Find It

Red raspberries are native to North America and to Northern Europe through Northwest Asia. Edible relatives can be found throughout the world. Raspberries prefer full sun, but can tolerate shade. They like a medium amount of water. You can find them in fields and pastures, on the edges of forests, and in vacant lots.

Propagation is best by vegetative or root cuttings. They do best in drained, loamy soils, and will thrive in high soil fertility with plenty of organic matter. They can spread rapidly, so give them plenty of room to spread!

How and When to Harvest

Raspberries can be harvested when red, juicy, and plump. They don’t store well, so freeze any that you don’t plan to eat within a few days.

The leaves can be harvested whenever they look vibrant, ideally before the plant flowers and fruits. Wash and pat the leaves dry, if needed. Then lay them out on a screen away from dust and direct sunlight. You can also tie the stems together and hang them to dry. Depending on humidity, the drying process should take 1 to 2 weeks. Ideally, the temperature for drying would be between 70°F and 100°F (21°-38°C)

The leaves are dry when they crumble easily. Store them in a glass container in a cool, dark location.Y

Red Raspberry: A Wonderful Gift

Red raspberry is a wonderful plant to have in your life or your yard. With its bountiful, delicious fruit, it’s sure to please your palate—but don’t stop there! Hidden within the leaves of the red raspberry is a powerhouse of nutrition to support the health of the whole family. In addition, when bodies need a bit of extra support in tonifying tissues or for women who are of childbearing age, raspberry leaf offers gentle, effective support for the female reproductive organs. What a gift!

Red raspberry leaf tea is especially popular due to its possible benefits for pregnant women. And not only. Botanical Name: Rubus idaeus, Rubus strigosus Family: Rosaceae Other Common Names: Red raspberry, European raspberry,

Winter is tough on your house. The temperature swings from below freezing to above freezing put great stress on all the elements of your house – both exterior and interior.

And if the power ever goes out – and you don’t have a backup heat source – a cold winter day can quickly freeze and burst your water pipes, causing great damage once they thaw out.


But with a few simple precautionary steps, this tragedy can be avoided.

Tasks to do before a cold spell arrives

Since you never know if you might lose power during the next cold snap to arrive, here are a few precautionary steps  you can take to ensure that  you don’t have damage to your water systems.

  • Before winter season comes, prep your pool and sprinkler system if you have them. Drain your supply lines and cover your pool as recommended for your area.
  • Take care of all your hoses. Drain, remove and store them in a safe place like your garage or shed.
  • Turn off the water to all external hose spigots and drain any water remaining in them. If your plumbing system is not set up to allow this, cover the hose spigots with insulating faucet covers to protect them from the cold.
  • Insulate all exposed pipes with pipe sleeves, heat tape or fiberglass. You will typically find exposed pipes under your house if you have a crawl space or under a mobile home. However, if you have pipes along outside walls in a cellar, these are also good candidates for getting covered. And if there are any pipes along outside walls in your living space, you should be sure those walls are insulated or they could be at risk of freezing too.

What to do during the cold snap

When you get news of a cold snap heading your way from your local weather station, there are several immediate steps you can take to ensure your plumbing system stays intact in case you lose power and heat. They include:

  • Keep all home access points closed to prevent loss of heat. This includes garage doors and crawlspace access panels. The more heat you can keep trapped in these areas, the longer it takes for the house to drop below freezing.
  • Keep all kitchen and bathroom doors and cabinet/sink doors open to allow as much heat as possible reach the walls where pipes are.
  • Let water trickle from several faucets in the house during the cold snap. As long as you have water pressure and can keep water moving through the plumbing system, it is less likely that it will freeze.
  • If you have a working heat system, try to keep the level above 55 degrees F. This will ensure that enough heat is penetrating into the walls to fight against the extreme cold.
  • If you think it is going to be a bad or extended cold spell, consider turning off your water at your main and draining your whole system. This is the closest to a foolproof system to ensure that you do not get damaged pipes. This step doesn’t need to be done right away but if you lose the ability to keep your home heated, you should consider it. For many houses, to shut the water off at the main, you need a special tool (a water shut off wrench) to turn the water off there.
  • If it is a very windy cold spell and you have extra insulated blankets, you can attach them to the side of the house that is getting bombarded by the wind. This is on the outside of the house, not the inside if there are pipes in the wall. If there are no pipes in the wall, attaching the blankets inside will cut down on some drafts that always seem to show up with a strong wind. And if you have them, place a Mylar thermal blanket between the wall and each blanket.

When the cold spell passes

Hopefully you passed through the cold spell without incident. If that is the case, just turn your water back on or turn off your trickling faucets and close all your cabinet doors.

If it is not the case and you found that you did have frozen pipes, here are a few steps you can do to recover as long as no pipes actually cracked.

  • Turn on your faucets and give the system time to flush itself. As water starts to move through the tiny cracks in the thawing ice, the thawing process will accelerate and eventually clear all the ice from the pipes.
  • If you have access to the frozen pipe, apply gentle heat – like from a hair dryer or small heater kept near the pipes. Do not use anything like a blow torch. The huge temperature difference could damage the pipe.

If you were unlucky enough to suffer a cracked pipe, turn your water system off and call a plumber to fix the problem. Or if you have the skills and can get the supplies, you can fix it yourself. Replacing a pipe is a relatively simple task.

Winter is tough on your house. The temperature swings from below freezing to above freezing put great stress on all the elements of your house – both exterior and interior. And

There are a lot of ways to eat food if the grid goes down, but almost without fail the best way is hot. Oh, sure you can swallow a lot if you are on the run. MRE’s were designed to be eaten cold. Canned food is edible right from the can, but I haven’t met a meal yet that didn’t taste better with a little doctoring. Maybe its some spices or cheese, but heating almost anything up makes it taste better. The warmer your meal is, especially in colder months, the better you feel when you are eating it. A warm MRE meal can actually taste great. OK, it can taste pretty good if you heat it up.

With the need for warm meals you are looking at some type of system for getting that food warmed up. We have discussed how if the grid goes down, how you might find yourself where there is no kitchen to cook your meals. Yes, you can use a fireplace, but what if you don’t have any wood? What if you want to keep your fire smaller to help avoid detection.

This is when knowing how to make a survival stove system can come in handy.There are hundreds of examples of stoves out there. I have a jet-boil, which isn’t really a stove, but I can boil water for soup or cook foods quickly with just a little gas. There is always the rocket stove if you have the time and wood available, but I just found a great tutorial for how to make a small alcohol stove out of two coke cans. If you can’t find two coke cans laying around somewhere you are hurting.

Alcohol stoves use denatured alcohol for fuel and are very common with ultralight backpackers because of the huge weight savings. You can pay a pretty high amount for these stoves, but that isn’t necessary if you have some time and a willingness to try your hand at creating something. These can be made simply with just a couple of tools you may already have and give you an excellent source for cooking or even heat in a pinch.

Alcohol stoves use denatured alcohol for fuel and are very common with ultralight backpackers because of the huge weight savings. You can pay a pretty high amount for these stoves,

One common concern for prepping is how you will be able to heat up and cook any food if you don’t have the nice stainless steel range to cook on? You might have a freezer full of the best steaks but they are awful tough eatin (yes that is the correct spelling) if they aren’t cooked to a nice medium rare at a minimum. A great Prep to either have or know how to make is a Rocket Stove.

Rocket Stoves were developed by a man named Sam Baldwin back in the early 80’s. What makes them so great is that the Rocket Stove concept achieves efficient combustion of whatever you are burning (normally small pieces of wood) at a really high temperature. It can do this because the unique design of the Rocket Stove allows a good air draft into the fire and this ensures you have a near complete combustion of the fuel and associated gases. Because of its simple year ingenious design, it has been used for cooking purposes in many third-world locales (notably Rwandan refugee camps) as well as for space and water heating.

LDSPrepper has taken this idea and adapted it to 5 simple cans most of us would either have laying around or could easily get our hands on. Using the steps in this video below you can actually build a rocket stove yourself with items lying around your house. Check out his video below.

One common concern for prepping is how you will be able to heat up and cook any food if you don’t have the nice stainless steel range to cook on?

A lot of people plan to bug out if the SHTF with all of their survival gear stowed in their vehicle or pulled in a trailer. What if you have to turn around quickly? Do you know how to swing that trailer around so that you don’t get stuck? Can you execute a turn on a blocked road so that you aren’t trapped in an ambush?

This is what I was thinking as I watched my neighbor this weekend. I was mowing our yard which is my favorite twice weekly activity this time of year (not) and my neighbor was working in his yard. He had hauled a little potting soil for some plants he was planting in a small trailer attached to the back of his SUV. The trailer was one of the less substantial types, perfectly suited for small jobs like hauling a washer and dryer but as he finished I watched him drive up the street to turn around. He pulled into a driveway and attempted the first backup. It was obvious he hadn’t given himself enough room or the trailer wasn’t straight enough and it quickly was wedged at a 90 degree angle to his car.

I watched him attempt this a couple of additional times and then finally, he stopped the car, got out and unhitched the trailer. It was when he unhitched the trailer that he realized that he had stopped on a hill and he quickly started jogging down the hill all the while trying to navigate his trailer into a position where he could back up his SUV, reattach and go back home.

What if this was you and you had hundreds, maybe thousands of pounds of stored food, ammunition, tarps, generators and survival gear piled onto the trailer. Could you turn this around without getting out of your car? How many attempts would you have to make to get the trailer and your vehicle pointed in the right direction? Could you do this under duress?

Backing up a trailer isn’t hard, but it does take practice. I like to lump this into the same category as sweating pipe. The concept itself is simple, but unless you know how to finesse the materials you will probably screw it up a couple of times. This is the main reason why I go ahead and call a plumber if I decide to get my handy-man hat on and mess around with anything on the back side of the wall in our bathroom or kitchen. If I ever build a new house I swear everything will be PEX.

Backing up a trailer is easier to do if you can see your trailer in my opinion, but that is probably because I don’t have any other experience. I do know that we have some professional truck drivers who follow this blog who are probably laughing right now and I am counting on for their comments below.

The Approach

Backing a trailer into a specific spot at a specific angle is mostly in the set-up. Like most things, preparation is key.

First things first: roll down your windows. Driver’s side and passenger’s, and it doesn’t matter if it is raining. If you have a passenger, it is best to kick them out before you even approach the actual boat launch, driveway, or campsite. You are probably going to want a spotter anyway, and they will either distract you or block your view if they stay in.

Forget about your rear view mirror, and don’t turn around and try to look out the back window. Chances are, you can’t see much over your trailer, and who cares what the front of that trailer is doing? You want to make sure your side mirrors are adjusted properly, because they are going to show you where the sides of your trailer are, allowing you to deduce what the back is doing. It may be more showy to do the big turn around and hug the back of the seat thing, but how much cooler to pull up and back that baby in without turning around? Appearances aside, it really is the proper way to do it. Proper mirror adjustment means when your rig is straight, your trailer is visible in about the inside third of your mirror. It is good to be able to see your trailer tires. This gives you a good view of where you are going and how you are doing.

Now you are almost ready to approach. For the sake of a consistent example, let’s say you are backing a camper into a campsite. It is coming up on your right-hand side. Stop short and get out of your truck. Go check for obvious obstacles that you will have to avoid. Don’t forget to look up. Even if you have a straight shot to the back of the site, will you clear all the tree branches? This sounds like retentive health and safety advice, but backing over a stray chunk of firewood or someone’s leftover wire roasting stick is going to be a rough start to your weekend. Try to make a mental map of where the picnic table is in relation to the fire pit and the back of the site. Pace off distances if you need to (you do know how wide your camper is, don’t you?). Have your passenger(s) stand near major obstacles so they can shout if you are too close. You may not always be able to see them, but your windows are already rolled down, right?

The Right Set-up

The moment of truth is at hand. If you do this next part wrong, it doesn’t matter much what you do after. Get it right, and you will look like a pro. It is the S-turn. You are in a forward gear with your campsite coming up on the right. Get that vehicle over to the right as far as you can without hitting something or rolling into the ditch and pull up alongside the entrance. How far along you go really depends on how long your rig is and what kind of hitch you have, but probably somewhere around when your truck bumper is coming up on the far end of the entrance, you want to swing out left. Don’t go all the way. Before you drive into the left side ditch, crank it back to the right. This will make the smaller angle between the truck and trailer be on the right-hand side. Stop with your truck somewhere around midway between road shoulders. Congratulations, your trailer is ready and begging to be backed into the sweet spot.

The Moment of Truth

The next part is where everyone gets nervous. People will offer “helpful” advice here, about how the steering wheel works in reverse now, but I’ve seen people start thinking everything in their vehicle works backwards and forget which pedal does what. So, take a deep breath and imagine you are a kid playing with toy trucks. You will probably need to make your turn angle a bit sharper, especially if you have a narrow entrance or a longer trailer. To accomplish this, turn your wheels as though you were going to steer to the left if you were going forward. Don’t turn it all the way. Put the truck in reverse, and let off the brake. Stay really calm at this point and constantly ask yourself “Is the right thing happening at this instant?” If the answer is yes, don’t change anything. As soon as the answer is “No,” stop. You aren’t going fast (I hope), and hopefully you didn’t choose a busy spot for your first attempts.

So, you are in reverse, with your wheels pointed left, causing your trailer to turn sharper. You won’t be able to keep that up for long before you fold your rig like a jack knife. It only takes a little distance to do what you need here. It is kind of like putting a crease in a piece of paper, where you only need that instant of pressure to kink it over. After that, you can lighten up and it will stay. So, after a couple feet (literally), start turning the wheel to the right. Think of following the trailer with the truck. My trainer always told me once I had the kink to “follow the trailer around.” Turning your wheel to the right will begin to straighten out the whole rig. I always think of it as “unsteering.” How soon you do this, and how sharply you turn depends on the relative sizes of everything. One of the biggest mistakes people make in reverse is over-correction. If the trailer starts going one way or the other, don’t crank the wheel all the way over. Unless you are in a really technical spot, needing to crank the wheel more than 180 degrees probably means you need to pull ahead and try again. Never shout when a whisper will do.

Words of Warning

Throughout this exercise, keep an eye on what the front of your truck is doing. Watch for ditches and obstacles. I once blew a steer tire on a set of stairs because I was too focused on the back end. This is another reason to back up like a man, using your mirrors, not wrapped around your seat trying to see out the back window.

Don’t be afraid of taking multiple runs to get into your spot. Obviously it is better to take a few runs and get it right than to hit something first shot. Some spots require multiple runs no matter how good you are. Also, don’t be afraid to put it in park, get out, and walk around to see what the back end is doing and how close you are to that fire pit. I did this constantly, even once I had some skill and confidence.

A word is necessary here about having someone “guide” you into a spot. Don’t. Having people to help is great, but give them specific jobs. Just like you have a limited perspective from the driver’s seat, they will have a limited perspective on what the far side of the trailer is doing. Tell your helper something like, “Stand so you can see my face in the side mirror of the truck and let me know if it looks like I’m going to hit the fire pit.” If they can’t see you, you can’t see them. Give them a specific signal that is verbal (your windows are still rolled down, right?) and visual. Inexperienced guides will usually run eagerly to the back of the trailer and start waving incomprehensibly while standing somewhere you can’t see and then yell after you’ve run over the picnic table.

Please practice this before you get to the boat launch with your new boat. Get your wife or your kids to come out and practice spotting you while you back up. How great will it be to pull up and have everyone know what to do? Don’t be that guy with the shiny new boat weaving and winding your way down the boat launch stressing everyone else out.

A lot of people plan to bug out if the SHTF with all of their survival gear stowed in their vehicle or pulled in a trailer. What if you have

Spring is in the air and with it comes yard work. For some we have already started planting our gardens, others are tending to their chickens and most have to start cutting the grass. I know you may hear the Home Depot song playing in your mind as you think of mulching and planting and sprucing up after winter’s snooze but I have already been cutting my grass and it is due again for another visit with the lawnmower.

As I started to think about getting out there and cutting the grass, I wondered if there would be a use for items like my trusty lawnmower when the grid goes down. Why? Because if you are like me, the last thing you are going to worry about is a nicely trimmed yard. Heck, we all might need to tear up the pretty green carpet to make way for additional garden capacity and if that happens, what could we do with that mower? Even if we didn’t have a grid-down emergency what other purposes could our mower serve?

You will need the following tools/parts:

Lawn Engine motor

The generator project will require a vertical shaft gas engine from a lawn mower. The typical lawn mower engine will be 3 to 5 horse power and will have a 7/8″ shaft, with a 3/16″ key way and a threaded hole in the bottom of the shaft. Most of these engines have either 3 or 4 bolts holding them down to the existing lawn mower base.

Alternator – A GM 10SI or 12SI style automotive alternator.

The alternator will fall into one of three categories:

A) External voltage regulator type.This type of alternator does not have an internal regulator and must have one connected externally to control the alternator field intensity and thus the output voltage and current of the alternator. The disadvantage in using this type of alternator is that connection is a bit more complicated and the regulator is an added component that must be mounted and connected properly. This type of alternator is typically less expensive than the other options shown below, but like the model with an internal regulator, it too requires an external on / off switch or the alternator and regulator pair can discharge batteries when it is not charging and the switch is left on.
B) Single wire connection type with internal regulator.The single wire connection type alternator automatically starts producing output power when the RPM of the input shaft reaches a minimum speed. And, when the RPM drops below a preset speed the output stops. A big advantage is that it does not require a switch to isolate the alternator from the battery source to keep the alternator from draining the battery when not in use. The disadvantage in using this type of alternator is that the alternator will start to charge the batteries as soon as the minimum speed is reached, and will place a load on the engine as soon as the minimum RPM is achieved. In some cases, you might need to throttle through this minimum RPM range to insure that the motor does not bog down at low RPM when the alternator begins to produce power. Another disadvantage is that these alternators are more expensive than other options, but it provides a very simple connection method.
C) Internal regulator type with external control switch.Another option is to use the type we used on our last project. This alternator has an internal voltage regulator but requires an external switch to start or stop power production. The advantage in using this model is that the alternator can be switched off while the motor is still running and power output stops. This aids in connecting and disconnecting batteries or other loads.
One note in the Single wire connection type with internal regulator:

We found that the single wire configuration is not ideal for this application. Because the lawn mower engine mentioned above doesn’t have much throttle adjustment, if a single wire configuration is used with a 2 1/2 inch pulley on the motor the alternator doesn’t kick in without manually moving the throttle butterfly to a higher setting and then releasing. This problem might be eliminated by using a 3″ pulley. However, a single wire configuration can be used on our last project using a horizontal shaft engine. The problem we have right now, is that we don’t have all the answers yet for this configuration. Feel free to experiment, but with the motor we used and the pulley we used, it wasn’t convent in that you had to reach under the carburetor to throttle up manually to start generation.

Electrical Wires – Think wire harness for your car battery


A positive and a negative car battery cable is needed, as well as an alternator connector and associated wires. The alternator wires are not needed if a single wire alternator with built in regulator is used.

A belt – An A Style Industrial Belt to be more precise

The V-Belt transfers power from the pulley (which will be mounted) on the motor to the pulley on the alternator. Various belt lengths can be used if your mounting system provides for several inches of belt length adjustment. Keep in mind that the belt length should be kept to a minimum to reduce belt slap and associated wear.

We have found that the Automotive V-belt used on a standard alternator is not compatible with the industrial “A” size belt that mates with all pulleys you will find for the motor. However, if you use an industrial “A” style V-belt, it will provide an exact fit for the motor and an “OK” fit for the alternator. Replacing the pulley on the alternator to match the pulley on the motor is an option (a more expensive option) but would be the ideal solution.

Cast Iron Pulley

The motor pulley needs to be high quality cast iron. The mass of a cast iron pulley tends to act as a flywheel, taking the place of the mass of the lawn mower blade. Remember that most lawn mower engines have a very light aluminum fly wheel and use the steel blade as part of the effective fly wheel mass. The added weight of the cast iron pulley (compared to the mass of an aluminum pulley) helps the engine idle smoothly and helps keep belt slap to a minimum.

Mounting Bracket

The mounting bracket is the most complicated part of the project. The great thing about the bracket is that it’s Universal in design and allows use of a wide variety of engine manufacturers and engine models.

It not only eliminates hours of time figuring out the bolt pattern of your motor, but also eliminates the trial and error guess work in finding a belt length that will work once the motor and alternator are mounted. Additionally, the bracket can be bolted down to a simple base of your own design and the rest of the work is done!

Detailed instructions on how to work on this project:

The first step is to remove the motor from the lawn mower base. Typically, there are 3 or 4 bolts holding the motor to the base, but before you remove them, you will need to remove the mower blade and the shaft coupler that holds the blade on the motor shaft. Getting the blade and the coupling off is a bit of a pain. Removing the blade is not nearly as difficult, but still requires a bit of ingenuity to figure out a way to “jam” the blade so it won’t rotate while you remove the bolt which holds it in place on the motor shaft.

We found that we had to use a “pulley puller”, to remove the shaft coupler after the mower blade was removed. A “pulley puller” which can be rented or purchased at most auto parts stores. Removing the coupler is difficult to impossible without use of this tool.

The next hassle will be in finding the required pulley. Our research indicated that nearly all the motors used in vertical shaft lawn mowers have a 7/8″ shaft, and a 3/16″ or 1/4″ key way. However, horizontal shaft motors under about 7 HP use a 3/4″ shaft. The 3/4″ pulleys can be found at most hardware stores, but the 7/8″ pulleys are impossible to find. What we had to do was to set up an account with a company that supplies Heating and Air Conditioning Systems, Motors, Blowers and Components to be able to order the correct pulleys.

Another catch is that a 3/16″ key way is not standard on cast iron pulleys. What we found was that a 1/4″ key way is the norm because most high horse power AC motors use a 1/4″ size key way. A pulley with a 3/16″ key way is not typically available in a 7/8″ shaft diameter configuration. It is possible to use a pulley with a 1/4″ key way on a motor that has a 3/16″ key way provided that the set screw is on top of the key on the motor shaft and NOT on the shaft itself. If close attention is paid to this detail the pulley will stay in place without vibrating or loosening.

The biggest problem is figuring out how to bolt everything together. Because each type of mower had different a base, we ended up concentrating on coming up with a universal base that just about any motor could fit on. Our base had to allow rotating the motor by about 30 degrees, and allow positioning the motor in any of the 90 degree quadrants. That allowed the motor to be in any position with clearance for the alternator and a method for hooking up the belt. We also wanted to allow the alternator position to be adjusted allowing for several belt sizes to be used. The bracket also has an integral belt adjustment slot which allows the alternator position to be adjusted, which also serves to tension the belt.

The lawn mower engine

The lawn mower we used had a 3.5 Horse power Briggs and Stratton 4 stroke gas engine. That particular model motor has a safety shut off lever on the lawn mower handle which has a cable attached to the motor, and the attached cable must be activated to disengage the motor shut off break and to allow spark to reach the spark plug. What we decided to do was to cut the cable off and deactivate the motor shut off feature. If your motor has this feature, you will need to spend some time looking at the cable and the levers on the motor to figure out a way to deactivate or preserve the feature. In either case the motor will not start unless something is done about the cable and levers.

We found that there was a small hole in one of the lever plates on the side of the engine, and after pulling the cable, a small nail can be inserted into the lever to keep the mechanism from retracting and shutting off the motor. Like I said, it will take a bit of time to figure out how your motor shut off mechanism works (if there is one installed on your motor).

Most of the lawn mower engines you will find have a 7/8″ shaft and a 3/16″ key way cut into the shaft. They also have a threaded hole in the bottom of the shaft.

Pulley Size and Type

The vertical shaft motor from this lawn mower would not throttle as high as the same horse power motor we used in the horizontal shaft generator project. That motor was from a lawn edger, and could be set to a higher maximum speed. After talking with some lawn mower experts, we were told that the throttle mechanism on the lawn mower has the maximum throttle set to be about 75% of the maximum butter fly valve position of the carburetor. We were told that the lawn mower manufacturers set the throttle mechanism that way so there is extra throttle capability for when the mower hits some heavy or wet grass. The motor could then self throttle to a higher setting if necessary, then throttle back to the pre set throttle setting.

The reason we mention all this is that the pulley size we used on the horizontal shaft motor project would not work on this project. In testing this motor with the throttle set as high as possible without modifying the carburetor, and using a 4 3/4″ pulley on the motor (similar size to the one on our other project), the motor would bog down and die with a 39 Amp load on the alternator. Without modifying the carburetor, we couldn’t keep the thing running when the load was switched in with the large size pulley.

We had excellent results with a 2 1/2″ pulley. It allowed the alternator to output voltage at even half or lower throttle settings at a slightly lower output current. So, with less than full demand, the motor speed could be reduced without killing the motor, and providing fuel savings.

Mounting the Motor and Alternator

Mounting all this stuff is the tricky part of this project. But to make things easy, we designed and manufactured a bracket to make the task simple.

The bracket is made from 1/8″ steel and has provisions for mounting the motor and alternator, and additional holes for mounting the plate to a base of your own design.

What we did for the base was cut two 2×4’s the length of the bracket, and another 2×4 as a cross brace to be installed under the bracket at the bottom of the long 2×4’s. Imagine the base as being an H. The two long pieces were installed so that the base was 4 inches in height, and the cross brace was installed on the two length wise 2×4’s at the bottom, and on it’s side so that it stood 2″ in height. That provided the necessary clearance for the belt and provided stabilization of the two side pieces. A further improvement would be to install two more short 2×4 at each end of the assembly to completely box in the rotating pulleys (for added safety).

We elected to mount the alternator in such a manor that it actually runs backwards. This simplifies the hook up and it still works. The fan still functions, but instead of pulling air through the back and exhausting through the front, the air flow direction is reversed. Also, the fan blades are not as efficient when running backwards so air flow is reduced slightly. But, remember that like in the other project, the alternator is mounted to a steel plate which also serves as a large heat sink. And from the two hour test run at 39 Amp output, the alternator case temperature was only 148 degrees (ambient temperature was 80 degrees). So, I guess what I’m saying is that it really doesn’t matter. These alternators normally spend most of their lives under the hood of cars stuck in traffic jams on hot days, and see temperatures much higher than this.

Now, getting back to the mounting issues: The lawn mower engine has a longer shaft than the alternator, and if the pulley is installed in the ideal location on the motor shaft the two pulleys do not align. So, what we found was that the alternator needs to be mounted flush on top of the bracket but the motor needs to be spaced 1″ above the mounting plate. This is easily carried out by using 1″ longer bolts, and 1″ long spacer tubes. Then the alignment of the pulleys is correct.

Wiring it up

The wiring depends on which alternator you choose. All three alternator types are shown.

Do not wire the alternator unless you are sure about what type you are using. If you make a mistake in the selection of the alternator or wiring diagram you run a very high risk of damaging your battery, electronic devices, or worse yet causing personal injury! Consult a parts professional for additional information!

This tip is intended for educational purposes only. No guarantees are expressed or implied as to the accuracy of information presented here! Consult with an automotive wiring expert before attempting to carry out any wiring.

If you are using an alternator that requires an external switch, you will need to turn off the switch prior to attempting to start the generator. If the switch is on, the generator will try to output voltage while you are pulling the starting cord on the motor. You will find that it will be nearly impossible to pull the cord! If the switch is off, then there is little to no resistance from the alternator. Once the motor is running, the switch can be set to the on position.


Spring is in the air and with it comes yard work. For some we have already started planting our gardens, others are tending to their chickens and most have to start cutting

Knowing how to build the perfect campfire is one of the main ingredients of a successful camping trip and of survival in general. The campfire is at the apex of any backwoods gatherings. You will most likely need it to prepare food, keep warm, ward off predators, and maybe even purify drinking water, as well as to just create that ambiance for the bringing people together. In case you have never built one before, or you are an old hand at it, everything can be a bit more involved than it appears on the surface. A “must have” skill for ALL preppers, you may find some valuable takeaways in this article, especially if your wood is poorly seasoned or the prevailing weather conditions are all working against you.

The key to success in building the perfect campfire is to have the right supplies, skills and patience. You must also have in the back of your mind what you will need the fire for so you can start and maintain the perfect campfire (given Mother Natures changing moods.)

WHAT YOU WILL NEED

Tinder: These are the tiniest of fire igniting materials. Examples include wadded newspaper, wood shavings, cardboard, wax, commercial fire sticks and dryer lint.
Kindling: It is consider just tinder that is bulkier and more substantial. Good examples are twigs about the thickness of a pencil.
Firewood: Well seasoned firewood somewhere up to 5 inches in diameter. You should split larger-diameter logs to make them easier to handle and burn more efficiently, however that also means they are consumed faster.
A Fire-starter: While you can use matches, lighters tend to do better jobs in the wilderness. A flint rod may also do for camping fires as well as a number of methods you have seen on this site in the past. Add fire-starters that you are experienced with at your discretion as these may be better saved for use when your tinder is wet or green.
A Shovel or Spade: A shovel or small spade may be necessary if you will need to create a fire pit from scratch. Also handy for extinguishing a fire as well as leaving as little trace of your passing as possible.

STEPS TO FOLLOW TO BUILD A PERFECT CAMPFIRE

Step 1: Check If Campfires Are Permitted if You Are Simply Camping

Before lighting any fires, you must determine whether campfires are permitted in your camping area. Look for posted signs in the campsite warning against starting fires. You can also ask the campsite host or a ranger for any such laws prohibiting fires. Avoid any assumptions from what you see and ensure you get necessary permissions before you start a campfire. The beaches of California are littered with fire pits from a by-gone era (just a few years ago, until things started getting ridiculous.)

Step 2: Pick an Appropriate Fire Spot

Established campgrounds usually already have fire-rings or fire pits. This will make your work easier. If such rings are nonexistent, choose a spot that is about 15 feet from your tents, trees, shrubs and other inflammable materials, if at all possible.

Look for a natural, or man-made windbreak. These will make your efforts easier, provide some cover, and draped with a emergency blanket may even make your fire more efficient at heating the surrounding area. If such a place does not exist clear any dead leaves, grass, and other vegetation to create at least a few feet of bare soil. Also, dig down a few inches to create a pit that’ll contain the fire. This will protect the hot coals as well making stoking the fire for a longer burn much easier.

Step 3: Choose the Type of Campfire to Build

Campers can choose between three different campfires depending on their needs. We will discuss the steps necessary to make perfect fires of each of the three types. The types include a teepee campfire, a lean-to campfire, and a log cabin campfire.

  1.  Teepee Campfire

  • Step 1: Centralize Some Tinder in Your Fire Pit

All campfires tend to begin start with a foundation made of tinder. To accomplish this, gather a portion of your tinder. Bundle them and put them at the center of the pit. A trick to make the tinder material easier to bundle, try to lay it on top of some piece of a well-dried tree bark.

  • Step 2: Build a Teepee

Use a portion of your kindling to build a cone-like teepee shape with some of the tinder in its center. Use just about six of the kindling pieces. Add a layer composed of firewood to build a wider teepee around your first one. Stick smaller branches or twigs into the ground around the teepee to secure it.

Do not forget to leave a gate in the teepee. Later on you will use it to ignite the fire. Ensure the gate or opening is on the side of the teepee facing the direction of the wind. This will provide your young fire with the air it needs to burn well. Similarly, leave spaces between the pieces of firewood to promote air circulation.

  • Step 3: Light the Tinder

With a ready teepee, place a match or lighter beneath the centralized tinder and strike or ignite. The teepee structure will encourage the fire to burn vertically from the tinder to kindling and then to the firewood. If the flames fail to fan, light the tinder again.

  • Step 4: Add Kindling and Firewood As Needed

As your fire burns, the firewood would be consumed and eventually, the teepee will collapse. At this juncture, add more kindling and pieces of firewood to maintain the fire. A teepee campfire is suitable for cooking because as it burns elegantly and steadily for a limited period.

      B. A Lean-To Campfire

  • Step 1: Place Kindling With Tinder beneath It

To make a Lean-To campfire, start by placing a long piece of kindling in the dirt at a 30-degree angle to the ground. Bundle some kindling and put it beneath the lean-to kindling. For the purpose of a lean-to kindling, a thicker stick or a small/medium size log will suffice. The end of the kindling should point to the direction of the wind.

  • Step 2: Add Tinier pieces of Kindling

With your lean-to kindling ready, place additional pieces of kindling in your fire set-up. In this case, use much thinner sticks than those serving as a lean-to. Place them against the lean-to and tinder bundles. Make a tent-like shape by leaning kindling against the lean-to. Create a second layer by adding a little bit larger pieces.

  • Step 3: Ignite the Tinder

Ignite tinder just like we discussed for the teepee type. Once the tinder catches fire, the rest of the kindling will follow to create larger flames. Add more kindling as well as some well-seasoned firewood to fan the flames. Begin with a single piece of firewood and increase the number appropriately. This is the best campfire type for cooking.

      C. Log Cabin Campfire (Pyramid)

  • Step 1: Create a Small Kindling Teepee

Use the first step in making a teepee campfire in this step. The only difference is that you will need just two layers of kindling around the tinder bundle at the center of your fire pit.

  • Step 2: Setup 4 pieces of small logs around the Teepee

Gather four pieces of well-dried firewood and set them around the teepee. Use two of the largest pieces on opposing sides of the teepee and then set up two smaller pieces on the remaining sides to make some sort of a square structure with the firewood. The smaller pieces must rest over the larger pieces for the log cabin to be steady. Ensure you leave a gate on the side that faces the direction of the blowing wind.

  • Step 3: Lay More Firewood

Continue laying more firewood over the four pieces of firewood. In this case, use smaller and shorter pieces in a similar pattern to the square. Your goal would be to create a structure similar to a cabin around the initial teepee.

  • Step 4: Invest Smaller Kindling On Top Of the Cabin and Ignite

Once your log cabin is ready, place some of the lightest kindling on top of the structure to close off your structure. Only then can you use a lighter or a match to ignite the fire. Light the fire from several sides in order to encourage your fire to burn. Create a log cabin type of campfire if you want fire that will burn for longer and therefore keep you warm for longer periods.

EXTINGUISHING YOUR CAMPFIRE

Besides knowing how to build a perfect campfire, you also need to know how to extinguish it. The simple option is cutting off its supply of oxygen. You can put out all types of campfires by pouring water on to the fire, stirring the ashes and then applying more water. You should repeat this process as necessary until the ash is cool to touch. The bare minimum is to ensure that the fire and its members are out and utterly cold before you leave the camp.

Water will cause smoke – a better method is to bury the fire with dirt. It does not cause smoke and generally hides the evidence of the fire being there in the first place.


CONCLUSION

No matter the type of campfire you intend to create, you now have the right information to help you do it right. Ensure you never leave the fire unattended and you must put it out before you leave to prevent unnecessary accidents.

Knowing how to build the perfect campfire is one of the main ingredients of a successful camping trip and of survival in general. The campfire is at the apex of

So I’ve hit a breaking point; I finally ran out of the razor blades that I bought in bulk  last year and took a quick trip to Sam’s Club.

Only this time I lost it, I don’t know what it was that hit me but as I stood there scratching the razor burn from the last shave with my “ultra high tech razor with five blades for the smoothest shave you’ll ever get”;  I just could not bring myself to shell out 40 dollars for razor blades.

I’d had it!

I was through!

I was growing a beard!

Well two weeks later, a combination of severe itching and a wife that is not a fan of the  “Grizzly Adams” look  sent me high tailing it back to the store.

But to be honest I had never planned on keeping the beard, and had been trying to figure out a more efficient and cost effective way to manage my facial hair.

And then it hit me, I found a way to stock up on supplies that are useful to me now, will be useful to me later, last a very long time, and will save me money in the process.

And it something that was completely normal just a few generations ago but is now seen is more of a novelty than a functional ( and better) alternative.

I’m talking about wet shaving

Sounds silly right?

My wife thought so too at first, but then we did the math.

A pack of my normal razors cost $38.98 for 16 blades; that’s  $2.44 per blade and each cartridge lasts me two shaves; so that’s $1.22 per shave.

A pack of double bladed razors for my safety razor runs $2.48 for 10 blades; which is $..25 per blade;  after testing I can  comfortably say that I get one shave per blade. ( and you can buy them even cheaper in bulk)

The math alone makes this a completely logical investment, as long as you learn how to use it properly.

Also, manufacturers are hyping up the “more blades equal a better shave B.S.”, pretty soon we’ll all end up with razors like this…:

I have been wet shaving with a safety razor and boars hair brush (the image to the right) for about a month now and couldn’t be happier with the results.

Yesterday I actually went back and shaved with my old razor and I think it is safe to say that I am now a life long fan of wet shaving and will be ditching my disposable.

With that being said, there are a few pro’s and con’s you should know about if you are interested reviving this lost art.

The Good:

A better shave; even with one blade I noticed that my skin was much less irritated that when using my normal 5 blade model.

Economical; the double edge blades are much more economical than the cartridges.

Shelf Life; Did you ever stop to think that your razors have a shelf life?  Most of the fancy razors have lubricating strips and  rubber pieces that can go bad over time.

Multiple uses; these double bladed razors are ultra sharp and can be used for more than just shaving your face, unlike their cartridge cousins (minus a few prison modifications of course).

Nostalgia; something about holding one of these reminds me of watching my Papa shave when I was young and makes me feel connected ( this is more of a personal pro but some of you may feel the same).

The Bad:

Shock factor:  The initial cost of a handle can be very expensive, but unlike modern razors, these are meant to last a lifetime.  I purchased my razor from a beauty supply store for around 12.00 just for testing purposes and while it seems to be pretty sturdy, I will soon be  switching over to a Safety Razor  from Merkur. The only problem is picking which one I want.  A good handle can cost you anywhere from $20-$100 and the sets that include the brush, stand, and lather cup, start at around $60 and go upwards of $200.  BUT if you buy a good razor it is something that you will be able to pass down for generations.

Time: Shaving used to be an art. Now it is a pain in the rear.  To properly wet shave you need to set aside time  so if you don’t think that you can set aside a good 15-30 minutes for a thorough shave, you might want to keep at the hack and slash method. ( see below for the technique that I use)

Learning curve:  Properly learning the technique to a wet shave is  not something you pick up overnight. There is a definite learning curve  that I am still trying to get over.

More chance to cut yourself: You are much more likely to cut yourself with a one of these butterfly type safety razors than with a cartridge, Not necessarily because the blade is more dangerous but because they are far less forgiving than a modern razor.

The Bottom Line

Wet shaving may not be for everyone, but it is a great skill to have.  The two main things  you need to concern yourself with are the initial cost of purchasing the supplies and whether or not you are willing to dedicate the time required to do a full shave.

You can stock up on razor blades now and even buy a few extra cheap razor handles to keep stashed away. That way you can have them for your personal use now and as a bartering tool after TSHTF.  Never under estimate the face value of a clean shave.  If you want to get started and skip going the cheapest route I would suggest getting this kit (it is probably the one I am going to end up with):

P.S. Like I said earlier there is a technique and finesse that you need to learn in order to be successful with this type of shave

The Technique

Prep your beard. If you want a clean shave, you need to prep your beard adequately. The goal during beard prep is to soften your whiskers so shaving is easier and causes less irritation. The best way to soften your beard is to to shave right when you get out of the shower. The hot water from your shower should hydrate and soften your beard enough for shaving. If you haven’t showered, at least wet your beard with some hot water. A hot towel is a great way to soften your beard.

Lather up. Take a small dollop (about the size of nickel) of your shave cream and place it in a mug. Take your brush that you’ve pre-soaked with water and swirl the cream around until you get a nice thick lather. Apply the lather with your brush in swirling motions. When your face is nice and covered, take a few strokes to smooth everything out.

The shave. Unlike shaving with cartridge razors, shaving with a safety razor actually requires some skill and technique. Once mastered, though, you should be shaving effectively in no time. The four keys to a successful shave with a safety razor are 1) use as little pressure as possible; 2) angle the blade as far away from your face as possible; 3) shave with the grain; and 4) go for beard reduction, not beard removal. This will take some getting used to if you have used cartridges your entire life.

You don’t need to use pressure because the weight of the safety razor is sufficient to cut your beard. If you press down, you’ll end up hacking up your face. To help counter the tendency to apply pressure, try holding the razor by the tip of the handle.

Angling your razor is probably the trickiest part. The proper angle is somewhere around 30 and 45 degrees. To get the proper razor angle, put the top of the razor head directly on your cheek, with the handle parallel with the floor. Now slowly lower the handle until the blade can cut your whisker. Practice on your arm if you’re not comfortable practicing on your face.

While shaving against the grain can get you that smooth feel, you risk slicing up your face and causing ingrown hairs. When you’re first starting out, shave with the grain of your beard. If you lather up and pass the razor more than once over your face, you’re guaranteed to get a smooth finish.

The goal with shaving should be gradual beard reduction, not beard removal in one deft swoop. Most men try to get rid of their beard in once pass of the razor. This hack-and-go technique is what causes the majority of skin irritations. If you want to avoid skin irritation, lather up and pass your razor over your face several times. Your face will thank you.

Post-shave. Rinse your face off with some cold water to close your pores. Treat your face to a nice aftershave. There are several to choose from, so pick the one you like best. Aftershave helps reduce any irritation that may have occurred and will leave your skin looking healthy.

There is much more to a shave than just the technique.

Anyone else practice wet shaving?

Or if you have a suggestion for a good razor handle model, leave me a comment and let me know!

So I’ve hit a breaking point; I finally ran out of the razor blades that I bought in bulk  last year and took a quick trip to Sam’s Club. Only this