Introduction to Building a Storage Shed – Part 1
Why would you want to do this? Look at the name: STORAGE Shed. Most everybody “needs” more storage because they can’t bear to have less stuff. And someone preparing for bad times probably has more stuff than a person who doesn’t believe anything bad can happen and expects their parents and/or government to take care of them no matter what. Some of that extra stuff you really don’t have room for in your house, and some of your prepping supplies you REALLY don’t want to have IN your house. Such as a generator and fuel, oil and vehicle parts, battery banks and so on so building a storage shed makes a lot of sense in some situations. You can, of course, rent storage space; there is a large industry devoted to just that.
There are a few problems with that solution though. One, you have to go there to get your stuff, and that assumes that you have a working transport AND that they can or will let you have access if they have no power or their computers don’t work or the people in charge are honesty challenged. Two, you have signed your stuff over to them if they don’t receive payment for any reason (such as banks being closed). Three, you are usually contractually obligated NOT to store some of the things you don’t want in your house. And four, they can raise their rates whenever they please unless you have a long-term lease. The place I am at currently is charging me TWICE what someone walking in off the street pays, and won’t reduce it. I could rent another unit, move my stuff over, and cancel the first place, or move to another location, but I know the new price will just start moving up again. The cost of a storage shed may seem large, but I did the math, and it will be paid off by two years of storage fees, and that is assuming they don’t raise the rate again, which is a very poor assumption.
Look at the other part of the name: Storage SHED. Do you have a “post Apocalypse” trade planned or set up; blacksmith, gunsmith, leatherworker, seamstress/tailor, weaver, or the like? This could be used for your business or the tools and supplies. Plus, a shed looks like a shed, but it does not mean it must be ONLY a shed. It could provide camouflage for an entrance or exit from an underground area. It can be built with concealed areas. Some sheds are designed as or can be converted to, a greenhouse if you are interested in growing your own food and/or medicinal plants or setting up an aquaponics system.
Ok, let us assume you have decided you want a storage shed. But can you have one? Like it or not, there are a number of people or organizations who have control over what you put up. Do you own the property? If not, the owner has complete discretion over what you put up, if anything. And if you don’t own the property, do you really want to make improvements to it? An option, in this case, might be “portable” storage, like a trailer, or one of those transoceanic shipping containers.
Do you belong to a “Home Owners Association”? If so, you have contractually agreed to give them complete control of the exterior of your property. Read the bylaws to see what is currently allowed. Figure out what you can do which abides by any restrictions. And once you come to an agreement on what they will accept “today”, get documentation which grandfathers your shed against any future changes to the bylaws.
How close are the neighbors, and are they reasonable? If you follow all the legal requirements, they may not be able to prevent you from doing what you want, but if they get annoyed enough, they can still cause you plenty of grief.
Dealing with Governments
And then there is the city, town, township, parish and/or county. Each level of government will have restrictions on what can be done, based on the “zoning” of the property in question. The less remote the property is, the more stringent the restrictions are likely to be. These include things like the percentage of the property which can be “covered”, height restrictions, required distances from property lines and other buildings, and many other things, collectively known as “Building Codes”. Your safest bet is to get a “building permit”, but this has some downsides. First of all, as a survivalist, you should attempt to stay “under the radar”. You would be hard-pressed to be more obvious than having your plans on public accessible file with the government and having inspectors checking you out each step of the way. Second of all, it will cost. The building permit has a fee, often based on the type of building and square feet. I once wanted to put up a carport, and they told me I would have to pay $5 per square foot just for the permit. For posts and an aluminum roof; the building permit would have cost more than the carport. Not only that, but it is likely they will factor this “improvement” into your property value when computing future property taxes.
By all means, find out all the restrictions on what you can put up; violating restrictions has potential for serious annoyances if the government wants to raise a fuss (and they usually do if violations are brought to their attention). However, if you can avoid getting a building permit, that might be a good path. For instance, here, if the shed is less than 200 square feet, you don’t need a permit. That means a 12′ by 16′ shed (192 square feet) can be put up without a permit being required. Just because a permit is not required, does not mean the restrictions can be ignored; you just won’t have the public records and government monitoring.
Ways to Get a Storage Shed
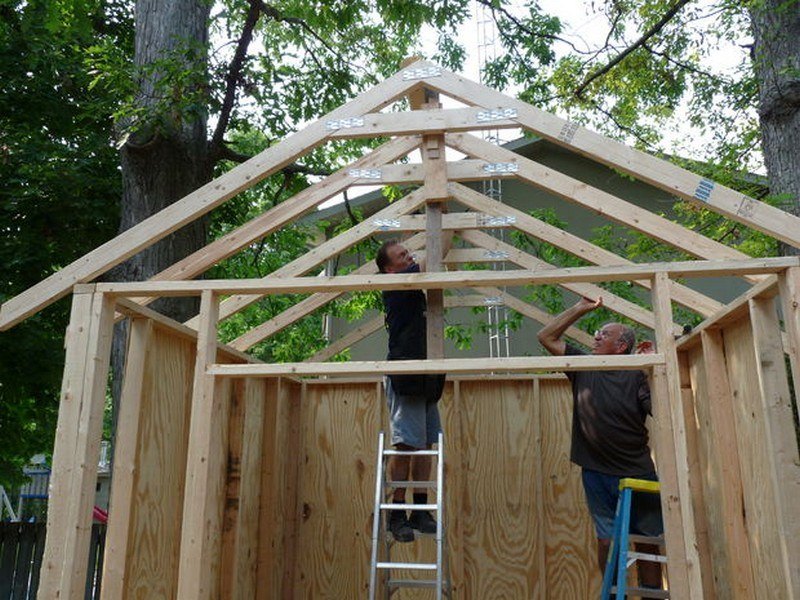
The “easiest” way is to have someone build it for you. This will not be the cheapest option, and a competent builder will likely insist on a building permit, meaning not only public records and government monitoring, but the builder and perhaps others will know all about your shed. The incompetent builder will refuse the permit and perhaps build something which violates code, with potential for eventual legal challenges or structural problems. For smaller sheds, you might be able to have it pre-built and delivered. You could build it yourself, which means you have to come up with a viable design (not that hard) and get the materials, which may be a challenge. I don’t know about your location, but the lumber here is crap; warped, twisted, split, insufficiently dried. As my dad said when we were trying to get lumber to replace a rotted porch, “I wouldn’t use this stuff for firewood”. The remaining option is a “kit”. This has the advantage that the design, acquisition of materials and much of the cutting are already done for you. A good kit will have better quality material than you may find locally and instructions which most everyone should be able to follow.
Types of Storage Sheds
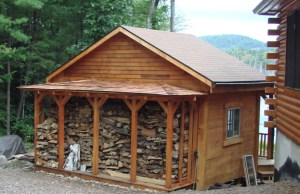
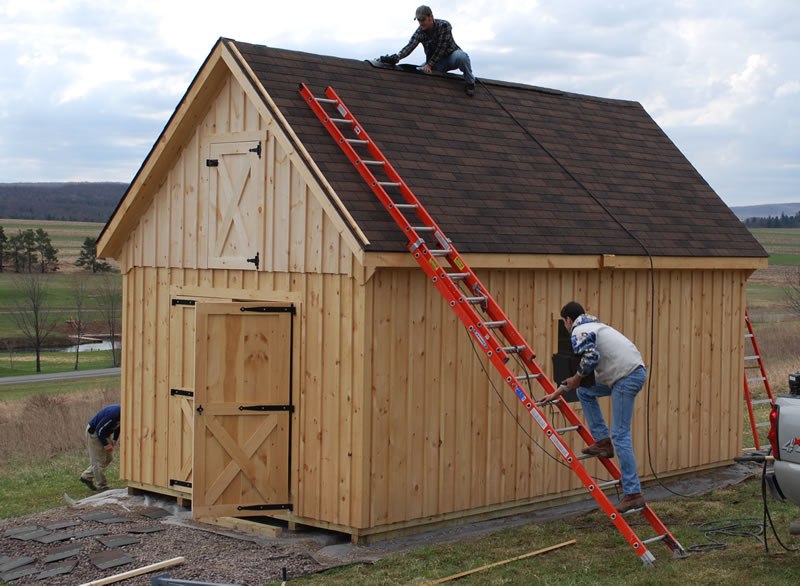
There are a number of architectural shed types. Chose what you like, and what fits your landscape and restrictions. I’m partial to the “barn” style, because it gives you more height, and even “lofts” in some models. Possible materials include wood, steel, aluminum and various “plastics”. Plastic and aluminum tend to be the hallmark of cheap “department store” sheds, great for lawnmowers and garden tools, but not what you would call “durable” or “secure”, and usually limited in size. For a substantial shed, wood or steel is usually the way to go. I’m more comfortable working with wood, so that is the path I chose, although steel seems like it might have some advantages.
Modifications
Depending on what you will use the shed for, you may want to make modifications or additions. For instance, wiring it for electricity may be useful. But since there is no guarantee electricity will always be available, make sure you have the ability to plug-in a generator (via a transfer switch), or add solar or wind generation capability. In some cases, you may want to add plumbing. Note that no matter how much of the electrical or plumbing work you are willing and able to do yourself, you should consider getting a permit for this work and having it inspected. Unlike the structure, which is hard to mess up (especially if professionally designed), a mistake in the design OR execution of electric or plumbing can cause fire, electrocution, leaks, odors or rot/rust. And if not up to code, an insurance company may refuse to pay off on a claim. Wherever practical, have the shed “completed” so it looks like you are “adding” the electrical or plumbing and follow all requirements for what must be visible to the inspector(s). Of course, if you got the permit for the shed in the first place, follow their instructions on when in the process the various inspections should be scheduled. If temperature control is a concern, you may want to add insulation, cooling or heating.
Flooring
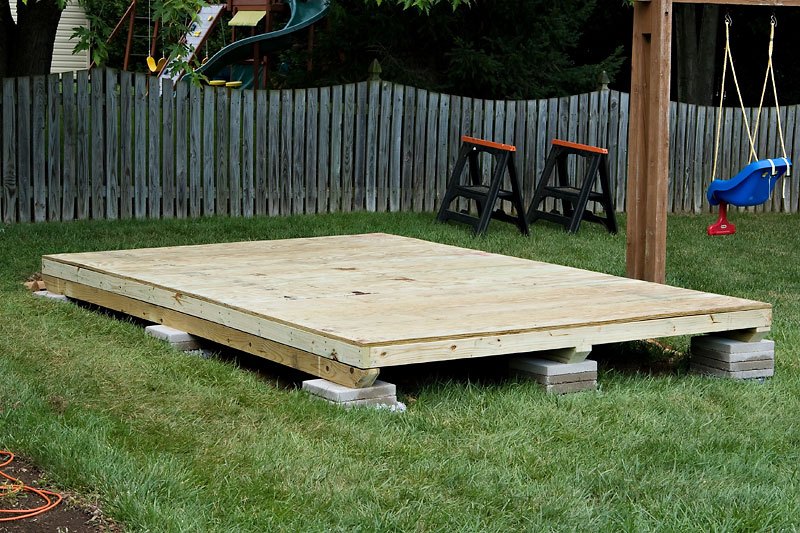
This foundation (literally) of a shed is an important decision. The common choices are concrete or joists with flooring panels. Concrete may be “better” and in some cases easier; pick your location, set up forms and rebar, and have it poured. It may be more expensive, and less versatile (it is kind of hard to dig through concrete if you decide a partial “basement” would be handy), and “impossible” to move. Joists are likely to be less expensive and more versatile, and if the ground is not even, may even be more practical. There will be beams running the length of the building, with the joists running across the building between the beams. Flooring panels are laid across the joists and fastened in place. Note that the beams and joists are in contact with the ground and so are at risk for rotting and/or insects. Thus pressure-treated lumber or corrosion-resistant metal is critical here.
Site preparation is highly important since, in order for the floor to be flat and level, and stay that way, the ground must be flat, level and stable. If it is not, you may be able to compensate by having a variable thickness concrete floor or building a foundation or partial foundation for your beams out of blocks and concrete. A “better” floor system is to have runners the length of the building, on which the beams and joists sit. As long as the runners are flat and level (and adequately supported), it does not matter if the ground is, plus it also allows ventilation below the shed, which can help with cooling and reduction of condensation inside. It also puts the flooring higher, which may make entry more difficult, but on the other hand, gives more protection against minor flooding. The runners, of course, must also be pressure-treated wood, corrosion-resistant metal, or even concrete and/or blocks, and a ramp can compensate for the step up.
What Next?
Does this sound like something which might be of value to you? Check out Part 2 of the Introduction for some more pre-build details.
Why would you want to do this? Look at the name: STORAGE Shed. Most everybody “needs” more storage because they can’t bear to have less stuff. And someone preparing for