HomePosts Tagged "Preppers" (Page 10)


Over the years I’ve heard many people describe how they would prep if they won the Lottery.

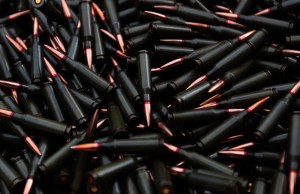
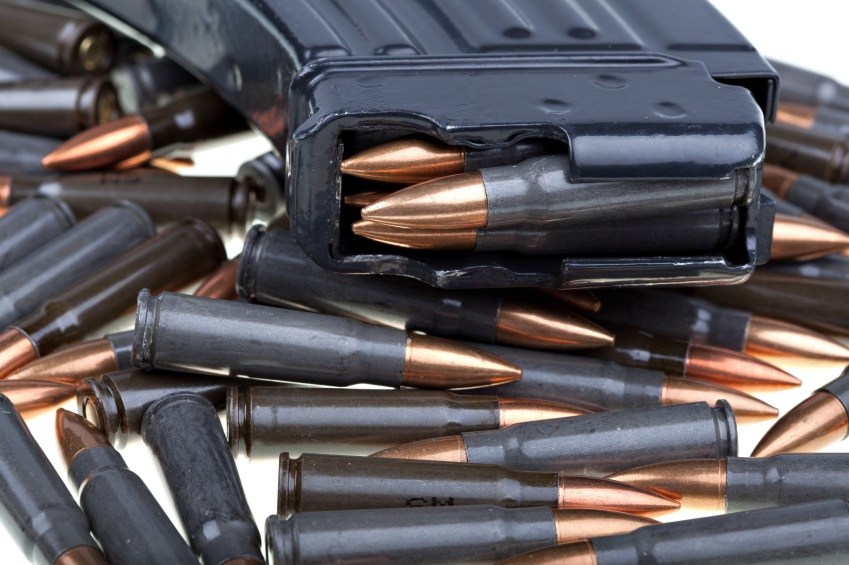
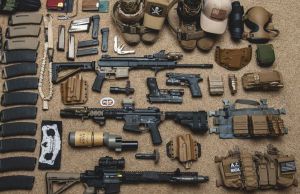
The Big Survival Truck is usually the first thing mentioned, and it’s almost always a 4-wheel drive multi-ton with brawny winches fore and aft and full stealth capability. Then there’s the all-encompassing armory of truly first-class (and extremely expensive) firearms. Plus tons of ammunition, and a Band-Aid. And a 30,000-acre BOL in Montana with a 17-bedroom underground nuke-proof house and an Olympic-size Jacuzzi—all solar-powered, of course.

Unfortunately, most of those people don’t do very much prepping while they’re waiting for their winning numbers to pop up. They just don’t have the money.

In today’s troubled economy, money goes fast, but it doesn’t go far. The average person doesn’t have enough money in the bank to carry them (and their family) through one month of lost income, much less a full-scale disaster. A person should always try to have some kind of emergency reserve. Not having emergency funds doesn’t leave much room for prepping.

So what can a poor penny-pinched Prepper possibly do?

Simple: Get four envelopes and label them Water, Food, Clothing, and Gear. Determine to use the contents of each only for its designated purpose. Then follow these three easy steps to fill them up with money:

Sell

Take a good look at everything you own. Then sell everything you don’t actually need and/or use except items of genuine sentimental value. Everybody needs two 9/16″ wrenches. But if you have three, you should sell one. Even if you can only get $0.50 for it. It may seem like a small thing—too little to be worth bothering with—but the average adult has about $2,500.00 worth of possessions they neither use nor need. Those are the things that should fund your first preps.

Sell everything that you don’t need or want to make money which could be used to purchase prepping supplies or simply build a nest-egg for harder times.

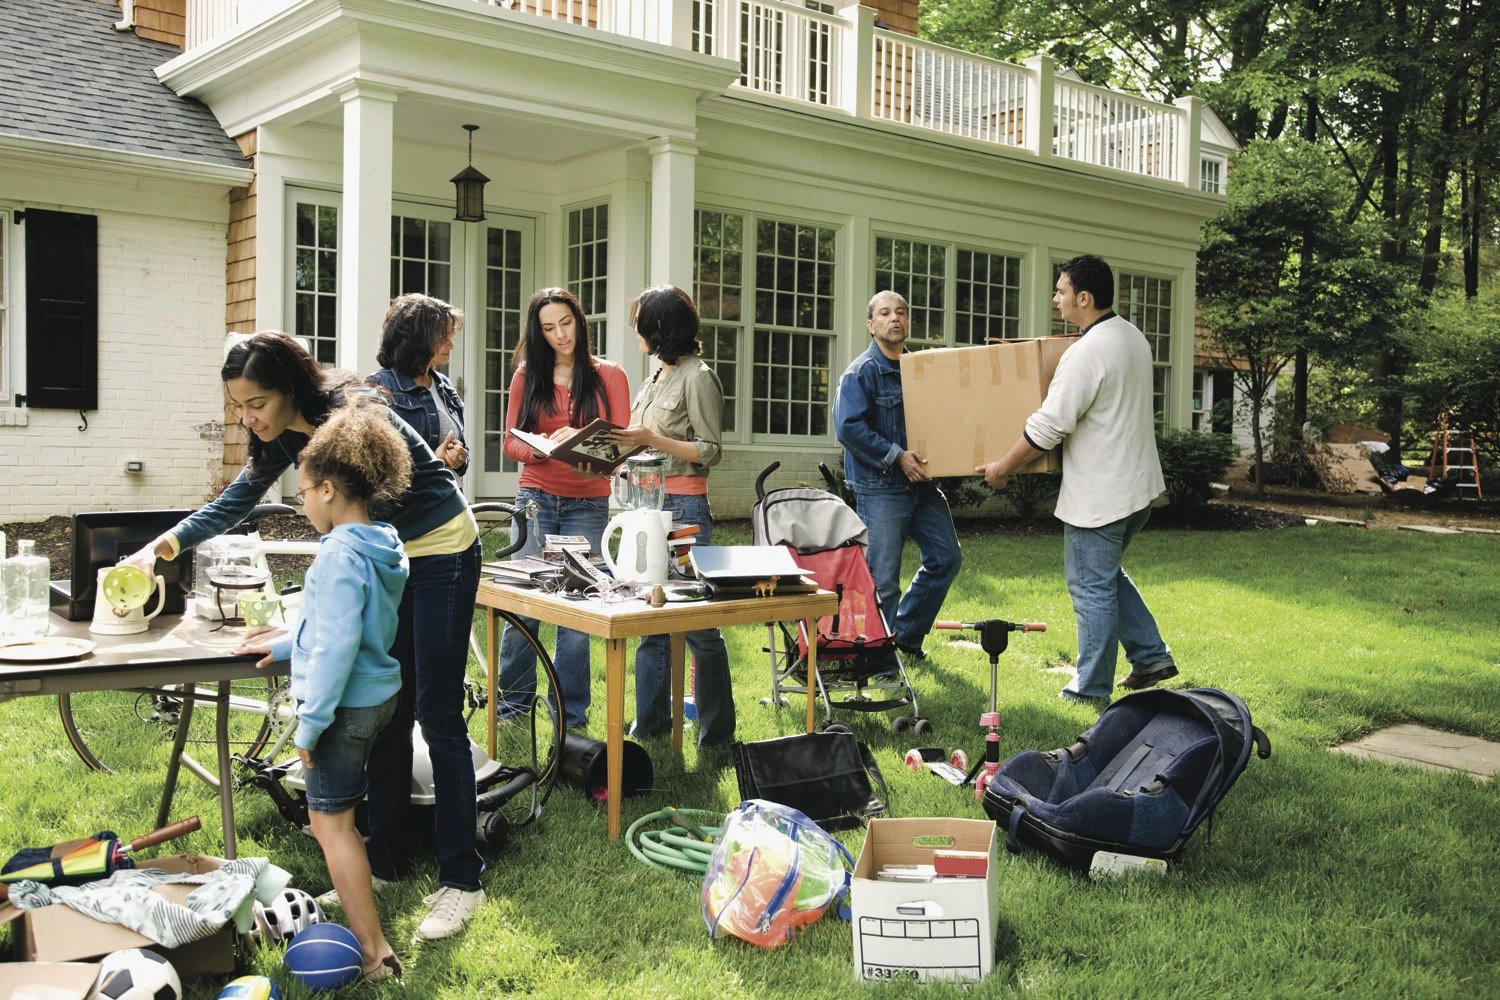
Auction the good stuff on the Internet, have a few yard sales, rent a stall at a flea market, advertise in the free Classifieds, and tell all your friends. Be persistent. Eventually, you’ll sell it all. Trust me on this: Somewhere, somebody desperately wants that three-headed elephant statue that someone must have given you because you’d never buy anything like that, especially if it cost money and you weren’t drunk. However much money this step makes, divide it equally into your four envelopes. (Water, Food, Clothing, and Gear)

Buy

Think outside the box and purchase wisely. Water, of course, should be your first concern. It’s far more critical than food. A person can last a month without eating, but after three days without water they’ve stopped lasting and started dying. The minimum water allowance should be 1 gallon per day, per person. Set 5 gallons per person as your first water goal, and pursue it with the cost of the container in mind. You can buy 3 gallons of “spring water” from the Wally Store for $5.78—but you shouldn’t.

Instead, collect freshly emptied 2-liter soda bottles, rinse them out, and fill them with food-grade water right out of the tap—at the rate of about $1.50 per 1,000 gallons. Price: $0.01, rounded up. Also collect every screw-top beer can you can get your hands on. Wash and rinse them thoroughly and then you can use them for storing water and many other needful things. Free cardboard boxes can be collected from supermarkets to store your water bottles neatly and to shift them fast if you ever have to bug out.

Don’t worry about purifying tap water that goes into clean containers. The chlorine that’s already in it will do that job for you automatically. Gradually work your way up to storing 30 gallons per family member, if you can. When you reach your water storage goal, empty the Water envelope into Buy/Sell.

Water should be the very first item you stock up on.

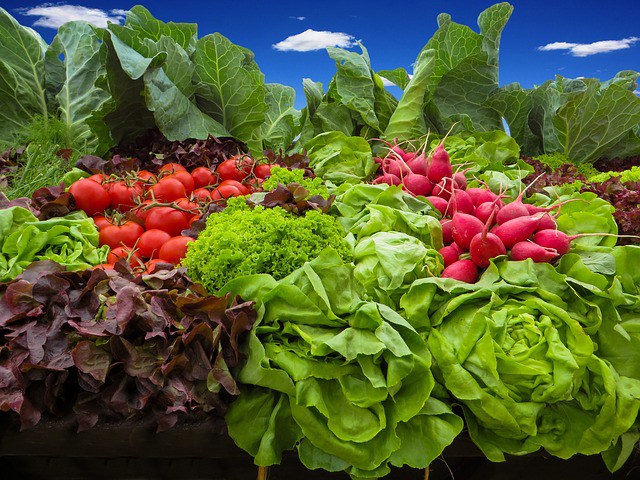
Food should be your next concern because in an emergency the supermarkets will be picked clean within hours. Do all your panic-buying long before it’s time to panic—then you’ll never have to. Again, shop wisely: Don’t automatically shop at the most expensive supermarkets. Go to the cheaper ones, and also check out any Bent & Dent Stores in your area. Many times the canned goods there aren’t dented: They just came out of torn cartons. Clip coupons and look for sales. Be sure to check out any local auction houses. Some have monthly food auctions where you can get almost anything except fresh meat at amazingly low prices—as low as 10% of retail for some things.

Buy long term storage foods only, plus whatever you find that you would normally buy in your ordinary shopping. After each auction, figure out how much you saved on the regular shopping items and add that much as cash to your Food envelope. What you save on regular items at the auction is the time and gas you would have expended in ordinary shopping. The cash saved can go to your preps without impacting your standard of living.

The first rule is “Store what you eat and eat what you store.” If you hate green olives, don’t buy a gallon just because they happened to be cheap at the moment. You should stock only foods that you are accustomed to and like. ALL your foods should be comfort foods. Emergencies are stressful enough. There’s no need to add diet discomfort to the situation. Store the kinds of food you are eating, eat the food you have stored before its expiration date, and replace it as you do.

Buy rice and beans because they are cheap and provide complete amino acids when eaten together—but be sure to acquire the recipes that make them into superb meals. Buy canned beef, pork, and chicken, plus soups and vegetables. Buy white pasta because it keeps longest. (Spaghetti packs very compactly.) Ramen noodles are cheap, but go rancid in about two years. Buy extra virgin olive oil and canned lard. Both have their different uses.

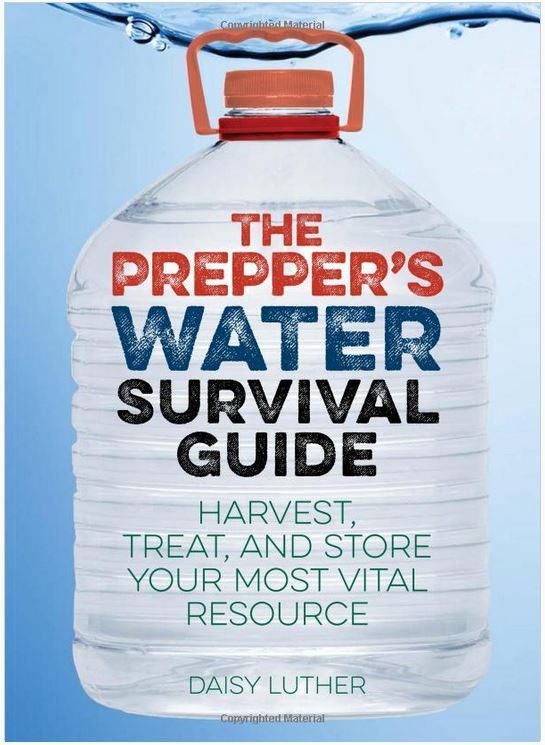
The Prepper’s Water Survival Guide: Harvest, Treat, and Store Your Most Vital Resource

The second rule is to buy in small containers. Refrigeration may not be available, so don’t buy canned vegetables by the gallon—unless your family is large enough to eat a gallon in one day.

The third rule is to buy variety: Don’t buy 100 lbs. of rice and 100 lbs. of beans and 10 lbs of “everything else”. Buy some of every kind of food you like, plus enough spices to put some serious zing into your cooking. When the flat-screen TV is dead, meals may become the high moments of the day.

Your first food goal should be three days (nine meals) for each person in your family. Do some careful calorie counting, and plan for three 1500-calorie meals a day. That’s more than the total 1500 calories a day many people recommend, but emergency situations are stressful, and usually require a lot of manual labor (such as walking instead of riding). The idea is to maintain your optimum body weight, not to drop to your minimum.

Gradually work up to a thirty-day food supply, and eventually try for ninety. When you’re good for food, retire the Food envelope and roll any leftover money into Buy/Sell. Then turn your attention to Clothing.

Start with durable but comfortable foot gear. Buy good new work boots, or military surplus combat boots. Buy several pairs of thick wool socks. Break the boots in, and wear them at least a few hours a week to keep them supple. Buy a surplus military poncho w/ liner. That’s good gear, and you definitely don’t want anything orange or yellow at any price. You may eventually need to be very inconspicuous.

Assemble one complete set of clothes for winter and one for summer. Include a camo hat with a brim and a black knitted watch cap, work gloves, knee pads, two bandannas, and sunglasses. Don’t be too proud to shop the thrift stores for used clothing. Incredible buys can be found there. Plus, in a disaster situation you don’t want to be seen in anything that says “Rich Person/May Have Food”.

When you’re good for clothing, empty the Clothing envelope into the Buy/Sell envelope. Then turn your attention to Gear.

Gear is an endless exercise in optimization. Start small. Buy the cheap stuff first. Haunt the thrift stores, dollar stores, yard sales, and flea markets. Roughly in order of importance: a good folding knife and a good sheath knife for each person. Also two Bic lighters, a Stainless Steel water bottle, personal cooking kit, pocket chainsaw, 30’ of 550 paracord, a tarp, a groundcloth, and a good wool blanket. A buck saw and a ¾-axe for the group, plus a four liter pot with bail & lid. Matches in a waterproof pill bottle for everyone, plus a small first aid kit.

Store your gear in a large gym bag—and with it your three day supply of food and three gallons of water. Two bags is okay, if there isn’t room in one.

All of that will be far too heavy to carry on your back, which is why you needn’t put it in a backpack. Instead of a $100+ backpack, buy an old golf dolly from a thrift store for $3.00 or so. You can tie the bags on and roll your gear instead of having to carry it. You’ll be amazed at how well that works.

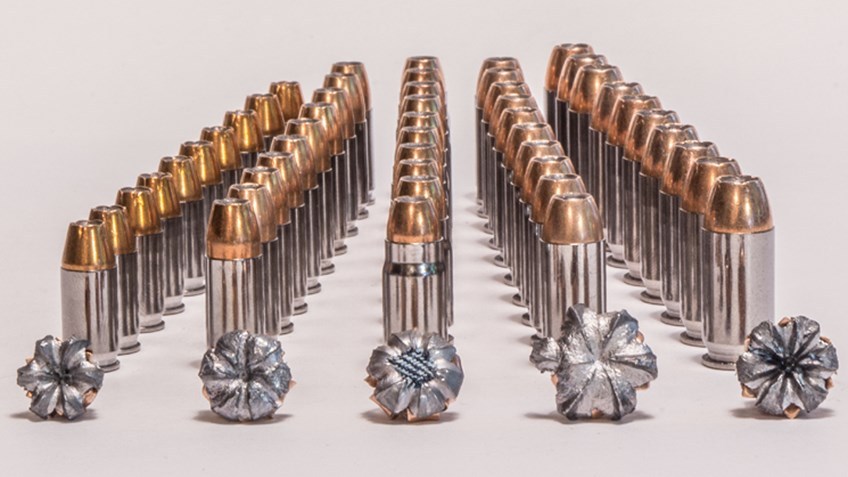
The last part of Gear that bears discussion is personal defense. It’s a sad fact that in a serious emergency or disaster scenario the only animal you’ll find that will be both vicious and eager to attack you will be another person. Every person should carry a razor-sharp machete to chop brush with. Machetes do not run out of ammunition. Mace can also be a good friend in bad times. The best brand is Bear Spray.

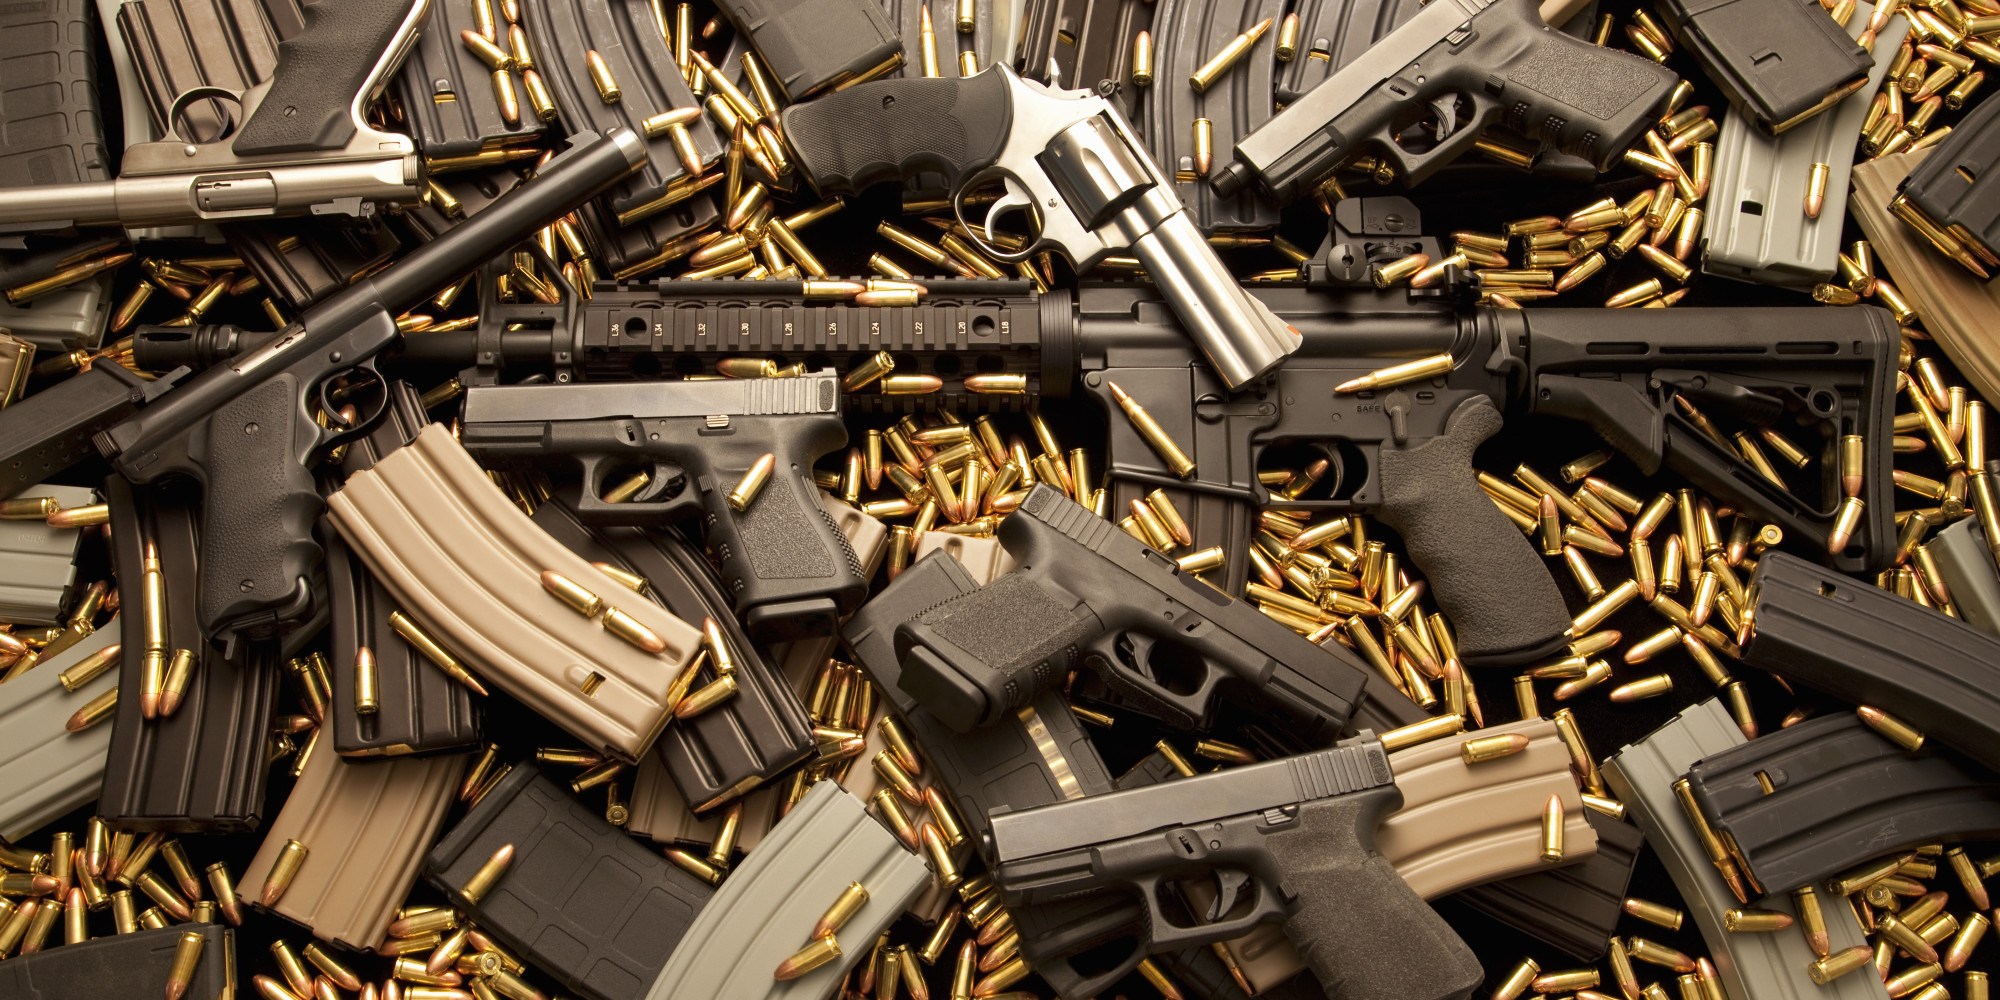
Depending on the circumstances and the personal choice of conscience, a firearm may be desirable. The debate over which is best is endless, but having both a pistol and a long gun offers the best of both worlds. Being seen with a long gun can be disadvantageous—it can draw the attention of law enforcement (if there is any law left) and it can draw the first bullet from an unseen sniper on the trail.

For that reason, I recommend the only long gun I know of that can easily be hidden in a Bug out bag, gym bag, or book bag.

That’s a 12-ga slamfire shotgun made according to the instructions in the Kindle eBook The 15-Minute Shotgun. It breaks down into two pieces, the longest being 18-1/2”, reassembles instantly without tools, and can be used for both personal defense and subsistence hunting.

And, to the delight of the average Penny-Pinched Prepper, it only costs $10.00 to make.

When you’re reasonably well geared up, the Gear envelope can also go away, and you’ll be down to one envelope: Buy/Sell. And that brings you to Step 3:

Buy/Sell

Prepping is an ongoing process. It requires a small but continuing subsidy. Use your Buy/Sell money at auctions to buy things you can immediately sell for a profit on Craigslist. By that I mean a good washer-dryer set bought for $50.00 and sold for $200.00 the same week. Or an ugly flatbed trailer bought for $65.00, spray painted generic black, and re-sold for $250.00. Or an immaculate recliner bought for $5.00 and sold for $75.00. I have done all of those things at auctions and many more. I have funded my preps for years with an occasional Buy/Sell and made a little money on the side, too.

Spend your Buy/Sell money however you wish. By the time you’re reasonably well geared up you’ll probably know exactly what you next prepping goals should be. Whatever they are, they’ll probably be as uniquely individual as you are.

In my case, I’m saving up for that solar-powered Jacuzzi.

  Over the years I’ve heard many people describe how they would prep if they won the Lottery. The Big Survival Truck is usually the first thing mentioned, and it’s almost always

Some of us have the ultimate goal of self-reliance. Maybe it’s just “increased” self-reliance, or maybe we’d like to be almost totally self-reliant. A big part of self-reliance is the ability to produce our own food, whether we’re working with planters in a window to avoid the common recalls or plotting out our 30K square foot pantry garden. Regardless of scale, maximizing our production is something we all strive for. There are some terms and sowing concepts we may see but not really understand that relate to sowing seeds, especially, that can help us maximize our yields.

Some of those concepts include underplanting, underseeding, sub-sowing or under-sowing, succession and staggered planting, and congestion planting or fill beds. A lot of the ways we can maximize production from our space overlap and interact, which means the terms get used together or in place of each other. That can lead to some confusion on what each really is. I’ll largely use small-bed examples to try to clarify the concepts, but they can be expanded to larger plots

Congestion Planting

Congestion planting has two main facets. In some cases, congestion planting refers to the use of a bed instead of separated single rows, even in bare-earth, tilled-ground plots. In other cases, it refers to absolutely packing something into a space – a “fill” or “blanket” sowing style.

The latter can be visualized as blanketing marigolds around tomatoes and cabbages instead of having one marigold to one crop plant, with bare earth around them. It can also be seen in spread seeding – sprinkling or machine throwing something like lettuces or a game plot mix over a surface. When we talk about congestion planting a companion like sweet alyssum or a cover like buckwheat, this is what we mean – dense blankets. It’s done to maximize benefits from a companion, create a zero-bare-earth or total-canopy systems, and to choke out weeds.

In other cases, congestion planting is used to maximize harvest.

Creating a diagonal grid or staggered line instead of a straight line or a square grid lets us put more plants into the same area. “Gaia’s Garden” by Toby Hemenway has a good example of the “row” version of this, which can be applied to annuals as well as perennials. Congestion planting a grid of plants in a workable bed instead of separating rows of crops lets us get more yield out of the same space, too. For example, take a 12-foot by 6-foot garden area. In this case, it’s for spreads of about a foot – because there are an awful lot of plants that fit that space, beans to pak choi, fingerling potatoes to corn, candle peppers to rattail radish – but it works for 15-24” plants as well.

Instead of getting 36 as in a single-row row-cropping example, we’re able to get 42 primary plants into the same area with a diagonal grid (AKA: staggered grid, offset grid). That is a ratio that scales up.

Read More: Conventional Guides to Crop Rotation

A “straight” or “square” grid (squash the row cropping lines together) would have netted 48 primary plants, while the diagonal grid allows for an additional 12 companions or smaller crop plants with the main crop, for a total of 54 yielding plants in a 4’x12’ space. Both exceed the yield from single-row sowing.

*Individual interests, planting style, and needs, as well as choosing a 3’ instead of a 4’ bed, will determine if a diagonal or square grid is more efficient.

In addition to the increased total yield from congestion planting, there are other benefits to congestion planting in beds – raised or in-ground.

Eliminating the walkways between each row means there is less compaction, which makes for better root and soil health through better water movement and increased aeration. The shade created by the mature main crops will help keep soil cooler and moister than open rows with bare earth between plants. It will also allow for cooler-season annuals like radish, spinach and lettuce later in the season than they would normally be palatable. Once established, the canopies also help reduce weed growth, whereas the space between rows allows for sunlight to penetrate to the soil line, making weeds more of a factor.

Eliminating the walkways between each row means there is less compaction

Succession Planting & Staggered Planting

Mini Farming: Self-Sufficiency on 1/4 Acre

Succession planting isn’t an overly new concept, and it’s probably one of the most-heard terms. In succession planting, the goal is to not have dormant space and open earth in production spaces. Crop cycles are timed so that we maximize our space and growing season, avoiding lost time and wasted area. We have our tomato and pepper transplants ready and staged so that as lettuce and cabbage comes out, we plug in the next start immediately. Heading toward autumn, we start additional cabbages and sometimes greens so we can stick them in sweet corn plots immediately.

“Succession planting” is also sometimes used instead of “staggered” planting and harvest – staggering sowing dates this time instead of designing a staggered row.

With staggered planting, we start our seeds at weekly or two-week or even monthly intervals. We may do only a few plants at a time, we may do a couple of square feet at a time, or we may do a few rows or a partial plot at a time. For things like radishes, we may put in 12-18 every two or three days for a while, skip a week, and do a few more sets.

Staggering our planting allows us to harvest reasonable amounts. We can start some early and late for fresh eating, and plot out periods when we expect to have the bulk of determinate tomatoes coming in, spreading out the canning workload around our tree crops and other annuals, vacations, and our busiest parts of the seasons.

It also allows us to hedge our bets. We can start the first 2-5 tomatoes, then another set, and hold off on the main body of our for-canning tomatoes until we’re certain weather will hold for them. Then we take a break, and either root some of the suckers we pinch or start a few more seeds, and plant additional tomatoes that will still be in full production later in the season, or that can be grown in containers or in a protected area, extending our tomato harvest into cooler weather. We could easily divide our tomato season into thirds or quarters instead, starting seeds for each segment so that they’re yielding excesses for canning, but so that a late drought, low-calcium problem, or early cold, wet weather doesn’t affect our total harvest as much.

Read More: Understanding Seed Types and their Importance

Succession and staggered planting aren’t exactly the same, although the terms are sometimes used interchangeably. Staggered planting is more a factor to take into account with succession planting. Succession planting is similar to “zero bare earth” or “full canopy” planting in that there is always something active in the garden during growing season. It can be used with tilled-earth methods as well as the mulch-bed systems, and with transplants or the concept of underseeding and underplanting.

Underplanting & Underseeding

Underplanting is an umbrella concept that includes underseeding (AKA: sub-seeding, sub-sowing, under-sowing).

Underseeding is when we drop seed while another plant is still actively growing. It’s a little different than the staggered seeding that produces best results in a Three Sisters mound. In underseeding, we wait for our Three Sisters mound to start crinkling from frosts or reaching its maturity, and we plant something like beets, radishes or greens underneath the corn, beans and squash.

The timing is important. We want to be cutting down our hungry, mature plants about the same time the seed is germinating below them, so the cool season plants don’t face as much competition. We can do it in the mounds mentioned, or we can do it along the sides of rows and within beds as well. It’s limited to non-tractor farming unless mature plants are low enough and well-spaced enough for single- or multi-row equipment to get through. The tight spaces make it something much more common for a backyard kitchen garden or containers than large-scale field crops like wheat and beets.

Underplanting has applications both for perennials and for annuals.

Deciduous trees take some time to leaf out in spring. By building up a no-till bed around their bases, even dense canopies can have some early garden space eked out for radishes, beets, turnips, greens, and some others. Cut-and-come-again crops like spinach and lettuces will benefit from an extended season in a lot of climates due to the cooling shade and reduced evaporation. Depending on orientation and climate, things like onions and some herbs may be fine all season under an apple tree, and in some cases, a summer cover crop such as crowder peas or buckwheat may be possible. Edible ornamentals like hostas and wild food such as upland cress or mock strawberry are additional options for the bases of trees.

The benefits to underplanting trees and shrubs extend beyond the additional and early harvest. The trees themselves benefit from less mowing compaction, increased biomass, and pollinators that camp out due to constant pollen and nectar access. In some cases, the crops and herbs we choose to grow may actually repel some tree pests and disrupt some diseases or their vectors.

In the case of annuals, underplanting acts more like the Three Sisters example.

For example, consider a plot where lettuces are interspersed with a line of beets of turnips or radishes, and maybe some small head cabbage (with bunches of marigolds if inclined). When the root veggies are pulled and it’s warm enough for tomatoes, those starts go out, with the lettuces and cabbages still thriving. Some of the lettuces are pulled instead of cut, opening up a little space around the new tomato.

With an egg and a handful of compost, tomato starts are plenty big enough and aggressive enough – especially since they have deeper root systems than most cutting lettuces – to grow without problems. Cabbages are timed to be cut and have the roots severed as the tomato grows to 18-24” tall and they start encroaching on each other. By the time the tomato is starting to rob from and shade out lettuces, the lettuces are bolting or going bitter anyway, and can be cut a final time. If they’re already bitter, they lay right on the ground, providing some additional shade and mulch for soil, which retains more moisture. That’s about the same time the tomato needs every bit of nutrients and less competition for flowers and fruit set, and – especially in raised beds and containers in dry and hot climates – enormous amounts of water.

The system works in reverse again as the season ebbs and tomatoes start to dry off. We underseed spinach and chard, prune our tomato aggressively so it concentrates on maturing its fruit about the same time our baby plants start popping up, and by the time the spinach and chard are starting to struggle from the competition, our tomato should be done for the season. A serrated blade or pruning shears gets used to sever the roots and cut the stalk, and our bed stays in constant production.

Both underplanting and underseeding are intended to make sure that not only is garden space actively doing something, but that there is no exposed earth. They limit the total amount of space we need to produce significant yields, and they reduce the amount of time we wait in between harvests.

Seeding schemes

Congestion planting, succession planting, staggering seed sowing, and underseeding or underplanting are just a few ways we can maximize our yield within a given amount of space. There are labor and water-saving benefits to some of them, but the primary goal is to make the most of our cultivated land. Using our space to maximum efficiently may allow us to grow additional crops, or we may find room for rabbits, water catchment systems, composting, chickens, an outdoor seating area, or shrubs and trees that will further increase our yields or act as passive solar heating and cooling devices.

Even more than when we select what types of seeds and the specific crops we want to grow, deciding upon a planting or sowing style can hugely impact our gardens and crop spaces. Someone who wants to use a tractor for all phases of growing and maintenance may not find as much use for most of the discussed styles, but for others, an efficiency planting style might be worth some consideration.

Some of us have the ultimate goal of self-reliance. Maybe it’s just “increased” self-reliance, or maybe we’d like to be almost totally self-reliant. A big part of self-reliance is the


Once you have a firearm you need to consider what it is going to take to feed your weapon. You can think of it in the way of just getting enough ammo for a particular hunt or recreation, but I suggest you take a good hard look at stockpiling ammo for the just in case scenario. There are some good guidelines and tips on stockpiling ammo that will simplify this process for you and make it easier than it sounds on some forums you may have come across.

Stockpiling Ammunition: Amounts and Types

First we will go over the best amounts and types of ammunition to stockpile. This could be specific to the caliber and gauge of the firearms you so they may be somewhat generalized. The first type is the ultra popular 22LR. It is common and popular for good reason because it is light, effective, and generally cost efficient. The fact that you can generally get larger lots of this ammo for a fraction of the cost makes it an absolute staple in any ammo stockpile. Chances are you already own a 22LR and if you are new to firearms they are great way to get into shooting because of the lack of harsh noise and absence of recoil making it easy to get your fundamentals down. If you are able to master your shooting fundamentals with a gun that uses cheap ammunition you will be way ahead rather than trying to buy a gun to make you better. 22LR is now becoming a little easier to get a hold of in the 500 round lots again so it is a good time to go out and grab some. My recommendation for the amount to keep on hand is 2,000 rounds that you actually keep stockpiled away from your normal shooting stash. In the event you need to hunt for food this gives you a lot of opportunities with minimal space to store it and weight of the cache. This is only 4 cases of the 500 round “bricks” you typically see people buying.

For semiautomatic weapons such as your AR-15 and AR-10 platforms, as well as semiautomatic pistols it is a good idea to keep around 2,000 rounds as well because these types of rifles can really chew through your ammunition stock if you do a lot of shooting. It’s pretty much nothing to go out and shoot 100 rounds in an afternoon and that is just a little over 3 standard 30 round magazines. If you can keep stock of more than this it is even better but aiming for 2,000 rounds in reserve plus whatever amount you deem for practice shooting is a great goal to shoot for. It is the easiest and most affordable to buy FMJ (full metal jacket) ammunition because it is the most available and in the largest lots if you want to get bulk pack. A good goal is to have around 200 rounds of the more specialty type ammunition such as ballistic tip, hollow point, and match ammo because they are great for what they are designed for but are often over double the price of the conventional FMJ type ammunition.

For your bigger bolt guns and magnum rifles try to keep around 250 rounds in your reserve stash. The reason for this being a lower number is factored by two main reasons: cost and amount typically used. If you own a 300 win mag you know how expensive it is to shoot and the fact you don’t typically go out and try to shoot 100 rounds in a day unless your shoulder is made out of granite. However if you do a lot of long-range shooting you may go through more of this ammo so keep in mind the 250 rounds is just the amount of ammo you are saving for an emergency not included in your normal shooting ammo. For shotguns aim for about 500 rounds because regardless of gauge this is a lot of firepower. It might be a good idea to get a variety of loads besides just basic #7 bird-shot. 00 buckshot is great because of its effectiveness at self-protection and slugs for hunting.

Storage Solutions for your stockpiled ammo

MTM 50 Caliber Ammo Storage Can – $10

Now that you have a better idea of how much ammunition to keep on hand I’ll go over the best ways to store it for long-term storage. First you will need some good containers such as plastic or metal ammo cans. These come with a gasket in the lid to make a strong seal when snapped shut making moisture and humidity difficult to permeate. I recommend leaving the ammunition in the boxes it comes in just for organizational sake to keep a bunch of loose rounds from rolling around. If you buy larger lots they sometimes come in an ammo can already so that will save you a step looking for a container. You can buy replacement gaskets so if a gasket ever starts to fall apart or dry up you can simply throw in a new gasket to keep the integrity of the ammo can. The best thing to do is keep desiccant packages inside the ammo can to absorb any moisture that would be inside the can keeping the rounds dry.  These are cheap and you can usually find them in things you already purchased in the packaging. Make sure to mark each box with what is inside either with some tape to write on or stencils so it is easy for you to identify if in a hurry.

Cost effective way to start stockpiling ammo

If you do not have the money to drop $350+ on a big lot of ammo you can simply go for a small box of ammo every week or couple of weeks. Just as an example say you will get a box of 20 rounds of .223/5.56 every week at around $9 a box for basic FMJ will add up to only $36 dollars a month and give you 1,200 rounds year. So basically you can incrementally add to your ammo stockpile instead of have to buy in bulk. It does offer some cost savings to purchase larger lots but may be a little easier to budget for a smaller weekly expense. As long as you take some simple steps to budget and prepare for it you will be able to begin getting a good cache built up.

  Once you have a firearm you need to consider what it is going to take to feed your weapon. You can think of it in the way of just getting


I love the internet and social media. It lets me be exposed to a slew of information and knowledge that I would have otherwise never been able to view. In just a couple of clicks I can watch how to build a primitive spear thrower,  or purify dirty water into something ….less dirty. After enough clicks, however, I inevitably stumble upon something displaying the need for a horribly impractical “prepper tool” that I just must have. Holding this awesome, life-saving, badass and totally affordable (insert sarcasm) thing is some ex-military looking, bearded fitness model that TOTALLY MIGHT HAVE BEEN SF, Or an overly sexualized woman with chiseled abs.

Now hear me.

I don’t think there is anything wrong with looking like a Viking with an AR or a jacked and tan super woman–in fact, that’s actually super impressive. But is it indicative of someone living the prepper lifestyle?

Pros of Tacticool

Let’s not underestimate the power of looking like a tactical boss, because there are some practical advantages to be found.

1) Predators naturally seek soft targets– It’s primal, like natural selection. Whether the predator is a lion or street thug, the predatory instinct is driven to achieve its goal via the easiest, most non-confrontational path available. When looking to rob a house, break into a car, or mug an innocent bystander, the criminal has a vast amount of potential options and they will inherently choose the path of least resistance. This is one obvious advantage to looking like a former linebacker with Don’t Tread on Me tattooed across your throat.

2) You might feel more confident– Hormones are a hell-of-a drug. Seriously. And your mindset and mentality play a role in how your body produces and expresses levels of certain hormones. Confident people have higher levels of testosterone than their more sheepish counter parts. They also have lower levels of cortisol. Here is a quick talk on body language hormones, it’s worth the watch. What will that do for you?! How about greater muscle mass, clearer skin, stronger bones, lower stress levels, and decreased levels of anxiety. So if a Mo-hawk and 80-piece pocket tool are what you need to feel awesome, then I would say, go for it.

3) It’s just fun– Unless you’re too uptight to enjoy the simple pleasure of holding blacked-out combat katana or you wouldn’t enjoy setting up plans with your buddies on how you would take back and survive a potential “Outbreak” like scenario.  But for most of us, this serves as a temporary form of escapism. We take it seriously, but definitely enjoy the process along the way.

Cons of Tacticool

How could looking awesome be a bad thing?

1) The issue with abs– On average men are 18-24% and women are 25-31% body fat. This is relatively natural. For men, they typically start to show visible abdominal muscles around 10% body fat, but will have more defined musculature closer to 6%. Women tend to fluctuate around these numbers because they naturally store fat in locations other than their midsection (where the sexy abs are). So what happens to these fitness icons if there is an actual SHTF scenario and food acquisition has becomes a real problem. At 6% body fat your body is already running low on fat, which is actually very important for cellular function. Now your body is forced to burn your lean tissue and muscle for calories. This is not an excuse to be un-athletic or out-of-shape. But if you do truly identify yourself with the prepper lifestyle, then how prepared your body is must be a primary goal. You should absolutely be strong and physically capable. I believe you should consider pursuing a body that thrives in every situation and scenario, rather than one that simply looks good on Instagram.

At 6% body fat your body is already running low on fat, which is actually very important for cellular function.

2) The lines between tactical and tacticool become blurred– The more time you spend in and around any group or community the more that community becomes your status quo. I am sure you have experienced this in your life countless times. Everyone at your work drinks beers on Wednesday nights at a bar close to your office. Now you also drink booze on Wednesdays. Your significant other watches a specific TV show, now so do you, etc. If you spend enough time pouring yourself into the cool, but unrealistic, prepper activities and products then eventually you will lose sight of what makes sense and perhaps lose sight of what’s out there just to make someone else money. This is a trap that most of us have fallen prey to at some point. If this is you, then don’t be too hard on yourself. You are in great company. But take note of the things and time you have invested in, that offer little to no return on actual preparedness.

3) Cool is not going to help, when all hell breaks loose– This seems like the most obvious and important reason why we shouldn’t be pursuing phony replacements for the real thing, but it needs to be said. The reason we prep is because we have this thing in the back of our minds telling us, “event X could happen”. Whatever your X is, you’re probably right to pursue it. But somewhere along the way we tend to get caught up in gadgets and thing-a-ma-bobs that offer little to no value in prepping for our X. Do not get caught in this trap. If you wake up one morning and event X is taking place all the money and time you spent on superfluous things and skills will leave a tangible bitterness your mouth.

Pros of Tactical – You are the real deal


1) You’re an actual hard target – There is a difference between looking the part and being the part. If you are stuck in the “cool mindset” currently then this will be hard for you to distinguish. But if you ever have the opportunity to spend time with someone who is actually prepared for event X then you will quickly realize they have no flashy bumper stickers, no unnecessary tools and they do not feel the need to show anyone how prepped they are.

2) You ARE more confident – There is something to be said about the benefits of the “fake it till you make it” mindset and the power of feeling confident. But nothing will substitute the confidence that comes from being tried, tested and proven worthy. This type of mental shift permeates every fiber of your being and you see the world differently. When you understand what you’re capable of and know the limits of your training, you can take that with you wherever you go.

3) It’s deeply satisfying – Don’t get me wrong, it also fun. But there is a certain sense of satisfaction you get with a job well done. There is a specific feeling of accomplishment and deep well-being that acts like a filter through which you see the world, knowing that you are ready. Ready for whatever life throws at you, ready for the good, the bad and the many potential X events that exist.

Cons of Tactical (kind of)

1) Work, work, work, work…work – This type of lifestyle and level of preparedness takes work and a lot of it. You cannot purchase it. You cannot watch a few YouTube videos and consider yourself amongst the elite. You must be diligent, consistent and continually striving to master yourself and your situation. This is something that few people are willing to do, because work is hard and uncomfortable. But that’s why few people are really prepared for the hardships of life. But you are going to win in this is game, while others are satisfied with following the status quo of mediocrity.

2) It takes humility – Humility is something that we are culturally void of and so, being humble is typically counter intuitive for most. But if you are over-confident or the least bit arrogant then you will have a false assessment of your abilities and mistake your level of preparedness for something it isn’t. Being tactical requires self-reflection and an accurate assessment of who you are and what you’re capable of. This will typically be accompanied by a degree of emotional or mental strain as your reality will not match up with your ideal. Being a great Prepper takes the ability to assess your situation and degree of readiness with accuracy.

3) It takes patience – Like humility, patience is another very important skill that one must cultivate if they are going to be prepped for life’s contingencies. It would be great if in an afternoon or weekend we could take a class, get a certification and be off-the-grid ready. But this type of work takes time. The more time you spend in this world the more you will come to realize that you have additional skills to master and continual knowledge to obtain. So, enjoy the journey and take pride in every step along the way. Patience is not only a virtue, it’s one of your closest allies.

As you can see, the above “Cons” are not negatives, they are just challenging. As you continue down the tactical road of physical and mental preparedness, remember that the journey is meant to be enjoyed. Don’t get sidetracked or fooled by anything that claims to be the end-all of products. Put in the time and work, seek to better yourself and know that the best investment you can make in your preparations for the future will always involve personal growth and investing in yourself.


  I love the internet and social media. It lets me be exposed to a slew of information and knowledge that I would have otherwise never been able to view. In

Hiding in plain sight is a term everyone has heard at one point or another. What does it mean from a prepper’s perspective? How much can you really carry around while still looking like the average Joe/Johanna? In this article I list some of the most unusual ways that some basic survival gear, weapons, and defensive tools can be disguised in items you already wear every day.

This is not about concealing knives and firearms. It is a collection of ways hide small survival items hidden in plain sight. You will even be guided through how to create one of the most useful resources that most people never think to include in their gear!

Here are just some of the items that can easily be concealed or disguised:

Razor Blades:

Secret Compartment Money Belt

  • a simple sheath and these are easily stored in a wallet
  • Can be inserted into a slit in a leather belt
  • Under the insoles of your shoe
  • Sheathed and taped to the inside of a steel toe boot (helps with metal detectors and xray)
  • In a hollowed out sole or heel of a shoe
  • Encased in a faux gold plaque that are common for necklaces as engraved name plates
  • Behind a fancy belt buckle
  • Underside of a watch face
  • Part of a brooch or inside your name-tag


Razor Wire:

  • long “noodle beads” can be used to protect ones skin and turn this into a necklace
  • Hollowed out heel
  • Inside a hollow purse strap
  • In a special groove inside a man’s ring
  • In a belt
  • Fishing Hook
  • encased in tear drop earnings
  • In/Behind pennants
  • Backside of belt buckles
  • Made into a Broach
  • Embedded in the brim of a hat
  • Inside a hair scrunchy (caution, best if used loosely over a rubber band bun)
  • Hollowed out shoe heel

Small items like razor, wire or even maps can be hidden in special watches.

Fishing Line, Rope, Paracord:

  • Simply sew into various items of clothing as a contrast stitch.
  • Embroidery
  • Necklace
  • Bracelet
  • inside hollow watches
  • Woven into a beanie
  • Braided into a belt

Survival Hiking Boot Laces – Wilderness Survival Emergency Fire Starter – 550 Paracord Laces with Ferro Rod Tips and Serrated Steel Striker Tools – Black or Brown

Fire Starter Rods:

  • Hollow tips of shoelaces
  • Dangle earnings
  • Pendant
  • Bracelets
  • Inside a Hollowed belt
  • Belt buckle
  • Inside wallet
  • Hollowed out heels
  • Replacing sections of underwire in a bra.
  • Fastened to a barrette

Black Powder vials:

  • Worn as pendants
  • Inserted into hollow chap stick or lipstick tubes.
  • Inside the heel of a shoe
  • Attached to your key-chain
  • Inside empty travel sized hand lotion bottles
  • Inside empty travel sized toothpaste tubes
  • taped to the backside of a large belt buckle
  • Simply slipped into a pocket/purse
  • Disguised as ornaments on the outside of a purse

100 Deadly Skills: The SEAL Operative’s Guide to Eluding Pursuers, Evading Capture, and Surviving Any Dangerous Situation

Blow Gun Darts:

  • Attached to barrettes and bobby pins
  • Dangle earrings
  • Pendants
  • Broaches
  • Inside belt-loops
  • Part of the belt buckle
  • Inside a hollow belt
  • Inside the straps of a purse
  • Replacing part of the underwire of a bra
  • In your wallet
  • On a key-chain
  • Under the insoles of your shoes
  • In a hollow shoe heel
  • Decorations on a purse

TIHK Handcuff Key

Handcuff Keys:

  • inside a slit on the back of your belt
  • On a Key-chain
  • Inside a hollow watch face
  • Inside a pendant
  • In a hollow belt buckle
  • Inside the hollow heel of your shoe

This list could go on and on. As you can see there are a variety of things that can have various survival uses that can be incorporated into items that you wear every day. By creating these clothing items now and stocking your supplies, you can guarantee that if SHTF you are wearing your basic supplies. If you cannot get to your Bug Out Bag and your EDC has been compromised in some way, you want to be sure you always have something, literally, On you.

So, where do you start?

Start with the items you wear the most. For most people this is their shoes. This is also the option that can possibly be the most difficult to alter, yet carry the most supplies. This is why I have chosen to help you through this process today.

Different style shoes have different alteration options and limitations. If you primarily wear tennis shoes with thin soles, you may want to start with replacing the shoelaces with paracord and fire starter laces. Depending on how thin the soles are, you may be able to still store some supplies in the sole (such as a razor blade) or under the insole, inside the tongue, and even secured to the inside.

If you wear boots with some heels, chances are these heels are already partially hollow. You can buy boots that already have this secret compartment, or you can take on the challenge of creating it yourself. If you are creating the hollow yourself, you will need to secure the opening of the compartment so it isn’t easily damaged, removed, or otherwise tampered with. Detach the insole of the shoe near the heel to carve it out yourself. You may want to find a solid container that can provide the heel some of the support that may be lost in the hollowing process. If you want easier access to your compartment you can leave the insole dislodged. If you are hiding items you intend to keep more secure, you will want to glue down your insole. take heed to also secure or resew the insoles before gluing so that it can stand up to more scrutinizing inspection. Depending on the width of the heel, and the quality and composition of your insole, you may need to find a thin but sturdy material, or extra rubber so that it doesn’t dip down later. We do, after all, want these shoes to remain comfortable.

The other option is to put the opening of the compartment on the bottom of the shoe for easier access. This can be accomplished by carving out a perfect circle or square and preserving it, then hollowing the sole enough to fit in the supplies you desire to hide, or the container to fit them. These must fit very snugly and be lightweight enough as to not put pressure on the plug. Take the preserved piece of sole and attach it to something a little larger than it is if you need to make it more like a cork. Simply plug the hole. If it needs help staying put, and you don’t care about how it looks you can use glue or staples. Of course if you are quite handy and looking for an even more accessible and sturdy option… You can cut the end of the sole clean off, replace the inside with a box with a circle opening, and fasten threads to the removed heel and screw it back on. This would work best on heels that were already hollowed, made of wood, or women’s high heels.

Final Tip: Pack the heel in a manner that is least likely to damage the supplies and add padding as needed so they don’t make strange noises while you walk.

Disclaimer:

Some of the items in the list could possibly be illegal to conceal in the manners suggested in your locality. Please use discretion when choosing the items to include in your EDC wear.

Hiding in plain sight is a term everyone has heard at one point or another. What does it mean from a prepper’s perspective? How much can you really carry around


Even if you only have a basic knowledge of prepping, you will be familiar with the idea of necessities. Food, water and shelter, as well as weapons, are the cornerstones of discussion pages and articles about beginning your preparations. Although those provisions are definitely necessary to keep you alive, there is one aspect of prepping that is often overlooked and it can hurt even the most knowledgeable and well equipped survivalist.

Sanitation: otherwise known as the horribly unsexy, anti-adventure aspect to survival that hardly gets discussed. Without proper sanitation, a person who has food, water and a secure shelter can still perish.

There are a number of aspects for proper sanitation that any prepper needs to consider. The simplest items for something like a Bug Out Bag can include hand sanitizing liquid, bleach wipes, water purification pills and an instant use purifier like a LifeStraw.

Benzalconium wipes that aren’t expired are guaranteed to kill many severe viruses that average household disinfectants can’t touch, so having a supply of those for cuts is going to give you an edge that alcohol swabs can’t provide. A roll of toilet paper is also a must and for ladies, a supply of feminine hygiene products, in case that time coincides with the end times.

Sanitation on the Go

An outdoor latrine already built and ready to use is ideal, but not a common site in most backyards.

The next level of sanitation preparedness involves supplies as well as preparation. If you are out in the wild that would include finding a spot at least 25 yards away from camp and 50 yards away from your water supply to do your business. That spot should include a way to wash your hands before returning to camp, so having a bar of soap is a good plan to reduce your dependence on hand sanitizer and keep your camp clean.

If you are sheltering in place your toilet is most likely not going to work, unless you are dealing with a situation where water service hasn’t been disrupted. That is fairly unlikely, so having supplies and a plan for them could make the difference in getting sick or staying healthy and ready to survive.

A simple bucket can become your best friend in a survival scenario. Using a toilet without being able to flush can lead to serious health concerns, especially if multiple people are using it. As it fills, the amount of germs becoming airborne increases. This is not safe at all. Having a plan can change that.

Luggable Loo Portable 5 Gallon Toilet = Cheap and easy Grid down solution to bathroom issues.

Using a bucket gives you the opportunity to throw your waste in an area outside of your shelter. Rather than using the bucket itself, it is far better to keep a box of garbage bags available to line the bucket. It will make disposal easier and prevent accidental spills. A bucket filled with garbage bags, soap and toilet paper rolls is easy to tuck away in a closet and it will make a drastic difference in your ability to maintain sanitary conditions.

There is always the option of buying a specialty bucket lid that is designed as a toilet seat to increase comfort, but it isn’t necessary. It’s a personal preference to include one in your supplies. Other ways to increase the safe handling of waste would be to include disposable gloves and bleach in your bucket to eliminate skin contact while moving or disinfecting with a bleach/water solution.

The most ardent prepper who has their eye on a homestead situation can take this planning even further. If you are intent on staying at your camp for an extended period of time, one of the best things you can have is a container of quick lime powder, which can be poured over your waste to help it break down faster. The same is true for packaged enzymes that are used to break down waste in septic tanks. It’s a good habit to get into, especially if you plan to build a permanent out house.

Simple plans for sanitation can go a long way in keeping your food and water, your camp or shelter and all those depending on you clean and healthy. It will help control the spread of diseases like cholera or diphtheria when medicine and doctors are hard to locate and general experience with those illnesses is lacking.

It has been said that an ounce of prevention is worth a pound of cure. With these tips and a bit of extra planning any prepper can ensure they are practicing good sanitation. Just because the SHTF, it doesn’t mean you have to get messy or sick.

  Even if you only have a basic knowledge of prepping, you will be familiar with the idea of necessities. Food, water and shelter, as well as weapons, are the cornerstones

You don’t have to buy into any woo-woo-ology or being “green” to reap the benefits of some of the concepts to come out of environmentally friendly growing methods and lifestyles. In fact, some once would have just been considered common sense. Stacking functions is one of those. Stacking functions is a quick term for the concept of planning things (elements) and areas (space) to perform the most services for us. It’s reusing things as many times as possible to get the most out of our inputs. In permaculture, we really like multi-purpose items (stacked functions) because they increase our efficient use of a space, decrease our labor, and make it easier to gain resiliency by having multiple items that perform each function. I’ll take this in two parts so I can be wordy. We’ll start with what stacking functions is and multi-function elements. Next time we’ll look at multi-function spaces.

Types of Stacking

When we talk about stacking functions we generally mean two things: a multi-function element or a multi-function space.

Within spacial stacking, we have things like silvopasture (livestock grazing on pasture beneath and in the alleys of trees, which can be for timber, firewood, fodder/forage leaves and branches, or a fruit or nut yield for humans or livestock). We also have things like companion planting, combined coop-greenhouse or greenhouse-home designs, total-system hutch-coop systems – anything with a great deal going on in one space.

Two types of stacking function include spacial stacking or multi-function spaces, like silvopasture to increase yield or a chicken moat to protect gardens and increase efficiency, and multi-function elements – each individual inside a system, like a particular plant or animal.


Multi-function elements are the individual things inside our systems that are capable of performing more than one job – an apple or locust tree, the fire from our thermal-mass heater and rocket stove, our coop with its roof and the way we arrange our bird fencing.

How we combine and site our various elements adds or detracts from their ability to maximize the efficiency of their multi-functionality. Creating redundant spaces and incorporating redundant-functioning elements increases diversity, which adds to the resilience and thus the stability of our systems and homestead.

Multi-Function Element – Pigs

Pigs have the ability to do more than turn my creek into a muddy wallow and turn broccoli into bacon. Joel Salatin reinvented the market for pigs.

I can also tweak his methods and make it just one stage. I can let them clear land (and run off predators) ahead of chickens. Chickens further till land, spread the pig manure, consume things they missed, and make my scrub woods a field ready for replanting a little bit faster. If I have relatively savvy chickens, I can arrange my pigs as a buffer between the poultry run or rabbit hutches and nearby woods or fields. Throw 3-5 pigs in a space, and even stupid domestic dogs will rethink crossing that lot to play with the fun feathered things. I’ve seen a coyote destroyed by a handful of five-month porkers, and it’s just not pretty.

I can also use them to create a no-rodent/canine/cat zone on the non-dog side of garden beds. Foraging pigs are pretty smart. Run a loose line at the top of a fence or between trees where the pigs’ hot line is, hang some bells or cans from the line, and slap it periodically as you toss in a squirrel tail and barely-keeper fish, entrails, bug-eaten produce, gophers, scraps – anything extra, they don’t care. Pavlov’s got nothing on pigs that discover goodies at the sound of a bell.

Happily, wild critters are pretty smart, too. I’ve seen raccoons change their mind when they hit the top line with a bell on it and hear those “feed me” squeals. On the other hand, I’ve also accidentally bumped an alarm line while already flailing for balance on loose leaves, which led to one of the scariest moments of my life. Pigs: double-edged swords.

Pigs would be one element in a system – any system. They’re

  • one of several food elements (garden, poultry x1-6, goats/sheep, rabbits),
  • one of potentially three brush removers (sheep, goats),
  • one of potentially two tillers (chickens),
  • one of potentially four garden/crop clean-up critters (chickens, goats, sheep)
  • one of potentially six alarm systems (guineas, dogs, chickens, geese, donkeys), and
  • one of potentially five guardian or protection systems for smaller livestock and gardens (dogs, large aggressive geese, donkeys, Winnie the Winchester or Kimmie the K98)
  • one of several manure contributors (any non-dog, non-cat)
  • one of several manure/compost spreaders for fields and garden areas (chickens, geese & ducks to lesser degree)

They potentially serve seven functions for me. Their characteristics mean that I need to haul them water and spend enough time dealing with them that I can safely enter the pen for the keepers and handle the raise-out(s), or I can spend more time and stick them in harnesses on leashes to forage other areas or just be more amenable to humans.

If we ran the same analysis of ducks, we could see the same type of multi-function creature that provides:

  • Bug removal/pest reduction (direct garden patrol when nothing is overly small; there’s less waddle-waddle, smack-smack compaction with mulch)
  • Parasite reduction (ticks)
  • Eggs
  • Meat
  • Manure

Different animals provide fewer and more services. They all come with pro’s and con’s like size, noise, feed needs, water needs, human care, weather resistance, protection, and their ability to interact with other elements. Our needs, capabilities, and desires affect what might fit on our space and in our lives.

Ideally we also seek out the animals that let us cover each of our systems’ needs in multiple ways – redundancy to build resiliency, using stacked-function elements that each perform multiple services. It creates a complex web, but when we have complex webs, we’re nearly immune to losing a strand or two. It just doesn’t hurt us the way losing a link in a single chain would cripple our production and self-sufficiency.

Multi-Function Element – Tree

Another individual element would be a tree – super simple. We can take a produce tree like an apple or a “resource” tree like locust. Locust wouldn’t be my pick for being right next to a house, but if I had rabbits in a small lot, I might go for it.

Apples provide:

  • Fruit for fresh eating, preservation, cider (and regularly, easy-storing fruit)
  • Fruit for pectin (potentially)
  • Fruit for livestock feed (potentially – too rich for some)
  • Limbs & leaves for green feed (rabbits limited, goats, sheep, chickens)
  • Limb tips & leaves for tree hay (rabbits, goats, sheep, limited chickens & cattle)
  • Limb tips, fruit cores, & leaves for silage
  • Pruned branches for garden supports, chipping into mulch (don’t mulch berries with Rosaceae leaves), smoker chips, kindling & rocket stove fuel
  • Mid- to late-spring pollinator fodder

Two goats under tree, one on hind legs nibbling leaves

The locust provides:

  • Nitrogen for nearby plants (leaves, roots)
  • Limbs & leaves for green feed (rabbits limited, goats, sheep, chickens)
  • Limb tips & leaves for tree hay (rabbits, goats, sheep, limited chickens & cattle)
  • Limb tips, fruit cores, & leaves for silage
  • Limb tips & leaves for leaf mold (fertilizer & mulch) or shredded leaves for worm bins & compost
  • Pods for fodder (honey locust)
  • Branches for fencing & tool handles
  • Firewood & kindling
  • Pruned branches for garden supports, chipping into mulch, kindling & rocket stove fuel
  • Early- to late-spring pollinator fodder (neck-and-neck with sage for the best honey)

Both trees also have the potential to be shading a greenhouse, workshop, or home against summer’s blasts, or shading livestock coops or hutches, sheds, tractors, tie-outs, or pasture. They could also very easily shade a hammock or patio set, creating an outdoor living area, or make up part of the wall and “roof” of an outdoor cooking area.

Everything that goes for the apple also goes for most fruit trees and some nut trees. There are other livestock fodder/forage trees and things like aspen and maple that provide some to many of the same functions and services as the locust.

When worked into a guild with other plants (basically: companion planting on steroids), the apple and locust become part of a multi-function space, with some of the functions overlapping to create the same redundancy and resilience discussed with the livestock. It’s possible even in a small space by coppicing that locust (or replacing it with another, smaller N-fixing tree, or using N-fixing shrubs instead) and selecting dwarf and semi-dwarf trees.

Single-Element Replacements

Although we can get even more out of a space by combining multiple multi-function elements that work together or have similar needs, there are times when a simple solution still does wonders for us.

Thorny and dense shrubs can harden fences against livestock and intruders, create chokepoints, and serve as windbreaks while also providing a food or resource.

For example, fences and windows. It’s pretty common to have a foundation plant around homes, and living fences or using fences as trellises isn’t uncommon. It’s a pretty well-known trick to use a particularly uncomfortable shrub or bramble to create choke-points around property, make fences a little “harder”, and make it a little less likely that somebody just hops up and through our widow without us knowing. Defensive properties are one function. I totally accept aesthetic landscaping as a function.

We can boost those functions by selecting roses that produce copious hips, thorny shrubs like goji and some of the nostalgia berries, and bramble fruit like raspberry. In the case of raspberry, I not only get either a medicinal or a fruit, I get both. With a lot of them, I can also select harvest tips to use as fodder supplements for rabbits and goats. Raspberry and blackberry canes add a lot of flavor as a smoker wood.

Rubus – Blackberry ‘Loch Ness’

The Bio-Integrated Farm: A Revolutionary Permaculture-Based System Using Greenhouses, Ponds, Compost Piles, Aquaponics, Chickens, and More

Seaberry is a pain for humans, but chickens are happy to work for the berries. As a dense, spiky plant it makes a great living fence and it has the benefit of being a nitrogen fixer, so heavy-bearing plants placed alongside it can reap all kinds of benefits, from fertilizer to protection from deer and humans, to less wind.

We can replace our just-showy shrubs with vitamin-packed blueberries, honeyberries and aronia and still get explosions of color twice a year, but also get human and livestock food and increased pollinator presence by tailoring our plantings so there’s always something for them.

If we already have a patio bed or sidewalk we past nearly daily, that’s a great place to put our berries and greens that so quickly go from perfect to squishy or tough and bitter. We can easily intermingle them with our annual and perennial herbs and flowers to maintain a pretty space.

Using a bed near a house or building also allows us to quickly and easily attach porous lines to our downspouts or water barrel overflows, directing even short, light rains to water-needy plants like greens and tomatoes.

Plants, plants & more plants … always with the plants

In my defense, plants are the fastest, easiest way for absolutely everybody at every skill and scale to increase their resilience, and they tend to offer almost as many functions as a chicken – without the noise. However, we can stack functions with abiotic things as well.

If the bane of my existence is mowing and I have downhill spots in my yard that turn into swamps every time it rains, I can solve two of my problems by deep mulching uphill – using landscape fabric. The mulch not only limits how much I have to mow, it also slows, spreads, and absorbs some of the rain, increasing infiltration and requiring a little more rain to fall before I have to jump the Niagara on the way to my car or mail in the morning.

I can also deeply mulch a play area so I can still kick the kids out when it’s been raining. And if it’s deep enough, children and animals are less likely to break a bone when falling off a slide, swing or tree branch.

Either mulched area is also a non-muddy staging ground for repairs and projects, harvest sorting, training, and all kinds of gatherings.

My quad isn’t just for recreation. It’s not even just deer- or harvest-season transportation and hauling. My quad also has a hitch that turns it into a furrowing plow, disker, seed spreader, and winnowing rake.

A rocket stove and thermal-mass heater can heat my pot of water now, have a cavity and lid that acts like an earthbox/slow-cooker and a cabinet to serve as an old-school warming box, be shaped into a lounger, slowly dissipates and keeps my house nice and toasty, and with embedded plumbing can have additional water right there still hot or warm for a hand wash or a faster mug of tea. A coil of hose in a greenhouse ceiling can provide some of the same benefits.

Stacking Functions – Elements to Areas

We can tailor non-living things to provide more and less shade, take advantage of sun, wind and rain or protect from wind and rain, and we can make purchases with an eye to multi-functionality (like a kiddie pool that will double as water catchment, a chick brooder, or a tarp). However, usually when we talk about stacking functions, we’re talking about productive spaces as a primary goal. If you want to eat it, it’s usually a plant or animal.

Those plants and animals can do a lot of jobs for us even if we look at them as just individuals and spread them out across a conventional homesteading site plan. When we start combining them into groups and when we start cramming them into small spaces, we can gain a lot of benefits. We’ll look at some of the ways various plants and animals can benefit each other or us by sharing space in an article that deals specifically with multi-function areas and guilds.

You don’t have to buy into any woo-woo-ology or being “green” to reap the benefits of some of the concepts to come out of environmentally friendly growing methods and lifestyles.

When it comes to things that are super useful in daily life, bed sheets rank right up there. In a world where we’d like to conserve energy, go as unnoticed as possible, or avoid stores, or when fresh resources just aren’t all that available, sheets go up even further on the usefulness scale. To be clear from the start, I’m not saying everybody should run out and buy multiple sets of brand-new bed sheets. For some uses, threadbare and worn are actually better. Used is always acceptable.

Tarps are best for some things, but tarps are also more expensive than old, used sheets we’d throw away or that we find for free or 10-50 cents each, and they tend to be larger to store. A cheap $5-10 tarp is usually about as vulnerable as a well-made used motel sheet, so if the moisture protection isn’t as much an issue and it’s a temp use, we may be able to save some money and space with sheets.

When the Sheet Hits the Fan: The advantage of bed sheets

One of the major repetitive advantages to sheets is that they’re lightweight. That means they’ll both wash and dry easily and pretty quickly, even in total off-grid situations. They’re also fairly compact, so it’s pretty easy to store them. They’re not heavy to carry. And of course, there’s the myriad uses an old bed sheet can offer us.

Uses for Bed sheets

Like any “must have” item, an internet search is going to return dozens of hits, some of them really, really good. This is the kind of area where Pinterest is worth its weight, too. I’ll stick to the less-artsy and more-practical uses here, but there’s still no way I’ll cover them all. It’s just to show some of the range so we can justify a trashcan filled with bags of sheets. I totally welcome other ideas and uses – it’ll only benefit everybody to share ideas.

Lining bedrolls – Lining a sleeping bag or bedroll with a sheet or two gives us hot-night options as well as keeps dust and sweat from hitting the thicker blankets and bag. The same applies to a “regular” bed – both under and atop the main covers, especially if there are pets. Sheets are much faster to wash and dry, especially on the move.

This also works for dogs beds, unless there’s a “nester” involved who likes to dig or root around in their spot before they lie down.

Lining furniture – I have pets, and a guy who thinks pets on furniture is normal, regardless of size or shedding seasons. I can switch out a couple of sheets on chairs and sofas, wash them, and hang them to dry in about the same time it takes me to vacuum and lint roll them. That’s especially nice if somebody drops by, because I can just flick sheets off and they have a clean place to sit besides an office chair and the kitchen table.

It also works for me. There are times I’m too sweaty to even consider padded furniture, but sometimes I’m just dusty or flecked with stuff when I’m hungry and want a break or to watch a show while I cool down or warm up. With sheets on my two rocking chairs and my squishier furniture, I don’t have to sit in the floor like a 1930s child.

Color coordinating by mood and season is just a bonus, as is catching all kinds of remotes and pocket detritus.

Plant covers – Keeping in some extra sheets can help extend our garden season, especially if we have unexpected cool weather. Thin, white or pale green sheets are best for extended use, but any color works for just overnight or for a day or two of cold weather. It’s best if they’re propped up above plants with some air space between the plants and sheets, but just covering them is enough to save tender seedlings and flowers in a lot of cases.

Heat sinks – We can use sheets to make dark curtains that absorb and hold onto more heat in winter without needing nails the way ad libbed tapestries from comforters do.

We can also fold them into 1-2’ rectangles several layers thick to lay right against our plant rows in early spring and autumn. They’ll help block some of the weeds and help protect against splash-up dirt, as well as help warm the soil, hold a little more moisture than bare earth, and protect the roots from frost a little more. Sheets aren’t going to last season after season, but not much does. If we’re only using them for a few days or weeks early and late, we can wash them and fold them back up, and protect them from the most damaging weather and extended bug attacks.

Image: An old bedsheet can be used to shade a baby or tractored livestock, or hung over a porch, used as window awnings and curtains, or spread like a tarp for even a few days or weeks to help beat blistering hot days.

Shade – Sheets aren’t going to last in the long run, but to break the heat for an afternoon, weekend, or even a particularly brutal heat wave, sheets are pretty nice for rigging as a shade cloth since they’re light enough to hang from clothesline, 550 cord, a lot of garden twines, duct tape, and household-level screws and nails. Without rivets, sheets are going to rip in high winds and after hanging soaked from rains and exposed to sun repeatedly, but I’ve had some last out most or all of the summer over rental porches in Arizona and Alabama. Folding the edges to double or triple before poking line, nails or hooks through them can help prevent some of the tearing.

Defensive Training Space – String line and weigh curtains with spare sticks and rocks, and create red-gun and airsoft reaction training courses. They’re inexpensive, faster to erect than OSB/plywood, they cost a fraction of stick construction, and they can be updated and renovated to keep experiences fresh. They can also be cut into truly man-sized targets for airsoft and paintball training. (Do not conduct live-fire drills with restricted visibility unless you have experience running live-fire drills with restricted visibility – that’s how idiots shoot each other.)


Sheets – especially thick, absorbent ones – can be turned into reusable paper towels, cleaning wipes, baby wipes, cloth pads, or hankies.

Health & Hygiene – We’ve all heard of boiling sheets for bandages. We can also cut them up to make hankies. We can go as sew-happy or KISS as we like to turn them into reusable bleach and Lysol cleaning wipes or baby wipes. They can make decent enough dusting cloths. Thicker and softer versions that are fairly absorbent can be turned into top and middle layers for cloth menstrual pads or diapers. We can use any of them to make “family” cloths (reusable adult baby wipes).

If we find multiple colors and patterns, we can color-coordinate by person for a lot of the hygiene uses, which might at least help with the knee jerk “eww” and “eek” factor.

Line floors – When there’s a sick or still-house training pet indoors, sometimes you just can’t get there fast enough. With carpets or old hardwood, this is a recipe for a lot of time on knees. My pets tend to avoid plastic (including training pads) or the cat plays with them, so folding sheets into quarters to stick in their usual areas and the runways leading to doors works far better for us.

Pine Sol and bleach are my friends, and they tend to make it all better. Instead of scrubbing on my knees, it’s a matter of wiping up the worst of it, then washing the sheets the same way I would a changing table cover, leaky diaper bedding, “accident” pants, and puked-on shirts and towels. One baby is very much like another when you love them, especially when the four-legged baby would kill, maim and die for the two-legged baby.

If it’s ugly or I’m rushed, since it’s a sheet that outlasted its mate or cost me $0.25-$1, I am more than willing to just throw that puppy away.

Lining the floors also has a great deal of use when it’s muddy and there’s a lot of foot traffic and no pre-built mudroom for dusty, sandy environments, snow and wet, and freshly tilled garden areas, especially when you’re dealing with poorly trained humans.

Sources for Bed sheets

There are lots of places we can get our hands on used bed sheets without necessarily outing ourselves as nut jobs. We can limit our “crazy” reaction by citing the camping, pet, and garden uses as our primary interest.

Image/Images: Used sheets picked up for free or at low cost can be re-manufactured and reused in all kinds of ways, to include clothing, which can be especially handy for families with growing children during a crisis.

In all cases, like free and low-cost buckets and windows and screens, the burden is on us. Other people have regular jobs and priorities. We cannot make contact once and expect them to both remember our request and keep our phone number, then declare it a dead and stupid idea. We have to check back. Weekly or twice monthly, not enough to be an annoyance, but enough to be that smiling sweetheart. Showing up in person works best in many cases, because a face, a respectful and pleasant tone, and a hand shake can still go far.

We can find used sheets from:

  • Salvation Army/Goodwill, etc. (they sometimes don’t accept linens, or don’t accept stained/ripped linens of any kind)
  • Lower-rent and independent motels (they eventually rotate worn and stained linens, and are less likely to brush you off or already have contracts like larger, mid-high level hotels)
  • Message boards for “want” ads – church and community halls, agricultural co-ops and Tractor Supply, and flea markets (ask first if it’s a member-driven location)

Usually you’ll need at least a manager. Most commonly an owner has to give their nod. Still, there’s nothing wrong with hitting up housekeeping ahead of time to find out how they handle worn linens or calling ahead to find out when owners will be available to talk to with the least disturbance. Second shift is always the busiest for hotels, so try to avoid harassing them between 1-11 p.m. In the case of donation centers, sometimes the sorters are happy to let you poke through the trash or to pile stuff beside the dumpster instead of in it.

Another use for old sheets: Divide living areas and sleeping quarters into separate spaces with easy-hanging privacy curtains. It can save some much-needed sanity during even a temporary crisis.

Preparedness via Bed sheets

Some of the other uses for bed sheets in various condition include stocking them for clothing fabric, having plenty of extras on hand to limit rainy-day laundry, and hanging windows and doors with 3-4 overlapping layers to help with light discipline. They can also be used for animal and human towels, outdoor shower privacy curtains, and to hang for a DIY iPod or cell phone movie projector screen.

On the “daily” side, we can also turn them into tablecloths to cover our buckets and cases of stockpiled goodies or use them to make hook rugs and animal bedding. When we start accruing friends and relatives at our prepper palace, we can hang sheets as curtains to at least visually divide space (don’t knock it – high stress is a bad time to have fights break out because one person’s fidget is another person’s pet peeve; there’s a reason some of us take our glasses off in church and waiting rooms when somebody’s twitchy or acting up).

Bed sheets have lots of uses, with tons of crafty DIY out there for those interested. When it comes to preparedness, they offer so much potential for such a low cost and relatively tight storage space, they’re almost a shoe-in for a must-have list.

When it comes to things that are super useful in daily life, bed sheets rank right up there. In a world where we’d like to conserve energy, go as unnoticed


What is it that makes natural disasters so dangerous? Is it due the fact that it has the ability to destroy anything that stands in its way? Or does it have to deal with our inability of recognizing the signs of danger? Well, the answer is neither. The reason why a natural disaster is so dangerous is simply because we don’t prepare. A large percentage of the American population goes throughout their day-to-day lives without ever thinking of a natural disaster occurring.

That being said, it’s important to ask yourself, “How can I survive something I’ve never prepared for”? It would be like walking into a room to take an exam, you never studied for. The simple fact of the matter is, you can’t survive a natural disaster without preparing for it. This is why earthquakes, hurricanes, floods, and tornadoes rips cities apart, taking thousands of lives with it and causing billions of dollars in damage repairs.

Believe it or not, a natural disaster like an earthquake or flood can strike at any time, without warning. In other words, even if we tried to recognize the signs before a disaster struck our home, we could still be misled and miss it. Those are the ones that cause the most destruction in communities, neighborhoods, and homes.

Time is a friend to no one,” so don’t wait until the last-minute to start inspecting your home and run to the hardware store. Don’t Wait Until The Clock Hits Zero

Cyclone Storms (Hurricane)

Even a four-wheel drive truck can be swept away with a relatively small amount of water. Either that or it’s because this is a Chevy.

It only takes one storm to change your life and community forever. Tropical hurricanes are among one of nature’s fierce and deadliest phenomena. A hurricane is like a giant engine that uses warm, moist air as fuel. Which is why they only form over warm water areas near the Earth’s equator. When the wind speeds reach 74 mph, the storm is officially a tropical cyclone. It’s also important to note that, during a hurricane, homes face the risk of getting damaged and possibly destroyed by high winds and high waves smashing against the foundation. Windows will be shattered and homes can even fall to the ground if they’re built on a weak foundation in extreme storms, like Hurricane Katrina.

Beat The Clock Before It Gets to Zero

  • Have a backup plan in case of a power outage. A home generator can keep your home powered-up when the power goes out.
  • Secure loose rain gutters and downspouts and clear any clogged areas or debris to prevent water from happening.
  • Trim or remove damaged trees and limbs to keep you and your property safe.
  • Lastly, reinforce roofs, windows, and doors (garage doors included) to ensure you and your family’s safety.

Downpour (Flash flood)

Flooding can quickly cut off escape routes and leave your family stranded.

There are just a few places on Earth where people need not to be concerned about floods. Despite the fact that rain isn’t the only cause for floods, anywhere water is present can make an area vulnerable. For starters, a flood occurs when water overflows and inundates land that’s normally dry. Most floods, take hours or even days to develop, giving residents a small amount of time to prepare and evacuate from their homes.

Others, generate rather quickly and with little warning. These are the most dangerous types of flash floods, instantly turning an average street into a thundering wall of water sweeping everything in its path downstream. The time that flood water spends in a house and the pollutants created in flood waters can vary greatly and determine the likelihood of a successful restoration.

Make Sure You’re Prepared and Protected

  • Once a flood watch occurs, move furniture, valuables, and important documents to a safe place.
  • Head for higher ground and stay there.
  • Avoid walking or driving through flood waters. Just 5-6 inches of water can knock you down, and 2 feet of water can swipe your car away.
  • Don’t forget the sandbags.

Foreshock (Earthquake)

Search and rescue teams survey the rubble in Amatrice, central Italy, 24 August 2016, following a 6.2 magnitude earthquake

An earthquake like all natural disasters can be deadly, and strike without any warning. An earthquake is usually caused when rock underground suddenly breaks along a fault. This sudden release of energy causes seismic waves, which is what makes the ground shake. Another way to think about this analogy, is by picturing two bricks lined up next to each other and rubbing them together repeatedly. When parts of the brick (rock) break, the earthquake occurs.

Don’t Get Shaken Up and Caught Off Guard

  • Take cover. In each room in your home, identify the safest place to “drop, cover, and hold on” during an earthquake.
  • Strengthen your home. Use anchor bolts every 4 to 6 feet to secure home to foundation. Also remember to reinforce brick chimneys.
  • Secure your space. Keep breakable items in low or secure cabinets with latches.
  • Use flexible connections where gas lines meet appliances to avoid explosions.]

Tsunami (Harbor Water)

A tsunami is actually a wave caused by sudden movements of the ocean due to earthquakes, and landslides on the seafloor. In fact, major volcanic eruptions and large meteorite can trigger tsunami as well. On average, two tsunamis occur per year throughout the world which inflict damage near the source. Approximately every 15 years a destructive, ocean-wide tsunami occurs.

Tsunamis range in size from inches to feet. In some cases, a tsunami can grow over a hundred feet high before colliding with civilization. In deep water, for example, tsunamis are rarely over 3 feet (1 meter) and normally go unnoticed by ships due to their size. As these waves make their way closer to shore, the height can increase by over 10 times.

Surf Your Way to Safety 

  • Find out if your home, school, workplace, or other frequently visited locations are in hazardous.
  • Make an evacuation plan. Unfortunately, no home, building, or school can survive an attack by a 100 foot tall tsunami.
  • Determine whether or not your street is above sea level and the distance of your street from the coast or high-risk water areas.

Common Practices For All Natural Disasters

Do’s Don’ts
●  Keep your gas tank filled.

●  Stock up on food and water. Prep for two meals a day, and 16 ounces of water per person.

●  Create an emergency medical kit to clean cuts and bruises.

●  Learn evacuation routes.

●  Purchase batteries, radios, and other devices to stay up to date on the latest news.

●  Pack a grab & go bag with all important documentation.

● Drink contaminated water.

● Be selfish, help those around you.

● Leave food outdoors for a long period of time.

●  Forget to wash and sanitize all eating utensils.

●  Lose your personal documentation. After all, once it’s gone, there’s no getting it back.

●  Panic. This will only make things worse.

In the long run, a natural disaster can occur anywhere, at any time. For those of us who have families, set a location where you and your family will meet in case communication fails. Furthermore, if you live in areas that are prone to natural disasters, never second guess leaving your home in order to escape the dangers of Mother Nature’s attacks. A home can be replaced, but a life can’t.

Stay safe!

  What is it that makes natural disasters so dangerous? Is it due the fact that it has the ability to destroy anything that stands in its way? Or does it

I am asked regularly what equipment people should have or need for tactical or hostile situations. I am not a gear-queer and tell people to make maximum use of what they have in their everyday environment, there is no need for camouflage knife, forks, and spoons. I am a great believer in the saying that “The more you know, the less you need” and I tell my students always look for equipment that is multi-use or think how something can be adapted for multiple uses.

Let me ask you a question… What makes equipment tactical? For me all that makes equipment tactical is the word “Tactical” which, is overly used these days by stores and manufactures to sell Chinese made junk. Apart from firearms and ammunition a lot of useful equipment can be found in most hardware or kitchen stores.

The advantage of kit from hardware or kitchen stores is that it’s meant to be used and worked with, not just talked about, and played with as is the case with a lot of tacticool kit. For example, I always buy my flashlights from hardware stores, they are generally a lot cheaper than tacticool flashlights and take AA batteries etc. that are more widely available than fancy lithium batteries. From a tactical perspective, you don’t need powerful flashlights, they need to be powerful enough for the job, you want to see, not be seen!

Camouflage and tactical black kit may look cool when you showing it off to your buddies but, try finding the camo flashlight or zippo you dropped in the bush when you need it… As, long as kit does not shine or reflect light it will be fine. When buying, equipment think about if you drop it, which you will, would it be easy to find! In potentially hostile environments all but essential equipment needs to be packed or in your pouches or pockets, so your orange spork should not be tucked in your hat band!

The below personal tactical gear list is taken from a proposal I put together for counterinsurgency / tactical team in West Africa a few years ago, this should give you a few hints on kit etc. I have made some explanations on why I have included some of the items, and not every item will be applicable to everyone in every situation, so use this as a guide and adapt it. This is a tactical gear list for operational personnel and I am sure some reading this will say it’s not applicable for most preppers etc. OK, then don’t read it, but remember not so long ago Libya, Syria and The Donbass (Eastern Ukraine) were peaceable countries, whose populations would not have believed you if you told them civil wars would tear them apart.

Discover in this video how this will affect you.

100 Deadly Skills: Survival Edition: The SEAL Operative’s Guide to Surviving in the Wild and Being Prepared for Any Disaster

From a U.S perspective look at what happened in New Orleans with hurricane Katrina in 2005 or the situation in South Chicago. Not so far afield look at what’s happening in Mexico, could this happen in the U.S., to an extent yes… The Mexican Cartels in the U.S. generally keep things amongst their own communities, they are making plenty of money and compared to Mexico they are relatively safe. But with the strengthening of security on the U.S./Mexican border, which will lead to human and drug trafficking routes being cut, things could spill over. What trafficking routes are left will be fought over and the now unemployed narcos will be seeking other sources of income.

Such situations can lead to what can be classed as “Bosnification”. Now when society breaks down, who takes charge? Sadly, in most places its usually the organized criminals; they are organized, armed and willing to take risks. After the Soviet Union collapsed Mafia groups took control in one way or another of local governments throughout the former USSR. Many of the irregular units fighting in the civil wars in the Balkans in the 1990’s were formed by what could be classed as Mafia bosses. You can see it these days in Iraq, Libya and Syria where local militias have taken control of areas and change sides on a regular basis, and in the meantime the local populations have to deal with their BS and taxes.

In Mexico, in theory, there is the Military, Federal Police, State, and Municipal Police to enforce the laws but much of the country is controlled by drug Cartels and their offshoots. I have worked in Mexico and the police there have an extremely difficult job. I have trained some very effective police tactical units in Mexico who in the long run were disbanded or became ineffective due to being targeted by criminals. State and local police generally live in the areas they work in, if not from and grown up in those areas, which makes it easy for the Cartels to identify them and their families. Even if the officers want to do their jobs properly are they going to put their families lives at risk to do so, or just take their pay check and look the other way? In many situations where regular law and order has broken down, be it in Mexico or elsewhere it has been up to the local communities to protect themselves.

Now, when considering what equipment you need, put it into four different layers and think what gear you need, rather than what you want. I have used British Army Infantry terminology to help explain this section, each layer would be added on as required.

  • Personal Items: Think about what should be on your person and at hand at all the time; knife, pistol, pistol magazines, cell phone/radio, lighter, personal water filter, basic first aid kit.
  • Assault Order: This would consist of the essential kit needed to conduct a short-term military type tasking in a potentially hostile environment; rifle, spare magazines, water bottles, comprehensive first aid kit, protective clothing etc.
  • Combat Order: This is the Assault Order with rations and personal equipment, that enable the you to live and fight for a period of 24 hours.
  • Marching Order: This is the Combat Order with the addition of a field equipment such as backpack, sleeping bag, poncho, cooking stove, spare socks etc. required for two week operations without resupply, except for ammunition, rations, and water.

As I stated earlier this kit list was put together for a government team who had access to military weapons, I know in most places civilians will not be able to get AK’s and CS grenades, so make use of what you have. If all I had access to was a double barred shotgun I would be happy, it’s a very effective weapon if you know how to use it and have your strategies planned! If you have access to firearms buy weapons that you can get spare parts and magazines for, in common calibers. I have heard people applauding the FN 5.7 as the best pistol on the market, and I will admit it’s a very nice weapon, but trying to get the ammo at the best of times can be a pain, during a SHTF situation, it might be easier to find rocking horse shit… I would suggest you stick to 9mm, .40 or .45 etc…

Team Formation & Equipment

Team operatives need to be carefully selected not only for physical abilities but also for social skills and their ability to blend in with other people. This means the best operatives are usually average height and weight and look like normal people. The operatives need to be physically fit and should be trained in light infantry tactics, first aid, communications etc. The operatives will need a high standard of self-discipline and intelligence; they will need to be mentally flexible enough to adapt to rapidly changing situations. The operators will need to be able to work by themselves or in team with minimal equipment and support. Our suggested size for an operational team is six operatives, this size team should be able to handle most tasks and be able to be split into two three-man independent fire teams. The team should consist of a team leader, a second in command and four operatives.

Equipment

The operatives need to be able to operate with minimal equipment and be able to adapt everyday objects to meet their needs. The operatives should be as lightly equipped as possible, too much gear will only slow them down. When on operations they should only carry what is necessary, if they don’t need it, don’t carry it. Below is a list of equipment the operative should have access to for cover and overt operations, they will not need everything for every operation.

Personal Equipment

  1. Communications; Radios, cell/mobile phones. Note: Consider if the cell phone networks will be working in SHTF situations. Remember with radios, the more powerful they are the easier they are to intercept from a distance. Make maximum use of smart phone apps if they do not compromise operational security. All communications equipment needs to be secured at all times.
  2. Power; mobile power sources need to be available for charging communication devices etc. Consider solar options.
  3. A reliable wrist watch
  4. Two good quality high capacity pistols with minimum of 6 magazines: We recommend two identical full size service weapons.
  5. Concealable/duty pistol holsters; strong side and shoulder rigs.
  6. One folding stock rifle/carbine with minimum 6 magazines. We recommend AK-47 type platforms. Note: AK platform was chosen for this location due to availability, always chose weapons you can get spare parts and ammunition for.
  7. Chest rig capable of holding 6 rifle magazines and two water bottles
  8. Plenty of ammunition for operations and training.
  9. Weapon cleaning kit
  10. Waterproof flashlight and batteries
  11. Personal first aid equipment
  12. Quality fixed blade knife
  13. Quality multi-pliers
  14. Quality pruning shears/secateurs. Note: used for building hides and clearing trails of brush that can make noise etc.
  15. Quality compass, Maps of operational areas, GPS with software updates.
  16. Minimum two 1 liter water bottles, water purification tablets or personal filters.
  17. A level 3A concealable bullet proof vest. Note: protective clothing should not inhibit movement and remember the heat factor!
  18. Smoke/CS grenades.
  19. Two Carabiners & 20 meters of 9.2 mm climbing rope
  20. Scrim net/sniper veil
  21. Backpack
  22. poncho
  23. sleeping bag
  24. stove etc.

Team equipment

  1. Spotting scopes
  2. Night vision
  3. Stills and videos cameras
  4. Bolt cutters/entry tools

Dress

Operatives should dress to blend in with their environments; civilian clothes should be used for tactical operations especially when working in close proximity of civilians. A simple green or brown shirt can blend in to bush just as well as camouflage if the operative is properly trained. Our preference for civilian cloths over military fatigues is because if you are performing an operation in a suburban/urban area you have to blend in with the public and if you are wondering around the streets in military fatigues and face paint you will draw attention.

For footwear, we suggest to wear what the general population is wearing, something light that is good for running and swimming in. Tactical boots can draw attention and their aggressive tread leave obvious ground sign. If using running shoes ensure any reflective material is removed.

The only specialist clothing we would recommend would be a fire proof balaclava and gloves. The balaclava can be used for concealing your identity and hiding the shine from your face on rural operations. Good gloves amongst other things gives you extra grip on your weapon and again hides the shine from your hands on rural operations etc. Tactical clothes for direct action operations should be fire proof and of a good quality.

Cash

Cash and assets will need to be available for operational expenses and to pay sources for information or services provided. Operatives should sign for all cash and assets and get receipts or at least record all expenses.

Safe Houses

Teams and operatives will need places to work from, live and train. Locations will need to be secure and defend-able. A threat assessment needs to be compiled on all locations uses by the team; weak spots must be identified and dealt with. Escape routes need to be identified from the safe houses to other safe locations or ERV’s. All potential surveillance and sniper locations around the safe house need to be identified and monitored. Doors and windows on all floors need to be secured, reinforced or blocked if they are not used. The safe houses should regularly be searched for listening devices, cameras or IED’s. When entering a safe house that has been left unoccupied even for a short period of time the whole place needs to be search for intruders, signs of intruders or forced entry. If a safe house is broken into it should not be used again. Fire alarms and firefighting equipment needs to be available and in working order. Above all the safe house does not want to draw attention; it needs to appear to be a normal house. It is difficult if not impossible to find the perfect safe house, find the best you can and take all precautions.

Transportation

All vehicles used by the operatives needs to blend in with the environment they will be working in and not draw attention. When working in vehicles you should where manpower allows always have two operatives in a vehicle. One would be the driver, who should always stay in the vehicle, behind the wheel ready to drive away in an emergency and the other would act as escort or navigator. Windows where possible should be tinted for surveillance purposes. The vehicles should be registered to front companies and not to the operatives or the agency they are working for, so they cannot be traced back to you by the terrorists. Vehicles should be reliable and regularly serviced, all should have a good break down kit. You will also need a recovery plan for immobilized vehicles and stranded personnel. When a vehicle is left unattended the area around it needs to be searched and then the vehicle needs to be searched for IED’s, tracking devices or contraband.

In urban areas, public transport should be used as it is good for identifying terrorist surveillance, losing anyone who has you under surveillance and is not usually an expected mode of transport for an operative.

Conclusion

Hopefully this article has given you a few things to think about. The main thing I try to stress to people about equipment is keep it simple and keep it to what you need… Remember, the more you know, the less you need!


On a different note, here’s some other self-sufficiency and preparedness solutions recommended for you:

The Lost Ways (The vital self-sufficiency lessons our great grand-fathers left us)
Survival MD (Knowledge to survive any medical crisis situation)
Backyard Liberty (Liberal’s hidden agenda: more than just your guns…)
Alive After the Fall (Build yourself the only unlimited water source you’ll ever need)
The Lost ways II (4 Important Forgotten Skills used by our Ancestors that can help you in any crisis)
The Patriot Privacy Kit (Secure your privacy in just 10 simple steps)

I am asked regularly what equipment people should have or need for tactical or hostile situations. I am not a gear-queer and tell people to make maximum use of what

In Part 1 of Introduction to Building a Storage Shed we considered why as a Prepper or survivalist you might want to build a shed, and gave some options and preliminary decisions to make and checking out to do.  In this part, we will look at some other things to consider before you install your storage shed.  And some general lessons learned to keep in mind through the process.

Storage Shed Kit Sources

Doing an online search seems to be an effective method.  Doing a search for “shed kit” on eBay gave me an idea of what was available.  Searching for the top brands found companies specializing in shed kits such as ShedsForLess.com.  Once I found the make and model I was looking for, more specific searches found the best price.  Prices seem fairly universal, although I did happen to find a sale on my choice.  A local source may be cheaper since delivery can be handled in house, but will be increased by sales tax, so the total price should be compared with companies which have to include freight in the cost but don’t have to charge tax.  It seems that shipping is usually “free” (more accurately, included in the cost) on some of the major brands.

Keep in mind that the floor is usually not part of the kit, although often can be ordered with the kit.  Often it is delivered first, from a local source, which means the quality might not be optimal.  On mine, most of the joists could be forced into place, but I had one beam which was warped at a knot, and attempting to force it straight caused the beam to snap.  Replacing it was not trivial, since the only receipt I had was the shipping order, and it took a long time for the local store to find it in their system, since it did not have my name on it or even the name of the company I ordered from.  It was under the name of the kit manufacturer.

There are kits which are material only, and those which are pre-cut.  The latter is easier to assemble and requires less equipment.

Also, when pricing a (wood) kit, keep in mind that hardware is often included, but paint and roofing are usually not, and these products are not cheap.  I could not believe they get over $30 a gallon for paint these days; fortunately Ace had a buy one gallon, get one gallon free sale.  For most (wood) sheds, the specified roofing is shingles, and those run about $1 a square foot.    Flooring, roofing and paint was about 1/4 of the total cost of my kit, and that did not include the roofing gun and scaffolding which will be used for other projects as well.

Options

Often a kit company will offer “options” such as additional or different doors, windows, a ramp, shelving/cabinets and various ventilation methods.  If offered by the kit company you pretty much have to order it with the kit.  Ventilation is good to prevent heat build-up; a “ridge vent” methodology is probably the best, but usually not available with the kit.  If you are going to use the shed strictly for storage, then windows would seem to be pretty silly since you lose wall space and reduce the security.  However, if you are going to be spending much time in there, a window or two will be quite helpful for light, ventilation and to reduce claustrophobia.

What to Have on Hand

The first thing to attempt to arrange is other people.  There are a couple of aspects of building the shed which will be very difficult for a single person to accomplish, without using “tricks” which need to be purchased or constructed.  More people not only allow completing these aspects in a “normal” manner, but will make things quicker and perhaps even “more fun”.  After all, if a single person needs to drive 1000 nails, two people only need to drive 500 each, and so on.  Plus, don’t discount the motivation having others involved provides.  If you can arrange for a person or group to help, that should be great.  If you don’t have people available or that you trust, it does not mean you are out of luck, just that you will need to approach the project differently.

There are certain basic tools you will need.  For a pre-cut wood building, that will be a hammer, drill (primarily for driving screws), tape measure (25′ may be adequate for medium sized buildings), level, framing square, carpenter’s pencil and a circular saw.  Having a cut-off saw was nice (more ergonomic and precise), but is not really needed by the pre-cut kit; the square and circular saw will suffice since there are not that many cuts left to be made.  A panel saw would have been handy, but for the one cut needed for the floor of my kit, a long straight edge, a pair of clamps, and the circular saw did just fine.  And you will need a ladder or two.  And, of course, don’t forget safety glasses and work gloves.  Plus arrange for the equipment for your preferred painting methodology.

Remember those 1000 nails?  I’ve used a nail gun for construction and it is very helpful indeed.  However, since the kit came with all the correct nails, I did not bother getting the pneumatic equivalents.  However, roofing nails were NOT included, and roofing is enough of a pain; I got a roofing nail gun and the nails for it.  Some kits say that “felt” under the shingles is “optional”.  I disagree.  Not only does it provide protection from a small leak in the shingles, but it protects the shingles from the roof panels and vice versa.  For the felt, you will need a hammer stapler and staples (no, a pneumatic stapler won’t do; it goes right through the felt, and your hands will hate you if you try using a standard squeeze stapler).  For the shingles, a utility knife and a bunch of hook blades for it, and a pair of tin snips (for the edging).  Be sure the hook blades fit your utility knife; my knife had a couple of extra pins which match up holes only in the same brand’s (much more expensive) blades.

This list assumes that everything goes perfectly, which it sometimes does not.  For instance, if there is a warped or twisted board, it can often be forced into position using a pipe wrench.  Or a twisted beam can be encouraged to stay in place with a long bolt and nut, tightened with a wrench and socket wrench.  Some places get rain, and getting raw wood wet is not wise.  A tarp big enough to completely cover the roof (and bungee cords to fasten it down with) can be a great help.  Things sometimes don’t fit quite right; I found a package of composite (not wood) shims (from Timberwolf) to be of great help in these cases.  If you end up with a crack or hole that insects can get through, some spray foam like “Great Stuff” can help.  Although roofing CAN be done with ladders, it is a tedious, slightly more dangerous process.  Buying or renting scaffolding can make it go quicker and is a bit safer to boot.  Of course, it might be easier and not much more expensive just to hire someone to do the roofing.

I used several other tools which I had on hand, to overcome problems and make “enhancements” to the shed.  These should not be normally needed.

Caveats

It is tempting to just order the kit and work on the site when the floor kit arrives.  This can be problematical; it took me over a month to get the floor flat and level (since the ground was very much neither).  Yet, the shed kit arrived only a few days after the floor kit.  Be aware of what the relative weather is between the source and your location.  My kit came from Pennsylvania when it was cold and wet, and arrived in Arizona where it was warm and dry, and sat in that wildly different environment for over a month.  It is not surprising that I had more warping and twisting than expected.  Two lessons learned.  Prepare site before ordering, and be aware of relative weather between source and destination.

The floor kit is often delivered by a local lumber outfit, who may have a trailer and fork-lift, and can put the pile in a relatively out of the way location.  The shed kit may be shipped by a standard shipper who has nothing other than pallet jacks to move things around with.  Pallet jacks require a smooth, solid surface, so they had to leave my kit in the road and I had to quickly and manually move it into my pickup.  The total kit weight is a bit over a ton, so to move it from curb to site will take more than one trip with a “1/2 ton” pickup.  When you get to the site, have something for the materials to sit on to keep them off the ground, sort the parts by size, and then stack them with the last needed pieces on the bottom and the first needed pieces on top.  I had two stacks, one of boards and one of sheets.  Cover with tarps if precipitation is expected.

Find the inventory list before you start unpacking and use it to verify the contents as you unpack.  I did a manual inventory, and matching it with the official one I found later was a bit of a challenge, since my descriptions did not match theirs.  There were a couple of pieces missing and a couple which were unusable; a call to the company got replacements sent right out.  Read the manual from cover to cover before you start, then follow it “exactly” (except for any typos) unless you are doing the build by yourself.

It was annoying that the 16′ shed floor kit came with 8′ runners; it was a challenge to keep them together and straight; I eventually gave up and used “StrongTie” connectors to hold them together end-to-end.

Standard felt is very easily torn.  It usually takes two people to install, and after we got one side up and took a break; the wind, more accurately a gentle breeze, ripped most of it off.  I finally had success with double thickness felt which is somewhat stronger, a “tool” I built which allowed me to put it up by myself, and putting on the edging as quickly as possible to prevent  wind from getting under the felt edges.  Yes, you need more rolls (being thicker, there is less length in each roll), but in climates such as ours, you generally put on two layers of standard felt anyway.

How to start

The first step is to figure out everything you want to accomplish with your shed, then find out any limitations on what you are “allowed” to put up and where you want to put it.  This includes finding out what is required by building codes.  Make sure you have plans for any alterations to be made to the shed; find the materials and figure out when in the build process you will need to diverge from the standard instructions.  Next, find the model or models of kits which you like, and get an idea of the pricing.  Arrange financing (cash or credit), prepare the site (marking and leveling for wood, forms. rebar and pouring for concrete), then order the kit.  Find out when it will be delivered and arrange to be available, with a truck or two to move the parts from where they deposit them to the construction site, and preferably people to help to load and unload.

In Part 1 of Introduction to Building a Storage Shed we considered why as a Prepper or survivalist you might want to build a shed, and gave some options and

Why would you want to do this?  Look at the name:  STORAGE Shed.  Most everybody “needs” more storage because they can’t bear to have less stuff.  And someone preparing for bad times probably has more stuff than a person who doesn’t believe anything bad can happen and expects their parents and/or government to take care of them no matter what.  Some of that extra stuff you really don’t have room for in your house, and some of your prepping supplies you REALLY don’t want to have IN your house.  Such as a generator and fuel, oil and vehicle parts, battery banks and so on so building a storage shed makes a lot of sense in some situations.  You can, of course, rent storage space; there is a large industry devoted to just that.

There are a few problems with that solution though.  One, you have to go there to get your stuff, and that assumes that you have a working transport AND that they can or will let you have access if they have no power or their computers don’t work or the people in charge are honesty challenged.  Two, you have signed your stuff over to them if they don’t receive payment for any reason (such as banks being closed).  Three, you are usually contractually obligated NOT to store some of the things you don’t want in your house.  And four, they can raise their rates whenever they please unless you have a long-term lease.  The place I am at currently is charging me TWICE what someone walking in off the street pays, and won’t reduce it.  I could rent another unit, move my stuff over, and cancel the first place, or move to another location, but I know the new price will just start moving up again.  The cost of a storage shed may seem large, but I did the math, and it will be paid off by two years of storage fees, and that is assuming they don’t raise the rate again, which is a very poor assumption.

Look at the other part of the name:  Storage SHED.  Do you have a “post Apocalypse” trade planned or set up; blacksmith, gunsmith, leatherworker, seamstress/tailor, weaver, or the like?  This could be used for your business or the tools and supplies.  Plus, a shed looks like a shed, but it does not mean it must be ONLY a shed.  It could provide camouflage for an entrance or exit from an underground area.  It can be built with concealed areas.  Some sheds are designed as or can be converted to, a greenhouse if you are interested in growing your own food and/or medicinal plants or setting up an aquaponics system.

Ok, let us assume you have decided you want a storage shed.   But can you have one?  Like it or not, there are a number of people or organizations who have control over what you put up.  Do you own the property?  If not, the owner has complete discretion over what you put up, if anything.  And if you don’t own the property, do you really want to make improvements to it?  An option, in this case, might be “portable” storage, like a trailer, or one of those transoceanic shipping containers.

Do you belong to a “Home Owners Association”?  If so, you have contractually agreed to give them complete control of the exterior of your property.  Read the bylaws to see what is currently allowed.  Figure out what you can do which abides by any restrictions.   And once you come to an agreement on what they will accept “today”, get documentation which grandfathers your shed against any future changes to the bylaws.

How close are the neighbors, and are they reasonable?  If you follow all the legal requirements, they may not be able to prevent you from doing what you want, but if they get annoyed enough, they can still cause you plenty of grief.

Dealing with Governments

And then there is the city, town, township, parish and/or county.  Each level of government will have restrictions on what can be done, based on the “zoning” of the property in question.  The less remote the property is, the more stringent the restrictions are likely to be.  These include things like the percentage of the property which can be “covered”, height restrictions, required distances from property lines and other buildings, and many other things, collectively known as “Building Codes”.  Your safest bet is to get a “building permit”, but this has some downsides.  First of all, as a survivalist, you should attempt to stay “under the radar”.  You would be hard-pressed to be more obvious than having your plans on public accessible file with the government and having inspectors checking you out each step of the way.  Second of all, it will cost.  The building permit has a fee, often based on the type of building and square feet.  I once wanted to put up a carport, and they told me I would have to pay $5 per square foot just for the permit.  For posts and an aluminum roof; the building permit would have cost more than the carport.  Not only that, but it is likely they will factor this “improvement” into your property value when computing future property taxes.

By all means, find out all the restrictions on what you can put up; violating restrictions has potential for serious annoyances if the government wants to raise a fuss (and they usually do if violations are brought to their attention).  However, if you can avoid getting a building permit, that might be a good path.  For instance, here, if the shed is less than 200 square feet, you don’t need a permit.  That means a 12′ by 16′ shed (192 square feet) can be put up without a permit being required.  Just because a permit is not required, does not mean the restrictions can be ignored; you just won’t have the public records and government monitoring.

Ways to Get a Storage Shed

The “easiest” way is to have someone build it for you.  This will not be the cheapest option, and a competent builder will likely insist on a building permit, meaning not only public records and government monitoring, but the builder and perhaps others will know all about your shed.  The incompetent builder will refuse the permit and perhaps build something which violates code, with potential for eventual legal challenges or structural problems.  For smaller sheds, you might be able to have it pre-built and delivered.  You could build it yourself, which means you have to come up with a viable design (not that hard) and get the materials, which may be a challenge.  I don’t know about your location, but the lumber here is crap; warped, twisted, split, insufficiently dried.  As my dad said when we were trying to get lumber to replace a rotted porch, “I wouldn’t use this stuff for firewood”.  The remaining option is a “kit”.  This has the advantage that the design, acquisition of materials and much of the cutting are already done for you.  A good kit will have better quality material than you may find locally and instructions which most everyone should be able to follow.

Types of Storage Sheds

There are a number of architectural shed types.  Chose what you like, and what fits your landscape and restrictions.  I’m partial to the “barn” style, because it gives you more height, and even “lofts” in some models.  Possible materials include wood, steel, aluminum and various “plastics”.  Plastic and aluminum tend to be the hallmark of cheap “department store” sheds, great for lawnmowers and garden tools, but not what you would call “durable” or “secure”, and usually limited in size.  For a substantial shed, wood or steel is usually the way to go.  I’m more comfortable working with wood, so that is the path I chose, although steel seems like it might have some advantages.

Modifications

Depending on what you will use the shed for, you may want to make modifications or additions.  For instance, wiring it for electricity may be useful.  But since there is no guarantee electricity will always be available, make sure you have the ability to plug-in a generator (via a transfer switch), or add solar or wind generation capability.  In some cases, you may want to add plumbing.  Note that no matter how much of the electrical or plumbing work you are willing and able to do yourself, you should consider getting a permit for this work and having it inspected.  Unlike the structure, which is hard to mess up (especially if professionally designed), a mistake in the design OR execution of electric or plumbing can cause fire, electrocution, leaks, odors or rot/rust.  And if not up to code, an insurance company may refuse to pay off on a claim.  Wherever practical, have the shed “completed” so it looks like you are “adding” the electrical or plumbing and follow all requirements for what must be visible to the inspector(s).  Of course, if you got the permit for the shed in the first place, follow their instructions on when in the process the various inspections should be scheduled.  If temperature control is a concern, you may want to add insulation, cooling or heating.

Flooring

This foundation (literally) of a shed is an important decision.  The common choices are concrete or joists with flooring panels.  Concrete may be “better” and in some cases easier; pick your location, set up forms and rebar, and have it poured.  It may be more expensive, and less versatile (it is kind of hard to dig through concrete if you decide a partial “basement” would be handy), and “impossible” to move.  Joists are likely to be less expensive and more versatile, and if the ground is not even, may even be more practical.  There will be beams running the length of the building, with the joists running across the building between the beams.  Flooring panels are laid across the joists and fastened in place.  Note that the beams and joists are in contact with the ground and so are at risk for rotting and/or insects.  Thus pressure-treated lumber or corrosion-resistant metal is critical here.

Site preparation is highly important since, in order for the floor to be flat and level, and stay that way, the ground must be flat, level and stable.  If it is not, you may be able to compensate by having a variable thickness concrete floor or building a foundation or partial foundation for your beams out of blocks and concrete.  A “better” floor system is to have runners the length of the building, on which the beams and joists sit.  As long as the runners are flat and level (and adequately supported), it does not matter if the ground is, plus it also allows ventilation below the shed, which can help with cooling and reduction of condensation inside.  It also puts the flooring higher, which may make entry more difficult, but on the other hand, gives more protection against minor flooding.  The runners, of course, must also be pressure-treated wood, corrosion-resistant metal, or even concrete and/or blocks, and a ramp can compensate for the step up.

What Next?

Does this sound like something which might be of value to you?  Check out Part 2 of the Introduction for some more pre-build details.

Why would you want to do this?  Look at the name:  STORAGE Shed.  Most everybody “needs” more storage because they can’t bear to have less stuff.  And someone preparing for