HomePosts Tagged "Preppers" (Page 5)

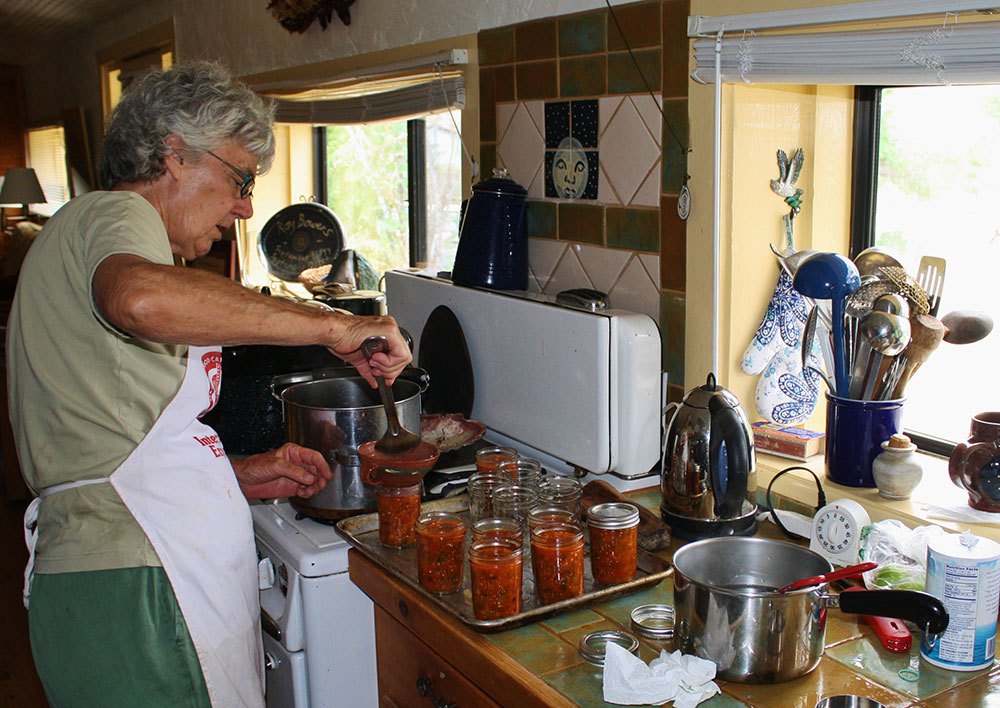
Pressure canning is, by its nature, done by those who wish to preserve an overabundance of fresh food for consumption at a later date, and as such is an activity routinely engaged in by many preppers. Of course, there are many other reasons people do their own pressure canning: environmental (only a thin metal lid to dispose of as the jar is reusable); nutritional (you know what’s in that jar); financial (saving energy by cooking several meals at once and by having convenience foods on hand).

However, those who are preparing for the dark days ahead don’t use their pressure canning to its fullest potential. They just don’t realize how important it is going to be to have variety in the diet, especially in a world where fresh and frozen foods will be lacking. 

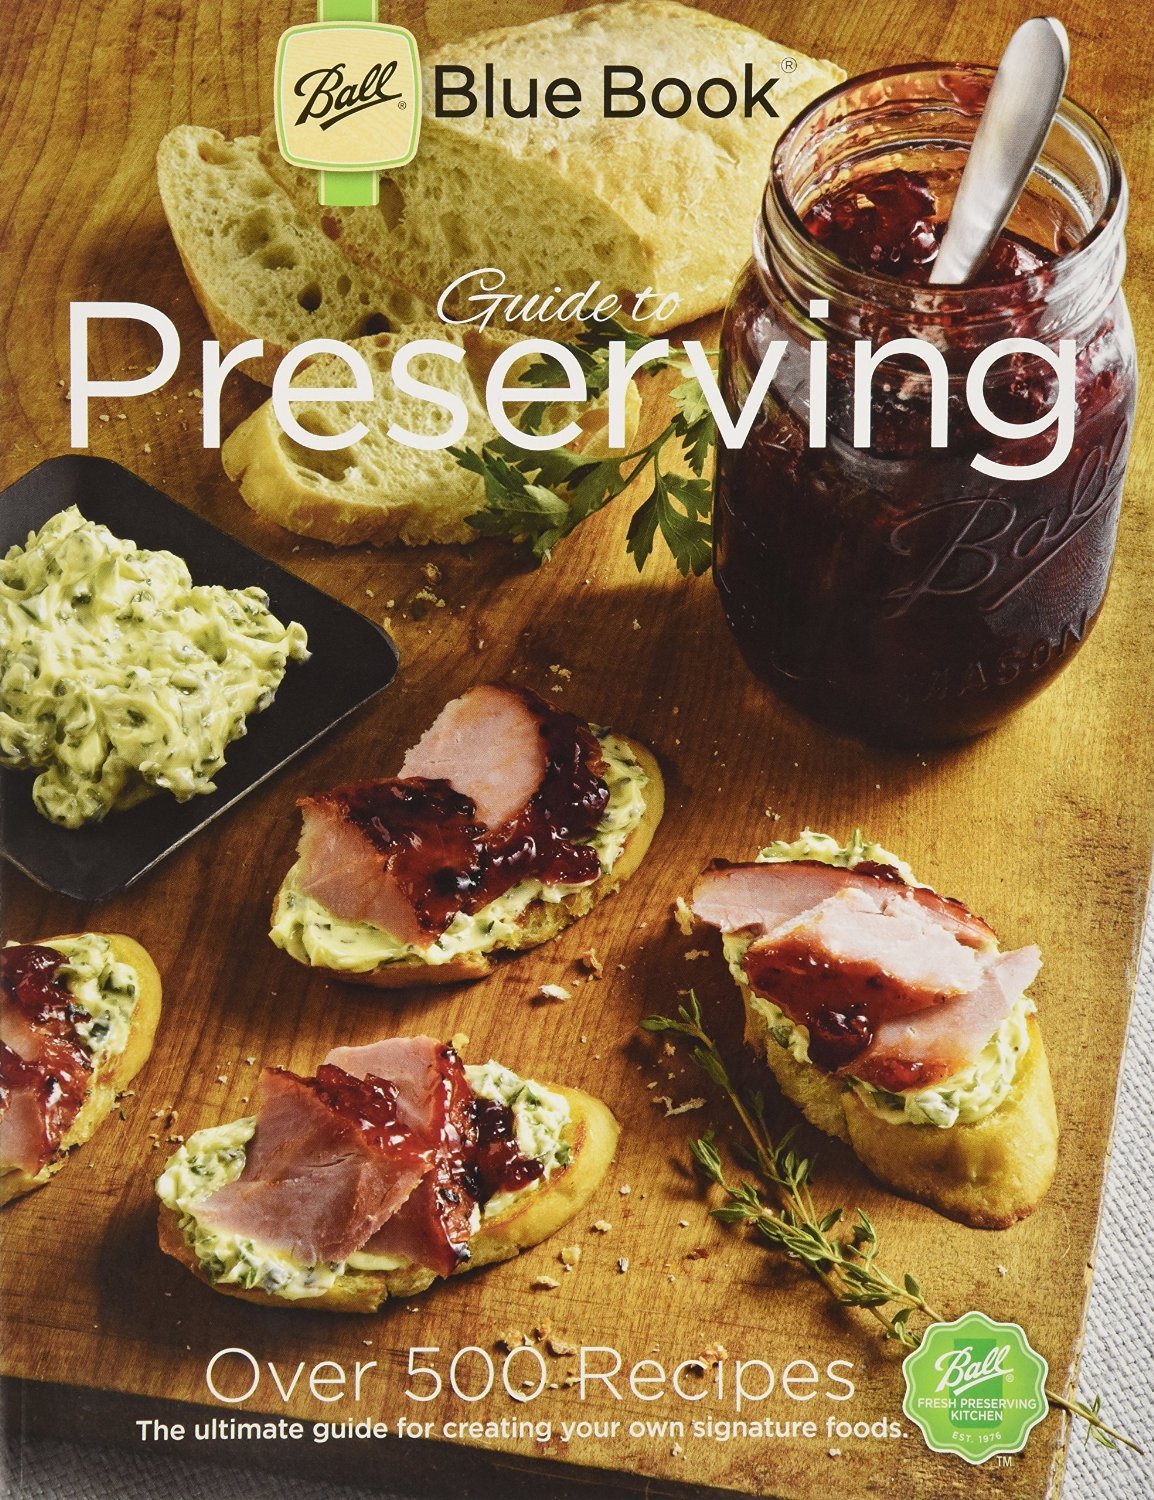
Most people look at pressure canning as a means of preserving garden produce and maybe some meat or a few stews here and there. And for those reasons alone a pressure canner is a worthwhile investment. But there is so much more that can be done. So let’s take it to the next level. The Ball Blue Book of Canning (hereafter the “BBB”) should be found in every prepper’s library and will provide all the guidelines for canning the basics. It should be consulted for all matters related to food preparation and processing times. This article is focused more on preserving some of the foods you really want to have on hand, those that will make meals a little more delicious and boost morale in difficult times.

Vegetables

Most of what is in the BBB regarding vegetables is pretty straightforward and beyond jazzing them up with spices or peppers, there isn’t a whole lot to discuss, with two exceptions. The first is canning shredded zucchini. Most people prefer to simply freeze their shredded zucchini to use later in zucchini breads and cupcakes (a favorite around here) and soups. But we’re preparing for when we won’t have freezers. So every year we can a few jars of shredded zucchini so that we can make our treats. The zucchini simply gets shredded in the food processor, packed in jars, and processed per the BBB.

Ball Blue Book Guide To Preserving should be found in every prepper’s library

The other exception is potatoes. Yes, potatoes are routinely canned so as to be able to make soups and mashed potatoes long after the fresh potatoes in the root cellar have run out. But in this case we’re talking about that other main food group in the American diet: the French fry. Even if the pressure canner was not used for anything else, it would be worthwhile (in this family, at least) to acquire one just to be able to have French fries when the grid goes down. These fries are so incredibly divine. Unfortunately, I can’t give you a taste. You’ll just have to trust me.

You’ll want a French fry cutter to make preparation a whole lot faster. Amazon sells them for about $15. (Use the larger blade—1/2”. The smaller blade is just too fine and the fries will kind of disintegrate. ) Buy a bag of large potatoes—not the super huge ones. The potatoes need to be scrubbed well, but as long as they are being used for fries, they don’t need to be peeled (soil can harbor the botulism spores, but deep-frying will kill the botulism, so no need to worry about peeling). Cut the potatoes into fries and follow instructions in the BBB, except instead of boiling potatoes for 10 minutes, only boil for three. Place the fries in wide mouth canning jars. Continue canning per instructions from your BBB.

When you wish to eat some fries (which will be often!), open the jar and put the fries into a strainer. Thoroughly rinse and drain to remove excess starch. Deep fry in peanut oil until they reach a golden brown.

Dry Beans

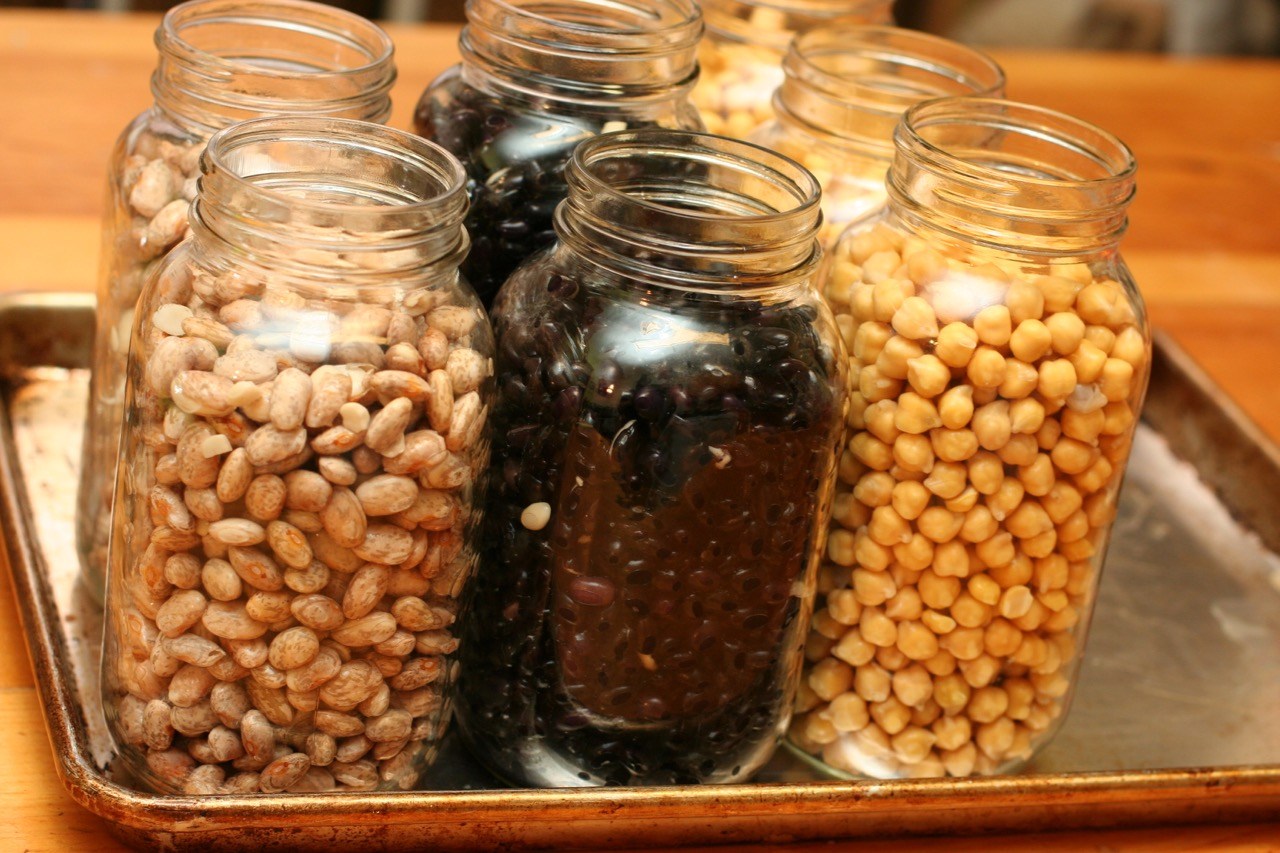
Dry beans aren’t a particularly exciting item to can, unless you get excited about saving money, time, and energy. Dry beans normally take hours to prepare for each meal. By utilizing a pressure canner, you prepare beans for several meals at once, saving money now and time down the road. So how is it done?

By utilizing a pressure canner, you prepare beans for several meals at once

Soak beans for several hours or overnight. Rinse and drain beans several times, then fill jars about halfway. This is the part that is a little tricky, and I can’t be more precise than “about halfway.” You see, the exact amount to put in the jar will vary due to several factors—the type of bean, for example black beans usually expand more than pinto beans; the age of the bean; and how dry the bean is.
After filling jars about halfway with beans, add salt (1/2 teaspoon per pint, 1 teaspoon per quart) and boiling water. Process per instructions in your BBB.

Meats

For those who haven’t ever ventured into the world of canning meats, but do have experience with canning fruits and vegetables, don’t be scared. Yes, you need to follow directions and be careful, just like for produce, but canning meats is so much faster and easier! All meats are canned exactly as outlined in the BBB; what I present here, however, are some ideas for preparing and packaging meats for other uses generally not discussed elsewhere. Having a variety of dishes in our menus will be critical to good morale in the coming crisis.

Beef

I can a good quantity of stew meat to be used as is in stews, but also to be shredded for use as taco filling, French dips, etc. Ground beef also gets browned and canned so that I can make soups and casseroles very quickly. Most people who are preppers and canners are already familiar with this. However, I know it will be very nice in the future to also be able to have a hamburger now and then. Obviously stew meat won’t work for this purpose, and neither will ground beef that hasn’t had a little extra preparation.

So this is what I do to have some hamburger patties. Form about one pound of ground beef into a log and roll it up in parchment paper that has been cut so that it is about an inch wider than the wide mouth jar being used for canning. Fold the parchment paper over the ends to help hold the hamburger log together. Put the hamburger log into the jar, making sure that you have one inch of head space. Process as per ground beef instructions in your BBB.

When you’re ready for some slider-sized burgers, run the jar under hot water for a minute or so to loosen the hamburger from the sides of the jar. Carefully slide the hamburger log out and remove the parchment paper. Slice the patties about ½” thick and fry them in a little butter or bacon grease for extra flavor. Serve with buns and all your favorite condiments.

Pork

Some pork is canned in chunks for later use in chili or to be shredded for taquito filling or super quick pulled pork sandwiches. Leftover ham from Christmas and Easter (we always get a large one for just this purpose) gets canned for adding to soups or fried rice.
I think bacon will be one of the most important morale boosters in the food department, so I can quite a bit. To can bacon strips, cut a piece of parchment paper about two inches longer than the height of a wide mouth pint jar. Lay the bacon strips (which you have cut into halves or thirds) side by side down the middle of the parchment, fold the parchment over the bacon ends, and tightly roll the bacon up as you go. You’ll need a few pieces of parchment, and you’ll want to overlap each additional parchment strip with the previous one to hold everything in place. Stop when the roll is large enough to fill the jar and place the roll in the jar. Process per BBB instructions for canning pork. When you wish to cook your bacon, you’ll need to run the jar under hot water to soften the fat and be able to remove the roll from the jar. Lightly brown the bacon and enjoy.

Can there be such a thing as too much BBQ after the grid goes down?

I also can bacon ends and pieces. These are typically sold in three-pound packages. There is usually quite a bit of fat, but there is also quite a lot of solid meat, and there are some pieces that look more like regular bacon. They all get canned separately. I use the bacon fat in some of my cooking, and the meat will become bacon bits for salads and baked potatoes. Some will say that in a TEOTWAWKI situation, bacon bits will be a bit of a ridiculous luxury. And I might have agreed a few years back, but for this one experience. A few years back we had a phenomenal crop of potatoes, and as such baked potatoes were a frequent dinner in our home. The kids were getting a little tired of them, so I decided to fry up a can of bacon bits to add to the spuds that night. I could not believe what a difference it made in the kids. They were so excited! Another lesson learned in avoiding flavor fatigue.

Chicken

This is probably what we can the most of in the meat department, mostly because I have one son who cannot have beef or pork. Home-canned chicken is perfect for making quick casseroles or adding to a summer salad for a main dish meal. And with a can of chicken on hand, it takes no time to get homemade chicken noodle soup ready when someone comes down with a cold.

Chicken bones. No, this isn’t being recommended as food for people, but chicken bones can be pressure canned (using directions for canning chicken meat) for feeding cats. Because the bones are hollow, after being pressure canned they can be easily mashed with a fork and fed to cats. Unfortunately, the chicken bones are too high in protein to be fed to dogs. (Too much protein can cause kidney damage in dogs.)

Convenience foods

Pressure canning is mostly about preserving the harvest, but it’s also just as much about making life easier. It’s what people have been doing for decades when purchasing processed foods at the grocery store. However, as more of us realize what kind of garbage is being added to commercially produced convenience foods, we’re opting to do more of our own. While we all enjoy freshly prepared meals, sometimes that just isn’t an option—the chief cook is sick, there’s been an emergency, or labors that day were needed elsewhere.
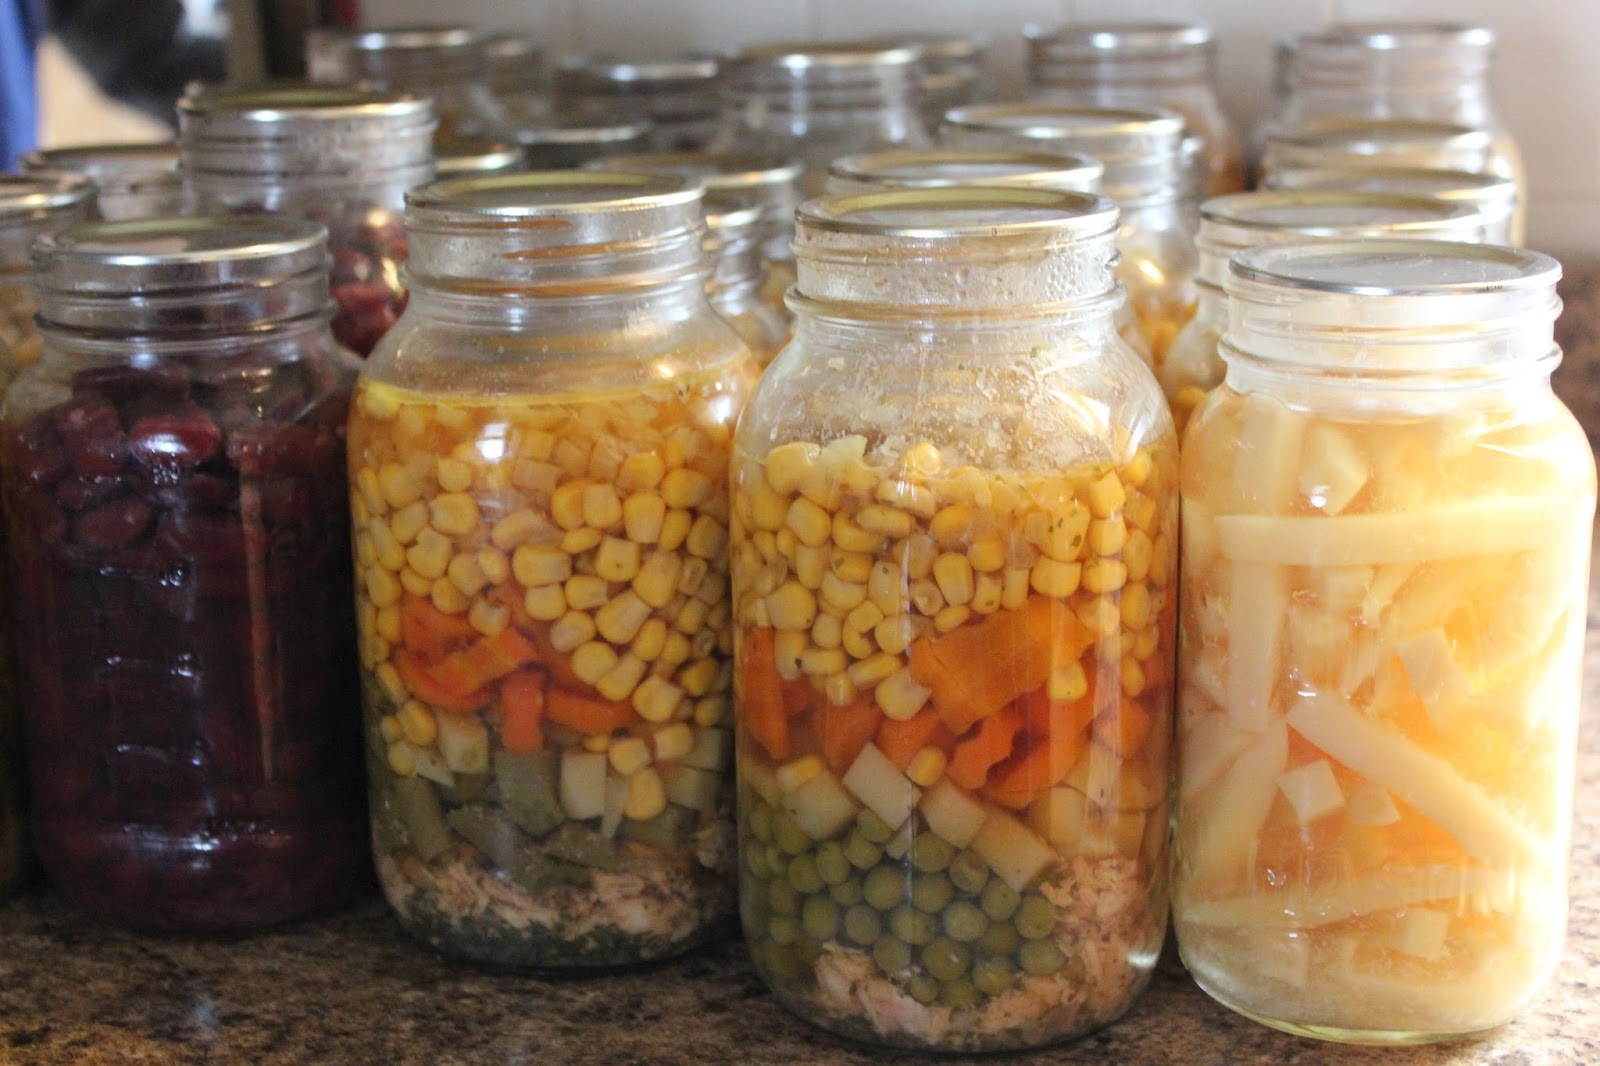
Keeping a ready supply of stew, chili, soup, and spaghetti sauce on hand for just such situations is a great way to reduce stress and be prepared at the same time.

Having some home canned convenience foods can really save the day. Keeping a ready supply of stew, chili, soup, and spaghetti sauce on hand for just such situations is a great way to reduce stress and be prepared at the same time. Because every family will have their own favorite recipes, I’m not providing any here. Most any recipe can be adapted for canning; one just needs to always remember to process for the time stated for the ingredient that needs the most time and highest pressure.

Traditional favorites for convenience foods to can at home are stews, soups and chili. Bear in mind, however, that some items just don’t do as well in a pressure canner at home. I’m not sure what the difference is between commercial canning and home canning, but unlike their commercially canned counterparts, noodles and rice just seem to go to mush when canned at home. So in this house we always add those ingredients just before mealtime.

With dark days ahead, and days that could quite conceivably turn into years, why not invest in a pressure canner and start preserving your own (at significantly greater savings over purchasing commercial products)? With more and more food being sourced from who knows where and with increasing reports of unsavory individuals employed at food processing plants, why not take control for more of our own food needs? A pressure canner is going to cost $100-$300. But the peace of mind that comes from preparing your own food? Priceless.

Pressure canning is, by its nature, done by those who wish to preserve an overabundance of fresh food for consumption at a later date, and as such is an activity

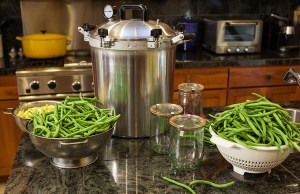
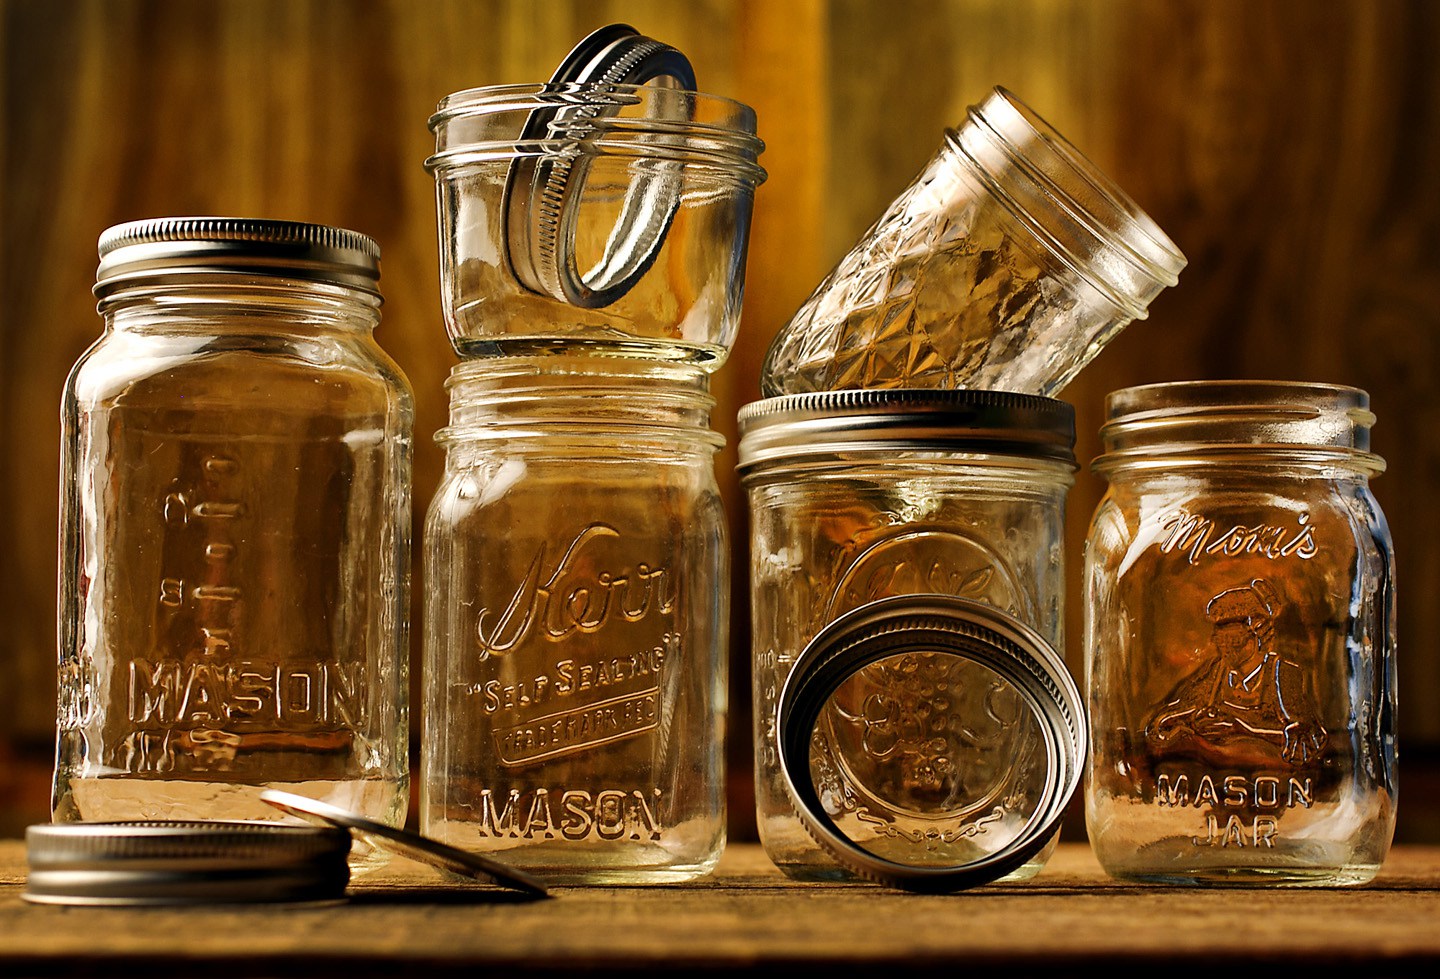
When we work our way toward a goal of self-sufficiency, a lot of times producing and preserving food comes up. There are lots of methods, and there are thankfully things like dry meats, grains and legumes, and fruits and veggies that can go straight into cellars and other cold storage. However, for most of us, canning eventually rears its head. How many canning jars we’ll need depends on whether we’re growing, foraging, fishing, hunting and raising livestock with an aim for total self-sufficiency in a societal breakdown or just some supplementary uses, and what we choose to grow or raise. Either way, we need a pretty big pile of jars (and lids). That’s a big commitment to storage space.

There are several types of canning jar lids that are reusable. That’s an area where everybody can make their own call based on what they prefer. Many of us are going to choose disposables. For every jar we get, we should make sure we have at least a couple of backup lids each.

So how many canning jars do we need? That depends on our plans. Small livestock could potentially be harvested and consumed, but if there’s no working freezer and we’re out of canning jars, taking advantage of migratory birds and preserving beefs and deer is going to be limited to smoking and drying or using up enormous amounts of our stored salts.

When the Granny Miller website was still up and running, the chart below was posted.

VegetableRequirementsChart

You are going to need a butt load of canning jars….

Get More Canning Jars … and Lids

It has flaws but it’s handy in many ways – starting point for row yields, estimating seed and start needs. In this case, it’s canning yields. For two cups of veggies a day for four people, her suggestions would require 800-1200 jars. That’s a lot of jars. That’s not a lot of calories, and most of the veggies won’t leave somebody feeling full for very long. It doesn’t account for cellar potatoes or squashes, grains, or dry legumes, of course. It also doesn’t include any jellies or a lot of never-canned fresh food like lettuces (diet food).

800 jars is a mighty pile alone: 67 flats. In quarts, that’s nearly 700# of storage on its own. It’s eight five-foot stacks taking up a bit over a one-foot square somewhere, or sixteen 2-3’ stacks we could run as a counter in a shed or bedroom if we’re inclined (my pick). We’re looking at devoting a fair amount of space to canning jars if we’re planning to delve in big time and live off our land during a crisis.

Others have also taken a stab at suggesting canning jars for self-sufficiency and preparedness, or jars-per-garden ratios, like the old Victory Garden guides and the “How Many Canning Jars” post (take this with a grain of salt: same totals for an individual as a couple, but the initial per-day breakdown is handy).

And again, to be able to can it all over again, we need spare lids.

canning-jars-breanne

Storage Space for your canning jars

Unless we’re already self-sufficient, it’s unlikely we’re using 800-1200 or more than 2K canning jars each season. That creates a lot of dead space. Jars can be stored outside in extreme temperatures, but it’s still dead space.

Happily, it doesn’t have to be wasted space. We can use our non-canning jars for some of our storage.

Water immediately spring to my mind, since few of us really have enough water storage for a comfortable buffer between a contaminated well or loss of utilities and a backup plan, but that would require actually canning them to seal it – which renders the first batch of lids “used” before a crisis even starts. There are other options, though.

Everyday Life

A lot of my dehydrated produce and herbs ends up in various quart and pint jars. I also keep in instant milk and sour cream powder. The canning jars make a far more bug-resistant storage vessel than Mylar bags or pasteboard boxes, in volumes that I can easily move through. Oxygen absorbers inside the jars keep them nice and fresh in the meantime.

009

Canning jars can be used with and without oxygen absorbers to store temporary and long-term dry foods like nuts, beans & grains, powdered mixes, and dehydrated produce.

We’re a hash brown family – any time, any day, grated potatoes make us happy. Cheesy grated potatoes make us even happier. Since I rarely make one box of instant mac-and-cheese, I tend to cheat a little. They think it’s ‘cause I love them. I’m really using evaporated milk and grating cheese so that I can stash 1-2 packets of cheese powder. That way I can use it for cheesy hash browns on a night or morning I don’t feel like cooking or am rushed.

Not only are there whole canning jar flats of my own and commercially purchased bulk hash browns in my “shop first” closet, there’s an additional flat where all my collected mac-and-cheese packets live. (Yes, we’re that lazy and that addicted to artificial colors and flavors, and we eat that much mac-and-cheese.) When I empty the jar in the pantry, I just pop in and grab more instant cheese flavoring. I do the same thing with those hideous Hamburger Helper cheese toppings.

I also use canning jars to take or send some of the tasty boxed noodles with cheese and cream sauces camping and hiking. A pint fits 2-3 packages much more compactly and with less breakage and more water resistance than their original boxes. That started as a storage supply trick, but it was just so darn handy that now some of our buddies do it just for camping.

filling-canning-jars

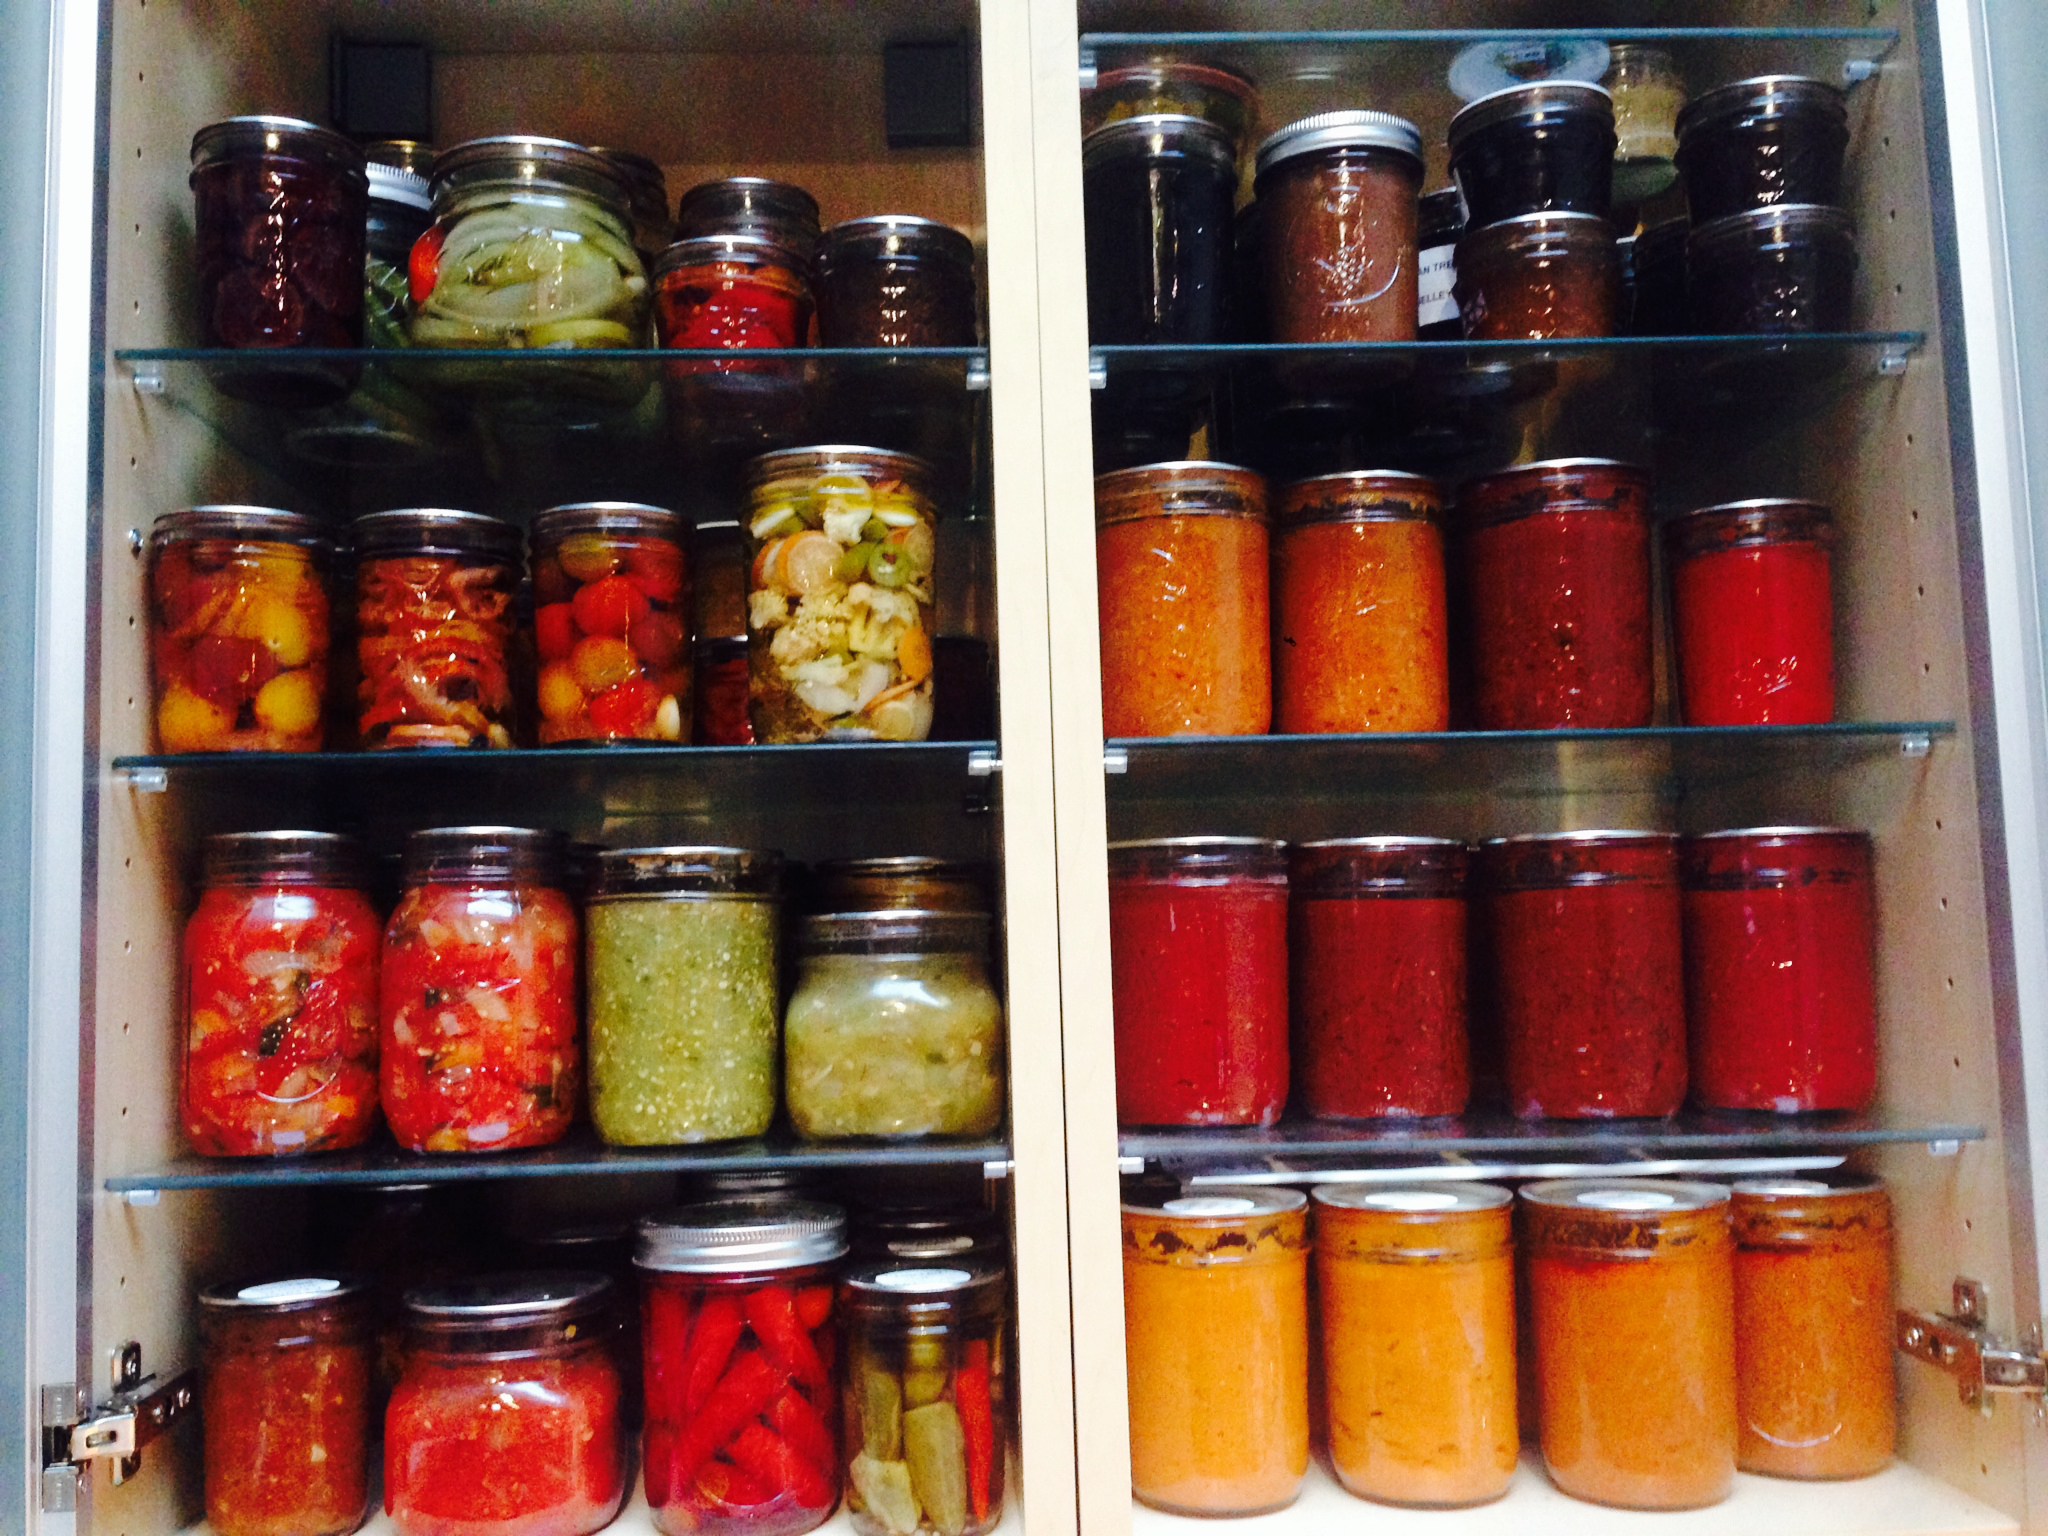
Salsa from all your tomatoes and peppers is a great canning idea. Make sure you stock up on chips too.

Canning Jars for Non-Food Storage in Daily Life

Canning jars are allowed for some of our shop-type and office-type detritus, but even though I will boil them all (I know – new rules), I still just mentally can’t deal with some things going in canning jars I will ever want for foods. Too, I don’t want them rolling around and screws and nails gouging the glass and providing a haven for grungies or chemicals.

Image: Canning jars can be used for non-food storage – just be aware of what’s going into them to avoid scratches and harmful chemicals.

Still, I do use them for banana clips, paperclips, sticky pads and flagging stickers, various tiny glue tubes, ear plugs, some sewing supplies, sugar and stirrers when I travel, some drawing-craft supplies, and some animal supplies like Cutter for fleas, the caches of Heartguard, and various dewormers.

I also keep some homemade cloth *bleach* wipes (dish detergent wipes and Windex wipes) in canning jars on my counter, and have trained my family that it’s totally normal to have a canning jar sitting in its lid and rim in the “dump the pockets” alcove and the laundry room. It’s just easier for me to haul the coins to the bank in a reasonable-sized jar with a fitting lid.

Image: I’m not the only one who keeps canning jars available for dumping coins from pockets.

There are all kinds of ways to use canning jars in our daily life. Some of them cross over into preparedness like my cheese sauce packets. Some of them are solely for daily life, like dehydrated peppers in my fridge and coins on my dryer.

30694_strawberry_blueberry_crisp_jar

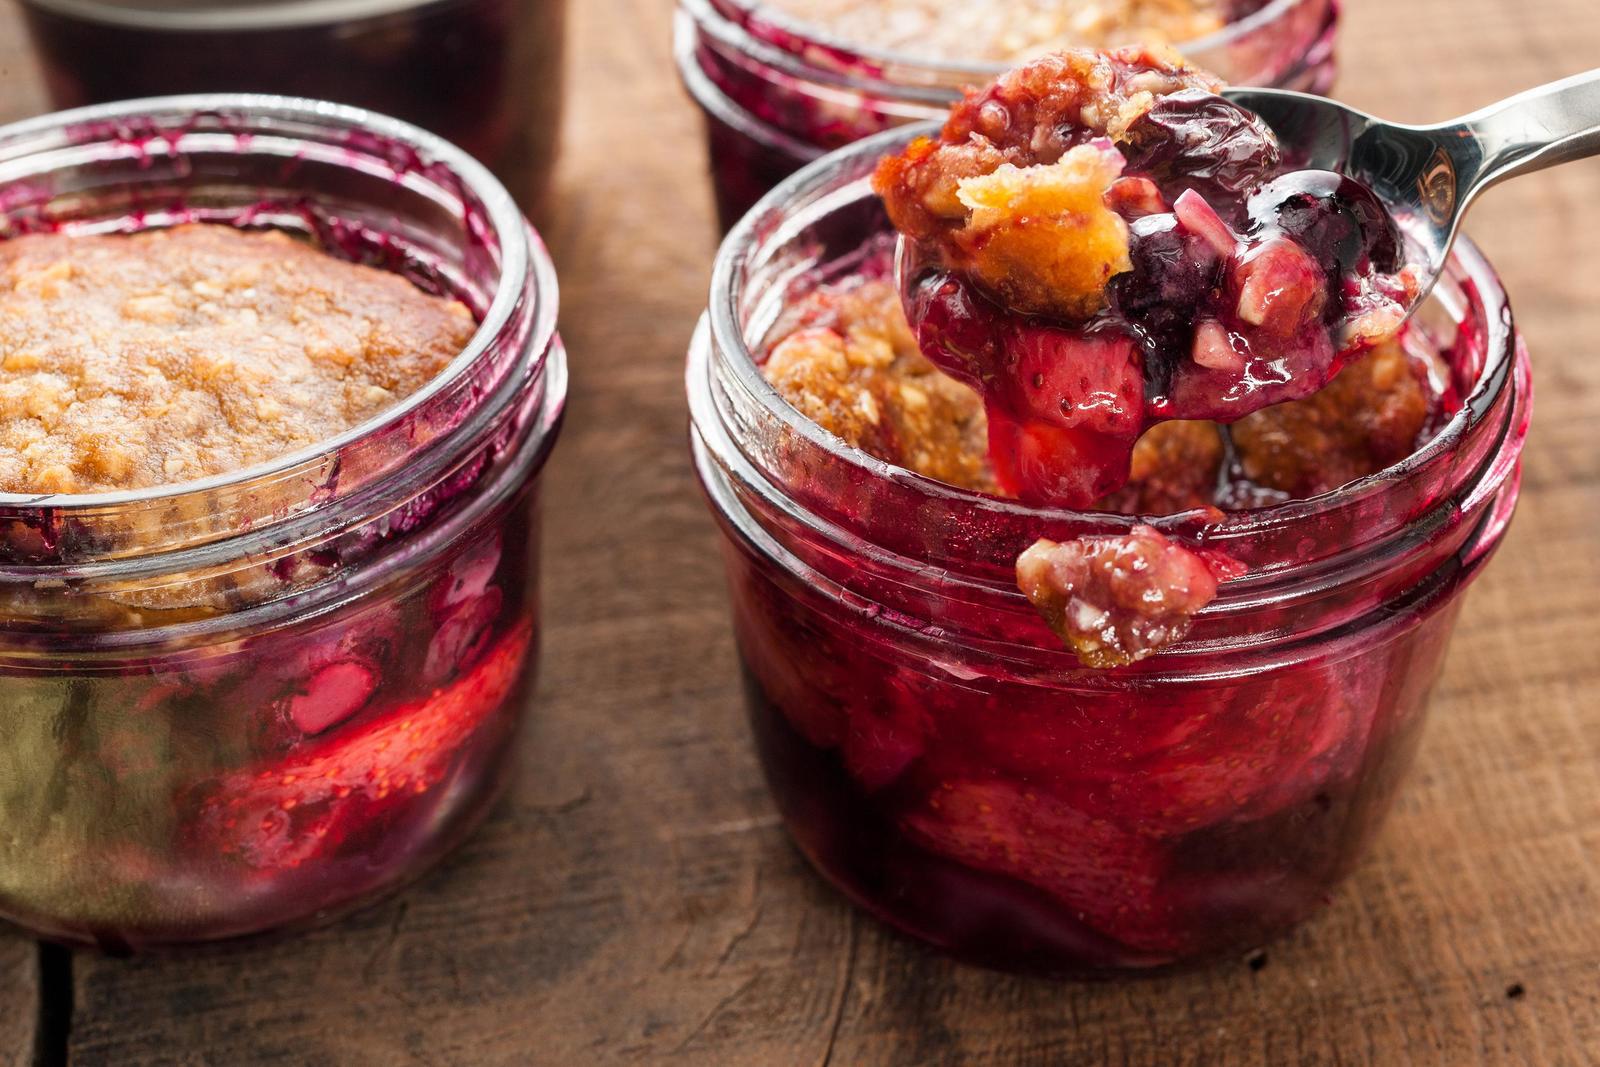
Whole meals can be canned, in this case dessert!

Salty & Crunchy Snacks can be stored in canning jars

Besides popcorn and banana chips, when we talk about feel-goods for storage, salty and crunchy foods don’t really get a lot of play. Maybe it’s because so many of those items get trashed in storage in bags, have relatively short shelf lives, and are expensive from MRE Depot and Thrive.

That’s the perfect kind of thing for canning jars.

Oxygen absorbers help extend the shelf life of our foods way past the original best-by or expiration date, and the solid walls of the jars keep delicate items safe from being crushed in the vacuum or by other bags. Portable? Not so much, maybe a few jars. But sanity saving in an outage, personal financial reversal, or serious crisis? Almost assuredly.

Think about the mood boost inside a household if you got a $5 packet of O2-absorbers, then took $13, $25 or $50+ dollars to Walmart and the dollar store, and picked up a weekly or monthly something special, something that isn’t another spoon meal like pudding or having peaches instead of berries in oatmeal.

There are also items that we only crave once in a while, but when we crave them, we’re insatiable until we get them. For some of us, those things are crunchies, be they salty or sweet.

Some of the things that can be stored for years in canning jars with oxygen absorbers are:

  • Goldfish & Chez-Its in their many wondrous flavors
  • Teddy Grahams
  • Pretzels (small rods and twists)
  • Tortilla chips (quarts or larger; don’t be silly here)
  • Corn chips
  • Graham cracker blocks
  • Cold cereal
  • Rice Krispies & Chex (yes, they rate their own listing)
  • Cookies (Crisp, dry cookies; not soft ones)
    *Think generics

Depending on the size of the cookies, it may take a couple of quarts and have some “wasted” air space inside per serving, or maybe it’s planned for just a couple of cookies with an evening lemonade or afternoon cup of tea. It depends on family size and cravings, but we don’t want a single cookie almost ever – it just points out that we don’t get cookies much. One exception would be the types of cookies we stick in the side of a bowl of pudding almost as a garnish, something just there as an extra special treat and a little crunchy finger food.

Portion Control

Another really nice aspect of storing our treats in canning jars is the portion control. It’s harder to decide not to eat a whole bag of chips, M&Ms, or cookies, or not make a whole box of Rice Krispy treats when it’s right there. It’s easier if we’ve reached into a specially marked tote or trunk or dark corner of the basement and only brought out a jar or two of whatever our vice is.

I can also shake the stuffing out of cake mixes and divide them between jars, scan the directions, stick those inside with the mix, with the note that it’s half or a third of the total – whichever divides best for the oil and eggs. I don’t usually need a whole cake mix, not really. In a crisis, a single-layer round pan or square pan or a bread loaf pan that’s been split for filling will be a mood boost as it is. When it’s just two or three of us, that’s already more than sufficient for multiple servings. I already split a baking mix when I do dessert for us a lot of the time, or I’ll freeze one layer or one bread loaf pan to turn into biscotti or triffle another time.

In an emergency, I don’t really want leftovers. Even more than now, I don’t want resentments about who got extras and who didn’t, and I don’t want bugs. Better if I can make the right number of cupcakes or a smaller pan of brownies. Canning jars let me do that.

Bonus: Even though they’re clunky and heavy, storing cake mixes in canning jars actually saves a lot of wasted air space in our cache. The jars are also a lot more water and pest resistant than boxes and cellophane.

Portion control with canning jars goes for just about anything, not just baking mixes. I do it with Chex cereal in daily life so I can open a reasonable amount of Chex Mix and not grab a handful from a big cookie jar every time I wander through the kitchen.

Large and small marshmallows for toasting, s’mores, rocky road, or cocoa are common ones in our storage. It’s one of the ways I mentally allot out feel-goods like chocolate chips to add to pancakes or bannock on a monthly basis in a disaster.

That budgeting applies to all phases of prepping storage. One jar of Milky Bones and one of chewies a week, then doggies get no more, or we stand a chance of running through all of them in three months. One jar of Kleenex, then use hankies. One jar of special-treat drink mix packets and extra tea a month, and then it’s just the daily plan for juices and caffeine. One jar of tampons, and then wear the moon cups or cloth pads. One jar of instant seasoning packets, then do it from scratch.

Image: Portion control and “budgeting” using canning jars extends to feel-good consumables and things like custom photo puzzles and miniature, party favor sized toys, games, & crafts.

I even use jars to hold some of the feel-good consumables for holidays and birthdays, and special-treat gimmicks like mini activity books and Oriental Trading Co. craft kits. Some things I store are:
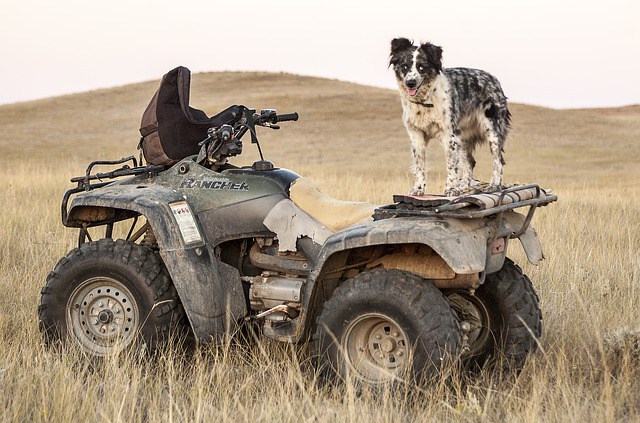
  • sponge-pill animals
  • miniature Farkle & Piggy games
  • marbles, jacks
  • keychain games & puzzles
  • cutesy soaps, lotions, mini body wash
  • custom photo puzzles

By portioning them into jars, I’m not as tempted to give them too often or grab too many at once the way I am with the ones in storage totes.

Canning Jars for Storage

Since we’ll need so many of them in a crisis or to truly go off grid, and since it’s one of the rare household goods items that really doesn’t exist in enough quantity in stores to make for a reasonable resupply once everyone has died off, canning jars and lids are something we should go ahead and lay on – in quantity.
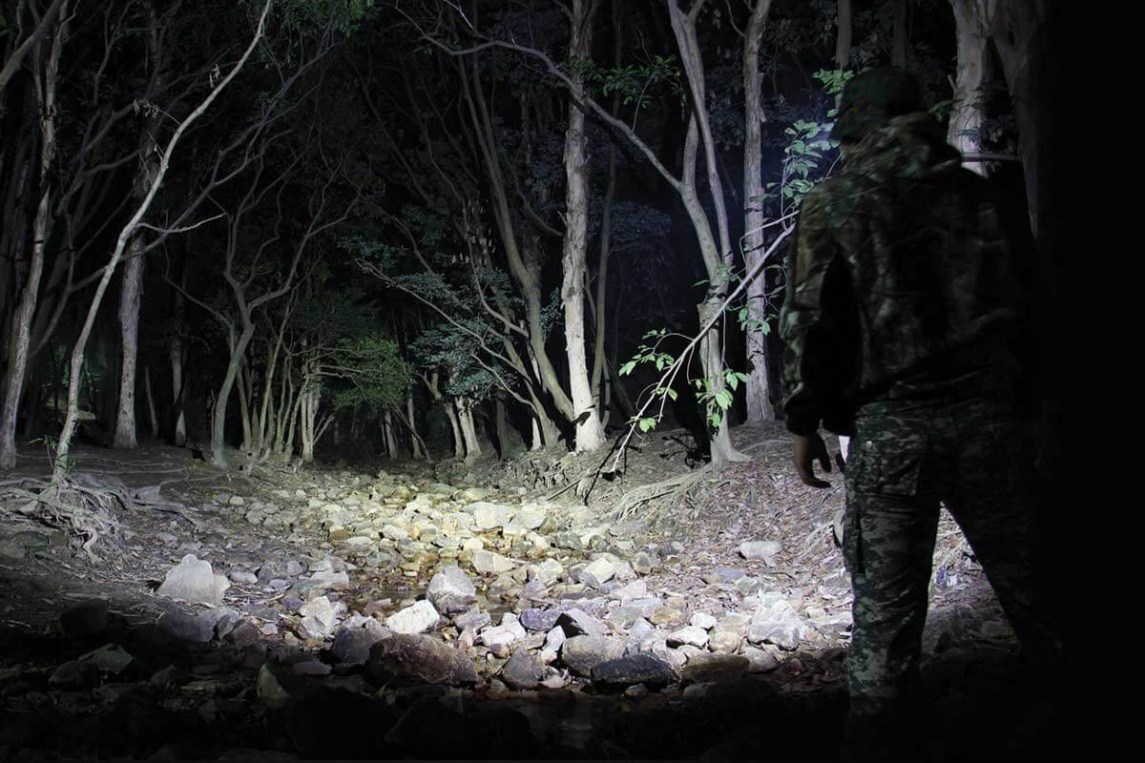
Image: Most stores don’t carry enough canning jars and lids for even one family’s meat or vegetable needs for 3-9 months, so they’re something to stock up on ahead of a disaster – they’re not like hammers and underwear that should still be available well after a major life-ending collapse.

That requires a lot of space, but we can make use of some of the “dead” space with other parts of our storage. Doing so is sometimes even more space efficient than original packaging, even with the density of jars.
Small oxygen absorbers (20cc, 50cc, 100cc) work well to seal jars to the same level that the factory cleaning does when we get them new. By that, I mean that it forms a vacuum. The seal is air-tight and more than sufficient for keeping out moisture. However, it’s not creating so much pressure that it deforms the lids. That means it’s safe to use a lid I’ve vacuum sealed with an O2 absorber for pressure or water bath canning later.
They’re not the lightest things on earth, so we have to make sure we’re using pretty sturdy shelving. Stacking them works, but make sure they’re stacked level or upper boxes like to slide forward and take out the next couple in line with them when they go.


Here’s some other self-sufficiency and preparedness solutions recommended for you:

The Lost Ways (The vital self-sufficiency lessons our great grand-fathers left us)

Survival MD (Knowledge to survive any medical crisis situation)

Backyard Liberty (Liberal’s hidden agenda: more than just your guns…)

Alive After the Fall (Build yourself the only unlimited water source you’ll ever need)

The Lost ways II (4 Important Forgotten Skills used by our Ancestors that can help you in any crisis)

The Patriot Privacy Kit (Secure your privacy in just 10 simple steps)

When we work our way toward a goal of self-sufficiency, a lot of times producing and preserving food comes up. There are lots of methods, and there are thankfully things

A ton of preparedness projects and skills can be completed in as little as an afternoon, regularly with minimal outlay of cost. Some of them can even be done with kids, significant others and neighbors, without even admitting to being a prepper. That can be a great way to learn yourself but also help others be more prepared, and fostering a work-together and DIY mindset can be huge. The confidence to do, build and create carries forward in daily life for both kids and adults, boosting other types of preparedness as well.

There’s a whole list of other ideas to research for quickie free-time, afternoon and even weekend projects at the bottom of the article. I’m not big into pushing every prepper into the Survivor-man aspect or tons of primitive/colonial skills from the outset, so you’re not going to see those from me.

Instead, here are some insights on half a dozen preparedness projects and skills that can be learned and put together in short bursts or even a single afternoon, things that can immediately affect our self-sufficiency and preparedness for daily life and major disaster events. The projects require minimal tools that most of us (should) already have.

Feather Sticks

I tend to make several when I make one, because you can use the extras to save a fire that starts to go out.

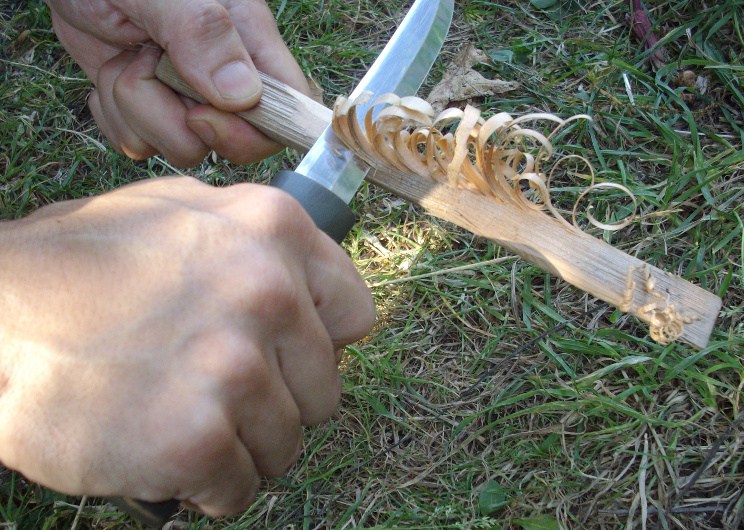
Feather sticks are handy-dandy tools anytime you’re making a fire or starting a grill, even on a small-scale with a mini rocket stove. You basically shave a stick into a fluffy cone. Doing so creates the thin shavings, increases airflow and surface area for early kindling uses, and in damp conditions has the added benefit of exposing potentially drier wood inside. They can be made with pocket knives, survival knives, and even machetes if needed.

I tend to make several when I make one, because you can use the extras to save a fire that starts to go out. That’s particularly handy in wet, windy conditions, and it’s handy while you’re learning to pyramid stack, use Swiss torches, or bank a fireplace or wood stove so it stays lit through the night.

#1 Mostest Importantest-Ever Tip: Cut away from yourself. Especially for these.

That means, do not brace a branch on your knee, ankle or thigh and then scrape a blade over a stick that could snap or have a knot that sends your blade skittering. Important tendons, blood vessels, and ligaments are in your limbs.

I won’t say anything if you’re inclined to put a stick in your shoulder and pull a blade toward your neck and eyes – Darwin is obviously working from beyond the grave and I try not to get in Darwin’s way.feather-stick

Internet hunting & phone gathering

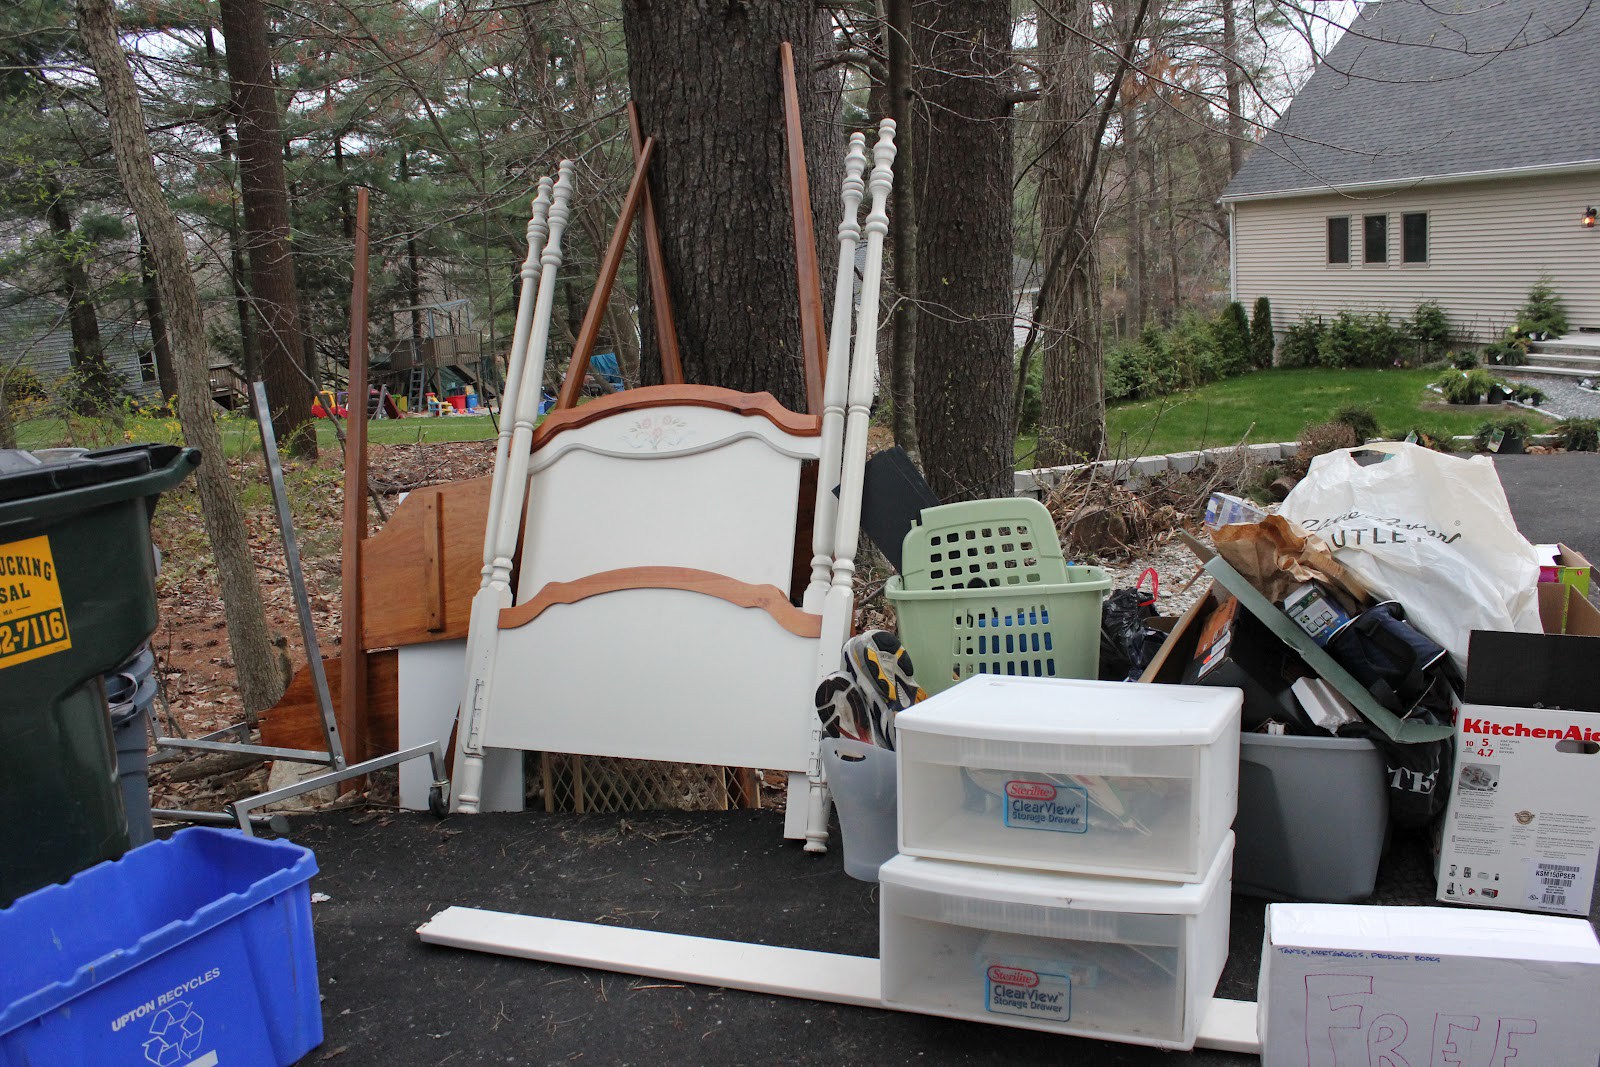
This isn’t actually a one-off. This is setting time aside to poke around sites with free and cheap used stuff, and hunting up “curbside pickup” locations.

In just one “free curbside pickup” listing, I see: high hoop poles + boards for water catchment shelves; metal trellis or bird-exclusion net supports; totes & drawers for water catchment or sub-irrigated or standard containers (big enough for shrubs and mini trees, even); and a laundry basket for growing potatoes in straw and compost

It’s also time set aside to find out who still chips trees to see if we can get ourselves a mulch source, time for calling around to see who still gets icing so we can get free buckets for food storage, and time for sourcing more buckets by calling around to see if the local humane society/ASPCA, Petsmart, Petco, or animal rescue gets kitty litter in buckets – and if they’d be willing for us to take them off their hands.

We can use Craigslist, Freecycle, and the phone to find sources for:

  • Wooden pallets (all kinds of projects, from mini raised beds to tall keyhole beds, sheds, muddy-spot bridges, etc)
  • Painter’s drop cloth (greenhouse, hoop material weatherproofing windows)
  • Replaced storm doors & windows or mesh from the same (shade covers, exclusion frames) (general contractors, handyman, window repair specialists)
  • Replaced windows and doors (cold frames to grow vegetables in cooler temperatures)

wood-pile

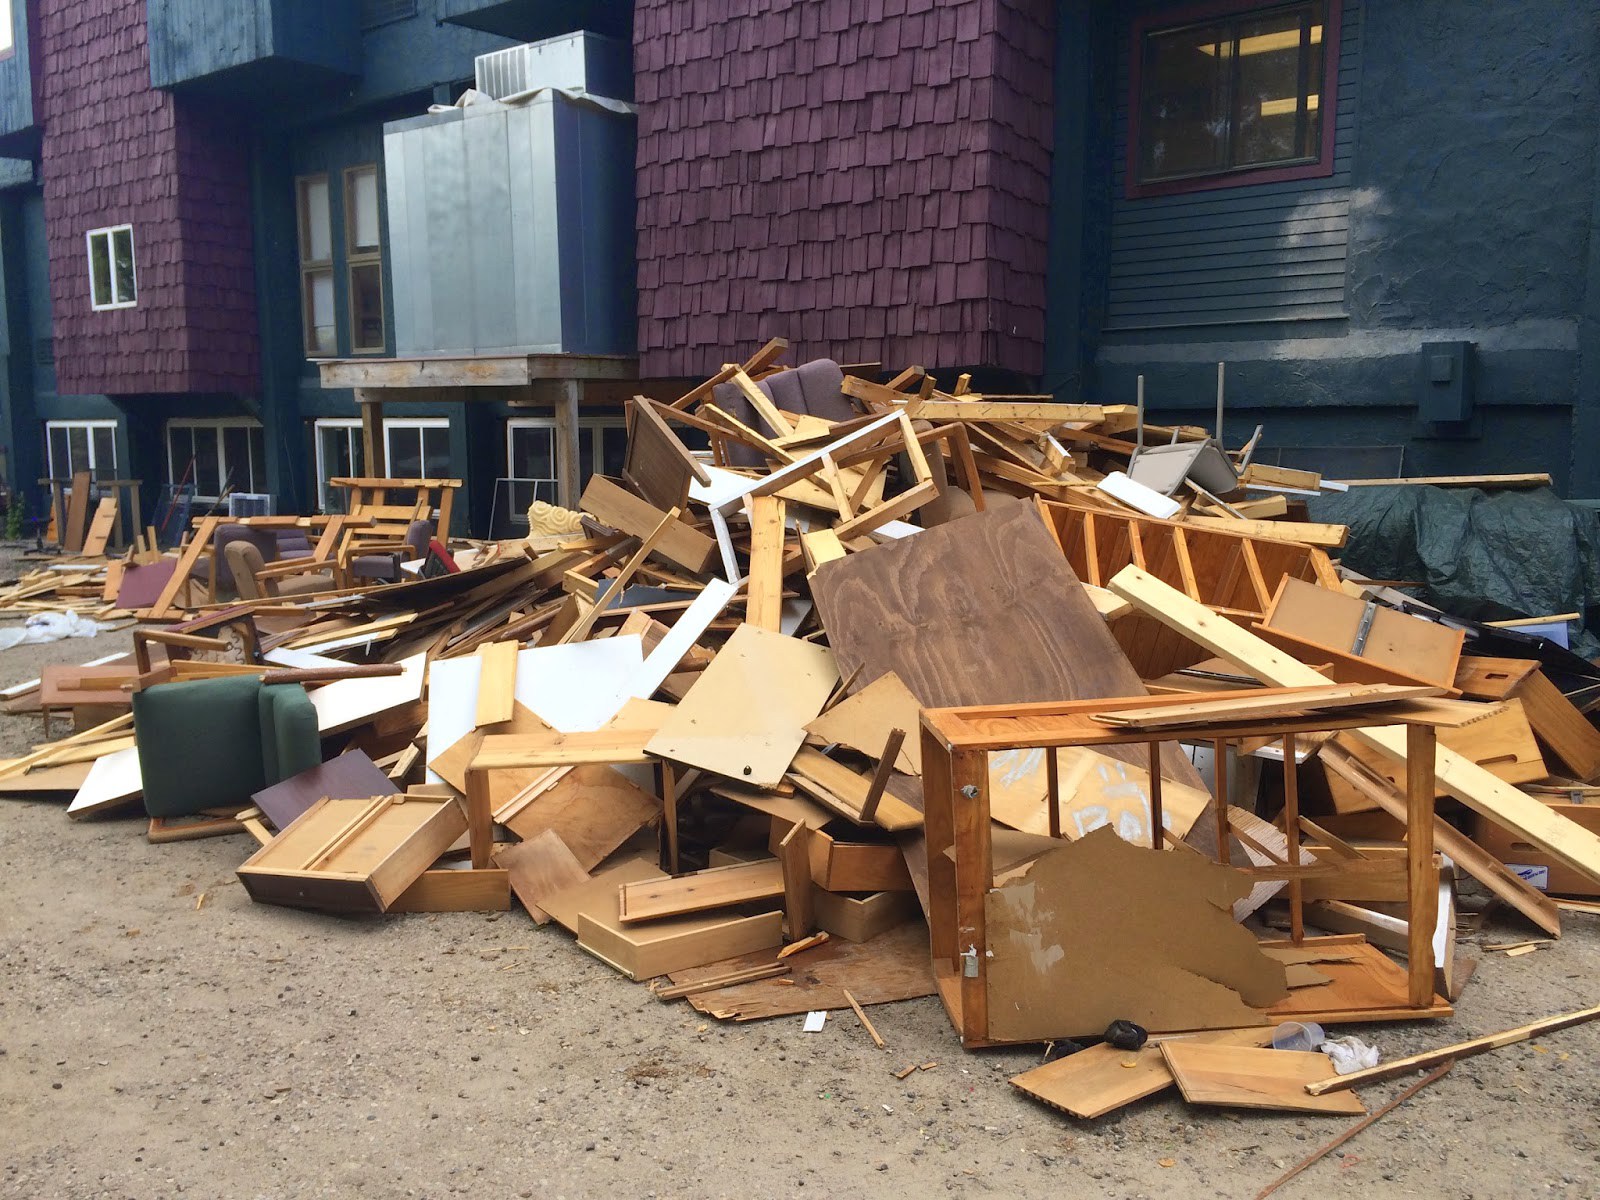
A downed tree look more like firewood or a hugel bed to me, and construction or renovation trash looks like my next source for all kinds of lumber, plus shelving I can use for raised beds pretty quickly and easily, poles for trellises and extending clothes lines, and plastic I can use as a weed exclusion, machine cover, to extend water catchment, provide shade, or to warm soil in spring and autumn.

  • Creative material for trellises, fencing, and supplies to make other items on the list from others’ refuse (2-5 drawers and a deep raised bed from a filing cabinet; old wire shelving unit; DVD racks for trellises; buckets from delis, caterers, bakeries, restaurants; liquor and appliance stores for cardboard for weed exclusion and water sinks in deep beds)
  • Dinged and scratched solar panels from roadside signs & hurricane netting from roadway construction & repair companies

Bucket rain catchment

We hear about rain barrels, but they can be pretty expensive to buy. Buckets are cheap or free, and easier to haul to the point of use, rearrange, and clean.

Especially early on, we might find some real benefit even in just stacking buckets on each other in a pyramid, or on a chair or stool, then a few bricks, then a couple of sticks or a boards, and angling them a bit so they overflow into each other and then maybe a lidless storage tote or freebie kiddie pool.

Rain catchment can be as simple or complex, large or small-scale as we want to make it – just getting started is more important than having a pretty, fancy system

If we cover them with old pillowcases, cut-up freebie sheets and towels, or shirts from yard sale leftovers piles, we prevent mosquitoes. We can also hide some of the “ugly” that way if we have neighbors or partners who don’t want to look at them.

We can also go higher tech with angled or laddered systems of several levels, drilling our double overflow and spigot holes as we collect hose, PVC and plumbing attachments.

Go higher tech with angled or laddered systems of several levels

Even if we don’t want to filter the captured water for human use, it can impact the amount we have to water plants or be used for cleaning purposes.

Draft-proofing

Draft-proofing (or at least locating) is about increasing the efficiency of our homes. We want to close doors and turn off lights, and creep around looking at the bottoms of doors and around the door jambs. If we have a partner, we can work at night, looking for places where their flashlight comes through. We can also carry a candle around – the dancing of the flame will help us locate and pinpoint drafts.

Some utilities will come out with sensors to help us find even the little holes where pipes and cables come into our homes.

Windows and doors can have various types of window weather-stripping, bottom-of-door weather strips, and “draft rolls” – homemade or purchased – put in place. We can also lay on clear insulating plastic to cover our windows with – or even a never-used door. There are also silicone sealants we can use with a caulk gun in some areas.

Cutting drafts can save us money on heating and cooling right now. It can also make our whole-house fans and our fireplaces more efficient – now and when we depend on them because grid power is out.

Earth boxes

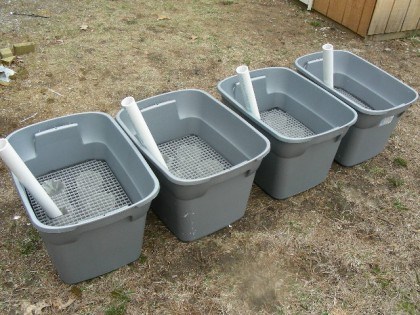
Buckets and totes, metal and plastic drawers, and even some wooden drawers can be readily turned into planters. If they’ll hold water, we can also turn them into Earth Boxes and “self-irrigated” containers.

*They’re not really self-irrigated, they’re sub-irrigated but you hear it both ways


Both input water through tubes to a reservoir space, and soil or wicks then pull it to the root zones, limiting evaporation and making our water use hugely efficient.

There are all kinds of DIY tutorials out there. What I will add to them is: Be sure you don’t actually have to buy something before you do.

I know for a fact that socks that have lost their mates can be filled with the exact same soil I plant in, and work just fine as a wick without buying any specialty baskets. Chunks of wood will eventually decay, but for a long time, they work as well as PVC or bricks for supporting the grate, mesh or upper container we drilled a million holes in. Do you need PVC, or can you daisy-chain some soda bottles together to create an input tube?

We have enough expenses in this life, especially in preparedness. Pocket what you can. Buy another can to put back or go wild and treat yourself, a partner, or the family to Value Menu sundaes or a new DVD when you can.

earth-box-4

I don’t have a lot of problems with nutrient runoff with these buckets, but you could elevate containers above other buckets, tubs or pools to collect it if you do, then dump the water back in. I’m just not big into the water-shedding lids (I hate not using rain). Mulch helps preserve more water and protect soil from compaction, which is another issue some folks have with bucket planters and container gardens.

Don’t have all the materials yet? No big.

Use the buckets as containers. Drill holes a few inches up or as much as 4-6” if you’re going to build one in the future. Fill to the holes with pine cones, sticks, logs, gravel, or mulch to limit your fill dirt to 6-16” – that’s sufficient even for corn, with a healthy mix, and the bottom becomes a water storage reservoir still, while promoting drainage. You can upgrade them into earthbox-type planters later.

More preparing with quickie skills and projects

Some other quickie afternoon, one-day and weekend projects and skills to consider are:

      • Creating and scouting positions for small-game and bird snares
      • Homemade solar cookers
      • 550 cord fishing lures (or make them out of boot laces) get crazy creative and pick out extra threads to make newts and frogs, too

  • perfect casting your fishing line (set up competitions in the yard)
  • Pace count (multiple terrains)
  • Pace count in full pack (or a small pack with equivalent weight inside); with one leg strapped straight for a hobbling effect; with an arm tucked inside your shirt/a sling
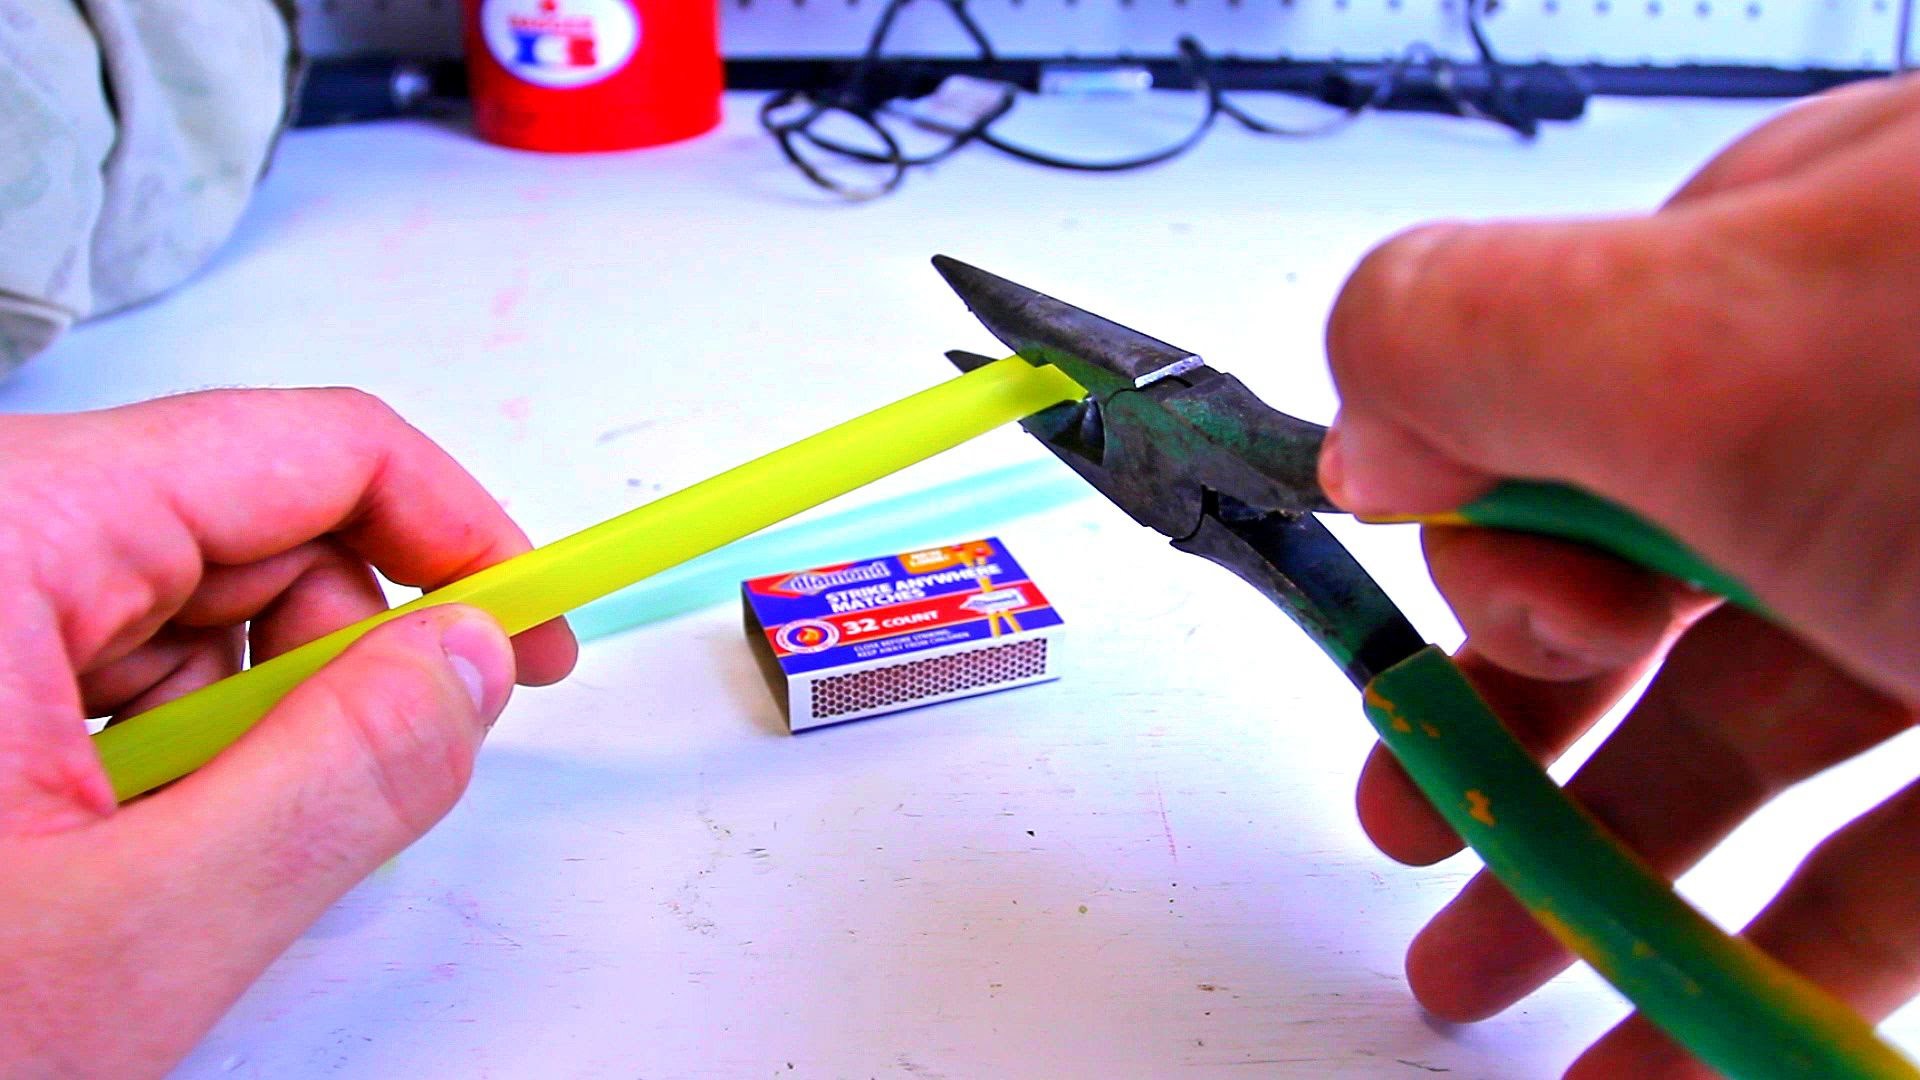
  • Disposable Straws for EDC, BOBs, and camping ***Go easy if you’re inclined to put flammables like cotton, sawdust, etc. in your straws, and try to think about the flame you’re going to use for sealing it before you play with alcohol, hand sanitizer, or pre-shaved magnesium.

straw

  • Solar showers from garbage bags and garden sprayers
  • Solar cooking grains in a canning jar by hanging it inside dark plastic or cloth
  • Swedish torch
  • Rat-trap squirrel traps
  • Master sharpening knives – properly – Angles and tasks matter with blades. Dull and wrong-angle, curled-over, nicked blades increase the labor it takes to do our work. Mister P would not be allowed near my knives if I had to hold them in my teeth and use a curb to sharpen them. Papa P, now, that man could probably sweet-stone a shaving edge on a machete or a chopping wedge onto a box cutter if he needed to. The skill matters now. If we’re ever cut off, it matters more.
  • Bucket-can & bucket-shingle mouse & rat traps
  • Garden journal/binder
  • Important document binder (& electronic versions)
  • Medical DIY home-remedy binder
  • Quiet step in woods & water
  • Proper knots for hauling, packing, tying off, and building tepees – which can in turn support poles and racks for clothes lines and drying foods or creating shade and plant protection
  • Rat-trap visual perimeter alarms
  • Carrying and stacking wood – It’s not always as easy as you’d first think, and there are some camping and backpacking hacks that help, and some nifty circular or beehive piles that put tons of wood in a very small footprint
  • Cord nets
  • Ash cakes

Outdoor/Clay bread ovens (and research the order of baking and ways colonists used all of the heat generated efficiency; no reason to heat up the house unnecessarily)

Bannock bread – Skip the complicated versions:

  • 1 cup flour (doesn’t matter)
  • 1 tablespoon sugar
  • 1 teaspoon baking powder
  • pinch of salt
  • herbs to taste (onion, garlic, Italian blend, lemon & thyme, black pepper) or dried fruit and nuts, or use chocolate chips or jimmies, brown sugar and cinnamon, and do a dessert version with apple or cherry pie filling or canned pears

Add small amounts of water to make a sticky dough or even a near-batter thickness for pans; this stuff is pretty forgiving and you don’t need 5-8 ingredients for the bare-bones survival version to be great with fresh fish or a can of chili.

You don’t have to take a lot of time to increase preparedness, and it doesn’t have to cost a fortune. In fifteen-minute increments, in a few hours, or with a weekend, you can start seriously impacting your preparedness with small, easy projects and useful skills.

A ton of preparedness projects and skills can be completed in as little as an afternoon, regularly with minimal outlay of cost. Some of them can even be done with

Planning for medical emergencies is one of the biggest challenges one faces. This is especially true if the situation will occur with limited outside resources on which to rely. There are several things you can do to improve the odds for yourself and your loved ones, including solid medical knowledge, the leadership skills necessary to create a makeshift hospital, and a comprehensive medical stockpile.

Education

Many people underestimate the immense value an education in a practical field like medicine will have in emergency situations. These types of skills can be bartered for goods and services in addition to being beneficial for yourself and those in your party. Training as a nurse or doctor is obviously going to be at the top of any resident wish list. However, any medical training will include basic skills that could be valuable.

Any career in the medical field will pay well and allow you to make interpersonal connections, receive continuing education, and give you access to information earlier than the general public. All of these are important considerations when preparing for an uncertain future. Be sure to keep any textbooks and potentially useful class materials with your supplies to use for reference.

Medicinal foraging and herbalism are other medical skill sets that will be indispensable for the long-term maintenance of medical supplies. There are local courses in most regions that will teach participants to identify plants native to the area and the best places to find those plants with medicinal and nutritional value.

Herbalism studies will teach people to prepare those plants as effective treatments and remedies for a variety of medical concerns. While many natural remedies are not as effective as their modern-day counterparts, they are far more effective than no care at all. The ingredients to prepare them will also be more readily available if modern amenities are unavailable.

Makeshift Hospital

One’s leadership style will play a significant role in how well any makeshift hospital is organized and run, as well as the type of patient outcomes it produces. In times of disaster, everyone looks for one person to take control and make them feel safe. That person will wield substantial power within the community, and knowing how to competently care for others is an excellent starting point.

The list of supplies needed, and the organizational effort required to run a field hospital are immense.  Start with basic supplies and build as your training and budget allow. The most important component of successful adaptation will be in the training and implementation of any plans you make. Make an effort to have quarterly or annual preparedness training for everyone who will be working together in the event of a disaster. If everyone knows their role, where supplies are located, and how to handle specific scenarios the real event will go much more smoothly.

Medical Stockpile

It is important to have a portable medical kit as well as a more comprehensive stockpile for larger emergencies. The portable kit should contain everything necessary for basic survival. The American Red Cross is a great place to find resources on a personal kit with basic components. The CDC and the WHO have excellent resources for planning on a much larger scale.

Don’t let the larger preparedness options overwhelm you initially. They are only appropriate after personal planning has reached maximum capacity. However, it is a good idea to begin looking ahead to create a plan for those who think they will want to take the initiative for their personal or local communities.


Other self-sufficiency and preparedness solutions recommended for you:

Healthy Soil + Healthy Plants = Healthy You

The vital self-sufficiency lessons our great grand-fathers left us

Knowledge to survive any medical crisis situation

Liberal’s hidden agenda: more than just your guns

Build yourself the only unlimited water source you’ll ever need

4 Important Forgotten Skills used by our Ancestors that can help you in any crisis

Secure your privacy in just 10 simple steps

Planning for medical emergencies is one of the biggest challenges one faces. This is especially true if the situation will occur with limited outside resources on which to rely. There

As much as you maybe want to believe your email is safe, it’s not… Prying eyes are watching you… Anyone who walks by your computer as you’re checking your email is privy to its contents; moreover, you could accidentally forget to log out of a public computer, malware could be recording screenshots and keystrokes, and (if unencrypted) your emails could be intercepted by unauthorized parties.

Data loss is a common issue, especially in regards to email. Accidental deletion is an example of email data loss, but all is not always lost in these situations. Email data recovery professionals can perform diagnostics and services in order to recover the lost data. And superior security software can ensure that your emails are encrypted and protected from malware attempts.

How to Keep Your Email Safe

Despite the fact that what’s lost can be recovered, it’s important to be proactive about email data protection. Take note of the Hillary Clinton email controversy? Presidential candidate Clinton used her family’s private email server to send official communications, including more than 2,000 emails which (once discovered) had to be retroactively marked as classified information.

Clinton’s use of her private servers has been widely debated because some members of congress believe that her actions violated State Department protocols, as well as some federal record-keeping laws. Although it’s debatable whether or not she was in compliance (she insists she was in compliance with federal laws), what’s not debatable is the security risks email poses.

Clinton was criticized for using her BlackBerry while appointed as Secretary of State. An unsecured BlackBerry poses a threat to security, and it’s just one example of how not secure email can be and how Clinton herself is fairly computer illiterate. She could have avoided the issue by not using personal email accounts for official business and ensuring that she was only corresponding about matters of national security from a federally sanctioned and secured computer.

You can avoid the issue of data hacking by avoiding transmitting sensitive emails on unsecured servers and unprotected mobile devices.

email

You can do everything on your end to protect your email, but if your recipient isn’t following a security protocol, you’re still at risk.

No matter what, it’s essential to encrypt your email. Especially in situations where your email correspondences include sensitive information, an encryption is vital to ensuring your emails aren’t intercepted by unauthorized third parties. As your email travels from the email server to its intended destination, if unencrypted it can be stolen by hackers. Only sign up for email with SSL-encrypted websites, which can be recognized by their link which begins with “https” instead of the unencrypted “http”.

Email Safety after Sending

You can do everything on your end to protect your email, but if your recipient isn’t following a security protocol, you’re still at risk. If your email account is on a private server, then you can manage your rights. Ask your IT team to include security features, such as a Do Not Forward option. This option ensures the email cannot be forwarded to others, nor can it be printed or copied from. You could also include something in the address bar that warns the user to read the email privately, such as “This email contains sensitive information,” or another type of warning that stops the recipient from reading it around prying eyes.

Also, and this is a big one, never ever transmit private information using a social media account. Facebook and other social media networks collect data on you, and they use it for their purposes… You don’t need that level of data breach in your life, and especially shouldn’t open your business up to it.

The rule of thumb here is to always assume the worst: nothing you email is truly private. Take proactive steps to ensure as much privacy as possible, but avoid transmitting anything that could damage your business or reputation. Change your password often, encrypt your data, and avoid opening your emails around lurkers and you should sufficiently minimize your security risk.


Other self-sufficiency and preparedness solutions recommended for you:

Healthy Soil + Healthy Plants = Healthy You

The vital self-sufficiency lessons our great grand-fathers left us

Knowledge to survive any medical crisis situation

Liberal’s hidden agenda: more than just your guns

Build yourself the only unlimited water source you’ll ever need

4 Important Forgotten Skills used by our Ancestors that can help you in any crisis

Secure your privacy in just 10 simple steps

As much as you maybe want to believe your email is safe, it’s not… Prying eyes are watching you… Anyone who walks by your computer as you’re checking your email

If you’ve been prepping for a while, you may have used some of your provisions during short-term emergencies. Perhaps you’ve used some when a storm knocked out power for a few hours. You know you’ve prepared well, because you were able to make meals without the use of kitchen appliances, and you had alternative lighting with fresh batteries. Simple things, like a manual can-opener, are additional proof that you’ve prepared well. A short-term power failure may even be a welcome change from your daily routine, and an excuse to make dinner on the grill.

On the other hand, prepping for an event that could result in societal collapse is no longer fun and games, it’s about your survival. It’s no longer a matter of settling for canned food for dinner. If we are forced to live through a grid down scenario, it’s whether or not you’ll have any food at all. It’s about dealing with starving people, who, in their desperation, will try to forcefully take what you have. It’s this possibility that drives you to take prepping to the next level.

Before you allocate significant cash resources to weapons, supplies, and survival equipment, you probably want to know what the odds are that you’ll ever need it. What is the likelihood that an event, or chain of events, could be serious enough to cause the collapse of society? Do the odds of that happening justify the significant cost of prepping for it? If you’ve never experienced anarchy, how will you know if you’re well prepared? It’s up to you to decide.

A massive and sustained power grid failure could cause a collapse of society, and it might happen in the not-to-distant future. I arrived at that conclusion not by accident, but rather by careful consideration of facts. As an Information Technology Professional I am well aware of the daily attacks on networked computer systems, and I know that cyber-criminals are getting smarter. Cyber-attacks on retailers and financial institutions are common place, as are attacks on U.S. Government agencies. With these things in mind, a successful attack on the power grid is not just possible, it’s inevitable. It’s not a matter of “if”, but “when”. Due to the severity of the damage that is possible, and the potential for a widespread and long-lasting outage, it’s high on my list of things that could result in a collapse of society, and therefore it’s what I prepare for.

Need more evidence? Consider this: In December of 2015, a freezing day in the Western Ukraine, a lone hacker shut down electricity to 225,000 residences. Power was restored in about 6 hours, but imagine a situation where multiple attackers attack multiple locations in a coordinated attack on the U.S. power grid. If successful, the outage would be widespread, not just localized to a specific area or region. To inflict the most suffering, the attack would probably occur in the winter months. Some communities, hospitals, and other facilities would have power from emergency generators, but only until they run out of fuel.

hack-813290_640

Cyber-attacks on retailers and financial institutions are common place, as are attacks on U.S. Government agencies.

A successful attack on the power grid need not be a cyber-attack. Just as 911 was a coordinated physical attack, coordinated physical attacks on multiple power generation or distribution sites are also a possibility. As undamaged facilities attempt to make up for the shortage created by the damaged facilities, they would become overloaded and eventually the entire power grid would shut down. Power plants that are able to isolate themselves from the grid would function for as long as they have fuel, but you and I may not be lucky enough to be in one of those areas.

Without communications, you won’t know where they are. You may recall the movie Waterworld, where Kevin Costner searched for “dry land”, not really knowing if it actually existed. For some people, searching for a stable society with electricity would be similar to that. Just like in the movie, avoiding the “bad guys” and struggling to survive, would be routine.

Terrorists hope to inflict as much suffering as they can on America. The recent attack in an Orlando nightclub appears to have been carefully planned, with escape routes blocked. As terrible as that attack was, less than 60 people lost their lives that morning. On the other hand, a coordinated attack on the U.S. power grid would cause massive suffering and death. I choose to take the threat seriously.

As disastrous as a successful coordinated physical attack on the power grid would be, an EMP event would be even worse. An EMP event could be either a deliberate attack by an enemy, or a massive solar flare. One such solar flare occurred in 2012, but barely missed the earth. Had earth been in its path, large parts of society would have been without power for months, if not years. A smaller solar eruption in 1989 knocked out power to Quebec.

In the event of a successful attack, or a large solar eruption, unprotected electronic devices would be destroyed. This includes the modules in your car. Imagine losing the use of your car, no working communication devices, no radio, no TV, no light, no refrigerator, and you could no longer cool or heat your home. It wouldn’t matter if you could make it to the grocery store, because the shelves would be empty within two days. In the event that a widespread power outage was to last for more than a few days, it’s easy to envision panic and anarchy.

It’s not just the hardship brought on by an absence of electricity, but also the confusion that results from the absence of electronic communications, that would lead to panic. Perhaps you can live without your phone, without texting, tweeting, or email, but being unable to check on loved ones might be more than some folks can handle.

Prepare for a situation such as this with the assumption that the power grid will be down for a very long time. Widespread damage to automobiles, as well as devices that contain sensitive electronic components, make up a worst-case scenario, and it would take months or perhaps years, to fully recover. A powerful EMP event would be just that bad. With these things in mind, for me, a comprehensive plan is actually two plans:

  1. A plan to implement if I can stay in my home
  2. A plan to implement if I have to bug out by all-terrain vehicle

My plan does not include an option to bug out on foot. I simply can’t carry enough with me to survive for very long, especially in the winter months. Instead of buying lightweight camping equipment, I’ve invested in weapons, ammo, and security devices for my home and property, not to mention stockpiles of food, and water purification capabilities. If I’m going down, I’ll go down fighting. Up until that time, I’ll be comfortable in my home.

In the event that I absolutely cannot stay in my home, I plan to bug out using my ATV vehicle. I’ve taken steps to protect that from an EMP attack. While I won’t be able to carry as much with me as I would like with that vehicle, the ability to travel off-road offers advantages over a standard automobile. In the event of an EMP attack, roads would be clogged with disabled vehicles. I can easily bypass obstructions with an ATV, and travel far from a danger zone in a relatively short time. I’ll go back for additional supplies only if I feel that I can do so safely.

I have a pre-selected bug-out location, and relatives not living with me are aware of it. Should they need to bug out, they know that they’re welcome to join me. In fact, in such a situation I would rather be with people I know and trust, instead of those I happen to meet up with.

My Provisions

My list of provisions includes most of the items you’d expect to find in anyone else’s list, so I won’t discuss those here, but I have additional items and special preparations that you don’t often see in others lists.

I own a small generator, but don’t consider it an integral part of my survival plan. Generators are impractical, primarily due to the need to store large quantities of fuel. A generator would only be good for the first few days, as you hunker down and begin to implement your survival plan. Once the stored fuel is used up, and all nearby sources of fuel exhausted, generators are useless. Additionally, the noise and smell of a generator advertises your presence to those who would harm you.

atv-1130685_640

My alternative source of electricity is an off-grid solar-electric system which I described in detail in a previous post (Living in Comfort when the SHTF) on TPJ. My preps include the ability to repair any damage that may occur as the result of an EMP attack. Spare parts and test equipment are stored in a Faraday Cage to protect them. I’ve also stored CFL and LED lights, and other portable electronic devices that contain components which could be damaged by an EMP attack. I doubt that my solar panels would be damaged by an EMP event, but I have spare blocking diodes, just in case. I also have a spare inverter and charge controller. My batteries are protected from the elements, but not shielded from an EMP attack, since an EMP attack would probably not damage them.

Like my provisions list, my bug-out kit includes items that others may not have considered. Since GPS may be down, a compass is a must.

In the event that I have to bug out by ATV, and if time permits, I’ll take the major components of my off-grid solar equipment with me. I believe I can disassemble and pack the equipment in 6 hours or less. Once I’ve arrived at my bug-out destination, I’ll set up a makeshift off-grid solar electric system.

My alternative electricity preparedness is far greater than most other preppers for a reason; it’s an important component of my survival strategy. I’ve also taken great care to protect communications equipment, and to maintain the ability to provide refrigeration, lighting, and the ability to charge portable electronic devices. Having electricity for power tools would make rebuilding after a disaster much easier. Communications equipment may provide vital information, in the event that broadcasts exist. Lights can be used to help secure an area, be it a home or camping spot, unless there is reason to believe that those lights will attract unwanted attention. I’ll share what I have, with the expectation that others in my circle will share their special skills, such as hunting, fishing, trapping, medical, food preparation, construction, security, etc. Hopefully, my group will include at least one member who has the desire, strength, stamina, and know-how to maintain a large garden. My preps include seed storage.

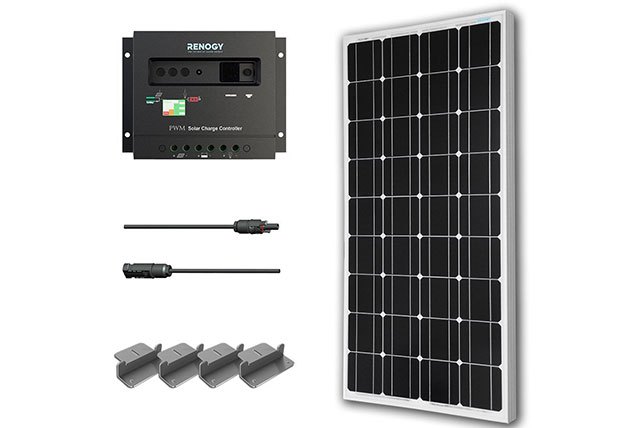
SolarPanelStarterKit

Solar Panel Starter Kit 400W

Should I need to bug out, it’s likely that I’ll be able to find a working refrigerator/freezer, a necessity for preserving food, and to keep medicine from spoiling. However, if an EMP attack were to damage the refrigerator’s control module, I know how to bypass that, and apply power directly to the compressor. The refrigerator/freezer could then be controlled by a mechanical timer, so that the compressor doesn’t run continuously. The modification is easy to make, and I’ve included a mechanical timer in my bug out supplies.

The alternative refrigeration device at my home is a 6 cubic foot chest freezer. It uses much less electricity than my upright refrigerator/freezer, and therefore is less of a load on my off-grid solar electric system. I can also use it to make ice, which can be used in a cooler for items that need to be kept cold, but not frozen. Because the chest freezer is a simple device, I can easily make the wiring change I described, should that become necessary.

Another prep that is currently a work in progress is the storage of important survival information. Understanding that the World Wide Web will probably be down, I’m storing as much information as I can on a Kindle Fire. Subjects include; medical information, edible plants, crop production, food processing and storage, water purification, raising animals for food, maps, and so on. I prefer the Kindle Fire over a laptop or PC because of its portability and low power consumption. It can easily be charged from the accessory socket in any automobile, or with the off-grid solar system I’ve described. I’ll store the Kindle Fire in a Faraday Cage until it is needed, or until I bug out. If I bug out, I’ll wrap the Kindle Fire in aluminum foil and store it in a waterproof bag.

Understanding that an EMP attack may be followed by additional EMP attacks, my provisions include the ability to put together a Faraday Cage once I’ve arrived at a bug-out location. When not in use, sensitive devices will be stored in that.

What is a Faraday Cage, and how do I make one?

A Faraday Cage is an enclosure of any kind which includes a layer of electrically conductive material. It can be as large as an entire room, or smaller than a deck of cards. The device(s) to be protected are wrapped in the conductive material, but insulated from it by a non-conductive material. The electrically conductive material can be metal, including aluminum foil, or a fine-mesh screen. The electrical signals will not pass through fine mesh screen, but there must be no openings larger than that. There should be no hole or gap larger than 1mm, about the thickness of a dime.

A simple Faraday Cage can be made by wrapping the device to be protected in non-conductive material, such as cloth, and then by wrapping that with three layers of aluminum foil. Make sure there are no holes or gaps through which electrical signals can pass. Put that in a cardboard box, and then wrap it with aluminum foil. This provides two layers of protection from EMP signals. That might be considered overkill, but you don’t know how strong the EMP signal (the attack or solar flare), will be.

The type of Faraday Cage described above would be well suited for bugging out, but inconvenient for frequently used devices. Instead, a metal toolbox, or metal cabinet, lined with cardboard would work well. Aluminum tape, the kind used in duct work, can be used to seal holes and gaps. Steel wool can be used to better seal gaps around the door, if needed. Wrap the devices to be protected in aluminum foil, and then place them in the metal container. This method provides two layers of protection, but easier access to frequently used items.

A larger Faraday Cage can be made by using a metal trash can, or an unused chest freezer, but you might have to seal the seams on the lid or door. A device wrapped in aluminum foil, placed in a cardboard box that is also wrapped in aluminum foil, and then placed in a sealed trash can, would provide three layers of protection, which would probably be enough to protect devices from strong EMP attacks.

EMP_over_Washington_DC_MW2

Imagine losing the use of your car, no working communication devices, no radio, no TV, no light, no refrigerator, and you could no longer cool or heat your home.

After you’ve built a Faraday Cage, test it. Place a tuned-in radio in the Faraday Cage. When the cage is closed, all electronic signals should be blocked, and you should no longer hear the radio broadcast.

Conclusion

Can you live without your phone, texting, tweeting, and email? That may seem like a silly question, but I wouldn’t rule out the psychological effect of losing those capabilities.

Survival without electricity is possible, of course, but I wonder how long most people will last without it. The winter months would be very difficult. On the other hand, the ability to process and store food until it’s needed would free you from the daily task of finding food. The ability to cook food using kitchen appliances is not just convenient; it’s more discreet than cooking over a campfire, adding to your security. The availability of lighting would allow you to extend working hours into the evening, and contribute to a level of protection from those who would steal your supplies, or harm you.

Banding together with others can dramatically increase your survival odds. Many of us already have a stockpile of food, and know how to purify water for drinking, but the greatest threat to survival may come from other humans. Having one or more group members with military or police training would reduce the likelihood of falling prey to those who would do you harm. Additionally, each member of your group will need to willingly perform a set of chores that match his/her age and abilities. A portable database of survival information will help to fill in survival skill gaps within a group. Your Christian values dictate that you take care of those who cannot care for themselves, but you’re wise to weed out those who are able, but not willing, to contribute. There is no room for those who would jeopardize the survival of the group. Survival is not just about stockpiling, it’s also about producing.

If you find yourself in need of a group to join, assess potential groups carefully. Keep your assets hidden, and don’t discuss them until you’re sure you can trust the group. If the group has a very liberal mindset, they may want to take your provisions, and distribute them among the rest of the group. Make sure you understand the “rules”, and are willing to abide by them. Assess the group leader. If he/she more closely resembles a cult leader than a resource manager, move on.

Since you don’t know how strong the EMP signal (the attack or solar flare), will be, you won’t know the extent of the damage until afterwards. It’s possible that computers, TV’s, radios, cell phones, CFL and LED lights, and portable electronic devices will be ruined. Devices that do not contain sensitive components, such as incandescent light bulbs, electric frying pans, and hot plates will probably work, but none of that will matter if you don’t have a source of electricity. Without electricity, refrigerated food will spoil.

Prepping well for a power grid failure requires an alternative source of electricity, other than a generator. That alternative source of electricity needs to be robust, to facilitate lights, refrigeration, communication devices, power tools, and kitchen appliances, as well as to contribute to home heating and cooling. While a small off-grid system will give you all of those capabilities, a larger system will allow you to do all of those things simultaneously, significantly contributing to your quality of life. Most of all, the system needs to be sustainable. A mid-size off-grid solar electric system is the best choice. It’s expensive, but one such system can serve multiple families within a survival group.


Other self-sufficiency and preparedness solutions recommended for you:

Everything You Need To Know About Your Plants From The Soil Up

Vital self-sufficiency lessons our great grand-fathers left us

Knowledge to survive any medical crisis situation

Liberal’s hidden agenda: more than just your guns

Build yourself the only unlimited water source you’ll ever need

4 Important Forgotten Skills used by our Ancestors that can help you in any crisis

How To Secure your privacy in just 10 simple steps

If you’ve been prepping for a while, you may have used some of your provisions during short-term emergencies. Perhaps you’ve used some when a storm knocked out power for a

Like millions of other preppers, I live in the southwest portion of the United States. That affords me the advantage of great scenery, mountaintop views and vast areas of land where I can escape the normal everyday business pressures of life by finding an outdoor area to escape into and reconnect with nature. Those vast open landscapes, however, expose an area that most preppers pay little attention to normally, which is how to communicate over those vast areas of land and communicate off-grid completely when needed.

In case you haven’t already noticed, time after time the news media reports that an experienced hiker, hunter, camper, or outdoorsman was found hurt or later found dead because they couldn’t notify anyone that they needed medical help. So even though their cell-phone worked in town, their departure into the wilderness created their own personal “grid-down” scenario, as their only means of semi-reliable long-distance communication (their cell phone) was made useless by their decision to head into the great outdoors (and way beyond their carrier’s cell-phone range).

As both an amateur Radio operator of 35+ years (and owning a company involved in two-way communications), I agree with most ham radio operators and FEMA officials that the “best” grid-down communication tools (including your own personal grid-down emergency that might arise) normally involve ham radio or satellite phone gear, so let’s look at the various types of communication gear and see how they hold up in a disaster or emergency scenario (and realize that your personal “grid-down” situation will share similar off-grid communication challenges).

Many folks first step into two-way radio frequency (or RF) communications usually doesn’t involve ham radio or satellite phones, sometimes due to their perception of the learning difficulty, or the equipment cost, or even them not understanding how the different radio bands allow hams to “target” our communication ranges (vs. a single band like CB or FRS/GMRS).

I also don’t believe that ham radio is the “only” way for EMCOMM (emergency communications) either, but not because of my Extra Class amateur radio license, it’s because of the vast ham radio infrastructure (located all over the world) available to any licensed ham (plus the relatively cheap cost to jump into either ham radio or satellite communications now).

According to the ARRL (Amateur Radio Relay League), we have just over 22,000 U.S. ham radio repeaters as of January 2015, with thousands more located around the world. Here’s an example of how that existing infrastructure can make a huge difference:

Imagine a disaster that sweeps through an area, wipes out the local electrical grid, takes out the cell tower(s), destroys the local public service repeaters (Fire, Police, etc.), and takes out the local GMRS and ham radio repeaters, plus generally wrecks the community with downed trees, power lines, etc.

So if everything involving local communications is toast (or if you find yourself 25 miles from the nearest cell tower deep in the back country of your state) – what’s the difference between using a small handheld (HT) ham radio vs. a CB, FRS/GMRS, Marine, or MURS radio? Won’t satellite communication be affected as well?

First, the vast quantity of communication options still available to the licensed ham, including more repeaters and more HF bands to use, allow us to use equipment outside of the disaster zone (just like a satellite phone user). There are 566 repeaters in my home state of AZ, so the odds of another ham radio repeater still being within range (and unaffected by the disaster) is quite high. Your states repeater numbers are probably similar – look them up yourself and compare.

Second, newer 2nd generation satellite phones use low earth orbiting repeaters approximately 800 miles up, well above any natural disaster. What’s kept the public from using them more frequently (until now) was cost, but that’s no longer a factor, as satellite service is available for just $65.00 a month from us (that works out to just $2.17 a day with a free sat phone).

Many of the ham repeaters also have one or more backup power sources available, and thousands of them support IRLP or EchoLink modes, allowing those same small HT radios to “link” one repeater to another – around the world if needed.

Imagine being able to contact your family (living in another state) to tell them you’re ok just minutes after a disaster strikes – when the phone lines are down and the Red Cross hasn’t even arrived yet (or when you’ve fallen and broken your leg miles away from your vehicle and unable to reach a cell-phone tower). Hams (and satellite phone users) enjoy the security of knowing they can get a message through in virtually any situation (without depending on a fragile wired or cellular infrastructure that can easily fail or be overloaded when a disaster strikes).

Hopefully you’re now convinced that a small ham radio will provide much more range (with repeaters) than anything else of similar size, cost, or weight – short of a satellite phone (which we also offer). Let’s also explain the various radio(s) you might already have (or are considering) and what their true capabilities are (vs. the marketing hype).

FRS/GMRS, Marine, and MURS radios generally provide approximately 1 mile of communication range for every 1 watt of power, sometimes much less (depending on several factors including height of the antenna, surrounding buildings, mountains, etc.).

FRS (or Family Radio Service) units are all 1/2 watt radios with non-removable antennas that will normally provide a range of approximately 1/2 mile. FRS/GMRS combo radios usually have all 14 FRS UHF channels plus 8 more GMRS UHF channels, but these combo radios still have the non-removable factory antenna, plus their power levels are automatically set within the radio (1/2 watt on all 14 FRS channels, and normally up to 5 watts on only the 8 GMRS channels). Real world FRS/GMRS communication range is much less than the “Up to 50 Mile Range” marketing hype shown on the box.

Marine band handheld radios generally have 16 VHF channels (but can have as many as 88). Most have non-removable antennas, which help keep some of the handheld radios waterproof. Most radios have 1 or 2 watts output, but some claim up to 5 watts.

MURS radios (Multi-Use Radio Service) was previously a VHF business band service that required a paid license (like GMRS), but several years ago the FCC eliminated the license. Some MURS handheld radios can have up to 5 watts of power, but most have 2 watts. MURS units can have removable antennas, which will allow better performance than their FRS, GMRS, or Marine radio counterparts, but MURS radios tend to cost more.

CB radio communications have several unique issues to overcome in our disaster example. First, it’s highly unlikely that an outdoor CB antenna would have survived (if all other public service, GMRS, and ham radio fixed installations didn’t). That leaves mobile CB’s or handheld CB radios, but that still doesn’t overcome the biggest issue with using CB for emergency communications – which is physics.

CB radio (within the U.S.) is located between 26.965 and 27.405 MHz. That’s lower in frequency than Marine or MURS bands (approximately 152 MHz) or FRS/GMRS bands (approximately 462 MHz). Being on an HF band allows the CB signal to “skip” great distances (depending on the current condition of the various layers of the earth’s ionosphere, which will cause the HF radio wave to reflect). That skip effect, however, can cause EMCOMM problems.

Unlike hams (that have multiple HF bands, each with a different angle of radio wave reflection – thus allowing hams to “target” a range area that we wish to communicate with), CB users are stuck with whatever band conditions are currently present. So a CB signal from Phoenix may be heard in Pittsburgh, but a few minutes later might now be heard in Miami. That makes for some interesting CB conversations, but it means using CB radio for EMCOMM is highly unreliable.

Some also have the belief that when the “skittles hits the fan” (SHTF), they will just grab any radio (including any ham or GMRS radio) and use it, since they believe no one will care at that point. While that “may” be correct in a truly end of the world event, anything short of that will mean those folks will be very surprised to learn it simply won’t be that easy.

Counting on using the local GMRS repeater has already been discussed (remember the local GMRS repeater has already been destroyed in our scenario). Amateur radio repeaters are monitored for non-licensed use (even during Hurricane Katrina, Hurricane Sandy, wildfires, floods, and earthquakes) and the control operators have different ways of restricting non-licensed use by various methods. Waiting until the SHTF is NOT the time to discover you can’t access the repeater that you had counted on for your emergency communication requirements.

The Technician Class amateur radio (or ham) license isn’t difficult to obtain. (We offer two different methods of study, one is a $10 book and the other is a $25 internet based online training course that will provide you with all the information you’ll need and guarantees you’ll pass.) Your actual FCC test consists of just 35 questions. Pass the test and join the 730,000 plus hams already in the U.S.

I’m all for using any radio you have available in an emergency situation, but you simply can’t count on your home’s outdoor antenna(s) to have survived, nor should you count on any local infrastructure, which means you really have to count on the radio gear you can carry (and perhaps what’s in your vehicle). Most hams prepare a radio “go-bag” (or BOB) in advance, an idea I highly recommend. With the rapid cost reduction in satellite gear, more of them are also including a satellite phone with their preparedness equipment as well, or they simply use it as an everyday carry tool (especially if they own a business).

Since both amateur radio and satellite phone service provides so many more reliable emergency communication options it seems silly to depend on CB, FRS/GMRS, Marine, or MURS radios during an emergency (options that provide you with the least amount of range – when you need it the most). With today’s low cost two-way ham radios and satellite phones, combined with the ease of getting your license, two-way ham radio communication is really a great EMCOMM choice, but many business owners also write off the monthly $65 satellite service plan cost as a legitimate business expense. Whichever you choose, don’t pack your bug out bag without one.


Other self-sufficiency and preparedness solutions recommended for you:

Healthy Soil + Healthy Plants = Healthy You

The vital self-sufficiency lessons our great grand-fathers left us

Knowledge to survive any medical crisis situation

Liberal’s hidden agenda: more than just your guns

Build yourself the only unlimited water source you’ll ever need

4 Important Forgotten Skills used by our Ancestors that can help you in any crisis

Secure your privacy in just 10 simple steps

Like millions of other preppers, I live in the southwest portion of the United States. That affords me the advantage of great scenery, mountaintop views and vast areas of land

When I say “hands-free light” I mean a miner/caver style headlamp or a clip-on cap light. I don’t mean a lantern or any equivalent. Lamps and lanterns have their place, just like the good ol’ portable spotlights and flashlights that also live in my house. However, when it comes to a portable light, it’s hard to beat something that leaves your hands free and moves around with your eyes. Their cost, usefulness, and weight make them an absolute must-have for preppers.

Different Types of Headlamps

There are two general types of headlamps. There’s the “miner” or “caving” style with a strap or two like this one:

8149gcml4rl-_sl1500

LITOM Headlamp Flashlight with White/Red LED, IPX6 Waterproof Helmet Light

Then there are the clip-on “cap light” types that rides on a hat brim like this one …

000-combo-clip-on-pan-light

ThorFire Cap Hat Light 5-LED Headlamp Rotatable Ball Cap Visor light Clip-on Hat Light

Both have some pro’s and con’s. Then there’s this guy, too, nearly a hybrid of the two:

clip-on-cap-light-ii

ThorFire Cree LED Cap Light Headlamp 3 Modes Ball Hat Lamp Flashlight Adjustable Zoomable Headlamp 155 lumen

With any headlamp, quality matters. That is sometimes to regularly reflected in price. Cheap stuff is … well, routinely cheap.

I can find good Rayovac and Browning models at HAM fests and flea markets for $5-10. Not only is the price spot-on or lower than online, there are regularly examples out, so you can get a feel for how sturdy clips are, how scratchy/smooth the band is, how heavy they are to wear, and how easy the controls are to handle before you buy.

Headlamp Shopping Consideration: Battery Type

Different models run off different types of batteries. Most take standard AA or AAA batteries or specialty coin/button cell batteries of various diameters and power, with some caving/miner’s style running off of a 9 volt.

There are a few that run off of A23’s and periodically a “matchstick” 4A/AAAA pops in one of our pockets. Those and the button cells are not exactly sitting on every shelf.

Even if they’re not going to be the victims of any crazy pre-disaster or mid-disaster runs, I’m not going to be able to grab any if I don’t already have them should a natural or manmade disaster bears down on us. They’re also not particularly inexpensive, although some of them have pretty incredible lifespans, especially in an LED light that gets used for a few hours during dark seasons, and I haven’t found chargers for them sitting on many shelves in my neck of the woods (or at all, ever).

The more powerful the headlamp – miner/caver headlamp or clip-on cap light – the faster it will burn up those batteries. In some cases, that’s mitigated by a light running off of 3-4 batteries instead of two, and that starts getting pretty heavy on heads that aren’t used to hardhats or helmets.

batteries_comparison_45_d_c_aa_aaa_aaaa_a23_9v_cr2032_lr44_matchstick-1

Headlamps that run off common batteries are easier to keep powered. Headlamps with battery packs opposite the light source distribute the weight and are a little more balanced, but aren’t particularly great if you have long hair.

For a lot of my everyday purposes, I really like the slim, curving clip-on cap lights that use a button cell battery, even though it does use uncommon batteries. They’re lighter to wear and slimmer to stick in a pocket when I’m not wearing a hat.

However, for preparedness purposes and away-from-home headlamps, I stock up on the ones that run off one or two AAA batteries.

They’re still relatively lightweight, and AAA is a common size for us. I have plenty of chargers, and rechargeable and disposable batteries for them, to include some that stay in my truck with a mini solar window charger. That means I can afford more batteries and I have more options for battery sources, so I can keep them fed longer than if I relied on a less-common or specialty battery.

There’s also less aggravation involved when a battery gets replaced, and then a light immediately dies a hero’s death (or an inglorious one; we’re a family of klutzes).

For people who prepare for the worst, how much money and what percentage of a supply is invested in any given risk is something to consider. After all, our plans should always include a visit by Uncle Murphy.

Shopping Consideration: Light & Switch Array

I prefer the kind where the light options are one-click selectable instead of progressive click types, but I’m learning to look down and shade them with a palm before I touch them.

combine_images-cap-light

Some clip-on cap lights have progressive-click single-button controls that require running through various light intensities, colors and-or flashing sequences to turn them off. Some are available with one-click select-able settings.

Why is this a factor?

Because it’s rude to blind people, horses, and dogs whose vision has adjusted, especially if you love them. Sometimes it’s only as annoying as living with somebody who doesn’t close cabinets or drawers, but sometimes it’s really a bad time to have your rods and cones flip-flop and your pupils tighten to a pinpoint.

Being able to just automatically go from a low light to “off” also has advantages at bedtime.

Some of us are sensitive to sudden light increases, even when we’re aware it’s coming. Closed eyes are not always barrier enough. When we’re done reading and ready for bed, but have to progress through three colors or 3-5 intensities of light to turn a lamp off, we have a real potential to wake ourselves back up or disturb loved ones or partners. That’s bad enough on a camping trip or for a short-term outage. It’s the kind of thing that can become a constant bur under the saddle and lead to tempers and serious discontent in high-stress situations.

Hands-free flashlights are supposed to be making our lives easier, not harder. It’s not an insurmountable problem (hence, learning to hold a hand over the LEDs); it’s just something to be aware of when we buy. If we’re forgetful or only have one good paw, maybe we make sure to buy the selective-setting versions with a separate on-off switch, or that we buy ours with just one light setting. Lots of options.

Headlamp Pro-Cons by Style

As I said, I really like the flatter clip-on styles over the caving/miner style of headlamp.

They fit in back pockets of jeans and coat pockets very easily and without snagging everything else in there in winter. They’re light enough to clip to my stove hood and to lampshades during outages, to a branch or fence wire while grilling, or to a pack strap sitting at a campsite, and to clip to my shirt or coat collar if I’m wearing a ski cap or bandana instead of a hat.

brand-new-water-resistant-headlamp-light-120-lumens-clip-on-cap-hat-light-headlight-hike-camping

There are clip-on cap lights with single optics and that prop up or rotate for convenience. They lose some of the drawbacks of a miner style headlamp, but they can weigh just as much and drag a hat down – which is a real pain if you wear glasses.

I’m also a chick, and the miner’s strap types snag my hair. That then gets in my way until I stop and re-band it. This is annoying when my hands are wrist-deep in raw meat, starchy potatoes, or garden soil.

When I’m wearing them without a hat, they rub my forehead uncomfortably. They’re a little bit heavier and a little bit bulkier, and you have to adjust multiple straps. They also give me one more length of strap to be snagging on things. Those annoyances add up when you’re already uncomfortable.

However, they, too, have their advantages.

cap-light-some-powerful-but-headlamps-usually-stronger

There are some powerful cap lights available, but for the same price, there is usually a caver/miner style headlamp that penetrates further or illuminates a wider area.

I can find more powerful lights that penetrate deeper into space without extreme costs in the miner’s/caving style of headlamp. It’s kind of their wheelhouse, after all. I can think of a lot of situations where that added distance has a real advantage.

As with the clip-ons, I can find versions with variable light distance and area coverage, and with the miner’s style, I can sometimes find them Maglite style, where twisting a ring lets me condense to a narrow point or open up to a wider area. That’s pretty convenient sometimes, and the rings tend to hold up well to years of use.

I tend to find the caver’s and miner’s style sturdier and more resistant to boots and bouncing down stairs than the clip on’s, even when they’re a lower-grade camping model.

We call them “nighttime collars” for the pups because we sling them on before we turn the pack loose in low-light situations.

With a handy clothespin or a wire clothes hanger, they can be used in just as many places around the house as the cap lights. The strap has periodically gotten looped around my neck or arm, I can hook them around pack straps to keep track of those while setting up camp (and of the nephews and BSA kiddos in front of me when we’re running late into a site), and I can hang them on my rear-view mirror easily instead of clipping a light to the sun visor.

Which is better? It’s really just a matter of preference, and sometimes preference changes just by use. I have both, just like I own both firearms and airguns.

headlamp-hands-free-moves-with-your-eyes

Image/Images: There are a lot of times when it’s not just nice to have a light follow our eyes without holding it in our hands – it greatly effects our efficiency and speed.

Hands-Free Lights – A Must-Have? Really?

Yeah. Because it’s dark out there. Most of us never truly know how dark it can be, even when we’re rural dwellers and backpackers, because there’s so much ambient light in most of North America. One of the big adjustments for non-camping suburban and city folks is just how dark a rural area can be – even with its household lights from electronics and appliances.

Long-term outages and a grid-down situation will change that, and potentially remove most or all of those constant glows from our lives. So light sources belong on any must-have list.

Especially in the dark, it’s really nice to have a light while working with my hands. Yes, there are all kinds of lanterns. I have quite the variety. Lamps and lanterns have to be carried around. That takes a hand, or requires fetching them. Other light sources are fixed and I have to move to them with tasks. That’s limiting my efficiency one way or another.

cooking-hands-free

Cooking is one of those times when a lamp doesn’t always cut it and it’s nice to have the light turn with our heads.

When I’m sitting somewhere reading, playing cards, or cleaning a tool, a lantern works great.

When I’m moving around cleaning, cooking, filing animal nails and feet, going from the back to the front of my truck and somebody else’s vehicle miracling one of them to life, or doing chores in darkness, it’s really nice to have a light that moves with me and leaves me with both hands free.

When I’m walking the dogs, hauling game to a vehicle or home, or chipping/brushing/shoveling our vehicles free from winter’s grasp, a light that follows me around without adding much bulk, weight, or effort on my part is definitely worth the price of somebody’s fancy coffee or Big Mac meal.

Since headlamps are so affordable, and since they have the potential to increase my efficiency so much over having to cart a lamp or lantern around with me, since they take up so little room in storage for their backups and backup power sources, and since those power sources and chargers cross with so many other devices … for me, hands-free flashlights are absolutely a must-have item.

In bulk, if I’m a bartering type, because they’re just that useful in an outage and off-grid environments of all kinds.


Other self-sufficiency and preparedness solutions recommended for you:

Healthy Soil + Healthy Plants = Healthy You

The vital self-sufficiency lessons our great grand-fathers left us

Knowledge to survive any medical crisis situation

Liberal’s hidden agenda: more than just your guns

Build yourself the only unlimited water source you’ll ever need

4 Important Forgotten Skills used by our Ancestors that can help you in any crisis

Secure your privacy in just 10 simple steps

When I say “hands-free light” I mean a miner/caver style headlamp or a clip-on cap light. I don’t mean a lantern or any equivalent. Lamps and lanterns have their place,

A Medical Chest: Is it important?

OF COURSE.

Whether your bugging out with a group or bugging out alone it is extremely important to have someone with some degree of medical knowledge and/or skill. If you’re bugging out with a group and you’ve got a plan in place, but no designated “medic”, you have a problem. If you’re bugging out alone and you don’t have any basic medical knowledge, again, you have a problem.

It’s easy enough to say “I never get sick” or “Ill tough it out” when it comes to an illness or injury in everyday life, but if you’re bugging out, everyday living will cease to exist. Whether you’re hunkering down in a bunker or climbing up foothills or mountains, sh*t is bound to happen. Maybe someone in your family brought in a simple cold. It doesn’t take long for that simple cold to turn into a sinus infection, which once your immune system is beat down enough, can turn into pneumonia. Consider you’re climbing in the foothills or hunkering down in a forest and you drink some bad water…maybe your Lifestraw has already filtered its limits, or maybe your water wasn’t heated for long enough. Bacteria can take hold of your body’s systems within days, sometimes hours, and cause unfortunate and inconvenient effects such as vomiting, diarrhea, dehydration and eventually, death. You get my point.

So what can you do to prevent this? Well, stay healthy, take your vitamins, and boil your water. Stating the obvious, right? Prevention is great, but like I said, and I’ll say it again, sh*t happens. A contingency plan for those SHTF moments is the key to efficiency and more importantly, survival. You can create a top-notch medical kit addition to any bugout bag or kit easily and cheaply. All it takes is basic medical knowledge and a small pack to potentially save you, your family or your friends in a SHTF situation.

The Doomsday Book Of Medicine: A Guide for When Help is Not on the Way

I wish that there was a six star option

“I’m a dentist, and I have just enough medical knowledge to be dangerous. This marvellous book has so far exceeded my expectations that I am amazed that so much useful knowledge can be packed into one book! Hats off to Dr. La Guardia! The information in this book can be used immediately to improve your health, and expand your treatment options in many areas even if there is never a crisis event for you and your loved ones. The panorama of medical, herbal, and traditional treatments in one easy reference makes this one a MUST HAVE! for everyone interested in healthy options and preppers/survivalists in particular. Cannot recommend it more highly. If you can only buy one medical reference book, this is IT!

 
Absolutely THE BEST prepper medicine book!”
DR. DALE W HUDSON

The Basics of a Medical Chest:

Ibuprofen: So Underrated. It’ll help with mild pain, but more importantly, it can help take down and break a fever. How fun is it trying to function at your day job with a fever that turns into a massive headache that turns into hot flashes and cold sweats? Now imagine dealing with that while you’re lumbering through the wilderness. Not fun.

Pepto Bismol: Once again, underrated. Not only will this reduce your burning desire to throw up those repulsive MRES, but it has the potential to get diarrhea under control. Having to stop every 5 minutes to see a bush about a horse? Inconvenient AND unpleasant.

Benadryl: Works for both people and dogs, making it a vital part of my personal bag. Hiking through the woods and your dog steps on or eats a wasp? I know I don’t want to carry my almost 50 pound dog for very long, how about you? 1 MG per pound of body-weight will take care of that problem. It can also be used to ease a dog’s anxiety, just lower the dose a bit. If you’re traveling or hunkering down with someone who has an allergy whether it be to a food or animal, a quick response with a dose of Benadryl can make a bigger difference then you would expect. I carry a bottle of Benadryl and a tube of Benadryl Cream for topical use.

Medi-Lyte: Uncommon, but not unimportant. I used to work in the oil fields during the big boom, and this was something I always kept stocked for my guys. It is used to replace electrolytes from excessive loss of liquids. I’m talking sweat, vomit, whatever. You can purchase 500 tablets on Amazon for twenty bucks. 100% WORTH IT. Oh, and try two tabs for a hangover, it’ll do wonders ????

Hydrocortisone Cream: Once again, suitable for both you and your dog. Hiking out in the woods comes with a price. While an occasional bug bite is not something that will really bother you, being covered in them probably will. The same goes for your dog. Mosquito bites, tick bites, flea bites, poison ivy, weird rashes; it covers it all. Literally.

Triple Antibiotic: This one is basically the jack of all trades. Use it on burns, cuts, scrapes, and anything else you’re worried about getting infected. I would suggest only using it the first 1-2 days after the injury is sustained. After scabs are formed it won’t do much and there is no point in wasting precious supplies.

Everyday Allergy Meds: Sudafed, Zyrtec, Claritin, because there is nothing worse than trying to walk long distance or climb bluffs or mountains with a runny nose.

CPR Rescue Mask, Adult/Child Pocket Resuscitator

CPR Mask and Sterile or Nitrile Gloves: I don’t care how well you know someone; do you really want to take a bath in their bodily fluids? I didn’t think so. Carry a CPR mask with you in your medic bag and remember the basics from CPR Class, compressions and breaths, 30:2. Compressions should be done by finding the middle spot between the nipples and pumping your overlapped hands down onto their body. They won’t tell you in your average CPR class, but I will; you will hear ribs cracking, if they survive they will be in pain from it, and it is not easy on the body to lean over and perform compressions on someone. You will be sore. Saving someone’s life though- 100% worth it. If you haven’t taken a basic CPR class yet, don’t be a dummy. It’s 50$ on average and takes only a few hours of your time.

Hot Hands: There is nothing worse than being sweaty, cold, and out in the wilderness. Once you’re cold it is very hard to get warm, but a hot hands pad can make the world of difference. Toss one onto the top of your head and cover it up with a hat. My dad has told me since I was little; heat rises. Keep your head warm and your body will be warm.

Various sized Band-Aids, bandages, ace wraps and anti-bacterial wipes: Obvious, but easily overlooked. I was on a mountain climbing trip in Montana this fall, and I got stuck coming down at night. Not smart, and not fun. I tripped on a tiny rock and my ankle bent and twisted. The next morning I had a 7 mile hike to a primitive forest service cabin across two mountain ranges and I could barely walk without my ankle giving in. An ace wrap and some duct tape made the world of difference.

The Not-So-Basics:

I don’t expect you guys to have giant stockpiles of these things lying around, but I can guarantee you if you dig through your cabinets and junk drawers you’re bound to find one or two of these things lying around. Please also remember I am not a doctor, and I’m not god, so take everything I say with a grain of salt. Having these things does not guarantee a life saved.

Elite First Aid Fully Stocked GI Issue Medic Kit Bag, Large

Epi-Pens: Unfortunately, these have gotten harder to come by recently, on account of obnoxiously high prices, but if you or your family member has an allergy that requires you to carry one of these, don’t leave it behind when you bug out. Not only could it save your life for what it was intended, but it could save someone in your groups life should they encounter an unexpected allergy source.

Muscle Relaxers: If you’ve done any hiking, walking or running long distances you know how exhausting it can be on your body. Imagine doing it for days at a time while trying to find the perfect camp location. These come in handy to both relax your body and your mind, making it much easier to carry on hiking or even sleep. Personally I can take one of these and continue on with my day, but I’ve heard stories of people taking them and falling asleep within the hour, so remember that everyone responds differently.

Antibiotics: I know I can’t be the only one that’s been prescribed antibiotics and not taken all of them. Do you have a stockpile of half taken antibiotics? In everyday life it’s not a good idea to take half of a dose and leave the rest behind, as it puts you at risk for antibiotic resistance, but if you’re in the wilderness or an emergency situation and you need antibiotics, I think you can afford to take that risk. The same goes for your basic antifungals.

Higher Dose Pain Relievers: If you have left over pain killers from a surgery or injury, pack them up and take them along. I will let you imagine all the possible injuries that may require their use.

Israeli Pressure Bandages: These bandages have been carried by the Israeli Army for ages for a good reason. They compress, clot, and cover a wound. The instructions are on the packaging, and they are fairly simple, lightweight, and about 10$ a piece on Amazon. Worth it.

Suture Kits: Also available on Amazon, although they are usually labeled “for veterinary use only.” They will work in time of need. It’s basically a needle and thread. Buy a few and practice stitching up an orange, or if you’re looking for a little more “real world” (and gross) experience, a pigs foot. It’s pretty much what you see on TV. Unless you went to medical school, you will not be an expert, but if it’s absolutely and undeniably necessary, you’re better than nothing.

I have all of these things in my bugout bag, and it only takes up a very small portion of it. Scrounge up what you can from what you already have, and buy the rest when it’s convenient or on sale to keep costs low. If you’re low on space, take the pills out of the bottles and package them in plastic instead, but remember that the bottles can have other uses in your bag.

I have no doubts that with even 1/2 of these items in your bag you will be better off than your average prepper. Never underestimate the power of basic medical knowledge and preparation. Good luck out there!


Other self-sufficiency and preparedness solutions recommended for you:

The Lost Ways (The vital self-sufficiency lessons our great grand-fathers left us)

Survival MD (Knowledge to survive any medical crisis situation)

Backyard Liberty (Liberal’s hidden agenda: more than just your guns…)

Alive After the Fall (Build yourself the only unlimited water source you’ll ever need)

The Lost ways II (4 Important Forgotten Skills used by our Ancestors that can help you in any crisis)

The Patriot Privacy Kit (Secure your privacy in just 10 simple steps)

A Medical Chest: Is it important? OF COURSE. Whether your bugging out with a group or bugging out alone it is extremely important to have someone with some degree of medical knowledge

When it comes to prepping, there is a lot of talk about what material needs we should have on hand. A bug-out bag, freeze-dried food, water, transportation, first-aid kit, weapons for protection and a place to bug-out to. The idea is to have the basic needs of food, water and shelter readily available. The problem is; when the SHTF not everyone gets to just go merrily about their way, to easily head out and get gone. In fact, it is quite likely that many of us will sustain significant injuries that need to be tended to. Whether it is ourselves, our loved ones, or the friends who will be with us, we will need to know how to take care of each others injuries and illnesses.

It’s official. This is now the prepper’s “go to book” saving them time and money on costly doctor visits. Details and how to get your copy here.

I am an Emergency Medicine Physician Assistant with more than 20 years of Emergency Room experience, the majority of it in Level I Trauma centers (where the most severe cases…crashes, gunshots, severe work injuries, falls from heights, etc. go). Prior to becoming a PA, I was an EMT. I have a great deal of experience dealing with trauma victims and worked in an ER where we saw multiple gunshots daily. I have lectured at several colleges in the Chicago area as well as being responsible for teaching EMT, Physician Assistant, Medical and Podiatry students. I have also been an instructor for the American Red Cross teaching First Aid, CPR and Advanced Cardiac Life Support (ACLS) classes.

There is a lot of information out there about what makes up a good medical kit for your bug-out bag. Everything you need can be either assembled by you or purchased as anyone of a variety of pre-stocked kits. While the kit you have with you when you bug out is obviously important, it is also completely useless if you have not taken the time to learn how to use it. The truth is you can stop most bleeding with direct pressure. Sometimes you need a torn shirt, some duct tape and a pair of trauma scissors. You don’t have to be MacGyver to do it. You do need proper training.

Pamela Rauseo, 37, performs CPR on her nephew, 5-month-old Sebastian de la Cruz, after pulling her SUV to the side of the road. The baby was rushed to Jackson Memorial Hospital, where he is reportedly doing OK.

That said; EVERYONE who expects to deal with the aftermath of when the SHTF needs to know basic CPR and at least basic Trauma First Aid. That means taking classes and practicing what you learn. I can tell you stories about people attempting to administer first aid who had no training, but I won’t. Suffice it to say the outcomes were less than desirable.

The Doomsday Book Of Medicine – What To Do When There’s No Doctor Or Medicine Around

Let’s think about some injuries you can expect in the woods, hiking or running to find cover. Or for that matter, just being in a place where help is not going to come anytime soon. Falls are very common and can result in anything from a scrape to sprains to more serious injuries like fractures and head injuries. So ask yourself; do I really know how to treat a sprain? What about a fracture? Do I know how to stop bleeding and properly clean a wound? Have I ever done those things? Would I be able to actually do the job the right way should I need to? What if it was something life threatening? Could I save a person’s life?

If the answer to any of the above is NO, then you can have all the gear in the world at the ready, but YOU are not ready to bug-out!

I’m going to give an example of injury event that can be a tragedy if you are not properly trained to treat it. Remember, this is about knowing: both what TO do and what NOT TO do.

You and your companion are moving quickly through a heavily wooded area and your companion falls. When you reach them, you see a branch has impaled their arm. They are essentially stuck to a tree because of a branch sticking all the way through their arm. Your companion is in shock and not even aware of the extent of the injury. They are confused. There is blood coming from their arm and also from a gash on the right side of their head which is bleeding profusely. You think you see bone exposed through the head laceration and it seems that one of their legs has something wrong. Closer examination shows you that the ankle is sitting at a strange angle. What do you do now?

If you are like most people, you freak out, try to compose yourself so you don’t freak out your companion, get really pale and nearly pass out and then reach for your cellphone to call 911. Oops, no connectivity, so no help coming. So what now? The first aid kit! You have a first aid kit with a manual in it to walk you through caring for these injuries. You dig out the kit, open and it and check the book only to find it’s great for small cuts and bruises and simple things, but it has nothing remotely close to what you’re dealing with now.

Suddenly, you realize that maybe it wasn’t such a good idea to cancel that first aid class you had signed up for but decided you were too busy/tired to take. Besides, someone else will know what to do or I’ll call 911 anyway, I’ll never need to use it.

WOW! Talk about contrary to prepper philosophy. Or is it? It would seem that Emergency Medical preparedness training is a no-brainer, but in reality, most prepper sites and stores that cater to preppers are focused on the medical equipment you need rather than the training required to use it.

So anyway, I can’t teach you the how to do it in this article. I can give you a good idea of what good, accurate care and treatment of this fall will require. And yes, you can look all these things up on the internet. However, unless you learn from a real, live person who can guide you and correct mistakes you will surely make as you learn, you are never going to be able to really address the problems this very real scenario depicts.

STOP, LOOK, and LISTEN.

The very first thing required in any trauma/accident situation is an evaluation of the site of the accident. Stop, take a breath and look at where you are about to go. Is it a safe place to enter? In the urban world this is akin to a Paramedic called to the scene of a gunshot victim. In that situation, the Paramedic cannot help the victim until the Police have arrived and determined that the Paramedic is safe from the danger of being shot herself when she goes to help. At that point the scene is declared “safe” and the Paramedics can get to work.

In the wilderness or woods, the dangers are different but still just as potentially deadly. Is the ground stable? Are there dangerous branches or rocks that could fall onto you as you make your way to your companion? Will you slip and fall as well if you attempt to help? Do you need to take time to tie off before going to the person? What about wildlife? Are you in danger of animal or insect attack when you go to help? Can you find a way to make the scene safe?

Only after you treat the area as if it were a busy street corner will you be safe. You have to STOP, LOOK, and LISTEN.

Once the scene is determined safe, or made safe the next thing is to get to the injured person and take stock of the situation by doing an initial survey of them. This is done by looking and speaking to them without touching them. Encouragement to stay still is recommended at this point. Usually saying “Hold on, try not to move, I’ll be right there,” is a good start.

Look carefully at the person and where they are lying. Do you see any blood? Where is it coming from? What about limb deformities? If so, which ones. Are there any objects that will cause difficulty in treating the injuries? Can they be cleared or do you need to find a way to work around them.

Now it’s time to your ABCDE’s: Airway/Head and Neck, Breathing, Circulation, Disability/Deformity, and Exposure assessment.

Airway: If the person is conscious and talking, then they have a clear airway, but they might have a neck injury which will require stabilization. In the case of any significant fall, or one with an accompanying head injury, be sure that the cervical (neck) spine is stabilized. If the person is unconscious or can’t talk, be sure that the airway is clear of obstruction before going further. Gently lowering the jaw while holding the forehead steady will allow you to see if anything is causing an obstruction. Look for broken teeth, blood, dirt or some foreign body causing an obstruction. Remove any obstruction you can see. Do not blindly probe their mouth. You could push an unseen object backward and cause an obstruction where none had previously existed.

Breathing: Is the person breathing on their own? If they can talk, they are breathing. Is there any reason to suspect a possible lung injury? Do they have any evidence of a chest injury that could have broken a rib? A broken rib can puncture a lung and lead to air in the chest collapsing the lung on that side. You can check this several ways. One is to watch the rise and fall of the chest and see if both sides rise equally. Another is to put your ear on one side of the chest, then the other and listen for breath sounds to be equal on both sides. If you notice that the trachea, the tube that runs down the middle of your neck, is pushed to one side; that is a clear sign of a lung injury. The best case scenario is that you have a stethoscope in your kit that will allow you to hear the actual breath sounds easily. If there is a lung injury, this is a true emergency and will need to be treated quickly, but that is a procedure that requires specialized training.

Circulation: Check for obvious bleeding, but also in the case of extremity injury, is there good blood flow to the far portions of the extremity? Is the color of distal (far) limb pink or pale/bluish? Is it warm to the touch or cool/cold? Pink and warm = good. Anything else indicates blocked blood flow which may be due to arterial injury or compression. Arterial injury needs repair soon. Compression can often be correct by adjusting the limb to an appropriate angle.

Disability/Deformity: Is neurologic function intact or are they confused, unable to answer questions or showing other signs of significant head injury? Are there limb deformities, obvious chest or facial depressions indicating broken bones? Depending on what you find, a variety of things may be needed from re-evaluation of the airway, to splinting or bandaging.

Exposure: How long has it been since the injury took place? Are they becoming chilled or hypothermic? Cold =shock. Putting a warm cover over an injured party ASAP is essential even in hot weather.

The important thing to do now is stay calm and determine what needs to be treated first. If there is copious bleeding indicating probable arterial involvement (this can also be characterized by blood that sprays with each pump of the heart) apply direct pressure and if necessary a tourniquet that can be tightened and released easily. If there is no major bleeding issue, then recheck the airway and breathing. If there is chest deformity and/or other evidence of a collapsed lung, that is the next thing to deal with unless there is now evidence of airway obstruction or the person is not breathing on their own. The former requires clearing the airway, the latter requires rescue breathing. The collapsed lung requires specialized training you can’t get from the internet or a book. Any other injuries can wait. Remember; the brain starts to die after 3 minutes without oxygen. Airway is first unless bleeding is so profuse that not stopping it would mean there would not be enough blood to circulate oxygen.

Back to our fall victim; we have bleeding, limb deformity, confusion and a fall. The fall means we have to have high suspicion of a neck injury and the confusion could be shock or it could indicate a more serious injury such as concussion or a brain bleed. We also have a penetrating injury which may have been an insult to a major artery. This person is seriously injured and qualifies as a trauma patient. Ideally, we would get this person stabilized and out of there ASAP, but that is not an option. Instead, we have to stabilize and create a sheltered space as close to where we area as possible so we can begin to treat the various injuries.

Assuming there are no immediate life threats (Excessive bleeding or collapsed lung/blocked airway) we begin by stabilizing the neck. A towel, shirt or thick cloth of some kind can be rolled and taped carefully in place to accomplish this. Next stabilize and splint any limb deformities so that we can move the victim with the least amount of discomfort to them. Continue to talk to them to assess their mental status. At this point, things get tricky…

People’s first instinct when presented with something sticking out of or through a body part is to remove it. STOP! Don’t do it! Not only is it exactly the wrong thing to do, it could quite possibly be the thing that kills the person. I know it is scary looking and seems like the danger comes from it being stuck in the person, but at this point the person is alive and has survived impalement. Leaving the object embedded is not dangerous at this point; it is actually the safest thing to do. As long as the object is left in place, it is acting to tamponade (stop) the bleeding. That is, it is putting pressure on any lacerated vessels and preventing any major bleeding. Yes there will be some oozing around the injury site, but it will be minimal as compared to what happens should the object be removed. NEVER REMOVE AN IMPALED OR IMBEDDED OBJECT FROM A PUNCTURE WOUND unless you have been trained to handle this procedure. This is another procedure that requires specialized training courses.

But what about infection, you ask? Yes, infection risk is high, but it is not a life threatening problem at this time. A neck injury or brain injury will need prior attention as will the bleeding from the head wound. Antibiotics are something you can give, but not at this time because the victim has a decreased mental status and it is not clear if they can swallow a pill without causing an airway obstruction or aspirating it into a lung.

For the time being, the safest and most efficacious thing to do is to cut both ends of the branch so that your companion can be maneuvered to the sheltered spot. Start with the end of the branch still attached to the tree and try to keep the arm as immobile as you can while doing so to minimize pain. You can then trim the protruding opposite side.

Don’t cut the ends short. Leave enough to be able to grasp both ends firmly to assist removal when it is time. Use your gauze or Ace wrap to secure the branch so that it moves as little as possible during transport to avoid causing undo pain.

Continue to monitor the ABC’s and mental status and address what need to be done ASAP. Once you have done as much as you can, find a way to get this person out of there and to an emergency care center as quickly as possible otherwise, they will likely not survive for very long.

This all started out as a fall but resulted in multiple injuries placing your companion in danger of dying. With the proper training, you could swing the odds much more in favor of a good outcome. So before you buy that cool medical kit, or put one together on your own, get out there and get trained. If you know someone who has been trained and can teach you the emergency survival techniques you’ll need, ask them to teach you. Meanwhile there are a multitude of courses in first aid, tactical lifesaving, wilderness emergency medicine, survival medicine and CPR. Don’t forget to look into classes that teach herbal remedies. Know what plants can ease pain or prevent infection, they may be the only medications you’ll have available.

So go out and get prepared. Learn.


Other self-sufficiency and preparedness solutions recommended for you:

The Lost Ways (The vital self-sufficiency lessons our great grand-fathers left us)

Survival MD (Knowledge to survive any medical crisis situation)

Backyard Liberty (Liberal’s hidden agenda: more than just your guns…)

Alive After the Fall (Build yourself the only unlimited water source you’ll ever need)

The Lost ways II (4 Important Forgotten Skills used by our Ancestors that can help you in any crisis)

The Patriot Privacy Kit (Secure your privacy in just 10 simple steps)

When it comes to prepping, there is a lot of talk about what material needs we should have on hand. A bug-out bag, freeze-dried food, water, transportation, first-aid kit, weapons

In preparing for what may come, big and small, we tend to focus on two things first: food and defense. Some of us do plan out our resupply and restocking – which means growing – but maybe we’re stuck in a rut because of the things we read about seeds, and maybe aren’t really and truly understanding seed types and some of the terms we see. I’d like to dig into some of those terms so we know what we do and don’t want to buy, and why.

Seed Terms

We see a few plant terms pretty commonly in our day-to-day life, especially if we’re of a certain mindset. The biggies we see when we’re researching and buying seeds are: hybrid, heirloom, OP (Open Pollinated), GMO (Genetically Modified Organism), and organic. So let’s look at them a little closer, because they’re pretty significant and tend to be rife with crazy advertising and misconceptions.

Organic

This isn’t actually a seed term. It speaks to the culture of plants, the way we treat a plant, how we grow it. States have differing requirements for what it takes to be labeled organic, but the upshot is that it limits the amount of chemicals used. GMO seeds are not considered organic, even when the modification is something that is considered an organic compound, like some of the cold-resistance genes from fish, Bt that is a naturally-occurring microbe, or genes that allow resistance to Roundup (AKA, RR-Roundup Ready). However, seeds do not have to be grown organically to be either heirloom or OP crops. Likewise, hybrid seeds can be grown organically.

The most comprehensive look at preventative medicine out there. Click on it for details.

Genetically Modified Organisms

Contain genes from something that did not start off in a particular genetic line. Genes that are implanted could be from another class of plant or algae, from a frog, or from a fish. Sometimes the modification is removing a gene that would normally suppress or create a reaction. It’s a wide field.

GMO plants are mostly capable of successfully breeding, just to clear up that myth. Plants are more resilient in the face of uneven chromosome matching than animals. That uneven number of chromosomes in offspring (seeds) are what make fertile mule mares newsworthy, but the ability to cope with genetic inequality is actually responsible for some varieties and eventually speciation within plants, totally naturally. However, since most GMO plants are hybrids, it’s like rolling a 10-sided die in hopes of a 6, just like breeding two mutt dogs to each other. Because of that – and because of contracts – farmers don’t collect seed from their GMO crops.

Another pervading myth is that you have to work hard to avoid GMO plants. Yes, in U.S. supermarkets. Unless otherwise marked, almost everything in the center aisles, dairy section, and meat department has likely been fed or contains GMO corn or soy.

You want to survive tomorrow? Start today.

However, GMO variants don’t exist for every type of crop, and few are readily available. Wheat, corn, squash, canola, beets, alfalfa, soybeans, and oil cotton are the most common GMO seeds sold by Monsanto, with sweet potatoes and papaya available in Asia. Tomatoes, rice and potatoes have been approved but are not yet available commercially. GMO seeds are actually pretty expensive, too, especially in small scale. It’s unlikely – unless we’re buying big bulk farm-cropping seeds from a supply store – that we will even see GMO products available to us.

So why do we see so many “GMO-free” and “organic” banners on seed packets? Because we’re more inclined to buy them – or pay more for them.

It’s a case of the tail wagging the dog – when we’re interested in something, companies strive to meet that interest. Even good sellers and producers need to eat and thus develop marketing strategies, but it’s something we can be aware of to save our own hard-earned cash. If we’re buying OP or heritage seeds, paying extra for a “GMO-free” label is like paying more for “cow-free” labeling on soy milk. How the seed parents were raised (organic or inorganic) is really only of political or moral interest. We’ll inhale more toxins in a day than that single seed will convey to the adult plant and its fruit. Therefore paying more for “organic” labels is more personal preference.

That’s not to say a certain pack of seeds is not worth more than another. I may be motivated to support independent farm-to-sale seed production, small companies, organic growing methods, landrace projects, or heirlooms. I might be paying for packaging, uniqueness, or to support some organization in conjunction with the supplier or retailer. Just be aware of what you’re really paying for.

Everything from the soil up. Seeds included. Click the book for details. 

Heirloom seeds

Also sold as heritage crops, have been around for a while, somewhat unchanged. I say “somewhat” because things change. Look up the evolution in AKC standards, especially for things like Airedales and German shepherds.

You can also look at vehicle tag standards. The 1991 F150 and the 1930 Model A are both older Ford pickups that qualify for the same classic or antique plate, but they’re very different vehicles with very different capabilities. Heirloom seeds are kind of like that. Some are fifty years old, some are centuries old. They may follow a basic form, but the 1850’s cultivar will likely demonstrate more changes from the original than the fifty-year-old seeds.

That’s okay. All our crops have changed significantly, usually for the milder and sweeter, sometimes getting bigger and sometimes yielding more fruit per plant. In other cases, plants have gotten smaller, like an heirloom wheat bred by human selection over about 300 years to produce seed at 2-3’ instead of taking half the season just to grow to 5-6’.

All heirloom is going to be open-pollinated, but not all OP seeds are heirloom, and that’s okay, too.

OP/Open-pollinated

This means that seeds will breed true, beagle + beagle = beagle, pepper to pepper.

Some plants (corn, wheat) use wind to pollinate them from another plant of the same species (two or more plants are necessary for pollination or for fertile seeds). Some plants (squash) need a thin paintbrush or a bug to get coated in pollen from a male flower and then coat the important parts of a female flower, but the flowers can be from a single plant. Peas could use wind or a bug, but will usually bear fruit just fine from the pollen and eggs within a single flower. Tomatoes could bear fruit from just one flower without any assistance, but will be more successful if the flower gets shaken by us or by insects, dropping more pollen onto the petioles.

Spacing-concepts-congestion-planting-marigolds-and-cabbage-www_welldonelandscaping

So long as our spaghetti squash does not begat-begat with acorn squash and our bantam sweet corn does not make time with our strawberry popcorn, all will be well. That’s how OP and breeding true impacts us: We can collect our seeds, plant them again, and make future generations of the same squashes and corns into infinity.

It does not require a particularly long genetic line to produce those results. OP seeds have regularly been refined over years, but they may only be a few years old, relatively, especially fast-growing plants that can produce multiple generations in a year.

OP’s are commonly tailored the same way hybrids are, breeding more and more for cold and heat and drought tolerance, expanding the range that a plant can be successfully grown in, or making it resistant to the introduced and stagnant-soil diseases we fight. We also breed for more produce per plant, either same-size plants or larger plants. Sometimes OP’s go the opposite way and are bred to be smaller and more compact, so they fit in more places, or so they spend less time on foliage and can be harvested earlier and easier.

OP’s can be had both determinate (most production in a narrow window) to aid in efficient harvest and succession or rotation cropping, or indeterminate (production spread out across a longer range) so that we can stagger harvest and processing.

OP is how all heirlooms start. They’re no less reliable than an heirloom or heritage crop seed. They’re just younger, 1991 F150 instead of 1948 F150.

Hybrids

Are what result from promiscuous plants or deliberate cross-pollination. The problem is that they don’t necessarily breed true to a parent hybrid.

Look at Labradoodles (Labrador + Poodle). If I breed Labradors for fifty years, I might get some slight variations but I’m getting Labs. However, if I breed two Labradoodles, I start gambling. I may get some pups that throw back to Labs, some pups that throw back to poodles, and some pups that do present as Labradoodles. There may also be some pups that look like maybe there was a milkman involved, because neither parents nor grandparents have upright, pointy ears or spots.

Genetics are funny that way. “Hybrid vigor” is awesome, I love my mutt livestock and pets, but it’s also a gambling game. When we want to eat, we don’t like to gamble on what’s going to show up with more than a year invested in the seeds.

Hybrids have their purposes, especially since a lot of heirlooms and some OP’s are indeterminate. A lot of hybrids are also faster than their heirloom fore-bearers. Although there are heirlooms and newer OP’s that are resistant to diseases, hybrids can usually be found already tailored for our exact growing conditions. They shouldn’t represent the whole stock for somebody worried about losing their supply line, but there are arguments that can be made for including them in planting and storage.

gardening-1117866_640

Bonus: Landrace

We sometimes see the term “landrace” in homesteading circles. That’s its own separate cookie, too. Landrace lines – plant or animal – represent the idea that regionally produced specimens are better than “generic” heirlooms and heritage crops.

They are being developed much the way our crops and livestock started and why we have so many breeds of chickens, pigs, goats and so many cultivars of plants: they stay in pockets. It’s not necessarily bottle-necking and inbreeding, although there is some – purposefully done and carefully controlled. It’s about a belief small, slow solutions, and in local products. It’s making a pig and a dent corn for Arizona that fits Arizona better than it does Alabama or Alaska. Some landrace programs are also working on livestock with native pasture and forage, to decrease the amount of reseeding and grain feeding we have to do.

We already apply some landrace principles when we give advice. I may suggest certain apple trees and chicken breeds for a pasture orchard, but I will also tell you to try to find a local nursery with a local or regional grower, and a local or regional breeder. The chances of you having success with something that’s intended for your area, that has come from healthy parents that are already thriving in your area, are much higher than if you order in a plant or livestock from two USDA growing zones away, even if it’s the same breed or cultivar.

Landrace initiatives are working to make those kinds of local-to-local sources more available, increasing local success.

Selecting Seeds

“One Size Fits All” is largely a myth. There are always exceptions. Needs and goals differ, so one specific seed type isn’t necessarily better or worse across the board.

Somebody might stock some 45-50 day hybrid squashes so that they can see returns if a tornado, rogue truck, fire, animal or torrential downpour takes out their garden 60 days before the average first frost. Somebody may want a hybrid cover that more effectively chokes out weeds for the first couple of years. Alternatively, some may be dedicated to saving towering heritage wheat, or may see good reason to cultivate tepary beans even though they don’t match their current climate.

That’s as it should be. We’re all different with different motivations, so we seek out our best fit.

Additionally, sometimes we can save a little money or increase our options by understanding how important a specific seed term is to us, and how important it is to us to have our heirloom or OP seeds also marked with the words “organic” or “GMO-free”.

The goal is to be aware of what those terms in seed descriptions really mean so that we can make the best purchasing decisions for our situations and expectations.


Other self-sufficiency and preparedness solutions recommended for you:

The Lost Ways (The vital self-sufficiency lessons our great grand-fathers left us)

Survival MD (Knowledge to survive any medical crisis situation)

Backyard Liberty (Liberal’s hidden agenda: more than just your guns…)

Alive After the Fall (Build yourself the only unlimited water source you’ll ever need)

The Lost ways II (4 Important Forgotten Skills used by our Ancestors that can help you in any crisis)

The Patriot Privacy Kit (Secure your privacy in just 10 simple steps)

In preparing for what may come, big and small, we tend to focus on two things first: food and defense. Some of us do plan out our resupply and restocking

A crisis of any scale is a tough time to either have to learn to do without, or create a lot of work for ourselves. With a little practice and planning, we can still have things that make our next dish of soup or pinto beans or squirrel a little happier, and give us some versatility in how we use flour and mixes for baked goods. We can do it without adding a ton of steps, mess, and in most cases a lot of ingredients to our daily tasks. Whether we’re at home or on the trail, that can save some sanity as well as time and labor.

This is me, so you’re mostly going to see 5 ingredients or less through here, and a focus on cleanup. I’m just not Martha Stewart. But I do like my breads and I do like something sweet now and again, so here’s half a dozen ways we can still get them, even without a working oven or supermarket.

Ash Cakes & Bannock 

What would a soup be without some sort of bread? Not as happy, that’s what. Any flour will work for either an ash cake or bannock bread, even purchased mixes like the dinner rolls Augason Farms apparently figures I’ll be making – ever, but especially in a disaster. Even when it’s got extra stuff in there, I go ahead and follow the cup-tablespoon-teaspoon ratio for bannock, or just drizzle in water or milk for an ash cake.

Those ash cakes and bannock can also be augmented by rolled oats, rolled wheat, or instant rolled barley, although you need to let those sit for 10-20 minutes to make sure they have a chance to soak up some liquid, and you’ll probably need to add more liquid than usual. It’s a way to both add some texture and variety to diets, as well as use up some of the cheaper ingredients like oatmeal that are in our storage even when we haven’t planned for no-bake cookies.

Any cornbread or cornmeal can also be turned into ash cakes or pseudo-Johnny cakes, to go beside a soup or under a stew, or to add variety to our breakfast meals.

Drop biscuits & dumplings

Most pancake and dinner roll mixes have the potential to turn into nice, easy biscuits; and anything that’s a biscuit (or bannock bread) can be dropped by mounded tablespoons into a simmering pot of broth, gravy or soup, simmered for 10 minutes, flipped, simmered another 10-12 minutes, and whala – we have a fluffy(ish) bread right there in our soups.

Head’s up: Biscuit dumplings will regularly turn your clear, light broth into something thicker and more gravy like. That is not a bad thing, just a point.

Something that can be a bad thing, is that if you completely cover the top of your soup with dumplings, it gets really hard to stir the bottom.

Both of those factors go away if you opt to make your meal in a solar oven or similar. You can do it one of two ways, just like a regular biscuit bake – stick the biscuits/dumplings on the bottom to slowly rise and fluff, or space them out on top from the get-go or after part of the bake time has elapsed.

An advantage to dumplings over other ways of getting a breading into our soup meal is that it’s still only one cooking pot.

Drop biscuits have advantages in clean-up, too, and in time and waste. When we mix a batter and then spoon biscuits out onto a sheet pan, we don’t even have to dip our fingers in flour for molding them. We sure don’t have to flour a counter and a rolling-pin or drinking glass (which is also what I usually use for a cutter).

When I make drop biscuits, they’re ingredients to oven in 5 minutes or less, and my cleanup involves a bowl and two spoons. When Mr. P makes *real* biscuits, I consider just torching the kitchen and starting over.

In a life with limited water, limited resources, and a lot of labor involved with every aspect of survival, the differences can matter. The same holds true for the drop biscuit dumplings instead of rolling out and cutting even more to make flat drop dumplings.

Hardtack

Hardtack is definitely an option to go with our soups, just like it was in colonial and pioneer days. There are lots of recipes online for baking it.

There are not as many as I’d have expected where people actually eat this stuff, and discover that it’s best soaked for a few hours first, then simmered right along with broth, tea, or soup, anywhere from 10 minutes to an hour depending on the alignment of the stars*.

*Snicker; but not entirely kidding on the predictability front.

That veers it away from a convenience food, but if you’re using a crock pot or equivalent, or are simmering soup for a few hours anyway, heating the house anyway, it’s pretty handy to be able to pop open a bucket of these things 2-5 years after you made them and have a nice, portable, calorie-dense portion to pick up and eat or saw with a fork and knife. We can even sub in some of our crazy flours like ground dry beans, acorn, and barley if we’re so inclined.

Just be aware that real hardtack is not Mountain House pilot bread or a cracker, and that 5-20 minutes under gravy or in a fry pan goes nowhere without a pre-soak once it’s hard and dry.

Beer bread

I am lazy, if it was not obvious from the articles about bed sheets, laundry, and gardening. I’m also not big into babysitting food at timed intervals.

Beer bread fits me to a T.

Price out some inexpensive light beer, and don’t neglect the option of a local store ordering a couple flats of forties for you. They’re actually the cheapest option for me, both bottles and cans, because I’m not willing to buy Natty Ice even for a disaster, even though there’s boxed wine in case I decide a wine IV or camelback is necessary for my sanity.

There are many recipes online. I like this one, although I sometimes just omit the butter entirely or use oil instead. This one skips the salt and goes straight to self-rising flour. We can sub in a dinner roll mix or Bisquick for either.

And the sifting … I call it optional.

We can use a beer bread recipe in any kind of cooker, from a crock pot or facsimile to a solar oven. We can make it in little cans around a campfire or rocket stove, too, or atop a clay pot candle heater.

Spread out in a pie plate or frying pan instead of a loaf pan, or separated into muffin pans, it’ll cook faster and be easy to portion out.

That can save arguments over who does or doesn’t get the heels (there are freaks out there who consider that a lesser slice). It can also just make it faster and less messy to serve, while also saving cooking fuel and time.

If you want more flavor to your bread, you can go with heavier and darker ales as you like. While I’m happy sipping a well-built Guinness or Killian’s Red, I don’t actually like them in my bread and that bread is no good for PBJ.

Griddle Cakes 

Another cheat I learned for backpacking is that you can make any baked good into a griddle cake. For those of us who want fast and easy in a disaster, or who aren’t *ready* yet and are dying for a quick and easy treat, bag and box mixes I have successfully made into little rounds of goodness with a pan or on the greased top of a canteen mug and any heat source include:

  • Oatmeal cookies
  • Brownies
  • Muffin mixes
  • Cake mixes
  • Scone mixes
  • Cornbread & corn muffin mixes
  • Hushpuppy batter

You can follow the directions (or portion them, depending on how easy fresh or powdered eggs and oil are to divide) or cut some of the liquids, and they come out about like puffy pancakes.

Thin them down a fair bit, and, boy oh boy, we’re starting to look into the gourmet side with crepes.

They can be eaten as-is like a soft cookie or roll-up, or topped with powdered sugar, cinnamon sugar, ice cream and milk flavoring syrups, nuts in syrup, honey, tree syrup, Karo, and jelly.

Frosting in a Ziploc bag offers the ability to make cute spirals and grids or fluffy artistic mounds. Pudding can be reserved and mixed thick to do the same, or used as a filling for crepes.

They can also be topped or filled with canned or rehydrated fruits, cannoli filling, pie filling, cream cheese, or peanut butter. You can also play with adding shredded coconut and nuts (and chocolate) to German chocolate frosting, or use sweetened condensed milk and shredded coconut as a super-sweet filler.

Fun note: They can also be baked in a skillet to cut like wedges of cornbread. I regularly bake muffin mixes in a pie pan to create thin little slices that are usually drizzled with something. Tuna cans and soup cans can also be used for any batter, as can small Pyrex bowls or ramekins. Those containers are also all options for baked pancakes, such as this one .

Off-Grid Cooking

Even when we’re not as prepared as we’d like to be, or when we like convenience and we want to continue to have convenient options in a disaster, we can still get the feel-good foods that bread and even “baked” sweet treats can be.

Whether it opens up options for us, just provides some extra backups, or becomes part of our daily habits, keeping an open mind about what we can accomplish – and how much effort it has to take – can only benefit us in the future.

This focused on my weakness: Breads. (And laziness, okay.) I totally endorse knowing how to do and make things from scratch. There are preservatives and cost issues with some of my cheats. However, from things like ash cakes and bannock that truly need few ingredients, to new ways to make and use mixes we might already have around, we don’t want to pigeonhole ourselves, especially if our disaster plans involve holing up in summertime or a lot more physical labor year-round.

Other things to consider when we look at these lists are the amount of fuel some of the treatments take, the amount of pan scrubbing and kitchen cleanup involved, and even the cookware we have at our disposal.

We also might want to look at some of our guilty pleasures when it comes to eating. Even if we don’t stock our cupboards to make it a daily or even weekly staple, we might consider stashing some premade mixes, hiding away some beer, and holding onto some tin cans so we can pop them out now and then for special occasions.

A crisis of any scale is a tough time to either have to learn to do without, or create a lot of work for ourselves. With a little practice and