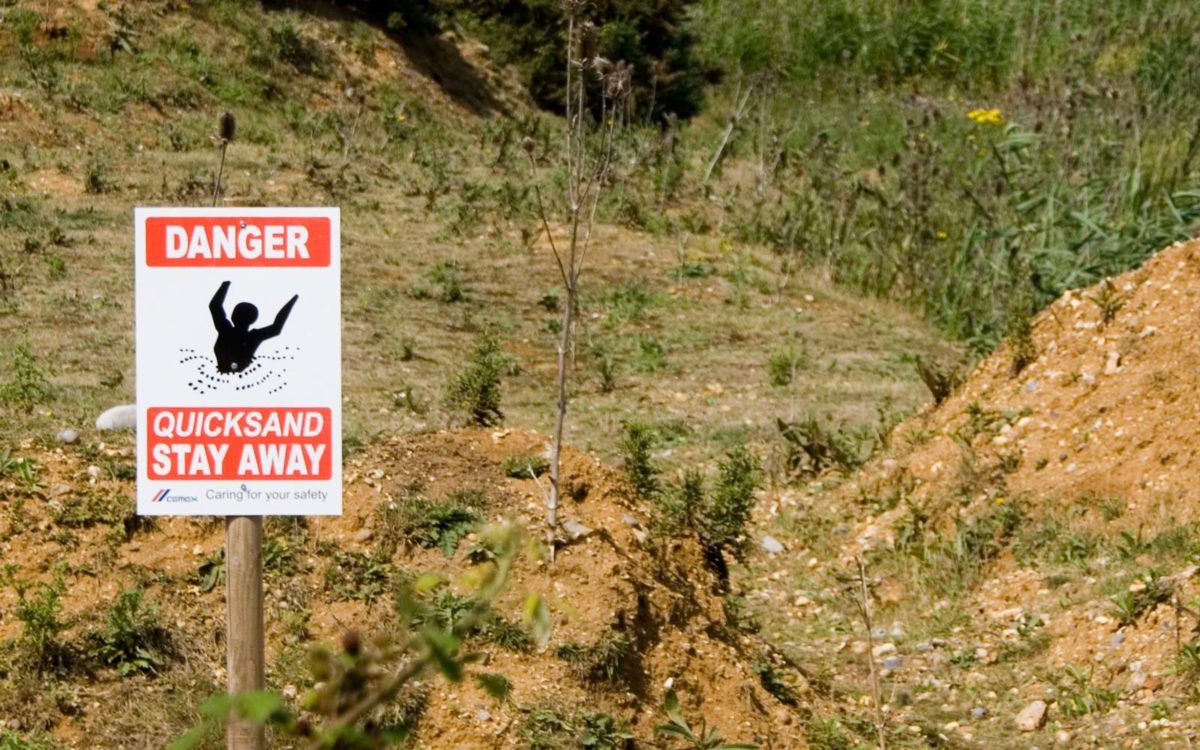
HomePosts Tagged "Survival" (Page 6)

Probably every Hollywoodian adventure flick out there has at least one scene where the protagonist or, better yet, the bad guy, finds himself trapped in quicksand. Film producers gave their very best to depict as gruesomely as possible what it means to become entangled in that sandy pit of death.

I have to admit that, for a very long time, I was convinced that there was no difference between stepping in quicksand and doing the mamba in a minefield. Although most of the things you see in movies are BS, not all are fictitious.

For instance, I remember seeing a screen adaption of The Hound of Baskerville, my favorite story from the Sherlock Holmes universe, in which one the main characters explain to doctor Watson how people may ‘unstuck’ themselves from quicksand by getting on their backs and swim. True to some degree, as you will find out later in this chapter, but not nearly enough to get out of quicksand.

A billboard advertising a book? DETAILS HERE

When it comes to movie depictions of shifting sands, the thing that irks me the most is this feeling of utter doom given off by those scenes. It’s something like “Crap! I stepped in quicksand. Well, nothing more to do than letting the sands swallow. Oh, to make things even more dramatic, I will roar like a raging lunatic and flutter my arms. That’s it! Lights out! Buh-bye! End of the line for me.”

It’s not exactly like that in real life. Sure, if you move around like crazy, that thing will eventually choke on sand or mud. That’s another thing – quicksand pits are not always made of sand, and it’s not just desert you’ve got to look out for.

Technically, any hole containing a fair amount of sand, dirt, silt or clay can become a quicksand pit it’s drenched by water and agitated by movement. I won’t bore you to death with the science behind quicksand, but I will say this – these treacherous pits can be found anywhere around the world, especially in areas that have been hit by natural disasters such as earthquakes, landslides, and flooding.

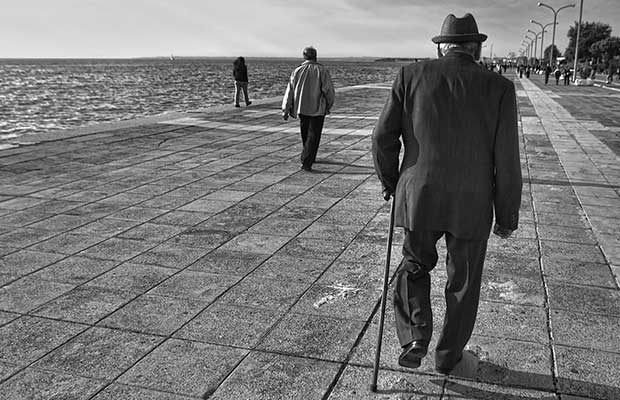
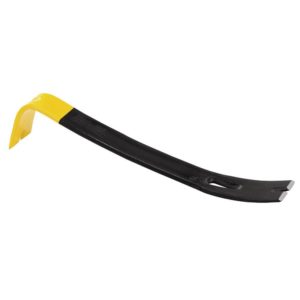
So, my advice to you is to watch your step and stay away from puddles or suspicious pits. Carrying a walking stick always helps, especially when you have to traverse unknown terrain. As you’re walking, the ground in front of you with your stick a couple of times. If it appears to be solid, it means it’s safe to walk.

Still, if the end gets caught and you have trouble getting it out, you should definitely avoid the area. That’s basically it for the prepping and prevention part. Let’s now see what we should do in case we end up in a quicksand pit.

Step 1. Stop and discard.

Once you step in a quicksand pit, you’ll immediately notice that your body will slowly begin to plunge in the pit. Stop! Take a deep breath! You’re not going to die here. Now, the first thing you’ll need to concern yourself with is your weights – the heavier you are, the faster you’ll sink.

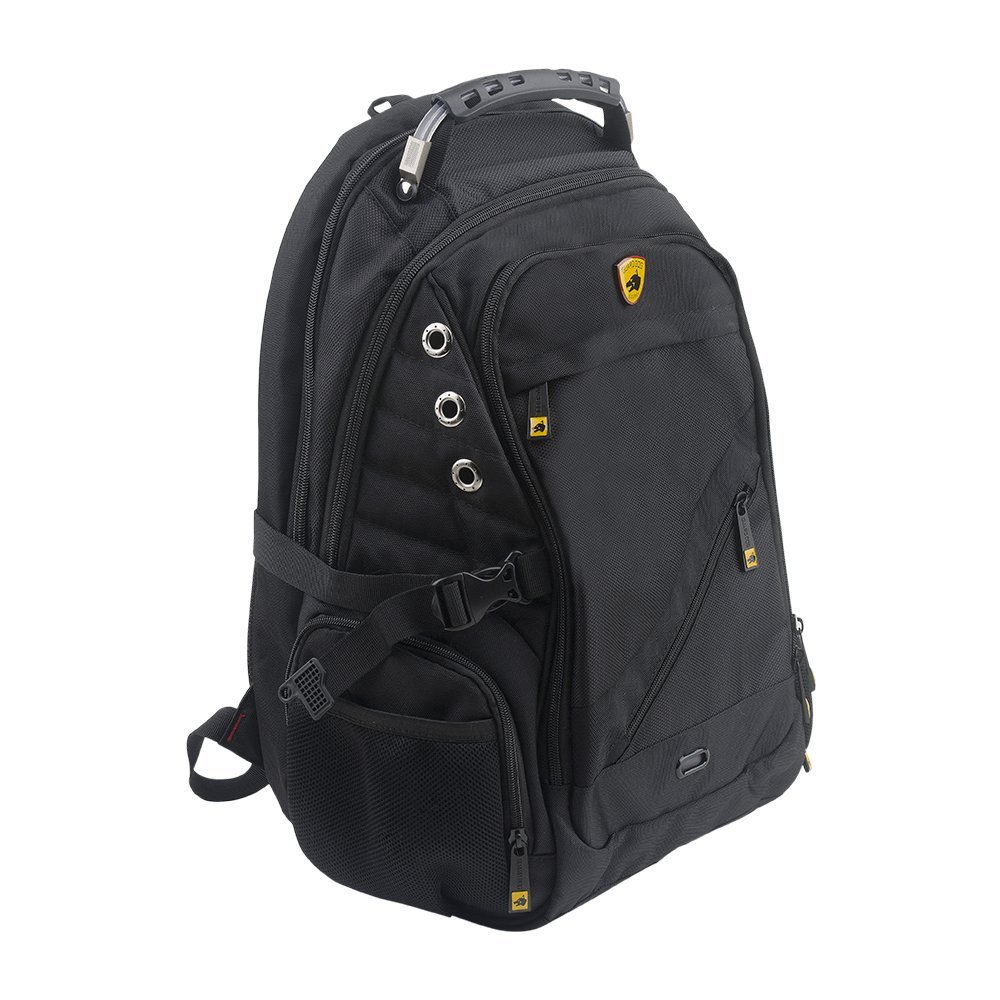
So, grab your backpack and throw it as far away from the quicksand pit as possible. If you have a toolbelt or anything similar, you should throw that away as well. Your boots make one Hell of a difference when it comes to getting out fast of quicksand. For instance, rubber boots, like those used by people fishing in shallow waters, are very useful for this kind of situation since they can be removed easier compared to their laced peers.

Step 2. Watch your movements


The whole idea of dealing with quicksand is knowing exactly when to move and when to stand still. What most people don’t know is that there’s a 5 to the 10-second interval which allows a quick escape. So, if you step in one of these quicksand pits, go through step one, which is discarding your backpack and any other stuff that might weigh you down, and try to take a couple of steps forward and backward.

Small, baby steps – don’t try to rush things. If you move slowly, you’ll soon feel that less grip. Continue doing this until you manage to break free of the quicksand pit.

Step 3. Drop and swim to safety

If you miss this interval, again, stop what you are doing, stand still, and take a deep breath. Remember that every twitch or sudden movement can stir the stuff inside the pit. This will tighten the grip and make you sink even further.

Once you’ve calmed down, slowly lay on your back, just as you would do at a hospital when a nice lady doctor offers you a consultation. Keep your arms parallel to your body. You should ensure that your head and torso remain above the ground. Take a short breather, and roll on one side. Now, arch your back and swim forward. Remember the backstrokes you’ve learned in swimming class? That’s exactly what you must need to do.

The only difference between swimming in water and quicksand is the amount of friction. Obviously, it’s more challenging to swim in mud or sand compared to water, but if you put your back into it, you’ll eventually reach solid ground.

Again, everything must be done in slow motion. Don’t rush it! If you feel that the effort’s too much, rest for a couple of minutes. Yes, I know it’s frustrating to have the same speed as a garden snail, but rushing it would only make you sink even further into the quicksand.

Once you feel that the ground below you is solid, flop back, firmly plant your hands on the ground, and push as hard as you can to yank yourself loose.

Don’t worry about losing your boots or smartphone in the quicksand pit. Those can be replaced; your life cannot. Above all, don’t try sticking your hand inside the hole in a desperate attempt to recover your position. Your priority right now would be to recover your B.O.B and\or toolbelt.

Do a quick inventory to see if anything went missing. If you have an emergency phone in your backpack, use it to call the authorities. You can also switch on your personal emergency beacon if you have one.

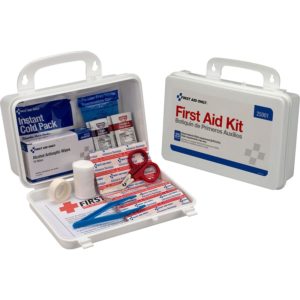
The next step would be to check all body areas that have been in contact with the quicksand pit. Remember that the extra friction may cause some nasty bruises and even wounds.  If this is the case, get the first-kit out of your bug out bag and treat all resulting wounds before infection sets in.

Additional considerations on surviving quicksand pits

In 99.9 percent of cases, you can survive a quicksand encounter. Still, there are a couple of more things you should know about these things.

Quicksand pits are not specific to only one part of the world.

In fact, research has pointed out that these formations can appear anywhere in the world, especially in proximity to bodies of water such as lakes, underground springs, riverbanks, beaches, and marshes.

Quicksand pits are featureless.

There’s no possible way of telling if the thing in front of you is a quicksand pit or just another mud puddle or hole in the sand. Well, there actually is – by getting stuck in it!

Swimming is the best way to get out of quicksand.

Buoyancy is the only thing that keeps you from meeting an untimely demise. However, there are times when you may not be able to backstroke your way out of a quicksand pit. More specifically, the friction will be too higher for your body. If this happens, arch your back and hips more. This will allow you to equally distribute your body weight, ensuring buoyancy.

Not all quicksand pits are dangerous.

Although movies show that each encounter with a quicksand pit means certain death, in reality, you won’t sink lower than your ankles. Still, you shouldn’t take this for granted, since everything depends on how deep the pit’s in the first place.

Panicking is the leading cause of death in case of deep quicksand pits encounters.


Researchers have determined that most people who have choked to death in shifting sands, panicked and tried to latch onto anything they could find.

Remember that sudden and violent movement will only stir the bottom of the pit even more which, as you’ve guessed it, results in sinking. Stay calm, lay flat on your back, flop over, and use the backstroke to get out of the quicksand pit.

Walking sticks makes escapes a lot easier.

Escaping a quicksand pit is a lengthy and strenuous process (sometimes, it takes more than half a day to cover one or two meters). You can reduce the time it takes you to get out by using your walking stick as a flotation device.

Provided that you haven’t lost the stick or threw away with your bug out bag and\or toolbelt, lay flat on your back and place the walking stick underneath your body (it should be right below the lumbar area). In a couple of seconds, you will notice that there’s no more sinking.

Using your legs only, push slowly. After advancing a couple of inches, move the stick to a new position. It will take a while, but by combining the leg-pushing drill with the stick, you’ll soon be able to reach firm ground.

That’s basically it for my take on how to escape a quicksand pit. Again, not all encounters with this sand and water formations area deadly. The odds are you’ll probably never sink below the ankle level.

For smaller quicksand pits, it’s enough to move your legs back and forth to get out. Of course, the best method of escaping quicksand pits is to avoid them in the first place. Granted that shifting sands are featureless, but you can test the terrain in front of you with your walking stick. Avoid marshy and sandy area also helps, but you never know where life takes you.

Other self-sufficiency and preparedness solutions recommended for you:

Healthy Soil + Healthy Plants = Healthy You

The vital self-sufficiency lessons our great grand-fathers left us

Knowledge to survive any medical crisis situation

Liberal’s hidden agenda: more than just your guns

Build yourself the only unlimited water source you’ll ever need

4 Important Forgotten Skills used by our Ancestors that can help you in any crisis

Secure your privacy in just 10 simple steps

Probably every Hollywoodian adventure flick out there has at least one scene where the protagonist or, better yet, the bad guy, finds himself trapped in quicksand. Film producers gave their

For some newbies, the topic may elicit some bravado – “wow, an open wound. Neat! I was looking forward to testing out my new suturing kit.” It’s never like that; the worst thing that could happen to you in an SHTF situation is being forced to deal with an injury of this caliber. Of course, it’s even shittier if you’re the one who has been wounded and no one around to provide medical assistance.

Learn how to both diagnose and treat any medical problems you are going to encounter. Learn more about it here.

I want to share with you some tricks and tips that will be of great use to you in open wound management. Pray to God that it will never come to that, but you never know where life takes you.

Open Wound Management for NMPs (Non-medical personnel) and preppers


You know what’s the real golden rule of prepping? Shit can happen anywhere. And, unfortunately, it does. Scrapes, bruises, and nicks are very common around a household, especially when you have kids or if you’re that kind of person that has butter fingers. There’s nothing special about treating small cuts – apply pressure, wash, clean, and disinfect.

That’s all there is to it! Still, considering the crazy world we live in, even a trip to the corner store can turn into a deadly, Indiana Jones-like expedition. This is the very reason why you should always be ready to tackle any kind of emergency, no matter its nature.

As far as today’s subject is concerned, a good friend of mine, who also happens to be a thoracic surgeon in his spare time, one told me that the best thing you could do about an open wound would be to leave it alone.

Related Knowledge to survive any medical crisis situation

Yes, I know it sounds crazy and rather dangerous considering that germs are always looking for ways to get inside our bodies, but there’s a good reason why doctors approach open wounds in this manner. Let’s backtrack a bit.

Regardless of the medical emergency, the first thing you need to do is to assess the patient. Check breathing, pulse, and state of consciousness. Many first-aid manuals state that the patient should not be moved unless he’s in immediate danger.

For instance, if a person is involved in a car accident, you should attempt to yank him out of the vehicle before the gas ignites it. So, if your patient is in danger, carry him to safety as fast as possible before assessing his condition.

In dealing with open wounds, hypovolemic shock and loss of consciousness are your opponents. When a person loses 20 to 40 percent of blood, his organs will begin to shut down one by one. Passing out is a distinct possibility.

However, if the blood volume cannot be restored, that person will die. Hypovolemic shock is a very common occurrence in case of open wounds. This is why the next step you will need to take would be to stop the bleeder.

Ask the patient to lie flat on his back and elevate the wound (if it’s on the leg, raise the his\her leg above body level). You may need to improvise some sort of stand; a rock, an old crate, a trashcan or anything that will help you raise the wounded limb.

Next order of business would be to figure out where’s the bleeding coming for – if an artery was severed or lacerated, then the blood will come out spurting. On the other hand, if it’s a vein, the blood coming out will flow.

Related 4 Important Forgotten Skills used by our Ancestors that can help you in any crisis

Why do you need to know this? Because each scenario comes with a different approach. For instance, in case of a venous hemorrhage, it’s enough to pack it with sterile gauze in order to stop the bleeding.

On the other hand, if you’re dealing with an arterial hemorrhage, apart from packing it with sterile gauze, you will also need to compress the upper part of the artery to control the bleeding, giving your body enough time to perform what docs call hemostasis (stopping the bleeding).

Treating Open Wounds

Once you have assessed the patient, elevated the wound, and identified the bleeder, it’s time to act. At this point, it’s important to stop the bleeding. It doesn’t matter if the wound’s filled with dirt or anything. You can concern yourself with those things after your patient no longer loses blood.

To do that, apply a sterile gauze right on the wound and apply pressure. If the wound continues to bleed, use another gauze. Stack as may gauzes or clean cloth as you see fit. Keep the pressure constant, even if you feel like your hands are about to give up on you.

In the meantime, if the patient’s conscious, ask him or her to drink water. Plenty of it! Remember that your goal is to replenish the liquids lost through the wound.

This is the only place where you can get DR. RALPH LA GUARDIA’S THE DOOMSDAY BOOK OF MEDICINE

Keep pressure on the bleeder and add more gauze or cloth, if necessary. Once the bleeding has subsided, it’s time to tend to the wound. One of the most common mistakes I’ve encountered is yanking the bandages. Don’t do that – the barrier formed by clotted blood and those little cells that repair leaks is keeping the patient from bleeding.

Still, you will need to clean that wound to prevent infection. To do that, grab a bottle of sterilized water and pour over the bandage. Once the gauze has enough moisture, you will be able to remove it without too much difficulty. Stay calm! You’re almost to the finish line.

After removing the bandage, take a closer look at the wound site. Do you any dirt? Piece of wood or metal sticking out? If it’s just dirt, use plenty of clean water to wash the area. However, if there’s anything sticking out of the wound like a metal spike or, even worse, a protruding bone, leave them be.

Between washing, using a saline solution to flush the wound. In case your first-aid kit doesn’t include a syringe with saline solution, you can make some using a clean plastic bottle, water, and a tablespoon of fine rock salt. Mix, shake the bottle and use your survival knife to cut a small hole in the plastic cap. Use this liquid to flush the wound.

Remember when I told you about my doc friend who said that in most cases it’s better to leave the wound open? Well, that’s exactly what you must do. When you’re done cleaning and flushing the wound, apply a sterile gauze over the site to keep the area clean. You may also want to waterproof the site – wrap a sterile glove or an unfolded condom.

Now, in case the wound is smaller (one or one and a half inches between the skin flaps), you can attempt to suture it. Bear in mind that suturing is a last resort solution – you should only do this if you know that help will not reach you in time. In one of my articles, I’ve talked about how to do simple interrupted sutures.

Be sure your first-aid kit includes a suturing pack. Keep monitoring the wound for signs of infection – skin discoloration, oozing or acidic smell. If you’re lost in the wild, a quick way to keep infection at bay and stop tissue necrosis would be to use maggots. Yes, it sounds utterly disgusting, but those little suckers are great at eating dead tissue.

Wrap-up

Keep your priorities straight – assess, elevate, identify bleeder, hemostasis, wash, flush, and continue monitoring. Sounds like a no-brainer, but I can bet that you won’t feel that way once you’re facing a wound that won’t stop bleeding. You should also tell the patient to drink plenty of liquids.

Bleeders can go out of hand if the patient goes into a panic. That’s why it’s important to talk to him or her. Tell your patient that everything’s going to be okay and that help is on its way. Above all, don’t let him close his eyes. If you see that the victim is about to faint, pour some water over his face, and ask him to keep talking to you.

That’s basically all that you can learn as a non-medical person about open wound management. If you’re interested in learning more, check with your local Red Cross chapter. They’re bound to have a free advanced first-aid course. Any thoughts? Hit the comments section and let me know.

Other self-sufficiency and preparedness solutions recommended for you:

Healthy Soil + Healthy Plants = Healthy You

The vital self-sufficiency lessons our great grand-fathers left us

Knowledge to survive any medical crisis situation

Liberal’s hidden agenda: more than just your guns

Build yourself the only unlimited water source you’ll ever need

4 Important Forgotten Skills used by our Ancestors that can help you in any crisis

Secure your privacy in just 10 simple steps

For some newbies, the topic may elicit some bravado – “wow, an open wound. Neat! I was looking forward to testing out my new suturing kit.” It’s never like that;

Could the year you were born have any bearing on your chances of surviving doomsday? Are there any advantages for one generation over another when it comes to living through some apocalyptic event? Do these labels (Baby Boomer, Generation X, Millennial), that somehow became affixed to relatively random ranges of time, hold some clue as to whether or not you and a bunch of your high school buddies could make it through a zombie apocalypse or invasion of mutant bikers from mars?

Related The vital self-sufficiency lessons our great grand-fathers left us

I was thinking about this topic from the singular perspective of my sometimes least favorite generation the other day: Millennials. Sometimes they are called Generation Y, but no matter what they are called in the media, their collective praises are sung at such high levels, in every facet of our society of how important this latest generation is to our country, planet and probably the entire universe as well.

The Millennial generation has received so much attention over the years that at times it nauseates me. If you didn’t know better you would swear anyone who wasn’t a millennial was both stupid and had purposely made a mess out of everything from the paper clip industry to education to race relations and the planet. Thank God we finally had Millennials to save us from ourselves.

No, I am not a millennial.

But this has been going on for a relatively long time of several years and there wasn’t some new event that prompted me to think about them although it could have derived from some conversation in the office I work during the day. The company I work for (yes I have a real job too) has a vested interest in making Millennials happy so I am forever hearing what the Millennials like and don’t like.

What motivates millennials and what inspires them, what they prefer in a job and their thoughts on giving back to the community to the point where I simply don’t care what happens to these people to a great extent anymore. After a little too much of this I started to think of a way to excoriate them.

Related Knowledge to survive any medical crisis situation

Instead of just looking at this one generation though, I thought it might make sense to step back and look at the three largest or most influential generations we have going right now, Baby Boomers, Generation X and Millennials and see which of them would have the best chances of surviving doomsday. So, mustering all of the highly anecdotal evidence I can; here is what I believe the results would look like if we faced a TEOTWAWKI disaster. For the record, this is not a scientific article, just in case that wasn’t clear.

You don’t get to be in your 60s usually without learning a lot of life’s lessons; some of them the hard way.

Baby Boomer Prepper odds of survival

Born between the years 1946 and 1964 – currently aged 51 to 69

Baby boomers have a lot of things going for them. Generally speaking they no longer have children at home to worry about or if they do, most of them are pretty self-sufficient in the respect that they can fend for themselves if need be and they are so inclined. Baby boomers are looking forward to retirement even if the economy has put their plans on hold for a little while. Houses are largely if not completely paid off for a lot of boomers and some have more than one property.

Most of the big purchases we make in life are already acquired by the time you reach this age so Baby Boomers have a little more disposable income. They also have the benefit of being old enough to remember a good bit of life without the modern conveniences we have today. Even if their parents, “the Greatest Generation” pampered them to the point of enabling societal changes we might not agree with, by and large they have benefited from a good degree of hard work. I think this along with the historical long-view of a well-lived life gives boomers an advantage. They have seen what works and what doesn’t and for those who are awake to the goings on of the society around them, prepping makes sense. You don’t get to be in your 60s usually without learning a lot of life’s lessons; some of them the hard way.

Related The Antioxidant 550 times stronger than vitamin E  and 6,000 x More Powerful Than vitamin C

However, age does have its drawbacks. While Baby boomers might be able to afford more time spent training or learning new skills, or making larger purchases of prepping supplies, they also have more health issues associated with age. One study called Baby Boomers, the Sickest Generation with higher rates of Obesity, High Cholesterol, Diabetes and Hypertension. In addition to requiring more medication, parts start failing you the older you get. Some of the most common surgeries for Baby boomers are Knee Replacements, Angioplasty, and Hip replacement. Not good news for a group of people who may be forced to walk long distances in a bug out scenario.

Generation X should not suffer from as many of the health issues of their Baby Boomer parents, but aren’t as spry as they once were either.

Generation X Preppers

Born between the years 1964 and 1980 – currently aged 35 to 51

Generation X is the forgotten generation. I say that because I am one of them and with all the attention focused on Baby Boomers retiring and the needs of the Millennials my generation has been rendered largely irrelevant it seems in the eyes of just about everyone. Pew research calls us America’s neglected middle child and that is what it feels like sometimes. However, this really isn’t an issue that keeps me up at night because I, like a lot of my fellow Gen X’ers are too busy at this stage of our life to care. Generation X is the typical quasi middle-aged group and we have our own set of strengths and weaknesses. Finally done with the more self-absorbed time of their lives, people in this generation are focused on protecting their families, growing their wealth if that is possible and are generally more aware of the world around them.

Related Liberal’s hidden agenda: more than just your guns

For Generation X preppers, we tend to be well along into careers with a somewhat stable life. Instead of partying every night, we are most likely at home watching TV. We have made it through the “wild times” of our younger days and have gained a little perspective and hopefully wisdom. Generation X may have children still living at home, but depending on where they fall on the scale, their ages might be all over the map. Prepping for family members is more of a focus for this generation. Most Gen X’ers do not have a remote property or enough disposable income to go hog-wild into prepping.

Generation X is coming into a more stable time of their lives financially if they have been lucky to weather the economic storms from the last 6 years and stocking up, while it isn’t easy may be more possible than someone still struggling through college or raising babies. Generation X people should not suffer from as many of the health issues of their Baby Boomer parents, but aren’t as spry as they once were either. Eyesight starts to go during this age and you learn you can’t eat what you used to be able to and quickly lose weight.

What will the highly functioning Millennial do in a world without Google to search for the answers to their questions?

The Millennial Prepper’s chances of surviving TEOTWAWKI

Born between the years 1980 and 2000 – currently aged 15 to 35

The Millennial generation is characterized by traits that our society views now as highly desirable. Often described as a product of the electronic age they have grown up in, Millennials are multi-taskers, connected via the internet to all their friends, all the time and are tech-savvy. Probably because they have been plugged into some device since they were born. With a world that has electricity, internet and no major problems, these skills seem to be great resume enhancements.

Millennials shouldn’t have any health issues at this point in their lives that couldn’t be cured by getting outside every once in a while, but their reliance on technology could be a huge factor if that is taken away suddenly. What will the highly functioning Millennial do in a world without Google to search for the answers to their questions? What will the young, technologically savvy person do if GPS doesn’t work or the car won’t start? Could this dependence on technology be a hindrance to their survival? Could the same children that were raised on a lifestyle of “Everybody wins” sports teams with helicopter parents who always took care of their every need pull themselves up and do what is necessary to survive or would they sit back and cry “unfair” at any slight that doesn’t go their way?

Just the Facts  Please

I know that the descriptions above are highly stereotypical and are even more they are very subjective. Every single person doesn’t fit into the broad categories above and I know for a fact that your chances of survival come down primarily to what you have inside yourself more so than what a lot of marketing guru’s say about you or your peers.

Knowing that each and every person is unique, I tried to find a better data point that would help me determine which Generation would have the best chances of surviving doomsday. The only objective data I could pull was from the actual viewers of the Prepper Journal so I measured the demographic information through analytics for the last two years. The results were a little surprising to me.

For the last two years May 13 to May 15 (over 6.2 million views)

  • 27% of the total Views were from people aged 55-older (Boomers)
  • 40.95% of the total Views were from people aged 35 – 54 (Generation X)
  • 31.1 % of the total Views were from people aged 18 -34 (Millennials)

So what does this tell me? I had expected that the overwhelming majority of our page views would be from people roughly my age and older but the demographics were very similar across the generations. I had expected the self-absorbed Me Me Me generation, of which 2 of my children belong, would be absent from any site that dealt with concepts like this. I thought that people their age would not care or even think about survival and by extension, their absence would be some verification that they don’t take issues like prepping for disasters seriously. I was wrong.

Related Diagnose and treat any medical problems you are going to encounter

I have said before that you can’t be too old to prep and I do believe that virtually anyone can take steps to give themselves a better chance, no matter what the disaster turns out to be in your life. If I can measure anything from the data above, it is that people from all the generations are curious about learning the subject of  prepping. Logic would say that everyone is trying to be more prepared and that every generation more or less is equipping themselves with knowledge. Their readership of sites like this one and tons of others suggests they already have the will to survive.

I guess I need to also say that you can never be too young to prep either. I shouldn’t write off a generation of people, largely based on what marketing or the experts tell me. From the youngest grade-school age child to the most senior among us, there are people from all walks of life interested in prepping and that gives me great hope for our future.

Perhaps if something happens we will stop referring to different ages by labels and share a trait more powerful than marketing demographics. Maybe we will all be able to survive as one generation.

Other self-sufficiency and preparedness solutions recommended for you:

Healthy Soil + Healthy Plants = Healthy You

The vital self-sufficiency lessons our great grand-fathers left us

Knowledge to survive any medical crisis situation

Liberal’s hidden agenda: more than just your guns

Build yourself the only unlimited water source you’ll ever need

4 Important Forgotten Skills used by our Ancestors that can help you in any crisis

Secure your privacy in just 10 simple steps

But this has been going on for a relatively long time of several years and there wasn’t some new event that prompted me to think about them although it could

I can’t even begin to describe the way I feel about ponchos – yes, those things you carry around in your B.O.B like all the time without actually having a chance to use it. I know that my “opening” statement could’ve come out sounding a bit off, but it’s the truth. One the one hand, they’re very useful for a lot of stuff besides rain.

However, I am sometimes annoyed by the fact that a good poncho is heavy as shit and that you never get around to use it. This is the very reason why I’ve made the journey to the all-knowing, and all-seeing Oracle called the Internet, in hopes of finding other uses for that over-sized raincoat.

Have to admit that I was a little bit surprised by the fact that most people who wrote about ponchos tend to emphasize the non-rain-use part, which I think it’s great. Anyway, because most of you are probably thinking about the same thing right now, here are X ingenious ways to use a poncho during an SHTF situation. Enjoy!

  1. Water collector

When SHTF, water becomes top priority (remember, remember, the rules of threes). Obtaining it might be a bit problematic, but don’t lose hope. While scouting for a water source, lay your poncho in a clearing. You may want to check the weather beforehand to see if there are any chances of rain. If you have Mom Nature on your side, that poncho of yours will soon become a veritable water tower.

  1. Taking shelter

Besides food and water, you will also need to find shelter. The simplest way to take cover from the elements is to take out your poncho and to turn it into a makeshift tent – just stick a long pole under the hood and get yourself some sack time. You’re going to need it.

  1. Crafting a mattress

Nothing’s worse than having to sleep on the bare ground. Sure, it’s no delight waiting for the Sandman to come when you’re lying on a thin sheet with rocks prodding you in the back, but it doesn’t have to be that way. You can make your own mattress by stuffing your heavy poncho with leaves, grass, fresh moss or pine needles. Snap it shut, place in on the ground, and sleep like a boss.

  1. Creating a hammock

Since we’re still talking about sleeping, nothing beats the comfort of a hammock. Ever! Well, a hammock’s kind of heavy to carry around, not to mention the fact that it’s a nightmare to make that thing fit inside a backpack. If you’re looking to relax after a long day of hiking, take out your heavy poncho, and use whatever cordage you have on hand to tie it between two trees.

  1. Shower curtain

Even a seasoned survivalist needs a good shower every now and then. Well, the idea of getting naked even there’s no around for miles can be a bit unnerving, but you can wish that anxiety away by making a shower curtain from your heavy rain poncho. Hang from the nearest tree, get inside, scrub until you drop, and come out a new man or woman.

  1. No more dripping

As a person who spent most of the summer looking for holes in the roof, I can wholeheartedly say that my heavy poncho spared me a lot of trouble. Sure, the roof still needed patching, but at least I managed to get myself a breather by plugging some of the larger holes with the poncho. Looks like a nasty piece of work, but who’s complaining?

  1. Red Riding Hood Cosplay

Yes, I know it sounds kinky, but I was, more or less, referring to how you can use your poncho as a basket. There are a lot of goodies lying around the forest and simply not enough hands to collect all of them. So, get into your apple-picking gear and enjoy your foraging.

  1. Controlling hemorrhages

Although it’s not advisable to use a tourniquet to control the bleeding, sometimes it may be the only way to prevent a person from going into hypovolemic shock (that’s what happens when someone loses more than 20 percent of his blood supply).

If you don’t have anything on had to use as a tourniquet, cut a long strip of poncho material, apply it above the wound, and start twisting with a stick.

  1. Carrying sick or injured party members

If someone from your hiking groups becomes injured or experiencing life-threatening symptoms, use the heavy poncho as a stretcher to carry him down to base. Don’t forget to get in touch with the local emergency serves and to stay on the line until the operator says that you can hang up.

  1. Protection against toxic fumes

If you’re about to cross an area which is filled with toxic fumes (a thing that happens very often during a wildfire), get the heavy poncho out of your bug out bag, put it on, cover your face and nose, and pull strings to keep it shut.

  1. Improv pillow

Being lost in the wild without any hopes of seeing your loved ones doesn’t mean that should give up the comfort of your home. What most non-preppers don’t realize is that we really don’t drink our own piss or eat half-digested berries from bear’s dung in order to survive. Nope, we use our noggins to increase our comfort and increase our chances of getting out alive.

You already know how to fashion yourself a mattress using a heavy one. If you also remembered to pack a light rain poncho, then you have everything you need to create a bedroom fit for a king.

Go around the woods and scavenge soft stuff like pine needles, leaves, moss, grass, soft earth. Put everything inside you light poncho, pull on the strings, put on the mattress and sleep as if you have not a care in the world.

Hope you enjoyed my article on ways to repurpose a poncho. Any thoughts? Hit the comment section and let me know.


Other self-sufficiency and preparedness solutions recommended for you:

The Lost Ways (The vital self-sufficiency lessons our great grand-fathers left us)

Survival MD (Knowledge to survive any medical crisis situation)

Backyard Liberty (Liberal’s hidden agenda: more than just your guns…)

Alive After the Fall (Build yourself the only unlimited water source you’ll ever need)

The Lost ways II (4 Important Forgotten Skills used by our Ancestors that can help you in any crisis)

The Patriot Privacy Kit (Secure your privacy in just 10 simple steps)

I can’t even begin to describe the way I feel about ponchos – yes, those things you carry around in your B.O.B like all the time without actually having a

When it comes to prepping, there is a lot of talk about what material needs we should have on hand. A bug-out bag, freeze-dried food, water, transportation, first-aid kit, weapons for protection and a place to bug-out to. The idea is to have the basic needs of food, water and shelter readily available. The problem is; when the SHTF not everyone gets to just go merrily about their way, to easily head out and get gone. In fact, it is quite likely that many of us will sustain significant injuries that need to be tended to. Whether it is ourselves, our loved ones, or the friends who will be with us, we will need to know how to take care of each others injuries and illnesses.

It’s official. This is now the prepper’s “go to book” saving them time and money on costly doctor visits. Details and how to get your copy here.

I am an Emergency Medicine Physician Assistant with more than 20 years of Emergency Room experience, the majority of it in Level I Trauma centers (where the most severe cases…crashes, gunshots, severe work injuries, falls from heights, etc. go). Prior to becoming a PA, I was an EMT. I have a great deal of experience dealing with trauma victims and worked in an ER where we saw multiple gunshots daily. I have lectured at several colleges in the Chicago area as well as being responsible for teaching EMT, Physician Assistant, Medical and Podiatry students. I have also been an instructor for the American Red Cross teaching First Aid, CPR and Advanced Cardiac Life Support (ACLS) classes.

There is a lot of information out there about what makes up a good medical kit for your bug-out bag. Everything you need can be either assembled by you or purchased as anyone of a variety of pre-stocked kits. While the kit you have with you when you bug out is obviously important, it is also completely useless if you have not taken the time to learn how to use it. The truth is you can stop most bleeding with direct pressure. Sometimes you need a torn shirt, some duct tape and a pair of trauma scissors. You don’t have to be MacGyver to do it. You do need proper training.

Pamela Rauseo, 37, performs CPR on her nephew, 5-month-old Sebastian de la Cruz, after pulling her SUV to the side of the road. The baby was rushed to Jackson Memorial Hospital, where he is reportedly doing OK.

That said; EVERYONE who expects to deal with the aftermath of when the SHTF needs to know basic CPR and at least basic Trauma First Aid. That means taking classes and practicing what you learn. I can tell you stories about people attempting to administer first aid who had no training, but I won’t. Suffice it to say the outcomes were less than desirable.

The Doomsday Book Of Medicine – What To Do When There’s No Doctor Or Medicine Around

Let’s think about some injuries you can expect in the woods, hiking or running to find cover. Or for that matter, just being in a place where help is not going to come anytime soon. Falls are very common and can result in anything from a scrape to sprains to more serious injuries like fractures and head injuries. So ask yourself; do I really know how to treat a sprain? What about a fracture? Do I know how to stop bleeding and properly clean a wound? Have I ever done those things? Would I be able to actually do the job the right way should I need to? What if it was something life threatening? Could I save a person’s life?

If the answer to any of the above is NO, then you can have all the gear in the world at the ready, but YOU are not ready to bug-out!

I’m going to give an example of injury event that can be a tragedy if you are not properly trained to treat it. Remember, this is about knowing: both what TO do and what NOT TO do.

You and your companion are moving quickly through a heavily wooded area and your companion falls. When you reach them, you see a branch has impaled their arm. They are essentially stuck to a tree because of a branch sticking all the way through their arm. Your companion is in shock and not even aware of the extent of the injury. They are confused. There is blood coming from their arm and also from a gash on the right side of their head which is bleeding profusely. You think you see bone exposed through the head laceration and it seems that one of their legs has something wrong. Closer examination shows you that the ankle is sitting at a strange angle. What do you do now?

If you are like most people, you freak out, try to compose yourself so you don’t freak out your companion, get really pale and nearly pass out and then reach for your cellphone to call 911. Oops, no connectivity, so no help coming. So what now? The first aid kit! You have a first aid kit with a manual in it to walk you through caring for these injuries. You dig out the kit, open and it and check the book only to find it’s great for small cuts and bruises and simple things, but it has nothing remotely close to what you’re dealing with now.

Suddenly, you realize that maybe it wasn’t such a good idea to cancel that first aid class you had signed up for but decided you were too busy/tired to take. Besides, someone else will know what to do or I’ll call 911 anyway, I’ll never need to use it.

WOW! Talk about contrary to prepper philosophy. Or is it? It would seem that Emergency Medical preparedness training is a no-brainer, but in reality, most prepper sites and stores that cater to preppers are focused on the medical equipment you need rather than the training required to use it.

So anyway, I can’t teach you the how to do it in this article. I can give you a good idea of what good, accurate care and treatment of this fall will require. And yes, you can look all these things up on the internet. However, unless you learn from a real, live person who can guide you and correct mistakes you will surely make as you learn, you are never going to be able to really address the problems this very real scenario depicts.

STOP, LOOK, and LISTEN.

The very first thing required in any trauma/accident situation is an evaluation of the site of the accident. Stop, take a breath and look at where you are about to go. Is it a safe place to enter? In the urban world this is akin to a Paramedic called to the scene of a gunshot victim. In that situation, the Paramedic cannot help the victim until the Police have arrived and determined that the Paramedic is safe from the danger of being shot herself when she goes to help. At that point the scene is declared “safe” and the Paramedics can get to work.

In the wilderness or woods, the dangers are different but still just as potentially deadly. Is the ground stable? Are there dangerous branches or rocks that could fall onto you as you make your way to your companion? Will you slip and fall as well if you attempt to help? Do you need to take time to tie off before going to the person? What about wildlife? Are you in danger of animal or insect attack when you go to help? Can you find a way to make the scene safe?

Only after you treat the area as if it were a busy street corner will you be safe. You have to STOP, LOOK, and LISTEN.

Once the scene is determined safe, or made safe the next thing is to get to the injured person and take stock of the situation by doing an initial survey of them. This is done by looking and speaking to them without touching them. Encouragement to stay still is recommended at this point. Usually saying “Hold on, try not to move, I’ll be right there,” is a good start.

Look carefully at the person and where they are lying. Do you see any blood? Where is it coming from? What about limb deformities? If so, which ones. Are there any objects that will cause difficulty in treating the injuries? Can they be cleared or do you need to find a way to work around them.

Now it’s time to your ABCDE’s: Airway/Head and Neck, Breathing, Circulation, Disability/Deformity, and Exposure assessment.

Airway: If the person is conscious and talking, then they have a clear airway, but they might have a neck injury which will require stabilization. In the case of any significant fall, or one with an accompanying head injury, be sure that the cervical (neck) spine is stabilized. If the person is unconscious or can’t talk, be sure that the airway is clear of obstruction before going further. Gently lowering the jaw while holding the forehead steady will allow you to see if anything is causing an obstruction. Look for broken teeth, blood, dirt or some foreign body causing an obstruction. Remove any obstruction you can see. Do not blindly probe their mouth. You could push an unseen object backward and cause an obstruction where none had previously existed.

Breathing: Is the person breathing on their own? If they can talk, they are breathing. Is there any reason to suspect a possible lung injury? Do they have any evidence of a chest injury that could have broken a rib? A broken rib can puncture a lung and lead to air in the chest collapsing the lung on that side. You can check this several ways. One is to watch the rise and fall of the chest and see if both sides rise equally. Another is to put your ear on one side of the chest, then the other and listen for breath sounds to be equal on both sides. If you notice that the trachea, the tube that runs down the middle of your neck, is pushed to one side; that is a clear sign of a lung injury. The best case scenario is that you have a stethoscope in your kit that will allow you to hear the actual breath sounds easily. If there is a lung injury, this is a true emergency and will need to be treated quickly, but that is a procedure that requires specialized training.

Circulation: Check for obvious bleeding, but also in the case of extremity injury, is there good blood flow to the far portions of the extremity? Is the color of distal (far) limb pink or pale/bluish? Is it warm to the touch or cool/cold? Pink and warm = good. Anything else indicates blocked blood flow which may be due to arterial injury or compression. Arterial injury needs repair soon. Compression can often be correct by adjusting the limb to an appropriate angle.

Disability/Deformity: Is neurologic function intact or are they confused, unable to answer questions or showing other signs of significant head injury? Are there limb deformities, obvious chest or facial depressions indicating broken bones? Depending on what you find, a variety of things may be needed from re-evaluation of the airway, to splinting or bandaging.

Exposure: How long has it been since the injury took place? Are they becoming chilled or hypothermic? Cold =shock. Putting a warm cover over an injured party ASAP is essential even in hot weather.

The important thing to do now is stay calm and determine what needs to be treated first. If there is copious bleeding indicating probable arterial involvement (this can also be characterized by blood that sprays with each pump of the heart) apply direct pressure and if necessary a tourniquet that can be tightened and released easily. If there is no major bleeding issue, then recheck the airway and breathing. If there is chest deformity and/or other evidence of a collapsed lung, that is the next thing to deal with unless there is now evidence of airway obstruction or the person is not breathing on their own. The former requires clearing the airway, the latter requires rescue breathing. The collapsed lung requires specialized training you can’t get from the internet or a book. Any other injuries can wait. Remember; the brain starts to die after 3 minutes without oxygen. Airway is first unless bleeding is so profuse that not stopping it would mean there would not be enough blood to circulate oxygen.

Back to our fall victim; we have bleeding, limb deformity, confusion and a fall. The fall means we have to have high suspicion of a neck injury and the confusion could be shock or it could indicate a more serious injury such as concussion or a brain bleed. We also have a penetrating injury which may have been an insult to a major artery. This person is seriously injured and qualifies as a trauma patient. Ideally, we would get this person stabilized and out of there ASAP, but that is not an option. Instead, we have to stabilize and create a sheltered space as close to where we area as possible so we can begin to treat the various injuries.

Assuming there are no immediate life threats (Excessive bleeding or collapsed lung/blocked airway) we begin by stabilizing the neck. A towel, shirt or thick cloth of some kind can be rolled and taped carefully in place to accomplish this. Next stabilize and splint any limb deformities so that we can move the victim with the least amount of discomfort to them. Continue to talk to them to assess their mental status. At this point, things get tricky…

People’s first instinct when presented with something sticking out of or through a body part is to remove it. STOP! Don’t do it! Not only is it exactly the wrong thing to do, it could quite possibly be the thing that kills the person. I know it is scary looking and seems like the danger comes from it being stuck in the person, but at this point the person is alive and has survived impalement. Leaving the object embedded is not dangerous at this point; it is actually the safest thing to do. As long as the object is left in place, it is acting to tamponade (stop) the bleeding. That is, it is putting pressure on any lacerated vessels and preventing any major bleeding. Yes there will be some oozing around the injury site, but it will be minimal as compared to what happens should the object be removed. NEVER REMOVE AN IMPALED OR IMBEDDED OBJECT FROM A PUNCTURE WOUND unless you have been trained to handle this procedure. This is another procedure that requires specialized training courses.

But what about infection, you ask? Yes, infection risk is high, but it is not a life threatening problem at this time. A neck injury or brain injury will need prior attention as will the bleeding from the head wound. Antibiotics are something you can give, but not at this time because the victim has a decreased mental status and it is not clear if they can swallow a pill without causing an airway obstruction or aspirating it into a lung.

For the time being, the safest and most efficacious thing to do is to cut both ends of the branch so that your companion can be maneuvered to the sheltered spot. Start with the end of the branch still attached to the tree and try to keep the arm as immobile as you can while doing so to minimize pain. You can then trim the protruding opposite side.

Don’t cut the ends short. Leave enough to be able to grasp both ends firmly to assist removal when it is time. Use your gauze or Ace wrap to secure the branch so that it moves as little as possible during transport to avoid causing undo pain.

Continue to monitor the ABC’s and mental status and address what need to be done ASAP. Once you have done as much as you can, find a way to get this person out of there and to an emergency care center as quickly as possible otherwise, they will likely not survive for very long.

This all started out as a fall but resulted in multiple injuries placing your companion in danger of dying. With the proper training, you could swing the odds much more in favor of a good outcome. So before you buy that cool medical kit, or put one together on your own, get out there and get trained. If you know someone who has been trained and can teach you the emergency survival techniques you’ll need, ask them to teach you. Meanwhile there are a multitude of courses in first aid, tactical lifesaving, wilderness emergency medicine, survival medicine and CPR. Don’t forget to look into classes that teach herbal remedies. Know what plants can ease pain or prevent infection, they may be the only medications you’ll have available.

So go out and get prepared. Learn.


Other self-sufficiency and preparedness solutions recommended for you:

The Lost Ways (The vital self-sufficiency lessons our great grand-fathers left us)

Survival MD (Knowledge to survive any medical crisis situation)

Backyard Liberty (Liberal’s hidden agenda: more than just your guns…)

Alive After the Fall (Build yourself the only unlimited water source you’ll ever need)

The Lost ways II (4 Important Forgotten Skills used by our Ancestors that can help you in any crisis)

The Patriot Privacy Kit (Secure your privacy in just 10 simple steps)

When it comes to prepping, there is a lot of talk about what material needs we should have on hand. A bug-out bag, freeze-dried food, water, transportation, first-aid kit, weapons

You can wipe that smile off your face because I ain’t going to teach you how to make a real grenade. Apart from the fact that they’re illegal, which means that I will be up to my eyeballs in SWAT the minute I hit the “publish” button, it’s not the topic of today’s article. Remember that scene from Rambo, when John unscrewed the cap of his knife to take out a piece of cloths? Well, that’s exactly what a paracord grenade is – a very small container that comes will all the items you will need to get out of shit hits the fan situation.

So, why is called a paracord grenade if it doesn’t explode? Well, maybe because it’s shaped like a grenade and because having one tied to your belt makes you a bad MF.

Anywho, in my opinion, every prepper should have at least one of these neat accessories. Yes, I am well aware of the fact that your bug out bag has everything you will never need, but you never know what could happen – maybe you’ll lose it, forget to take it or perhaps you may be compelled to abandon it in order to run faster. So, without further ado, here’s how to make your first paracord grenade.

Materials required

For this project, you will need the following items:

  • Survival items of choice. I packed an emergency blanket, a signal mirror, a magnesium rod, two pieces of paper, a small pencil, six Band-Aids, some fishing line, and a small fishing hook.
  • 550 paracords. For this project, I used black and red 550 paracords.
  • Rubber bands.
  • Scissors
  • Paracord fid (they look like regular knitting needles, but they’re used for paracords).
  • Mini carabiner.
  • Aluminum foil.

All done gathering your supplies? Good! Here’s how to make your paracord grenade.

Step-by-step paracord grenade

Step 1. Place some aluminum foil on your work table. Use a knife or a pair of scissors to cut the excess foil.

Step 2. Place your survival items in the center of the tin foil.

Step 3. Fold edges as to create a grenade-shaped package.

Step 4. Tie the black and red paracords to the small carabiner. To ensure that both paracords will be wrapped tightly around the package, use a Larks Head Knot for both of them. If you don’t know how to make this type of knot, check out the video below.

Step 5. Place the carabiner on top of your package. Right now, the red paracord should go on the left of your package, while the black one should run along the right edge of your package.

Step 6. Secure paracords to package by applying two rubber bands right below the mini carabiner.

Step 7. Tie the red and black paracords ends at the bottom of your package. For this, you will need to use a square knot. If you don’t have any clue on how to do that, check out the video below.

Step 8. It’s now time to make the first knot. Now, take the paracord piece on the left side and make an S shape right below the package.

Step 9. Grab the end of the left paracord and get it through the loop that’s on the left side.

Step 10. Now pull until there’s no more slack. Leave the loop on your right side for the time being.

Step 11. To close the loop on your left side, you will need to grab and pull the upper part of the loop that on your right side.

Step 12. Now you can pull the upper part of your right loop to close the left one.

Step 13. To cover the rest of the package’s surface with black paracord, make several Solomon knots. If you don’t know how to do them, watch the video below.

Step 14. Once the entire surface is covered, start the second pass using your red paracord. Follow the steps above to add another layer of paracord. When you’re done, use a square knot to secure the red paracord to the mini carabiner.

Step 15. Attach the paracord grenade to your belt or bug out bag, and you’re done.

Additional considerations on the paracord grenade

Keep in mind that the paracord grenade can be used only once – just like a regular grenade. If you run into trouble, undo the knots, take out the items inside, and save the paracords for later use. I wouldn’t recommend attempting to make a paracord grenade in the field because it’s a time-consuming process.

Now, if the above-mentioned steps seem too difficult, you can use one type of paracord instead of two. The process is the same: start with a square knot at the base of the mini carabiner, Solomon knots all around, and finish up with another square one.

As far as the contents of the paracord grenade are concerned, you’re free to add or remove items. When I first did this project, I used the same items as John Rambo. One thing I forgot to add was a firestarter. Of course, the magnesium rod is important, but you can also try to add things like a bit of char cloth wrapped around in plastic or even a wad of steel wool. Think of it this way: the paracord grenade mirrors the prepper’s personality. Your bug out bag contains all items needed in the field, but this small container should pack only those items you can do without.

Another thing to keep in mind is to add some sort of protection for sharp or pointy items. For instance, if you want to pack a pocket knife or fishing hooks, wrap them in some tissue paper or cloth before putting them inside the package. If you want to weatherproof your package, place your items inside some plastic wrap first before packing them in aluminum foil. You may also want to add some dental floss in case the paracord is too big.

That’s basically it on how to create a paracord grenade. What’s your take on my little DIY? Hit the comments section and let me know.

You can wipe that smile off your face because I ain’t going to teach you how to make a real grenade. Apart from the fact that they’re illegal, which means

For some minutes after this fancy possessed me, I remained without motion. And why? I could not summon the courage to move. I dared not make the effort which was to satisfy me of my fate — and yet there was something at my heart which whispered me it was sure. Despair — such as no other species of wretchedness ever calls into being — despair alone urged me, after long irresolution, to uplift the heavy lids of my eyes. I uplifted them. It was dark — all dark. I knew that the fit was over. I knew that the crisis of my disorder had long passed. I knew that I had now fully recovered the use of my visual faculties — and yet it was dark — all dark — the intense and utter raylessness of the Night that endureth for evermore.    The Premature Burial, Edgar Allan Poe

Welcome, weary traveler! The journey’s been a long one and you rest. Sleep! Sleep! And awaken to find yourself trapped in a pine box. Deep silence apart from the thumping sound made by your heart – like a Mad Hatter racing past everyone to get front-row tickets to see the Rapture. Charming perspective, isn’t it?

Well, for us, it’s just a tall tale, a decrepit fable meant only to scare children or to make chicks jump into your arms when campfire ghost stories become too ghosty. However, for people living in the Victorian Age, it was a very distinct and frightening glimpse into the afterlife. Rumors of medical conditions that so perfectly mimicked the symptoms of death fueled the common folk’s fear, leading to all kinds of peculiar funeral practices.

Have you seen the Autopsy of Jane Doe? Great horror movie, by the way. You should definitely watch it if you like old-school horror flicks with lots of jumpscares. Anyway, there was this scene in the movie where a mortician explains to his apprentice the significance of attaching a small bell to the cadaver’s toe.

Won’t spoil the movie for you by quoting the doc, but I’m going to say this – that’s a very old and very common 19th-century medical practice to ensure that the deceased wasn’t interred while being alive. As I’ve mentioned, some conditions such as catalepsy mimic the symptoms of death.

With Medicine lacking the needs to detect faint life signs, some patients were declared dead even though they were very much alive. The bell attached to the toe was to make everyone aware that the soon-to-be-buried person still had life in him.  Historical records that toe bell was not the only peculiarity when it came to the mortal dread of being buried alive.

Affluent families commissioned intricate coffin which featured let’s say, emergency release switches. These levers or buttons were installed inside the coffin, probably in proximity to the deceased’s limbs.

As death spares neither the rich nor the poor, even the working class sought to outfit their loved ones’ final resting places with similar signaling devices. The most common was the bell mounted on the tombstone, which could be triggered by the deceased via a thin metal wire running through the ground.

Anyway, welcome again to the first part of my extreme survival series; a project which I have postponed for far too long. As you’ve probably guessed by now, the first article will be about how to escape being buried alive.

I know that with nowadays medical gadgets it’s next to impossible to second-guess the symptomatology associated with death, but it can happen (check out the story about the Spanish man who woke up during the autopsy). Now, without further ado, here’s what needs to be done in order to escape a coffin if you’ve been buried by mistake (or intentionally!).

Step 1. Assess the situation

Fear is only natural and waking up in utter darkness, surrounded by four wooden boards can make even a man with nerve made of steel to go nuts. Don’t do that! I know it’s hard to think about anything else in those moments, but screaming, kicking, crying, and obsessively scratching the inside of the lid will only force your lungs to consume more oxygen, not to mention the fact that you will more than likely end up hurting yourself.

Take a minute or two to compose yourself and assess the situation. Knock on the lid and listen – if you hear a hollow sound, it means that the coffin has yet to be placed underground; in which case, all you’ll need to do would be to kick open the lid. Doesn’t matter if haven’t had the chance of break open a door – with that much adrenaline coursing through your veins, you can probably kill a bull.

Now, in the event that you don’t hear a hollow sound, you should assume that the casket has been buried. There’s no reason to panic. Calmly, reach into your pockets and try to figure out what you have in them. I know that this sounds really sad, but people nowadays tend to bury their loved ones with some of their possessions – this could mean, well, anything: a small switchblade, a lighter, a smartphone, a tablet, heck, even a laptop.

Don’t even bother trying to call someone if you find a phone in your pockets – the signal won’t get through that far underground. However, you can use flash to check out the inside of the casket. Don’t forget about your breathing – even if all the odds are against you, panicking will only make you act irrationally.

Most caskets are made from flimsy materials, meaning that breaking open the lid would not be much of an issue. It’s the earth on top that must concern you at this point.

Step 2. Provide some sort of head protection

It’s obvious that you won’t have access to the tools you keep inside your B.O.B, but that doesn’t mean you can’t improvise. Bear in mind that breaking the coffin’s lid is the easy part. Having to deal with the earth will be quite challenging, but not impossible.

To spare yourself a chocking death once the earth starts pouring into the coffin, pull your T-shirt, shirt or park over your head (hands should not be in the sleeves). After doing that, use the sleeves to make a knot just above the head. Yes, I know it sounds awful and rather ineffective, but this simple trick will protect your head while preventing you from chugging dirt.

Step 3. Look for weak spots in the coffin.

If the unfortunate event happened very quickly and away from your family, you’re very likely to have been buried in a rectangular box. Those require little force to break since the lid’s held in place by a couple of nails. Still, if some funeral arrangements were observed, you could end up in one of those double-doored caskets. It doesn’t really matter, because all of them have weak spots – in the latter case it’s the gap where the two doors meet. That’s where you will need to strike.

However, before making any attempts, take a few moments to compose yourself; you’re alive, you’re still breathing, and you will get out of this no matter what. Free your mind of any menacing thoughts and focus only on the task at hand.

Step 4. Break the lid and start shovelling

When you’re ready, ensure that the shirt’s sleeves are secured, and, using all the force you can muster, kick the coffin’s lid. Hit it until earth begins to fall inside the coffin. Don’t panic when that happens. Push the falling earth on the sides.

Always keep your head and torso above the earth. Keep pushing and piling the dirt to the sides. You can guess how far you will need to pile by using your nose – if the air’s still stale and, well, earthy; it means you’ve still got a few feet to go. Again, keep breathing at a steady pace and don’t attempt to remove the ‘bag’ over your head no matter how uncomfortable you feel. As the earth piles inside the coffin, you’ll notice or rather feel less of the stuff falling on you.

Step 5. Get up on your feet, soldier!

Once the inside of the coffin starts feeling up, arch one of your feet, and plant the foot firmly on the coffin’s bottom. You’re nearly out! One more push and you’re free! Using that foot as support, muster all the strength you have left and stand up.

You’re one step away from freedom. It may be very hard at first, but once you’ve managed to raise your head and torso above lid level, standing up will be very easy. At this point, all you’ll need to do would be to push away the remaining earth and to crawl out of your grave. Congratulations! You’ve just survived one of the worst fates anyone can imagine.

Final Thoughts

I should emphasize the fact that even with our astounding progress in life signs detection, errors can sometimes occur. Nobody’s to blame for this. It’s just the fact that your body has decided to slow all body functions to the point where detection becomes impossible. Still, one cannot ignore the fact that someone could have done that to you on purpose. Yes, I know that it’s a rather disconcerting thought, but, then again, the world is a crazy place.

Once you’ve got out of the grave, head immediately to the nearest hospital for a full checkup. You should also find a way to notify the authorities. The chances of you being the target of an assault may be slim, but at this point anything is possible. One more thing before I go – emotional support. This kind of things stirs some serious shit inside your noggins.

Don’t even dare to assume that it’s over. Ever heard about PTSD? Yes, that awful conditions which afflict so many battle-hardened soldiers. Post-traumatic stress disorder doesn’t occur solely during an intense battle. Nope! According to the docs, you have more chances of experiencing PTSD-like symptoms after a car accident or going through a breakup, than on the battlefield.

So, after the good doc gives you a clean bill of health, do yourself a favor and go talk to the therapist about this experience.

What are your thoughts of being buried alive? Hit the comments section and let me know.


Other self-sufficiency and preparedness solutions recommended for you:

The Lost Ways (The vital self-sufficiency lessons our great grand-fathers left us)

Survival MD (Knowledge to survive any medical crisis situation)

Backyard Liberty (Liberal’s hidden agenda: more than just your guns…)

Alive After the Fall (Build yourself the only unlimited water source you’ll ever need)

The Lost ways II (4 Important Forgotten Skills used by our Ancestors that can help you in any crisis)

The Patriot Privacy Kit (Secure your privacy in just 10 simple steps)

For some minutes after this fancy possessed me, I remained without motion. And why? I could not summon the courage to move. I dared not make the effort which was

In a SHTF situation where you can’t stay in your own home, and moving in with a friend or relative is not an option, what will you do? If bugging out to the wilderness suddenly becomes your only option, will you survive? Probably not for very long, if you believe the experts. Nevertheless, if your survival plan doesn’t include a bug out to the forest option, it should, but coming up with a good plan might be more difficult that you think.

For starters, do you have a reliable bug out vehicle? If your bug out plan has you escaping the city or suburbs in a modern vehicle, you may be in for an unpleasant surprise. Most modern vehicles won’t survive a strong EMP event. You may find yourself traveling on foot, away from a major metropolitan area, in search of food and water. But at least you won’t be alone. When food and water run out, millions of others will be traveling, mostly on foot, away from large centers of population. Even if you have a working vehicle, it may be useless, due to the gridlock created by people and disabled vehicles, all on the same escape routes. You may avoid some of that if you get away quickly, but will you? How much time will pass before you’re packed, and ready to go? Will the roads already be jammed by the time you depart? As time passes, the situation will get worse. Can you imagine what starving, desperate, people are capable of doing? I’m thinking “zombie apocalypse”.

My Bug-out Plan

Understanding the predicament, I don’t have to look any farther than my garage for a solution. My bug out plan doesn’t depend on a full-size vehicle, but I won’t be bugging out on foot either. I suspect that I wouldn’t last very long, with just the items I can carry on my back. Instead, I’ve decided to use my garden tractor (riding lawn mower), pulling a small trailer. Don’t laugh, it’s more practical than it may seem.

  • It would probably survive an EMP event.
  • It can travel off-road, avoiding traffic jams and bypassing bottlenecks.
  • It can pull a small trailer, loaded with essential supplies.
  • I can avoid people who may want to harm me, or take what I have.
  • I’ll have a 360 degree view, helpful for situational awareness, and if I have to use a firearm.
  • I’ll be able to travel to places inaccessible by car, which in theory will make me more secure.
  • My getaway will be at a whopping 6 miles per hour, maximum, but it beats walking.

There are drawbacks, of course. I’ll have no shelter from the elements, as I would in a car or truck. My traveling companion will have to ride in the trailer, or walk along side. Perhaps the biggest drawback is that I won’t be able to outrun anyone. For that reason, it’s important to pack and leave quickly, before things get out of hand.

The bug out location I’ve selected is far from the densely populated area where I now live, and is an area that provides opportunities for hunting, fishing, growing crops, and is near a fresh water source. I know what some of you are thinking… A city boy, living in the wilderness, wouldn’t last long. You might be right, but what choice do I have? Since I don’t own a wilderness cabin, or even a camper, how can I best prepare for a situation that forces me to abandon my home? For starters, I’ve compiled a virtual library of information that will be helpful in such a situation. I’ve also purchased some basic survival equipment and supplies. I practice the skills I’ve learned, and I’m a pretty good gardener.

While living in the wild will be a challenge, I first have to arrive there safely. Traveling with a fully loaded trailer screams “Hey look at me! I have food, water, and survival gear!” How do I get to my destination without being robbed or killed? I see two main problems:

  1. Starving, thirsty, desperate people won’t hesitate to attack me and take what I have.
  2. Those already settled in, near my bug out location, won’t appreciate the competition for limited resources.

To make matters worse, the noise of the tractor will announce my presence. In either case, one bullet could ruin my day.

Bugging out is risky, but I’m thinking of a scenario where I have no choice. I’ll improve my odds somewhat by getting away quickly, before anarchy is commonplace. To do that, all of my things need to be organized, and ready to toss into the trailer. This includes items that are protected from EMP’s. The list that I’ve already prepared helps to make sure that I don’t forget anything.

As I travel, I expect to cross paths with others who are also bugging out. The majority of the people I encounter will be just like me, trying to survive. Many of them will be traveling on-foot, with very limited supplies. My survival odds will improve if I join a like-minded group of travelers, or convince others to travel with me. I’ll bring extra food to share. Travelling with a well-fed and motivated group should help to keep the criminal element away. I’m not trying to be a group leader, or a macho tough-guy, but just one of the many people fleeing an area that has become unsafe. Being armed, and avoiding likely trouble spots, will also help.

With luck, I’ll make it to my bug out spot, probably with a number of other people who’ll soon become my neighbors. As I settle in, I’ll begin to implement a plan that might be described as “Living in the Wilderness, but Not Wilderness Living”. After food and water, my top priority will be the construction of a substantial shelter. As Pat Henry put it “your tent offers zero protection from a sharp stick, much less bullets.” I’ll use modern tools and technology to deal with challenges that come with living in the wild. I’ll have lights when and where I need them, and I’ll use sensors to alert me to intruders, and garden pests. Some of the pests that would otherwise be a threat to my garden, will become food, if I can kill or capture them. My garden tractor-trailer combination will continue to be an asset, as long as gasoline is available. I’ll be able to haul whatever useful items I can find, including building materials, firewood, and water. It’s likely that some of my traveling companions will become the nucleus of a survival group, and the benefits of belonging to a group are many. One could be hunting or fishing, while another guards the supplies and equipment. One could be on the lookout for intruders, while another prepares food, or tends to a garden. One could sleep, while another stands guard. Portable two-way radio equipment, as well as low-tech devices, such as whistles, may be used to alert group members to emerging threats.

My trailer is approximately 48” by 30”. If stacked 30” high, I’ll have about 25 square feet of cargo space. My supplies will be covered with a tarp, protected from rain and wind.

I’m using 3 plastic containers. One is for food, another for shelter, and the third for cooking, cleaning, hygiene, health, and miscellaneous supplies. Those containers account for about 15 square feet, and mine will be similar, leaving me with at least 10 additional square feet. Because I’m thinking long-term survival, I’ll pack clothes and bedding for all weather conditions. I’ll use the additional space for items that will help me survive in the long-run. Included will be the components of a small solar electric system that can be easily reassembled at my destination. I’ll have lights, and a variety of electrical devices that can be powered by the solar electric system. Sensitive electrical items are pre-packed, wrapped in aluminum foil and insulated from each other, which is the equivalent of a Faraday Cage. The ability to use power tools will make construction of a shelter much easier.

Because of the trailer’s small size, I look for ways to conserve precious space. I won’t bring bulky items, like table lamps. Instead, I’ve assembled small and simple light fixtures. I won’t bring a pedestal fan, or even a tabletop fan. Instead, I’ll use small muffin fans, similar to those you find in computers. I’ll mount them on frames, made from pvc tubing, that can be disassembled, saving space when packing. I’ll make good use of paracord, rope, and plastic sheeting. I need not carry books, and volumes of survival literature, because all of those things have been scanned, and stored on a KindleFire. Likewise, carrying a large quantity of water is not practical. I don’t have space for large containers. Instead, I’ll pack several collapsible water containers. I won’t bring a propane stove, or even a charcoal grill, but I will bring a grill top. I’ll assemble a fire pit with stones that I’ll find at my bug out location, and finish it off with the grill top. I’ll pack my cast iron Dutch oven, overlooking my concern for weight, just this one time. Once settled in, my tractor-trailer’s ability to haul things contributes to my bartering opportunities.

The bug out location I’ve selected will be a 7 to 8 hour trip by garden tractor. I have to make sure I have enough gasoline, but my preliminary estimates indicate that I can make it with just the capacity of a full tank, and a full 2 ½ gallon container. I’ll also carry a tube for siphoning, in the event I’ll need to do that. I’ll be carrying a shovel and an axe, helpful if I get stuck or need to clear a path, and very useful when I’ve settled in at my bug out location.

I’ll have the ability to collect and store rainwater. I’ll be prepared to filter water, and boil it, making it safe for drinking. My bug out supplies will include heirloom and hybrid seeds for food crops. Traveling light is an important consideration, and for that reason I’ve created a separate list of items to acquire, once I’m settled in at my bug out location. For the most part, those additional items will make life more comfortable, but are not essential for survival.

Once I’ve settled in at my bug out destination, my first priority will be a sustainable source of food. I’ll start a garden of course, but I’ll need to have other food while I’m waiting for my crops to mature. My bug out supplies include a live trap for small animals, but it is safe to assume that others will quickly decimate local population of rabbits, squirrels, and other edible creatures. My bug out location is near a large lake, and I suspect that I’ll be able to catch fish.

In an effort to avoid bland meals, I’ll pack items such as olive oil, spices, sauces, flour, and corn meal. My list for shelter is similar to Pat’s, but I’ve added an air mattress for additional comfort. I’ll have construction tools, and plan to make tent-living a very temporary arrangement. My list for cooking, cleaning, and hygiene is different from Pat’s list, because I put more emphasis on long-term survival. While I will pack items such as soap and dish detergent, I’ll place a high priority on reusable items, such as wash cloths and towels. Instead of a propane stove, I’ll pack a rocket-stove, and reusable cooking supplies. I’ll have a solar-heated camp shower, wash basins, and collapsible containers for water. I’ll have a good first-aid kit, a variety of medicine, alcohol, bug spray, toilet paper, and other items for health and hygiene. One container, perhaps a backpack, will be for items that need to be easily and quickly accessible. Items in this container will include a flashlight, weapons, maps, a compass, binoculars, cash, a lighter, a KindleFire, snacks, a pocket knife, basic tools, and a rain parka.

My “electronics” box will include all of the components for a small solar electric system, except the solar panels and batteries. It will include test equipment, extension cords, power strips, lights and light fixtures, fans, portable alarms, an AM/FM radio, and a GPS device.

Items that will be packed separately include tools, solar panels (mounted on a hinged aluminum framework), batteries (for the solar electric system), weapons and ammo, live trap, gasoline container, tackle box with fishing supplies, shovel, ax, rake, grill top, and a jump starter (includes tire pump and light). I’ll have the tools and supplies needed to make repairs to the tractor and trailer tires.

After I’ve set up camp I’ll be on the lookout for anything that might be useful, such as a propane stove with a full propane tank, table and chairs, buckets, tools, food and water. If I can find them, I’ll increase my stockpile of disposable items, such as paper towels, zip-lock bags, trash bags, aluminum foil, toilet paper, soap, dish detergent, laundry detergent, insect repellent, toothpaste, shaving cream, alcohol, and other items for health and hygiene. I’ll also stock up on firewood and tinder.

Perhaps the most important item I hope to acquire after I’ve settled in, is an energy-efficient chest freezer. In the event that I have success hunting, fishing, trapping, or growing crops, the freezer will provide an easy way to preserve food. Not needing to find and process food everyday will give me opportunities to rest, and attend to other aspects of survival. The smallest of the chest freezers on the market today are very energy-efficient, meaning that they can be powered by a small off-grid solar electric system. According to the energy-guide tag, 600 watt-hours per day is required for a 5 cubic foot chest freezer. I can get that much power with just 2- 100 watt solar panels, and 2 – 100ah batteries. My system will be a little larger than that, to accommodate the other things needing power, and for extended periods of cloud cover.

Cold Weather Considerations:

Where I live, the months of December through February can include some very cold and nasty weather. Extreme weather may force me to deal with the danger, and postpone bugging out. I may instead choose to make my home as secure as possible, and prepare to defend it. Those traveling through my neighborhood would also be susceptible to extreme weather, perhaps giving me a bit of an advantage. If I’ve already bugged out, and set up camp in advance of cold weather, preparing to survive cold conditions will be a high priority. This includes the construction of a substantial shelter, and a way to provide heat.

The Long Run:

In the event that federal and state government no longer exist, law and order will be maintained at a local level, by an assembly of the people of that area. A protective force can be created, and guard duties shared. Efficiency can be realized in areas such as food production and cooking. Those with special skills will be highly revered, and will serve the entire community. Bartering will be commonplace.

I don’t expect my wilderness life to last more than a couple of years. In a serious SHTF situation, many people will die off from lack of food, or simply from the inability to survive without the conveniences we take for granted today. If that happens, there will be plenty of empty homes to move into. I would choose one with a fenced back yard, to help protect my food source. Most of my food will come from my garden, and perhaps some fish, chicken and rabbit.

Summary:

If I can’t safely stay in my own home, which is at the edge of a big city, or move in with someone else, far from a densely populated area, moving to the forest may be my only option. I need to be ready to bug out quickly and travel safely. I’ll need to bring the appropriate equipment and supplies. And finally, I need to be able to survive wilderness living. I’ll have to depend upon my hunting, trapping, fishing, and gardening skills. My prepping includes the equipment and knowledge to do those things. I don’t expect it to be easy. The competition for limited resources will be fierce, and not everyone will be honest and ethical. Still, I plan for a comfort level far exceeding that of tent camping. I applaud those who can live in the forest with only a knife and the clothes on their back, but I can’t do that.

Perhaps the best things I have are a list, and a plan. I don’t depend upon a modern vehicle, since impassable roads, or an EMP event, could stop me dead in my tracks. My pack-out list helps to ensure that I’ll bring the essentials, while not being overloaded with items I can do without. My extensive database of information will be useful in the event of a medical emergency, or other unexpected circumstances. Moving quickly, with a destination in mind, might prevent me from becoming a victim of the lawlessness that would likely follow a SHTF situation. Getting to my destination quickly means that I’ll also be able to “scavenge” more quickly than some, and acquire useful stuff before it’s all gone. Banding together with trust-worthy, like-minded others may offer the best odds for survival.

We thank John D for his contribution.


Other self-sufficiency and preparedness solutions recommended for you:

The Lost Ways (The vital self-sufficiency lessons our great grand-fathers left us)

Survival MD (Knowledge to survive any medical crisis situation)

Backyard Liberty (Liberal’s hidden agenda: more than just your guns…)

Alive After the Fall (Build yourself the only unlimited water source you’ll ever need)

The Lost ways II (4 Important Forgotten Skills used by our Ancestors that can help you in any crisis)

The Patriot Privacy Kit (Secure your privacy in just 10 simple steps)

For starters, do you have a reliable bug out vehicle? If your bug out plan has you escaping the city or suburbs in a modern vehicle, you may be

In a previous article, I might have mentioned something about cowboys and bandanas. Apart from the fact that they looked awfully cool and would help them conceal their faces during a bank robbery, those wild rags, as they were called, had more uses beyond fashion or crime. And since bandanas will never go out of fashion, I’ve decided to do this little follow-up to show you how this painted rag can save your can in a shit hits the fan situation. So, without further ado, here are 17 survival uses of a bandana.

Water collection

Water’s essential in field survival. Still, if you get lost or anything, you won’t be able to rely on your emergency water supply. If there are no streams or rivers nearby, it’s possible to use your bandana to soak up water. Tie to your ankles and walk through tall grass during the wee hours of the morning to collect dew. Tree holes usually harbor a small amount of water. Get that bandana in there and soak as much water as possible. It may sound disgusting, but you can also squeeze some water from that rag after a long day’s walk (yup, drinking your own perspiration).

Crafting a simple pouch

Don’t have any pockets left to carry out your gear? No problem! You can whip up a simple pouch which can be attached to your belt or backpack. Just place your items in the center of the pouch, bring all folds into the middle, and tie it with a piece of dental floss or whatever cordage you have available.

Head protection

It’s obvious that a bandana cannot replace a safety help, but you can also use these thingies to keep your head dry when it’s raining, or the sun’s up in the sky.

Makeshift bandage

In case you’ve lost your med kit or had to use that gauze as tinder, you can use your bandana to bandage a wound.  If you have to deal with a large arterial bleeder, you may also use that wild rag as a tourniquet.

Setting up the table

Sorry if there are no roses nor lit candles – all I can offer you is a bandana used as a tablecloth.

Getting your keister clean

Well, you know that they say – when shit hits the fan, there’s nothing more to do than wipe your behind and move on. In case you run out of TP or paper tissue, take out your bandana and improvise. Just be sure to wash it before using it as a headcover or tablecloth.

Marking a trail

If you feel like you’re walking in circles, get the bandana out of your bug out bag and place on the ground right where the trail starts. Keep going. If you still see the bandana, it means you have to change your approach.

Repair broken backpacks

One of the most frustrating things that can happen in the field is a broken backpack strap. If you don’t have a sewing kit in your B.O.B, just use your bandana to replace that strap.

Starting a fire

No need to tear your clothes for tinder if you have nothing left in your box. Just place the bandana on the ground and set it on fire using your method of choice.

Using it as a mask

If you need to cross an area filled with dust or debris of any kind, you can always wrap the bandana around your head. Don’t forget to soak it in water to increase its filtration efficiency.

More grip on tools

Knees are weak? Hands are sweaty and cannot get a decent grip on the tools you’re using? Wrap the bandana around your hand and give it another go.

Instant sleeping bag warmer

What’s the purpose of including an electric blanket in your bug out bag if there’s no electricity around for miles? Still, you’ve got to do something about getting some warmth inside your sleeping bag. Making an indoor fire is the obvious approach, but not the only one. Before making a fire, wall your pit with whatever rock you find. When it’s sack time, take a couple of hot rocks, place them inside the bandana, tie the pouch with some rope or string, and place under the sleeping bag.

Making ice packs

Bruises? Fever? Headaches? Use an icepack. Get your bandana out of your B.O.B, put a couple of ice shards inside, wrap, and profit.

Gas Cap

In case something happens to your gas cap, don’t run around the city with that intake exposed. Until you reach the next auto shop, you can stuff a bandana inside to protect the gas pipes. You can do the same for gas canisters if you’ve lost the metal cap.

Diapers

As a father of two, I’ve always had to make supply runs to the store for diapers. You know you’re in deep shit when two boxes per day are not enough. In case the local store runs out of diapers, or there’s no one else around the house to take care of your kid while you’re away, use your bandana as a diaper.

Naptime cover

Do you know what I hate most about having to nap during the day? The sunlight is getting in my eyes. Ever since my kids came along, I was forced to rethink my napping habit. Well, long story short, if you’re in the situation, you can sleep like a boss even during the day by using that bandana as an eye cover. Try it yourself! It works like a charm.

Picnic protection

Too many insects around the campsite? Well, if you don’t have any repellant on hand, cover the food basket with your bandana to prevent those pesky termites from making away with your food.

This about covers it for my funky ways of using a bandana in a shit hits the fan situation. What’s your take on this? Hit the comments section and let me know.


Other self-sufficiency and preparedness solutions recommended for you:

The Lost Ways (The vital self-sufficiency lessons our great grand-fathers left us)

Survival MD (Knowledge to survive any medical crisis situation)

Backyard Liberty (Liberal’s hidden agenda: more than just your guns…)

Alive After the Fall (Build yourself the only unlimited water source you’ll ever need)

The Lost ways II (4 Important Forgotten Skills used by our Ancestors that can help you in any crisis)

The Patriot Privacy Kit (Secure your privacy in just 10 simple steps)

In a previous article, I might have mentioned something about cowboys and bandanas. Apart from the fact that they looked awfully cool and would help them conceal their faces during

Welcome to the jungle! We ain’t got any fun, games, plants or even swinging vines. What we do have is concrete, iffy back alleys, and lots of ways for you to lose your wallet and, perhaps, even your very life. Charming perspective, ain’t it?

Well, that’s more or less what it feels like living in the big city; nature may be wrathful, but not even her can hope to emulate our fellow man when devotes his entire energy to darker things. Urban survival has gained a lot of traction over the past couple of year and, I, for one, agree that you don’t need to become in the middle of nowhere in order to exercise those survival skills.

Anything can happen when you’re on the street – and that’s not fear-mongering, that’s a reality. If you don’t believe me, just hop on the Internet and do a quick search on crime in your area. You’ll be surprised to find out that your seemingly-quiet neighborhood becomes a minefield at night.

Anyway, after these cheerful little thoughts, let’s get acquainted with today’s topic – urban survival. Prepping means being ready for anything and at any time.

This also covers things like taking a stroll around the park or visiting another part of the city. Can’t say I got into too much trouble around the city, but then again, I’ve always tried my best to avoid some areas, especially at night.

No, it doesn’t have anything to do with mystical mumbo-jumbo, but anyone can get a little jumpy when having to traverse a poorly-lit area with tons of dark corner and who knows what else.

Ever since I got bit by the prepping love bug, I’ve always done my business to carry around a downscale version of my B.O.B. Well, on the outside it looks like a regular backpack (nothing too fancy about it), but in the inside, I have all the tools I need to get out of just about urban SHTF situation. So, without further ado, here are my choice of X items that shouldn’t be missing from your urban survival kit.

  1. Tactical flashlight

I truly believe that entire books can be written on the topic of tactical flashlights, and for a darn good reason – they have many other uses, some of them going well beyond their original purpose. Now, this is the kind of item you really wouldn’t want to buy from a thrift or yard sale.

A high-quality tac light can cost anywhere from $100 to $1,000, depending on things like construction and add-ons. I found it best to carry around one of the tac lights that come with a built-in taser (the electrodes are built into the flashlight’s butt, so be careful not to fool around with it).

Apart from the fact that most tac lights are LED-powered, meaning that they offer thrice as much battery life and light compared to those using incandescent bulbs, it can also serve other purposes. For instance, if someone wants to mug you, use the back end to zap him.

Or, if you prefer something more hardcore, you can always use that tac light as a club. A high-quality tactical comes with various gadgets which you can use to attach them anywhere – suction cup for walls or glass surfaces, strap, and socket for headwear, and even a lanyard hole. They are very robust but, at the same time, very light (mine weighs a little over 200 grams). So, get yourself a tac light and toss it in your urban survival kit.

  1. First-aid kit

No matter where the winding road takes me, I always carry around a downscaled version of my B.O.B’s medical kit. If you’re going to stroll around the city, you won’t need stuff like straight scissors, suturing kits, syringes, saline solution or whatnots.

For a basic urban first-aid, toss in a couple of Band-Aids, sterile pad, a small bottle of disinfectant, hand gel, and a couple of safety pins or some tape. That’s it! Still, if you live in a rough neighborhood, you should remember to pack extra supplies in case you have to deal with a more severe injury.

Moreover, if you have any allergies, you should always carry an EpiPen and a box of antihistamines in case you experience an allergic reaction. Before I met my wife, I used to hang around another part of the city where – how should I say this? – was not for those faints of heart. Since the opioid crisis’ on the rise, I made sure to carry a Narcan pen with me at all times.

No, it wasn’t for me, if that’s the question on your mind, but on several occasions, I found myself standing in front of various individuals who ODed on God knows what. Why not spend a couple of bucks each month to save a life? Chance are that you will never need to use a Narcan pen or someone, but wouldn’t it be neat to have one close when someone’s life hangs in the balance?

  1. Small pry bar

No, I really don’t fancy myself a burglar, but I always remember to carry a small prybar in my urban survival backpack in case I need to get off the street really fast and need to break down a door or something.

That thing’s really very useful in you to live in old condos where the elevator tends to break down on a daily basis. So, no matter the circumstance, a pry bar is always a valuable asset. Just don’t go waving it around like crazy, unless you want to wind up in the cooler on purpose.

  1. Face mask

Living in a big city means sucking in all kinds of toxic fumes and gases. I am very grateful to all those wonderful people for getting hybrids because I can still feel the smoke coming from the exhaust pipes during a traffic jam. Anyway, you really don’t need to face a chemical attack in order to make use of a face mask – there are some areas of the city where the fumes are thick enough that you can probably cut them with a blunt butter knife.

  1. Emergency potty

There’s nothing worse than having to go number two, only to realize that the toilet’s clogged or the water pump has stopped working. Well, I have to admit that this is a little strange, even for a prepper, but I always carry one of those foldable potties in my backpack.

Yes, yes, I know that most of you are picturing me know to get out my portable potty to “spend a penny” on a crowded subway, but it’s not like that. You may never know when the shit hits the fan, and you wind up having to cross half of the city for a working toilet. No, I will not expose myself on a bus full of people, but I will find a secluded place for when Nature calls in those moments when there’s nothing available nearby.

  1. Multi-tool

I always like to carry around Ol’ Vicky (that’s how I named by Victorinox Swiss Multi-tool). Why? I don’t know for certain, but I usually find a way or two to use my multi-tool before the day’s over. I found very handy for those Saturday afternoon bike trips of mine – I should seriously consider buying a new bike since I tend to spend more time making repairs than actually riding it.

Anyway, the multi-tool’s a very useful asset, no matter where you go and do. Broken zipper? No problem! Key broke in the lock? Just use the multi-tool to get it out. Locks are cheap; doors aren’t!

  1. Work or hiking boots

Wearing heavy-duty work or hiking may not much of a fashion statement, but they can help a bunch during an SHTF situation. Of course, being in the city means that you won’t have to do too much mountain climbing. Still, in certain situations, you’re going to need that extra traction offered by a pair of hiking boots.

For instance, there’s no guarantee that during one of the walks you won’t wind up stuck in an elevator or inside a subway tunnel. Both situations call for hiking, climbing, and maybe running. Sure, you can always wait for the repair team to arrive and fix the thing or you can get out and lend them a hand. Remember that in some cases, like a tunnel collapse or whatever, it may take the emergency response team hours to get to you.

That wouldn’t be much of a problem if you didn’t have a limited oxygen supply or surrounded by injured or scared to death people.  Anyway, weather permitting, you should do yourself a favor and tour the city in hiking boots. Of course, not every social call allows for this type of footwear, but I’ll let you figure that one out yourself.

  1. Solar charger

I find nowadays smartphones very irritating. Yes, I know you can take lots of pretty pictures with them, shoot 4K videos, surf the Internet, buy stuff online or play games, but that battery life though. Had this Samsung Galaxy Whatever-Model smartphone – great gadget.

The only thing wrong with it was the blasted battery – 6 hours on a full charge. That’s how long my battery lasted, no matter the circumstance. Tried changing the battery, tinkering around the apps; nothing worked. So, I’ve decided to carry around one of those portable solar chargers.

They work great, and if there’s enough sun, you can probably get a full charge in 4 hours or less. However, the best thing about these solar chargers is that you don’t have to stop in order to charge your phone or whatever. The solar cell can be taped to your backpack and the cable’s long enough to reach your pocket. Try it out! You won’t regret it.

And so, we come to the end of yet another article in which I glorify the well-made bug out bag. Well, it’s not exactly your run-of-the-mill backpack, but you get the idea. I know that most of you don’t feel comfortable carrying zero hour items while going shopping, strolling in the park or going to propose to your SO, but do bear in mind that shit happens everywhere, regardless if you’re a big city dweller or the king of your own mountain.


Other self-sufficiency and preparedness solutions recommended for you:

The Lost Ways (The vital self-sufficiency lessons our great grand-fathers left us)

Survival MD (Knowledge to survive any medical crisis situation)

Backyard Liberty (Liberal’s hidden agenda: more than just your guns…)

Alive After the Fall (Build yourself the only unlimited water source you’ll ever need)

The Lost ways II (4 Important Forgotten Skills used by our Ancestors that can help you in any crisis)

The Patriot Privacy Kit (Secure your privacy in just 10 simple steps)

Welcome to the jungle! We ain’t got any fun, games, plants or even swinging vines. What we do have is concrete, iffy back alleys, and lots of ways for you

Remember!

  1. Moving targets are harder to shoot than stationary targets!
  2. Smaller targets are harder to shoot than the large target!

When I ask my students what is the most important thing they must do in a hostile incident, most reply that they should simply shoot the bad guys, get access to their weapons, shoot for the head, carry a big gun and so on.  The answer I am looking for is not to get shot by the terrorists!

You should first of all work out a plan of action that you will take in the case of an active shooter or terrorist attack.  Do this for your home, business and for when you are out and about in public. Things that need to be considered are means communication, safe areas, when to fight and when to flee and so forth. Planning is what sorts the professionals from the amateurs, if you plan how to deal with a hostile situation if it happens, you’ll know what to and how to react to it and not be confused and panic!

GET THIS BOOK NOW AND BEGIN TO LEARN SUCH SECRETS AS: The Antioxidant 550 times stronger than vitamin E and 6,000 x More Powerful Than vitamin C

Plan your reaction to being shot at!

As I just mentioned, you NEED to put together a plan of action on how you will react to a shooting or a hostile incident. Over the years I have spoken to many security contractors, police and former non-British military personnel and find it amazing that when talking about their reaction fire drills most just say they would draw their weapon, if they have one and return fire…  That’s OK if you have a gun or are on a gun range but you need to take a few other things into consideration if someone is shooting at you!

This is an adaptation of the British Army individual reaction to fire drill. Some of this may apply to you and some might not- use this as a basic format. If you are serious about your security, you must put together a plan that is specifically designed for your personal situation and then practice it until it is second nature.

  • Preparation: If you have a gun it must be clean, serviceable and well-oiled. Ammunition must be of good quality, clean and your magazines full. You must be properly trained and ready to deal with the incident.
  • Reacting to fire: The immediate reaction at close quarters is to identify the threat, move to cover as you are deploying your weapon, if you have one and returning fire. If you are being shot at from a distance or do not know where the shots are coming from, you should:
    • Dash– a moving target is harder to hit than a stationary target.
    • Down– keep low and present a smaller target.
    • Cover– Get into cover from fire.
    • Locate – Observe where the threat is.
    • Return fire– if you have a firearm.
    • Winning the fire-fight, if you have a firearm: As soon as the threat has been firmly located, you must bring down sufficient accurate fire on the terrorist to incapacitate them or force them into cover so you can extract yourself from the situation.
    • Re-organizing: As soon as you have incapacitated the terrorist or are in a safe area, you must reorganize yourself as quickly as possible in order to be ready for other possible threats. You need to re-load your firearm if you have one, make sure that you or anyone with you is not injured and inform law enforcement and emergency services immediately.

406378856_640_bigger

There are two types of cover: 1.) Cover from view 2.) Cover from fire (bullets and shrapnel), you always want to locate the latter.

Moving targets are harder to shoot than stationary targets. It’s a fact, it’s harder to shoot a target that is moving than one that is stationary. So, if someone is shooting at you, do not stand still, run. Smaller targets are harder to shoot than large targets! If there is no cover for you, make yourself a smaller target and drop to a kneeling position. I do not recommend prone position, as it takes too much time for most people to stand up. From a kneeling position, you can quickly run and get to cover.

If You Are Diabetic THIS Book Is Essential For Your Survival Medicine Chest.

Use of cover

This is a very important and basic subject! In your home, business or when you are walking around, you should always be looking out for positions that you could use for cover in the event of a shooting incident. There are two types of cover: 1.) Cover from view 2.) Cover from fire (bullets and shrapnel), you always want to locate the latter. You also may want to consider which type of rounds the cover will stop. A table might be able to stop a .32 fired from a handgun, but a 7.62X39mm fired from an AK-47 would go through both the table and you. Also consider will you want to be able to shoot through the cover, such as at a criminal in your house through dry wall etc.

619gmsnjhvl-_sl1000

Guard Dog Security ProShield 2 Bulletproof Backpack

Cover from view includes:

  • Cardboard boxes and empty rubbish bins
  • Bushes
  • Thin walls and fences
  • Thin tabletops
  • Doors
  • Shadows

Cover from fire (depending on the firearm used):

  • Thick tabletops
  • Heavy furniture
  • Stone and concrete walls
  • Dead ground
  • Thick trees
  • Various areas of a car
  • Curb stones

One of the best-publicized examples of good use of cover happened in St. Petersburg, Russia on February 26, 1996. At 4:25 pm, two mafia gunmen in long coats entered a fashionable café. Under their coats, each man had a AKS-74. They were there to kill an opposing mafia boss, who was in the cafe with his two off duty police bodyguards. The mafia gunmen fired 60 rounds at close quarters from the AKS-74s and killed both the police bodyguards. The criminal boss tipped over a thick marble table he was sitting at and hid behind it; although wounded he was well enough to walk out the cafe making phone calls, after the gunmen had escaped. A Scottish lawyer was killed; he was just sitting drinking coffee in the café when he was hit by three stray bullets. The attack took about 40 seconds from the gunmen entering to leaving the café. The Scottish lawyer was in the wrong place at the wrong time.

When you get into cover, you should always try to have an escape route and try not to get pinned down. When using cover as a shield, always keep low and fire or look around cover- not over it. When you are in cover and need to move, first select the next piece of cover that you will move to and move fast and keep low. Keep the distances between cover positions short. When you get behind the cover, assess your situation, where the threat is, etc. Keep moving this way until you are out of danger.

active_shooter

Remember!

  • Always looking for and make maximum use of available cover and concealment.
  • Avoid firing or looking over cover; when possible, fire or look around it.
  • Avoid silhouetting yourself against light-colored buildings, backgrounds and lights.
  • Always carefully select a new piece of cover before leaving the cover your in.
  • Make sure you always have an escape route planned.
  • Avoid setting patterns in your movement, for example, shooting or looking from the same position at the same level.
  • Keep exposure time to a minimum; don’t look over or around cover for an extended period of time.
  • Always look up and behind you remember that positions which provide cover at ground level may not provide cover on higher floors.

Camouflage yourself

It makes me laugh when I see a lot of SWAT Teams and PSD guys wearing Tactical Black and other colors that look cool but do nothing bit make them stand out. In reality black is one of the worse colors to wear, what is black in nature, look around you now and what in your surroundings are black? I expect very little… In urban areas most walls are white, gray or cream… Light colors! The colors you wear should blend in with your background whether its day or night. Even at night dark clothes stand out when moving past light backgrounds. In the country or bush when moving through low bushes or fields the silhouettes of people in dark colors are easy to see at a distance…

Learn How to treat each problem without prescription pharmaceuticals, often with everyday items already in your pantry or medicine cabinet.

Moving Through a Building

If you have to evacuate your home or business, for whatever reason, it should be done quickly, quietly and with the minimum of fuss. You should also have already worked out your escape routes and exits. If there is an incident, get as much information as possible to what the threat is, where and what the threat is. I recommend you never use obvious evacuation routes and exits, the criminals or terrorists could have blocked, booby trapped, ambushed or manned them.

If you have to walk down corridors keep low and move fast, do not walk down the center and do not walk next to the walls. Stay a couple of feet off the walls to avoid being hit by any ricochets and wall fragments if you come under fire. Doorways and frames can make good cover, even in an apparently empty corridor look for things that could be used as cover. Remember to continuously check behind you, and if you must stop, do not stand up, stay in a kneeling position. Always be aware of where you are casting shadows, you do not want this to give away your position, such as before you go around a corner. You should always keep staggered spacing from anyone who is with you; you do not want to bunch up. Remember; one bullet can go through two people; large group of people make an easier target than a lone individual. Also if you are dealing with criminals or terrorists who are using improvised pipe bombs or hand grenades, one of these devices could take out your whole group if you are close together.

With the rise of active shooter incidents in the United States, students and faculty members are highly encouraged to be aware of the policies to follow in order to promote safety precautions in case of an active shooter incident were to take place. (Photo Illustration by Cassandra Nguyen | The Collegian)

With the rise of active shooter incidents in the United States, students and faculty members are highly encouraged to be aware of the policies to follow in order to promote safety precautions in case of an active shooter incident were to take place. (Photo Illustration by Cassandra Nguyen | The Collegian)

Going through doorways is very dangerous, especially if the room or area on the other side could contain a criminal or terrorist. If you must go through a doorway, try to determine if there are any threats on the other side before you enter. Use your senses of smell and hearing, in addition to sight; take a quick look into to room at a low level before entering. If you have to open a door, do so quickly, quietly and then back away from the door and listen. You want to back away from the door because if there is a terrorist in the room they will be shooting at the now opened door or moving if startled. Also consider if the wall around the door could stop a bullet; the criminal or terrorist could shoot through the wall and hit you, especially if they are armed with hunting or assault rifles. When you go through a doorway, again keep low and move fast, check the corners, when though the door move away from it and get behind cover.

You must keep a cool head as you might not be the only person evacuating the building. When you are clear of the building, get out of the area and summon support and law enforcement, ASAP.

Remember!

  • Never use obvious escape routes.
  • Use your senses of smell and hearing not just sight!
  • Move quietly, cautiously and quickly.
  • Corridors are areas of extreme danger- avoid whenever possible.
  • If you need to use a corridor, NEVER walk down the center stay a couple of feet off the wall.
  • If you must walk past an open door keep low and move fast.
  • Always check around corners before you go around them and expose yourself.
  • Continuously check behind you.
  • If you must stop do not stand up, stay in a kneeling position.
  • Avoid offering a silhouette for your opposition to shoot at.
  • Lights behind you should be extinguished.
  • Always keep a space between you and others; one bullet can go through several people.

After a Shooting Incident

You should do all that you can to avoid getting involved in any hostile situations, even indirectly. If you are somewhere where a hostile situation is developing, leave the area quickly and not by an obvious route. You do not want to be in the wrong place at the wrong time and to catch a stray bullet. So, if you see a hostile incident developing and it has nothing to with you, mind your own business and leave the area, ASAP! If you are unfortunate enough to get involved in a shooting incident, when you believe the incident is over, you should reload your weapon if you have one, prepare to deal with any other threats, give first aid to anyone with you who is injured and evacuate to a safe location. You should also call for support and police etc. as soon as is safely possible.

Learn How to both diagnose and treat any medical problem you are going to encounter.

In developed countries, even if you believe others have already called the police, do so yourself and identify yourself to the dispatcher as the victim and you should do as the dispatcher tells you, as long as it does not compromise your safety. You must ensure that the police officers responding to the incident know that you are the victim and not the attacker. For their own safety, the police officers will assume that anyone at the scene of the incident is a threat. You should never point your gun at the police and should comply with their every request. Remember the responding police will be scared and most are not that well trained and will shoot with minimum excuse. Try to remain calm and do not argue with them- do as you are told. Make no fast movements and keep your hands where they can be seen. It would be unfortunate to survive a lethal encounter with a criminal, only to end up being shot by the police.

If you get into a hostile shooting in a country where the police cannot be trusted and going to prison would most probably mean you would catch an incurable decease to say the least, you should have pre-planned on how to deal with the situation. My advice; leave the country as quickly as possible if you are a non-resident of that country!

The Tactical Use of Lights

In my opinion, many people are over-enthusiastic in the use of flashlights. There is a big market in tactical flashlights and the companies making them wants everyone to buy one, thus making them a must have item. Flashlights have an application in hostile situations but you should remember that any light will give away your position and draw fire. Light should be used sparingly and tactically. I tell my students to get used to training in the dark and using their senses of hearing and smell in addition to sight. At night there is more chance you will hear someone before you see them! When moving in a dark environment, do so slowly and cautiously and try to make minimum noise. Try finding your way around your house or business in the dark, before you start moving around give your eyes a few minutes to adjust to the dark.

If you must use a flashlight, keep it at arm’s length and keep it on for no longer than necessary, then move quickly or get behind cover. If you want to check a room or a corridor, one option is to roll the flashlight across the doorway, corridor or into the room. Light can be used as a distraction and help to cover your movement, shine it in their general direction of your opponent and move. This will mess up their night vision and if you leave the light pointing in their direction, it will be difficult for them to see what is happening behind the light.

If possible, use remote lights, as this is more of an application for your home or business. For example, place powerful spotlights that illuminate corridors to safe rooms, stairways or doorways. If your home is broken into at night, you could move your family to your safe room and take up a position in cover behind the lights. If you hear or identify movement to your front, you turn on the spotlights; this will surprise, blind and illuminate anyone in the corridor. This will also help you to confirm that the people in your house are criminals or terrorists and give you good targets to shoot at if you have a firearm.

Remember! Moving targets are harder to shoot than stationary targets! Smaller targets are harder to shoot than the large target! When I ask my students what is the most important thing

If I could, I would write an ode to the bug out bag.

A couple of days ago, I was wondering what the H would I do if that B.O.B would go missing or worse, gets damaged beyond repair? Well, in the world of prepping, a broken backpack means nothing as long as you have a couple of materials at the ready.

In today’s article, I’m going to show you a quick easy way to craft your own backpack. Apparently, this type of carrier is called a horseshoe rucksack although I cannot see any resemblance between this thing and the metal hoop that goes around the horse’s hoof.

Anyway, from a historical perspective, the horseshoe backpack was, let’s say, invented around the time of Napoleon’s military campaigns. This kind of rucksack was used by foot soldiers to carry stuff like toiletries, spare ammo, paintings or valuables.

Well, I have to admit that given its aspect, the horseshoe rucksack goes above and beyond the call of duty – it’s incredibly light, can be used to store any number of objects and, most importantly, it’s incredibly resilient.

So, without further ado, here’s how you can craft your own horseshoe rucksack.

Materials required

For this project you will need the following items:

  • Cordage (works with anything from 550 paracords to string and dental floss).
  • Heavy poncho (you can replace with light rain poncho or a rectangular piece of the tarp).
  • Everything that goes inside your B.O.B or scavenged items.

Yup, it’s that simple. Soldiers didn’t like this type of rucksack for nothing. Imagine having to spend hours crafting an intricate backpack knowing that the sarge could give the “move out” order at any moment. All done gathering all the necessary gear? Great! Find yourself a quiet spot to piece together your horseshoe backpack and get to work.

How to assemble a horseshoe backpack

Step 1. Take out your heavy rain poncho\light rain poncho\tarp and set it on the ground.

Step 2. Fold it in the middle two times. You should end up with a rectangular piece. Don’t forget to tuck away the hood.

Step 3. Place your items on one side of the backpack. Arrange them in a straight line. If you have sharp or objects with jagged edges, wrap them in pieces of cloth to protect your tarp or poncho. Keep in mind that you’ll still need to use that for other purposes like water collection or shelter-crafting.

Step 4. When you’re done arranging the objects on the tarp\poncho, grab one side and start rolling it. Remember when you were little, and your mother asked you to roll the carpet? It’s the same thing. Be careful not to let any of the objects slip.

Step 5. After rolling the tarp\poncho, take some cordage, cut a small piece, and tie one of the ends. Don’t forget to make a tight knot. You wouldn’t want to lose the stuff inside the rucksack.

Step 6. Tie the other end of the poncho\tarp roll using a small piece of cordage.

Step 7. Cut two more pieces of string and make knots along the length. Now it’s time for the strap.

Step 8. Measure a piece of string and cut it with your survival knife or sharp rock. Take one end and tie it to the string attached to the upper part of your rucksack. Finally, tie the other end to the lower part, and you’re done. It’s adventure time!

Additional considerations on the horseshoe rucksack

Technically speaking, you can craft one of these backpacks from, well, anything you have on hand – a T-Shirt, a long piece of sterile gauze, a bedsheet or whatever. However, there is a good reason behind the use of a heavy rain poncho.

First of all, by default, ponchos are waterproof or, at least, it should be if it doesn’t have any holes in it. Second, ponchos, especially army-grade ones are resistant to tearing, breaking, and warping. So, you can be sure that everything inside will be dry and very well protected.

The old horseshoe backpack has only a single caveat: it’s not suitable for carrying heavier items. If you bug out back contains stuff like AM\FM radio, personal emergency buoy, extra smartphones or whatever, you will need to find other ways to carry them with you – I would recommend a pouch made from a piece of cordage and a piece of cloth.

There’s a big difference between hiking with a regular backpack and using the horseshoe – in the first case, the overall design distributes weight equally. The same thing cannot be said about our horseshoe backpack. I should also mention the fact that hiking with that thing on for more than four hours is totally unadvisable.

If the lack of weight balance is not a major turnoff, then the strap tearing into your shoulder is. Still, I wouldn’t consider this a caveat since you can easily fix it by adding some kind of padding to the string segment resting on your shoulder.  If you still have your old backpack, use your knife to cut a piece of strap. Aim for the one with extra padding. Place it over your shoulder, and that’s it!

When tying the horseshoe rucksack, I would advise you to be extra careful around the dangling end. For extra safety, tie another piece of cordage around it.

Other Options?

In case you have to hike for a longer amount of time, the horseshoe backpack’s not exactly the best option.

For this, I would recommend building a so-called cage backpack. Instead of using your heavy poncho, construct a cage-like frame by stacking small pieces of wood. Secure them using your cordage of choice. Mount two string straps and that’s it. In addition, this type of backpack is quite useful, especially if you’re forced to hunt – you can’t really fit the game, no matter how small, inside the horseshow.

Congrats! You now know how to make a simple backpack. What’s your take on this? Hit the comments section and let me know.


Other Self-sufficiency and Preparedness solutions recommended for you:

The Lost Ways (The vital self-sufficiency lessons our great grand-fathers left us)
Survival MD (Knowledge to survive any medical crisis situation)
Backyard Liberty (Liberal’s hidden agenda: more than just your guns…)
Alive After the Fall (Build yourself the only unlimited water source you’ll ever need)
The Lost ways II (4 Important Forgotten Skills used by our Ancestors that can help you in any crisis)
The Patriot Privacy Kit (Secure your privacy in just 10 simple steps)

Well, in the world of prepping, a broken backpack means nothing as long as you have a couple of materials at the ready.