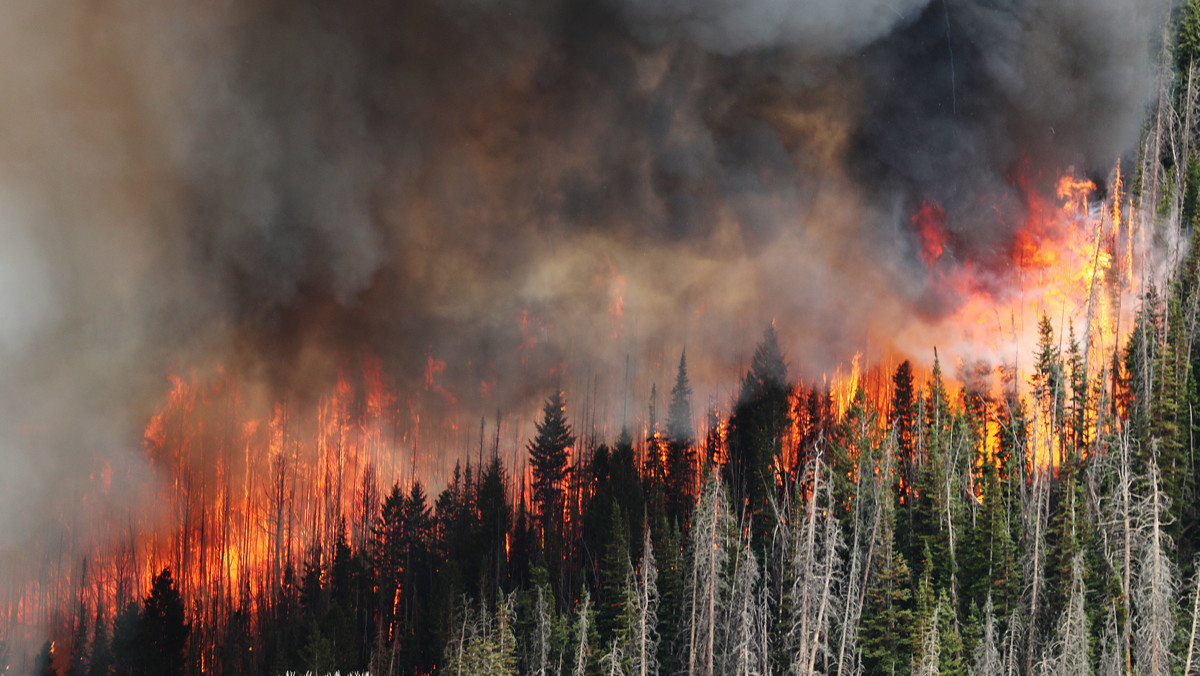
HomePosts Tagged "Survival" (Page 9)

Welcome back. I hope you’ve enjoyed my first piece on wildfires safety and prevention. Without a doubt, it’s a force of nature you don’t want to reckon with; not that you can for that matter. One of the things I’ve been trying to say over these odd years was that preppers are neither gods nor immortals. Realizing that you’re knee-deep in trouble is the first step of your journey.

Try to deny it, and you’re dead as a doorknob. So, what’s the point of prepping and buying stuff if the end-point’s the same? Well, I’m not here to wax poetics or discuss philosophy, but I am going to say this – you need to keep it together, stay focused, and get into the game before the game becomes the death of you. Surviving’s not enough; you need to thrive and continue to live like a boss even though you’ve seen and experienced some nasty stuff. Some wildfire survivors cannot even look at an open flame, let alone use it for warmth or cooking. It’s essential you put everything away so that you can go on with your life.

Anyway, to broach today’s topic which deals in how to live through a wildfire and learn to tell the tale, I want to turn towards a twisty story I’ve heard several years after moving into my newly-furbished hunting cabin. So, there I was – new house, new emergency kit, lots of open space, a little garden; we even had a small white picket fence just like in the movies.

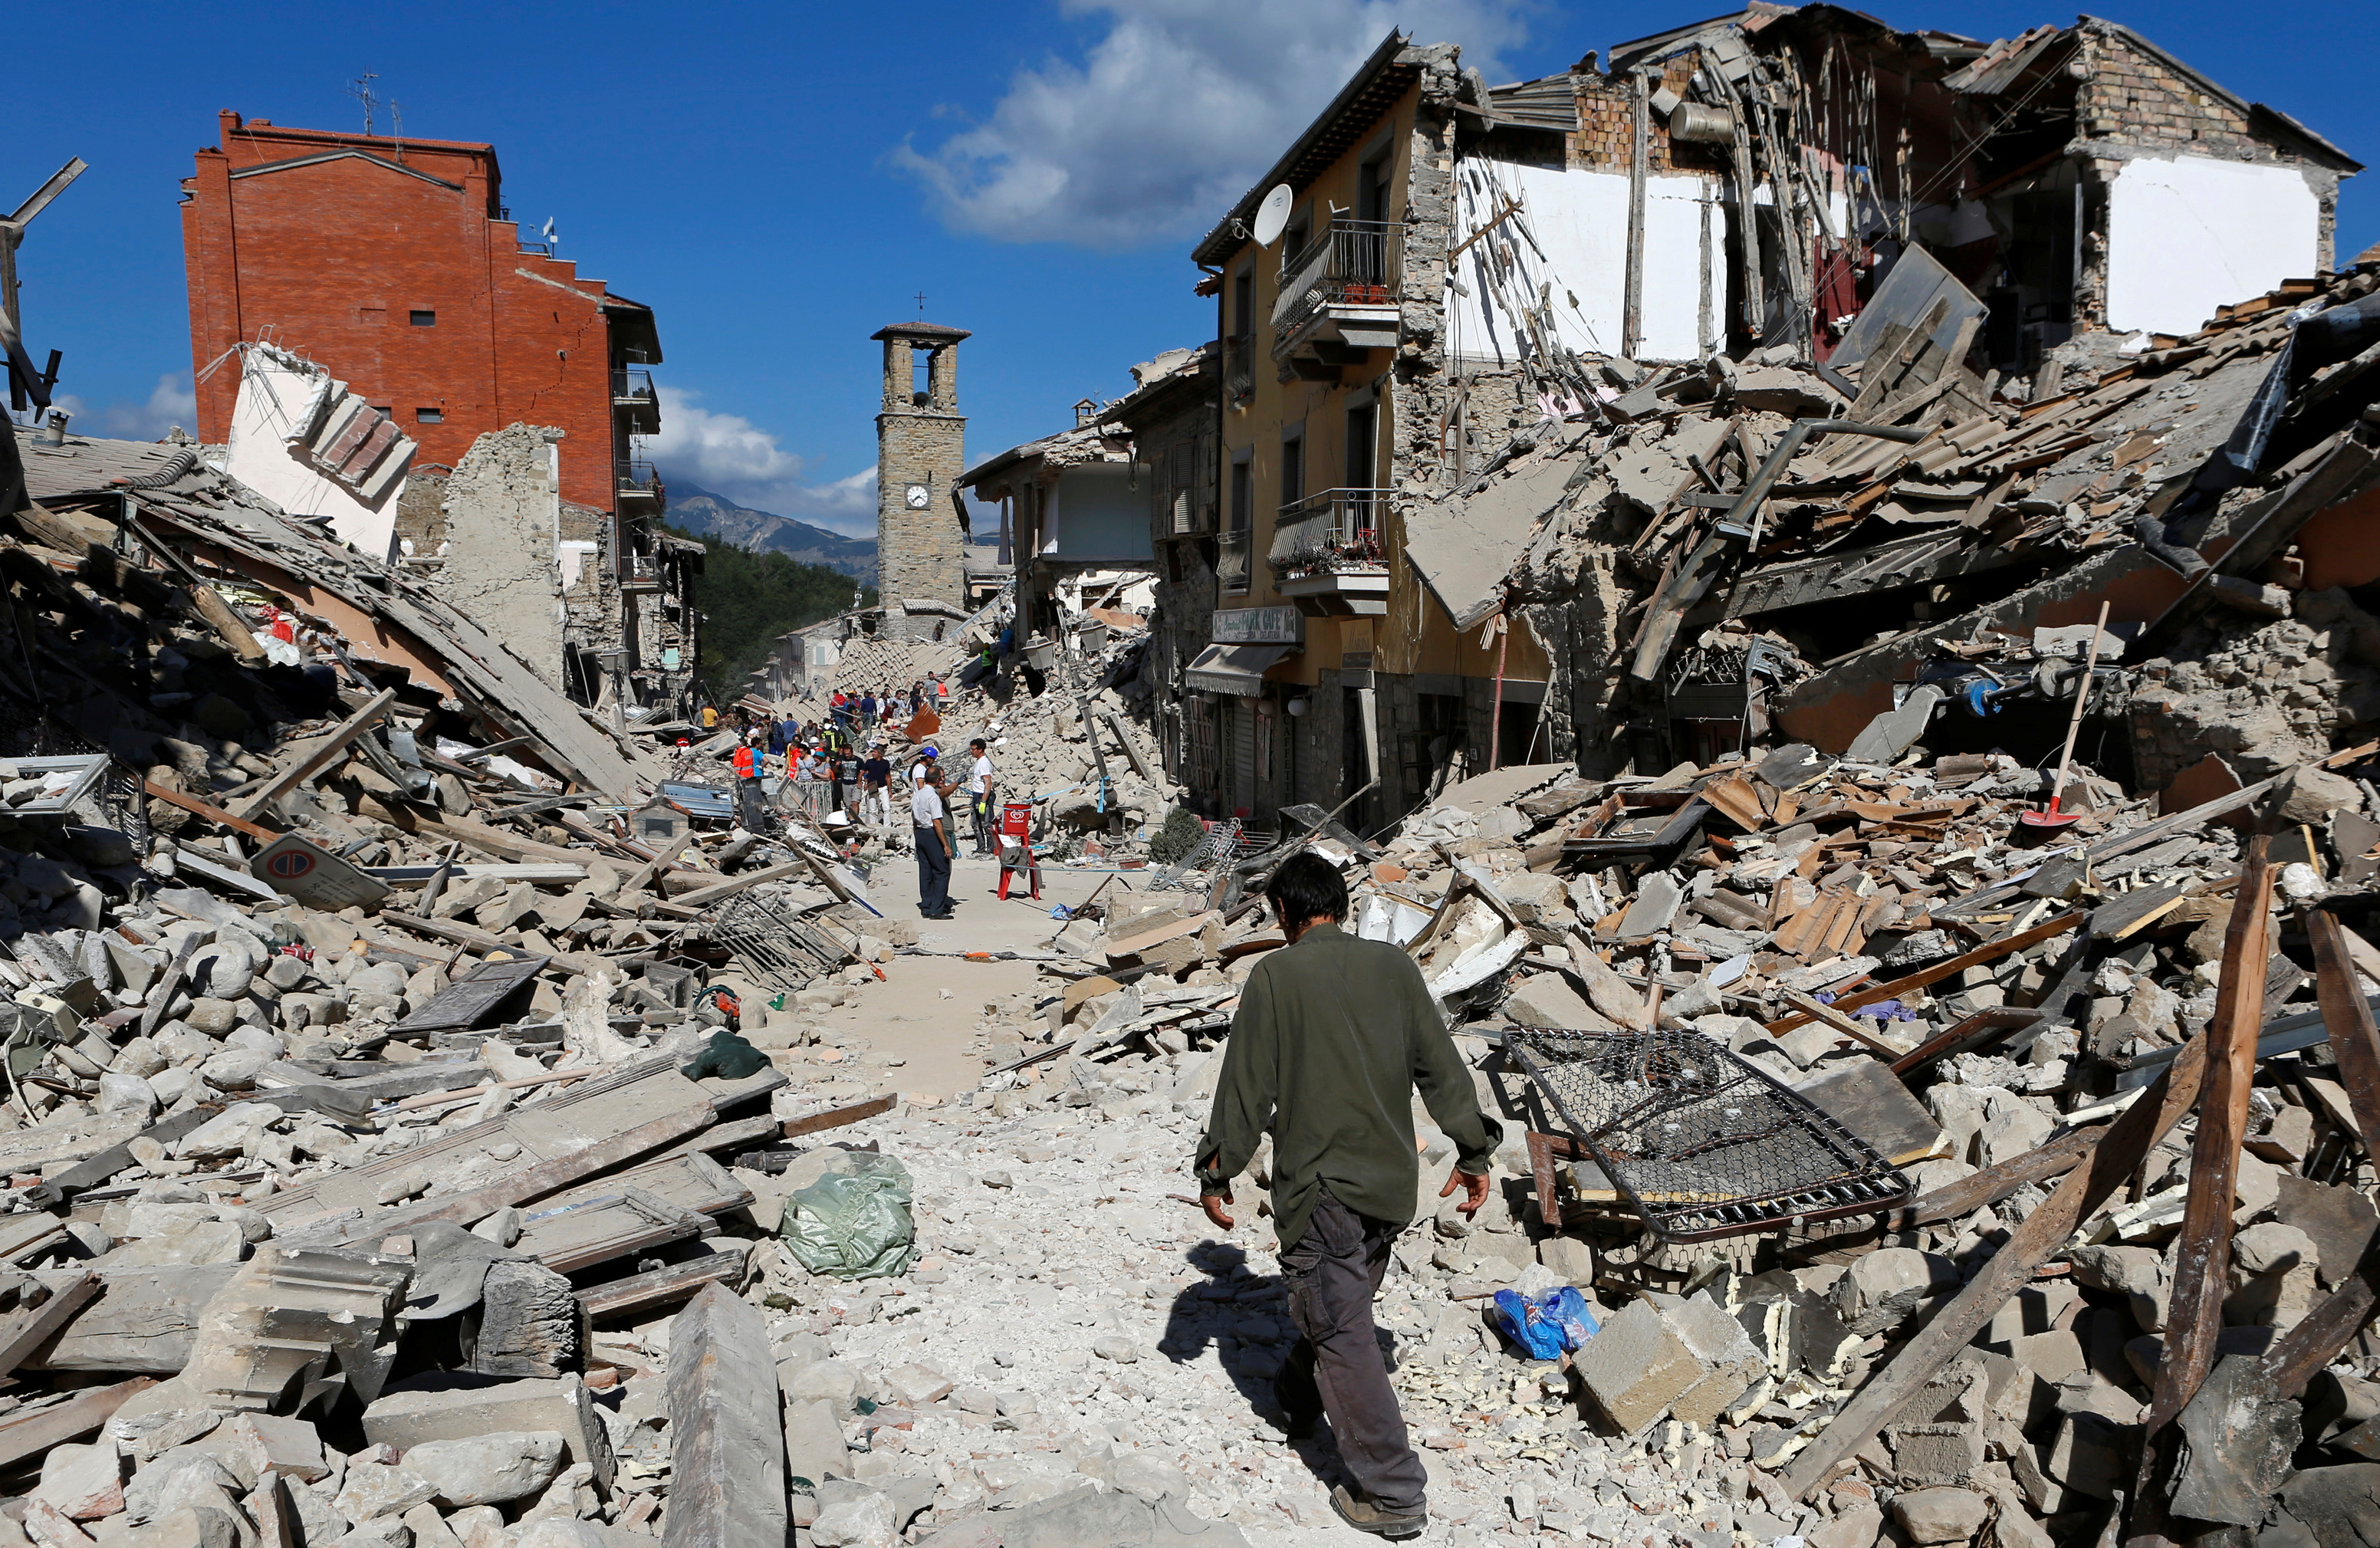
I was very well acquainted with the ranger. And the stories he told me; Geez, talk about human stupidity and carelessness. This one time, the entire regional fire brigade was called not too far away from my cabin because some kids decided to reenact some kind of chapter house initiation ritual. Long story short, several acres of forest went up in flames, leaving those poor idiots trapped inside.

As the ranger’s story went, the EMTs and firefighters couldn’t get to where they were, but they did manage to get them on the cell. As you know, the best way to escape a chocking death is to go low and slow. And that’s what they did. The trouble is, they had to crawl through 2 miles of heavy forest, with the fire on their tails. Miraculously enough, all of them made it through. Why? Because they used their noggins for once and paid close attention to what others had to say. That’s some great piece of advice, no matter the circumstance.

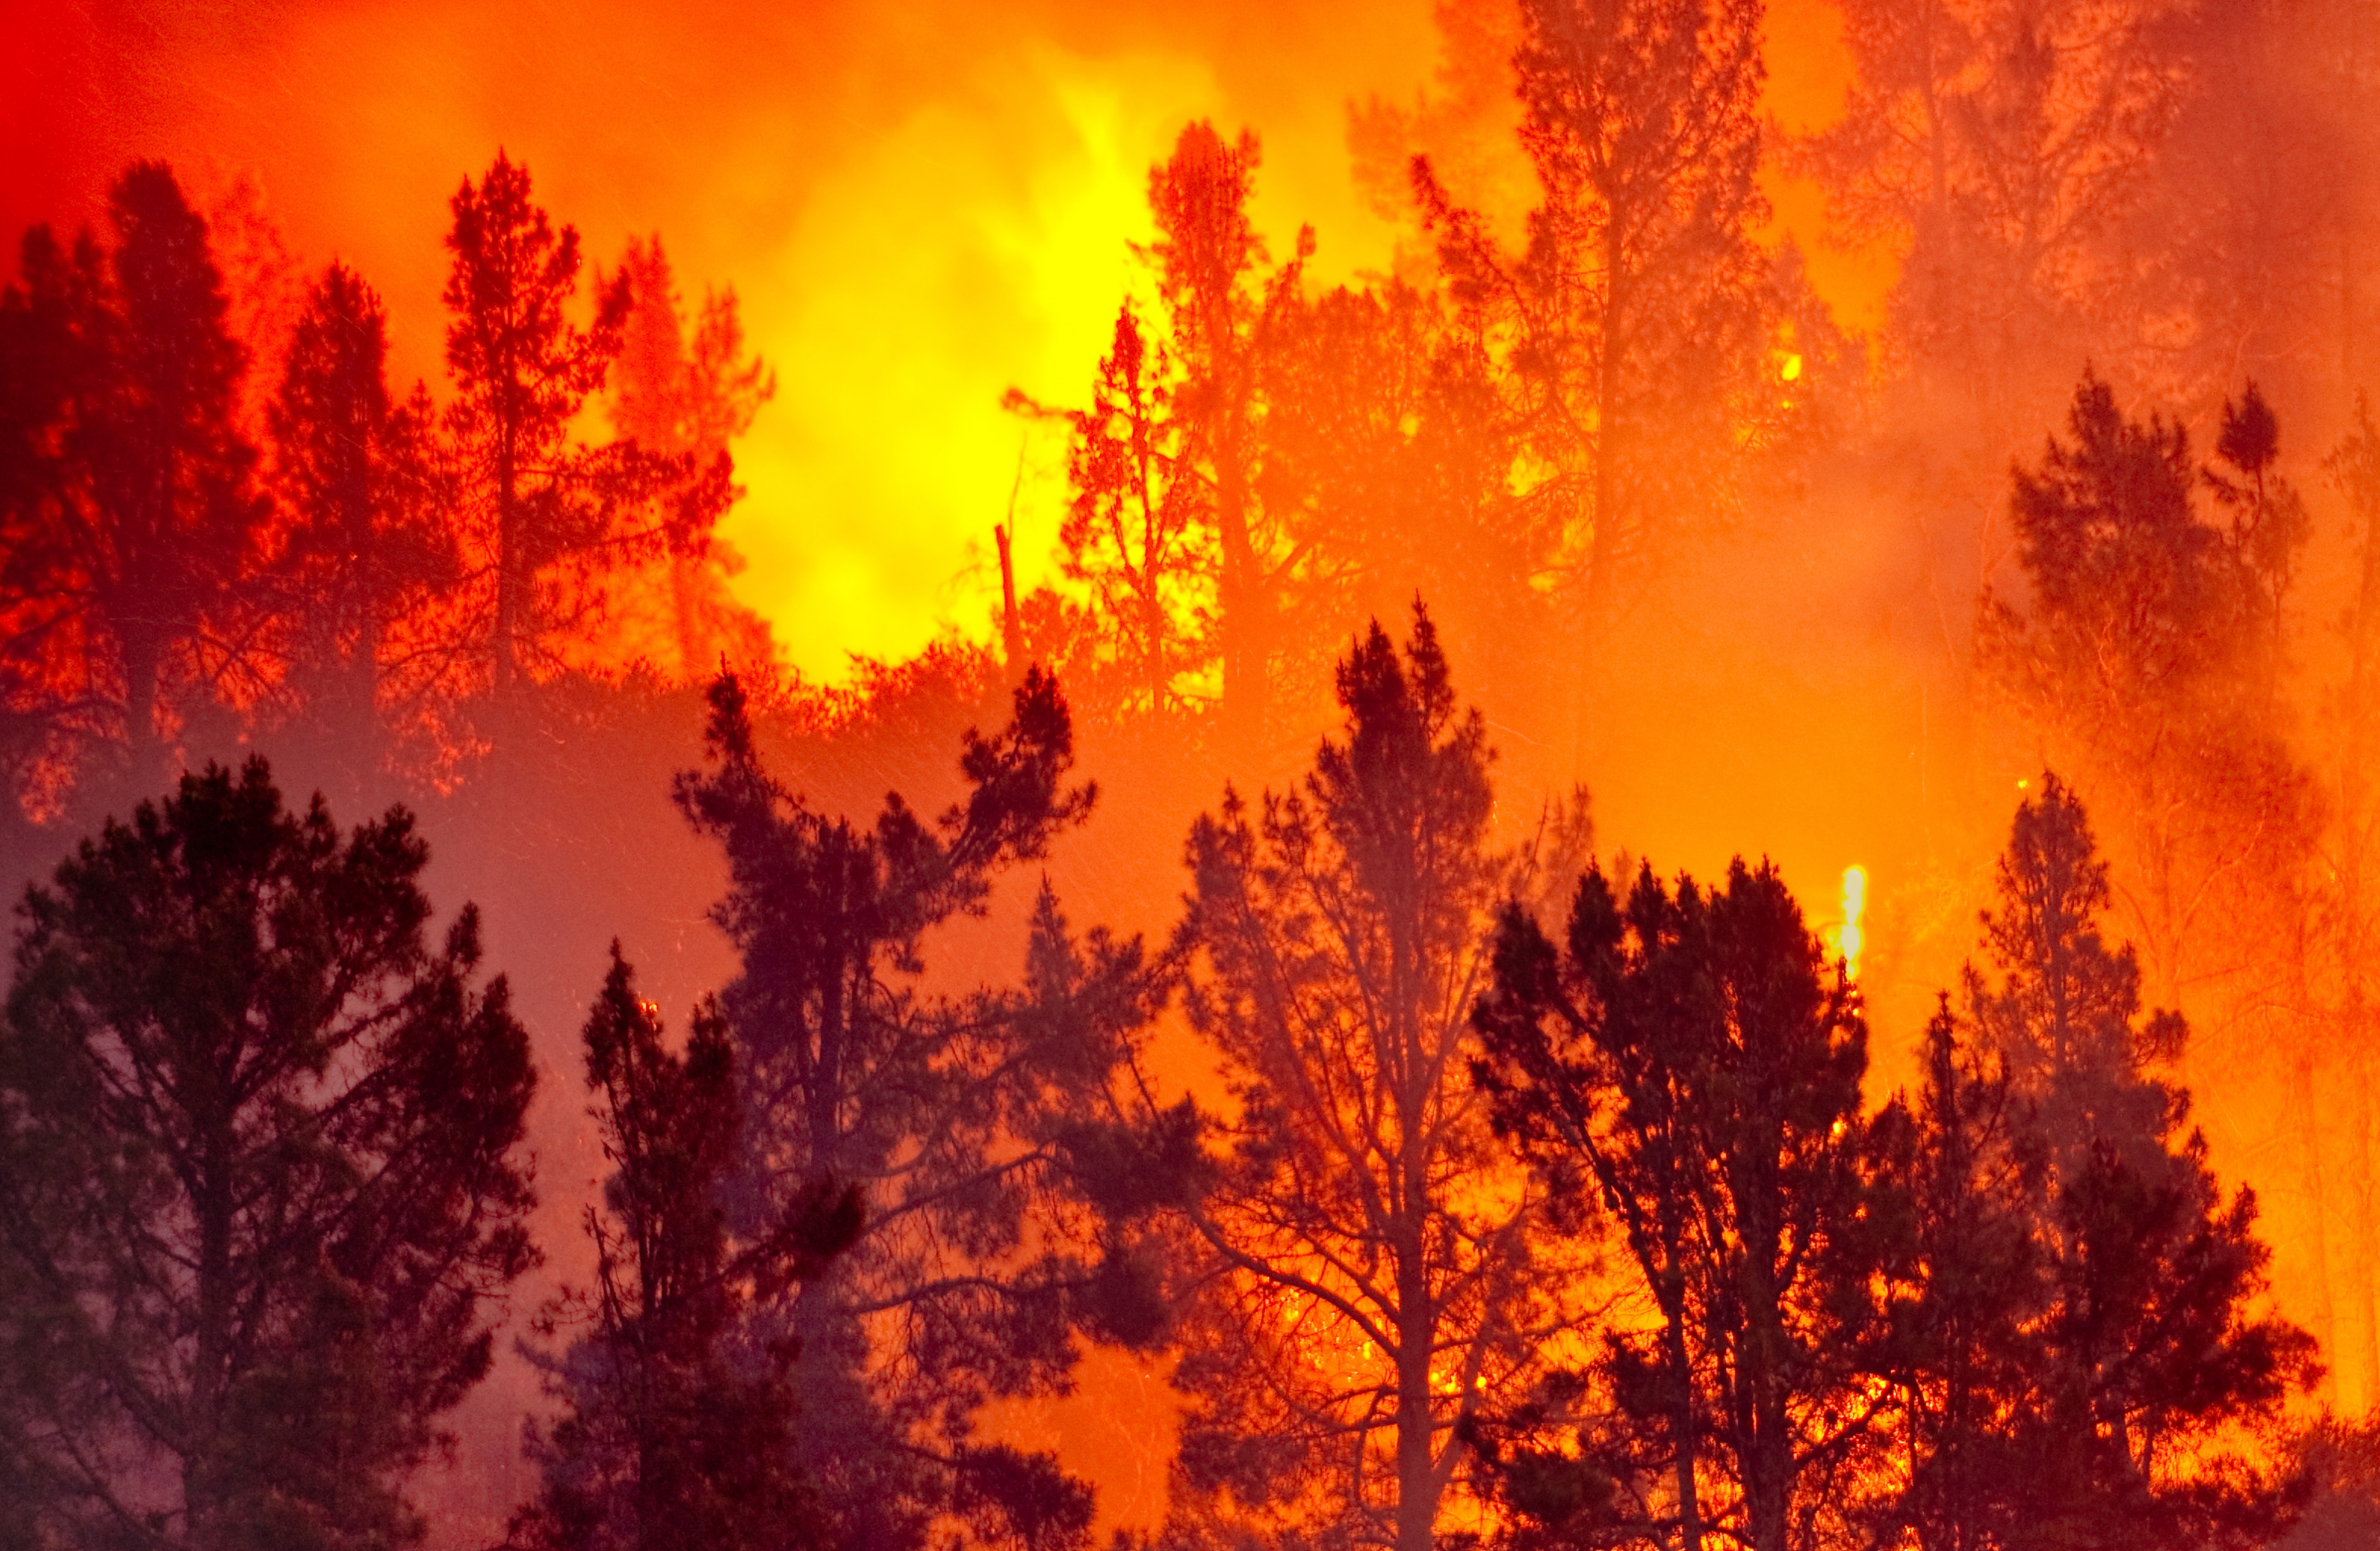
This inspired me to reach out to you guys to let you know that wildfires are out there and they are, as its name suggests, pretty wild. That’s why it’s always a good idea to know what do to if you get caught in the flames. Here’s what I had in mind.

Wildfire routine, as explained by the ranger.

  • Keep calm. Panicking won’t do you any good and, chances are, you will wind up in a ditch with a “smoking-hot” tag on your toes.
  • Forest shelter. If you’re in the forest during the wildfire, your best bet would be to find an area with little to no vegetation. A ditch, a dried-up river bank, an outcrop – anything that doesn’t have leaves, branches, twigs or fuel.
  • Duck and cover. Protect your head and hands by hitting the dirt and using your Go Bag for cover.
  • Wait. Don’t assume for a moment that the danger has passed just because you can’t see the flames. Wait around for a bit. In the meantime, try to get ahold of the authorities with you CB or cell.
  • Move only if necessary. If there’s danger nearby, leg it! Don’t run through as that will force your lungs to inhale more of those poisonous fumes. Steady your pace and keep your head down. If the smoke cloud’s too thick hit the deck and crawl to a safe spot.
  • House fight. If you have a little hunting cabin just like I have, stay indoors with all windows and doors locked and sealed. Before heading inside, don’t forget to turn on all your sprinklers and to aim them at the roof and outer walls. That should keep the masonry from reaching critical temperatures. If you have dust or hazard masks, use them. They’re not Halloween accessories, you know.
  • Cannonball! One nifty trick I’ve learned from the ranger is that you can seek shelter from wildfire by taking a skinny dip. Yup, if you happen to come across a body of water during a wildfire, jump in and stay there until it’s safe. Don’t forget to keep your head out of the water for as long as possible. If the flames extend over the water’s surface, take a quick look around for a safe place to get out, submerge, swim, and get away. Don’t take the skinny dip part too literally. Keep your clothes on.

Feels like I’m reliving a chapter from Emerson’s Self-Reliance. Well, when you’re a prepper, that’s what you basically do – become the character of your own survival book. I can’t say for sure what scares me the worst; the fact that wildfires exist and they cause a lot of damage, or that one of my peers is very likely to start one out of sheer stupidity. I’ll leave that one up to you, for the time being.

But think about this – what are the odds of a wildfire springing up in my neighborhood? Don’t go out there thinking that city folks are more protected from Mom Nature’s wrath just because they hide behind concrete and iron walls.

One more thing – have plenty of cash on hand. Doesn’t matter if it’s a wildfire or another natural disaster. Cash is king at any given time. That’s why I always like to put some money in my glove compartment and my Go Bag. See you around, guys, and stay safe.

Some wildfire survivors cannot even look at an open flame, let alone use it for warmth or cooking. It’s essential you put everything away and start prepping so that you

One thing you learn as a prepper is that any new skill you acquire will come handy one the day, cooking including. Sure, not all of us have the talent of whipping up a terrine or a souffle, but at least we learn to go by without actually having to starve to death or wasting away money on takeaways.

For my part, I actually managed to pick up a thing or two about the art of preparing delish and nutritious meals during one of those long blackouts. Yes, I’m still here, and no, the city council hasn’t gotten around to fixing the problem yet.

Now, for most of us, cooking’s not that big of a deal – get online, pick a recipe, follow the steps, and, Shazam, dinner’s ready! Still, the rules of engagement tend to change a bit if you’re forced to do the same thing during a power outage.

No electricity means that you will not be able to use the mixer, microwave, electric oven, toaster, and whatever cooking appliance running on electricity. Such a situation calls for some serious improv and, in today’s article, I’m going to show you my favorite blackout dishes and how to cook ‘em.

So, without further ado, here are my top 7 choices in no-power food.

  1. Oats

Yes, I know they’re not palatable, but they do wonder for the body. Most importantly, you can prepare anywhere and at any time, power or no power. Just let them soak overnight in a bowl of water. You can serve them for breakfast or dinner with assorted nuts, honey, and dehydrated fruits.


2. Gazpacho

Great Spanish dish and stupidly easy to make. I personally like to have fresh gazpacho year-round, since it’s packed with vitamins and minerals. More than that, this over glorified tomato soup is a wonderful thirst quencher during those hot summer days.

So, grab yourself a couple of diced tomatoes cans and empty them inside a large bowl (don’t forget to drain all of the juice). All that remains is to add one chopped onion, a thinly-sliced cucumber, a dash of cayenne pepper, salt, and pepper. If you’re looking for a bit a hit, you can add one teaspoon of Tabasco. Finish the dish by adding a little bit of olive oil, chopped parsley, and some lemon juice. That’s it!

3. Corn salad

This is what I like to call the lazy man’s easy way out of the kitchen. I usually like to prepare this dish when my wife’s away – kids love it, and it takes me about five minutes to get everything ready. So, it’s a win-win. Take a can of corn, drain the excess liquid, and put the contents inside a large bowl.

Chop any veggies you have left in the fridge (I like to add onions, red and yellow bell peppers, and tomatoes to my salad). For extra flavor, you can add a can of black beans. Toss it around a little, add a sprinkle of olive oil, and serve. If you fancy a bit of dressing, you can quickly make one by combining apple cider vinegar, olive oil, dried basil, pepper, and salt in a bowl.

4. A simple salad with apples and white beans

By far, my wife’s favorite Sunday morning salad. Super easy to make: pour the contents of white beans can in a large bowl and add some apple chunks. To finish the dish, you need only add some olive oil, fresh thyme, a handful of walnuts, salt, pepper, and scallions. Give it a good mix and serve.


5. Good, old grains and beans salad

This is one of the first recipes I learned during the first bout of blackouts. It’s very handy to know since anyone has at least one can of beans and a grain sack around the house. Take out your portable stove from the B.O.B and boil water in a small pan. Add the grains and let them cook for about 10 minutes.

Drain the grains and allow them to cool down. In a large bowl, combine one can of beans (works great with both black and grain beans) and the pre-cooked grains. Add salt, pepper, and a sprinkle of olive oil. If you wanna add consistency to your dish, throw in a couple of diced veggies, and chickpeas.

6. Chickpea or white beans spread

If you ever get tired of PB & J sandwiches, you might want to give this recipe a try. Empty the contents of a chickpea or white beans jar inside a bowl. Use a fork or potato masher to make them into a coarse paste.

Add some olive oil, parleys, a little bit of mint, half a tablespoon of garlic powder, and some oregano. You can serve this spread with white bread, toast, and even crackers. I personally like to serve it with oven-baked white bread – if you want to get all fancy, take a clove of garlic and smear each slice of bread before adding the spread.


7. Tuna salad with canned corn and green lettuce

Personally, I prefer this recipe over all those BS, new age stuff with salmon or whatever. Grab yourself green lettuce and wash it thoroughly with cold water. Using your hands, rip it into big chunks. Add a can of tuna over the salad (don’t drain the oil inside) and a can of sweet corn.

To finish this dish, pour half a tablespoon of olive or sunflower seed oil, salt, and lemon juice. Toss it around and serve. This is what I like to call the ultimate detox dish – very healthy and tuna being packed with omega-3 fatty acids and all that, it’s a breath of fresh air after eating spare ribs and burgers.

Hope you’ve enjoyed my list of blackout dishes. Think I’ve missed something? Hit the comment section and let me know.

No electricity means that you will not be able to use the mixer, microwave, electric oven, toaster, and whatever cooking appliance running on electricity. Such a situation calls for some

Power’s out; car won’t start, pantry’s empty – anything can happen. You either need to learn how to make do without or to take the high road which, in this case, means making it yourself. I’ve spent many sleepless nights thinking about how to be even more self-sufficient. Sure, learning how to whip up a quick dinner or to repair stuff around the house helps, but something was missing.

Then it hit me: what if took a breather from shopping and instead tried to make my own things at home? “How hard can it be?”, I told myself. Well, everything’s hard if don’t know what you’re doing. Luckily, I have this magic lamp called Google which revealed a couple of very handy instructions on how to make day-to-day items.

So, for my first no-shop month, I started with one of the most common things found around the house: soap. Yes, I stopped stockpiling it for a while and instead I tried a quick and easy recipe I got off the Internet. Have to say that I’m quite impressed with how it turned out, considering that I had no clue as to how soap-making works.

Pity that my great-grandmother passed away. Mom always used to talk about how she spent hours toiling in the shed, making soap and all kind of cosmetic stuff. Apparently, the bars my great-granny made were so good, that you could hardly make any difference between her home-stuff and supermarket soap.

Anyway, because I know that most of you people would rather make than buy, I’ve decided to share with you the recipe I’ve uncovered. As I’ve told you, it’s super easy to make, and with a couple of other ingredients, you won’t even know the difference. So, enough chit-chat! Let’s get cooking.

Materials needed

  • An old newspaper (to cover your work area)
  • Canning jar (I used a quart jar for this project).
  • Gloves and goggles.
  • Spoon.
  • Thermometer.

As for ingredients, you will need:

  • Coconut oil (about 2/3 of a cup).
  • Olive oil (2/3 of a cup).
  • Liquid oil of choice (you can use sunflower, almond or grapeseed oil; aim for 2/3 of a cup).
  • Lye (around ¼ of a cup).
  • Distilled water (2/3 of a cup).

How to make

Step 1. Cover the table with the newspaper and put on your protective gear.

Step 2. Put the canning jar on your work area.

Step 3. Pour the water into the canning jar.

Step 4. Slowly pour the lye over the water, while stirring with your spoon. Don’t get too close, as the fumes resulting from the reaction are toxic.

Step 5. Wait for the mixture to settle. You can proceed with the next step when the water clears up.

Step 6. In a pan or bowl, mix your coconut oil, olive oil, and the third oil of your choice (I used sunflower for this recipe).

Step 7. Stick the pan of mixed oils in a microwave for about one or two minutes. When it’s done, stick the thermometer in and check the temperature. It should be between 95 and 105 degrees. This is the sweet spot of soap-making – it the temp’s lower, you’ll end up with mush.

Step 8. After the oil mixture reached the right temp, pour it in the canning jar over the lye and water. You may want to add an extra ¼ cup of lye to ensure consistency. Slowly add the lye while stirring with your spoon.

Step 9. Stir the mixture for about five minutes. It should have a nice, vanilla-like color. You know it’s done when it starts to thicken.

Step 10. Add herbs or oil of your choice. Stir until they’re incorporated.

Step 11. Place the mixture into molds (I used an old baking tray for this experiment).

Step 12. Cover with plastic wrap and store in a dry and dark place.

Step 13. Check the mold every 24 hours.

I should warn you though that home-made soap is not something that magically appears overnight. In fact, the curing process takes about two to four weeks depending on environmental factors such as moisture and heat. So, if I were you, I wouldn’t hold my breath. Another thing you should know is that your kitchen or garage will end up smelling like a funeral home after doing this, mostly because of the lye.

Last, but not least, always remember to measure your stuff before adding them to the canning jar. If you pour too much or too little, you’ll end up with a mushy thing that won’t cure. As for the aesthetic part, you’re free to choose the shape of your soap.

Sure, the rectangular part would be the most obvious choice since it’s easier to handle, but you can opt for any shape that comes to mind. Just be sure to make hand-size bars. What I did after the soap has cured was to drill a hole near one of the edges and draw a string through it. That way, I don’t have to worry about dropping the soap while bathing (no, it’s not what you think).

As for the storage bit, once you’ve cut them into shape, you can store them in an airtight container. Make sure that the place you’ll be keeping your bars of home-made soap is dry.

Now, if you want to add a bar of soap into your B.O.B or household survival kit, wrap it in food foil before tossing it inside. It may be a good idea to throw in a desiccant pack or two to prevent the soap from drawing too much moisture from the air.

See how easy it is to make your own hygiene products? Well, this turned out rather well, if I can say so myself. In fact, this project gave me enough confidence to try out some other stuff. I have this buddy of mine who uses natural glycerin and herbs to make ointments and beauty cream. Maybe I’ll try a recipe or two and let you know how it turned up.

Power’s out; car won’t start, pantry’s empty – anything can happen. You either need to learn how to make do without or to take the high road which, in this

Many people have asked me about what’s the hardest thing I had to deal with since I’ve started writing about prepping and survival. Of course, most of you would say that hitting the books or reviewing survival gear are the trickiest parts, but no – it’s convincing others why prepping is essential. Sure, it’s easy to speak in front of a group of people who either do this for a living or are interested in the topic. Here’s one for you – how likely are you to convince your mom, dad, grandparents or in-laws to create a household emergency kit or to take a first-aid class? Let me answer this one on your behalf: too hard and, at times, downright impossible.

A while back, I was sitting on the patio with mom, dad, and my in-laws. We were chatting about humdrum stuff like the weather, dad’s diabetes, father-in-law’s arthritis, mom’s cooking. At one point, my mother-in-law turned towards me, looked me straight in the eye with that steely gaze of hers and said: “And what exactly did you say you’re doing, Eddie? Hiking? Backpacking?”.

Have to confess that her tone irked me a bit, but I kept calm and explained again about my prepping editorship. Slowly, but surely, I magically managed to turn around the entire conversation. So instead of chatting about nonsensical stuff, I got to explain a bit to everyone what prepping is and why is so important.

Of course, I couldn’t avoid questions like: “do I need a tinfoil hat or something to join this religion of yours?” I didn’t mind. It’s only natural to be suspicious about this sort of thing, especially when bias comes into play. Fast-forwarding a bit in time, I am now proud to share with you guys that mom, dad, and in-laws have joined our prepping community. More than that, they are very active members on our website, and I would often catch them reading STHF articles.

Can you really have the talk with your folks?

Anyway, to broach today’s topic, there are a lot of very good reasons why you should openly discuss prepping with your parents, their health and wellbeing counting among them. Far too many times, I’ve seen active individuals turn into couch potatoes after retirement. Take my dad, for instance. He would hit the gym at least three times a week after work and cycle every other Sunday.

After he retired, dad’s best friend became the remote control, and the only kind of activity that would even come close to exercising was opening the fridge’s door to get another beer. Yes, I know it’s sad, but you can’t actually argue with them.

Tried that and each time I would hit the same brick wall: “Son, I earned the rest. You’ll understand this when you’ll be my age.” You’re probably familiar with this kind of phrasing. All of us are. And, it’s very difficult to try to convince someone who’s twice your age or more than you know what you’re talking about – yes, the generation gap exists, and that old man stubbornness is the worst enemy a caring person could face.

Which brings us to the first argument on our list – waving your magic want to turn your parents into active people once more. As most of you know, most adults after the age of 50 find themselves in the positions of dealing with all manner of chronic illnesses: heart disease, arthritis, diabetes, bladder issues, kidney afflictions, enlarged prostate in men, osteoporosis. And the list goes on. Help your parents live a better and healthier senior life by showing them a couple of simple activities that involves prepping. Here are a couple of ideas to get you started.

  • Teach them how to build home emergency kits and go with them to the store for supplies. Keep their minds busy by asking them to draw up shopping lists. Don’t give in to their pleas: “Son, I’m not feeling like prepping today. Would you mind going out for some shopping?” There will be none of that from now on.
  • Practice emergency drills with them. Take your pick: drop-roll-and-hold, drop-and-hold, home evacuation via pre-established emergency routes, hunkering down in the basement or the safety room. Don’t overdo it, though, and do not try to up the pace. Keep in mind that your parents are not as spry as they once had been. You should also take their health into account – some of them might have illnesses that could put too much strain on the body.
  • Convince them to learn new skills. For instance, my folks had no clue how stuff around the housework. If something broke down, they would either call in a pro or buy a new one. Making them take some repair lesson is good for the brain. In fact, each medical article you would read on dementia and Alzheimer’s states the positive effects of learning new skills all the time.
  • Ask them to tag along during one of your Go Bag training sessions. A great exercise for cardiovascular disease prevention is jogging. Us preppers usually build endurance and back strength by talking long walks with our Go Bags. You can skip the backpack part if their doctor says otherwise. Keep a steady pace and don’t let them fall behind. You can even show them how far they’ve progressed by sharing results from your Fitbit watch or smartphone application.

Mom, Dad! Are you in on this?

The second reason why prepping’s good for your folks has very much to do with their way of thinking. Most of our parents and grandparents, were down-to-earth, hardworking people, which means that value common sense above anything else.

And since prepping is deep-rooted in it, learning to get ready for anything is only a natural extension. Keep in mind that you will no doubt encounter this sort of suspicion regarding prepping. This can easily be countered by offering a couple of simple examples based on everyday scenarios.

For instance, my dad always had to use his lighter or anything he had on hand to inspect the underside of the family van. This would mostly happen during trips across rocky terrain. One way of explaining prepping to a person like my dad would be to point out that a fully charged flashlight tucked inside the glove box would have helped him more in case of such emergencies than fumbling around with lighters, matches or other light sources. See? It’s that easy.

Let me point out a couple of more scenarios which you can use to describe prepping to your folks:

  • Emergency generators.Tell your folks that the most logical approach to living in a blackout-prone zone (check out the news on the Venezuelan power grid failure) would be to buy a gas-powered generator. That way, you won’t have to worry about food spoiling in the fridge or breaking into the water supplies became the electric pump in the basement went out with the light.
  • Losing the bus. Imagine that you have to take the bus each time you need to get into town. If you miss that bus, the next would be to call someone at home and say that you’re going to be late. I know it’s a stupid example, but it’s how prepping works – by calling that person you let him, or she knows your location, the reason of your delay, and what to tell the authorities in case you fail to show up at home.
  • Emergency evacuation. In case you are told to leave the house, the first thing you should take is your Go Bag. Apart from knowing the escape routes, your folks should also know how to prepare an emergency backpack. Ask them to draw up a list of things they cannot do without hearing aids, canes, whistles, BP monitor, prescription glasses. Be sure to point out that the Go Bag has limited space, which means that they need to carefully consider the items. More than that, do not forget to remind them of the golden rule: everything you take, you’ll have to carry.

Wrap-up

My giveaway to you is this: don’t try to impose your lifestyle and choices upon your parents or loved ones. You should point out to your folks that prepping is more of a mind-conditioning kind of thing, rather than a set of actions based on hindsight or SHTF way of thinking.

Baby-step it, explain everything as many times as necessary, and always keep in mind that they’re your parents, not some bored students who dropped by your class for extra credits. It’s much difficult to change one’s mindset, but everything can be accomplished with the right attitude and, of course, as much prepping as possible.

Here’s one question for you – how likely are you to convince your mom, dad, grandparents or in-laws to create a household emergency kit or to take a first-aid class?

“She lit wildfires inside my soul and fanned them with hurricanes.”
― Morris R. Gates

“The whole world was on fire.” These are the exact words of Brian R., a Magalia resident, who only minutes before his statement has experienced first-hand the horrors of Camp Fire, one of the deadliest and most extensive wildfires in Californian history. I can’t say for certain if it was Brian’s statement or the news reports that prompted me to write this article. Don’t even care, come to think of it.

Every prepper out there should know just how wild wildfire can get. And believe me, you haven’t seen anything yet. If you’re faint of heart, then you should quit while you still can. I have to warn you though that the article you see here before your very eyes will be pretty graphic and explicit. Be warned and welcome on board!

I can literally stay here an entire day and talk about the reasons behind wildfires. Some say that they are undeniable proof of climate change (nope, I ain’t going to touch that, not even with a ten-foot pole), while some cling to a more sordid theory – that each and every one of them is the work of guy or girl with too much time on his\her hands and too many matches. Can’t say for sure which one of them is more far-fetched. I’m going to go along with saying that wildfires are real and very deadly, at that. FIY, according to the guys over at the Insurance Information Institute, a staggering 90 percent of all wildfire are made by humans.

Pretty neat, isn’t it? What’s that got to say about forest fire prevention – in your face, Smokey! BTW, your hat is stupid. Anyway, wildfires tend to envelop entire acres of vegetation, which means that putting out the flames is a very difficult and time-consuming task. More than that, those toxic fumes are usually carried by strong winds, turning the entire area into a lung-killing trap. Wildfires closer to major cities like the 2018 Camp Fire can be far more dangerous compared to those limited to unsettled areas since most of injuries and deaths are not fire-related! Yes, you read that right.

Wildfires and natural disasters, in general, can make everyone lose their noggins. Think that this is something out of an Orwellian novel? Nope, it’s a fact. If the fire or smoke don’t kill you then maybe a crowd of scared-to-shit people will. And that’s another thing I want to address in this article. But more on that later. Remember – all good things come to those who wait!

It’s a wild world out there!

Back in ’16, Fort MacMurray in Canada had experienced the most devastating wildfires of the last two decades. I was back home that day, watching TV with my wife. There was this special bulletin on CNN saying that thousands of people were trying to get out of the city – some on foot, others by car, and there was even this young lady who got out of Dodge on horseback.

Anyway, the anchorman said that there was so much confusion going around that day, that entire family got separated just because they didn’t have any actionable means of staying in touch. As I later understood, the officials planned two separate evacuation routes – one was in the north of the city and the other one in the south.

The only thing was that the northern evac route was not designed to sustain that much outgoing traffic and people simply abandoned their cars and proceeded on foot. There was this one family who ended up in separate parts of the city because one member went to fetch the kids and took the northern route, while the other one returned home, and had taken the southern route, convinced that the other one made the same choice. Crazy, am I right?

The truth of the matter is that crazy doesn’t even begin to cover it when it comes to panic induced by natural disasters, not to mention the sheer stupidity which caused some of them in the first place. Ever heard about the catch-phrase “Like my fire”? If your first thoughts were “attention-seeker” and “social media”, then you’re right. Back in 2013, a teen by the name of Sadie Renee Johnson set a whole forest on fire just because she wanted to put to work two of her friends who happened to be firefighters.

Long story short, Sadie drove to one of the largest forest surrounding Portland and set fire to a firecracker. After the entire forest was on fire, the teen took a picture, posted it on social media with the message “Do you like my fire?” Her stunt led one hell of a wildfire, which burned down 51,000 acres and caused damages amounting to $8 million. You go, girl! The saddest part is that Johnson is not the only person to have caused a wildfire.

Getting back to the matter at hand, wildfires can be prevented. How you ask? By using a thing called common sense. Put out those fire pits before leaving the forest. Better yet, use a portable fire device like a Bunsen burner or something to cook your food or to get smoochy with that chick you picked up from Tinder. Also, if you’re a smoker, my advice for you would be to quit. Still, if you’re hiking in a heavily forested area, it would be a good idea to extinguish that butt with water, sand, gravel, dirt or anything. A portable ashtray would also be a major improvement.

Now, after getting these out of the way, let’s have a little chat about some of the things you could do in order to prevent a wildfire. While at it, I will share with you my kick-ass wildfire prevention evil scheme (insert Doctor Evil laughing with pinky in his mouth meme here).

Wildfire prepping and prevention

I’ll just say this once: if you’re in the city, you’re royally screwed. If you’re in the countryside, guess what? You’re also in danger! No matter where you go if the wildfire will eventually catch up to you.

Let’s talk a bit about a little thing called wildfire prevention. I’ve already given you one example. Putting out a fire pit is not only your way of saying “thanks” to the forest but the most efficient way of preventing a wildfire.

On that note, you should always keep a close watch on that fire, especially if you plan on spending the night in the forest or something. It’s always a good idea to keep a bucket of water or dirt or sand near the fire pit in case something goes wrong. You should also wall your fire (placing rocks around the fire pit) to prevent it from expanding. Simple and common-sense stuff.

Of course, I guess it would also help not to set fire to firecrackers by the side of the road so that your friends may have work cut out for them. Anyway, this just about covers the stuff you can do to prevent wildfires while you’re outdoors. Still, if you’re living off-grid, say a small hunting cabin, like yours truly right there, things get a little more complicated. See, when you’re smack in the middle of something that can at any time turn into a searing oven, your prepping must take on a more active role.

The idea of dropping off the grid is neat, and nothing beats that fresh mountain air in the morning. However, as I later came to find out, having such a place puts you a bit in harm’s way, wildfire-wise.

In respect to all you wonderful crazy guys and girls out there, I’ve whipped out a small to-do wildfire prevention and prepping checklist. I haven’t got around to solving all of them since I still have a 9-to-5 and this here editorial gig, but I’ll eventually come around to it. So, here’s what I was thinking about fireproofing an off-grid home.

  • Keep cordwood and fuel as far away from home as possible. One spark and everything goes to shift (damned autocorrect). What I did was to bundle all my firewood and wheelbarrow them to a small outcrop, some hundred feet away from the house.

Would be neat if the place is upwind. If you’re Gung-Ho about fuel storage, you can always build a small shack for them. You can find everything you need for the job at your local hardware store (bought everything I need from Costco). If you have a gas-powered generator, store the canisters inside this shack, and always under lock and key.


  • Trimming. Since I’m smack in the middle of the forest, obviously I need to do a little more pruning than usual. Great for the heart, but not that okay when you have other stuff to tend to. Anyway, take all the time to trim bushes, tall trees with low-lying branches, shrubs, and any kind of vegetation close to your house. See, when the wildfire hits, all of those things turn into fuel.

Spare yourself the trouble of racking and buy a leaf blower. They’re not that expensive. Start with the roof – see if there are branches hanging over it and use a hacksaw or gas chainsaw to cut them off. You may either dispose of this stuff or do I did – dry them up and turn them into fuel for your stoves, fire pits or whatever floats your boat. Having so much vegetation around spared me a lot of firewood money.


  • Sprinkler system. Gotta make sure that sprinkler system is up and running. My advice to you would be to buy the non-automatic version and to outfit it with a mechanical timer – they’re far more reliant and endearing compared to their electronic peers.

Here’s what I did to make sure that my house doesn’t get scorched from a wildfire. I went ahead and installed two separated sprinkling systems – one for the lawn and one for the roof and the front side of the house. That way, if a wildfire sprouts nearby, I can use the system closer to my home to water down the roof and walls.


  • Trash the trash. Get rid of another wildfire danger by burning your trash and burring the ash pile far from your house. I know it’s a thankless and smelly job, but, hey, it certainly beat the alternative. Sure, that doesn’t mean you can’t have some fun while doing it.

See, when I moved in with my wife and kids, I discovered I had this charming guy who claimed that the cabin is his and wants us off his property. After a couple of lovely chats with the local sheriff and idle threats, I managed to prove to him that the cabin was mine and mine alone. Still, he would hang around, waiting for a chance to call the cops on me for whatever reason.

So, this one night, me and a couple of buds, after drinking one too many suds, decided to pull a fast one of the peeping Tom. We grabbed all the garbage we could find around the house, placed inside one of those black, heavy-duty bags, and arrange everything so that it would look like a body bag with a corpse inside. And, while he was watching, we took out the faux body to the yard, lit up this big fire pit, and threw it over the flaming pile. From that day on, I haven’t seen him around.

So, this is the end of part one of my take on wildfires. Stay tuned for more misadventures from the prepping world. Stay frosty guys, and see you in part two of my wildfire series.

Every prepper out there should know just how wild wildfire can get. I have to warn you though that the article you see here before your very eyes will be

You’ve probably heard plenty of horror stories about people being caught under tons of debris from a falling building, the golden triangle, and other pleasant stuff about quakes. Let me tell you something – it ain’t pretty. Far from it! A quake can level entire cities in just a matter of seconds.

Remember that little Japanese garden you always enjoyed on the other side of town? Gone! Your favorite pub? Kaput! I kid you not when I say the earthquakes are, by far, the nastiest thing you can experience in terms of natural disasters. During one of my stays in Europe, I’ve heard this one particular tale told by a guy whom I imagined to be a paramedic or something.

Anyway, this guy said that during the 70s, a massive earthquake took an entire East European country by surprise. I’m talking here about entire neighborhoods razed to the ground, landlines disrupted, the works.

So, this guy tells me that it was not the collapsed buildings, nor the deafening sirens that got to him – it was the smell. Everywhere he went, he was followed by the same pungent aroma that turned his insides into mush: rotting flesh. It was so bad that the smell was still there weeks after firefighters and police officers managed to remove all the corpses. What do you do when you’re staring true horror in the face? Prepare and survive!

So with that in mind, I wanted to pull together this earthquake safety checklist which hopefully will point out any areas in your preps that you might need to work on. You can also find more information from FEMA’s Earthquake Safety Checklist downloadable as a PDF file and all the Earthquake information you can shake a stick at (no pun intended) on the USGS Earthquake hazard site.

How to prepare for an earthquake?

  • Know where you are at all times and how to get out of the building. This is more important if you are in a strange place like a hotel in another city.
  • Select a safe place in your home for everyone to wait out the earthquake if needed
  • Practice earthquake drills with your family
  • Keep flashlights and sturdy shoes available.
  • Bolt gas appliances to walls (water heater, oven, dryers)
  • Know how to shut off the gas in your house and have the proper tools on hand if you need to do this.
  • Keep emergency supplies/bug out bags in a safe location.
  • Have a plan for power outages before you are faced with one.

What should I do during an earthquake?

If you are indoors

  • Move to your safe place as quickly as possible; make sure your head is protected from falling debris.
  • Stay away from windows and glass.
  • Stay indoors until the shaking stops.
  • Use stairs instead of an elevator in case of structural damage or power outage.

If you are outside

  • Find a clear spot away from any buildings, power lines, trees or streetlights.
  • If you are in a vehicle (and notice the shaking in the first place) pull over to a clear spot and stop. Don’t pull under an overpass or anything that could fall and trap you.
  • If any power lines are down stay away even if the power appears off. Especially if there are power lines on vehicles, do not touch the vehicle.
  • If you are in the mountains or near cliffs watch out for rock-slides or unstable features. Landslides and avalanches can be triggered by earthquakes.

What do I do after an earthquake?

  • The initial shock-waves may only be the first of many that could still cause injuries. Expect aftershocks and use the time between instances to get to a safer place. If you are anywhere near the coast Tsunamis could occur so immediately seek higher ground.
  • Check your family or group for injuries and move injured people to a safe location.
  • Make sure you are wearing appropriate clothing, footwear, and protection for your hands if there is a lot of debris.
  • Make sure any fires are extinguished as quickly as possible.
  • Check radios for the extent of the damage and any emergency notifications.
  • You should already have stored water, but if not and the water is still working, it may make sense to fill your bathtubs (providing your house is safe) to use the water for hygiene if the water is cut off.
  • Stay away from power lines and out of damaged buildings as much as possible.
  • Contact your loved ones if possible and let them know you are OK.
  • Go to your prearranged rally point if you are able to do this.

There you have it. Let me know what you think. Or if you any stories to share that we can all learn from.

You’ve probably heard plenty of horror stories about people being caught under tons of debris from a falling building, the golden triangle, and other pleasant stuff about quakes. It ain’t

Any SHTF story begins like this: “so, there I was, once upon a time (in December), in the wild, no water, no food, and with wolves on my ass.” Well, not exactly like that, but you get the picture. What I meant to say was that in every survival-type situation, water becomes denominator. And for good reasons – you need water for digestion, heat regulation, breathing, living, stuff like that.

Today, I’m going to hit you with my very best FUBAR story – how I converted my heater and toilet into open bars. See, when you’re at home, in the city, you fail to realize just how important water is. Sure, tune on the tap, and, voila, you have water. The nasty part comes soon after there’s no more water coming from the taps and you have no idea what to do next. Keep calm, my friend! Water can be siphoned from any area of the house, and I’m going to show you how I did it. Let’s start with the heater first.

Sucking Water out of the Heater, Dracula Style

“Listen to them (water heaters). They’re the children of the night”, and what music they make when you plug a hose in them to suck out that water. Backtracking a bit, a couple of months ago, there was a power outage in Fresno. A big one at that – must have at least 2 days, if not more. Anyway, I was at home, thinking about going out to buy a couple of stuff for my household emergency kit.

Ironically, we’ve just the last drop of bottled water to prepare formula for the tyke (bundle of joy that little monster is). I need to say that some time ago, at father-in-law’s bequest, I swapped the old electrical water pump for a brand-new, computer-controlled one. Yes, I know it’s the stupidest thing a prepper can do, but, hey, it’s hard to talk your way out of the wishes of a retired Marine.

So, the power goes out. Naturally, I went for the breakers. Nothing! Tried everything I could think of but to no avail. Soon enough, I came to realize that I didn’t have a drop of water left in the house. Okay, so what do I do? And then it hit me – I recalled reading in a book or something about using the water heater’s contents to augment my non-existing water sources.

So, after some careful deliberation, I grabbed my toolbox, a hose, and a bucket and got to work. Here’s what I did. One short disclaimer though: my heater is electric. This means that the things I’m about to show may not apply to you if it’s running on gas or an older model.

  1. Turn off the heater

You can’t just siphon water from the thing while it’s still running. For once, the thing has a lot of fail safeties in place to prevent leakages. And two – the water inside has around 104 degrees Fahrenheit, which means that you’ll wind up with a nasty second-degree burn if you try anything. What I did was to unplug the thing completely (could still have had some juice in the system, so I took no chances) and let it be for the next 12 hours.

Naturally, I had to make do without the water from the heater. I’ll tell you in a sec, what I did in the meantime. While searching online for my water heater model, I’ve discovered, much to my amusement, that the damned thing had a sort of blanket around it to help keep the water hot. If you want the water inside to cool off faster, I would advise removing the heater’s “coat.” This will cut back on the cooking time by at least a couple of hours, if not more.

Now, in case you have a propane water heater, don’t forget to close the gas intake valve before cutting the electrical power. It should be somewhere at the bottom of the heater. Best thing to do would be to read the heater’s manual for more info. Same thing as before – allow the heater to cool down before attempting to siphon the water inside.

2. Figuring out where the drain valve is

Okay, after allowing the heater to cool down, next on the list is to identify the drain valve. In my case, it was way in the back (had to move the water heater to gain access to it; hard to since the support was nailed to the floor). Most heater models have plastic drain valves. However, some of them have metallic taps. Whatever the case may be, rotate the heater, until the valve’s facing you. If your heater is on a rack just like mine is, don’t take it down. The slope will allow the water to drain faster.

3. The old hose-and-bucket switcheroo

Take a hose (I’ve used an old sprinkler hose which I was keeping in the shed) and attach it to the drain valve. Place the other end in an empty and clean bucket. Don’t forget that some of this water will be used for stuff like cooking, washing, and drinking.

So, storing it in a clean container is a must. One thinks to keep in mind – water heaters are not that great at water filtration as other appliances. You may have to sterilize the water before drinking it. There are plenty of ways to do that: boiling, distillation, chlorination, tossing in a couple of water purification tablets. The choice is up to you. I, for one, boiled the living hell out of that water before I poured it into clean bottles.

4. Open the valve and let it rain!

Before attempting anything, open a sink faucet anywhere in the house but the place where your heater is. Once you’ve placed the hose inside the bucket, open the drain valve halfway. When the water’s starting to come out of the hose, you can fully open the valve. Keep an eye out on that bucket because it’s going to fill up pretty fast.

Be sure to change buckets once the hose starts to resurface. You can store the water from the heater in the bathtub, collapsible water carrier or inflatable kiddie pool. On average, there should be at least 50 gallons of water inside the heater at all times. Just don’t let that water go to waste. Once you’ve siphoned every last drop of water from the thingamajig, don’t forget to close the tap.

Finding even more water around the house

Do keep in mind that the heater is not the only emergency water source around the house. Even though the pump may be out of commission, there’s still water in the pipes. The quickest way to get some extra water would be to find a low-lying outlet like the one connecting the toilet tank to the pipes and to remove the part that goes into the tank.

Get a bucket or a plastic bowl and put the disconnected pipe inside. Gravity will do its magic, and the remaining pipe water will slowly appear in you basic. Of course, there are always at least 2 gallons of water inside the water tanks which can be used for stuff like washing dishes or cleaning.

Just remember that neither the water inside the heater nor that drained from the toilet tank or pipes is entirely safe to drink. As always, if it’s intended for long-term use, although I do not recommend it, use one or more water purification methods to remove harmful bacteria.

This concludes my mission with this article. If you have anything to share about it, please feel free to comment or send us an email. Have a good one.

So, the power goes out. No water! Tried everything I could think of but to no avail. Soon enough, I came to realize that I didn’t have a drop of

I know this is not the first time I’ve written about flea markets and garage sales. Probably won’t be the last time either. Do you want to know the secret behind a successful flea market shopping spree? – never expecting to find anything of use. It really works, and I’ve tested it a couple of times.

See, when you go with a shopping list in hand, chances are you find zilch or end up buying crap you really didn’t need. That’s the beauty of browsing without purchasing I guess – expecting nothing, but, boy, when you do finally find that one item you were looking for, it’s as if the skies themselves opened up to you (with trumpeting angels and everything).

Anyway, as I’ve said it countless times, the flea market is treasure troves, especially to us preppers who are always on the lookout for more stuff to enhance our survival kits or B.O.Bs. And since “old is the new, well, new,” in today’s article I’m going to talk about some neat vintage items I picked off from my last trip to the flea market.

Why vintage? Because they’re cool and, of course, most of them have no need for electricity or whatever to work, which makes them invaluable in just about SHTF situation. If you’re interested in visiting this flea market, I was talking about, come to Bozeman, Montana, and check at the corner of S. Wilson and W. Main Street. If the weather holds out, the chances are that those wonderful guys will probably stay for a couple of days more.

Now, before I bore you to death, here’s my list of retro\vintage things I bought from the flea market.

  1. Adze

No, it’s some kind of STD or ad on someone of those websites with a lot of onomatopoeia, it’s actually a very useful wood-working tool. See, if you’re into carpentry and would like, say, to make the surface of a log smoother, you need this bad boy to scoop out the excess wood.


It kinda resembles a pickaxe or a garden hoe, except for the top part which is shaped like a cone or scoop instead of being pointy. I guess you can buy one from any hardware store but, in my experience, special tools like the adze are very hard to come by – a friend of mine had one custom-made ‘cause he was unable to find one for sale. Picked up mine for $10. ‘Twas a little out of shape; the scoop needed to be straightened, but there’s nothing a little hammering can’t solve.

  1. Apple slicing implement

How about them apples? Everybody loves ‘em (except for docs, of course, who tend to cower in the corner like Nosferatu or something) and for darn good reasons. Still, the most annoying thing about them is having to peel and remove the core. Well, for me, that’s kind of a thing of the past, since I’ve managed to get one of those apple slicing and coring gadget. Nothing too fancy about it: just a squid-like metal ring with several tiny jagged strings in the middle.

Handy to have around the house, especially if you like (or are forced) to prepare stuff like baby purees, salads or are plain lazy. I got mine for two bucks, and I can wholeheartedly say that it was money well spent. Dunno why it’s considered a vintage item though. Sure, compared to a food processor, nearly every kitchen tool can be considered obsolete. However, sometimes, simple is better. Doctor, it’s safe to come out now! Finished talking about apples.

  1. French press

Of course, brother Eddie is going to write about another nifty coffee gadget he bought from the yard sale. This time, it’s an awesome and, why not, a peculiar contraption called the French press. No, it’s not used to print newspapers or counterfeit money, but for making coffee. I really can’t figure out why people stick to coffeemakers instead of using one of these bad boys. Anyways, the French press is basically a glass jar with a little flat piece in the middle that can be moved with a lever.

All you have to do in order to make a great cup of coffee is to add water, coffee, and wait a couple of minutes. Then you simply press the lever all the way down – coffee ground remains on the bottom, and you’re free to serve. The one I got from the flea market is made out of the tin, which means I can also use it to boil water. If I’m not mistaken, there’s even a tea version of the French press – works the same, but the strainer is thinner.

  1. Cameras

Time and time again, I’ve been trying to convince myself to go digital. Sure, nothing beats the 35mm for a mirrorless or 8mm for one of those vintage cam records, but the thing is, they’re very hard to come by these days. In fact, the last 8mm dozen I bought came from an online auction on eBay.

If you really don’t want to spend hundreds of bucks on something you may or may not use (if you’re not into photography, selfies or whatever, you should at least have a digital with you for insurance purposes), you should definitely take a closer look around the flea market.

My wife managed to get ahead of me this time, and, oh boy, the stunt she pulled! We managed to get ourselves a brand-new Canon EOS (thing was literally inside its original packaging). For this jewel, we forked over 25 bucks. Now that’s what I call a great bargain!

  1. Electric bum warmer

Before there were self-heating chairs and portable heaters, there were the so-called electric bum warmer. Basically, it’s a blanket with heating elements placed on some kind of support. These things sold like hot cakes during the early 50s and were very much appreciated by the ladies, especially during those not-so-pleasant-days of the months.

If you happen to come across one of these babies during one of your trips, do yourself a world of good and buy one. I purchased two of them for my hunting cabin – beats cranking up the heat and it comes really handy when it’s cold outside, and I have to do some tinkering in the garage.

  1. Keyhole saw

Also called the jab or alligator saw, this nifty little tool is great for jobs that call for precision cutting. Yes, I know that you can probably find one in every hardware store, but do keep in mind that the manufacturing tech has changed quite a bit.

In other words, you might end up doing more stuff with the one you found in your grandpa’s toolbox than a brand-new one. You should also know that the first batch of alligators ever produced had their blades made from stainless steel, and the handles from sterling oak – not that’s what I call solid, all-American craftsmanship!

  1. Goosewing axes

And because we like to enjoy the little things in life like splitting a fire log evenly, here’s on an item that shouldn’t be missing from your tool shed – the goosewing ax. For those of you who are unfamiliar with the terms, goosewings resemble those broad axes Vikings used during their raiding parties.

The ‘civilian’ version, if we can call it that, has a smaller head, shorter handle, but preserves the same curvature. As for the answer to our Friday night trivia: “what the Hell can I do with the midget version of the executioner’s blade?” (dramatic pause). Busting knots. Plain and simple. No matter how much strength you put in that swing, the blasted thing will not keel.

That’s where the goosewing comes into play – the blade chops and, at the same time, splits the wood. Careful though, because this ax version is heavier than most. And yes, you can find goosewings at any flea market. Just give it a good sharpening after you bring it home (handle might need some polishing too).

  1. Stanley’s Zig-Zag Rule

No, it’s nothing like Occam’s blade or Murphy’s rules which should, by the way, be taught in prepping school, if there ever will be such a thing. Stanley’ Zig-zag is a foldable measuring device that can fit inside any pocket. Shorter than a tape measure, but far sturdier, it’s the kind of tool carried around by engineers and constructors ever since the late 19th century.

The most common Stanleys had 15 folding points and a total length of 35 inches. Now, this is the kind of tool you would want in your shed, especially if you’re into carpeting or metalworking. I found one at a flea market in Toronto last year. Think I must have paid 2 bucks or something. Ka-Ching!

  1. Plumb bob

Sometimes it’s hard to guess whether the thing you’re working on is straight or will turn out crooked. This is why it’s always a great idea to have a plumb bob nearby – a nifty and very basic tool that lets you determine the true vertical faster than you can say “preparedness.” Of course, if have the right materials, you can build one at home. Still, if you come across a flea marketeer selling one of these thingies, you should definitely go in for the kill.

  1. Vise clamps

I very much like wood-working, but I always had trouble gluing pieces together, especially when I have to use fast-setting epoxy. Vise clamps are great for this kind of job and, if you’re lucky, you can probably walk off with a whole bunch of them.

That about wraps it for my list of 10 retro items bought from flea markets. Before going away, I should give you a bit of a heads up – don’t expect everything you buy to be in tip-top shape. Sure, there’s always a chance you can end up with a mint-edition item, but those are very rare instances.

In fact, in most cases, the items have some kind of defect – missing screws, paint scratched, faulty wiring, extensive warping, and the list goes on. My advice to you is this: don’t blow a gasket and don’t throw the object in the trash. Yes, I know it’s very frustrating to end up buying a big nothing, but do keep in mind that with a bit of love, care, tenderness, and the right Philips screwdriver, everything can be fixed.

So, what are your thoughts on this list? Think something’s missing from it? Then hit the comment section and let me know. I would very much also like to hear some of you more “unusual” experiences from trips to the flea market. Who knows? Maybe some of you managed to find a missing Rembrandt or perhaps other treasures from the past.

Do you want to know the secret behind a successful flea market shopping spree? – never expecting to find anything of use. It really works, and I’ve tested it a

There’s a reason why each shopping cart contains at least a bottle of bleach – this stuff’s good for a lot of odd jobs around the house, and some of them don’t have anything to do with cleaning. I being a computer geek have always kept an ample supply of bleach because it works wonders on yellow computer cases.

Anyway, ever since it became commercially available, bleach has been held in high regards, especially by those who had a rough time cleaning nearly-impossible to remove stains and for keeping germs away. In it’s watered down form, bleach can also be used as a room freshener and for giving shine to grandmamma’s white porcelain collection.

Beyond the mere household, bleach can also be successfully employed in survival-type situations. Hence today’s piece which will deal in the many uses and faces of survival bleach, this Jack-of-all-trades of the pantry.

Because I had time to look up more stuff while doing research on my pleasure rubber in SHTF article, I’ve somehow managed to stumble upon a treasure trove of info about the over glorified Clorox bleach. So, fellow preppers, prepare yourselves and feast your eye on the wonders of bleach in just about any SHTF situation.

  1. General sterilization

Of course, one would be very inconsiderate if not stating, well, the obvious – bleach is the ultimate germ buster, being successfully employed in virtually every cleaning job. Grime? No problem! Scale? Who cares? Smears? I have 99 problems, but Clorox makes all of them go away. The stuff is very handy for disinfecting tools used in minor surgery (a pair of pickup scissors or needle with surgical thread) when you don’t have other means of removing the germs. If you water it down a little, you can also remove stain and bacteria from small objects.

For instance, a solution containing one-part Clorox and three parts water may be used to clean and sterilize LED displays (always water down the bleach before using it). My grandma had the habit of spraying all the rugs and upholstery with a diluted bleach solution.

Apparently, this is the best way to remove bacteria, revive colors, and prevent warping. If you’re a fan of second-hand shopping, the above-mentioned bleach mix will help you get rid of lingering germs, while removing that old, musty smell that tends to follow every object bought from these sorts of establishments.

If you have a kid on the way, you may use spraying bleach to disinfect every item the kid may come in contact with – cradle, toys, clothes.

In the field, it may be possible to use trace amounts of chlorine bleach to purify water. Sure, it won’t have the same taste, but at least you won’t come down with dysentery, enterocolitis or any other tummy diseases.

Pet owners can use spray-based chlorine to remove animal smells from the furniture. I being the proud owner of two cats (a boy and a girl), I found relief in the fact that bleach’s able to remove that nasty odor tomcats tend to leave behind when establishing boundaries.

  1. Crafting an anchor

Though the idea of becoming adrift is akin to pure dread, there’s no reason why you can’t anchor down your raft if you have a bottle of bleach nearby. If the situation calls for immediate action, use the remaining bleach to sterilize your gear and water supplies, and salvage the bottle.

Wrap paracords or any dental floss around the bottle’s neck and fill it with anything heavy (concrete, sand, tiny rocks). Congrats! You’ve just made yourself an anchor worthy of any ship on its maiden voyage.

  1. Cleaning your veggies and fruits

Water’s the best way to clean fruits and veggies, isn’t that right? In most cases, yes, but there are some cases when using just purified water just won’t cut. Enters bleach, a marvelous disinfectant that can be used in case of an emergency to clean your veggies and fruits. Just be sure to use a watered-down mix. Otherwise, you will end up with bleach-soaked food, a thing which does not agree with your esophagus and stomach.

By the way – be very careful around the stuff, because the thing can burn through your skin like acid. In case you accidentally spilled some on your hands, or other parts of the body (I don’t judge) go and wash the area with plenty of soap and lukewarm water. As for the drinking part, don’t try to induce vomiting. Instead, dial CDC’s accidental poisoning hotline and await further instructions. In the meantime, drink water or a glass of milk. You should stop in case you’re experiencing convulsions or other changes.

  1. Weed-whacking

Without a doubt, every prepper’s turned gardener waking nightmare is seeing his crops wilting or, worse, eaten away by pests or overtaken by weed. Sure, you can try out all kind of artificial weed-whackers and whatnots, but you’ll probably end up poisoning the soil and making bad veggies.

A great and safe way of getting rid of pests and weeds is to spray your plants with a mixture of water and chlorine bleach. Like always, the recipe calls for one-part chlorine bleach and three parts water. Cover your garden using a hose with a fine mist. For the best results, you should do this at least once a week. Be careful about weed-whacking the wrong kind of weeds (see my article on healing herbs and weeds that grow around the house).

  1. Anti-rad countermeasure

Although it’s highly unlikely that we would have to deal with a nuclear detonation any time soon, it’s good to know that household bleach can be used for decontamination. Hypothetically speaking, if you find yourself stranded in an area with high radiation, take off your clothes and soak them in a tub filled with water and chlorine bleach.

As for body decon, wash all body parts with water and soap first, then used a watered-down bleach solution to rinse your body. Be careful when preparing the mix – for body decon, it should be one unit of bleach to 100 units of purified water.

  1. Self-defense

Pray it won’t come it, but when the spam hits the ham, a bottle of chlorine makes a great weapon of self-defense and distractionary device. If your opponent gains ground, uncork a Clorox bottle and toss it in his face. The results won’t be pretty, I guarantee that, but saving your can is sometimes more important than thinking about the interaction between skin and bleach.

  1. Outliving a contagion

Hold on to your britches there, because I wasn’t referring to the next Black Plague or Ebola. Even the flu season is considered an outbreak, and it should not be taken lightly. One way to purify the air is by bleach and water.

Hygiene is very important but becomes crucial when dealing with a contagion. To minimize exposure to the virus, make a 50-50 bleach and water mix. Pour it inside an empty and clean spray. Use a fine mist on things like clothes, upholstery, pet beds, bathroom tiles or any place that may hoard bacteria and deadly viruses.

  1. Getting rid of mold and mildew

Probably the most annoying part of being a homeowner is finding ways of removing mold and mildew from various objects. Since my son has a slight allergy to mold, I and my wife always try our best to removing as much as the stuff as possible.

One of its nesting places are the gaps between bathroom tiles (yeah, I real back-buster when it comes to spring cleaning). It is possible to hack away any mold and mildew from your home by mixing bleach and water in a bucket. Take a clean rag, soak it in the mix, and wipe. Not only will the mold come off on its own but it takes less scrubbing compared to using special cleaning supplies.

  1. Removing grime and dirt from trashcans

As you know, in case of an emergency, trashcans, especially the big ones, can be converted into portable water carriers. Still, that they are somewhat challenging considering the amount of grime, dirt, and sludge festering at the bottom. A quick way of removing that filth in a sinch is by using bleach in addition to detergent. Prepare a 50-50 bleach mixture and add some detergent. Don’t forget to wear protective gloves while cleaning the trashcan. Word of warning – while preparing the mix, fumes might emerge from inside the container.

Don’t breathe in those fumes as they are highly toxic. If you do, immediately stop what you’re doing, wash your face with plenty of water, and wipe with a clean cloth. You can try to flush out any lingering bleach from your nostrils with blood serum (you can find those bottles in any drug store or pharmacy, and they’re perfectly over-the-counter).

Fill up a small syringe with blood serum, tilt your head a bit, and slowly inject the stuff into your nostrils. Don’t breathe in the stuff!  Blow your nose in the sink and rinse with plenty of water.

  1. Field-sanitization of food plates and eating utensils

Just because one finds himself in the middle of shit hits the fan situation, it doesn’t mean that one should disregard basic hygiene rules and eat from whatever plate, no matter how dirty it is. If you were planning on adding one or more items to your B.O.B, my advice to you is to toss in a small bottle of Clorox. Combined with purified water, bleach can be used to clean and sterilize everything from plastic plates to cutlery.

I myself like to use the stuff in order to clean and remove any grime from my portable stove. The mix also works wonders on other objects used for cooking like cast-iron pots, stoves, ovens, and knives. Careful about using too much bleach on your chopping implements as the substance is known to reduce the life of stainless steel blades.

That about wraps it on ingenious ways to use bleach in an SHTF situation. Instead of a conclusion, I will leave you with a question: to bleach or not to bleach? As always, if you figure out another great way of using this stuff in a survival-type situation, don’t be shy and hit the comment section.

There’s a reason why each shopping cart contains at least a bottle of bleach – this stuff’s good for a lot of odd jobs around the house, and some of

As a full-blooded prepper, I’ve always been looking for ways to make my food last longer. Sure, buying stuff like honey, white vinegar, and baking soda, get you a well-stocked pantry with food that never goes bad. Still, one cannot live on those alone.

So, after doing a bit of research, I stumbled upon this nifty passage from a prepping book which talked about brining and pickled meat. The recipe was so awesome and simple to make that I just had to share it with you guys.

See, long before fridges were invented, humans looked towards other ways of preserving food. Curing or smoking meat is one way of doing it, but hardly the only one. Around the 19th century, brining, as in the process of using salt to preserve food, became very popular, especially among sailors who had to spend months if not years on the sea.

Back then, frosty treats like ice-cream were very rare and quite expensive, year-round. In fact, most of the ice used for various purposes had to hauled from the North Pole. Still, people needed to eat meat, no matter the time of the year. Thus, brining came to be.

Apparently, this method was discovered completely by accident by some British sailors messing around with salty water and meat. Brining became so widespread that long after fridges became commercially available, people would still turn to it. You know the saying: if something’s not broken, why replace it?

The recipe I’m about to show involves pork. For my test-drive, I went ahead and bought a 2-pound shoulder from the butcher’s shop. Don’t worry too much about following this recipe to the letter. It works just as well with other cuts and meats – a friend of used it last week to pickle some salmon. Still waiting to see how it turned up. So, grab your recipe notebook and start writing.

Ingredients

For one large pickle jar, you won’t need more than 2 pounds of meat. Don’t go ahead and buy too much. Make a small batch first and see how it turns out. So, for this recipe, you’ll need the following stuff:

  • Meat.
  • Sharpened chef’s knife.
  • Glass jar.
  • One egg.
  • Salt.
  • 1/3 cup of sugar.
  • Bay leaves (4 are more than enough).
  • Garlic cloves (3 or 4, depending on your taste).
  • Peppercorns (20 will do).

How to prepare pickled meat

Step 1. Grab a clean cutting board and place your meat (I was referring to the pork) on it.

Step 2. Using your chef’s knife, cut the meat into 2-inch cubes.

Step 3. Get a strainer from the cupboard or whatever and wash the meat with plenty of cold water.

Step 4. Wash the jar with water and soap. Rinse! I would advise you to boil the jar before placing the meat inside. That deals with most of the bacteria that could make the meat go bad even with the added salt.

Step 5. Fill the jar with water. Don’t forget to leave plenty of room for the pork cubes and the rest of the condiments.

Step 6. Add salt to the jar. For this recipe, I measured a cup of salt. You may add more if you’re using a bigger jar.

Step 7. Time to test out if you added enough salt to your container. To do that, break the egg in the jar. If it goes down, add more salt. On the other hand, if it floats it means that you have more than enough.

Step 8. Place the pork cubes inside the jar and the rest of your condiments.

Step 9. Fill the remaining space with cool water and screw the lid in place.

More insight on pickling meat

That’s it! You only need to place the jar in a dry and cool place. Some call for keeping the jar in the refrigerator for one or two weeks. But that’s a bit of an overkill, considering that this method was used for food preservation long before fridges landed on the market.

What I like about this recipe is its simplicity and the fact that meat prepared this way can be cooked in many ways. For instance, being a big fan of Asian cuisine, I like to replace regular, freshly-slaughtered pork with the pickled kind. You can also use this meat for soups, broths, and even for preparing baby purees.

This is pure gold, especially during blackouts or any SHTF situation, for that matter. With pickled meat, you can whip yourself a quick dinner even the only heating source is a 12-hour emergency candle. Since it’s already prepared, it doesn’t take long to cook. Just be sure to avoid adding more salt, even if it’s second nature to you.

On that note, careful about eating pickled meat if you have kidney or heart issue. I mean that stuff is literally swimming in salt which does not agree too well with your condition(s).

Don’t worry, you can still enjoy a nice picked meat dish even if the doc says that you should refrain from eating salty food. Take the meat out of the jar, rinse it thoroughly, and submerge it in cold water. Leave it in there for at least an hour. That should clear most of the salt out.

Be careful when choosing your meat cut. Beef and fish are okay, but pork may require attention. If you bought your meat from a farmer or something, you should boil the meat before pickling it. The process kills most harmful bacteria, including trichinosis. Of course, you can always go crazy with the recipe and more stuff to it. I will try to pickle some beef and chicken next time to see how it goes.

Store it in a dark and dry environment and don’t forget about tightening the lid. For the first batch, I placed a cloth on top of the jar and tied it with a piece of string. Don’t know for sure if that helped or not, but the jar did look awfully nice and rustic.

Let me know how your pickling went.


On a different note, here’s some other self-sufficiency and preparedness solutions recommended for you:

The Lost Ways (The vital self-sufficiency lessons our great grand-fathers left us)
Survival MD (Knowledge to survive any medical crisis situation)
Backyard Liberty (Liberal’s hidden agenda: more than just your guns…)
Alive After the Fall (Build yourself the only unlimited water source you’ll ever need)
The Lost ways II (4 Important Forgotten Skills used by our Ancestors that can help you in any crisis)
The Patriot Privacy Kit (Secure your privacy in just 10 simple steps)

See, long before fridges were invented, humans looked towards other ways of preserving food. Curing or smoking meat is one way of doing it, but hardly the only one.

There are a lot of articles, videos, tips and even special chemicals designed to enable the average Prepper to be able to light a fire in all manner of weather. Most of this I think is a little too thought out and complicated but knowing how to start a fire is definitely vital.

Having a fire enables you to cook, boil water and provide light and safety. In my bug out bag I always have a couple of Bic lighters. These are generally the easiest and cheapest means of starting fire that virtually everyone is comfortable with and are easily accessible.

When we talk about survival though, you don’t always have your lucky bag of tricks with you. You may have taken a day hike, wandered off the trail and become lost or zombies attacked while you were on vacation at the beach. You may not have any survival gear with you and that Bic lighter you have might be back in your car. You have a lot of options like we mentioned above. You could start a fire with a fire plough, or bust your cell phone apart and use the screen as a lens.

I like the idea that Grant shows below and this is another easy way to get a fire out of something you might have on you when you get lost. When all you have on you is a bottle of water, it helps to know how to start a fire with a water bottle. You can impress your kids with this too.

There are a lot of articles, videos, tips and even special chemicals designed to enable the average Prepper to be able to light a fire in all manner of weather.

This is not a debate on whether we like war or not. This is about the human condition during such terrible times. Isn’t weird that people are capable of equally amazing things and despicable acts of terror when pushed to the limits? And not to go too deep in the whole (tug of) war thing, let’s only talk about the food problems that come with it..

If you ask a soldier or veteran about their field rations and you’re probably going to hear a lot of complaints. Part of that is because soldiers just complain a lot (that’s no criticism – you would too, if you had their life) but most of it’s totally justified; field rations just aren’t that good. They’re nutritious and packed with energy, but they’re never going to win any awards for taste.

All this meant the hungry troops had to adapt, be imaginative and use whatever was available. Here are some of the survival foods that sustained soldiers through the battles after D-Day.

Nettle Soup

Stinging nettles are a common weed that grows just about everywhere in Europe. Soldiers hate it, because nettle rash is just another inevitable discomfort of life in the field – but they also used it as a food source. The truth is that although it’s a weed, the nettle is also a very nutritious plant. It contains lots of Vitamins A and C, iron, potassium, manganese and calcium, and it has a very high protein content of around 25% dry weight – more than most vegetables.

Nettles can be boiled or steamed, then served as a green vegetable – they taste quite like spinach – but soldiers caught up in the vicious Normandy battles didn’t have time to make elaborate meals.

They just wanted greens to break the monotony of their rations, and some extra bulk and energy to keep their bellies full. That meant simple dishes like nettle soup. They would collect the leaves from nettles, chop them or pound them to pulp, then boil them in a mess tin or steel helmet.

Bully Beef Rissoles

When British troops had access to a field kitchen they ate hot meals made from 14-man ration packs; the rest of the time, their diet was monotonous in the extreme. They got tinned corned beef and hardtack biscuits, and that was pretty much it.

The beef contained plenty protein and the hardtack was a solid slab of carbohydrates, so it was effective enough at keeping soldiers going for a few days, but it was nauseatingly dull. Dull food isn’t just boring; soldiers will get so fed up of it they’ll eat as little as possible, and that affects their fitness.

To make the rations more edible, soldiers got creative. They would crush and soak the biscuits, mash in the beef and add any vegetables they could find – chopped onions were popular, but chopped field greens would do as well. The mixture was formed into patties the size of a large burger, then fried in fat saved from the beef.

Porridge

Proper porridge is made from oats and eaten by Scotsmen, but the basic idea has been used throughout history – crushed or chopped grains, cooked in milk or water. Soldiers on all sides ate it during the Normandy campaign, because it was an easy way to supplement their rations.

Sometimes, especially later in the campaign, soldiers would find a field of ripe wheat or barley that could be plundered for grain. Other times they resorted to collecting grass seeds.

These are a lot smaller than wheat grains, but if you can collect enough (and even in a campaign as brutal as Normandy, soldiers spent a lot of time sitting around waiting for something to happen) you can make a nutritious porridge out of them. Wherever possible soldiers would flavor the porridge with items from their rations – jelly, sugar, milk powder or even just salt.

Field Greens

Although Normandy was an agricultural region, few crops were ready to harvest when the hardest battles were fought. That didn’t mean there was nothing to harvest, though. Soldiers scavenged any edible plants they could find, from dandelion leaves to birch bark, and added them to improvised stews made from tinned ration meat. Often these stews were thickened with crushed hardtack or ration crackers.

Unlike the truly horrific battles on the Eastern Front, like Stalingrad or Leningrad, soldiers in the Normandy campaign were never really in danger of starving to death. Even the Germans managed to deliver enough rations to keep their men fighting.

Those rations could be pretty thin at times though, and soldiers did supplement them any way they could. The methods they used are just as useful for supplementing your own emergency food reserves in an emergency.

We all hope war is just something we hear on the news. But it never hurts to be prepared. To thank you for your attention and interest, check out this FREE Guide of Medicine. It’s filled with examples of powerful medicinal plants you can use as natural remedies. It would’ve been real handy for our soldiers.

If you understand how useful this knowledge is and will be in the near future, you will definitely feel way more prepared next time a man-made or a natural disaster disrupts our lives, no matter for how long.


This is not a debate on whether we like war or not. This is about the human condition during such terrible times. Isn't weird that people are capable of equally