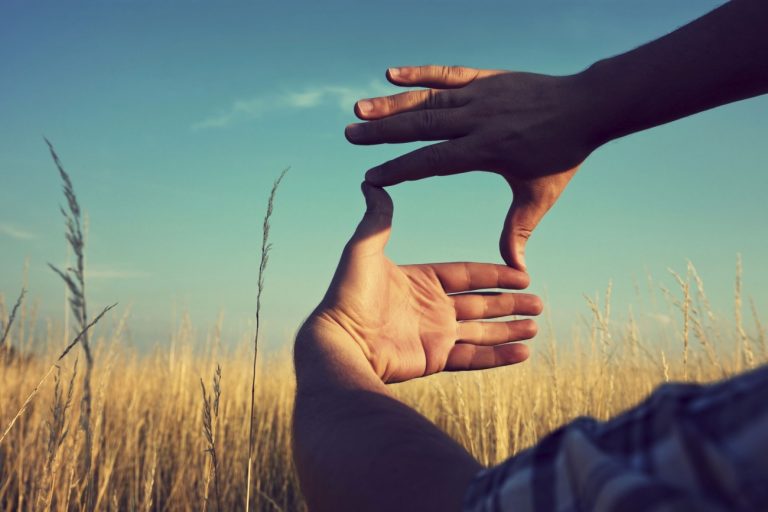
HomePosts Tagged "Top Menu" (Page 21)

While in high school chemistry class you would have been called a geek or nerd if you ever truly believed that “I am going to use this one day,” while everyone else was saying “I am never going to use this in my future, so why must I learn it now?” I’m here to tell you today that I was that nerd that believed such things and further studied chemistry for another five years into college.

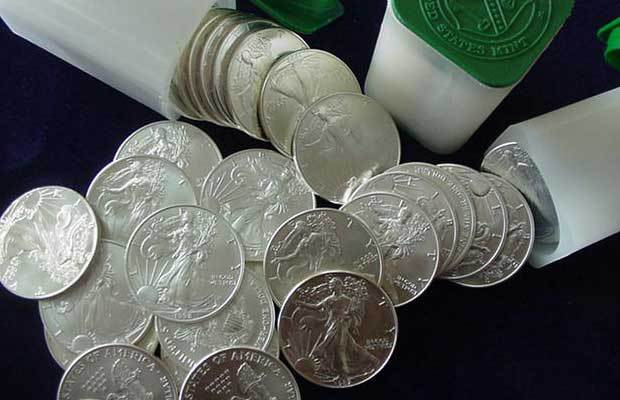
During my academic career my interests always sparked when I learned about chemicals that could be used for some medical treatment, or were able to create an exothermic reaction and generate enough heat to produce a combustion of sorts. One that was very particular to me was a chemical called Potassium Permanganate (KMnO4). Potassium permanganate was especially interesting because if mixed in the proper quantities it can be used as an aseptic treatment to prevent infection on wounds and injuries. To add to its unique properties if mixed with a locally bought form of glycerin it would create an exothermic reaction to cause a small flame to form.

Now that I have given you some background information I will tell you of my experience when chemistry class saved my life. During the fall semester of my junior year in college I joined a backpacking adventure group that was composed of individuals, whom all shared the passion to learn survival skills and backpacking techniques. Being a rookie in the world of prepping this group caught my interests. So as meetings began to start and we practiced various skills such as cooking over fires, knots, survival skills and techniques. As we continued expanding our knowledge we also planned our first outing into the back-country of New Mexico during the month of October.

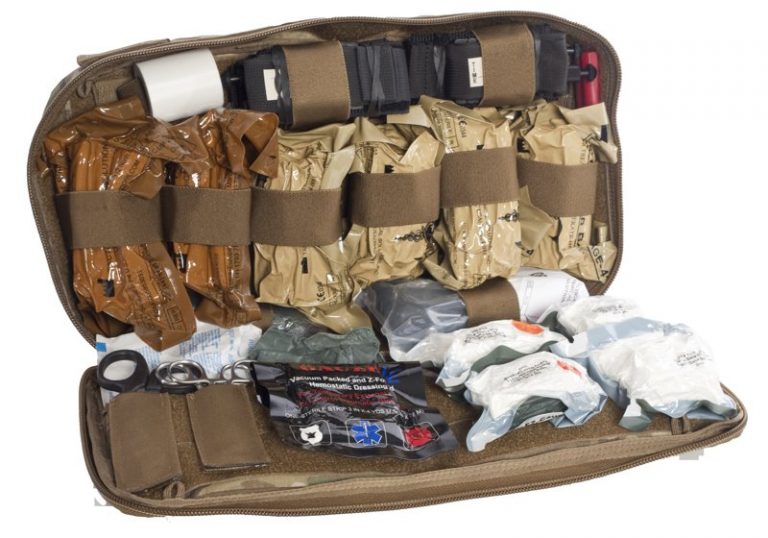
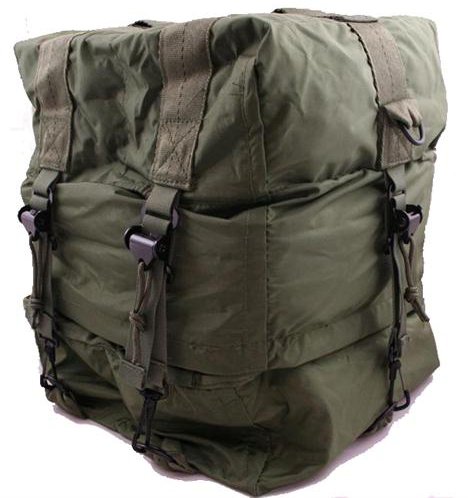
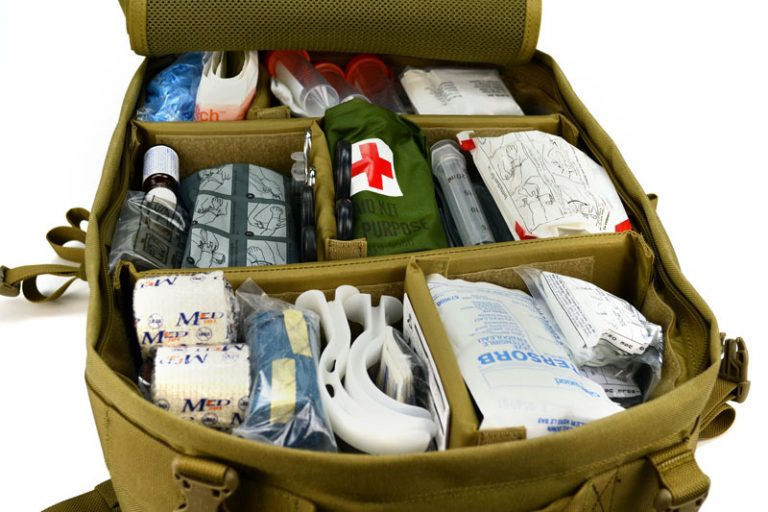
We assembled our gear and packs and planned out our route with enough food to last our 30 mile trip into the wilderness. Along with the checklist of items that we were given that would be necessary for any camping trip; I thought it was necessary to pack my trauma kit, and some chemicals for a chemistry experiment. This experiment was to take place towards our highest elevation at 13,000 feet above sea level and to be as much for entertainment for the group as an experiment for me.

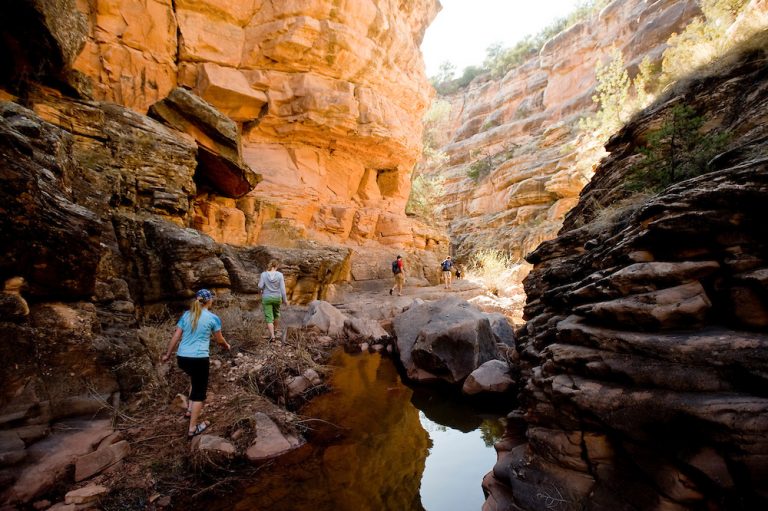
We trekked for two days up and further into the back-country until the only tracks we saw were our own and the native wildlife. As the group approached the summit the weather began to rapidly change and thunderclouds started to form. We had made a group decision that in order to get back into the tree line for cover, we needed to summit the peak and descend on the other side as quickly as possible, because the route back down on the ascending side if caught in a storm would become even more dangerous due to its steep and narrow trails than the route descending on the other side.

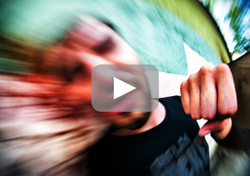
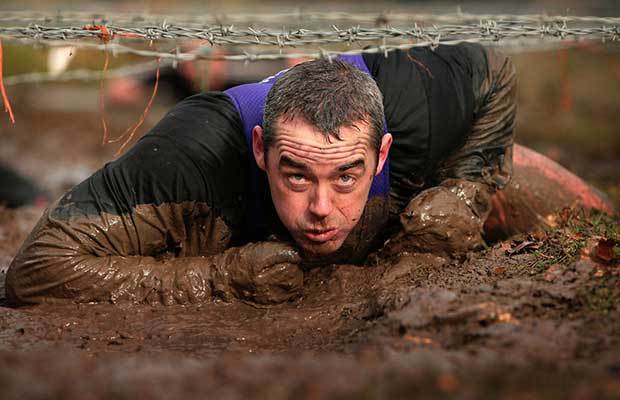
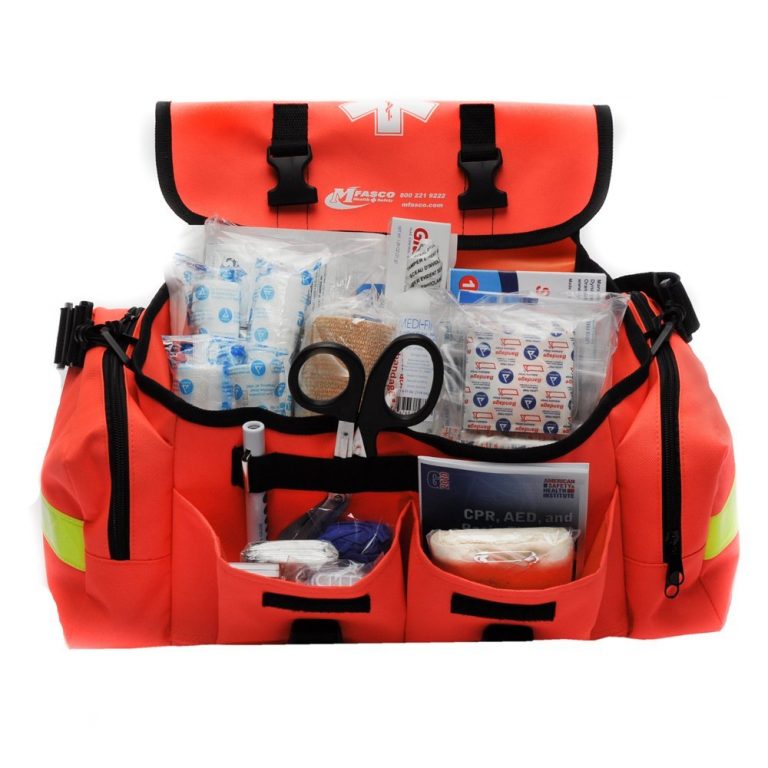
Moving with a purpose the group quickly summited the mountain while fighting the wind that was gusting approximately 60-80 miles an hour the entire time. As the group began the descend one of the female hikers tripped and tumbled down the steep rocky path and received a moderate laceration on her knee. Quickly I dumped my pack and my skills as a nurse took over. I quickly had another member pour approximately a teaspoon of potassium permanganate in a one liter water bottle and shake it until dissolved while I readied the bandages and wraps for her knee. I cleansed her cut with our prepared aseptic solution and bandaged and wrapped her knee so that she could continue down the best she could.

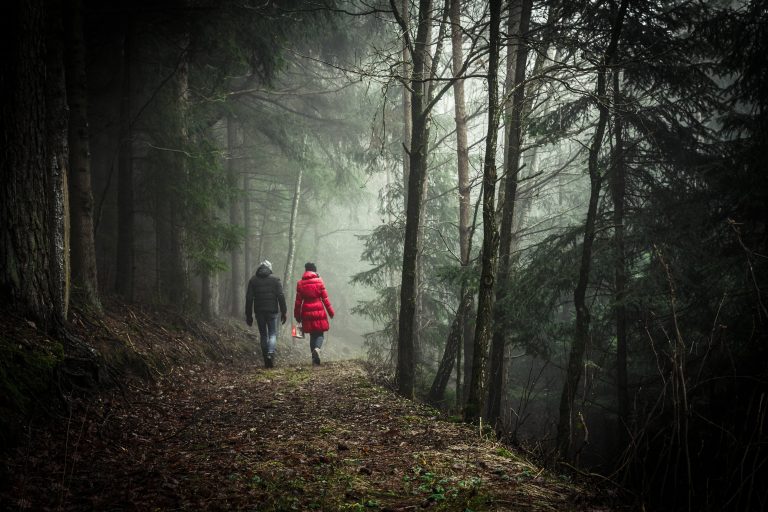
Shortly after our unfortunate event our luck continued to fail and heavy rainstorm began just before we reached the tree line. Quickly the group of six gathered firewood, and threw together a tarp lean-to for shelter. Wet and miserable some of us were experiencing early signs of hypothermia, and we all desperately wanted to feel some small amount of warmth. Several members tried various means to start-up a fire from lighters, storm-proof matches, to even burning their own cotton shirt to get a flame to arise and light our fire. However the wind was awe to powerful and would extinguish our flame before it could ever catch.

It was then I remembered my plans to do an experiment and rushed to my bag and removed the small baggie of potassium permanganate and small bottle of glycerin I picked up at the store. I paused before I began and looked back on my previous trials with this combination. I remembered back home in Texas at 3500 feet elevation it would take approximately 5 seconds to generate a flame, but at this elevation and wind I knew my chances would be limited. So then I figured I’d better go for broke and used my remaining supply of both ingredients. What seemed like an eternity ended up only being about a minute before the greatest sight of our lives appeared.

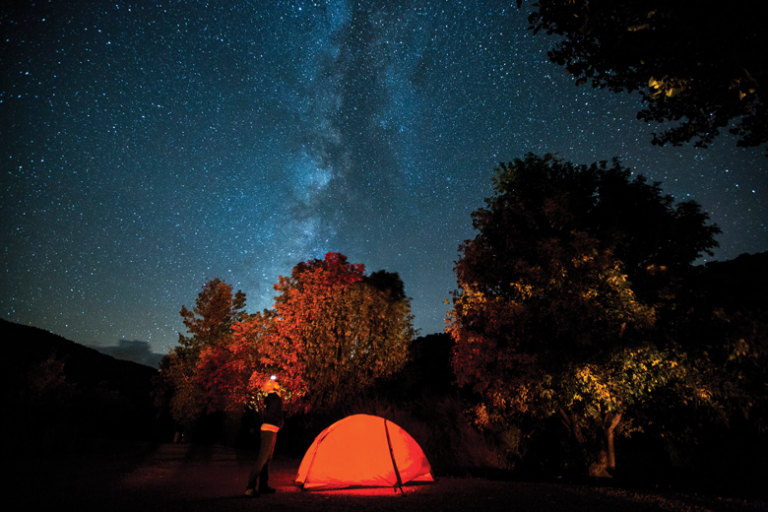
A huge, bright fire-ball arose from our stack of tinder and kindling, and the group simultaneously began tossing larger logs onto the fire for it to chew on before the wind would have a chance to counter its warm punch. Our fire was a great means for improving morale and keeping at bay the clutches of hypothermia. We were able to dry our wet clothes, cook a warm meal and drink some tea and hot chocolate under the tarp until the rains subsided. After the rain stopped and we were all dry and full we set up our tents and crawled into our sleeping bags for much-needed rest. Once we woke up that morning it was as if the rain had cleansed the mountain of any bad juju, and we finished our adventure safely and pleasantly back to the truck.

There were numerous lessons learned from my first trip into the back-country that I have since benefited from. Most importantly the one that I and the group agreed on was that if there hadn’t been a chemist in the group then we all undoubtedly would have had a much more difficult time fending off hypothermia than we did that night.

While in high school chemistry class you would have been called a geek or nerd if you ever truly believed that “I am going to use this one day,” while

You could encapsulate just about anything in the world of prepping under one simple word: planning. Preppers are planning for different scenarios where they must implement one or more plans for how to deal with various aspects of said scenario. We plan on how we will act, what prepping supplies we will need to acquire and we plan how to talk to family members and avoid neighbors.

Preppers plan for medical emergencies by selecting the right medical supplies, books and resources such as wilderness training to put us in a better position to render first aid to wounded family and friends. We plan for economic collapse by investing in precious metals, or diversifying our income by a second or even third job. Preppers plan to bug out and deal with violent confrontations from displaced and possibly hostile individuals or groups that will stop at nothing, including your life to survive themselves. Gardens, food, shelter, alternate power, FEMA, government abuses and on and on we have our plans. But are you planning to fail? Is what you are doing really a plan at all?

What is your prepping plan?

I have written a few articles on the subject of planning with respect to prepping because it seems to me like a logical step but I was reminded of this topic again while planning a backpacking trip with a small group of my daughter’s friends. We would be going into the woods in a remote location that I had been to before, but my “plan” focused on me really – the basics I knew I would need to take into consideration and I had not fully appreciated this group of kids that I hardly knew. I hadn’t expanded my scope of thinking outside of my own little bubble. Almost instinctively I was making lists in my head of what gear I would need and where it was stored. Mentally I calculated the weight I would be packing in and pictured myself walking through the woods with my faithful dog and a bunch of teenagers lagging somewhere on the trail behind me. It didn’t take long for me to figure out that I certainly couldn’t “plan” on each of these kids knowing what they were getting into and what they would need.

I started writing out a list of the basics: Who, What, When, Where, and How. I left out the Why because I don’t need an excuse to go live in the woods for a few days, I have been waiting for almost a year for the opportunity! In my revised plan, I focused on what they would each need to have, the conditions of the voyage into the great unknown and many details the parents would likely need to know. Before long my plan was a two-page word doc that my daughter laughingly said “detailed enough, Dad?” It’s a simplistic example, but I started thinking about my prepping plans considering that exercise.

A list isn’t a plan

When I started prepping, the first thing I did resembling a plan was to write out a long list of the items I thought I needed to focus on in order to “be prepared”. I still have that list around here somewhere but I remember exactly the types of things I scribbled down back so many years ago. There were sections for Food, Water, Shelter, Security, Finances, Gardening and Medical. Each section had a list of items I knew from my research could help me and my family. It was a good start but just writing down these supplies I needed wasn’t really a plan. It was a shopping list.

My list helped me get started with the acquisition of food. I was able to focus on first a 30-day supply of food and that grew as I had other items checked off. My list was constantly being analyzed for priority. If I got an extra $100 to spend I would look at my list and see where I had the biggest hole in my preps and move in that direction. Some months I was able to cross items off my list and other months I wasn’t able to. It helped me but again this was not a plan.

Having a ton of supplies isn’t a plan

Eventually my supplies stared to add up and I was feeling more comfortable with the odds of my family being able to survive, I still didn’t have a plan other than to stay in my house and use the supplies we had been scraping together. I had a supply of ammo, weapons, rain barrels, our garden was started and the pantry was filled with canned beans, rice and corn. I had freeze-dried food under the beds and medical supplies stashed in bins at the bottom of closets but after all this, the only thing I could really say was that my plan was not to need to go to the store for a while. I could sit pretty while the world collapsed at least for some time.
It wasn’t too long after that I realized a few things:

  • No matter how much you stock up, it will run out eventually.
  • Your plan to stay on your piece of land might need to change against your wishes.
  • If the world goes to hell, your reality will likely change. Your health, responsibilities and abilities could all suffer in a long-term collapse.

Going back to my backpacking analogy, I started to reflect on all the other people whose lives could impact my prepping ideals. It is wise to take these other people into account when I made my plans. My neighbors, the people down the street, law enforcement, rescue services, the military, gangs, relatives, friends. A disaster will likely be a dynamic event that you will have to adjust to and make changes to your plans on a daily basis in some cases. A warehouse of supplies is nice, but what if you are forced to leave all those behind?

So, in some ways all the work we think of as being the bulk of Prepping – the accumulation of gear, guns, ammo and supplies only gets us maybe 15% of the way to this mythical point of preparedness. The rest is what we will do with those supplies we have accumulated, how will we use them with our families in various situations. How will we ensure the use is done in a manner consistent with how you envisioned them when you purchased the supplies. Do we need to ration and when? Who can access the supplies and how will you deal with resupply? Who will you share with and what are you prepared to do in situations where you don’t want to share? But that’s just the Stuff part of it. There is so much more!

Prepping is not simply distilled only to the acquisition of gear. You should not relax when you have a pantry full of food and some camping gear and a rifle or two. Granted, that will put you ahead of many people, but that is only a short-term gain. If you are searching for true preparedness, your plans must begin to imagine a life without many of those supplies you have stockpiled because in a true grid-down disaster, end of the world calamity that you are imagining there is a pretty good chance your MRE’s will be long gone, your ammo could be gone and any medical supplies you had might have vanished months ago.

For me, a true prepping plan is being able to live without any of the supplies I am stocking up. I am pointed in that direction now with efforts on self-reliant power, food production and living off the land as much as possible. Does that mean I am not stocking up anything and I am only going to be prepared to eat bark and roots? Nope, but I won’t be sitting in my suburban bunker eating my canned peaches watching DVD’s on my solar-powered player either as the world burns outside. The supplies will only buy me time. That time is going to need to be spent on many initiatives that will lend themselves to survival. Survival for my family and everyone I can bring along with me.

What’s your prepping plan?

I have written a few articles on the subject of planning with respect to prepping because it seems to me like a logical step but I was reminded of this

Regardless of whether you are just now getting into prepping or you have been prepping for years, there is more to survival than having a stocked pantry, bountiful garden, or a well with a hand water pump on your property. Simply having supplies isn’t the true yardstick you need to be comparing yourself to if you realistically want to know how prepared you are for this or any other crisis that may happen. Supplies can be taken away, they can be flung across the county or washed down the river. What matters most of all is your mental capacity to see you through difficulty. Your will to live and survive no matter what the odds will do more for you than any survival knife. Your determination and confidence that you will succeed will be more valuable than a box of MRE’s or freeze dried food.

Without being trained in survival though, how can the average person get this type of mindset? Do you need to have survived through a big earthquake or tsunami in order to have what it takes? Should you sign up for intensive wilderness immersion courses that teach you the things you need to know? Possibly and I am not discounting any training like that, but the average person can increase their survival endurance skills by much simpler means. Some people are born with the will to survive and other people need some practice.

Pull the plug

Have you ever imagined what your day would be like without electricity? If you have lived through any power disruption you know. Out of habit, I will flip on light switches and nothing happens. I will press buttons, open doors to use appliances and it takes a second to realize that nothing is working in each instance. I still go to the wrong silverware drawer in our kitchen even though my wife changed that years ago so maybe its just me. Dealing without power or electronic devices is a huge hurdle for some people to overcome. In a life or death situation, the absence of power is disorientating so what can you do now to develop experience in living without the convenience we are all so used to?

You could go a weekend without power and this is frequently recommended. Simply flip the main breaker on Friday night and put all of the cell phones, tablets and e-readers in the closet. Bonus points for shutting off the water also.

This exercise will allow you to adapt to living without electricity as you see how to light your way, possibly use stored water or perhaps go and get water to live on, cook and bathe for the weekend. For a lot of people this is a huge eye opener that can highlight holes in their preparedness plan.

Practice makes perfect

Is your plan to bug out to the woods if Ebola breaks out or some other form of societal collapse? Have you meticulously gathered the contents of your Bug Out Bag and have it ready to go in the back of your car? Have you ever put it on and walked 20 miles through the woods or even down the road with it on your back? Have you tried to live for 72 hours off the supplies in your Bug Out bag to see if you have the right equipment and more importantly the experience with what works and what doesn’t. Another aspect of prepping is the knowledge and experience of what to do with these supplies you have stored. You don’t want your first experience building and lighting a fire with your Swedish fire steel to be when it is raining, dark and you are scared. Your ability to safely collect and filter water will give you confidence. The ability to navigate without the benefit of roads or GPS possibly will also give you invaluable exposure to the aspects of your plan that could fail.

Navy SEAL Survival Secrets Now Released to Americans for Limited Time


This former SEAL Team Platoon Commander/Sniper is on a mission to deliver the elite-level “spec ops” survival secrets to 250 lucky, everyday Americans today.
Do you make the “cut”?

Click here before they’re all gone!


Activities like backpacking are the perfect test scenario for bugging out. You strap that behemoth you have been building for months with all of the gear you have read about on bug out bag checklists and see what it’s like living in the woods for 3 days. There will be so much you learn about both your physical ability, the weight and utility of your bug out bag as well as whether or not the items you have worked or were necessary in the first place. After my first backpacking adventure with my family, I knew that I needed to drop at least 20 pounds from my pack if I had any hope of running through the night away from disaster in it.

Challenge yourself in small but important ways.

Develop a can-do attitude

One of the main elements of survival is the belief that you will make it through; that you can overcome whatever obstacles you face. This is not something that comes naturally to everyone so it helps to put yourself in uncomfortable situations and see how you fare. Just take something as relatively simple as being too hot or too cold. When winter comes do you run inside the second you get cold? This is probably because you aren’t dressed for the weather. What if you couldn’t go inside? Would you sit there, shivering and complaining?

In a disaster, expect things to be uncomfortable. Expect to suffer a little bit and try this out when you are perfectly safe. Stay outside in inclement weather all day and do physical things. You will learn that you won’t die and that you can make it through situations where you’d rather be back indoors. Spend the night out in the woods by yourself, set up your tent, build a fire and think big things. You learn that you aren’t helpless and that you can do things for yourself. Even if you already have a healthy dose of this experiences like this build your endurance. They mentally reinforce you will the knowledge that you can do things on your own.

Train to build up your body strength

Nobody ever said survival was easy. You could expect to be hungry, tired and to work more than you do on any normal day. To have the best chance at survival you need to be in excellent physical shape. Does that mean you need to be carved up like one of the models on the fitness magazines? Not at all, but you do need to be able to carry yourself around all day without pain or discomfort regardless of your age. Can you walk around all day, possibly with a pack or do you have a hundred pounds or so to lose? Can you pick yourself off the ground when you fall? If not, how do you expect to survive out in the wilderness with that bug out bag that’s too heavy on your back? Some people want to give up rather than put the effort into survival but even if you have every prepping supply in the world, you have to be in shape.

Get in shape now or suffer later.

Everyone who doesn’t have a physical handicap can get in better shape for $0. If you are overweight, start off walking. Walking is a great exercise that is free, doesn’t require a membership and you don’t need fancy clothes or equipment for it. Start off slow and build your way up. Maybe you could even begin running one day. Personally I think everyone who is seriously considering any bug out on foot scenario should be able to run 2 miles without stopping. Can you run at all? Can you run with your bug out bag?

Mastering your own body strength is something that anyone can do with time and will give you a huge amount of endurance. If you can walk all day without stopping, run a few miles three times a week, knock out a few dozen push ups and sit-ups daily you will be in so much better shape than the person who watches TV for 4 hours or sits in front of that computer all day. Strength will keep you healthy, it will prevent injuries and will help you last longer, go the extra mile when you might need to in order to save your life.

I wrote about the will to live and I believe that is at the heart of every prepper out there. I know it is my goal and I want to take as many people along with me as possible. Do you have what it takes to endure?

Navy SEAL Survival Secrets Now Released to Americans for Limited Time


This former SEAL Team Platoon Commander/Sniper is on a mission to deliver the elite-level “spec ops” survival secrets to 250 lucky, everyday Americans today.
Do you make the “cut”?

Click here before they’re all gone!


Regardless of whether you are just now getting into prepping or you have been prepping for years, there is more to survival than having a stocked pantry, bountiful garden, or

Equipped with a large database of knowledge, co workers and all the equipment/supplies they need at their fingers tips.. it is no secret that America is home to some of the best doctors and medical professionals in the world. If SHTF, what happens if all the lights go out? Would the equipment still function? What if all the supplies run out? What if all the doctors are sent to make-shift-camps or hunkered down with their own families? What if there is no hospital, no 911, no help coming?

Believe it or not, this actually happens all around the world each and every day. Out there right now there are doctors, nurses and medics working around the clock without power or computers, without their co workers, without all the fancy equipment.. They are equipped with nothing more than their knowledge and whatever is packed into their medical bags. That is right, they are saving lives out of the contents of their medical bags.

Most of us are not doctors nor do we have access to the same kind of supplies that they do. However, having a medical bag is one of the most important things we should all consider while preparing for those situations we hope never happen. You may be wondering what to put in your own medical bag or if you are forgetting anything so I’ve provided my own list to help get you started.

The Medical Bag

Elite First Aid Fully Stocked GI Issue Medic Kit Bag, Large – $132

There are all kinds of options out there for medical bags. Use what works best for you. I have seen people use back packs, tackles boxes and shoulder bags. I personally went with the shoulder bag because my bug out bag is a back pack and I only have one back. I also would like to keep both of my hands free so this was the best option for me.

Sanitation and Personal Protection

Regardless of the emergency, sanitation is not something that should never be overlooked. For your own protection and the protection of your patient, always WASH YOUR HANDS!!!! I cannot stress the importance of hand washing. For this reason and so you never forget.. choose the most easy to access part of your bag to store your sanitation supplies. Most of these items can be found at your local dollar store so there are no excuses not to be hygienic when providing first aid. These very simple step could mean the difference between life or death.

**Tip: Keep a small zip-lock bag with a maxi pad and bandanna in with your sanitation supplies. In the event someone is bleeding you can buy yourself a minute to wash up by having the injured use the maxi pad to apply direct pressure, if they are unable, you can hold it in place with the bandanna.

Items to include:

  • Bar of hand soap and a case to put it in (dollar store)
  • 4 oz hibiclens hand cleanser (if your budget allows)
  • Nail clippers, nail file, scrub brush (keep nails short and clean – dollar store)
  • Large bottle of hand sanitizer (you will need a lot of this – dollar store)
  • Hand disinfecting wipes (for when washing isn’t possible $2 at pharmacy)
  • 2 oz hand cream (sanitizer and gloves dry out your hands – dollar store)
  • 3 mini soaps/3 mini hand santizers (these are for giving away. It is important to keep the patient clean, too – dollar store)
  • 50 pairs of latex free gloves (latex is a common allergy)
  • 3 pairs nitrile gloves
  • 10 surgical masks
  • 3 N-95 masks
  • 10-20 surface disinfecting wipes (dollar store)
  • 10 puppy training pads (will work well as underpads – dollar store)
  • 10 garbage bags (for plastic backing – dollar store)
  • 5 bio hazard bags (if budget allows)

First Aid Kit Emergency Response Trauma Bag Complete

Equipment

The more we have to work with, the easier it will be so some basic equipment is good to have. If your budget is tight you can pick up some of these items at the dollar store and then add the rest when you are able

**Tip: Know how to use these items!! They are all easy to use, I promise.

Rescue Essentials Shears EMT/Scissors Combo Pack with Holster, Tactical All Black

Items to include:

Wound Care

From superficial scrapes to life threatening bleeding it is no surprise that there are millions of wound care products out there. Try not to get too overwhelmed with this. The first thing we need to do is to make sure that whatever caused the injury is no longer a threat. We then need to make sure the person wants our help!! Before we rush in to play doctor, we should always let the injured person know who we are and what training we may have. In the event this person is or at any time becomes unconscious implied consent is given. Once we have established that there is no current threat to ourselves and that we have consent to help then the main objectives are to stop the bleeding, monitor for shock and prevent infection. It may be wise to divide this into 3 sections so if you are ever in a panic, you’ll be less likely to miss a step.

**Tip: Pack what items you can afford then add to it as you are able to.

The Survival Medicine Handbook: A Guide for When Help is Not on the Way

Items to include:

Bleeding Control

Wound Cleaning

**Tip: this will be a lot easier if you can keep the person calm. Consider pain management ideas for while you are treating. Flushing a wound with clean drinkable water will be the ideal method. You may need to pick out tiny pebbles or dirt with tweezers and possibly even scrub it. It is very important to make sure the wound is clean. You will then want to use an antiseptic such as peroxide, alcohol or iodine. If a person had been bitten, infection is much more likely use a BZK wipe.

  • Stress ball (give it to the patient to squeeze but never in the arm they are bleeding from)
  • 5 paper bags (having the patient breathe into one for a couple of minutes may help distract them and will remind them to breathe)
  • Dermoplast antibacterial spray (this works wonders on pain for after birth, scrapes and cuts)
  • 4oz of drinking water (something so simple may not be available if you don’t pack it)
  • 60cc irrigation syringe and a perinatal bottle (I personally get better pressure with the perinatal bottle)
  • Tick remover
  • Poison ivy soap bar
  • 50 alcohol wipes
  • 10 Sting wipes
  • 5-10 BZK wipes
  • hydrogen peroxide (dollar store)
  • 1 oz (30ml) iodine

Wound Closure

It is almost never a good idea to close a wound in a non-sterile setting, you can pack a suture kit for just in case but this should be a last resort. I did not pack a stapler because I personally am not comfortable with using for a number of reasons.

  • 100s of different size band-aids (dollar store)
  • Mole skin
  • 50 butterfly closures
  • liquid band-aid
  • super glue (dollar store)
  • Suture kit
  • 10 triple antibiotic ointment packets (you can buy a tube but this would be cleaner)
  • Burn gel (for pain relief)
  • Vaseline (for making non-stick dressing)

Dressings

  • 50 2×2 gauze pads
  • 50 4×4 gauze pads
  • 10 8×10 ABD pads
  • Rolls of gauze (at the very least 2 in different sizes)
  • Medical tape
  • Reusable cold packs (for swelling)
  • Ace wrap (for sprains)
  • 1-3 triangular bandages

Other emergencies

If possible divide up other emergency supplies into sections to keep them more organized and easier to access. Try to keep these in plain view when you open your bag.

Items to include:

Section 1 – Breathing Difficulty/Chest Pains

  • Manual suction device with extra tubing
  • Areochamber mask with asthma inhalers (if someone in your group has asthma)
  • Berman oral airway kit (has 6 different sizes)
  • Children’s liquid benadryl and syringe (this works slightly faster then the tablets)
  • 10 aspirin (if you suspect a heart attack)
  • 2 CPR masks (one for you and one your assistant if you are lucky enough to have one, CPR is exhausting)

Section 2 – Hypothermia

Section 3- Dehydration/Low Blood Sugar/Weakness

Section 4 – Eyes and Ears

Section 5 – Nose, Lips and Throat

  • Saline Nasal Spray
  • Bulb syringe (for babies)
  • 3-6 Vicks Vapor Inhaler (if one person gets sick you all might and these shouldn’t be shared – dollar store)
  • Chapstick (dollar store)
  • Blistex (dollar store)
  • Abreva coldsore treatment
  • Vicks Vapor Rub (dollar store)
  • Throat lozenges

Section 6 –  Oral/Dental

Medications

If you are reading this.. then chances are pretty good that you can still run out to the local pharmacy whenever you may need to. If SHTF easy to access pharmacies may become a thing of the past. Without power and oil production it would become extremely difficult for pharmacies (or any stores for that matter) to re stock their shelves. This is why it is so important to buy these things while we still can and while we still have health care professionals to ask all our questions to.

First and foremost, everyone with medical needs should pack at least a 30 day supply (the more the better) of any medications that have already been prescribed or recommend to you by your doctor, pharmacist or health care provider. Nothing you read on the internet should ever substitute the advice from your health care provider. Seek their care and medical advice whenever necessary for as long as it is available.

The amount of medications you should pack is going to vary greatly from person to person. I recommend packing enough for yourself and at least one other person, if you can. If you have a larger group then pack accordingly. I have not included any amounts as to how much you should pack because it is important for you to carefully think numbers through based on your own groups size. Talk to your health provider before taking any new medications.

Again, you may pack these however you choose but breaking them to sections may help you find what you need faster. Toiletry kits work great for this.

Items to Consider:

Bag 1 – Indigestion and Upset Tummies

  • Tums (for heartburn)
  • Antacids (for more severe Indigestion)
  • Ginger and Peppermint tea bags (a natural aid for nausea and upset tummies)
  • Gravol tablets (for adults and children – for motion sickness, nausea and vomiting)
  • Pepto tablets (for all your tummy needs)
  • Metamucil (for constipation)
  • Anti Diarrhea tablets
  • Small cup (for the tea)

Bag 2- Fever, Pain and Discomfort

  • Tylenol (for infants, children and adults)
  • Advil (for adults) and children’s Motrin
  • Ultra strength advil liquid gels (works faster)
  • Muscle Rub (for sore muscles)
  • Preparation h (hemorrhoids)
  • Gold Bond Powder (foot odor)
  • Vaseline and Diaper ointment (I highly recommend Beaudreaus butt paste – for rashes)
  • Cold pack and heat pack
  • Numb 520 with 5% lidocaine (amazing deep numbing pain relief, this will numb someone enough for suturing)
  • Vasocaine Numbing Spray (also amazing, it’s mostly used for tattoos)

Bag 3- Infections and Supplements

  • Rehydration salts (yes, I’ve included these twice)
  • Activated Charcoal (accidental ingestion of toxins)
  • Colloidal silver (Talk to a health care provider first)
  • Oral Antibiotics (for infection – I’ve chosen 3 – talk to your health care provider)
  • Essential oils (tea tree, clove, lavender, eucalyptus and oil of oregano were my choices)
  • Polysporin and Neosporin (for minor scrapes and burns)
  • Triple Antibiotic Ointment (in a tube)
  • Honey
  • Foot Fungal Ointment
  • Nystatin (yeast infections)
  • Monistat (yeast infections)
  • Hydrocortisone Cream (treats many skin conditions)
  • Children’s vitamins (Safe for pregnant woman, children and adults)
  • Vitamin D drops (for breastfed babies)
  • Iron supplements (after blood loss)

Education

I have saved the best for last.. Education. Take all the classes you can and read all the books you can get your hands on.  In fact,  pack your favorites in your very own medical bag!! One of my personal favorites is “Where There is no Doctor“. It is also completely FREE to call or drop in to your local pharmacy to ask all the questions you may have about any items you are including in your own medical bag. Talk  to your doctor about any pre existing conditions or concerns. Your knowledge is your best chance of survival.

P.S) Don’t forget to WASH YOUR HANDS!!

Equipped with a large database of knowledge, co workers and all the equipment/supplies they need at their fingers tips.. it is no secret that America is home to some of

If you are planning to build a survival fishing kit on your own and so are looking for some guides, then your search stops right here. Survival fishing kits could be of any size and shape, and it would adapt readily to suit your particular needs.

To get started on how to build your own survival fishing kit, we have come up with a list to help you out.

Building Your Own Survival Fishing Kit

This best fact about this kit is that it wouldn’t cost more than 20 dollars to create. The tools and materials that would be used here are easily available along with the fishing essentials.

Tools and Materials:

  • 1” Threaded PVC Adapter
  • 1” Threaded PVC Cap
  • 1” PVC Pipe Of 10” Length
  • PVC Cleaner
  • PVC Cement
  • Scrap Wood
  • Paracord
  • One Small Washer
  • Fishing Line Of 100.’
  • Drill Bit Of 1/8”
  • Drill Bit Of 1/16”
  • Hand Drill.

Fishing Elements:

  • Lures
  • Hooks
  • Bobbers
  • Swivels
  • Sinkers.

Step-by-Step Instructions

Step 1: Attach The Threaded PVC Adapter To The Pipe

First step is to connect the 1” PVC pipe to the threaded PVC adapter of 1”. You could either press the two materials together or glue them employing PVC cement and PVC cleaner.

However, gluing the pieces would be better as, if by chance the adapter becomes loose from the PVC pipe, then your fishing essentials could get loose.

For attaching the two pieces, you would need to clean the areas of joining with PVC cleaner, and then use PVC cement to press the pieces all together.

If you slightly turn the PVC cap after it got fitted on the pipe, you would get sure whether it has bonded firmly or not.

Lastly, let the pieces sit for 30 minutes.

Step 2: Add a Lanyard to 1” Threaded Cap

At this level, you would use the drill along with the drill bit to bore two evenly spaced holes in the 1” PVC threaded cap’s top.

After it is done, you would now have to lace the paracord of 20” length through these holes and tie a knot.

The lanyard would help to carry the fishing kit quickly. It could be even wrapped around the wrist at the time of fishing to prevent the kit from slipping down from the hand.

Step 3: Forming And Installing The Front End Plug

Most of the survival fishing kits employ a PVC end cap for closing the fishing kit’s front end. This is because these caps are available easily and could be installed quickly. But such caps could create a problem while casting the fishing line.

Therefore, it would be better to make a customized cap that would fit tightly on the pipe.
You would need to chuck a wood piece and make its diameter same as the 1” PVC pipe’s outside diameter. You would have to shoulder it off till it gets fitted inside the pipe snugly.

After this, you would need to cut a portion of the turning to have a slight cone or rounded end. It would help your fishing line to come off in an even manner while casting.

Lastly, you would have to employ the 5 minutes epoxy for affixing to the fishing kit’s end.

Step 4: Drill Holes To Secure The Hook

Once these steps are complete, the next thing you would have to do after epoxying the front plug is to bore some holes. These holes would not have to be very deep as they are only to secure the hook.

You could drill about six holes around the plug to have many points for attaching the hook.

Step 5: Wrap The Handle

Paracord is always a great prepping supply to have in a survival scenario so you could wrap some of it around the handle. This would not only help you to use for many things but also would offer a solid grip to prevent the kit from slipping out from the hand.

Step 6: Add the Fishing Line

Next, bore a small hole of 1/16” in the 1” PVC pipe for adding the fishing line. You would need to thread one end of the line through the hole and let it come out from the kit’s end.

After this, you would have to tie a small washer on the line’s end employing a stronger knot. The washer would help to fix the line on the kit and prevent it from coming out.

After this, you will have to pull the line steer to draw the washer’s end into the kit and start to wrap the fishing line around the PVC pipe. If this wrapping is done nicely, then the line would unspool exactly as it does from fishing reels while casting.

Step 7: Loading It Up

After completing the fishing kit, you would now have to load up the fishing essentials or survival gear in the kit. It would be entirely upon you that which things you would pack according to your needs.

However, small hooks, lures, sinkers, swivels or bobbers could be some of the materials that you might include.

Step 8: Ready To Cast

A fishing kit would work almost like a fishing rod. You would just have to hold the fishing kit around the paracord with your hand and hold the line’s hook end in place with the index finger.

Now you could either employ underhand or overhand movement for casting the line.

Conclusion

Well, we hope that our process of how to build your own survival fishing kit will help you a lot to make a kit easily. A survival kit is always necessary as it would keep you sufficiently equipped to survive in any situation. However, if you have any suggestion regarding this article, please let us know in the comments below.


If you are planning to build a survival fishing kit on your own and so are looking for some guides, then your search stops right here. Survival fishing kits could

I wrote about forming the Neighborhood Watch on Steroids and described a situation where you might need to join together with others in your neighborhood to provide defense from people or groups looking to do you harm or simply steal what is yours. Long ago, there were no such thing as police officers who roamed around in their cars connected by radio and dispatchers who monitored a central 911 system. If trouble broke out, you and your family were on your own. You may have been able to rely on neighbors if they lived close enough but the defense of your property was a personal responsibility.

Flash forward to today and for a whole host of reasons our society has largely abdicated this responsibility to law enforcement. While there are many noble police officers out there, they are woefully outnumbered when it comes to people so while they may arrive in time to help, usually the police arrive after the drama has occurred and try to sort out the players as best as they can. This isn’t ideal when our society is functioning as it should be. A police presence could be non-existent in a crisis or disaster and it will be back to you and possibly your neighbors to defend your village or neighborhood.

Again, I am not talking about some snow that keeps people at home. I am talking about chaos where for whatever reason, law enforcement is unable to get to you much less protect you and you have bad people who are trying to get in. For the rest of these articles I am going to assume a national disaster that has rendered our nation in a crisis where there is no rule of law.

Rethinking your Neighborhood

Your neighborhood could be configured in all types of ways depending on where you live. In a larger city we might have boundaries that are simply streets. Your neighborhood might run a certain number of blocks ending at the river. It could be that your neighborhood is the traditional suburban subdivision complete with a sign out front. You could live in a gated community or your neighborhood might just be a dozen homes in the country.

Before you enact a plan to defend your neighborhood, it helps to think about a few things first.

Understand the Enemy – Who are you defending your neighborhood from? What kinds of threats could you expect to encounter? For the purposes of this article, we aren’t going to consider a professional military force. We will say that the enemy could be lone individuals or gangs who range from simply hungry and desperate to organized and violent. Depending on your location and the duration of the event, you might encounter all types of people.

Neighborhood map with icons.

Use Situational Awareness – This will be key to any defense and that is to know what you are protecting and who is trying to get in. The size of your defensive team will dictate how much area you can realistically try to secure. There are force multipliers obviously and we will get into those in an upcoming post, but you have to know your neighborhood better than anyone so that you can model your defensive strategies where you will have the most advantage.

In another post on Preparing your neighborhood against attack, I mentioned drawing out the boundaries. You may only be able to secure a couple of streets or even one street and it will help to draw out the streets identifying access areas, choke-points, natural cover and the assets you hope to control. Some resources you can use now are websites like MyTopo.com that will allow you to order a detailed topographic map of your entire area or Scribblemaps.com that will allow you to create your own maps and add symbols. Naturally, these would need to be taken care of before any crisis prevents you from access computers or the internet.

Advertorial


Face to face with a street thug?
If you’re over 55, do THIS

For the first time ever, an ex-CIA Officer is revealing The TRIDENT
…the ultimate self-defense move for anyone over 55.

[Watch: Demonstration to the left]

The TRIDENT is the most lethal fighting move on earth. And it’s designed specifically for American seniors.

CLICK HERE to see how it completely DEVASTATES street thugs in this video.


Use the defenders advantages

I mentioned also that virtually none of us have a walled compound so it isn’t like we can march along the wall and shine spotlights down on anyone trying to access your neighborhood like some type of Alcatraz Island. You will have to use the advantages you do have though to give you and the rest of your neighborhood defenders the upper hand. If someone does come into your neighborhood you will be able to rely on your strengths.

You will have the ability to fight from cover and to create fortified positions. Again, this is assuming a SHTF type of scenario. What can you use? Depending on the disaster you can roll cars into position, refrigerators, use stones that used to form your ornamental garden walls. For me if this really was a disaster I would be looking to build my own foxholes and augment those with sandbags. Digging a hole is free and a lot of dirt makes great cover. With planning and enough resources (people) the routes into your neighborhood that you want to defend can be set up to be highly defensible.

You have the home field advantage. You know your neighborhood and where everything is. You will know where your partners are with rifles trained on the bad guys. Communication will augment this but we will get into that later as well. You will know where paths through the woods go, where fences are opened or where special defensive devices meant to injure or slow the enemy are hidden.

You have the ability to prepare. Anyone who is intent on coming into your neighborhood will only be able to observe from the outside what is going on provided you don’t have patrols outside of your area watching for this behavior. You can set up defensive positions, deploy obstacles to prevent unwanted vehicle traffic and reinforce as you go along. If this is a gang who is somewhat organized they could have experience offensively but they will not have had as much time as you to prepare your neighborhood to be defended against them.

I wrote about forming the Neighborhood Watch on Steroids and described a situation where you might need to join together with others in your neighborhood to provide defense from people

Throughout history, settlements form near water. The largest and most successful settle with plentiful water. There are a number of reasons for that. One, water really is life. We require water for drinking. We also use it for cleaning and laundry. As the human species advanced, we needed additional water for livestock. Then we became stationary, mastered various forms of irrigation, and bred our crops to become more and more dependent on water. Doing so allowed us to reap larger yields of sweeter and more mild crops, but it also tied us inexorably to water systems.

Historically we were further tied to water systems for faster and easier travel and trade, and we eventually turned to it for some of our labor. First with direct-labor systems such as grinding mills, then for the generation of power that could be sent across distances, water made life easier as well as sustaining it.

We are no less tied to water now than the caveman, Viking or European colonist. We just don’t always notice. And because most of North America enjoys easy, low-cost water, we aren’t great about conserving it.

Test Your Water Use

Want to see just how influential water is, and how much we use? Easy enough. Turn off the water at the main for a day. Remember to also tape or turn off faucets so you don’t empty any hot water heaters and end up with problems.

If you’re on a well, use your backup pump system. If you don’t have a backup system, one immune to fire and earthquake and the prepper-minded EMPs, you don’t actually have a water system. Turn it off.

Do it on a standard day. A day you’re not off backpacking, not working on your three-day bare-minimum drill doing a dry camp in the living room or backyard. Really ideally, do it in summer or autumn on the day(s) you’d be watering if you irrigate gardens, and on a day you’re hunting or harvesting some doves, chickens and rabbits.

For less-immersive comparison, just monitor the water gauge. For livestock on a non-metered system, fill containers that can have checks and tally lines added quickly.

Don’t let yourself become complacent or say, “well, that’s just because” to justify the amount of water used. Yes, our grooming standards can go down and change, and we can adopt some laundry methods and clothing treatment from the past that limit our uses more. Eventually, though, hygiene suffers.

If water’s out, something else is regularly going on, from “small” family-sized crises to storms and other disasters that affect the area and region. Roads and doctors may not be available if someone does become ill.

If anything, a crisis is a time to focus more on proper hygiene.

Handwashing, especially, can make a major impact on fecal-oral route infections, which tend to be the root of most of the illnesses laymen call “food poisoning”.

If your hygiene is dependent on wipes, run that test as long as you can to get the best possible average for how many you run through per day. Whatever your backup toilet system is, use that.

Use the data to create a baseline. How much do you use? How long will your stored water last? What seasons can you reasonably count on resupply?

From there, we look for ways to increase our sources and our efficiency in harvesting and using the water we can access.

A Double-Edged Sword

Water is one of the few things we can’t do without, and a functioning stream, river or lake system or even just a marsh can make a huge positive impact on our preparedness. They aren’t without hazards, however.

Flooding is a primary risk, although healthy marsh systems can actually mitigate and minimize floods. Still, the levee systems in the U.S. are aging and Midwest floods aren’t uncommon. Colorado and Tennessee have both had major, devastating disasters due to river- or creek-originated floods.

In a protracted crisis, the hydro dams put in by the Tennessee Valley Authority and in the Northwest are likely to suffer failures, on top of the failures we see washing out roads and creating mudslides and large floods right now.

In addition to those failures, there are mines and factories along our waterways these days. We’ve seen in just the last year what can happen as they fail and toxins leak out. Nuclear plants are routinely along waterways.

Failures combined with flooding can wash those contaminants into our farmlands, cities and suburbs, affecting creeks and wildlife long before and long after we can see the effects.

EPA Accidentally Turns Colorado River Orange With Pollution, Putting Drinking Water At Risk

Livestock are also a contamination risk to both well intakes and streams, just like human waste can already be right here in the U.S. Those risks are even more prevalent in some of the third-world nations that live without our level of basic services. Disease is rampant after earthquakes, hurricanes, and floods due to fecal wastes, and can be expected to go up after a major disaster.

Mosquitoes and the spread of ever increasing and previously “dead” diseases by insects are another risk.

Many of those risks can be limited with site selection and sculpting the land a little, by planting a few things that can help create buffers, predators, and sinks for water and its diseases and pests. An interruption in “easy” water after we’ve become accustomed to it is still the bigger and more likely threat for most of us.

While a gravity-driven well with a pressure-driven cistern would be ideal, not everybody is there. Not every well can either reach or hit the amounts needed for livestock and crop irrigation.


Pairing the unprecedented, super-filtration power of an all-new gravity block core with a hybrid ceramic shell, it removes 99.9999 percent of impurities, including bacteria, cysts, disinfectants, volatile organic contaminants (VOAs) and heavy metals.

Because requires no electricity, it is ideal for home use, on or off-grid.


Self-Sufficiency through Streams

A moving channel is a fantastic element to site. One aspect to watch for with small systems is that they don’t dry out in summer. Ideally, they won’t even dry up in the 25- and 50-year drought cycles.

Through much of history, moving water has helped us either with direct labor, such as the old mills we can still find here and there, or later by producing power for us to then use however we like.

Running streams, creeks and rivers can also turn water wheels that help us by lifting water into aqueduct systems or into cisterns that will produce enough gravity from water weight to push water further away from the source.

With even a small amount of motion, there are sling pumps capable of moving water for us. Even if a sling pump won’t reach all the way to gardens and livestock, saving us the bend-lift labor of filling buckets and being able to fill a cistern while we move the first load can make an enormous difference.

With greater rates of movement, we can create hydro re-directs to lessen some of our labors and in some cases produce small amounts of energy. We can dam small waterways to increase pressure or create channel- or pipe-based systems to generate power.

In some cases it’s not going to be a lot of electricity, but even the ability to slowly charge electric tools, appliances, and our music and photo devices can be a huge boost.

Slow it, Sink it, Spread it, Store it

In permaculture, there are several “S’s” promoted in regards to water. They simplify the desires to:

  • Catch water for future use
  • Prevent flooding even on the “daily” and seasonal scales, and by doing so prevent erosion and soil hardening via water (runoff, soil compaction)
  • Allow water to infiltrate so roots can access it, and to lift the water table for springs and swale systems
  • Keep chemicals and waste from running across landscapes and polluting our waters or gardens

Catchments are one way we capture water – storing it for later and preventing it from running wasted over the surface of the soil.

Water catchment on a huge scale was and still is used in Australia, with systems similar to water towers and large roof-to-cistern systems both above ground and below ground.

Sheep and cattle stations and small farmers also create nearly lock-style channels to store water for the three- to six-month dry seasons. Those systems can be duplicated in North America depending on local laws.

In places where regulations prohibit such large scale water harvesting or hoarding, it may be possible to obtain permits to put in lakes or ephemeral or permanent pond systems, which can function similarly and have added benefits for homesteads.

On a small scale, water can be stored using systems as complex as we like, or we can go simple and create pyramids or triangles of trickle-over buckets and barrels with no plumbing and just mesh or permeable cloth to prevent mosquito infestations.


Small, shallow swales sequester less, but can prevent damage from rains over years. Larger swales can hold more water, allowing that water a greater amount of time to infiltrate. That water then creates a “lens” beneath the surface of the soil and allows plants a longer period of time to access it.

The slope of the land and the soil type and structure play the biggest roles in the types and sizes of swale systems we put in.

Preexisting vegetation and the type of vegetation we want to put in, if we plan to move livestock through the swale systems and what type of livestock also affects what type of swale system will work best for us.

Reducing Reliance On Systems

We have to have some water, and ideally a constant source. However, even with the best of planning and siting, sometimes we run into droughts or damaged systems. One way to build resiliency to those is to lessen our overall dependence.

Silvopasture over turf can provide forage and fodder even in drought years, and lessen dependence on irrigated grains and delicate pasture and hay. Some silvopasture is coppiced, but most will be either pollarded or selective-drop of large limbs from each tree.

The type and number of livestock and the amount of labor desired affects what style of silvopasture is effective.

Our livestock selection can also lessen dependence.

Ducks tend to be wasteful of water, while with drip waterers, chickens can be highly efficient. Pigs really need a lot of water to gain weight efficiently, and they need regular access to it. Comparatively, dairy and meat goats need a little less access and less total water per pound of produce.

If we veer a little further away from the American norm, camels need less yet, and have traditionally been used for milk, meat and hides and in some cases angora just like llamas.

We can also look into more water efficient breeds from typically dry regions of the world. They may be more expensive as an initial investment and have less-efficient feed-milk-meat ratios, but in a survival situation, the fact that they do survive with little water may make them invaluable.

If we have a fair bit of property, we can also tailor habitat for hunting small game, and focus our water labors on egg and dairy producers.

Hugelkultur beds are another way to limit use and dependence on rainfall and irrigation. Once established, a properly sized and layered hugel bed requires almost no assistance at all. It retains and essentially generates moisture from within.

When we do use water, we can use it as many times as humanly possible instead of letting it run and flow past our fingers.

Gray water systems, using cooled cooking water in gardens or for livestock, and reclaiming runoff from sprouts and sprouted fodder for livestock or re-watering can all help decrease our total draw.

Then there are little things like using a cup of water to rinse while brushing teeth, and having catch basins for washing hands or rinsing produce that then gets used for laundry or put back into the garden systems – at least once, and in some cases, several times.

Water Is Life

We have always been dependent on water as a species, and civilization and modern post-industrial life has made us more so. However, we can look back at history and to some of the underdeveloped nations to find ways that we can harvest and store water against need, and in some cases, use water wheels and even small creeks or lake properties to help us move water or generate a little bit of power.

Pairing the unprecedented, super-filtration power of an all-new gravity block core with a hybrid ceramic shell, it removes 99.9999 percent of impurities, including bacteria, cysts, disinfectants, volatile organic contaminants (VOAs) and heavy metals.

Because requires no electricity, it is ideal for home use, on or off-grid.


There are a few tips here. The article about gardening in droughts has additional lessons from fairly recent history that can be applied to reduce water uses for human and livestock food production, large scale or small, urban or rural.

When we’re ready to delve into long-term disaster planning, water needs to be a focus. Without water, and a backup plan for water, all the rest of our preparations become null and void in a large-scale emergency.

Water can also be dangerous. It’s worth researching the local flood patterns, especially pre-levee system, and looking up the diseases, symptoms and cures common to waterways in third world nations and after disasters.

Throughout history, settlements form near water. The largest and most successful settle with plentiful water. There are a number of reasons for that. One, water really is life. We require

Halloween is arguably one of the best days of the year to conduct surveillance, practice your bug out drills, and really test your prepper OPSEC. This is the only day out of the year where you are not only allowed to go on other people’s property but are actually incentivized and encouraged to do so while wearing an outfit designed to protect your identity.  Now “full disclosure” I have never gone “trick or treating” nor do I have any desire to do so.  However I have done some surveillance and drills on Halloween and these are the five things I have learned, and what I look for on my surveillance runs!

Learn your Bug Out Route

A night bug out being tactically advantageous, well this is the best experience you will get in a night setting without there being an actual catastrophe.

This is the perfect time to get a good bug out route in place.  There will be an abnormal amount of traffic in the general vicinity especially on foot. People who generally would not be out at night will be roaming the street begging for morsels while decorated in their scariest attire. Generally most preppers talk about a night bug out being tactically advantageous, well this is the best experience you will get in a night setting without there being an actual catastrophe. Adding the value of the sophistication of the numerous outfits it will feel like a real “Purge” scenario, just adding to the hype and excitement.  This will give you a real feel for what to expect in regards to the density of people, movement of traffic and the heart pumping realism of getting into the spirit of being in a WROL situation. Not to mention a great way to get the family together for an adventure rooted in the reality of a WROL situation. At the minimum you can have the family together dressed up to take on the world. Afterwards you can have a pizza, your favorite dessert and watch your favorite scary movie together as a family. What’s better than that?

Learn the Neighborhood Security

This is an excellent time to learn what the security around your neighborhood is. When going around the block you can see the openly advertised security signs, neighborhood gates, even beware of dog signs and you can see what infrastructure is set in place whether that be fences, locks, metal bars, motion detecting flood lights, barking dogs, natural topography etc. In a normal setting walking around taking note of local neighborhoods and underlying infrastructure would be seen as very suspicious but during Halloween foot traffic is quite normal so use it to your advantage. This will give you the ability to see what individual houses use as security and to see what security parameters are in place in a certain neighborhood which will give you a greater “security site picture” and a better understanding of  the overall community as a whole.

Political Signs

Which of these signs will prevent another tragedy

When walking through a neighborhood you get a lot of information about it by what kind of political innuendoes presented on the yard. There is no better way to advertise ones biases then by putting signs up for the whole world to read. So if I see signs in support of Madame Hillary Clinton and or local liberal community organizers I can make a solid case that this neighborhood is probably not in favor of values held by conservatives or libertarian like the 2nd Amendment, and preparedness. Vice versa if I were to see signs in support of a conservative Military/ LEO veteran Sheriff who is a strong supporter of the 2nd amendment chances are I will find individuals who are armed. This goes for car stickers and Flags (American, POW, American Jack, LGBT etc.). If I see a house with a vehicle with Pro/Anti constitution sticker or an American/LGBT flag raised it gives me a better understanding to the mindset of that household.

Natural Topography

bugout_survival_route_planning
Understanding what kind of terrain you will be operating in is paramount.

I can say without equivocation that natural topography is huge factor especially when thinking with a tactical mindset. Understanding what kind of terrain you will be operating in is paramount. Walking on a flat riverbed path is much different from an uphill rocky path. Knowing where water sources are, where different types of topography intersect is something that you should know or at least be familiar with. Especially when operating in low light conditions. Also remember with topography comes unique animal/plant life considerations. Snakes, Bears, spiders, deer, coyotes all of which can be found in the forest. While in snakes, scorpions, cougars, rabbits, and wild dogs can be found in the rocky desert. Also take the time to see if there is any edible/poisonous plantation in your area.  Bottom line; get to know your area, terrain, and the players involved.

Density and Movement of people

The density of groups and the pattern by which they move and interact with each other is a topic that one could talk for years about. The whole academic scholarship of anthropology is really centered on these premises. We can discuss if we as humans do this consciously or subconsciously but the fact remains that we do it. So when you’re out there take note of the general movement of people, group sizes and demographics of those groups. See if there is a certain pattern of traffic flow. Do certain groups follow other groups? The incentive in this case is for the individuals to find the most resources (candy, treats etc.). Some will go out with a game plan based upon prior experience while some will wing it while others will follow those who they feel will get the most return on their investment. You may even learn a few shortcuts you didn’t know where there before! Knowing this information will help you better understand how your local communities interact with one another and will allow you to understand how to be the best “Greyman” you can be. Lastly I’ll leave you with this tidbit; chances are if there is a favorite home or neighborhood during the “quote” holidays then it will probably be just as popular during a catastrophe.

Do certain groups follow other groups?

Now this is by no means an exhaustive list of things to note however this is a great-itemized list for starters. It’s also important to note that I don’t in any way condone any kind of actions that would violate any state, local, or federal law or ordinances.  Now with that being said you will be hard pressed to find a better day to either put your plans into motion or gather critical Intel on your local area. If you have to be out with the family dressed like a princess or zombie you mind as well give your family and yourself the ultimate doomsday experience, and capitalize on the ease of intelligence surveying, and route planning.

The final thought I’ll leave you with is this, if you don’t plan to roam the streets but would rather “stay and play” (distribute candy, treats, resources etc.) what would someone learn about your household, neighborhood or community?


Pairing the unprecedented, super-filtration power of an all-new gravity block core with a hybrid ceramic shell, it removes 99.9999 percent of impurities, including bacteria, cysts, disinfectants, volatile organic contaminants (VOAs) and heavy metals.

Because requires no electricity, it is ideal for home use, on or off-grid.

Halloween is arguably one of the best days of the year to conduct surveillance, practice your bug out drills, and really test your prepper OPSEC. This is the only day

A Bug Out Bag is something that most of us are familiar with even if most of us do not have one loaded by the door or in the trunk of your car, ready to go at all times. For the uninitiated, the Bug Out Bag’s purpose is to give you everything you should need to live for 72 hours if you are forced to evacuate your location suddenly. A bug out bag should be pre-packed with all of your supplies so that you can grab it, throw it on your back and walk or run out your car, or head for the hills.

I have written a couple of other posts about Bug Out Bags and one dealt specifically on the subject of the contents of your bug out bag or BOB. My contention is that there are too many people that are throwing everything but the kitchen sink in their packs and I feel that there is something of an insane rush to get everything humanly possible into your BOB without much thought as to the why or the weight.


A bug out bag is not a U-Haul. It is not a Bug Out Suitcase even though I swear some people pack more into a Bug Out Bag than they do for a week down in Cancun. I have another post lined up to rehash this concept under a different theme, but I have heard others talk about packing 50 to 70 pounds in their Bug Out Bag and they plan to walk for hundreds of miles if necessary. 70 pounds???

I won’t get into weight or the absolute foolishness (in my opinion) of packing anything remotely that heavy in this post. I will talk about intelligently packing what you do have because regardless of whether you have an ultra-light pack or some behemoth weighing as much as a 4th grade boy, you need to pack this in a way that will make it as comfortable as possible to carry. We are going to talk about how to pack your bug out bag to take the most advantages of weight distribution and tried and true backpacking tips as possible. Backpackers have been bugging out for a long time and it pays to take a lesson or two from people who have more experience than the average Doomsday Prepper fan when it comes to packing everything they need for 72 hours on their back and living to talk about it.


Packing a backpack and packing a bug out bag are virtually identical. I would argue that you could just as easily bug out with a back pack as you could with any military looking pack from Blackhawk, maybe even easier. There are 4 simple rules to packing any pack you are going to carry on your back.

  • Heaviest gear goes close to your back
  • Light gear away from your back
  • Frequently used items go on top
  • Less used items go on bottom

The Basics of Pack Loading

Packing a backpack or packing your bug out bag are pretty similar. To be successful, you want to pack the right gear, but you need to pack it the right way too and that means keeping your center of gravity as close to you as possible. The last thing you need is a big pack that keeps you off balance and puts unneeded stress on your back.

Sample Bug Out Bag loading diagram.

Items like water and food usually weigh the most unless you have some really heavy gear in your bug out bag. A lot of people have moved to carrying water bladders like a Camelbak and most new packs have a place right inside the back next to your spine for carrying this. Keep the heavy stuff as close to you as possible and low as opposed to above your shoulders.

The Bottom of the Pack

Using the guidelines above, I pack the items I am going to need to get to least,  at the bottom of the pack. My pack has a compartment in the bottom for my sleeping bag so that goes in first. Additionally, having your sleeping bag on the bottom gives you a nice soft cushion when you set your pack down. I have my sleeping bag in a compression sack, but if I have any fear of rain I would add a waterproof bag instead. Running out the door isn’t the time to worry about this, so it may make more sense for you to pack your sleeping bag in a waterproof sack regardless.

Next, I add my tent or hammock gear. I still prefer the tent and it is one of the last items I need so It goes in the bottom of the bag. Depending on the trip I also have a tarp that is attached at the bottom.

The Core of the Pack

Once I have my sleeping bag and tent in the bug out bag, I pack most of my spare clothes, then food and cooking gear. I say most of my clothes because depending on the weather I will carry a fleece or windbreaker too and I want this where I can get to it easily. My main food isn’t going to be eaten until I am at camp or stopped most likely.

I also carry a JetBoil that takes up about as much room as my food and I have my fuel in that same container. My jetboil can boil water for drinking, cook food or quickly heat my water for coffee in the mornings.

The Top of the pack

The top of your bug out bag or the pockets on the outside depending on what you are using should have the gear or equipment you are going to need the most. My pack has a compartment that is waterproof and that is where the lighters and fire kit go along with my headlamp and snacks. This way if I get hungry, I don’t have to dig in my bug out bag, just unzip the top compartment. On the backside of my pack, I have a zippered pocket for tp and spare cordage. I will also carry maps and maybe a camera.


What’s on the sides?

The sides usually hold the water filter, maybe some additional items depending on what I am carrying like spare water bladders. I carry two spares so that when I get to camp I can pump plenty of water for washing up, cooking and even breakfast in the morning. When they are empty they weigh nothing.  My pack also has side pockets for my water bottles too and those work nicely because I can easily reach water while I am walking. One of these days I am going to pull the trigger and get a Camelbak so that I don’t have to carry it, but I still think the good old bottle is easier in some aspects.

That’s how I do it. How do you pack your bug out bag?

A Bug Out Bag is something that most of us are familiar with even if most of us do not have one loaded by the door or in the trunk

Early long guns could be carried in two hands ready for instant use or in one hand for almost as quick use.  But you really could not do anything else with that hand or those hands.  It became quickly obvious that a hands-free way of carrying a long gun was needed, and probably the first sling was simply a piece of rope tied to each end of the gun. Times have changed and today this article will be begin with some history, but will also share how to choose the best rifle sling for your  use.

Introduction to Slings (Part 1)

In the late 17th century, as European militaries were arming more and more men with muskets, sling “swivels” started to appear on military firearms.  Generally this was a slotted ring on the bottom of the stock near the butt, and a matching ring on the underside of the forend.  A flat strap, usually of canvas, was then threaded through these rings.  There was generally some length adjustment ability.  In the 1870’s, a new U.S. military rifle was introduced which came with a fairly new concept: a sling made of leather.

As the experience with slings became more common, people found that besides allowing for hands-free carry, a properly set up and fitted sling could help achieve greater accuracy.  The model 1907 sling was the height of sling development as far as support while shooting goes, where the forward arm is inserted between the straps of the sling and “locked” in place with “keepers”.  Despite efforts to replace it, this model continued to be an official U.S. Military option until the days of the M16, which came with a simple adjustable nylon strap, returning the sling to a mere carrying device.

Note that even with a sling which is designed only for carrying, there is a technique of wrapping the sling around your forward arm which provides some of the stability of a M1907 style sling.  This technique is called “hasty sling” because it is pretty quick and doesn’t require a lot of adjustment.

Originally the sling attachment points, and thus the slings, were usually along the bottom of the gun.  This was not really a problem with early firearms, but as magazine fed guns started to appear, the sling and the magazine tended to interfere with each other a bit.  Slings along the side of the gun could fix this problem, but were by no means ambidextrous and did not work as well for shooting support.

Quick Disconnect Mounts

Civilian shooters preferred a sling which could be easily attached and detached, encouraging the development of quick detach sling attachments.  The strap is threaded through the QD attachments, which then can be easily attached to or removed from the matching mounts on the gun.  Nowadays there appear to be at least five possible true QD options to put on the end of your sling.

Which of these options can be used on a particular gun depends on what mounts are built-in or added to that gun.  It is optimal to have the same QD attachment on both ends of the sling, but it is not a requirement if having mismatched attachments is appropriate.  It is handy to have the same mount or set of mounts on similar guns, so you don’t necessarily have to have a separate sling for each one.

STUD Mount

One of the first choices was “studs” screwed into the wood or clamped around the barrel.  There was a hole through this stud and flat sides perpendicular to the hole, and the matching part had two flat flanges separated by the width of the stud, with a pin through them.  Attached, there was a flange on each side of the stud and the pin through the flanges and the stud.  Uncle Mikes has an extensive history with these swivels and still have a good selection.  They are pretty good on sporting arms, but for tactical use they are not optimal.  Early models could be “popped off” as the moving flange was merely spring-loaded.  Some later models have a threaded knob, which when screwed down to the flange, prevents it from unintentionally opening.

CUP or HOLE Mount

Another early option was a “cup” inlet into the stock with a groove around near the top.  The matching part had some small balls around the circumference, which clicked into these grooves.  A button in the center retracted the balls so the part could be removed.  An alternative mount to the cup is a hole in a piece of metal of the same thickness as the distance from the top of the cup to the groove.  This system is fairly heavy-duty and can rotate side to side, which can be both good and bad.  A few have built-in stops to prevent complete rotation, keeping the sling from getting twisted.

RING Mount

The M-LOK Paraclip Sling Mount is the M-LOK compatible variant of the older MSA – MOE Sling Attachment.

More recently, rings started appearing on tactical guns.  These can accept a quick connect hook, and there appears to be three common choices.  There is the Magpul Paraclip, slightly similar to a clothespin.  This is fairly bulky; on the one hand, it does not fit on smaller rings, but on the other hand, is very stable.  If it comes with a cross-bar lock (and you use it), it is highly resistant to unintentional release and even without using the lock I have not had a problem.  Next is the HK snap clip.  This is very versatile and flexible, but is a bit noisy and floppy, and if you twist it right, it can pop off by itself.  The third common option is the Mash Clip.  This has a structure similar to a split key ring, but rather than having to pry the layers apart, there is an area you squeeze to separate the layers.  Like the HK clip, it is a bit noisy and floppy, but is much more secure.

There are a few other hooks which might work and are available from some sling makers.  One is called a “trigger snap”.  There very well may be a version which is strong enough and secure enough for sling usage, but the ones I’ve used (on keychains and other non-sling items) release accidentally and even bend open.  Another is a freaky-looking hinged hook, which I don’t know the name of and have never seen in person.  Basically, before relying on any connector other than the common ones, investigate it thoroughly.  You want to make sure it won’t bend or break, won’t release accidentally, is acceptably easy to attach and detach, and does not get “tangled up” with the gun.

SLOT Mount

The slot mount, like the original slotted ring, is not a quick disconnect attachment.  Although it, like the original slotted ring, can approximate a QD attachment if you strap a quick connect buckle to the slot, and have the other part of the buckle on the end of the sling.

No Mount

Having no mount on your gun does not mean you must do without a sling or even without a QD sling.  One option is to have a strap wrapped around the stock or forend to which a sling can be attached.  Most often, this attachment point is a ring or a quick connect buckle.  If you have a picatinny rail on the gun, pretty much any kind of mount you want is available to be clamped on to the rail.

Combination Mounts and Adapters

There are a few “combination” mounts available, which offer more than one type of connection.  Blackhawk has a nice one to attach to a picatinny rail which offers a cup, slot and ring.  This is another way that one sling can connect to multiple guns, or different slings can connect to the same gun.  Another rare option is various “adapters”, which connect to one type of mount and provide the connection for a different QD connector.  Finally, there is the “Universal Wire Loop” which can connect to anything the wire or cord can fit through.

Sling Types

Nowadays, the most common slings are nylon or equivalent.  A few are woven out of paracord, and ones made of leather, including the venerable M1907 style, are still available.

The classic sling is attached to the gun at two points, near the butt and near the front.  These are known as “two point” or “dual point” slings.  These are pretty good for carrying a long gun, but have some problems in getting the gun into action quickly.  One option is to put one arm through the sling and hang the gun on the same side.  This is fairly quick to get into action, but very insecure; the gun can easily slide off the shoulder and down the arm, resulting in dropping the gun.  On the other hand, if you put your arm and head through the sling so that the sling bears on the opposite shoulder, this is very secure, but slow to get into action.

In the 1980s, there were attempts to improve the tactical capabilities of the sling by developing the “three-point” or “triple point” sling concept.  This added more strap, so that the shooter’s body was enclosed by the strap.  Thus the “three points” were the two points on the gun and the third point was the person carrying the gun (since the sling was “attached” to the body).  One common characteristic of a three-point sling seems to be an additional length of strap which goes between the two attachment points on the gun.  Often the forward part of the sling which was to be attached to the wearer’s body was attached along this length of strap.  The problem with this concept was that the additional strap along the gun could interfere with the mechanical operation or use of the gun.  Furthermore, some of these designs used various mechanisms to extend the gun for use or retract it for carrying, and these mechanisms could be easy to miss under stress, or a pain to return for carrying.  These designs tended to focus on transitioning from carry to use, and not providing support.

One interesting sling variation which actually attaches to the gun at three points (but is not considered a “three point sling”) is the “Ching sling“.  This was intended to approximate the support of the M1907 sling but be much quicker to get your arm into.

The next major evolution in slings was the single (one) point sling.  As you might expect, this sling is attached to the gun at just one point, usually right behind the receiver and not near the butt as was common up to this point.  The “other end” of the sling was attached not to the gun, but to the sling itself, allowing a quite secure attachment to the body.  This is a very good option for quick access, allowing a free range of movement of the gun and easily switching from strong side to weak side shoulder as needed to get around obstacles.  And if you suddenly need your hands, you just drop the gun and it hangs in front of you.  The down side is that being attached at just one point; the gun can swing around, bumping you and everything around you.  This is not a good option for long-term carrying, but is hard to beat when quick access is important.

As a solution to the weakness of the single point sling, the “convertible” sling was developed.  This is a two point sling with a ring or buckle near one end, to which the forward end of the sling can be attached, turning it into a one point sling.  This gives you the best of both types of slings.  Other improvements were elastic elements in the sling which helped to absorb shock or chest expansion, an attachment point on the sling or your belt, allowing you to tie down the forward end of the gun when in single sling mode, and wide-range quick-adjustment options.  By the time you combine these features, you get a sling which makes the three point sling obsolete.

Tune in next time for some hints on choosing a sling and a look at a few tactical choices.

Early long guns could be carried in two hands ready for instant use or in one hand for almost as quick use.  But you really could not do anything else

Imagine this is your home…

A darkened house in the suburbs of Columbus, around eight on a cold winter’s evening.

A little girl is snuggled under a blanket, next to her mother on a couch.  A couple of candles throw shadows against the family room walls.

“Mommy, where’s Daddy?”, asks Kayla.

“Honey, like I told you before, Daddy went on his business trip to Chicago before the power went out a week ago.  It’s not easy for him, but I’m sure he’s on his way home right now.”  replies her mother, Melissa.

“Well I hope he hurries up – he told me he was taking me to McDonald’s when he gets back!”

Her mother laughs, but inside she worries about her husband John and their own situation.  When the lights first went out, it seemed like an everyday outage.  Maybe the ice storm had knocked down the power lines, or maybe the cold weather had overloaded the system.  But now with the stores closed “for the duration”, and no news of help on the way, Melissa didn’t know how long the food in the pantry would hold out.

John had a hobby as a prepper, she knew, but she didn’t know exactly where anything was, or what the plans were, so she was hesitant to start rummaging around.  But now she was getting desperate and scared for her and her little girl. What should she do?

Could this scenario happen to your loved ones?

While some ideal families may work together to prepare for emergencies, many of you may be in my situation.  My kids and wife have their own activities and interests, so they look at me a bit oddly and are mostly uninterested when I bring up my prepping actions and purchases.  I have ended up being the sole person in my family responsible for preparing.  Despite their reactions, I want to make my family’s life easier, safer, and less stressful should I be sick, dead or otherwise not around when the SHTF.

Here’s what I’ve done:

  • Labeled all supplies and equipment, and kept them organized.
  • Prepared an Emergency Planning binder, with a separate section for each of my family’s needs.
  • Reviewed the contents with my wife.

My binder

Section A: Short-Term Emergency

Eight days or shorter for our family.  Foods need only be heated, lots of convenience foods and bottled water.  Life would be kind of like camping.  Each need is covered, same as in the Long-Term section, but some details differ.

Section B: Long-Term Emergency

Life would be very different and more difficult, so I made a separate tab for each need:

  • Food –This section contains a menu based on the food I stored, a short cookbook with recipes adjusted for our situation and family size, and a food inventory spreadsheet with amount stored, portion size, calories, etc.

I also detail how to prepare for life after our family’s food stores run out.  An example from our binder:

  1. If power goes out and LED flashlights don’t work with fresh batteries, immediately go to the corner store and buy as much food as you can carry with the emergency cash.
  2. Use our saved seeds to plant a large garden (as large as possible), with precedence given to foods that can be stored/preserved. Spring and fall growing seasons can provide a lot of food.
  3. Our stored wheat, barley and beans can be planted, eaten or sprouted.
  4. When protein supplies run low, hunting and snare use will be necessary.  Use the shotgun, or the stored snares.  Meat can be cooked fresh, salted and cured, jerked, or ground and dehydrated. See the meat preservation cookbook.
  5. Wild plants can be collected – dandelion leaves, young plantain leaves, spring cattail heads, as well as apples, persimmons, and pawpaws in the fall. See the wild edible plants handbook.
  6. Foraging in stores or houses is a last resort, because of the danger involved.

Even though I think I know how to tell if an EMP attack has occurred, my family doesn’t, so I gave explicit instructions as to what to do, since we only have 4 months of food stocked up so far. I also have guidebooks for them to use to plant, can, and other vital functions that I know how to do, but they don’t.

  • Drinking Water – how to filter and treat rainwater with pool shock, how to assemble and operate a water filter.
  • Hygiene & Sanitation –how and where to construct an outhouse, handle trash, wash clothes and dishes, and keep healthy.
  • Defense – a list of weapons, ammunition, and how to use them. Since my wife doesn’t shoot, this will be a tough one to communicate in writing, a very good reason to store more food, so my family doesn’t have to search for food outside during potentially dangerous times.
  • Power – including how to operate a solar-powered battery recharger for lanterns and other battery-operated devices.
  • Shelter – discuss what’s needed for basic house maintenance (shingles, plastic sheeting, plywood), and basic fortification with stored materials.
  • Heating – use of kerosene heaters, wood-burning stove, and where to safely collect firewood.
  • Medical care – inventory of first aid kit, medical supplies, and use of emergency medical and dental handbooks.
  • Communication – walkie-talkies are all we have, so that’s an easy one.
  • Transportation – Any vehicles, their fuel and supplies.

In summary, the best way to help your family prepare for when SHTF is by having them involved in the preparations.  But in case they aren’t yet receptive to this message, in case you aren’t around, or just to make the job easier in a very stressful time, it’s best to write down your family’s emergency plans now stored only in your head.

Imagine this is your home… A darkened house in the suburbs of Columbus, around eight on a cold winter’s evening. A little girl is snuggled under a blanket, next to her mother

The bottom just dropped out all of your warning triggers are telling you that it’s time to pack everyone into the family bug out mobile and leave town before it gets worse. Much worse. You thought ahead which is fortunate for you and your family. You have a vehicle adequately equipped for the journey to your bug out location with essential gear, plenty of fuel with extra in reserve and everyone in the family has their bug out bags stowed safely away. Nervously, you pull out of your driveway in the middle of night to avoid most of the trouble already brewing. This may possibly be the last time you see your home and just like every trip before, you have that nagging sensation you forgot something.

Many disasters that preppers think and plan for could require you to leave the safety of your home, possibly forever. In a situation like this, your well stocked bug out bags and any other gear and supplies you are able to load and carry could be the sum total of all your worldly possessions. Some disaster scenarios assume the worst, a complete destruction through various means that leaves the civilization as we know it destroyed beyond repair for years. In a complete disaster like that, we make assumptions that normal commerce as we know it would effectively be over so the subject of bartering after SHTF comes to mind.

In other scenarios, which some might argue are many times more likely, the world won’t just stop spinning overnight. Every store won’t be closed and you will be able to buy supplies with whatever monetary instruments you have on hand that are still worth a commonly understood value. For most of the world, certainly here in the US we look to cash as the main fallback, but some people are saving precious metals as well to hedge against a currency collapse where that cash you are stowing away is worthless.

Assuming that money in the common forms we are talking about here (cash, precious metals) is able to be used to our benefit during a bug out scenario, have you ever thought about how much you need to put into your bug out bag?

A reader asked me about this subject today and after he pointed out that I hadn’t really addresses the subject on my site, I decided to write an article.

Question from Sam:

I have one question, how much money or other valuables (gold, silver, etc.)do you have in your bug out bag to buy/trade or barter with? I have looked on many prepper sites and have not found an answer to this. Can you please give me some guidance or advice for me?

First, let me thank Sam for this great question and I would encourage anyone else who has questions, or comments about anything you have seen or not seen addressed on Final Prepper to please contact us.

Back to Sam’s question, so how much money do you have in your bug out bag? That part is simple. I have as much “money” as I can carry but I will break this down into specifics with my reasoning why below.

What are some reasons to have money in your bug out bag?

Why have any money in your bug out bag in the first place? Well, there are many good reasons I can think of. Imagine a scenario where the power is out, possibly for weeks. You wouldn’t be able to use ATM machines because they rely on power. Stores couldn’t run credit/debit card transactions without power because they all go through the internet now which relies on power. If the electricity is out, the way we commonly get access to our money or conduct electronic transactions is gone until the power comes back.

You could just drive to the bank and pull out as much as you need, right? Not necessarily. You only have to look to the people of Greece who still can’t get more than roughly $50 out of the bank each day. Would you want to have your cash reserves limited by what the banks could or would allow you to take out? No, I wouldn’t either and that is the main reason why I advocate keeping as much money as logical for you personally out of the banking system.

So having a supply of cash makes sense for the simple fact that you might not be able to get it when you need it most, but what could you possibly need cash for if you were a good prepper and have your fully stocked bug out bag and your BOV with a full tank of gas? I can see situations where a cash bribe might get you past security or could buy your temporary safety. There could be checkpoint guards who could be swayed to let you past if you empty out your wallet and having some cash could facilitate your escape. What about being able to purchase a ticket on a train, plane or some other means of transportation out of a country that is collapsing? It happened all of the time in Germany back before WWII. There isn’t any reason to think we in the US would be immune from needing to migrate ourselves if it got bad enough.

Cash might still be able to be used to purchase supplies if you were out ahead of the panic or were prevented from leaving. If you needed to purchase additional fuel along the route for example and you found a gas station that was only accepting cash, you would be in luck. I think the majority of people might not realize the effects of a currency collapse or revaluation of the dollar, but if you were on top of your gain, you could find someone still accepting cash that could for all intents be worthless.

How much money do you keep in your bug out bags?

I try to keep as much cash as possible where I can access it relatively quickly without needing to go to the ATM or bank. If I had to bug out I would be taking all of the cash I had with me. I don’t have tens of thousands of dollars or anything like that so weight isn’t really a consideration. Money in smaller denominations will probably be better to take with you on one hand because people might be less likely to make change. I don’t imagine anyone is going to worry about getting change for a dollar back but if you needed something that cost $5 and you only had a $100 bill that might hurt a little more. $20, $10 bills seem to make the most sense for regular day-to-day transactions where in a society like Greece, the stores are open but capital controls are keeping you from freely accessing your cash. You could use these small bills at stores to purchase food, pay for meals etc.

In a total collapse though, $100 bills might be needed or could be used more appropriately for extreme inflationary prices. If gas went to $100 a gallon, and you could find someone selling, that $100 bill could spend nicely. Flashing a $100 bill to buy your way through a checkpoint is instantly recognized and might get you through faster than a stack of $20s. I keep a mix of both, but the overwhelming majority is smaller bills ($20). I think if I had $1000 in my bug out bags that would cover me for most conceivable disasters so that is what I plan for.

I would not keep all of your money in whatever form together. I would store some in a shirt pocket maybe. Some in one pants pocket, some in the wallet, maybe more in a fake wallet, maybe a shoe or elsewhere. You don’t want to get robbed of all of your cash in one instant. Diversifying where you have your money could allow you to act like you are giving a bad guy or even a someone driving a hard bargain that you have given them all you have.

Should you take silver coins in your bug out bag?

Is silver and gold a good idea for your bug out bag?

But the other part of Sam’s question had to do with Gold and Silver. Do precious metals make sense for your bug out bag? I think they could, but the situation would need to be pretty unique I think. Some advocate buying 1/10 ounce gold coins because they are worth less than a standard 1 oz coin and they rationalize that one of the biggest complaints about having gold would be reduced. Most people would have a hard time bartering a 1 oz gold coin because they are worth about $1200 each today. Can you imagine trying to get some groceries and giving the person at the register a gold coin? Even if they knew what it was and the worth of it, do you think their manager would allow them to take the coin in the first place, much less give you the accurate change for your transaction? I don’t see that happening.

The 1/10 oz. gold coins are worth about $130 now so the change factor might be lessened, but you would still likely not be able to purchase anything at a traditional store with Gold. What about Silver? The benefit of silver is the value is much smaller. The lesser value makes this precious metal easier to purchase for preppers with limited funds and would seem to be easier to trade with because the change factor wouldn’t seem to be as prominent. You go buy $100 worth of groceries and give the person at the register 5 Silver coins. However, I still think you would have the same problem using these after the grid goes down, at least for a very long time.

Do I keep precious metals set aside for bugging out? Yes I do but I am not counting on using them in the short-term. I probably wouldn’t take more than 10 coins per person with me for the reasons I mention above and their weight.

I know that some will say that Gold and Silver always have value so their worth after a collapse would only go up. I disagree with that from the standpoint that anything you are talking about only has value if the person you are trying to conduct business with agrees with you on the value. A gold coin might be worth $10,000 after an economic collapse, but what good is it if you can’t get anyone to give you something worth $10,000 for it?

If you are talking about taking a box with all of your precious metals to another country and finding someone to give you fair market value, then that does make sense, but getting back to the Bug Out Bag scenario, I think precious metals have a low potential for usability in the days and months after some calamity and that is why I am not taking too many along with me.

That’s what I think anyway. How much money do you have in your bug out bag?

The bottom just dropped out all of your warning triggers are telling you that it’s time to pack everyone into the family bug out mobile and leave town before it