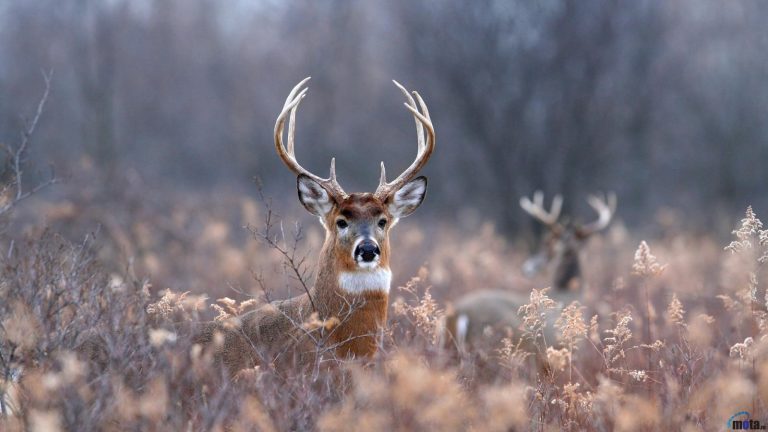
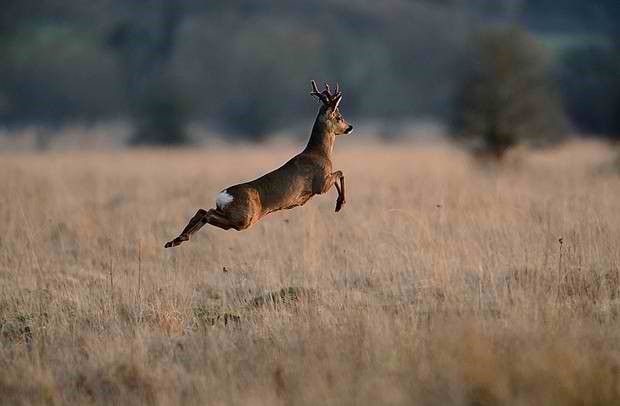
Deer hunting can be done in two ways; either by using rifles or using bows. If you are one of the many hunters who prefer the latter option, this is the perfect article for you to know the practice tips to hunt deer with a bow. Dedicated hunters will know that practice sharpens your skill on shooting a bow with precise and accurate shots. Thus, here are a few tips to pave your way to become a skilled bow hunter.

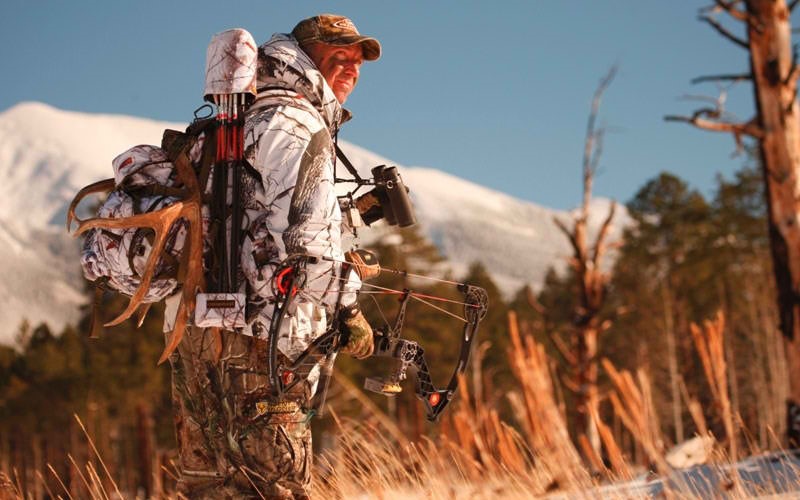
Practice during unfavorable conditions

Obviously, a good hunt is scheduled during the peak seasons when the weather is favorable for hunting and trekking. However, weather can be a greatly unpredictable thing, and while out on a hunt, it’s better to be prepared for anything.

Practicing in windy conditions where the direction and force of the wind can greatly affect your accuracy can improve your bow skills. Think of this way; if you can shoot well in crappy weather, then you can do so better in normal conditions. More importantly, you are prepared for any kind of situation when you’re out hunting.

Take it slow

If you’re planning to shoot your first buck from a tree stand, you cannot do so successfully without learning how to shoot from a higher position.

It’s not wise to push your limits while at the beginner stage of bow hunting. The best strategy to gauge your skills is to start slow. Start shooting at small distances until you can perfect your shot at that distance. Only then should you further increase the increments.

This strategy can also minimize frustration because it will let you know the farthest distance where you can shoot most accurately. On the field, it will help you gauge your Effective Kill Range (EKR), or the distance range wherein you are most likely to take down a deer without messing up the shot.

Learn how to use a bow sight

A bow sight is an essential tool when shooting long distance. The best bow sight can greatly enhance your long-distance shooting by a tenfold. Basically, it has pins set at different distances which can help you shoot long-distance targets from stagnant position, such as a tree stand.

Other than a bow sight, you should also use other essential bow accessories such as a bow stabilizer. A bow stabilizer, on the other hand, is an accessory that helps minimize torque, stabilize shots, and increase the accuracy of your shots.

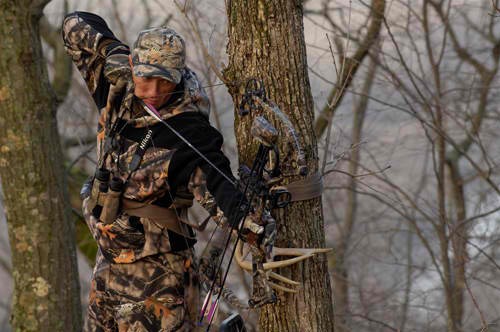
Know how to shoot from a higher position

If you’re planning to shoot your first buck from a tree stand, you cannot do so successfully without learning how to shoot from a higher position. Because the trajectory will change once you shoot from an elevated place.

So one of my tips is to practice shooting dummy targets from a tree stand. Once you get a hold of this skill, you’ll find tree stand hunting an easy task.

Target for easy-kill areas

The most humane way to kill a deer is to shoot it in the chest area, where the arrow can pierce through the lungs or heart and deliver almost instant and painless death. To practice this skill, you can use target print-outs of a deer in order to enhance your ability to kill instantly.

Moreover, this will also minimize the possibility of the deer running away because of a shot in the belly, hind, or legs. With accurate shots to the chest area, you can harvest your kill easily.

Don’t hesitate to ask questions

If you’re not sure about something, ask a more experienced bow hunter than you. Remember that it’s not a competition of who is best. Every great bow hunter starts somewhere, and while you’re a beginner, it’s best to take advice from experts and use it to work on your weak points.

Other than constructive criticism, you can also form bonds with other bow hunters and potentially join them on their next bow hunt. This will be a big plus for you: because not only do you have new hunting buddies, you also have a lot of people to help you work on your skills.

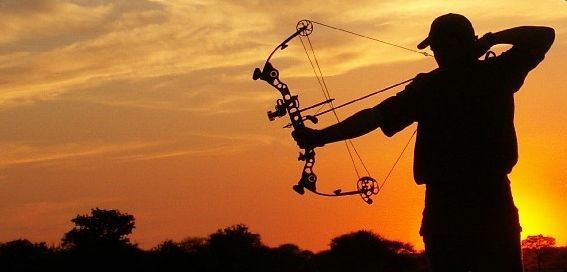
Practice with your bow in low-light conditions

You can also master shooting with it during near sunset or near dawn conditions.

Most often, whitetail deer make an appearance before sunset when the light is dimming and your bow sight is getting difficult to use. Although most bow sights come with a glow-in-the-dark pin feature, it will be much wiser and a skill-builder to practice shooting in low light.

If you have a bow sight with a low-light feature, you can also master shooting with it during near sunset or near dawn conditions. In this way, you won’t need to fumble with your bow sight while on the field.

Adjust your bow according to the wind

The wind plays a big role in the accuracy of your shot because, as said before in this article, it can affect the direction and/or trajectory of your shot. When hunting deer with a bow, you’re also most likely confined to shooting from far distances. Therefore, it’s better if you learn to adjust your aim with the wind.

Most importantly, with this skill you can reap rewards when a supposed to be sunny day turns into a windy one. Remember: the weather is completely unpredictable, and as a hunter, don’t expect it to always be in your favor.

Work on your form

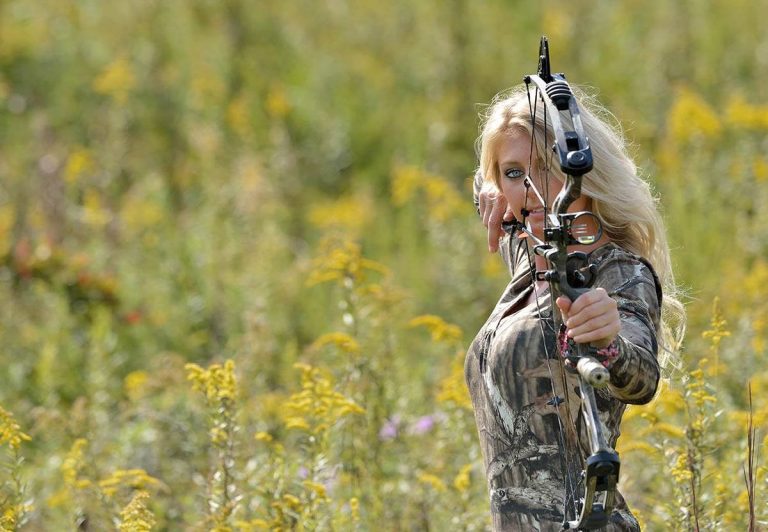
As a beginner, the best form for archery is one of the most difficult aspects to master. It’s imperative that you work on your form every time you practice shooting. Moreover, you can also ask an experienced bow hunter to evaluate your form and tell you the mistakes that you’re making.

Why does this need to be done? Well, a great form will directly affect the accuracy of your shot and help you shoot better. Otherwise, a bad form can lead to inaccurate and imprecise shots that will just leave you discouraged. Thus, remember to work on this aspect along with everything else.

Learn how to wait for the perfect shot

In deer hunting, timing is everything, whether you shoot with a bow or a rifle. The proper timing of your shot will decrease the chances of a botched kill. Since deer are highly receptive of sound, you can scare away a bunch of them if you have off timing with your shots and they end up on a nearby tree or the ground.

Unfortunately, the only way to practice your timing is to do it on an actual deer. Because automated practice targets have predictable movements, they aren’t great options for practicing timing. Unlike with deer, you can learn how to assess their movements and make it predictable to you.

Conclusion

Here, we’ve highlighted the best practice tips to hunt deer with a bow. It’s not the actual camping and hunting that’s the most difficult part, but the practice on shooting a bow. Thus, the best option you have in order to be the most prepared hunter in the world is to practice at every chance you get.

Did you like this article? If you did, leave us a comment below and tell us what you think. You can also share this with your friends. Thanks for reading!

  Deer hunting can be done in two ways; either by using rifles or using bows. If you are one of the many hunters who prefer the latter option, this is

When we talk about survival, there are certain items that immediately come to mind. We start with the discussion of beans, bullets and band-aids. This logically flows to having at least a 30 day supply of food, firearms and ammo to defend your home or retreat and medical instruments and supplies to take care of a variety of injuries in an emergency. This gets you the basics and then we talk about extending those provisions to last longer time periods, support more extreme scenarios or to include additional bodies.

On top of the basics, we have allowances for backup power, usually in the form of solar panels for long-term energy self-reliance or generators for short-term needs. Stored fuel is brought in to alleviate gas shortages or to extend our reach to our bug out locations or power generators. Gardens and raising small animals rounds off the discussions nicely.

What we seldom talk about though are the little survival items that people can forget. These are often the easiest to procure, least costly and seemingly simple items that a lot of you may have around your house already. If not, you might kick yourself if the SHTF and you were without some of these.

Oils for engines

Often overlooked is oils and lubricants. You may have 50 gallons of gas stored up for your generator, but do you have any oil? Generators or any two-cycle engines need oil to work, so it’s good to stock some away if you have to use any equipment. If you have used your generator, don’t forget to resupply. Not resupplying is a problem for many preppers (myself included) and is frankly stupid. You go through the pains of getting the supplies you need and a simple project around the house or camping trip requires some of those same supplies. It doesn’t matter if you have the world’s greatest first-aid kit. If it is empty of bandages because you used them to take care of cousin Bob when he split his head open at the last family reunion, you are screwed. If you use it, replace it.

Back to oil; make sure you have plenty for all of your equipment and more to share. This can be used for barter also and might help a neighbor out. If your neighbor has a tiller or chainsaw and you have the oil, you can make a deal.

Good boots

One of these days I will write a post about the best footwear for a survival situation, but for now let me simply state the importance of good leather boots. You need something that will protect your feet and hold up for a long time of abuse. Canvas hikers are really comfortable, but the soft soles wear quickly and a sharp stick can open them up. They may be great at wicking water, but if they are falling apart in 9 months of everyday use, are they really that great?

On the same subject, I see so many people nowadays running around in flip-flops. God forbid if something was to happen and you had to trek 40 miles over rough terrain. Good leather boots, maybe with steel toes will last a long time and can save your feet from a lot of pain. Redwing makes several great lines of boots and I believe they are still American made.

Maps

This should be a no-brainier but we as a society have relied less and less on maps because of our GPS enabled lives. You should have good quality road maps for the area around you or if you plan to bug out. I have a big road atlas in each car and anytime we go somewhere new I try to pick up a map. Another option is good topographical maps of your home town or retreat areas. You can get a lot of excellent maps at the USGS Topographic Map site.

Rope

Rope has millions of uses from tying down tarps to lashing poles together. I would get several different types of rope from nylon to hemp for different uses. Paracord shouldn’t be the only thing you buy. Along with purchasing rope you need to know how to tie a knot. A great site for learning important knots is Animated Knots by GROG where you can learn everything from a half-hitch to a Carrick Bend Mat.

Duct Tape

Like rope, duct tape has millions to the 12th power of uses. Buy several roles and don’t get the basic stuff meant for actual duct work. Splurge and get Gorilla tape. It will hold stronger than regular duct tape.

Spare Wood

Spare wood is one of those items that my wife hates. She simply can’t see the need to have a lot of pieces in various lengths, styles and shapes just sitting in the shed not doing anything. Having spare wood can come in handy though for a variety of situations. If you have to cover a door that was kicked in. it’s good to have a few sheets of plywood. Need to make a simple addition to your chicken coop to handle the growing flock? You could use some two by fours. Almost all wood can be used to build something. As an added bonus buy several boxes of nails to go along with that. 8D, 16d and finishing nails will knock out a lot of projects.

Hand tools

To compliment the spare wood, you need hand tools to go along with them. I am not talking about the kitchen “junk drawer” tools that everyone has; a little pink ball peen hammer, a crescent wrench and two screwdrivers. You need tools that will allow you to build something if there is no more electricity. I would purchase a good saw and some clamps, a very nice hammer, set of screwdrivers and wrenches.

Expanding on this you will likely need tools for your yard or garden. I can’t tell you how many rakes and shovels and wheel barrows we have been through because I bought the cheapest thing they had. Remember, there won’t be any Home Depot if the grid goes down so buy quality. You may cry now, but it’s better to buy one tool that lasts a lifetime. A decent shovel, axe and sledge-hammer will do thousands of chores.

Carry system

It’s much easier to have and practice with gear now than to try and create it later.

Moving on from household items, there are some considerations for if it really all goes bad and we are living in a WROL (without rule of law) scenario. All of the guns you have saved for need a home a proper holster is a minimum. If you only have a handgun, a quality leather holster is a great investment. It will keep your side arm on you at all times in an easily accessible position. If you are like me, I prefer a thigh-rig. This is for two reasons. First, I plan on wearing a vest and there isn’t room for the pistol. Secondly, I have two additional magazine pouches on the thigh rig so it keeps everything nice and neat.

I mentioned a vest. There are a lot of options for LBE (load bearing equipment) but I like the vest concept as a generally good solution for most situations. This allows me to hold 12 AR magazines, First Aid kit, radio and two additional pistol magazines right up front where I can reach them. There are lots of other options that work nicely, the point is you want to have something now to hold your stuff if the time comes when you need it. You don’t want to be the guy in the street sticking his Glock down his pants because he doesn’t have a holster.

Knee-pads

These are on every soldier that is deployed, every police officer in a tactical unit and pretty much anyone who knows what it feels like to take a knee on top of a good-sized rock. Knee pads will allow you to take cover with less injury to your knees. For about $15 you can protect your knees (which may be more sensitive than you know) from a lot of pain. Try sliding on your driveway behind the car with nothing but your pants on.

Camouflage

I am not recommending everyone suit up for battle, but camouflage is a great choice of clothing for a few reasons. It is great at concealment when hunting. For pattern, I would recommend the old Woodland camo pattern. You can pick these up cheaply on eBay or Craigslist or my personal favorite, the Army Navy store. Camouflage will help you blend into foliage if the time comes when you need to hide. I would also recommend a ghillie suit for extra credit, but you can make your own with burlap bags and some patience. I am sure you can imagine various reasons where having this would be preferable to your skinny leg blue jeans.

Backup Solar Power

Solar panel systems can be very expensive. If you plan to have enough solar panels to enable off-grid living you could be looking at well over 10K as an initial investment. There is a simpler option to get you by in a disaster though that won’t break the bank. There is a system called the Sunforce 50048 60-Watt Solar Charging kit that will get you basic power. Add this to four deep-cycle batteries and you can comfortably charge a good many electronics each day. If you have the system charged properly, you might even get away with running a fridge or freezer for a couple of hours too.

Bolt cutters

I’ll say this again that I don’t condone nor am I advocating stealing from anyone. However, there may be circumstances where this guideline doesn’t apply for various reasons. You have to make that choice. If the situation does dictate you needing to cut a lock, bolt cutters are a good, cheap option that are nice to have. You don’t have to use them on anyone else’s lock but yours if you like, but like insurance, you never know when you will need them.

I am sure others have plenty of ideas too. What items have you thought of to store?

When we talk about survival, there are certain items that immediately come to mind. We start with the discussion of beans, bullets and band-aids. This logically flows to having at

This guide will walk you through the basics of some simple ingredients you can add that will help take your compost to the next level.

But first, it’s important to eat a healthy meal before you get started. Let’s start with a healthy breakfast. Load up the coffee maker – a whole pot sounds just fine. Like tea instead? OK, make some tea then. Crack a few eggs and cook them up in any style you want, then put some whole wheat bread in the toaster. Serve that up on a paper plate, with paper napkins, since there’s no time for doing dishes – we’re composting today. Remember how your doctor always wants you eating your fruits and veggies? Go the extra mile! Peel a banana, de-stem some kale, and chop the tops off a few strawberries, put them in your blender and make a smoothie. Eat that up, and then we’ll get started.

Or have we already started? All of the items we just discussed in our healthy breakfast are also a part of a healthy compost pile. No, you don’t need to serve up those microorganisms with an omelet, but they would like those egg shells, and they’ll break down any leftover bread from your toast. In fact, if the loaf goes stale or moldy, you can throw the whole thing in your compost pile, turn it a few times, and you’ll have that to add to your garden. Coffee grounds, and the leftover coffee you didn’t drink, are also good food for them, as is tea (with or without the bag), and any leftover veggie products, like the kale stems or strawberry heads. You can add any paper goods, including your paper plate and your napkin (although you’ll want to start using the kind of paper plates that are not coated in a plasticc substance, as it will break down very slowly, if at all).

Compost is, essentially, a dirt and a fertilizer. All fertilizers in the US are rated using an NPK (nitrogen – phosphorus – potassium) scale. These are the three basic ingredients that help our plants to grow, and so it is essential that your soil has them – plants will use them up as they grow. Banana peels are extremely heavy in potassium, just as bananas themselves are full of potassium for humans. Coffee grounds contain significant amounts of nitrogen, and while egg shells are also nitrogen heavy, they contain a lot of calcium, which is as important for plants as it is for human bones. Speaking of bones, bone meal is the primary way of introducing phosphorus to your garden, although it is not recommended that you add too many to your compost, as residual meat attached to the bones will attract critters. You could add some manure to your compost, particularly horse manure, especially if you are already raising animals on your property.

Here are some additional tips for working items into your compost pile:

– My compost pile is not so much a compost “pile” as a compost bin collection. I have a pile for items that break down very slowly (woody plants, rotted planks of wood, cardboard, etc.), but my usual compost bin is a black garbage can I bought from the hardware store. With this, I don’t need to spend an hour digging in and turning my compost – I can simply ensure that the lid is on tight, turn my can sideways, and roll it around on my lawn a few times, and it will be well-mixed. The black color also ensures that my compost heats up quickly (all compost will get warm as things break down, but maintaining that heat makes it go quickly).

– Many gardeners like to sift their compost prior to using it. With a simple rectangular frame and a medium grain mesh material, you can create a sifter that will allow only the fully decomposed materials to fall out, while items that are not entirely done decomposing can be caught by the mesh and added back into your pile. Alternatively, you could just add the non-decomposed material to your garden and allow it to break down in place (there’s no magic to the pile, it just tends to be faster). The best method, in my opinion, is just to maintain multiple bins or piles, and allow the material to decompose over a longer period of time.

– When disposing of hard items, like those egg shells, if you blend them first in your blender with a little water, that will chop them up into little bits, which is ideal – the smaller the individual pieces of trash are, the faster they will decompose.

– Water, coffee, or tea is essential for a compost. It shouldn’t be drowning, but it should never be left dry. Coffee is a dessicant, so the liquid will not last long.

– If you’re tired of waiting around for your compost to decompose, and you feel like you need it quicker, bag the grass when you mow the lawn. Grass clippings make quick work of even the most durable and hardest-to-compost material. Don’t have grass? Add a bit of good garden soil, as it already contains many microorganisms, or a bit of compost from a bagged source. This will jump start your new pile. Many hardware stores offer a “quick start” powder you can add to your compost ingredients, and while it does work, it can be difficult to maintain the acceleration if your compost isn’t already balanced. Grass clippings are a much better alternative, because they are still quick, but they wear out over time instead of expiring quickly, and they’re free.

– Bugs are A-OK. Animals…not so much. Usually, animals will not be attracted to a compost pile unless there’s something in there that there probably shouldn’t be. Dairy products, like milk, eggs or cheese are fine in limited quantities, but if used in excess, will cause your compost to smell, which does tend to attract more bugs and animals. Meat products, while they will decompose and add some beneficial nutrients to soil, will attract raccoons and skunks, as well as other undesirable animals. That’s never a good idea.

– In the fall, instead of bagging the leaves that fall from the trees on your property, add them to a compost bin or pile. Leaves are slow to compost, but if added to a bin with heavy items inside, a simple rotation will break them apart. By mid-summer, these will be ready for use.

– Finally, like a balanced diet, you want a variety of items in your compost pile. Lettuces, grasses, cardboard, wood chips or shavings, sawdust, coffee grounds, dirt, fruit peels or leftovers, breads, knobby ends of zucchinis or other squashes, tomato stems, weeds, expired blossoms, and pretty much any other organic (once-living) landscape material are good additions.

This guide will walk you through the basics of some simple ingredients you can add that will help take your compost to the next level. But first, it’s important to eat

Many of us who are new to prepping become wrapped up in the things we don’t have. We scour the internet looking for prepper checklists and there are millions out there. We look for ideas on the best handguns to purchase or the best firearms to have. We look at bug out vehicles and survival bunkers and hidden retreats in the woods. It can be overwhelming.

I know a lot of preppers including me in the beginning focused on the things we felt we needed to get at the beginning. The sheer volume of ‘things’ that make up all these lists can seem insurmountable and you might even be wondering where to start.

How about starting in your own home first?

There are a lot of great household survival supplies that you as a prepper already have. I am not saying that you don’t need to look at other options for survival, but don’t overlook the obvious either. A true prepper isn’t defined necessarily by what they have, but more how they are prepared to deal with crisis and looking at the items you have on hand is one way to adjust your perception.

  1. Bleach – Bleach is great for a couple of things. First you can use it to disinfect surfaces because bleach will kill almost anything. Bleach could be used to sanitize your home should there be some infectious disease outbreak and it can also be used to disinfect water which could come in handy if for some reason the tap stops working and you have to get your water from alternate sources. For instance, if you have a lake or rain barrels for water collection you will want to disinfect that water before you drink it. Boiling is a better alternative, but bleach is great in a pinch. Bleach does have a shelf life though that I discuss in another post.
  2. Towels – Do you have old towels lying in a closet somewhere? We have a ton hidden in a box that we use for all types of odd jobs. When the car needs washing we break out the old towels. When the survival dog is wet from the rain, out come the towels. These old towels and rags have a use in a survival situation too. They can be stitched together to make blankets, they can be shoved in cracks to keep drafts out; they can be ripped up to make diapers or bandages or fire starter. You can wrap them around hot pot handles to save your hands too.
  3. Dental Floss – Dental floss makes great fishing line or emergency rope although you would need a lot of it to make rope and that is assuming you don’t have that wimpy wax tape they are selling now. Floss can be used to suture a wound, as your noose in a small game snare or as fishing line. I like to use it to keep my teeth clean and I have some stocked for that purpose and I’ll use the inner cords from my paracord for the other uses.
  4. Feminine hygiene products – What? Well you might be thinking these are necessary for one thing but think outside of the box. These products are great for stopping blood so in an emergency situation, they can save someone from bleeding to death. Tampons can be used to plug bullet wounds and maxi-pads make great pressure bandages. What about those make up remover pads? They make great tinder for starting fires. You can actually soak them in paraffin wax and they will make starting fires a breeze so they are a good addition to your bug out bag. Check out this video for instructions.
  5. Duct Tape – If you don’t have at least one roll of duct tape in your home right now, I am pretty sure you are violating a natural law of some type. Duct tape is incredibly useful from making repairs on clothing or survival gear, patching holes, protecting your feet from blisters and generally being awesome. All duct tape isn’t made equal though and I recommend something like Gorilla tape which is much stronger than traditional duct tape. For a bug out bag tip I don’t carry a whole roll. I take a plastic card like a hotel key or old credit card and wrap about 20 feet of duct tape around the card. This way I have plenty of duct tape if I need it but do not have all the weight or space a whole roll takes up. You can even use it to make a sling!
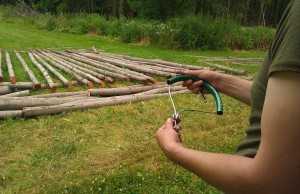
  6. Garden hose has more uses even if it has a hole.

    Garden Hose – Garden hose can be used to do what it normally does and that is transport water from one location to another. You can also use this as a siphon to get gas out of vehicles or storage tanks. You can also cut the hose and use it to protect your hands when you are dealing with wire. Just cut some of the hose off, slice it down one side and slide the wire in. You can use the garden hose to set up a makeshift shower with a bucket of water hung in a tree and gravity. Let a large bucket of water sit in the sun for a few hours until it gets warm. Set the hose in the bucket and get the water flowing much as you would in siphoning gas and you have a way to hose off with warm water.

  7. Tools and Lumber – Hand tools will most likely be needed as I don’t want to use my gas to recharge electric tools. A hammer, some nails and heavy duty plywood can be used to seal openings and make your home more secure from intruders. Nailing windows shut can slow access and repairs to all manner of items is easier with tools. You can also use box cutters and even lawn mower blades as defensive weapons.
  8. Cooking Oil – So what do you do with oil when you are all out of fish sticks and French fries? Make an oil lantern with it. That’s right, oil burns so if you have a power blackout and you are fresh out of candles, you can use oil and a glass jar or small empty can to create a source of light in your home. Make sure you are careful though because any open flame can cause you more problems than it solves. This video from the Shepherd School demonstrates how to make a survival oil lamp.
  9. Kitchen Knives – Every kitchen in America must have that block of knives sitting on the counter that we got as a housewarming gift. Just because you don’t have an expensive EDC knife on you doesn’t mean you have to forgo the advantages that knives offer. A good kitchen knife will cut just as well as most of the tactical knife blades out there and in a pinch would be better than nothing. If you want to carry a knife you can make a sheath for it out of plastic or cardboard and duct tape. Wrap a long piece of paracord around the handle to make the grip better and you have your caveman survival knife.
  10. Survival Oil Lamp

    Tea Bags – Tea Bags are not only good for a beverage (as long as you have sugar or honey IMHO) but they are also a great homeopathic addition to your medical kit. Tea leaves contain tannins which are a natural anti-inflammatory. Some people will use wet tea bags to reduce bags under their eyes and you can use this for lots of other uses like bee stings, hemorrhoids, boils (not in that order obviously).

  11. Toilet Paper – If there is one prepper item that I have seen people obsess over more than anything it is toilet paper. What will you do when the roll is all gone? I am thinking there are far bigger problems in the world if you can’t buy toilet paper anymore, but let’s say you have an abundance of the fluffy white stuff and are looking for other uses. You can twist toilet paper into a wick for a toilet paper wick heater, or your oil lamp or use it to start fires, apply medicine or write notes on it.
  12. Canned Food – Once you are done with the contents of your canned food you can use them as containers. You can build that oil lamp I mentioned above. You can also use them to cook with over a fire and when they are all done, you can string empty cans together to make a hobo alarm system. Don’t worry if the disaster left you a ton of cans but no way to open them, because you can easily open a can without a can opener.
  13. Potato Chips – Believe it or not you can use potato chips to start a fire. That is because they have so much fat and oil in them. I will add that this would be a really silly way to start a fire because you are using food to make a fire when that should be unnecessary in all but the most extreme circumstances. Maybe you are trapped in a Lay’s warehouse or something and need a fire to keep warm. I added this just for kicks but you should know how to start a fire using tinder and not food. It is possible though.
  14. Fire Extinguisher – Not only can this be used to put out fires, you can also use this as a defensive weapon. Granted, I don’t ever want to be that close to the bad guy; I’d prefer to be shooting distance away, but in a pinch you can use a fire extinguisher to blind someone. Spray them hard in the face and while they are blinded, crack them over the head with the fire extinguisher.
  15. Garbage Bags – I don’t know how many uses garbage bags have but they are really just plastic sheeting that has been folded and welded together. We look at these as our go-to option for taking out the trash but they can also double as rain gear. Just cut a hole for the head and one for each arm and you are all set. You can use them as a water barrier if you have to sleep on the ground. You can also use them to keep the rain off your head by cutting them down the sides to make the bag footprint larger. These can also be used to black out your windows if something happens and you don’t want your neighbors looking inside at your oil lamp. Garbage bags and duct tape go a long way.

What items do you have in your house that could have other uses?

Many of us who are new to prepping become wrapped up in the things we don’t have. We scour the internet looking for prepper checklists and there are millions out

Life is often about measuring ourselves against a standard. The standard changes with the situation but there is always some metaphorical yardstick we are trying to use to gauge our progress for our efforts. Consciously or maybe subconsciously we keep looking back to that yardstick, checking to see how we stand. In some cases it is easy to see how you are doing. If you want to diet and lose weight, you have the ability to look at yourself in the mirror, maybe your clothes fit more loosely, and then obviously there is that dreaded bathroom scale. If you never get on the scale, you might think you are doing better than you actually are on your diet. The problem comes when you do step on the scales and find that you are much further away from your goals than you thought.

With Prepping, I think we should also do a similar exercise at least once a year where we pause for a moment and take stock of where we are and how much further we need to go. With a clear understanding of where you are at currently in contrast with your prepping goals, it is easier to identify any problems before they are too late to fix. You don’t want to get invited to a pool party at the end of the world and realize you are still 15 pounds overweight and your bathing suit has a big moth-eaten hole in the butt.

I wrote an article some time ago titled “How Will I Know When the SHTF” where I brought up this concept of the Arc of Preparedness. For me, the journey most of us are on towards being more prepared doesn’t have a final destination, but I think there is a less prepared and a more prepared side with a healthy middle in between. Ideally, we would be as close to the more prepared side as possible, but without measuring your progress on that continuum occasional, how would you really know where you stand? The last thing we want to happen is some SHTF event and you realize with horror that some vital aspect of preparation you thought you had covered, is not going to be able to save you or worse missing completely.

What is the Arc of Preparedness?

Like anything else we measure on an arc I will start with least prepared and end with what I think is the maximum level of preparedness we need to realistically worry about achieving. Obviously, nobody is expected to have capabilities akin to a Global seed vault like they have in Norway, but for the average family I think something a good bit less than that is a reasonable level of preparedness. Knowing again that I consider prepping a journey with no destination. You can be very squared away, but I don’t believe anyone will be able to prepare for everything under the sun for the rest of their lives.

Minimum Requirements to be Prepared

I think the minimum level for being remotely “prepared” would be one week of supplies to feed, clothe, shelter and protect you and whoever is in your care. This should assume that all utilities are off, no emergency services are working and you have to rely on only what you have at your present location. Could you live for a week if the grid went down? What if you had to leave your home? If you aren’t even to this point yet, you might want to read our How to start Prepping article.

Just as a point of clarification, I am not talking about extremes here which some commenters like to throw out as an argument. If a nuclear bomb goes off in your neighborhood, I don’t expect you to be able to live for a week. I am not talking about the military or someone else dropping a bomb on your house or an F5 tornado barging through the front door. The example I will use is a global disruption in power. This in itself doesn’t kill everyone, at least not at first, but for all intents and purposes, it is the end of our world as we know it.

It is important to routinely measure your progress towards prepping goals.

Low-Medium Preparedness

Low-Medium preparedness using the same scenario above is the ability to take care of your family for one month. This means you have at least a month of food and water stored and can survive without power to heat or cool your home. Stocking away an extra month worth of food and water for your family is nothing to sneeze at and would keep you safe for 99% of all disasters.

Medium  Preparedness

Medium level of preparedness would be 3 months. All of the supplies above to keep your family alive for this duration. Of course with a longer duration of TEOTWAWKI, we have to assume mass civil unrest and possible violence in your town or neighborhood. At this point I don’t believe you would be safe on your own and hopefully have banded together with like-minded individuals, perhaps your neighbors for shared safety.

Medium-High Preparedness

Surviving in a grid down world for more than a few months will require skills most of us no longer have.

Medium High in my opinion is the ability to take care of your family for 6-9 months, assuming you haven’t been forced from your home. This level means you have acquired or identified a pretty large amount of prepping supplies. After this amount of time, the country may be very different. Martial law may have been declared and confiscations of supplies, or forced relocations or forced labor may have taken place in some areas.
Preparedness

I think anything over one year could constitute a high level of preparedness. This would allow you to feed your family while you work on setting up a sustainable food alternative. Assumes you have some backup power for the duration.

Maximum Preparedness

More than one year or the ability to care for larger groups of people. There are some who have many years of stored food, water, underground bunkers and all of the necessary things you would need to weather the apocalypse in style. I can’t say I wouldn’t do this too, if I won Powerball, but until that happens, this side of the arc is probably unobtainable for most of us. This could also include people completely self-reliant with food, gardens, power and a warehouse of supplies, although that is no small feat either and like Powerball is not possible for most preppers.

How to measure where you are on the Arc of Preparedness

Most of us, going back to that earlier analogy have a feel for how we are doing. We know if we are losing weight or in this context, how prepared we are. I think it is good to measure yourself though because you might be surprised. Do you have a ton of freeze-dried food stored in the shed? When is the last time you checked that out? Is it still good? What about your water supply? Have you measured how much you have? How is your garden doing and more importantly, how much food are you able to put up each year from the harvest? Have you considered that amount if you are eating solely on what is produced? Will that be enough?

Training is a component I didn’t even cover because that is a little harder to measure. You can take a first aid course, but that doesn’t mean you won’t crack under pressure or the individual you are treating will be worse than your skills can handle. Patients die every day even in the care of doctors with all the modern conveniences you have. What about self-defense? Do you have weapons? Are you training with them? How much ammo do you have?

Measuring where you are on the Arc of Preparedness is highly subjective I know, but the practice of taking stock each year might help you avoid disaster down the road. Knowing what you have will help you focus on what is needed and at the same time, reassure you of the bases you do have covered.

So, where are you on your own personal Arc of Preparedness?

Life is often about measuring ourselves against a standard. The standard changes with the situation but there is always some metaphorical yardstick we are trying to use to gauge our progress for

One common concern for prepping is how you will be able to heat up and cook any food if you don’t have the nice stainless steel range to cook on? You might have a freezer full of the best steaks but they are awful tough eatin (yes that is the correct spelling) if they aren’t cooked to a nice medium rare at a minimum. A great Prep to either have or know how to make is a Rocket Stove.

Rocket Stoves were developed by a man named Sam Baldwin back in the early 80’s. What makes them so great is that the Rocket Stove concept achieves efficient combustion of whatever you are burning (normally small pieces of wood) at a really high temperature. It can do this because the unique design of the Rocket Stove allows a good air draft into the fire and this ensures you have a near complete combustion of the fuel and associated gases. Because of its simple year ingenious design, it has been used for cooking purposes in many third-world locales (notably Rwandan refugee camps) as well as for space and water heating.

LDSPrepper has taken this idea and adapted it to 5 simple cans most of us would either have laying around or could easily get our hands on. Using the steps in this video below you can actually build a rocket stove yourself with items lying around your house. Check out his video below.

One common concern for prepping is how you will be able to heat up and cook any food if you don’t have the nice stainless steel range to cook on?

How do you go about protecting all those new gadgets and gizmos you got at Christmas or your birthday? You might be surprised to discover that there are many ingenious ways to keep your stuff safe other than keeping them on your person at all times or locking them up somewhere.

Whether you’re at home, at work, in a public place, or on vacation, the following tips will help you secure, disguise, hide, or make it easier to track down your stuff.

How to Keep Your Stuff Safe At Home

When you’re home, the best way to keep everything safe is to sign up for a reputable monitored home security system, especially if living in an area where burglaries are relatively common, such as a city. If you’re deterred by the price, you might be surprised to learn that top security tools like ADT security can protect your home for as little as $9 a week.

Besides keeping your stuff safe, your family will be protected, too. If your children get home from school before you get out of work, you will know that the house is protected from any unwanted intruders.

However, the most vulnerable possession in your house and the one that has the highest likelihood of getting stolen is your sensitive information. So it’s important to keep all the data on all your devices safe, too. Use passwords protect everything from your Wi-Fi network access to your desktop, laptop, or mobile device. Additionally, buy some good antivirus software to prevent people from stealing your data when you go online.

It’s also important to keep your stuff safe from accidents and loss. Buy reliable cases for phones and tablets, and making it a habit to put things in their proper place when done using them.

How to Keep your Stuff Safe at Work

One way to keep your stuff safe at work is to put a label on it. This is especially useful for gadgets. The label should have your name and address on it. Sometimes your stuff might not get stolen but either lost of misplaced. For example, you leave your handbag in the break room and the night cleanup crew finds it under the table. With your name on it, it’s much easier for the finder to return it.

Prevent your lunch from being stolen with this fake mold anti-theft lunch bag.


Use an anti-theft lunch bag to protect the sandwich and apple you’ve been saving as your mid-afternoon treat from getting lifted by a lunch thief. Simply smudge some food dye on your plastic sandwich bags. Once somebody pulls it out of the lunch bag, they will see fuzzy green dots, they will mistake it for mold.

How to Keep Your Stuff Safe in Public Places

The best way to attract attention in a public place, like a mall or grocery store or coffee shop, is to carry it in a bag that screams “opulence.”

If you’re shopping in a neighborhood with a crime rate, it’s best not to take your most expensive handbags with you. Besides handbags, laptop bags also attract a lot of attention–bags that have a high-tech look attract attention from those who would like to have a laptop without buying one.

One way to keep your laptop or mobile devices safe is to use a simple nondescript bag to carry your precious electronic belongings. It could be as simple as a fed-ex envelope, a cheap plastic shopping bag, or a beaten up old leather case.

What about your wallet or purse? That’s probably even more tempting than handbags or laptop cases. While you might do your best to keep your cash and credit cards and id safe, but you might still lose your purse or wallet, either through an act of carelessness or a pickpocket. Worse still, you might only realize that you lost it when you’re back home?

Here’s one ingenious way, you might be able to get your lost or stolen wallet or purse back:

In Edinburgh, psychologists conducted a test with 240 wallets. After losing these wallets around city streets, they waited to see how many would be returned. In the plastic sleeves, they either put a picture of “a smiling baby, a cute puppy, a happy family or a contented elderly couple” were inserted or no image was left at all. Some wallets also contained papers indicating the owner had recently donated to charity.

Here’s what happened:

The baby photograph wallets had the highest return rate, with 88 per cent of the 40 being sent back. Next came the puppy, the family and the elderly couple, with 53 per cent, 48 and 28 respectively. At 20 per cent and 15, the charity card and control wallets had the lowest return rates.”

So insert a cute baby picture in your wallet!

How to Keep your Stuff Safe When Traveling

If you’re backpacking, you might sleep in a hostel room, a bus, or train. Use a concealed money belt to keep your passport, credit-cards, cash, and camera memory cards on you.If you’re staying at a hotel, read reviews about the hotel. Finally, keep an eye on your bags as you travel on taxis, buses, and trains, and if you have precious possession in them, distribute them over several bags.

Try out these ideas. While you might not be able to keep everything safe from loss, theft, or someone borrowing it without your permission, you will at least protect most of your important stuff.

How do you go about protecting all those new gadgets and gizmos you got at Christmas or your birthday? You might be surprised to discover that there are many ingenious

Whether you want to make money from your yard, save money on groceries, enjoy foods you can’t easily buy, or simply get more out of the experience of gardening, growing your own food is a great choice, and it’s easier than you might think. As long as you have a spade or fork, a rake and a hoe, and a sturdy trowel, you can make a go of it – additional tools help but aren’t essential. These handy tips will help you to get started.

Caring for the soil

All sustainable gardening begins with taking care of the soil because plants need nutrients in the growing medium almost as much as water and sunlight. Investing in fertilizer will let you enrich the soil easily but it can be expensive, so if you want to save money you can create your own compost from garden waste and leftover food scraps. If you know someone who keeps cattle or horses, there’s nothing like well-rotted dung for nourishing your plants. You can also bind nitrogen into the soil by growing peas or beans, or if you have a fish pond – or even an aquarium – you can use the nitrate-rich wastewater from that for irrigation.

Choosing the right crops

The right crops for your garden will depend on how acidic or alkaline the soil is, how much rainfall you get at different times of year, and what you actually want to eat. Don’t grow food in quantities that overwhelm you, and bear in mind that having a lot of variety in your yard reduces the risk of losing everything to pests. Choose crops that fit around one another over the course of the year, so you can be ready to plant one as soon as you harvest another. Keep moving your crops around within the yard because they will take up different nutrients from the soil, so this will help to avoid exhausting it.

Extending your growing space

Composting is a simple way to enrich your garden soil and reduce trash.

If you have limited room for growing crops in your yard, ask yourself if you’re making the most of all your options. If there are paved areas you don’t want to dig up, you can still grow things in pots on top of them. Running trellises along your walls or fences will enable you to grow things vertically. You can also bring plants indoors – south facing windows act like greenhouses and are great places to grow tomatoes or bell peppers.

Extending the season

Setting up a proper greenhouse with some heating in winter will allow you to grow food all year round. Simpler devices like cold frames can also make a big difference; you can get plants started earlier in the year. Not every crop takes a full season to grow, so with good planning you can fit in multiple harvests. Potatoes, for instance, can produce three crops a year, and you can harvest radishes monthly.

There are thousands of DIY Greenhouse plans on the internet.

Preserving your post-harvest crops

Experts predict that the world is heading for a food shortage in the years ahead so post harvest food preservation is now a vital area of scientific research. Population growth, increasing demand from emerging economies and the adverse effects of global warming will be the main causes of the problem. This might be hard to believe now with food from all over the world currently displayed for sale in supermarkets, however, the growth in crop production won’t continue forever, and waste must be reduced.

Scientists all over the world are addressing the problems of food supply sustainability with some urgency, and agriculture executives such as Jai Shroff, who is CEO of UPL Ltd, have worked hard to provide more support for small-scale farmers and gardeners. Shroff’s initiatives have seen the development of practical preservation solutions for those with limited harvesting options. The company has also developed affordable fertilizer products to fit with a sustainable approach and they are a more practical choice for growers who don’t have sufficient land to let areas lie fallow for extended periods. Shroff’s LinkedIn page states: “By providing the agriculture sector with quality seeds, plant nutrition, and post-harvest preservation products, he aims to strengthen food security in over 120 countries.”

An effectively planned kitchen garden can work well in even a small area and should produce an abundance of fruit, salad crops and vegetables.

Food security is already a worry for many of those countries that are striving to meet today’s demands, and the development of new preservation methods that will play an important role in the future is becoming essential. Until those new methods become available the conventional methods of preservation will continue to be used. Storing fruit and root vegetables in temperature-controlled conditions or freezing as soon as possible after cropping are still the favored options to prolong the life of foods and reduce waste.

Keeping a kitchen garden

An effectively planned kitchen garden can work well in even a small area and should produce an abundance of fruit, salad crops and vegetables. If you’re a keen cook you’ll need herbs as well as fruits and vegetables. Herbs can be grown in all sorts of little niches where other plants won’t fit, such as hanging baskets or well-secured mini-beds running along the tops of your walls. This will help you to use up every bit of space and will give you many more flavor options when it comes to making use of the things you grow. Just bear in mind that some – especially mint – grow like weeds, so you’ll need to keep a close eye on them (best in containers). Choosing flowering herbs is a great way to give an extra boost to everybody’s favorite garden helpers, bees.

Growing your own food requires some manual work. You’ll need to weed your yard at least weekly, turn over the soil after harvesting and pay careful attention to draining and irrigation. When you sit down to enjoy a hearty meal of home-grown food, however, that work definitely feels worthwhile.

Whether you want to make money from your yard, save money on groceries, enjoy foods you can’t easily buy, or simply get more out of the experience of gardening, growing

Yes, most of us depend on the local electric company for our energy needs. Not all of us even have the power to choose from differing rates like they do in cities like Dallas. Most of the time, especially in smaller areas, there is just the one power company and you either go with them or you don’t have power.

The thing is, traditional power companies aren’t the only way to get energy to our homes. What’s more, you don’t need to go off the grid to have these types of alternative energy sources in your home. Some of these types of energies include things like:

  • Solar power
  • Wind power
  • Water power
  • Geothermal energy

Why don’t we take a look at a few of these more closely?

Solar Power

There are people out there who claim that solar power for the home is the energy of the future. They wouldn’t be too far off base either. It is a renewable source of energy and can be done on very large or very small scales. Right now, the prices for the equipment are falling and there are other financial incentives in place. These alone can make this a tempting option. There are even some cases where a home solar power system will create more energy than it needs and some of this can actually be sold back to your local utility company. As nice as all of this sounds, there are some things you will need to consider if you want to take this route. They include:

Wind Power

Some people are turning to wind power as a source of energy for their homes. This is done by installing a small wind turbine. These are basically generators of electricity. They use the power of the wind to create power that is clean and free from emissions for family homes, farms, and even some small businesses. This technology is simple and gaining in popularity and allows for people to create their own energy and slash their energy bills while doing their part to reduce their carbon footprint and help the environment. Like with solar power, the government does offer rebates as well as tax credit programs to encourage people to turn to this as a source of energy.

Water Power

Water power has been in use for homes for longer than either of the first two and there are hydroelectric power plants scattered across the country. That is large scale hydro power. However, if you happen to have a creek, stream, or other source of water flowing on your land, you can have your own hydropower system. Typically, a 10 – kilowatt system is enough to power a large home or even a small farm. To do this, you will need to figure out how much power you can get from the water on your land and will have to get the proper water rights and permits. This type of power is also eligible for rebates and some tax credits from the government.

When you are ready to say goodbye to high energy bills and invest in your own source of power, check with the Database of State Incentives for Renewables & Efficiencies to see what tax credits and rebates are offered in your area.

Yes, most of us depend on the local electric company for our energy needs. Not all of us even have the power to choose from differing rates like they do

NEVER! If there is one “miracle” survival product it is paracord. It can handle so many jobs, it can be packed efficiently, it can be used, reused, re-purposed, reconfigured, and depended upon in almost any situation, it is the friend-zone of materials – always there, always ready, expects (and gets) nothing in return.

No matter how many ways one lists to use paracord they will be as far short of all its uses as a politician is of getting something, anything done.

If you see a bug-out bag without paracord in it walk away, disown or unfriend the bags owner, and put some distance between you and them. At some point, they will be the comic-relief in the horror movie who surly gets eaten and you do not want to be in their “collateral damage” zone. You could try and correct their ways but this might take hundreds of years and cost millions of dollars, though, seeing that light bulb light up in their brain, realizing you may have, perhaps for the first time, made two of their contiguous brain cells work together, could be rewarding. Your call.

Cinching together lean-to or shelter materials, securing a Mylar blanket to a shelter to reflect back campfire heat and light and not depending on dumb luck and no wind to not bring things crashing down. And don’t get me started on “making stuff” – a belt, a bullwhip, a lanyard, a rifle sling, a monkey fist (ouch!), snowshoes, hammock, trap ring/snare (varmints roasting on an open fire), bow sling, bottle harness, knife handle, dog collar, survival donut (we LOVE efficiency), grab handles (for a vehicle, for bags, for water jugs, for panicking people), the list is endless.

Learn how to cut and cap it off properly with a lighter. As a sailor I like to also duct tape (aka combat tape, safety tape, field-medical tape, keep-grandma-in camp tape, and all its other names) the end but it really isn’t necessary for paracord, while it is for larger nylon ropes. If you do “duct tape” go for dull as opposed to shiny, though with the variety of colors available in both paracord and duct tape, one could get creative.

Is color important? Bright orange can easily be seen. A plus when taking down a camp, a negative if you don’t want to draw attention to yourself. Black, or any of its variant, great for camouflage, not so great for taking down tree branches and such lashed together and used for a shelter, in the rain, in the dark, at midnight.

For the purist, I always recommend the Mil-Spec (C-5040H) for the tough jobs as you usually don’t need a lot, the price difference isn’t that big, and you know what you are getting, if you read the spec. Also, the 4 simple visual tests to verify Mil-Spec are easy to perform. Cut off an end, and push back the sheath and count 7, 8, or 9 inner strands. Good. Less than 7, not Mil-Spec. On the inner strands unravel one, if it is NOT 3 strands wound together it is not Mil-Spec. If the inner strand is NOT even twisted strands then again, not Mil-Spec. Finally, if one of the inner strands is not colored, it is not Mil-Spec. These colored ID strands, called “Manufacturer’s ID Strand” are required and a registered marker of compliance.

Just one more point, I said I was a purist, but I am also rational to a fault, so, to be clear, 550 Type III Commercial Nylon Paracord, not Mil-Spec, is an excellent product. It is excellent for building all the things mentioned above, and readily available from multiple sources and it will meet all your needs. This is rated with a tensile strength of 550 pounds, so unless you are trying to air-lift Michael Moore out of Krispy Kreme, you are good!

NEVER! If there is one “miracle” survival product it is paracord. It can handle so many jobs, it can be packed efficiently, it can be used, reused, re-purposed, reconfigured, and depended

The majority of Preppers are well equipped in survival skills, including finding food, keeping warm and making temporary shelters, but how many of you are prepared for a total life-long power cut? Would your home stand up to being totally cut off from the grid?

This is where survival retreats come in. Many people choose to have an emergency shelter to prepare for a SHTF scenario, others just want a back-up place to go in case they lose their primary residence, or perhaps some just want to get off the grid and be less visible.

Preparing such a location, is a great way to ensure your safety should you ever need somewhere to escape to. But regardless of that, even if you don’t end up using it as a retreat, it can have many different purposes – to store your personal survival cache, or even just a great place to meet up with family and friends.

Whatever your reason for wanting an emergency shelter –there are so many different options, from

shipping container homes, homes made from trailers and old school buses, to log cabins.

Many Preppers already have an off-grid shelter prepared just in case of an emergency, and one of the cheapest and most natural ways to do this is to build a log cabin. To build a cabin from scratch is going to take you months, possibly years. But there is a way to get around that time-frame if you don’t have that much time to dedicate to a build.

You can build an emergency prepper shelter in just a couple of days if you choose to buy a log cabin kit. The main purpose of your log cabin is literally just for shelter and warmth, so you don’t need to build anything fancy. You can get an extremely basic one, which will be perfect to live off-grid in for as little as $20,000.

Building your own cabin can be an extremely rewarding process, and will provide you with your own place to get away from it all, soak up the natural world and practice your survival skills, but this is a serious undertaking and you need to do your research properly. So, how do you know which cabin kit is right for you, and which suppliers to trust with your build?

There are four main steps to buying a survival kit; understanding kits and what you should know before buying, how to choose a supplier, what’s included in your package and the total cost. I’m going to share over 30 years of experience with you to help you get the best deal.

Step One: Understanding Kits

There are so many different kits available, it’s difficult to know which one to choose but really, it’s just a matter of personal preference.

The first choice you’ll need to make is whether you want milled or bespoke logs. Milled logs are those that are all identical and uniform in shape because they have been machine processed. Bespoke logs are hand peeled which preserves all the natural characteristics of the logs. Bespoke log kits are rightly so, more expensive than milled.

Once you’ve chosen the finish type, you’ll need to choose the lumber and profile of the log. The four-main species of trees used for log cabins are pine, cedar, spruce and cypress. The most common is pine because it’s so readily available. Cedar is also very popular but comes at a premium price.

The next step is to choose how the corners of your kit will join. The traditional round logged cabin is joined using a Scandinavian Saddle Notch, other common joins include the dovetail notch, butt and pass, tongue and groove and corner post.

The log profile is how the log is finished; round logs, half-logs, square logs and D-logs. D-logs, with a tongue and groove join are the most popular, because they are so easy to slot together.

You’ll also have the choice between air-dried and kiln dried logs. It’s important that the logs are dried to prevent warping and bowing, kiln dried logs are more expensive due to the energy intensive process they go through. Whichever you choose, the logs should have around a 10% moisture content before building.

Step Two: Choosing a Supplier

With over 300 suppliers to choose from across the US, how can you be sure you’re choosing a reputable and professional company to buy your kit from?

There are a few ways to tell if a company is reputable, and therefore offering quality kits. The first is to look at whether they are a member of the Log and Timber Homes Council, or another association which requires the supplier to meet certain standards.

Once you’ve found out if they’re registered, ask if you can visit the factory where the kits are made and if possible, visit a model home. You’ll get a good feel as to whether the people building your cabin are real craftsmen or just technicians. You can also ask to talk to previous customers to hear their experiences and reviews.

Additionally, to these standard checks, other things to keep an eye out for are whether the logs and blueprints are graded and stamped. Whilst this is sometimes included in the price of a regular kit, with other companies it can come as an extra, but ensuring plans and logs are stamped and graded gives you assurance that the materials and plans are quality.

You should also ask whether the company offer an installation service, and on-site assistance if you require it. You may have no intention of taking them up on this service, but the very fact that the offer it shows they are confident in the level of quality of the product they are offering.

The last thing to consider is the warranty. Any decent company will offer you a minimum of 10-year warranty.

Step Three: Kit Contents

Kits normally come in three different stages of completion; shell only, dry-in package and turn-key packages. The kit you opt for will most likely depend on how much you want to pay, and the completion of package you want.

A shell only package, also known as the log wall system, comes with all the logs and beams that you’ll need to construct the basic shell of a cabin. You’ll have to source the windows, doors, possibly the roof and all exterior and interior finishes.

The dry-in package usually provides you with all the materials you need to create an air-tight log cabin, including all the logs, windows, doors, floors and roof, as well as all the exterior finishes.

A turn-key package will provide you with everything you need to complete you cabin, including interior finishes. This option provides you with everything you need for the cabin to be ready to use straight away.

Depending on which kit you opt for, you’ll receive some of, or all the components you need to build a log cabin shelter.

Step Four: Total Cost

The most important cost you need to look at is the turn-key cost. This is the complete cost of the cabin including the logs, roof, floor, windows doors, interior fittings and labor cost.

The shell package will cost you in between $50-80 per square foot, the dry-in package around $70-$130 per square foot, and a turn-key package in between $130-$180 per square foot.

You should compare like-for-like packages in cost, there is no use comparing a shell price from one company to a turn-key price with another. Figure out what the additional costs will be for the shell package before making a comparison.

One thing to keep in mind with any package is this will not be the total cost of your survival cabin. The golden ratio to use is 1:2. So if the kit costs $20,000, you can expect your final cost to be closer to $40,000 if you intend to carry out all the work yourself. If you employ someone to build the cabin for you, use a 1:3 ratio.

Is a Log Cabin Kit Right for Your Emergency Shelter?

Having an emergency shelter is a wise idea, if the day comes that for some reason your main place of residence is no longer a viable place to be.

In the mean-time, it doesn’t have to go to waste – it can have multiple uses such as somewhere just to go a hangout on the weekends with friends, or a place to store all your survival supplies.

A kit might work well for you if you really want an emergency shelter, but don’t have months or years to spend building a log cabin. All the difficult work is taken out of the build, and it is delivered straight to you ready to assemble. The assembly of a kit can be done in just two or three days with a handful of people.

The majority of Preppers are well equipped in survival skills, including finding food, keeping warm and making temporary shelters, but how many of you are prepared for a total life-long power cut? Would

The list of items to pack in your bug out bag (BOB) can seem limitless. However, you cannot afford to pack all of them due to limited space available and the fact that you must keep the weight of the BOB down. This leaves you with very few options if you must carry all the essential items to help you with successful bugging out.

Put another way, you must come up with ingenious ways to ensure you pack the vital items. One of the best options is to pack multipurpose items. Wouldn’t it be great to pack a single item that can perform many tasks? This will eliminate the need to pack specialized items for each of these tasks. So, what are these multipurpose items for your BOB?

A Multi-Tool

multi-tool to handymen or repairmen is like what a stethoscope is to a doctor. Soon after a multi-tool was invented, preppers developed a special liking for it because of its versatility. Just as the name sounds, a multi-tool is a single unit that has most tools attached to it. Each of the components tools is designed to perform specific functions.

A good quality multi-tool is a great replacement for a knife, can opener and even a saw. Imagine using a single tool to cut wood, prepare a game for food, build shelter, harvest forage and cut ropes/cordage. You can even use it for defense. This is a just a fraction of what a multi-tool can do.

A Survival Knife

All preppers know the importance of a survival knife. Bugging out without a survival knife is an impossibility. It comes handy in almost all your survival needs. You’ll need a knife when preparing food, for First Aid in medical emergencies, for bush crafting, for preparing firewood and many more.

A survival knife is important if you need to start a fire but you have no matches or lighter. Simply use the knife with a Ferro rod to start a fire. It also offers a great way to secure you and your companions from potential attack in the wilderness. You need to choose the best knife that can handle multiple tasks.

Duct Tape

 You may not think of a duct tape as a multipurpose item for your bug out bag. That couldn’t be further from the truth. You can use a duct tape to fix literally anything. You can use it to repair ripped jeans and even cover open wounds. The material used to make a duct tape is highly flammable. It is very good tinder for starting a fire.

An entire roll of duct tape can be several meters long. It can also be bulky. Amazingly, you can increase its versatility by simply rolling a small portion onto another item such as a flashlight. Thus you’ll not need to pack tinder and a whole roll of a duct tape.

Dental Floss

A dental floss, really? You could be wondering how a dental care item could serve as a multipurpose tool in a survival situation. The secret to its versatility is the material used in its construction. In most cases, the material used is nylon. Nylon is strong, lustrous, resilient, elastic and resistant to abrasion. Theseproperties make it ideal for many applications.

It can act as a dependable fishing line. You can use it as a cutting tool to cut soft material such as cheese blocks. It is also a good item for repairing torn clothes.  Dental floss takes very little space. It is also extremely light. It is impossible to underestimate the versatility of a dental floss.

Cordage

Pack good quality cordage such as 550 Paracord if you want to unlock the potential of the item as a multipurpose item for a BOB.  The 550 Paracords are so called because they have a minimum of 550 pounds of tensile strength. With such strength, this particular cordage can handle some of the heaviest tasks you will have to accomplish in a survival situation.

It will act as a reliable replacement for heavy and bulky ropes as well as some First Aid items. You can use a paracord to set a trap for a game, build shelter, make a clothesline, climb up or down a steep slope and tie things together.

Garbage or Plastic Bags

Garbage or plastic bags are annoying clutter all over our kitchens. Instead of disposing of such bags, use them as multipurpose items for bugging out. How can a garbage bag be of help in a survival situation? Well, you can use them as leak-proof water containers or carrying containers. You can also use it as a poncho.

Wrap a plastic bag around your water-sensitive items such as tinder and firewood. This is because plastic provides excellent insulation to protect such items against water and dampness. Interestingly, you can stuff things such as plant leaves inside a garbage bag to serve as a makeshift pillow.

A Hammock

The obvious use of a hammock is for relaxation. However, it can become a great multipurpose item for bugging out. In a survival situation, you can use a hammock for sleeping. It will keep you off the ground and therefore protect you from elements such as wet, dusty or cold ground.

If you have a cloth type hammock, you can use it a carrying bag for extra items you collect on the way such as tinder or firewood. If you happen to find yourself close to a water body, a netting type hammock can serve as a reliable gill net for fishing.

A Tarp

tarp is a lighter and more compact alternative to a tent. Unlike a tent, a tarp has many more applications. As a shelter, it will provide you with a dependable protection against the environmental elements. I would recommend you go for a brightly colored tarp. It will act as a good signaling device in the wilderness.

Most tarps are made of waterproof material. This means you can also use it to cover your sensitive items. Also, use a tarp as a makeshift hammock to keep you off the ground if the conditions on the ground are not favorable.

Final Verdict

This list may not be exhaustive if we must list all the multipurpose items for BOB. However, at the bare minimum, you need to pack these eight items. This information is invaluable if you are serious at your prospects of becoming a successful prepper. Going by the tips, you can pack the maximum number of items for bugging out without having to carry a very heavy bag.

The list of items to pack in your bug out bag (BOB) can seem limitless. However, you cannot afford to pack all of them due to limited space available and