
How to make your own apple cider vinegar at home
As Final Preppers, we need to be ever resourceful, and growing our own food and making our own medicines certainly is part of that mindset. Here are some simple instructions in making two things – first, hard apple cider (cider with alcohol) and secondly, further fermenting the hard cider to make apple cider vinegar.
Making Hard Apple Cider
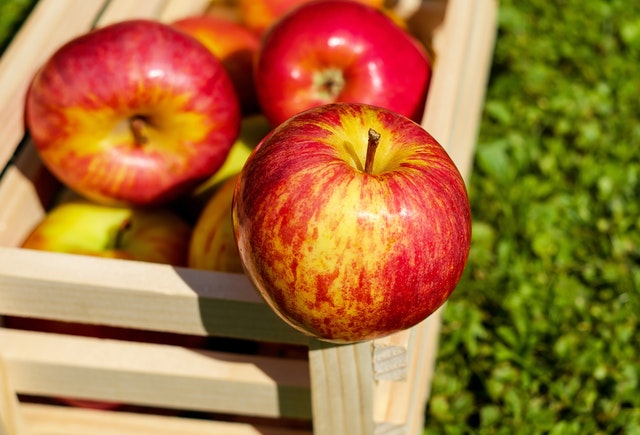
The first thing you need, naturally, are apples. Not just any apple will do, you will need apples that ripen in the fall or winter. These apples contain more sugar than summer and green apples, which don’t make good cider. In a pinch you can use any apples; you might just have to increase the sugar content of your ferment, more on this later. Let us begin:
- Gather up the fruit you need and wash it to remove any dirt and debris from the skins of the apples.
- Now, take the fruit and crush it into pulp, if you have an apple press it will be much easier.
- Drain off the juice from the pulp. If you don’t have an apple press, use cheesecloth to strain the juice and separate it from the pulp.
You can also make your hard cider from apple cider that you have bought. It can be from commercial ciders because they are usually pasteurized and this will ultimately affect the flavor.
There are two kinds of pasteurization, cold and hot.
Cold pasteurization is done with ultraviolet light to kill o the microorganisms and this is the preferred method because it impacts the flavor less than heat pasteurization.
At this point you have two choices.
You can put the juice in a large glass bottle and cover the top with a double layer of cheesecloth and secure it with a rubber band and place it in a dark, cool place for several months, the ideal temperature being around 60 degrees F. Natural wild yeasts in the air will enter the juice and start the fermentation process. Is slower than the second method of adding active yeast cultures to your juice.
Note: Bread yeasts are not good for this. You can use dry wine yeasts that work fine; these can be found online or from any home-brew store. Dry wine yeast packs are very inexpensive and work just as well as cider yeasts.
You can also make your own starter. This is your own active culture which you can add to lots of batches of cider. The formula for your own starter is:
- First, pour out about one-fifth of your cider out of its bottle; you will need this room for fermentation.
- Crumble one cake of cultivated yeast into the remaining one quart of cider.
- Reseal the bottle and shake it vigorously for a few seconds and then reseal the bottle.
- Within five or six hours you should start to see bubbling in the bottle; now fermentation has begun.
- Once you see this, lift a corner of the bottle’s lid to release the pent up gases within the bottle and then reseal it and put it in the refrigerator.
- To use it as a starter you will need to take it out of the refrigerator again and let it sit at room temperature for a few hours before you add it to your next batch of cider.
This will make enough starter for approximately five gallons of cider. Doing this step is optional, but I recommend doing it because if you have a bad batch of yeast then you have not ruined a large bottle of cider. You will know if it is a bad or dead batch of yeast because it will not begin the bubbling signifying that fermentation has begun.
Only use glass, ceramic, or stainless steel to make cider, do not use other metals or plastic which will react with the ferment and leach out toxins into the cider. The acid in the cider will also corrode most metals except stainless steel.
It is best to sanitize your container or vessel. This step is not critical but highly recommended or you could possible spoil your cider. Sanitizing your container is relatively easy; here is how I recommend it:
- Pour a cup of bleach into your vessel or container
- Fill it with cold water
- Swish it around
- Let it sit for about a half an hour
- Then pour it out and rinse thoroughly with cold, clean water.
- Repeat this process one or two more times to get any smell of bleach out of the container.
Now take your cider and add either your starter or directly add your yeast.
- Stir the mix with either a plastic or stainless steel spoon for several minutes to mix it well and then seal the lid.
- Place your container in a room, closet, or basement.
- The ideal temperature for fermentation of cider is about 60 F, but anywhere from 60-75 degrees F will work.
- If the room is too cold it will stop the fermentation and if it is too warm it will speed it up too much and will change the flavor.
- The temperature is very important for proper fermentation and you should make every effort to keep it as close to 60 degrees F as you can; doing this correctly now will really pay off in the end.
- Within a few days, you will see gas bubbling from the airlock. This is great news; that is carbon dioxide, a by-product of the fermentation process. We are now on our way to making some great cider.
- This bubbling will subside after about two weeks, signaling the end of the first step or primary fermentation.
- Now let the cider sit for a few more weeks to allow the yeast in it to settle out.
- At this point, you can pour the cider off into smaller bottles or jugs that have been sanitized
- Reseal them and allow them to sit for a week or two and then they will be ready to drink. When performing this step be careful not to slosh around the large container as this will raise the yeast sludge from its bottom and cloud up your cider. This is only cosmetic and does not affect the cider in any other way.
- Keep in mind that your cider will most likely be “still”, meaning it is not fizzy.
- However, if you let it sit for several months the fermentation will produce some fizz. Cider is like wine, it does improve with age.
- The alcohol content of your cider can be raised by raising the amount of sugar that is in your cider for the yeast to ferment and change to alcohol.
- To sweeten the cider, add either honey or brown sugar before you add the yeast or starter to it. This will raise the sugar content of the cider and once fermented will raise its alcohol content as well.
Now you have completed the first step in making hard cider. This step is also known as yeast fermentation for obvious reasons, and is done anaerobically or without oxygen. If you want to drink some of your cider, now is the time. Usually the alcohol content of most ciders is about twice that of beer, so enjoy yourself.
Making Apple Cider Vinegar
Now if you want to go on to make apple cider vinegar, this involves changing the alcohol of the cider to acetic acid of vinegar.
This step is known as “acetic acid fermentation” and is carried out by the acetobacter bacteria and unlike step one, this is done aerobically or in the presence of oxygen. The production of apple cider vinegar from apple cider involves two critical factors; temperature and oxygen content.
The temperature has to be as close to 60 F as you can get it and you have to stir your brew daily to introduce oxygen into the mix. Also covering the brew with cheesecloth will allow oxygen to enter.
The first step in the conversion of hard apple cider to apple cider vinegar is to pour off the cider into the containers you want to use to ferment your cider. These have to be sanitized as explained above. Only fill the containers about three-quarters of the way, and cover it with cheesecloth and keep it out of direct sunlight and as mentioned at as close to 60 F, but no warmer than 80 F. Take a large, stainless steel or plastic spoon and stir the contents daily to introduce oxygen into your mix.
Each time you are finished stirring, replace your cheesecloth cover. This will allow oxygen to continue to enter your mix and will allow the bubbling off of carbon dioxide from the fermentation. A mat of what is known as mother will develop at the bottom of your mix. This is harmless and is a natural part of the fermentation by the acetobacter bacteria.
Full fermentation will take about three to four weeks. As the vinegar is maturing, the mix will get a vinegar smell. This is from the acetic acid formed by its conversion from alcohol. The taste will mature over time. You should taste your mix periodically to see how far along you have reached.
When your vinegar is fully fermented you can filter it through either several layers of cheesecloth, or a plain coffee filter will work just fine. The filtering will remove the “mother of vinegar” or the cloudy sediment that has accumulated from the fermentation process. This does not have to be done and is only a matter of preference. Personally, I prefer the mother in my vinegar. However, if you choose to remove the mother this will prevent further fermentation and will prevent the vinegar from ultimately spoiling.
Another method to prevent spoilage and ensure indefinite storage of your vinegar is to pasteurize it. Pasteurization is done with heat and you have to do it at just the right temperature. This requires a minimum of 140 degrees F and a maximum of 160 degrees F. This will kill off the acetobacter bacteria and allow the vinegar to be stored indefinitely.
You do this by placing the bottle of vinegar in a large pan of water and bringing the water to the 140 to 160 F range as stated above. You should use a cooking thermometer to ensure the proper temperatures. As soon as this level is reached, remove your vinegar bottle from the pan of water and allow it to cool. Store it out of sunlight in a cool area at as close to 60 degrees F as you can. Remember, the vinegar reacts with its container and can only be stored in glass, ceramic, or stainless steel bottles.
Flavoring Your Vinegar
You can also flavor your vinegars if you like. This can be done with a variety of items including garlic, green onions, ginger, and various herbs. is will also boost the nutritional content and allow you to make some delicious vinegar that is also very nutritious.
Flavoring your vinegar with plant parts whose molecular size is too large to normally use in essential oils is not a problem, and they can easily be introduced into vinegar. The reason this can be done is because vinegar is being ingested, broken down and absorbed by your intestinal tract.
This will also allow you a method to introduce larger plant molecules that can be ingested and absorbed in the intestines that otherwise would be too large to cross the skin in an essential oil. To flavor a vinegar, suspend the vegetable or herb that you want in a small cheesecloth bag and leave it in the vinegar, usually for four days with the exception of garlic, which is only one day. Make every effort not to overload the vinegar, too much vegetable matter will ruin the acid and ruin the preservation of the vinegar and ultimately cause it to spoil.
A good rule of thumb is to mix as follows:
For every two cups of vinegar add the following for each flavor:
- Fresh Herbs
- use half a cup Dried herbs,
- use one tablespoon Garlic,
- use two large cloves Green onions, use eight small
What do you think? Still here with me? Would you surprised to find out this recipe comes from a book that has it all? Written by real doctor? His name is Ralph La Guardia. And the book is The Doomsday Book Of Medicine. And you can only find it here, at Final Prepper. Like, really.
I’m just saying.
You do the math.
Until next time, God Bless. And don’t forget to tell me when I’m right or wrong, good or bad…
As Final Preppers, we need to be ever resourceful, and growing our own food and making our own medicines certainly is part of that mindset. Here are some simple instructions