HomePosts Tagged "cooking"

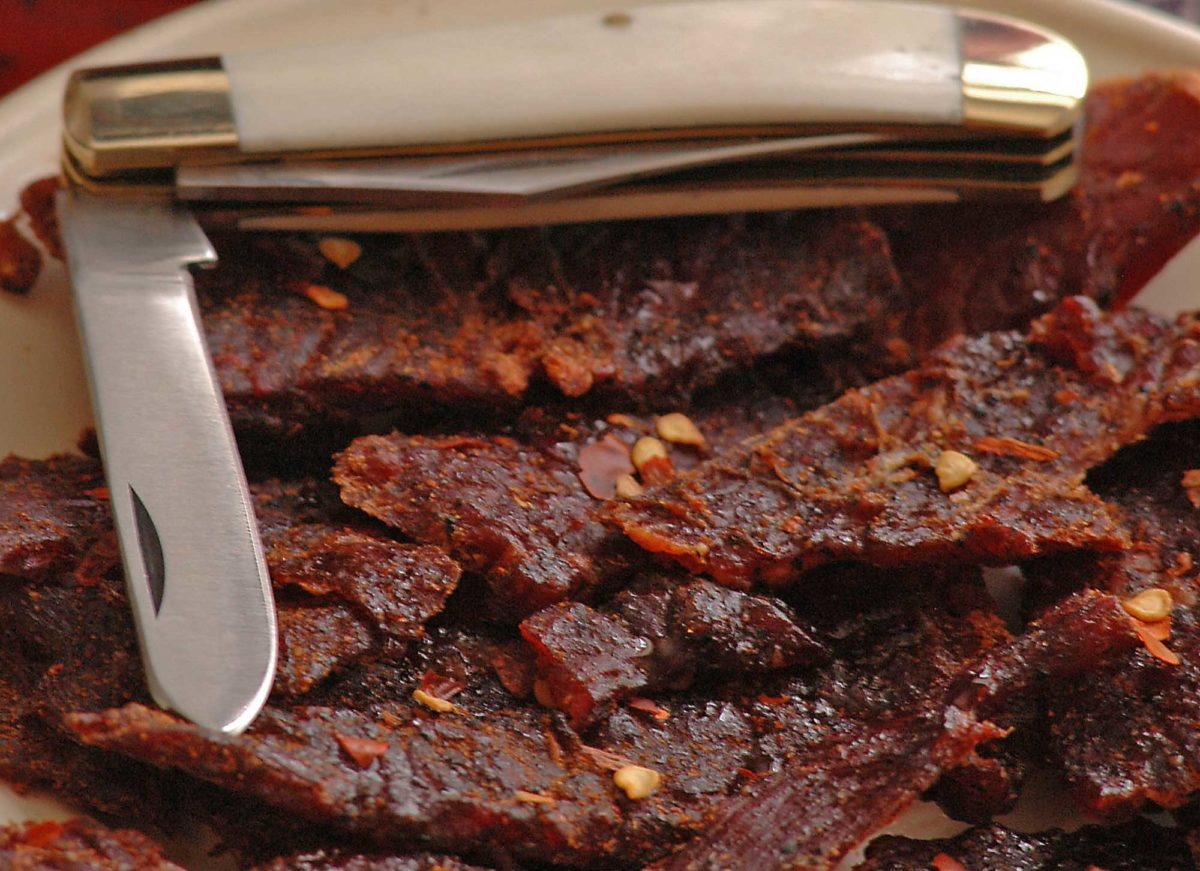
Beef jerky…the stories I could tell you about this stuff. I’m just going to say that I would marry beef jerky if that were possible (thinking about moving to state or country). Anyway, beef jerky’s awesome and, from where I stand, has but one caveat – not enough of it to go around. I mean, c’mon, I know it’s supposed to be emergency food or trail food, but who in God’s name eats just one 20g bag? It’s like saying “hey, it’s game night, and I’m gonna drink just one beer or eat one bag of chips.”

As far as a survival food is concerned, jerky’s the right call since it’s packed with just enough protein and fats to keep that engine of yours running. Sure, they’re salty AF and feels like you’re chewing on a rubber band, but it’s amazingly delicious. Since most of you are busy with your jobs and have neither the time nor the mood to replenish your beef jerky stocks, I thought about sharing with you my mouthwatering homemade beef jerky recipe.

It’s super easy to make and, most importantly, it mostly requires ingredients you probably have in your pantry. Why make beef jerky at home when you can always order some online? Because, let’s face it – as cheap as store jerky is, it’s pretty hard to find one that’s exactly the way you like it. Some are chewy, others salty as Hell and some, well, taste like crap.

First of all, preparing your own beef jerky puts you in full control of the dish, from choosing the beef cuts, all the way to the cooking part. Second, by choosing to cook rather than buy, you can make it as salty or sweet as you like. Last, but not least, beef jerky’s one of those recipes that don’t require an advanced degree in rocket science in order to prepare.

So, without further ado, here’s how to make some delish beef jerky at home.

Ingredients and Utensils

For this recipe, you will need the following:

  • Angus beef sirloin. I use around two pounds of beef for this recipe. Once you get it dried, you end up with one large zip-lock bag of beef jerky.
  • Worcestershire sauce (three-quarters of a cup).
  • Soy sauce (three-quarters of a cup).
  • Smoked paprika (one tablespoon).
  • Honey (one or two tablespoons).
  • Ground black pepper (two teaspoons).
  • Hot chili flakes (one or two tablespoons, depending on preference).
  • Garlic powder (one teaspoon).
  • Onion powder (one teaspoon).

That’s it for the ingredients. As for kitchen utensils, you will need a large bowl to mix your ingredients, an oven tray, baking paper, a pair of scissors, and, of course, a zip-lock bag for the jerky. All done gathering your utensils and all of the ingredients? Take your time. I ain’t going anywhere. When you’re ready, here’s how to put everything together.

Preparing mouthwatering beef jerky

Step 1. Take your beef cut out of the bag and wash it thoroughly. Dry with a couple of paper towels or place in a strainer.

Step 2. In a large bowl add your Worcestershire sauce, soy sauce, smoked paprika, honey, ground pepper, hot chili flakes, powdered garlic, and powdered onions. Whisk the ingredients using a fork or, well, a whisk.

Step 3. Cover the bowl with some plastic wrap and place it inside the fridge for half an hour.

Step 4. It’s now time to tend to the meat. Using a very sharp butcher’s knife, cut the meat into thin strips – if it’s easier, make stake-sized bits.

Step 5. Take a big zip-lock bag from the pantry and put the beef inside.

Step 6. Get the bowl out of the fridge and pour over the beef. Seal the bag and place in the refrigerator. Leave the meat to soak up all those juices for at least a couple of hours. Ideally, you should leave it overnight. Remember – the longer you marinate your meat, the tastier it will be. I usually keep it in the fridge for one or two days.

Step 7. When you’re ready to cook the meat, preheat the oven to 176 degrees – yup, you’ll need ultra-low heat. The idea is to dry the beef cuts, not to bake it.

Step 8. Take the marinated beef out of the bag.

Step 9. Place the meat on an oven tray covered with baking paper. Use a paper towel to soak the excess marinade.

Step 10. When the oven reached the desired temperature, stick the tray in the oven and cook for 4 to 5 hours. Every hour or so, flip the beef cuts.

Step 11. When they’re done, take them out of the oven, allow the cuts to cool down, and cut them into thin strips using a pair of scissors or a knife. Bag and tag!

Another Way to Prepare Beef Jerky

Don’t go anywhere, because this was just the warm-up. Okay, so you now know how to prepare beef jerky at home. But can you do the same, say during a shit hits the fan situation? Beef jerky is, more or less, the beauty of the best – thought it looks totally unpalatable, it’s actually delicious, nutritious, and, on top of that, it can be made anywhere and with any type of meat.

Now let’s imagine for a moment that you’re lost in the woods and you run out of food. Obviously, you’ve got to do something about it. Now, if you still have your bug out bag with you, whip out a snare and wait. Keep in mind that beef jerky can be made with any kind of meat.

However, if you want your trail snack to contain all the proteins and fats your body needs to keep on going, you would want to stick with red meat or fish. When you’re done with the gutting and butchering parts, here’s what you will need to do in order to prepare jerky.

Step 1. Find a clean spot to set up your working area.

Step 2. Use your survival knife or a very sharp rock to cut the flesh into very thin strips (half a centimeter). Don’t forget to cut across the grain, not with the grain (those muscle fibers will make meat harder to chew).

Step 3. While the meat’s still wet and tender, season it with your condiments of choice. I like to keep stuff like ginger, cumin, sugar, salt, pepper, and chili in small pill bottles. You can also make your own mix which you can use to season the meat. Put a little bit of sugar if you have some in your bug out bag.

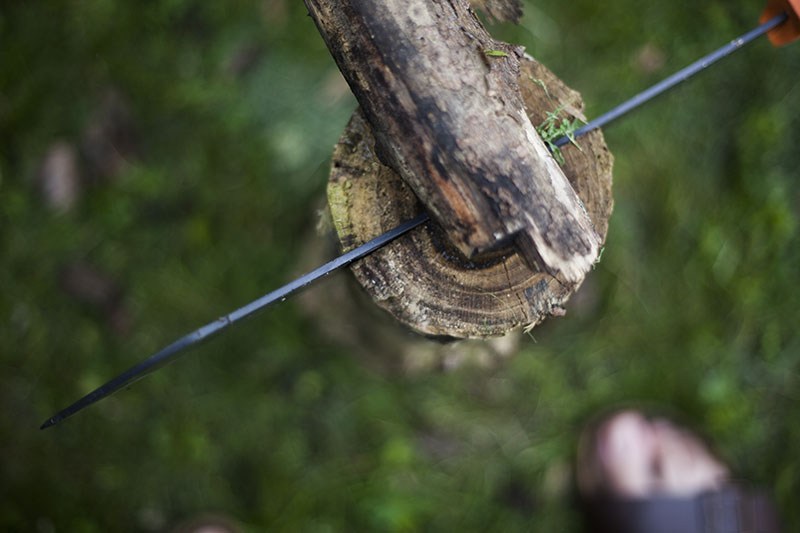
Step 4. It’s now time to create some sort of drying rack. Look around for twigs, long stick or branches. If there’s nothing available, you can always hang the meat cuts by a low-lying branch using heavy duty zip ties. Just be careful to place that meat within eyeshot because it’s bound to attract some unwanted attention (flies, mosquitoes, and, yes, even bears).

(Optional) If you want to a little smokey flavor to your meat, place it over a small campfire. Don’t leave there too long, though. You’ll want to dry your meat, not cook it. Of course, there’s nothing wrong with some BBQed game, but it tends to spoil faster.

Step 5. If you manage to improvise a drying rack, flip the meat every couple of hours. Depending on weather conditions, like wind, humidity, and temperature, it can take up to four days for the meat to lose all moisture.

Yes, I know it’s a painstaking process. More so because you’ll need to be on the lookout for critters. On that note, when it’s time to hit the sack, don’t forget to bring the meat inside your tent or improvised shelter. Obviously, you won’t be able to keep an eye out while you’re asleep.

Step 6. After a couple of days have passed, take a look at the meat. You’ll know it’s ready to eat when the meat has a brittle aspect. If you prepare jerky from red meat, the color you’re looking for is a purple-brown. On the other hand, if you’re using white meat, the jerky will turn pink-grey when it’s done.

Step 7. All that remains to be done is to cut the meat into thinner strips and to store it in a zip-lock bag or an airtight container.

Wrap-up

Taking all these facts into account, I would have to say that jerky is indeed the ultimate survival food. Given the right storage conditions, a batch of jerky can last for at least a couple of months, if not for a whole year.

Now, as far as the oven-drying version is concerned, I would advise ditching the salt. Yes, I know that salt and jerky is a marriage made in Heaven, but the soy sauce adds and smoky taste to the meat, which means that it doesn’t need extra. Of course, if you’re not a big fan of soy, you can always replace with two tablespoons of rock salt.

I don’t know about you, but I like to add some kick to my jerky. If you want your snack to be spicier, you can add half a teaspoon of Tabasco in addition to the chili flakes. Yes, I know it sounds pretty hardcore, but hey, at least your jerky won’t be bland.

One of my friends told me that it’s also possible to prepare beef jerky using a dehydrator. Remember my powdered eggs recipe? Well, the method’s more or less the same. The only advantage of using a dehydrator instead of a regular oven set on ultra-low heat is that it reduces the cooking time by at least one, maybe two hours. If you have one of those gadgets in the kitchen, you should definitely try it out.

One more thing – the meat itself. Though I highly recommend using sirloin for this recipe since the cut will be, well, chewier, you can use whatever meat you prefer. Just be sure it has the same amount of fat as sirloin. Haven’t tried it yet, but from what I heard, jerky prepared from fish like rainbow trout, tuna or salmon is absolutely divine. Trouble is that it’s very hard to get ahold of a good recipe and most of the stuff on the market looks way too nasty.

So, here’s where I take my love. Hope my little winding has managed to convince you that making your own beef jerky is better than having to go through hundreds of Google pages in order to find the right one. As always, don’t think of cooking as something you need to do – have fun around the kitchen. Play some tunes. Work on your air guitar skills; whatever floats your boat. What do you think about my beef jerky recipe? Hit the comments section and let me know.

Beef jerky…the stories I could tell you about this stuff. I’m just going to say that I would marry beef jerky if that were possible (thinking about moving to state

Nothing beats mom’s homemade food. Unless you live alone or don’t have any cooking skills or no emergency food left in the pantry. Well, you know how it goes – when life wants to throw crap at you, it uses a shovel. However dim the perspective may be, Mother Nature will always provide, if you know how to ask.

In today’s article, I’m going to talk about one of the most interesting birds out there – the pigeon. Some love them because they’re friendly and chatty and pettable, others not so much. I personally neither like nor hate them – they’re okay as long as they stay away from my car!

Anyway, even though the perspective of catching your own food is not something one would do out of pleasure, there are times when stop caring about those things and do what’s best for your growling stomach. If you find yourself without food, you can always enjoy a nice and tasty pigeon stew or steak.

The idea of eating pigeon meat may appear as revolting. However, history reveals that pigeon meat is not only palatable but a delicacy which once adorned royal feasts. During the 19th century, around Boxing Day, young couples and families would head out of the house to do a little bit of ice-skating.

As the weather was nippy, the skaters needed something hot and tasty to put some color back into those flushed cheeks. The snack of choice was the so-called Pigeon Pie Mystery. Fast-forward in time, pigeons have become associated with nasty things like car-wreaking, necrophagic behavior, and uncleanliness.

Despite these objections, pigeon meat is safe to eat, but you’ll need to catch them first. Sure, they may be friendly and a bit curious, but that doesn’t mean they’ll allow you to gut them.  In today’s article, I’m going to show you a quick and rather ingenious way of trapping pigeons, using common household items. Enjoy!


Gathering the materials for your first pigeon trap

For this project, you will need the following materials:

  • Plastic straw rope (you can replace it with dental floss or any kind of cordage).
  • An old plastic bottle.
  • Plastic bucket.
  • Wire cage (it doesn’t have to be new; if you can’t find one around the house, you can always go and buy one from your local flea markets or thrift shops).
  • Styrofoam board (should be about the size of the wire cage).
  • Crafts knife.
  • Pole.
  • Glue.
  • Small wooden board.
  • Hammer and nails.

Are you done gathering the necessary materials? Wonderful. Here’s how to piece together your first pigeon trap.

Crafting the backyard pigeon trap

Step 1. Remove the part of your wire cage. For this project, you may want to get one of those rectangular cages (mine is an old chicken coop I found in the attic).

Step 2. Glue the Styrofoam board to the top part of your cage. Allow the glue to work its magic before proceeding to the next step.

Step 3. Using your crafts knife, cut a hole in the Styrofoam board. The hole should be wide enough for your plastic bucket to pass through with any problems but, at the same time, prevent the pigeon from escaping.

Step 4. Once you’re done cutting the hole in the Styrofoam board, use the same knife to cut two small entrance on each side of the plastic bucket. If you really don’t want to sacrifice a bucket, you can go for one of those one-kilo yogurt containers. Just be sure you keep the lid.

Step 5. Apply some glue over the edges of the lid and place in on the bucket. Allow the glue to dry.

Step 6.  It’s now time to craft your wooden lever. Nail the small wooden board to the top part of the pole. Make sure that the board can move up and down freely.

Step 7. Plant the pole-and-board lever into the ground, just above the Styrofoam board opening.

Step 8. Make one small hole in the front part of the board and another one in the back.

Step 9. Draw some cordage through both holes. Ensure that the cord drawn through the hole made in the front back of the board is long enough as to allow the bucket to reach inside the cage.

Step 10. Tie the front string to the bucket’s handle.

Step 11. Fill your plastic bottle with water and tie it to the back string.

Step 12. Place a couple of seeds, kernels or breadcrumbs on the bottom of the bucket, and wait. Congrats! You’ve just built your first pigeon trap.

More on the makeshift backyard pigeon trap

The idea behind this simple trap is simple: attracted by the seeds or kernels placed on the bottom of the plastic bottle, the pigeon will land on the edge of the Styrofoam board. Bear in mind that pigeons are cautious by nature, meaning that they will take a good look at your thingamajig before stepping inside the trap.

If you cut only one small hole in the side of the bucket, the pigeon will not approach the seed, because it will realize that they’re no way out of there. That’s why you should have two openings.

Once the little sucker starts eating, it will probably figure out that everything’s okay and will step on the bottom to stuff its beak with them goodies. The second it steps inside, the bucket will be lowered inside the coop, trapping the bird.

You should pay extra attention to how the bucket’s lowered inside the cage. For this trap to work, the cord’s length should allow for the bucket’s body to reach the inner part of the cage, with the lid blocking the opening made in the Styrofoam board.

I can’t give you any precise measurements – it’s a trial-and-error process. One last thing: the plastic bottle’s contents. It would be wise to fill it with water instead of sand or earth; the trap’s sprung by the pigeon’s own weights. Putting anything heavier inside the bottle will make the trap useless.

That’s it on my makeshift pigeon trap. What do you think? Hit the comments section and let me know.


Other self-sufficiency and preparedness solutions recommended for you:

The Lost Ways (The vital self-sufficiency lessons our great grand-fathers left us)

Survival MD (Knowledge to survive any medical crisis situation)

Backyard Liberty (Liberal’s hidden agenda: more than just your guns…)

Alive After the Fall (Build yourself the only unlimited water source you’ll ever need)

The Lost ways II (4 Important Forgotten Skills used by our Ancestors that can help you in any crisis)

The Patriot Privacy Kit (Secure your privacy in just 10 simple steps)

Nothing beats mom’s homemade food. Unless you live alone or don’t have any cooking skills or no emergency food left in the pantry. Well, you know how it goes –

Recall how almost all material on prepping says something about having at least one cornbread around the house? It’s, indeed, delicious, nutritious, and, all thing’s considered, very easy to make.

As I’m always on the lookout for great survival recipes, a couple of days ago, I stumbled upon this nifty cornbread recipe. The thing that stroke me is that I still can’t figure out if this thing should be served with something on the side, like some butter or cheese, or is more of a dessert. Well, it’s up to you to figure it out.

Anyway, the cornbread recipe I’m about to show you is not only very easy to prepare, but it also has a peculiar name. In Mormon tongue, this type of cornbread is called a Johnnycake. No comments there. I will do some more digging to figure out why it’s called that way (if you know, don’t be stranger and share with the rest of the community. So, without further ado, here’s how to make some Mormon Johnnycake.

Gathering the ingredients

For this recipe, you’ll need the following:

  • Two eggs. This recipe calls for both egg white and yolk.
  • One cup of buttermilk.
  • Two or three tablespoons of molasses.
  • Half a cup of all-purpose flour.
  • One teaspoon of salt.
  • One teaspoon of baking soda.
  • Two cups of Yellow cornmeal (you can find that at your local food market).
  • Two or three tablespoons of melted butter.
  • (Optional) Agave nectar.

All done gathering the ingredients? Neat! Put your chef’s bonnet on because it’s time to do some major cooking.

How to prepare Mormon Johnnycake

Step 1. Start by grabbing a baking dish or cast-iron skillet. To ensure that your Johnnycake won’t stick to the bottom, grease it with some butter, tallow or a little bit of sunflower oil.

Step 2.  Preheat your oven to 425 degrees Fahrenheit.

Step 3. Grab a large bowl and add your eggs, buttermilk, and molasses. Give them a good stir with a whisk.

Step 4. Get another mixing bowl for your dry ingredients.

Step 5. Grab a flour sifter and get to work on that flour. You can skip this step if you like your bread with air bubbles.

Step 6. Add your salt and the baking soda.

Step 7. It’s now time to put everything together. Using a mug, add the dry ingredients to the bowl with the buttermilk, honey, eggs, and molasses. Don’t add it all at once. Empty the contents of a cup and slowly whisk the mixture. Do this until you’ve incorporated all the flower.

Step 8. The batter should be smooth. If it’s too watery, add some flour and whisk.

Step 9. It’s now time to add your cornmeal. Just like before, pour half a cup, and gently whisk it. Yes, I know it’s frustrating, but do you have anything better to do?

Step 10. When you’re done incorporating the ingredients, transfer the batter to the cast-iron skillet or baking dish.

Step 11. Stick the baking dish\skillet into the oven and bake for 15 to 20 minutes until it’s golden brown. To see if your Johnnycake is ready, use a toothpick to test the batter. If it comes out clean, it means that it’s ready.

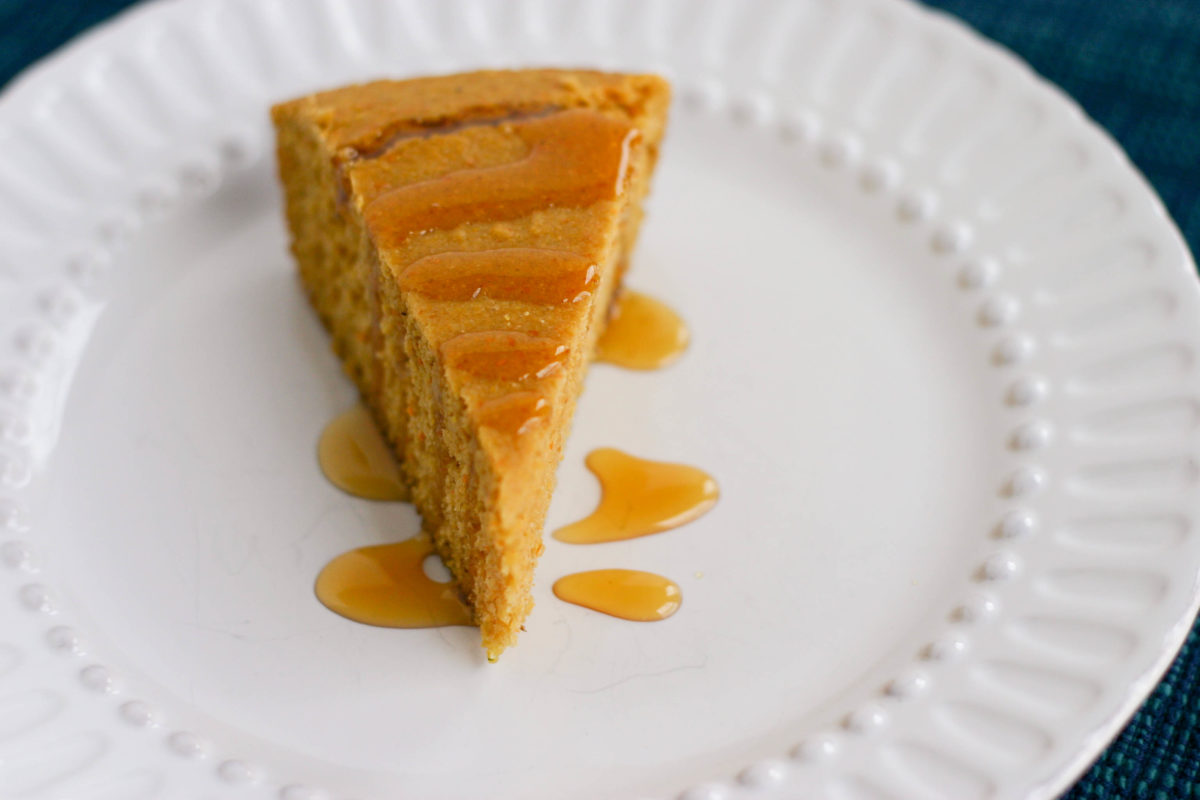
Step 12. Johnnycake is what chefs like to call comfort food. Serve it on rainy or cold days with plenty of butter. If you like to turn it into a desert, pour some agave nectar or maple syrup on top. Enjoy!


An alternative way to prepare Mormon Johnnycake

This recipe’s extremely versatile. Although the classic recipe calls for oven or stove baking, there’s another approach. Called Hoe Cakes, it’s the Southern take on the original Mormon Johnnycake recipe. The major difference between the two is that the first gets you a classic bread loaf, while the latter is more, well, pancakes. Anyway, here’s how to make some delish Southern Johnnycake pancakes for breakfast.

Ingredients

  • One cup of flour.
  • One cup of cornmeal.
  • Two and a half teaspoons of baking powder.
  • One teaspoon of salt.
  • Three-quarters of a cup of milk.
  • Half a cup of water.
  • Half a cup of melted butter.
  • One teaspoon of vanilla.
  • Half a tablespoon of nutmeg.

How to prepare Southern-style Johnnycakes

Step 1. Take a large bowl and mix your flour, sugar, baking powder, salt, nutmeg, sugar, and cornmeal.

Step 2. Using your fingers, make a little hole in the center of your dry mix.

Step 3. Put the milk, egg, vanilla, melted butter, and water in the hole.

Step 4. Mix the batter using a whisk or a fork. Since Southern Johnnycakes are closer to pancakes than to bread, your batter should be silky smooth.

Step 5. Take a cast-iron skillet or a frying pan and place it over the oven. Set to medium-high heat. You can use butter to fry the Johnnycakes or some cooking oil. I personally prefer to use tallow.

Step 6. Using a ladle or a small cup, pour some batter in the skillet and fry. Once the bottom is golden-brown, flip it and fry the other side. Continue until there’s no more batter left in the bowl.

Step 7. Like in the first case, serve hot, with some agave nectar or maple syrup. If you want to turn this into a really fancy dish, you can also add some frozen berries.

Wrap-up

As far as the traditional Mormon Johnnycake is concerned, I believe you can turn it into a full-fledged bread if you skip the sweet ingredients. Yes, I know that it’s hardly a substitute for oven-baked peasant’s bread, but it’s super easy to make and requires no cooking skills at all. If you’re careful enough to store it in a zip-lock bag or airtight container, that loaf can last for at least a couple of weeks, if not months.

The traditional recipe calls for the bread to be served hot out of the oven. Well, it is possible to eat it stone-cold but doesn’t have the same taste. What do you think about the Mormon Johnnycake? Hit the comments section and let me know.


Recall how almost all material on prepping says something about having at least one cornbread around the house? It’s, indeed, delicious, nutritious, and, all thing’s considered, very easy to make.

Oh, how I love food! Let me count the ways.

Actually, I don’t like food-food, but the homemade variety. And nothing beats a meal cooked during an SHTF situation.

Yes, I know how that sounds, but admit it that the best meal you’ve ever eaten was back when your can was on the line. Even spam taste better when it’s eating from tin plate set beside a romantic 24-hours emergency candle.

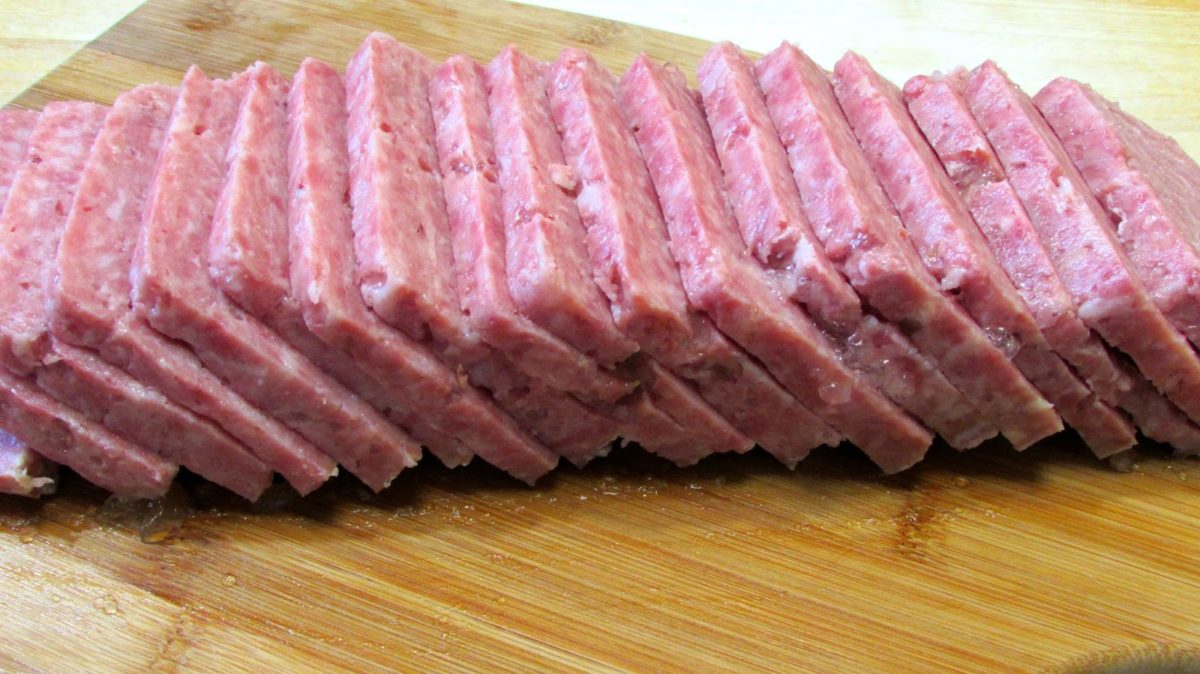
Which brings us to the topic du jour – how to make spam at home.

I know most of you people have enough cans in your emergency supplies pantry to make it through WWIII, but wouldn’t it be neat to learn how to make some yourself instead of buying? Sure it would, and I am going to show you how easy it is to make this stuff. What can I say about spam? The dish is so popular that it inspired songs and even phrases like the one we use each day: “for when the spam hits the fan.”

Now, as for the recipe, I have to warn you that it takes a little bit of muscle to pull this through because everything will have to chop, diced, and ground. So, without further ado, here’s how to prepare emergency spam. Ingredients:

  • Pork shoulder (about two-and-a-half pounds). You can use other pork cuts as well. Just be sure that your cut of choice has enough fat on it.
  • Good-quality ham (about three ounces).
  • Tender Quick Meat Cure (bought mine from Amazon. Aim from one tablespoon at first and then half a tablespoon later.
  • Garlic (two cloves are more than enough for this recipe).

Already gathered your ingredients? Great! Then it’s time for phase two of our spam cookery.

How to prepare homemade spam

Step 1.

Get your oven ready. Pre-heat to 300 degrees Fahrenheit.

Step 2.

Tend to the meat. Take your pork shoulder or cut of choice and cut it into small cubes.

Step 3.

Set up your grinder. After you finish installing the thingy, grind the pork shoulder cubes. If you prefer your mixture to be less chunky, grind the meat one more time.

Step 4.

Ham and garlic. Take your ham and mince it. Place it afterward in a food processor. Now mince your garlic and add it to the ham.

Step 5.

Finely mince the ham and garlic. Don’t make it into a paste, though.

Step 6.

Grab a large bowl and wash your hands. Place the ground pork meat, ham, and garlic in a large bowl. Add one tablespoon of Tender Quick Meat Cure and use your hands to mix the ingredients. If the mix seems too loose, add half of spoon of Tender Quick Meat Cure.

Step 7.

It’s time to shape your ham. Grab a baking tray from the pantry. For this recipe, I used a small ceramic terrine tray my wife got from her mother. Put the mixture inside the tray and use your hands to spread the mixture over the entire surface.


Step 8.

It’s oven time! By now, your oven should have reached the desired temp. Cover you spam tray with an aluminum foil. Make sure it’s wrapped around nice and tight, especially around the handles. Now, take a large baking tray from the pantry and place the spam tray smack in the middle. Fill the larger with water (should be ¾ full). Place in the oven for three to four hours. Check the larger tray every half an hour and make sure that there’s still water there.

Step 9.

Time’s up! Let’s pop the lid. This is the most important part of making ham. Remove the tray from the oven and allow it to cool for a bit. After that, use some gloves or something to get the spam tray out of the bigger tray. Have to warn you that this part’s a little bit disgusting. Take the aluminum foil off the spam tray. That yellowish goo on top of your meat is pure fat. Take a ladle or a large spoon and remove the excess fat. Temporarily place it in a plate or bowl. After it cools down, throw it in the garbage because it cannot be reused. Don’t forget to leave a thin layer on fat on top of your spam.

Step 10.

Bag and tag. Grab yourself a lid from the pantry and place it on top of the spam tray. All you need to do know is to find some sort of weight to put on top of the lid. This prevents the blob inside from expanding and from drawing too much moisture from the air. I used two small bricks to weigh down the lid, but you can use anything you have on hand as long as it’s heavy and keep the lid shut.

Step 11.

The ice-man cometh! Place the tray with the weight on top inside the fridge. You can also turn this into full-blackout recipe by swapping the fridge with a cool and dry place. Don’t worry about the meat turning bad because it’s packed with enough salt.


That’s it!

If you’ve gone through every step, you should have fresh, homemade spam in 24 hours or less. Now, bear in mind that this is not the canned spam variety which means that it doesn’t have a very long shelf life. However, if you know a little bit about canning, you can go for the kill.

I haven’t gotten around to canning my span mostly because I don’t know a thing about how to seal those blasted things. My mother told me that there’s a special tool for that job, but I’ve yet to discover it. Anyway, it’s not like there’s enough spam to can – my family made quick work of it.

Like my recipe? Let me know your thoughts in the comment section. Also, if you know of any canning method, I’ll be grateful if you would care to share it.


Other Self-sufficiency and Preparedness solutions recommended for you:

The Lost Ways (The vital self-sufficiency lessons our great grand-fathers left us)
Survival MD (Knowledge to survive any medical crisis situation)
Backyard Liberty (Liberal’s hidden agenda: more than just your guns…)
Alive After the Fall (Build yourself the only unlimited water source you’ll ever need)
The Lost ways II (4 Important Forgotten Skills used by our Ancestors that can help you in any crisis)
The Patriot Privacy Kit (Secure your privacy in just 10 simple steps)

Nothing beats a cooked meal during a SHTF situation. You have no idea how easy it is to make this stuff.

In my opinion, every prepper needs to know how to cook. More than that, he or she must become acquainted with the intricacies of preparing the game. Since it’s nearly impossible for me to cover every kind of game out there, I’m going to stick with something smaller and found in almost every corner of the globe – the rabbit.

Yup, you’ve guessed; in today’s article, I’m gonna show you how to deep-fry Bugs Bunny. Yes, I am well aware of the fact that they are cute and friendly and make great house pets, but do keep in mind that in SHTF situation, there’s no room for bias or, in this case, for mercy.

Anyway, you should know that in many countries, the rabbit is considered a delicacy, especially the wild one. Not that there’s anything wrong with domesticated bunnies, but those with ‘freedom to roam’ have an entirely different taste – it’s exactly the same thing between eating domesticated and wild hogs.

Now, the recipe I’m about to show you is very easy to prepare and, as the headline suggests, it involves plenty of oil. Consider this dish a prepper’s take on Colonel Sanders’ iconic fried chicken. So, without further ado, here’s how to prepare a Kentucky-style fried rabbit.

Gathering the ingredients

For this dish, you will need to following ingredients:

  • One young rabbit. Regarding the meat, you can use almost any part. I prefer the cottontails because they’re easier to prepare and far juicier compared to the other cuts.
  • Two cups of buttermilk.
  • Two tablespoons of Italian seasoning or your favorite spice mix. Just make sure it contains oregano, thyme, and dried parsley.
  • One tablespoon or paprika.
  • One tablespoon of powdered garlic.
  • Two or three tablespoons of black or cayenne pepper.
  • One and a half cups of all-purpose flour.
  • One teaspoon of salt.
  • Two cups of vegetable oil or tallow.

You done gathering the ingredients? Great. Let’s get to the fun part.

How to prepare Kentucky-style fried rabbit

Before seasoning your rabbit, you may want to brine it. The thing about using wild rabbit for this recipe is that it comes out all dry. Brining the rabbit beforehand ensures that the, well, nuggets will be moist and crispy at the same time.

To do that, grab a zip-lock back an add a ¼ tablespoon of rock salt and four cups of water. Put the cottontails inside and leave in the fridge for four to 8 hours. After that, take the rabbit out of the bag and start cooking.

Step 1. In a large bowl, put your buttermilk, paprika garlic powder, pepper, and Italian seasoning. Whisk the ingredients.

Step 2. Coat the cottontails with this mixture, stick in a zip-lock bag, and place in the fridge for a couple of hours or overnight.

Step 3. When you’re ready, take a skillet or frying pan and fill it with oil or tallow. Ensure that the oil completely covers the cottontails. Otherwise, you will need to flip it more times than necessary.

Step 4. Take the rabbit out of the zip-lock bag and place it into a strainer. Allow your cuts to drain for 15 or 20 minutes.

Step 5. While the rabbit’s sitting in the strainer, prepare the crust. Normally, you would have to put flour in a deep plate or something and sort of roll over your cottontails in it. However, there’s a faster way, one that does not involve getting your hands too dirty. Take a large zip-lock bag, add all-purpose flour and the salt.

Place your rabbit cuts inside, seal the bag, and shake. That’s it! All you have to do now is to use some thongs to take out the flour-coated rabbit and to place on a plate while waiting for your cooking oil to reach the desired temperature.

(Optional) If want a crunchier crust, follow the Viennese schnitzel recipe. Put some all-flour in a plate, some breadcrumbs in another one, followed by a third plate which contains one whisked egg, two tablespoons of milk, a dash of salt and pepper. First, roll the cottontail through the flour, dip in the eggs and milk mixture, and finally roll through breadcrumbs.

Step 6. Set the heat to medium-high. You’ll need a temperature of at least 325 degrees Fahrenheit to deep-fry those rabbit cuts.

Step 7. When the oil gets hot, add the cottontails. Deep-fry them for 8 to 12 minutes. Keep in mind that rabbit tends to suck a lot of oil, so be ready to pour some more if the oil level drops.

Step 8. When they’re done, place on a piece of paper towel. It will absorb the excess oil. That’s it! Serve while it’s still hot. Rabbit cottontails is a very versatile food since it can be paired with almost any kind of side-dish. I personally like to serve them with mashed or blanched potatoes and some green lettuce. Since it’s a deep-fried dish, you can always serve it with garlic sauce and a cold beer.

Wrap up

Preparing the rabbit is not that difficult. Of course, there are other ways to prepare this sort of game, but those recipes call for a lot more steps and ingredients. The best thing about this dish is that you can prepare it in any kind of setting. I personally like to prepare this recipe during a family camping trick. All you need are the right spices, a survival knife, a medium-sized cast-iron pot, and a source of the fire.

If you can’t afford to carry a pot, you can always use your canteen. As for frying the cuts, you can replace oil with tallow if you’ve got some of you. Always remember that domestic rabbits don’t need brining. Moreover, while keeping the wild rabbit cuts in the salt and water solution, you would do well to set a timer. If it stays longer than 8 hours, it will get all mushy during the deep-frying process.

That about covers it for my mouthwatering Kentucky-style fried rabbit. What do you think about this recipe? Hit the comments section and let me know.

Every prepper needs to know how to cook. More than that, he or she must become acquainted with the intricacies of preparing the game.

I don’t need to remind just how darn important it is to know what to cook when the power goes out. There are so many recipes on the grand world-wide-web that you need only type in “gimme food” in Google to figure out your next step.

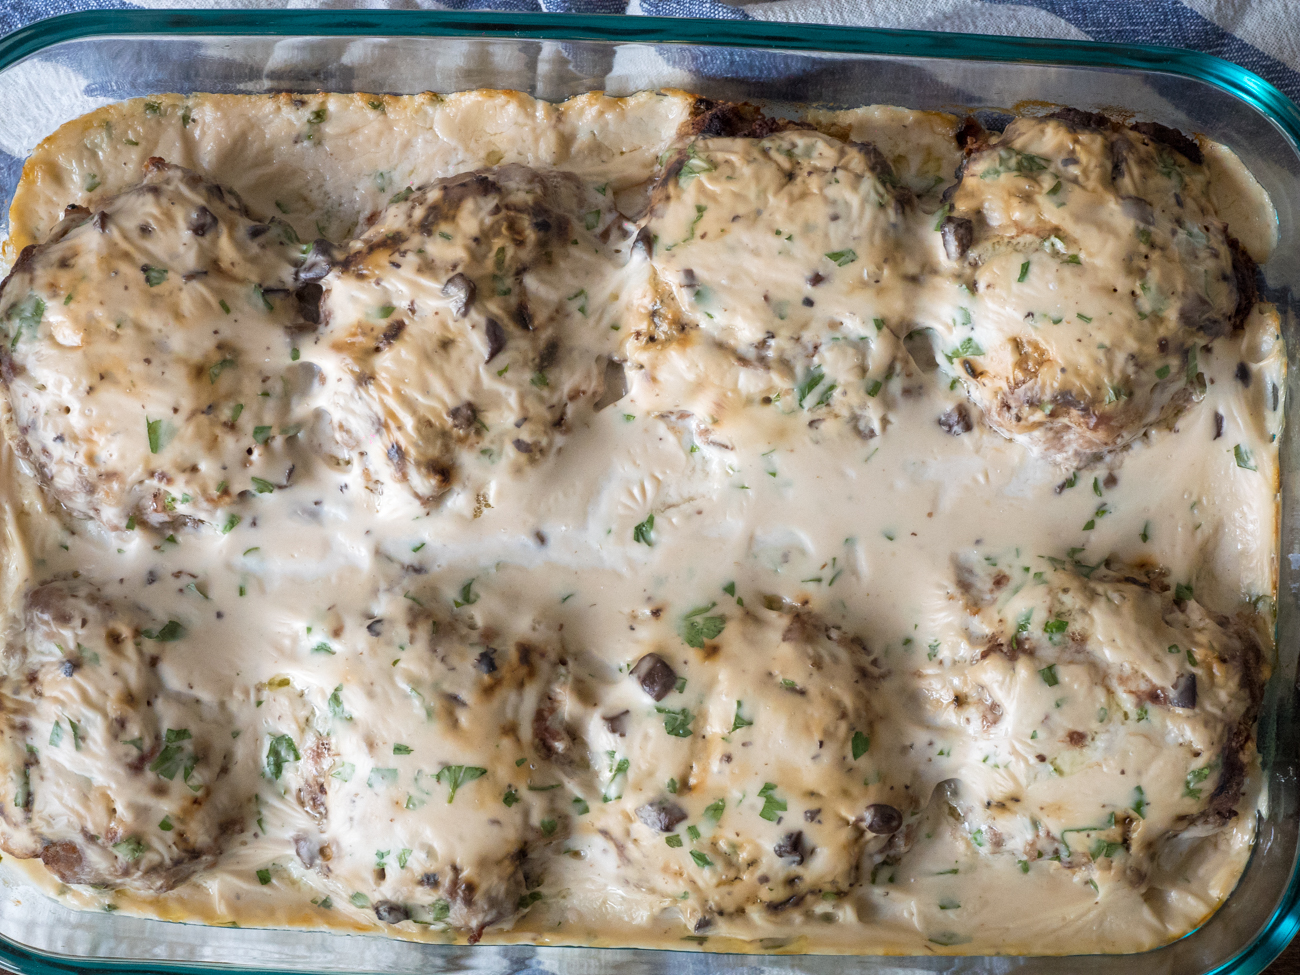
The trouble with these “whip-up” dishes, as I like to call them, is that they have a very limited shelf life, despite being bagged and refrigerated. In my searches for the next cannable superstar (be sure to check out my article on canning and pickling pork meat), I’ve stumbled upon a most interesting recipe – the so-called Poor Man’s Hamburger. According to its description, it should be an Amish dish, although I find it very hard to make a connection.

Anyway, the recipe’s pretty straightforward and if you have a good pressure canner, you can keep this stuff in your pantry for at least three months if not more. The weird part about preparing this recipe is who or rather what gets the spotlight – though it’s a meat-based dish, the gravy’s actually the one who steps into the limelight.

Crazy, right? Not in the very least! As you’re about to see, the gravy you get is what you might consider a great SHTF asset – it can very easily be combined with the meat of all sorts (chicken, beef jerky, spam) but it can also be eaten, well, plain, as a sort of early-morning broth.

Before we get to the cooking part, I should warn you that this recipe takes time. If you have something big planned that day, I will leave it for another day, preferably a lazy Sunday. So, without further ado, here’s what you’ll need to do in order to prepare Cannish, aka the canned version of the Amish Poor Man’s burger.

Gathering your utensils and ingredients

For this recipe, you’ll need the following tools:

  • Canning jar (the bigger, the better).
  • Plastic container (I would go for a 35 quart because you’ll have a lot of stuff to mix)
  • Food processor.
  • Oven grill (if you don’t have one, you can always use the top part of an old BBQ which you can place it over a tray).
  • Mouth rim (you’ll need this to shape your burger patties).
  • Skillet (for cooking the gravy).
  • Aluminum foil.
  • Lots and lots of patients.

As for the ingredients, go raid the pantry or the local farmer’s market of the following supplies:

  • Celery (around five cups).
  • Onions (five cups will do).
  • Saltines (I used one and a half pounds of saltine or six packs).
  • Eggs (two dozen).
  • Milk (five cups).
  • Lots of salt and pepper.
  • Ground beef (this recipe calls for at least 30 pounds. That’s around two or three big-ass rolls).
  • Canned mushrooms (five cans).
  • All-purpose flour.

Yes, I know it’s a very long list, but as I’ve told you, this is the kind of recipe that kind of makes you spend the entire day in the kitchen. Still, do bear in mind that will also be some waiting time, which would be right after you stick those burger patties into the over. All done with the tools and ingredients? Great! Let’s get right down to business.

How to prepare Cannish

Step 1. Grab a cutting board, a sharp knife, and get to chopping. Have your food processor ready, because everything you’ll chop or crush from this point forward will require a little bit of mixing.

Step 2. Leave the chopped onions and celery aside for the moment. As for the saltines, you can either use a mortar and pestle to crush them or place everything inside a zip-lock bag and use a rolling pin to beat the living daylights out of it. When you’re done, add them to the food processor, and give them a good mix (I scrambled them for 10 or 15 seconds to make sure that there are no chunks left).

Step 3. Grab yourself a large bowl and crack open two dozen eggs. Whisk the shit out of them.

Step 4. Measure five cups of milk.

Step 5. It’s now time to put everything together. Place the plastic container on your work table and add your chopped celery & onions, saltines, whisked eggs, and milk.

Step 6. Get dirty! You have two choices for the mixing part – wooden spoon or hands. I personally prefer the latter (make sure you’ve washed your hands before dipping them in the mix).

Step 7. Add some salt and pepper to the container (I used two tablespoons of rock salt and one and a half tablespoon of grounded black pepper) and continue mixing.

Step 8. Stick the container in the mix in the fridge for 30 minutes. It will be easier to handle once you get to the patty-making part.

Step 9. Get your ground beef out of the freezer and use a knife to remove the membranes. Add the meat to your plastic container and use your hands or a wooden spoon to bind the mixture. FYI, it’s easier to do this if you dip your hands in ice-cold water. Fill a small bowl with cold tap water and keep it next to your container.

Step 10. Start making patties. Take a handful of meat and stick in the metal rim. If you’re skilled patty—maker, you can ditch the ring, and form them by hand. Don’t make them too big or thick. Remember that your goal will be to place each cooked patty inside the canning jars. You shouldn’t also take into account that this type of meat is packed with fat, which will kind of end up in the oven tray.

Step 11. Stick the formed patties in the fridge for 15 or 20 minutes. To prevent them from sticking to each other, create patty layers separated by baking parchment.

Step 12. Get the patties out of the fridge and arrange them on your grill. If you use the exact amount of ingredients, you’ll end up with 28 or 29 burger patties.

Step 13. Preheat your over to 375 degrees Fahrenheit.

Step 14. Place the BBQ grill with a tray in the oven and bake for 35 minutes. Don’t forget to flip the patties after 15 minutes. Depending on your rig, this step can take anything from 2 to 6 hours. In my case, it took about three and a half hours to bake all the burger patties. When they’re done, place them in a large roasting pan. Cover it with two layers of aluminum foil. Allow the burgers to cool down.

Step 15. In the meantime, get a skillet and prepare the gravy. Here’s how to do it. Get one and a half cup of fat from the patties and add it to the skillet. Set your heat to medium-low. After the fat begins to warm up, and half a cup of all-purpose flour.

Use a spoon to stir. Don’t rush it! Gravy’s something that takes a lot of patience. If you see that the mix is about to go up in flames, lift the pan off the stove, and put it back again. You’ll know that the gravy base is done when it turns light brown.

Step 16. It’s time to prepare the mushroom soup. In a big pot, pour the contents of five mushroom soups cans. Using an empty can as a measuring cup, add five cups to the shroom soup and bring it to a boil.

Step 17. While the shroom soup’s still hot, grab a ladle and carefully add it to the browned flour mixture. The secret to not ending up with burned gravy is to stir while pouring shroom soup with the ladle. It may take a while longer, but it’s worth it. If you feel that the mix is too thick for the spoon, use a whisk instead.

Step 18. When you’re done adding every last drop of shroom soup, give the mix a good whisk, and let it bubble for five more minutes before killing the flame.

Step 19. Take a breather. Smoke if you have them. After the gravy cools down a bit, it’s time to put everything together.

Step 20. Give those canning jars a good wash. You can either submerge them in a tub filled with water and dish detergent or boil the Hell out of them before using. Your call.

Step 21. Place five burger patties in each canning jar and cover with gravy. Put the lid on, tighten it, and allow the jars to cool down overnight before placing them in the fridge or pantry.

Congratulations! You’ve just made your first batch of canned Amish Poor Man’s burgers. Your kitchen probably looks like a scene from WW2 or something, but who cares when you have delish marinated burgers. If stored probably, you won’t have to worry about running of food, at least for a couple of months. Although the canning part allows you to store this stuff in any place outside of the fridge, I would strongly advise you to keep your jars refrigerated and to consume it in two months’ time.

Another thing about this recipe is that it will take a while to figure out how to make the gravy base. For my part, I had to discard the contents of two skillets and ended up using more than three cups of fat before I was able to make a ‘stable’ base. As I’ve mentioned, the trick is to gently stir the mix and to lift the skillet every now and then. If the weather’s nice, you can always skip the oven part and cook your patties over a charcoal barbeque.

As for the mix, if you can’t find any saltines, you can always replace them with other types of crackers. Just make sure that they’re salty. The dish can be eaten hot off the oven but, if you want to get more kicks out of it, stick in the fridge and leave it overnight. By morning, the patties would have sucked in all that delicious gravy. You can heat them up in your microwave or in a pan with boiling water.

That’s it for my Cannish recipe! What do you guys think about this SHTF dish? Hit the comments section and let me know your thoughts.

Before you go, you may also like:

This is more than just about your guns…
How to survive any medical crisis situation with ease
10 Easy Steps to Secure your privacy
Secret Military Solution For Power Independence

DIY Unlimited water source
Why a food reserve is way better than the Federal Reserve
Lost Skills of our Ancestors that still work today

Anyway, the recipe’s pretty straightforward and if you have a good pressure canner, you can keep this stuff in your pantry for at least three months if not more.

There’s nothing more American than bacon, and don’t even try to deny that. We love it, cherish it, and with good reason since breakfast isn’t the same without those mouth-watering, fat-laden pork strips. I know that for the most part bacon’s a big dietary no-no, but what would life be if we couldn’t indulge on simple things like bacon?

Yup, you’ve guessed it – since he’s a big fan of bacon and, to that end, he has searched high and low for all kinds of wacky ways to make those juicy strips last longer. That’s the trouble with bacon I guess – you’ve got to cook it as fast as possible. Otherwise, you will end up with some bad to the bone meat (insert guitar riff here), along with a lot of crushed breakfast dreams and hopes.

Anyway, since yours truly hasn’t better things to do around the house than looking for ways to preserve food, in one of my scavenger hunts, I’ve stumbled upon a kick-ass bacon storage method. Of course, I couldn’t resist the urge of writing about it and sharing it with you wonderful people. What stroke me the most was the method’s simplicity.

Come to think of it; it’s almost elegant. What’s even better is that, according to the guy who recommended it, by following a couple of simple steps you can potentially increase the bacon’s shelf life by at least 15 years if not more.

As far as the ingredients are concerned, I’ve only tried it on a single batch of common supermarket bacon. Still, if you’re the kind of person that fancies pancetta or prosciutto over bacon, you could try canning those as well (as someone who a lot of cooks, I can tell you that there’s virtually no difference between the three types of meats, except for the fancy names).

Well, time’s a-wasting, and you’ve grown tired of hearing me talk about my buds and exploits. So, without further ado, here’s the well-kept, military-grade secret of storing bacon.

Ingredients and materials:

  • Bacon (as much as you can find).
  • Pressure canner (I use a traditional one).
  • Canning jar (be sure they’re sterilized).
  • Parchment paper (use the unbleached kind. I don’t have some nearby, use masking paper instead).

How to prepare

Step 1. Get your pressure cooker ready. If you opted for the no-power version, it would be a good idea to bring it to a boil before placing the canned bacon inside. As for the electric version, plug it in, pour water inside, and set the pressure between 10 and 15 PSI.

Step 2. Take the parchment roll and use a pair of scissors or sharp knife to cut a long piece (it should be at least 18 inches in length).

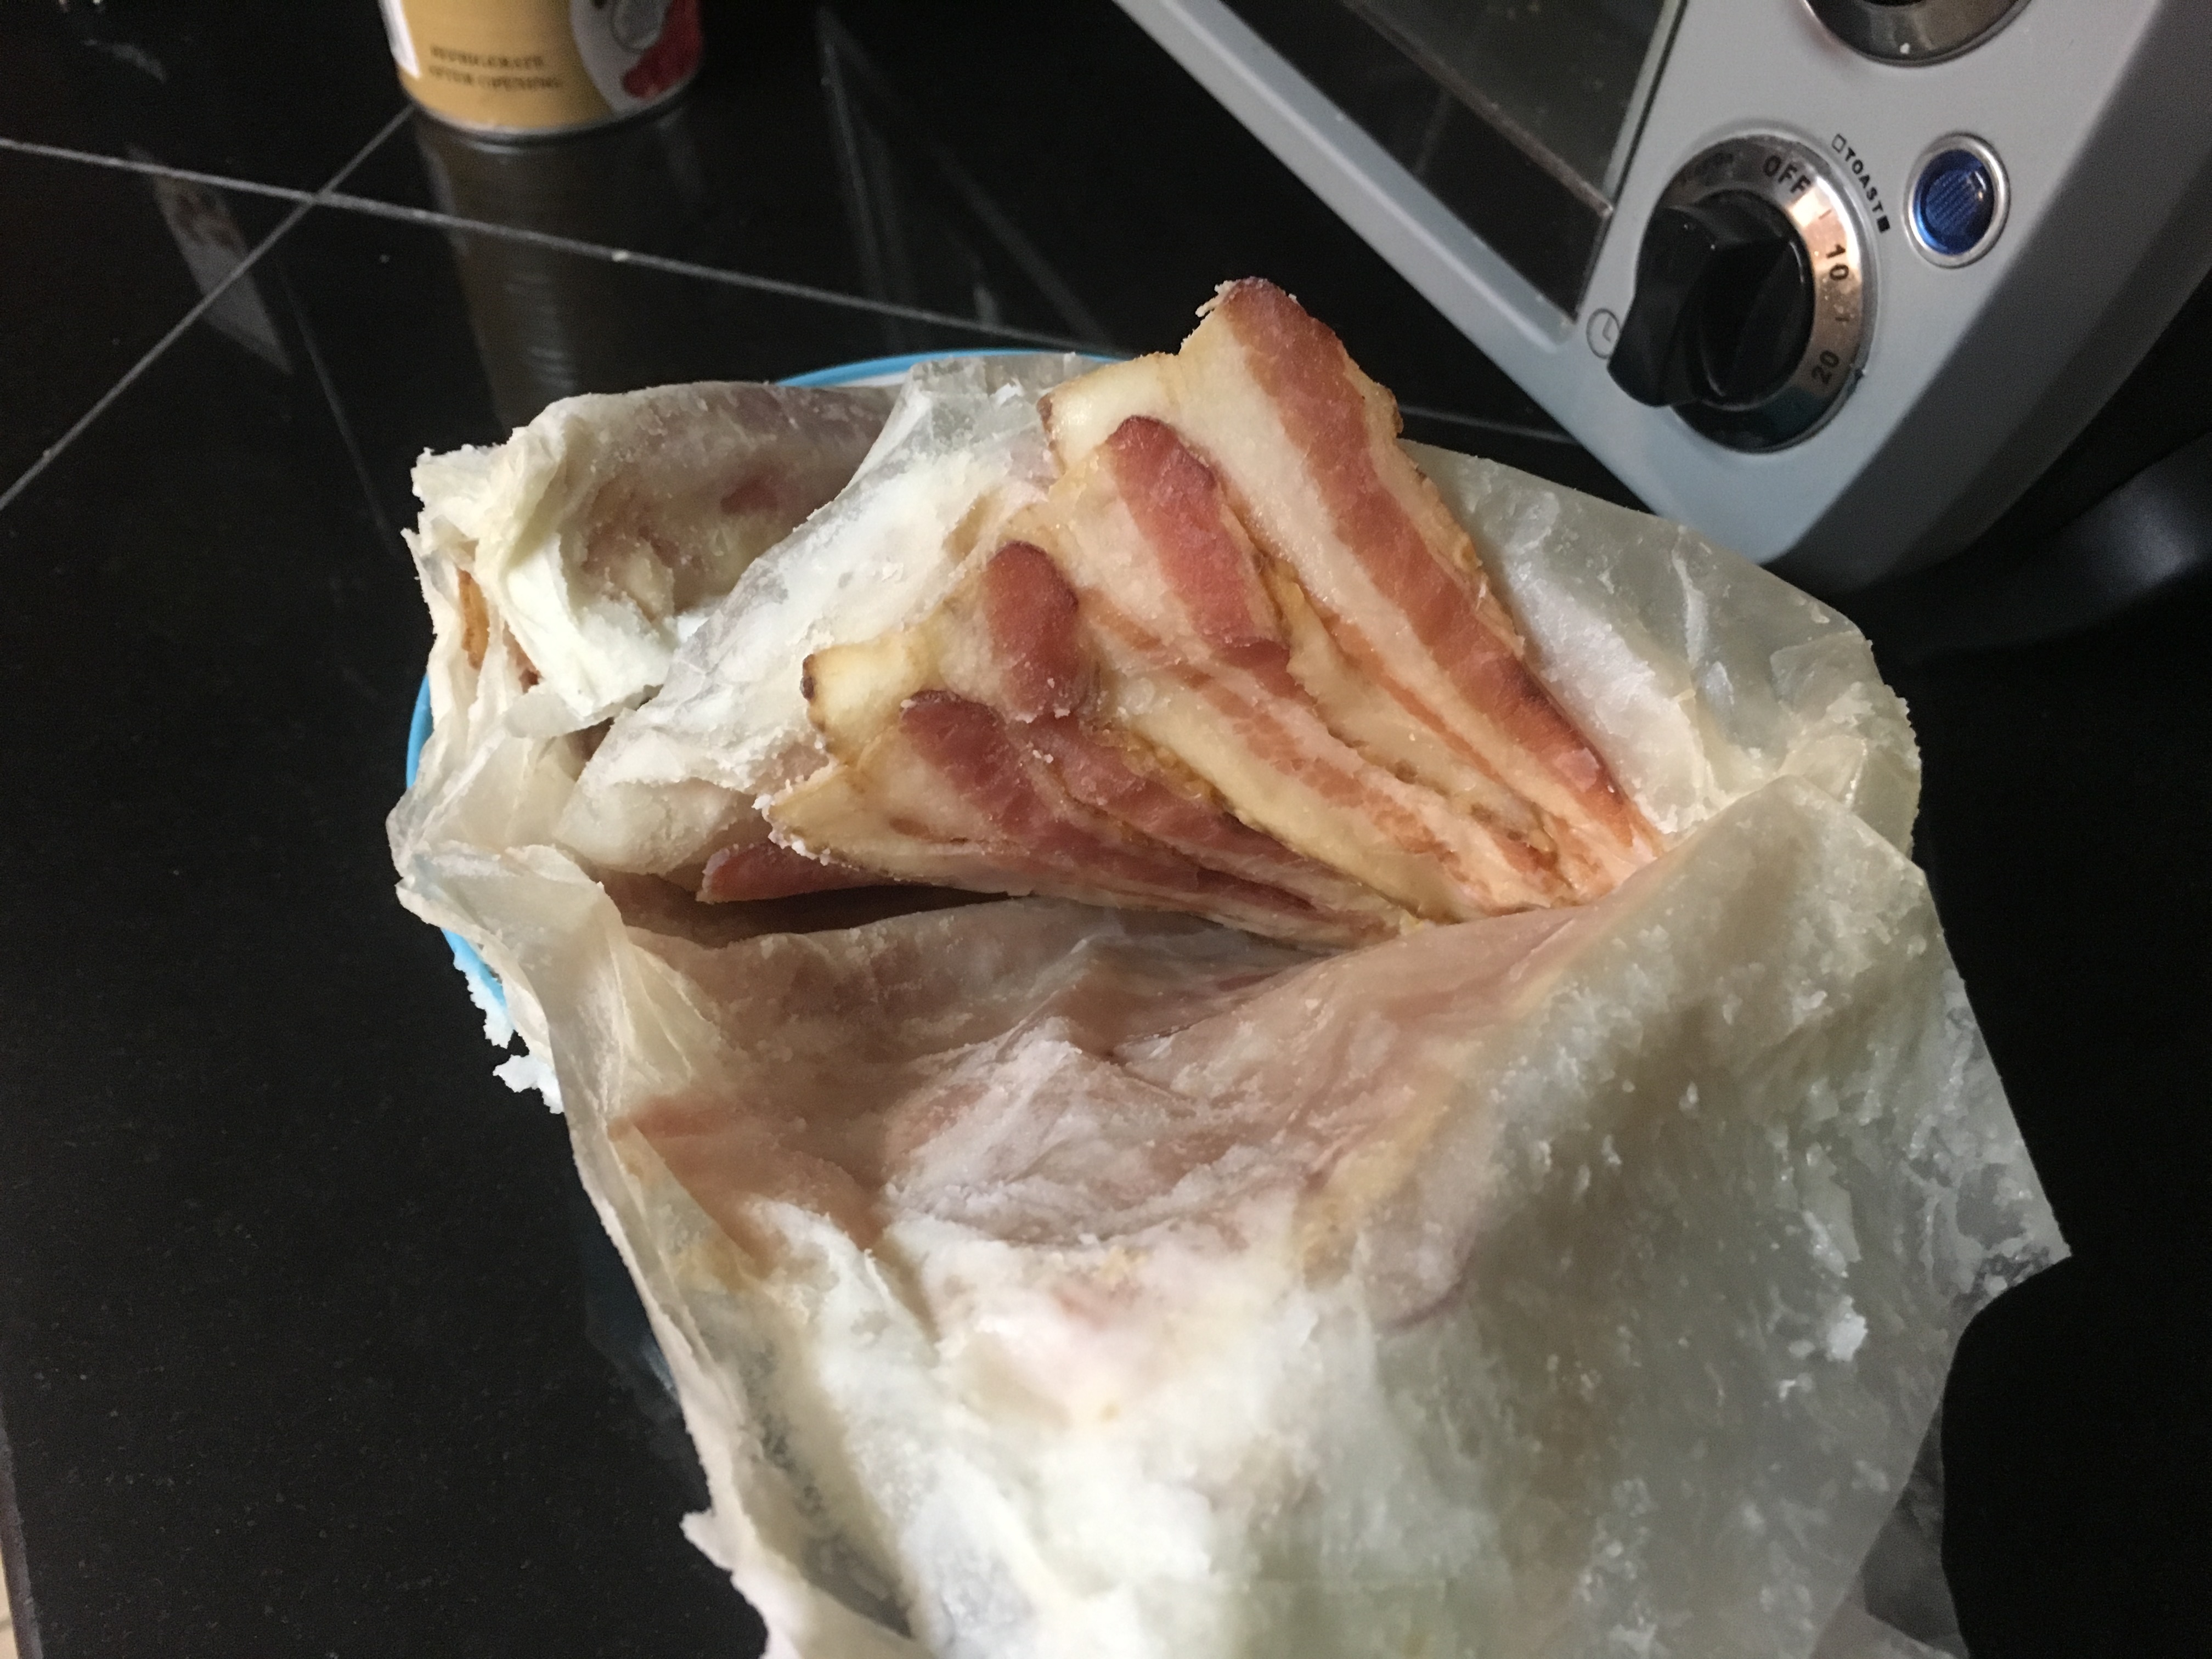
Step 3. Get your bacon out of the fridge and separate the slices.

Step 4. Arrange the bacon slices on the parchment. Don’t leave any gaps between them. You’ll see in a moment why this is essential.

Step 5. After arranging the bacon on the parchment, fold over both paper and bacon in half. By the way, someone suggested that you can make the bacon last longer in the fridge or even in a space without refrigeration by coating each piece with a very thin layer of maple syrup.

‘Twould be better to do this after placing the bacon on the parchment paper. Otherwise, the pieces will be a sticker and, therefore, harder to arrange on paper.

Step 6. Upon folding the paper into half, grab the other hand and start rolling it. Just like you do with the newspaper when the dog goes number two on your grandma’s Persian rug. Tuck in the excess paper at both ends to ensure that the parchments don’t unravel inside the jar.

Step 7. Put the Bacon Parchment of Absolute Truth and Might inside a CLEAN and STERILIZED canning jar. Regarding the latter part, there are various ways to do it. If you’re just as lazy as I am, fill a tub with hot water, pour liquid detergent, and dump your canning jars inside. Let them soak for about half a day.

Afterward, take them out and rinse out the excess detergent. Still, if you want to take the high road, you can always boil the living Hell out of those jars before using them for canning. The choice is entirely up to you.

Step 8. Put the lid on each jar and tighten them gently. You won’t need to apply too much force as your pressure canner will do all the heavy lifting.

Step 9. If the water inside your pressure canner has reached the boiling point, carefully place the cans inside. Put the lid on, set the pressure to 10 PSI, and let them simmer for approximately 90 minutes.

Step 10. When it’s over, kill the fire, pop the lid off the pressure cooker, and carefully remove each jar. Place them on a wooden support or something and allow them to cool down. Word of caution – don’t try to force-cool the jars. Heard my mother-in-law say that ‘cooked’ jars are liable to blow up in your face if you run them under cool water or submerge them in ice.

Your best choice would be to leave them be for the time being. Another thing I should mention is that the canned bacon will leave quite a lot of fat on the bottom of the jar. Don’t concern yourself with that part, ‘cause it’s normal.

That’s it! You now know how to can bacon, prepper-style. As I’ve mentioned, this method extends the bacon’s shelf life by at least 15 years. Perhaps even more. To store, either place the canning jars inside the fridge or stick them in the pantry you usually keep your emergency supplies.

Works both ways. To eat, pop the lid, unroll the bacon, cook, and enjoy. I personally like to eat plain canned bacon – it’s less smoky compared to the fresh variety, but has a gentle aroma that reminds me of meatloaf.

What’s your take on this awesome canning method? Let me know what you think in the comment section.

What’s even better is that, according to the guy who recommended it, by following a couple of simple steps you can potentially increase the bacon’s shelf life by at least

Yesterday evening I had a couple of friends over for a kick-ass movie night. Of course, you know how these things usually turned out – after the second movie, we’ve decided to take the party outside (yes, I know it’s still kind of nippy, but after a couple of cold ones, who cares?) Anyway, one of the movies we’ve watched was what you might call a prepping cult-classic: Kevin Reynolds’ Water World, starring Kevin Costner and Dennis Hopper. You can’t get more old-school than this.

Now, halfway through the movie, there was this brief scene depicting some shady and raggedy characters huddling around a fire made in this rusty fuel barrel. Not the most breath-taking scene from the movie but actually the only one that somehow got stuck in my head. So, after replaying this scene a couple of times in mind, something clicked in there – what would happen if we all had to find fuel barrels in order to keep warm?

Yes, I know it’s one hell of depression though, but anything can happen when shift hits the fan. Think you’ll still be able to use the water heater or your fancy, voice-activated smart AC? Obviously that everything goes down the brown swing when disaster hits. And you don’t need a nuke or EMP of the coming of the second Black Plague to witness first-hand what it means to get on your knees and beg for a heating source.

Anywho, you know what I’m talking about, so I won’t go into many details. So, after the movie night, I put on my mad scientist lab coat and decided to do a little home experiment. My goal was to come up with a heat source that was powerful enough to heat up a small room and, at the same time, help me prepare something very basic, like hot water.

Easier said than done. The first challenge was finding some fuel, but not gasoline or petroleum or gas. Those are the first things that disappear during an SHTF situation. So, I needed something that was easy enough to obtain, cheap, and, if possible, lying around the house. Although it took me a couple of hours to figure it out, even though the answer was staring me in the face, I ended up using cooking oil as food. Neat, but “how the Hell am I going to burn this?”, I asked myself.

So, after some deliberation, I hopped into my van and went into town for a couple of supplies. For this project, I bought two 4-ounce ball jars – you can find them in every thrift store – two wicks, and four bricks. Yes, I know it’s a weird shopping list, but then again, most of the stuff we preppers do can pass as peculiar to most people.

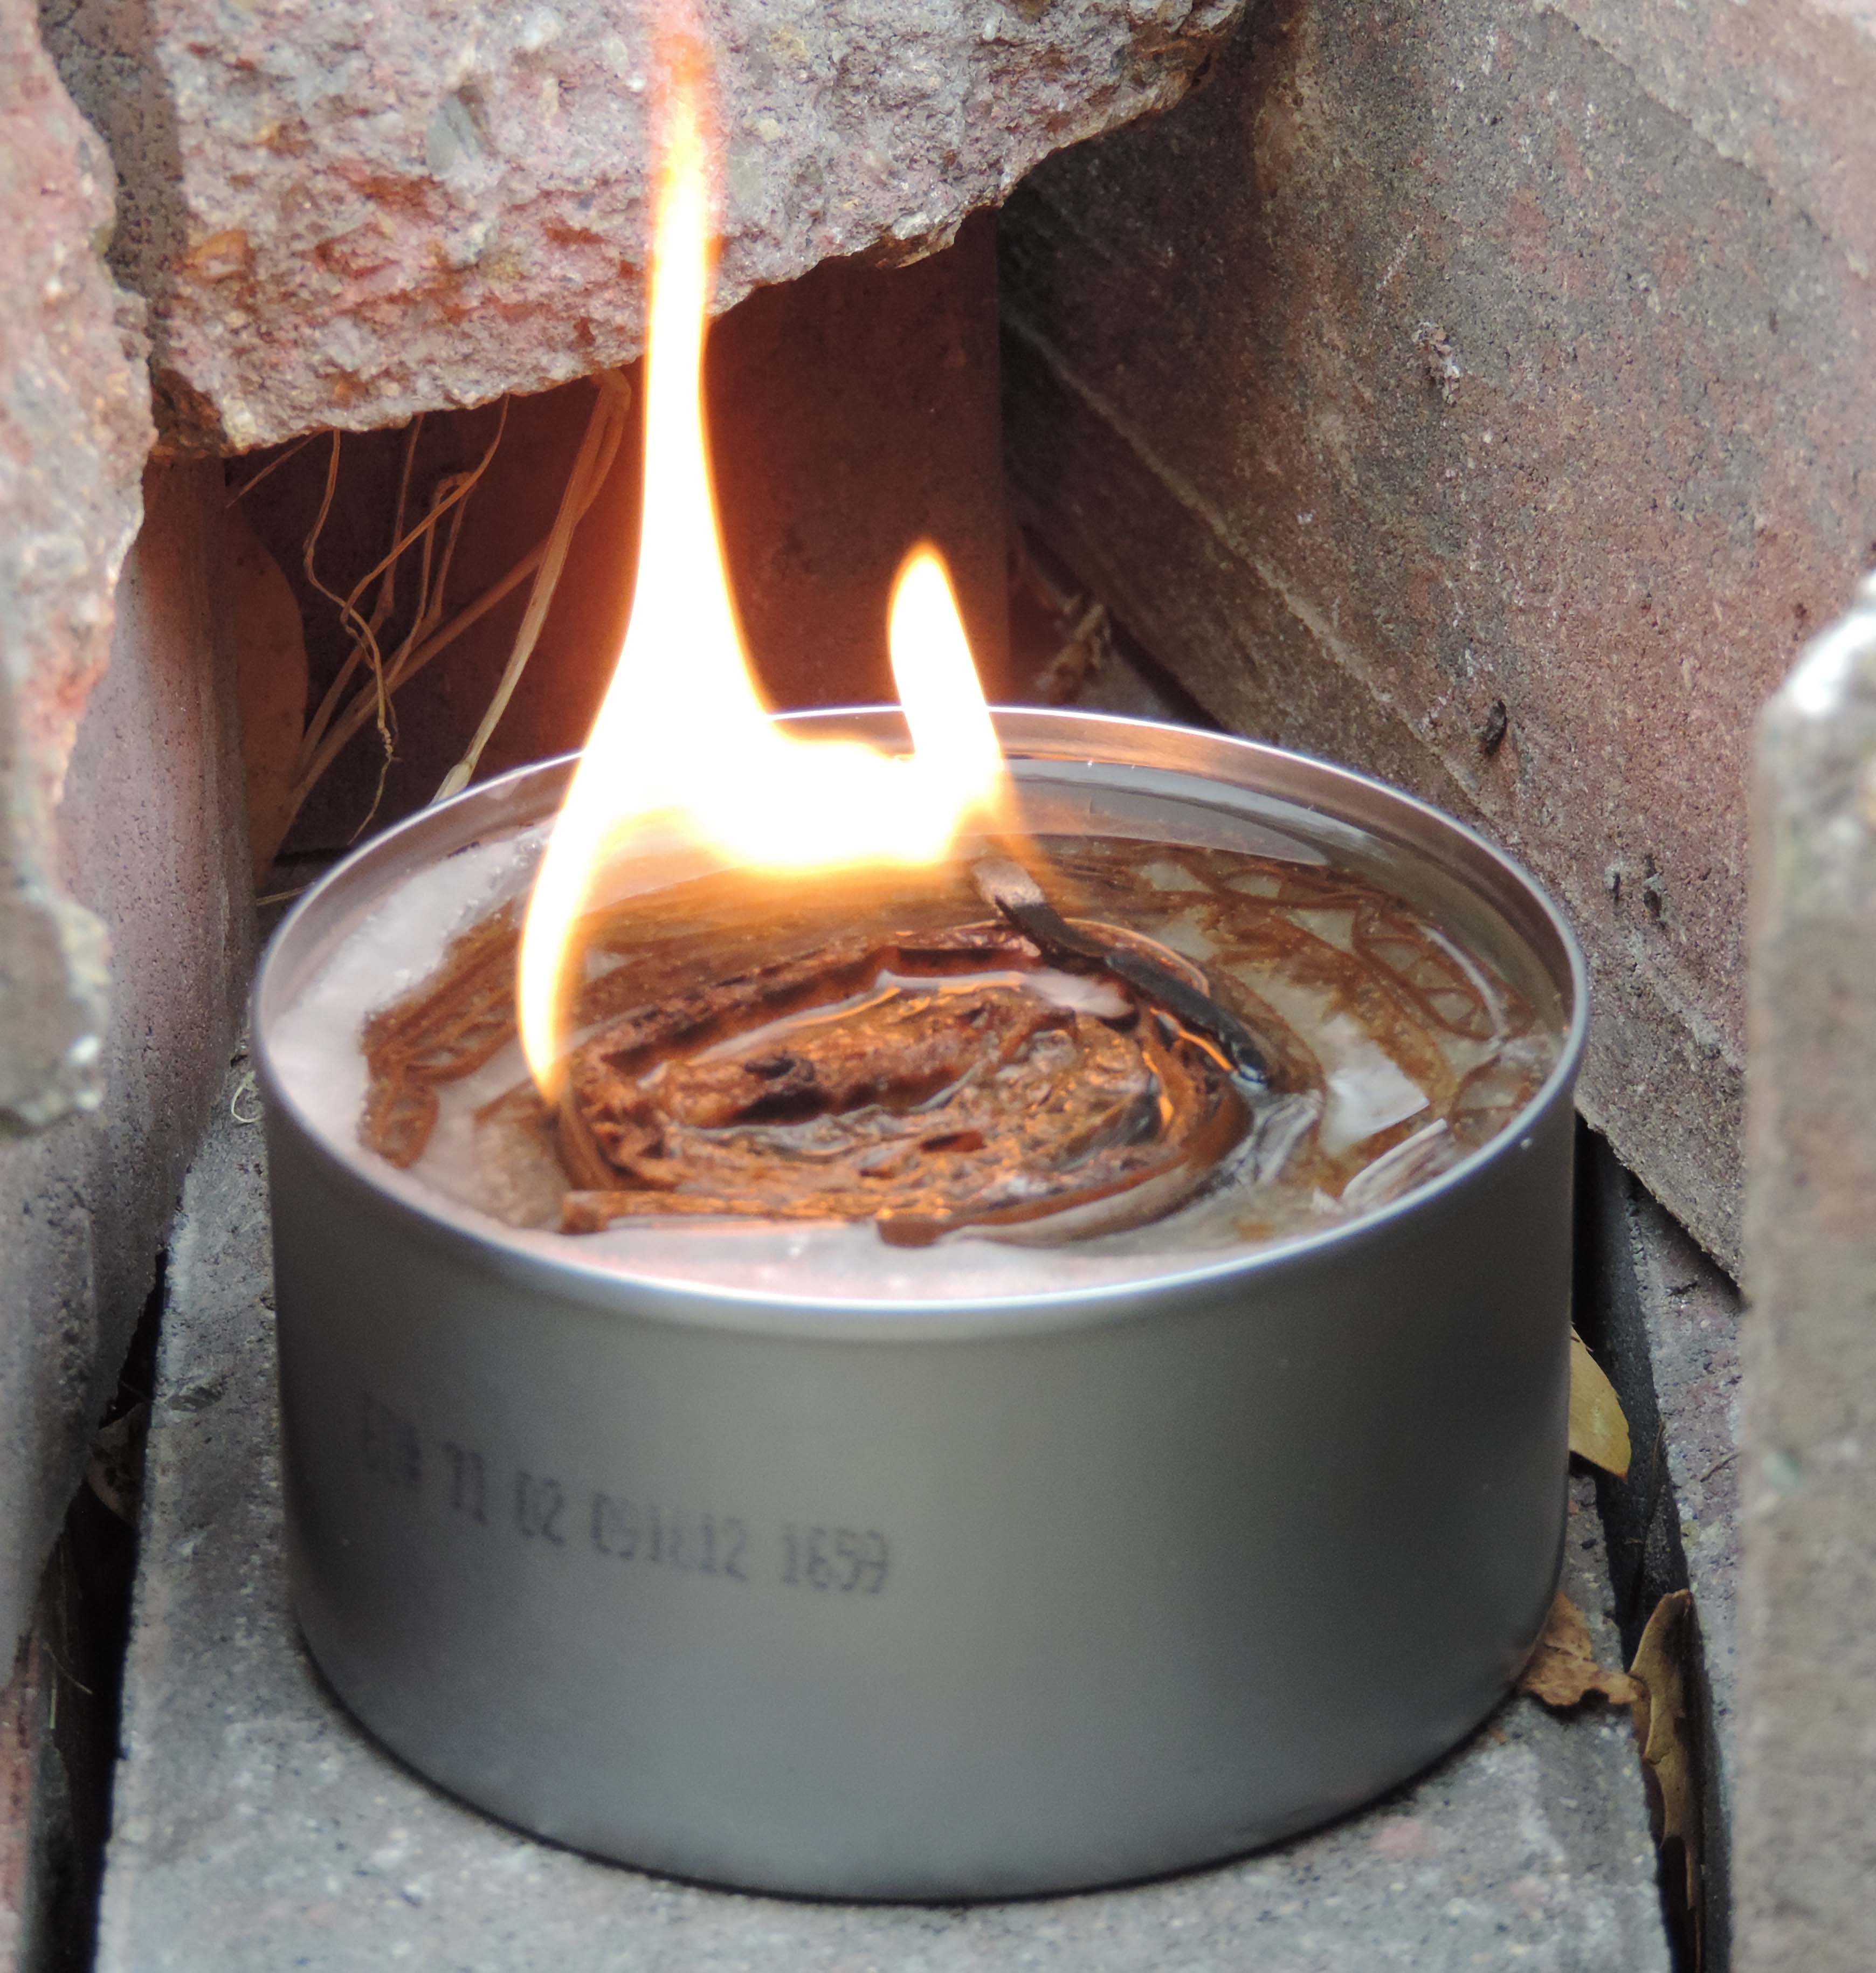
Now, for the first step of my project, I’ve tried to make emergency candles from cooking oil. It’s super easy, and they really put out quite a flame if you’re careful enough to screw the lid nice and tight. Here’s what you will need to do in order to complete the first phase of your alternative heating source project.

Making Quick Cooking Oil Candles

First thing’s first – choosing your poison. For my part, I stuck with sunflower oil since I have a near-endless supply in my pantry and I could always go and get more if I want. However, you’re free to use any kind of oil you like; heard that palm oil is a great alternative to sunflower and not just in matters of crafting heating devices. It’s ludicrously cheap and has, more or less, the same taste like the one made from sunflower seed. You can also reuse the oil from your deep fry machine or cast-iron pans.

So, after getting all the stuff together, here’s what you will need to do in order to make those candles\burners.

Step 1. Take an awl or anything pointy and puncture the lid. You don’t need a large hole. Should be enough for your wick to pass through.

Step 2. Get one end of the wick through the hole. If you can’t find any wicks, you can also use cotton shreds or any piece of cloth. Just don’t use textile that has been treated with fire retardant textile substances (winter jackets, pieces of carpet, and upholstery, in general).

Step 3. Put the other end of the wick inside the bell jar. Make sure that you have enough of the stuff, as the fire will eat through that stuff. If you’re thinking about upscaling your project, you may be able to make a sort of lamp out of a canning jar and a longer wick.

If I were you, I would pick one of those jars that come in with a handle – just be careful not to burn your paw while holding the thing. Moreover, about the moving part – it’s not a good idea to move the thing into another room. The chances of a house fire are very real and very scary.

Step 4. It’s now time to add the fuel. Carefully pour the cooking oil inside the jar. Don’t spill any on end sticking out of the lid. Otherwise you’ll have trouble setting fire to the wick.

Step 5. Secure the lid, and that’s it. Now, for the best results, I would advise you to leave you burners be for at least 24 hours. By that time, the wicks would have drawn enough fuel to allow you to light them up fast. If you’re using regular cotton or ripped fabric instead of wicks, you should allow them to soak a little longer. Moreover, I wouldn’t advise dipping the other end in oil to make the candlelight faster because you’ll end up with more smoke and less flame.

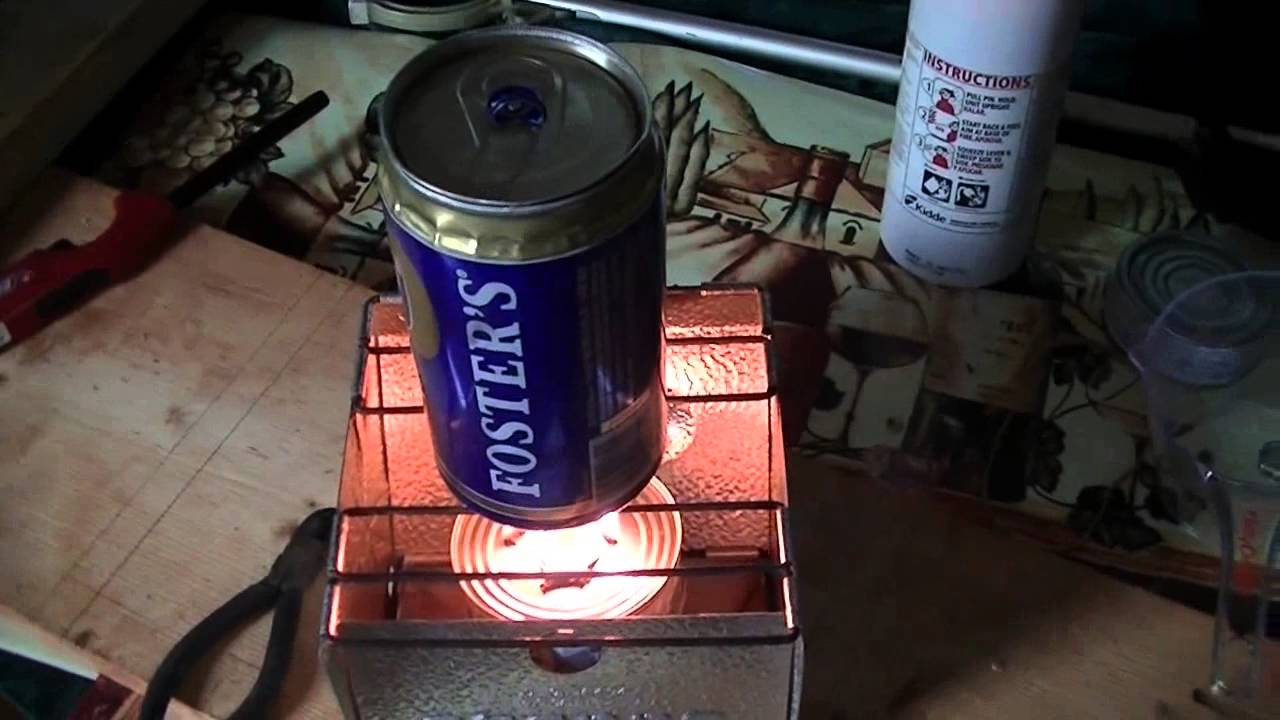
Already done with your emergency candles? Great! If everything’s hunky-dory, then you’re ready for phase two of your heating project. For this, you’ll go to need some bricks or two concrete slabs, a thin tray (I “borrowed” a cookie tray from my wife) and a pan. Here’s what you will need to do in order to create an awesome room-heating device.

Piecing together the heater

Step 1. Place the concrete slabs or brick on the ground, preferably in the center of your room with all the doors and windows closed. You may want to grab a thermometer for your experiment in order to take a reading before and after the heating device has been switched on.

Step 2. Lay the tray on your slabs or bricks.

Step 3. Place two homemade emergency candles\burners right beneath the center of your tray.

Step 4. Light up your candles. It will take a while for them to generate heat. I know I told you to keep the doors and windows closed to see just how much heat your thingamajig can generate, but you may want to keep the front door ajar, especially until the heaters go into stasis.

The thought never crossed my mind while performing the experiment, so I ended up fumigating the entire living room. Yes, I know that it will probably take me days to get rid of that smell, but hey, at least I managed to whip up a device capable of heating up a small room in case of an emergency.

Step 5. After half an hour or so, the flames are going to stabilize. Of course, your tray will take quite a bit, but you know the saying – it’s for the good of science. So, after you get a steady flame, you may try to see if the tray resting on top of the concrete slabs can boil water.

As far as the heating part is concerted, I managed to get a 10-degree rise with just two burners. It may be possible to convert the whole thing into an efficient house heating device, but that would require more makeshift heaters and, of course, a metal surface capable of deflecting heat far better than a tin tray. I was thinking about using four burners and thing steel sheet for my next experiment.

Remember that show Jackass which used to air on MTV? They had this message at the beginning of the show: “all the stunts have been performed by professionals. Don’t try this at home.” Well, that’s exactly the sort of advice that I want to give you – don’t try this indoors.

No matter how fire-proofed your test area is, there’s always a chance of something bad happening. If this is your first time, you would be better off doing it in an area without flammable substance. If you have a fire extinguisher at home, keep it close just in case – I really wouldn’t try to put out that kind of fire with water.

Anyway, keep a close watch on the top of the try. Once it turns black, it means that you’re all set to begin the third and final phase of the experiment – bringing water to a boil. I know that for the layman this may be a bit silly, but do keep in mind that in any SHTF situation, the whole idea is to get more while spending the minimum amount of energy and available resources.

So, after the thin tray starts to black, fill a pan with tap water. Place it in the middle of the tray and keep a close watch. Now, this is the point where the results differ. From what I understood after doing a bit of research, someone who attempted the experiment said that he managed to boil a gallon of water in 15 minutes.

Was a bit suspicious about that but, hey, that’s what experimenting’s for. Turned out that I was right all along. After waiting around for about 45 minutes, nothing was happening – no bubbles, no mist, no nothing. It was as though I’d placed the pan on the floor or any other cool spot.  So, after the frustration kicked in, I took the pot off the tray and placed on the stove.

I got to a boil really fast, and then I transferred the pot back to the improvised heater. Again, nothing happened. In fact, even though both burners were working, they weren’t strong enough to maintain a steady temperature.

As for the results of this little experiment, here’s what I managed to jot down in my notebook. In case you’re looking for a heater or AC alternative, this Bunsen burner wannabee is quite efficient. Even with two sunflower oil-based candles, you’ll still be able to get a 10-degrees ambient temp increase.

However, as for the part of using this device to boil water or to cook food, I wouldn’t bet my last dime on it. Of course, the design itself may be faulty, since most of the heat’s lost through the gaps created by the tray and concrete slabs, but then again, the whole purpose of this experiment was to create a quick and efficient heating device with fuel that can literally be found anywhere.

Anyway, instead of my usual wrap-up, I’m gonna end this article with a question for you: Do you think this device is able to fully substitute a water heater, AC or your run-of-the-mill oil barrel bonfire? Would love to read your answers in the comment section. Meanwhile, I’ll try my best to get rid of this awful smell before she gets home.

My goal was to come up with a heat source that was powerful enough to heat up a small room and, at the same time, help me prepare something very

One thing you learn as a prepper is that any new skill you acquire will come handy one the day, cooking including. Sure, not all of us have the talent of whipping up a terrine or a souffle, but at least we learn to go by without actually having to starve to death or wasting away money on takeaways.

For my part, I actually managed to pick up a thing or two about the art of preparing delish and nutritious meals during one of those long blackouts. Yes, I’m still here, and no, the city council hasn’t gotten around to fixing the problem yet.

Now, for most of us, cooking’s not that big of a deal – get online, pick a recipe, follow the steps, and, Shazam, dinner’s ready! Still, the rules of engagement tend to change a bit if you’re forced to do the same thing during a power outage.

No electricity means that you will not be able to use the mixer, microwave, electric oven, toaster, and whatever cooking appliance running on electricity. Such a situation calls for some serious improv and, in today’s article, I’m going to show you my favorite blackout dishes and how to cook ‘em.

So, without further ado, here are my top 7 choices in no-power food.

  1. Oats

Yes, I know they’re not palatable, but they do wonder for the body. Most importantly, you can prepare anywhere and at any time, power or no power. Just let them soak overnight in a bowl of water. You can serve them for breakfast or dinner with assorted nuts, honey, and dehydrated fruits.


2. Gazpacho

Great Spanish dish and stupidly easy to make. I personally like to have fresh gazpacho year-round, since it’s packed with vitamins and minerals. More than that, this over glorified tomato soup is a wonderful thirst quencher during those hot summer days.

So, grab yourself a couple of diced tomatoes cans and empty them inside a large bowl (don’t forget to drain all of the juice). All that remains is to add one chopped onion, a thinly-sliced cucumber, a dash of cayenne pepper, salt, and pepper. If you’re looking for a bit a hit, you can add one teaspoon of Tabasco. Finish the dish by adding a little bit of olive oil, chopped parsley, and some lemon juice. That’s it!

3. Corn salad

This is what I like to call the lazy man’s easy way out of the kitchen. I usually like to prepare this dish when my wife’s away – kids love it, and it takes me about five minutes to get everything ready. So, it’s a win-win. Take a can of corn, drain the excess liquid, and put the contents inside a large bowl.

Chop any veggies you have left in the fridge (I like to add onions, red and yellow bell peppers, and tomatoes to my salad). For extra flavor, you can add a can of black beans. Toss it around a little, add a sprinkle of olive oil, and serve. If you fancy a bit of dressing, you can quickly make one by combining apple cider vinegar, olive oil, dried basil, pepper, and salt in a bowl.

4. A simple salad with apples and white beans

By far, my wife’s favorite Sunday morning salad. Super easy to make: pour the contents of white beans can in a large bowl and add some apple chunks. To finish the dish, you need only add some olive oil, fresh thyme, a handful of walnuts, salt, pepper, and scallions. Give it a good mix and serve.


5. Good, old grains and beans salad

This is one of the first recipes I learned during the first bout of blackouts. It’s very handy to know since anyone has at least one can of beans and a grain sack around the house. Take out your portable stove from the B.O.B and boil water in a small pan. Add the grains and let them cook for about 10 minutes.

Drain the grains and allow them to cool down. In a large bowl, combine one can of beans (works great with both black and grain beans) and the pre-cooked grains. Add salt, pepper, and a sprinkle of olive oil. If you wanna add consistency to your dish, throw in a couple of diced veggies, and chickpeas.

6. Chickpea or white beans spread

If you ever get tired of PB & J sandwiches, you might want to give this recipe a try. Empty the contents of a chickpea or white beans jar inside a bowl. Use a fork or potato masher to make them into a coarse paste.

Add some olive oil, parleys, a little bit of mint, half a tablespoon of garlic powder, and some oregano. You can serve this spread with white bread, toast, and even crackers. I personally like to serve it with oven-baked white bread – if you want to get all fancy, take a clove of garlic and smear each slice of bread before adding the spread.


7. Tuna salad with canned corn and green lettuce

Personally, I prefer this recipe over all those BS, new age stuff with salmon or whatever. Grab yourself green lettuce and wash it thoroughly with cold water. Using your hands, rip it into big chunks. Add a can of tuna over the salad (don’t drain the oil inside) and a can of sweet corn.

To finish this dish, pour half a tablespoon of olive or sunflower seed oil, salt, and lemon juice. Toss it around and serve. This is what I like to call the ultimate detox dish – very healthy and tuna being packed with omega-3 fatty acids and all that, it’s a breath of fresh air after eating spare ribs and burgers.

Hope you’ve enjoyed my list of blackout dishes. Think I’ve missed something? Hit the comment section and let me know.

No electricity means that you will not be able to use the mixer, microwave, electric oven, toaster, and whatever cooking appliance running on electricity. Such a situation calls for some

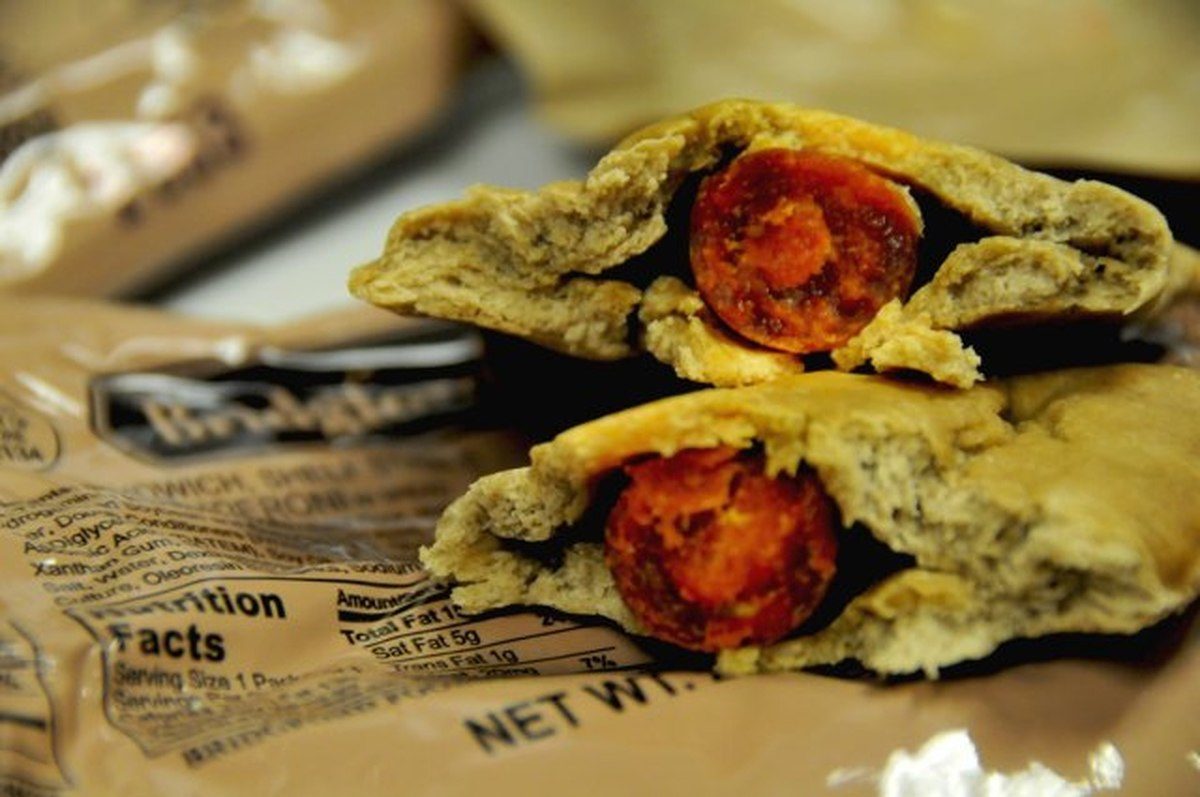
You know ‘em, love ‘em, and, most of the time, you buy them by the pallet. No wonder MREs are so popular since they make excellent snacks while providing your body with all the proteins and fats it needs to keep on rolling. But let me ask you a question here – is it really necessary to go to the military supplies store to buy MREs every time you run out? The answer’s “no” because these delish treats can be baked in the comfort of your kitchen. What’s even great is that you already have all the ingredients this recipe requires.

When I was doing my research for the first piece on pickling meat (be sure to check it if you haven’t done so already), I discovered, much to my bemusement, that there are lots of preppers out there who wanna know the best places from where one can buy Meals Ready to Eat. Can’t say that I wasn’t tempted in pulling a fast one by doing a piece on top 10 places that offer great bargains on MREs, but, then again, I really wouldn’t want you guys to spend more of that hard-earned cash.

I came to realize that my folks were baking MREs, long before the stuff hit the market. So, is this a family recipe? Yes, it is! An old one, at that. Mom told me she picked it up from my great-grandmother’s recipe book, who was a sister of mercy back in WW1. Apparently, this stuff would sell like hot cakes during the Great Depression, mostly because they go along so well with a glass of beer or moonshine or whatever (that raised a couple of eyebrows, back in the time).

After baking the first batch, my wife and I did the math: we spend somewhere around 20 on the ingredients for 8 jumbo-size MREs (although we could have made more if yours truly wouldn’t have sampled the mix too many times). That kind of money will probably get you around 4 or 5, and we still got enough left for another batch.

Still not convinced? Keep on reading for our killer survival ration baton recipe.

Why should I bother baking when I can always hop on the Internet to buy some more?

Because, contrary to popular belief, knowing your way around the kitchen is as important as learning how to swim or perform CPR. And we’re not talking here about whipping a quick breakfast or curing meat for long-term storage.

Nope, far from it! Cooking’s a no-brainer if you know how to follow a couple of simple steps.  And by that, I mean that you’ll be able to whip up a delicious and nutritious dish in no time, even if you’re that kind of person who sees the kitchen as just a room. Since I know most of you guys enjoy a good survival ration baton every now and then, I’m going to show you that it’s easy-peasy.

As I’ve said, the recipe involves ingredients found around the house – honey, assorted nuts, sugar, oats; stuff like that. There’s nothing fancy about this recipe, and it will only take you a quarter of an hour, tops. The result – 8 crunchy and sweet energy bars, each of them packing at least 3,000 calories. Check out it for yourself.

Get ready to ruuuuuumble!

As I’ve told you, all the ingredients for this recipe will cost you around 20 bucks, at most.  If you’re not too keen about going shopping, you can always order them online. Now, for 8 survival ration bars you’re going to need:

  • 5 cups of dry milk powder.
  • 3 tablespoons of honey.
  • 3 tablespoons of water.
  • 1 cup of granulated or white sugar.
  • 1 pack of gelatin (at least 3 oz)
  • 1 cup of peanuts or assorted nuts.
  • 2 cups of dry oats (you can also use normal oats).
  • 1 cup of dried cranberries (if you’re not too fond of cranberries, you can replace them with trail mix or assorted dried fruits of your choice).

Managed to grab all the ingredients? Neat! Let’s start making some survival bars.

Step 1. Preheat you over. Aim for 350 degrees.

Step 2. Grab a large bowl from your pantry and mix the following ingredients in order: milk, oats, nuts, and sugar.

Advice: use a wooden spoon or spatula to mix the ingredients (avoid using metal because the resulting mixt will have a bitter taste to it). Don’t stir too fast. You’ll want your mix to be a little chunky. What I like to do is to sort of dip the spatula and bring everything from the ground up top. Do this for a couple of minutes to make sure that there are no air bubbles left.

Step 3. Time to prepare the gelatin for the bars.

  • Grab a small pan and empty the gelatin pack’s contents inside.
  •  Add three tablespoons of water (don’t add more otherwise you would end up with mush).
  • Add three tablespoons of honey to the pan.
  • Crank up the heat and bring the mixture to a boil.

If you want to add a dash of color to your energy bars, try using some edible paint. Go crazy with them.

Step 4. It’s now time to put together everything – the dry and the moist ingredients. One thing you shouldn’t do would be to let the gelatin and honey mixture cool down completely. If you do that, you won’t be able to mix them with the dry ingredients.

So, toss the spatula aside, and ready your hands. Yes, you’re going to use the hands for this part. It’s much easier and, why not, fun. Don’t forget to wash them hands before messing with the mix.

Just like before, stick your hands inside the mix and bring the stuff on the bottom right to the top. Do this for a couple of time to make sure your dry ingredients are thoroughly mixed.

When you’re done, grab the gelatin pan. Pour a little over the mixture and use your hands to knead the stuff. Continue pouring and kneading until there’s no more gelatin.

Advice: the first time I tried doing this one on my own, the dough turned out to be way too dry even after pouring the entire contents of the pan. To make is moister (wipe that smirk off your face), add a little bit of lukewarm water or even a tablespoon of milk.

Knead, knead, and knead again, until everything’s hunky-dory. If you want your batons to be extra puffy, cover with a clean cloth and it aside to rest for around half an hour. Plastic wrap also works if you don’t have a cloth.

Step 5. Place some baking paper on an oven tray and pour the mix right in the middle. Then, using a spatula or your hands, spread it around as to cover the entire surface of the tray. Over should have reached the desired temperature by now.

Step 6. Use a pizza knife or the other end of a wooden spoon to separate your energy bars. I like to make them rectangular, but you’re free to try out any shape you like (next time, I think I’ll make them in the shape of hearts or Christmas trees just because I can).

Step 7. Stick the tray into the pre-heated oven and bake for 20 to 25 minutes (might takes less if you have one of those convection ovens). Here’s what I like to do in order to see if the bars are ready to be taken out of the oven.

FYI, this trick works for all your baking needs (cake, cookies, pastry). So, what I do is take a toothpick or small piece of wood (grandma used a clean straw from the broom), and sort of poke a small hole in the middle of the dough. Take out the toothpick and look at it – if the dough’s still clinging to the toothpick, it means that it’s not yet ready. On the other hand, if the toothpick’s clean, take it out of the oven before it hardens.

Step 8. Take the tray out of the oven and allow the power bars to cool down before bagging them. You can store them in zip-lock bags or airtight plastic container.

More on home-made MREs

That’s about it for the baking part. It’s exactly what I’ve been telling you – simplicity itself. Now, some of you are probably wondering about shelf life.

Well, since this recipe calls only for ingredients with very long shelf life, in theory, they should last for quite a while if you’re careful enough to store them in a proper environment. Still, if I were you, I would bake a fresh batch every couple of months or so just to be that the B.O. Bs are up to speed.

For those of you with peanut allergy, I would advise you to replace them with dehydrated fruits. You can also use more oats if you like that stuff.

Also, if the good, old doc told you to cut back on the sugar, you can always 86 the sugar from the recipe and stick to honey, pun intended. I wouldn’t use artificial sweeteners like stevia because that would give the bars and unpleasant, metallic-like taste.

The best thing about this recipe is that no matter how clumsy you are in the kitchen, you’ll still be able to make it to the finish line. First time I tried baking MREs, I poured the mixture from the side, instead of putting it in the middle of the tray. Yeah, I ended up doing more cleaning than actual baking.

If the power goes out, which tends to happen of a weekly basis where I live, you can still bake these thingies if you have a gas oven, a thing I highly recommend.

Another thing you can try out is to try an all-nut version (without fruits). Of course, that would definitely make the calorie count go through the roof..

So, have fun with your baking and don’t forget to hit the comment section to show me how your MREs turned out. Ta-da, guys!

Is it really necessary to go to the military supplies store to buy MREs every time you run out? The answer’s “no” because these delish treats can be baked in

As a full-blooded prepper, I’ve always been looking for ways to make my food last longer. Sure, buying stuff like honey, white vinegar, and baking soda, get you a well-stocked pantry with food that never goes bad. Still, one cannot live on those alone.

So, after doing a bit of research, I stumbled upon this nifty passage from a prepping book which talked about brining and pickled meat. The recipe was so awesome and simple to make that I just had to share it with you guys.

See, long before fridges were invented, humans looked towards other ways of preserving food. Curing or smoking meat is one way of doing it, but hardly the only one. Around the 19th century, brining, as in the process of using salt to preserve food, became very popular, especially among sailors who had to spend months if not years on the sea.

Back then, frosty treats like ice-cream were very rare and quite expensive, year-round. In fact, most of the ice used for various purposes had to hauled from the North Pole. Still, people needed to eat meat, no matter the time of the year. Thus, brining came to be.

Apparently, this method was discovered completely by accident by some British sailors messing around with salty water and meat. Brining became so widespread that long after fridges became commercially available, people would still turn to it. You know the saying: if something’s not broken, why replace it?

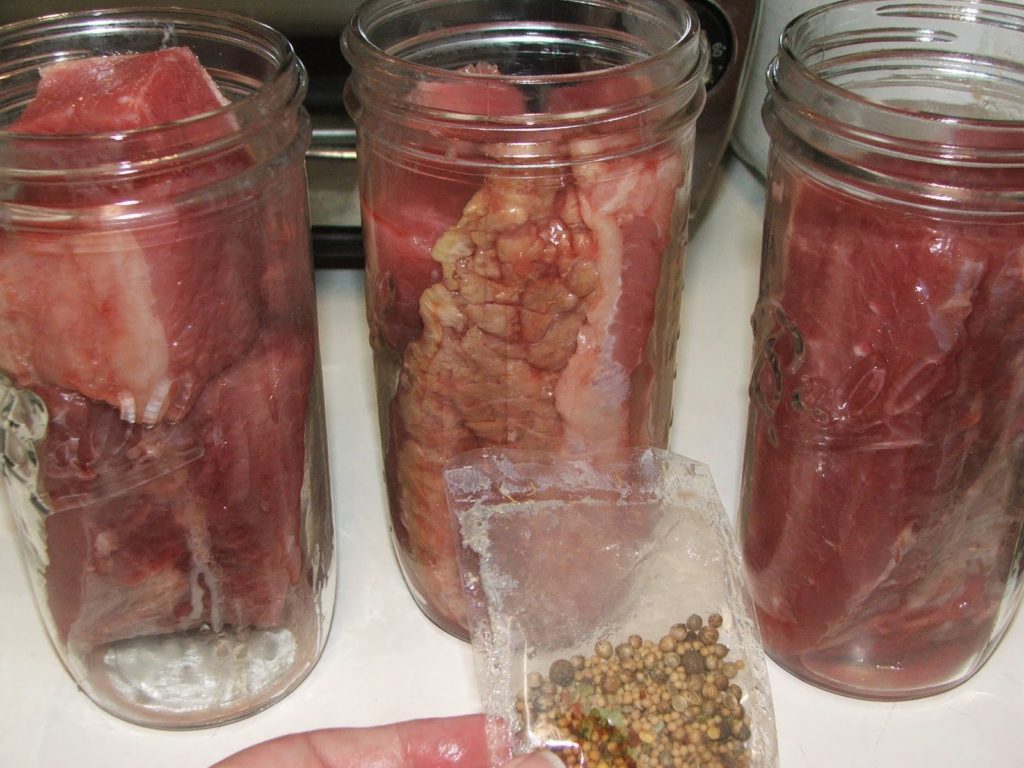
The recipe I’m about to show involves pork. For my test-drive, I went ahead and bought a 2-pound shoulder from the butcher’s shop. Don’t worry too much about following this recipe to the letter. It works just as well with other cuts and meats – a friend of used it last week to pickle some salmon. Still waiting to see how it turned up. So, grab your recipe notebook and start writing.

Ingredients

For one large pickle jar, you won’t need more than 2 pounds of meat. Don’t go ahead and buy too much. Make a small batch first and see how it turns out. So, for this recipe, you’ll need the following stuff:

  • Meat.
  • Sharpened chef’s knife.
  • Glass jar.
  • One egg.
  • Salt.
  • 1/3 cup of sugar.
  • Bay leaves (4 are more than enough).
  • Garlic cloves (3 or 4, depending on your taste).
  • Peppercorns (20 will do).

How to prepare pickled meat

Step 1. Grab a clean cutting board and place your meat (I was referring to the pork) on it.

Step 2. Using your chef’s knife, cut the meat into 2-inch cubes.

Step 3. Get a strainer from the cupboard or whatever and wash the meat with plenty of cold water.

Step 4. Wash the jar with water and soap. Rinse! I would advise you to boil the jar before placing the meat inside. That deals with most of the bacteria that could make the meat go bad even with the added salt.

Step 5. Fill the jar with water. Don’t forget to leave plenty of room for the pork cubes and the rest of the condiments.

Step 6. Add salt to the jar. For this recipe, I measured a cup of salt. You may add more if you’re using a bigger jar.

Step 7. Time to test out if you added enough salt to your container. To do that, break the egg in the jar. If it goes down, add more salt. On the other hand, if it floats it means that you have more than enough.

Step 8. Place the pork cubes inside the jar and the rest of your condiments.

Step 9. Fill the remaining space with cool water and screw the lid in place.

More insight on pickling meat

That’s it! You only need to place the jar in a dry and cool place. Some call for keeping the jar in the refrigerator for one or two weeks. But that’s a bit of an overkill, considering that this method was used for food preservation long before fridges landed on the market.

What I like about this recipe is its simplicity and the fact that meat prepared this way can be cooked in many ways. For instance, being a big fan of Asian cuisine, I like to replace regular, freshly-slaughtered pork with the pickled kind. You can also use this meat for soups, broths, and even for preparing baby purees.

This is pure gold, especially during blackouts or any SHTF situation, for that matter. With pickled meat, you can whip yourself a quick dinner even the only heating source is a 12-hour emergency candle. Since it’s already prepared, it doesn’t take long to cook. Just be sure to avoid adding more salt, even if it’s second nature to you.

On that note, careful about eating pickled meat if you have kidney or heart issue. I mean that stuff is literally swimming in salt which does not agree too well with your condition(s).

Don’t worry, you can still enjoy a nice picked meat dish even if the doc says that you should refrain from eating salty food. Take the meat out of the jar, rinse it thoroughly, and submerge it in cold water. Leave it in there for at least an hour. That should clear most of the salt out.

Be careful when choosing your meat cut. Beef and fish are okay, but pork may require attention. If you bought your meat from a farmer or something, you should boil the meat before pickling it. The process kills most harmful bacteria, including trichinosis. Of course, you can always go crazy with the recipe and more stuff to it. I will try to pickle some beef and chicken next time to see how it goes.

Store it in a dark and dry environment and don’t forget about tightening the lid. For the first batch, I placed a cloth on top of the jar and tied it with a piece of string. Don’t know for sure if that helped or not, but the jar did look awfully nice and rustic.

Let me know how your pickling went.


On a different note, here’s some other self-sufficiency and preparedness solutions recommended for you:

The Lost Ways (The vital self-sufficiency lessons our great grand-fathers left us)
Survival MD (Knowledge to survive any medical crisis situation)
Backyard Liberty (Liberal’s hidden agenda: more than just your guns…)
Alive After the Fall (Build yourself the only unlimited water source you’ll ever need)
The Lost ways II (4 Important Forgotten Skills used by our Ancestors that can help you in any crisis)
The Patriot Privacy Kit (Secure your privacy in just 10 simple steps)

See, long before fridges were invented, humans looked towards other ways of preserving food. Curing or smoking meat is one way of doing it, but hardly the only one.

This article acts as a comprehensive guide to batoning. Be sure to pay close attention to the last two sections (the one on proper batoning technique, and the one on troubleshooting the difficulties of batoning), as these two sections will help you most out in the field.

What is Batoning?

Batoning is a survival and bushcraft technique whereby a sturdy knife is lodged in a piece of wood then struck repeatedly by a baton-like object, a heavy piece of wood for instance, in order to split the wood.


Among other purposes, batoning is often used to split logs and other wood to create kindling, to create access to the dry inner portion of a wet log for generating dry tinder, and to produce shingles, slats, or boards.

Advantages of Batoning

In many instances, batoning makes the process of splitting wood far easier than it’s alternative, chopping wood. Batoning requires less effort, takes less time, and results in a much cleaner cut than chopping. Batoning also requires much less experience to master than chopping, as aiming while chopping may be difficult to do at first. Batoning is an extremely handy technique to know when you do not have a chopper lying around, as may be the case if you’ve forgotten to take a chopper camping, for instance.

Disadvantages of Batoning

Under certain conditions, such as in the case of batoning wet logs, batoning can be somewhat difficult. Batoning can also sometimes damage or even break the tool being struck. Thus, some caution must be taken when batoning. To reduce difficulties and knife breakage, proper batoning technique should be used (see the section below on proper batoning technique).

Why Knives Break When Batoning

In most cases, knives break when batoning because they are being batoned at an angle. If they are placed and batoned straight, the knife is far less likely to break. Batoning with the wrong baton (like a rock or brick for instance) will obviously also cause damage to the knife, which is why wood should really be the only thing used as a baton when batoning. If proper batoning technique is used, however, this can all be avoided, or at least mitigated dramatically.

batoning-large-log-with-bokerBoker Plus Vox Rold Knife

Ideal Baton

A piece of wood is the best tool to use for a baton. Rocks, bricks, and other extremely hard objects will work, but they will severely damage the spine of the knife you are using to baton. The best piece of wood to use is a piece of hardwood. If you would like to make a more comfortable batoning tool, say if you’re going to be batoning a lot of wood, shape your piece of wood to look something like a short baseball bat: debark it, and thin out a handle, then shave it down until it is smooth to the grip. The goal is to make a batoning tool with a wider hitting surface, and a thinner handle surface.

Ideal Batoning Knife

Batoning can be done with nearly any fixed blade knife, so long as the blade is strong enough to be able to stand repeated batoning. Knives with full tangs (where the metal from the knife extends past the blade and through the entire handle) are stronger and because of that will work better for batoning, as they are less likely to be damaged or break. The size of the ideal batoning knife depends on the width of the piece of wood you are attempting to go through. The edge of the blade of the batoning knife should be approximately 2-3 inches longer than the diameter of the wood you are trying to baton. That being said, if you’re looking for a single versatile batoning knife to use, you may want to stick to a longer blade. It is obviously possible to baton smaller pieces of wood with a longer blade, although it might be a bit tricky, but you will not be able to baton thicker pieces of wood with a shorter blade. The thickness of the knife’s blade doesn’t make much of a difference in batoning, only the length of the blade matters.

Rigid knife handles will very often create uncomfortable vibrations when struck with a baton, but handles that are completely encased in a synthetic material (like rubber), will normally absorb the shocks reasonably well. Thus, the ideal batoning knife will also have a synthetic material handle. If the knife you intend to use does not have a synthetic material handle, to reduce the felt vibrations, handles can be covered with synthetic material like bicycle inner tube.

proper-batoning-techniqueGerber Bear Grylls Parang Machete

Proper Batoning Technique

When batoning, there are many ways to mitigate damage and potential breakage to your knife. Use these guidelines to attain proper batoning technique:

Center the knife in the middle of the piece of wood you are trying to split.

Place the knife straight down, and not at an angle, when getting ready to baton (this is very important to mitigate damage or breakage to the knife). Hit the center of the knife with the baton until the knife is properly lodged in the wood, then proceed to the next step.

Baton on the blade end of the knife, but do not hit the very tip of the blade when batoning, as the tip of the knife is usually relatively weak and susceptible to breakage. The metal of the knife should protrude from the wood far enough so that you can hit, not the tip, but a part of the spine that is strong enough to take the batoning.

Readjust the knife, correcting the blade orientation by making the knife straight again, if it happens to shift to an angle after having been batoned for some time. Make gentle, corrective taps to the handle end of the knife when batoning whenever the blade begins to stray from it’s original downward alignment. Do not hit the handle as hard as you would hit the blade end of the knife, as the force may cause the knife to break or be damaged, but feel free to make light hits to the handle end when you feel it is appropriate.

Troubleshooting Difficulties with Batoning

Other than using proper batoning technique, the following is a list of adjustments you can make to have an easier time batoning. Try using one or more than one if a particular piece of wood is giving you a hard time.

Baton with the grain of the wood, not against it.

If possible, baton around and not through knots in the wood, as knots create sometimes extreme resistance and can, in certain situations, damage the edge of the knife.

If the log already has a crack, take advantage of it, as mother nature has already done most of the work for you. Align the knife on top of the crack and go through as you would normally.

Move the piece of wood you are trying to baton to rest on the hardest surface you can find. Ideal surfaces include large rocks, a second log, or, in more urban settings, concrete.

Use a more appropriate knife (see the Ideal Batoning Knife section above).

If you simply cannot baton through a particular piece of wood, try batoning a smaller one (in terms of it’s diameter or radus), as batoning becomes easier with thinner pieces of wood.

Hardwood is of course much more difficult to baton through than softwood (like balsa). Adjust expectations accordingly in terms of expansion of energy, and if it doesn’t matter whether you have hardwood or softwood, switch to batoning a softwood instead.

This article acts as a comprehensive guide to batoning. Be sure to pay close attention to the last two sections (the one on proper batoning technique, and the one on