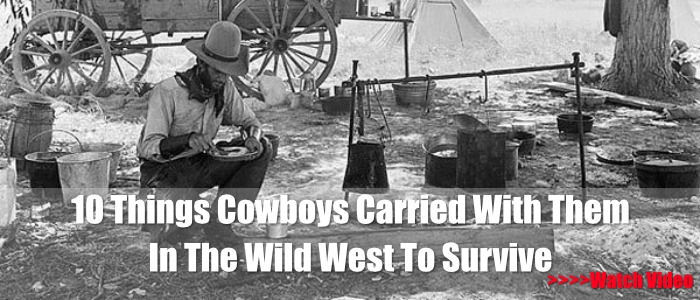
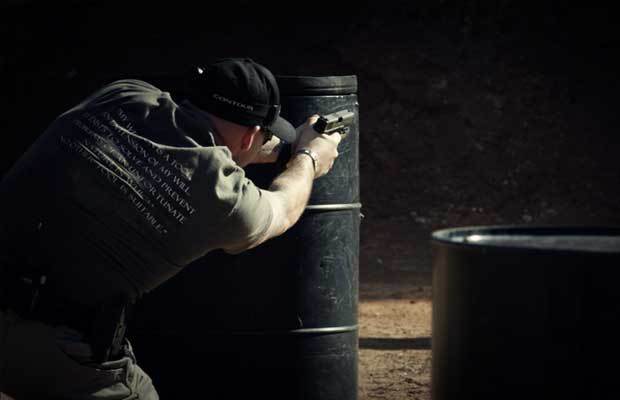
A key but often neglected part of having firearms in your prepping plans is practice. Many people purchase thousands of dollars worth of weapons with the intention of using these in a life and death situation. The truth of the matter is that when you are actually in a life and death situation, your skill is dramatically reduced. The confidence you had with that weapon is gone and fear and stress kick in big time. It is at this most critical time that your skill level and proficiency need to be the highest they can be, but the reality is we are able to muster only a fraction.
Practicing with your pistols before there is an emergency is vital to improving your chances of successfully living to talk about it. If your going into a gunfight, you need to be training for a gunfight. Bruce outlines some steps and exercises you can follow below to become more proficient, to increase muscle memory and hopefully increase your odds of hitting what you are shooting at, before it hits you. Practice these drills as often as you can. They could mean the difference between life and death.
The Crush Grip
The crush grip is one of the elements of Massad Ayoob’s five-point “pre-flight checklist” comprising the fundamentals of solid combat handgun marksmanship (Ayoob, 2012). When a shooter uses a crush grip or hard grasp on the handgun with the thumbs curled down, the curled thumbs promote a stronger and tighter grasp. Thumbs curled down do not shift the windage on one’s muzzle direction. My experience and the results with my students validate that one can shoot with combat accuracy with such a grip.
Furthermore, as demonstrated in Massad Ayoob’s Stressfire combat handgun training program (www.MassadAyoobGroup.com), when a shooter intentionally “gorilla grips” the handgun to the point of tremor, the resulting “wobble zone” results in shot groupings on target at combat distances that are still within a combat accuracy acceptable 3 to 4 inches.
However, there is yet one other essential point. The harder you grasp the handgun, the better you will control the gun. Also, the harder you grasp, the easier it is to isolate your trigger finger. Just perform this little experiment:
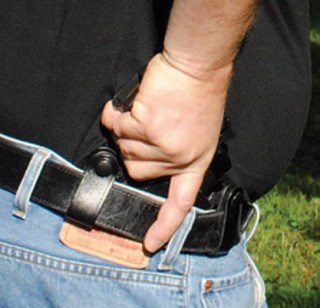 Full combat grip on holstered gun.
Make a loose fist with your dominant hand and keep your thumb pointed forward. Now, extend your trigger finger and press your trigger finger to the rear just as if you are working a trigger. If you watch your hand as you do this, you may notice that as you work your trigger finger, your other fingers are also moving. You have not completely isolated the movement of your trigger finger from the rest of your hand. This is called “milking,” and if you do this while you are shooting, it typically results in shots that are low and to the left.
Now make a much tighter fist and curl your thumb down. When you extend your trigger finger and press it to the rear now, as if you’re working the trigger, you will notice that your other tightly clasped fingers do not move in unison. You have isolated your trigger finger. This is one advantage of a crush grip.
The importance of a combat shooting program emphasizes techniques that depend on simple gross motor skills as opposed to complex fine motor skills, since fine motor skills deteriorate under life and death stress.
It is my position that we should practice defensive shooting in ways which are consistent with what happens physically and psychologically if we were fighting for our life. These techniques should feed off of the effects of the body alarm reaction and become more effective under stress. They must be simple gross motor techniques that can withstand the tremors and increased physical strength attendant to the body-alarm-triggered adrenaline dump into the bloodstream. A “crush grip” does this.
Can we and should we train for a gunfight?
My position on the matter is that we can train for when the proverbial balloon goes up and that we should maximize our training time by building skills that we might have to use in a deadly force situation. After all, we carry guns because we just might have to use them in defense of life. Therefore, we had better prepare ourselves by running drills that build skills we might actually use for real.
How to Train for the Gunfight
I have developed a practice drill regimen that runs through some of the core elements of combat shooting. It is doable in a lane in an indoor range. I use this practice drill regimen for my own skills maintenance, and I teach it to my private students. I will outline it here. It requires 100 rounds (two boxes) of ammunition.
Training for a gunfight means building skills you will need if you are in an armed confrontation. First and foremost, you will need good basic marksmanship skills because advanced combat shooting skills involve solid applications, and in some cases, modifications, of the basic skills. Thus, you must master the basics.
These include a solid (power) stance, a solid and stable (crush) grip on the gun, acquisition and maintenance of good sight alignment and sight picture, good trigger control and trigger reset, and good follow-through. Second, you will need good point shooting and retention shooting skills. There will be no time to take your time. You need to be able to fire multiple shots fast and accurately close in, because most gunfights happen within nine feet. And third, you will need to move! The person who stays planted is going nowhere fast, and in fact, may get planted. Conversely, the person who moves rapidly is more likely to emerge from the fight alive.
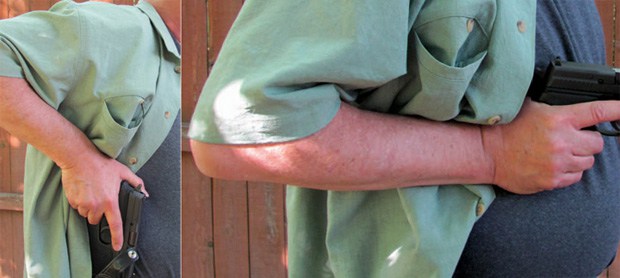 Drill 4: Elbow Up. Elbow Down.
Drill 1. Basic Marksmanship Drill: Two-Handed Grip (30 rounds)
Every trip to the range for practice should include practicing basic marksmanship to refresh and strengthen the fundamentals. Advanced skills build on the basics. This first drill is a primer. I typically run at least 30 rounds through my primary defensive handgun at five, seven, ten, fifteen, and twenty to twenty-five yards. The handgun is brought on target either from the low ready, combat ready, compressed combat ready positions, or the holster. Typically I begin shooting close-in to build confidence and then increase my target distances.
Basic marksmanship means employing the fundamentals; power stance, hard two-handed grasp on the handgun, good sight alignment and sight picture, good trigger control and follow through (give the bullet time to leave the barrel before the trigger reset and preparing for the follow-up shot). For this drill, I am aiming for precision accuracy. I am essentially running the “one-hole drill” or “focus drill” that I have described in previous articles. This is a take as much time as you need drill to get all shots in one hole using the basics of good marksmanship.
Drill 2. Basic Marksmanship Drill: One-Handed Grip (20 rounds)
This drill is the same as the above drill (incorporating all of the fundamentals) except that now you are shooting one-handed at various distances, alternating between your dominant and non-dominant hands. When you shoot one-handed, it is important to grip your handgun even harder, as you have only one hand on the gun. The harder you grasp, the better you will control the gun. Also, the harder you grasp, as we illustrated above, the easier it is to isolate your trigger finger.
Movement
The above two drills use up a box (50 rounds) of ammunition. The drills to follow require another 50 rounds. The following drills should incorporate movement at least some of the time that you run them, to the extent that the range will allow. Obviously, if you are working in an indoor range in a lane, your movement will be minimal. Basically, when you are not shooting, you should be moving. As noted defensive firearms trainer, John Farnam is fond of repeating, “Don’t just stand there like a potted palm.” If you present a static target in a real fight, you just might get planted. So, movement should be incorporated into your gun presentation (your draw from the holster) and movement should follow each string of shots.
Drill 3. Draw and Shoot Two-Handed from Compressed Ready to Full Extension (20 rounds)
DRILL 5 as you aim through point shooting at the target, you are shooting up the target from your initial point of aim/point of impact, sort of like a zipper.
In a real gunfight, you will be firing multiple shots. Typically the fight will begin close in. To prevail and survive, you need to get hits on your assailant before he hits you. And you need to move away from your assailant as you are doing so. Distance is your friend. This drill is
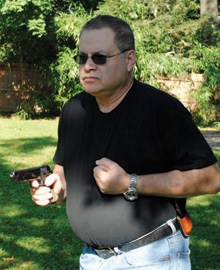 One-quarter hip retention point shooting position.
run at three, five, and seven yards. You begin from two-handed compressed ready. When you give yourself the go signal, start shooting from the compressed ready and fire two to three additional shots as you push your gun out to full extension.
In a fight, you would be extending the gun as you fire and simultaneously move away from your assailant. Note: Your first shot at compressed ready should be taken with your hands at least six inches in front of your chest so that the rear end of the cycling slide will not hit your chest.
Drill 4. Elbow-Up/Elbow Down One-Handed Point Shooting from the Hip (10 rounds)
In this drill, I practice drawing from the holster (strong side) and shooting from retention (which in this drill is the one-quarter hip retention position), as soon as the gun is pointed at the target. A total of 10 rounds are fired. This drill should be perfected first without movement. Once you are comfortable with the drill, then you can incorporate movement. However, if you are shooting on an indoor range in a lane, it may not be safe to incorporate movement into this drill. This is the flow sequence broken down into steps:
- Acquire a combat grip on the holstered handgun.
- Your elbow swings up as you draw the gun up vertically and clear the mouth of the holster with the muzzle.
- Your elbow swings down as you rock your forearm up toward the target with your arm in the one-quarter hip retention position.
- You fire one shot as soon as your muzzle is pointed at your aim point on the target.
It is very important to maintain a crush grip on the gun as you run this drill. By doing so, you will have more control over the gun.
Drill 5. “The Zipper” (20 rounds)
This drill is an extension of Drill 4. In this drill, I draw from the holster (strong side), begin shooting from the one-quarter hip retention position as soon as the gun is pointed at the target, and continue firing as I push the gun out toward the target through the half hip, three-quarter hip, and full extension positions. This drill is called the zipper because as you aim through point shooting at the target, you are shooting up the target from your initial point of aim/point of impact, sort of like a zipper.
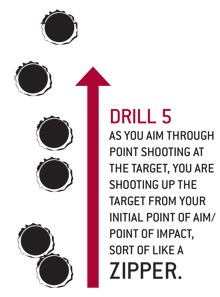 DRILL 5 as you aim through point shooting at the target, you are shooting up the target from your initial point of aim/point of impact, sort of like a zipper.
Here again, we are practicing getting multiple shots at speed into our assailant. You should start running this drill slowly, and gradually build up speed over several sessions. It is important to do it smoothly in one continuous flow. Here you should “flow like water.” Remember that initially at least, slow is smooth, and eventually, fast, effective and coordinated is always smooth.
Recognize that in reality, you would only extend your gun as you are firing as far as you safely can in order to maintain good gun retention. If you are too close to your opponent and you extend your gun too far toward your opponent as you are firing, you may end up giving your gun to your assailant or his partner.
This drill should be performed without movement while you are shooting, as with all of the above drills. Give yourself time to become proficient at this drill before you incorporate movement into your draw from the holster. Again, if you are shooting on an indoor range with lanes, it may not be safe to incorporate movement into this drill. Again, it is very important to maintain a crush grip on the gun throughout the shooting sequence. Especially when you are practicing this technique, if you do not gorilla grip your handgun, you will not have as much control over it as you need to have.
This is the flow sequence broken down into steps:
- Acquire a combat grip on the holstered handgun.
- Your elbow swings up as you draw the gun up vertically and clear the mouth of the holster with the muzzle.
- Your elbow swings down as you rock your forearm up toward the target.
- You fire your first shot as soon as your muzzle is pointed at your point of aim on the target and when your arm is in the one-quarter hip position. You continue firing as you push the gun out toward the target through the half hip, three-quarter hip, and full extension positions.
Summary
Training for a gunfight means practicing drills that incorporate skills you will need if you are in an armed confrontation. First of all, you need good basic marksmanship skills. Advanced combat shooting skills involve solid applications, and in some cases, modifications of the basic skills. You must master the basics as discussed above. That is why my practice regimen includes a basic marksmanship component.
Second, you need good point shooting and retention shooting skills. Armed confrontations and gunfights typically happen in seconds. There is no time to take your time. You need to be able to shoot multiple shots fast and accurately. Most gunfights happen within nine feet. You will most likely be fighting one or more assailants who are coming toward you, so you will need to hold onto your gun tightly (crush grip, retention position) and fire multiple shots.
Third, you will need to move, so you need to incorporate movement into your drills! The person who stays planted is going nowhere fast, and in fact, may get planted. Conversely, the person who moves rapidly is more likely to emerge from the fight alive. The drills described above incorporate all of these elements.
A key but often neglected part of having firearms in your prepping plans is practice. Many people purchase thousands of dollars worth of weapons with the intention of using these


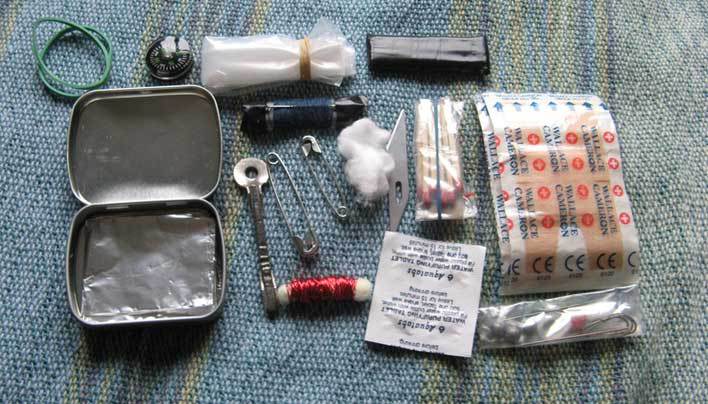 A survival tin has an assortment of items that you think can help you out if you are ever faced with some life or death survival scenarios.
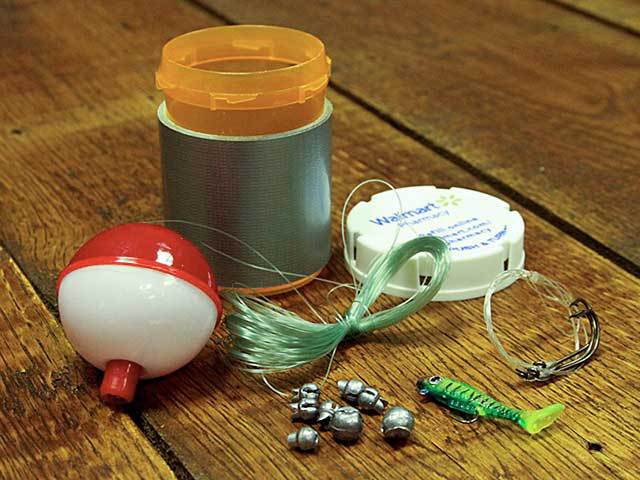 A survival fishing kit doesn’t have to be complicated or take up too much space.


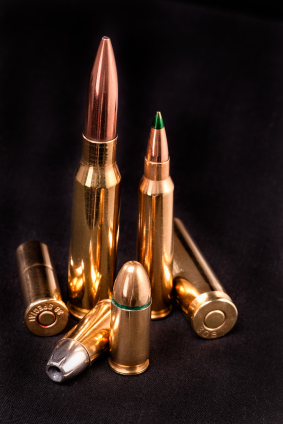 What are the recommended minimums in your favorite calibers?

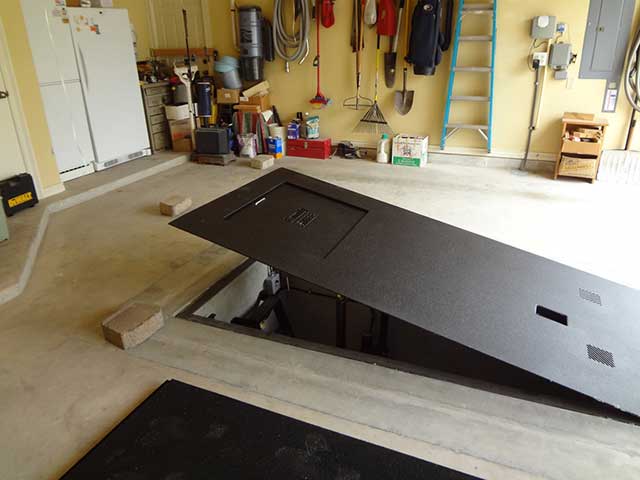 Shelters like this one in the garage can be installed after your home is constructed and could double as a panic room.
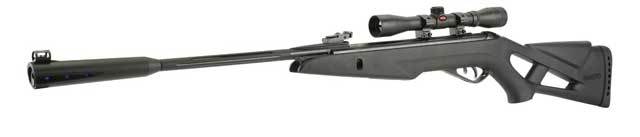 1200 FPS with a scope for less than $140.
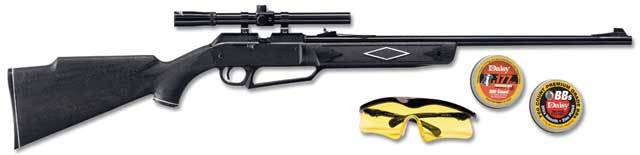 880 air rifle kit includes safety glasses, 4×15-millimeter scope with rings, 500 Daisy pellets, and 750 BBs – $60
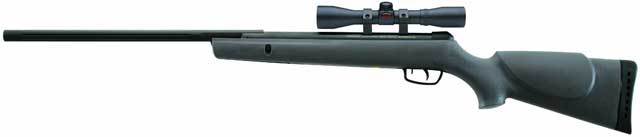 Velocity of up to 1,200 fps with PBA Raptor ammunition; 4×32 air rifle-scope – $99