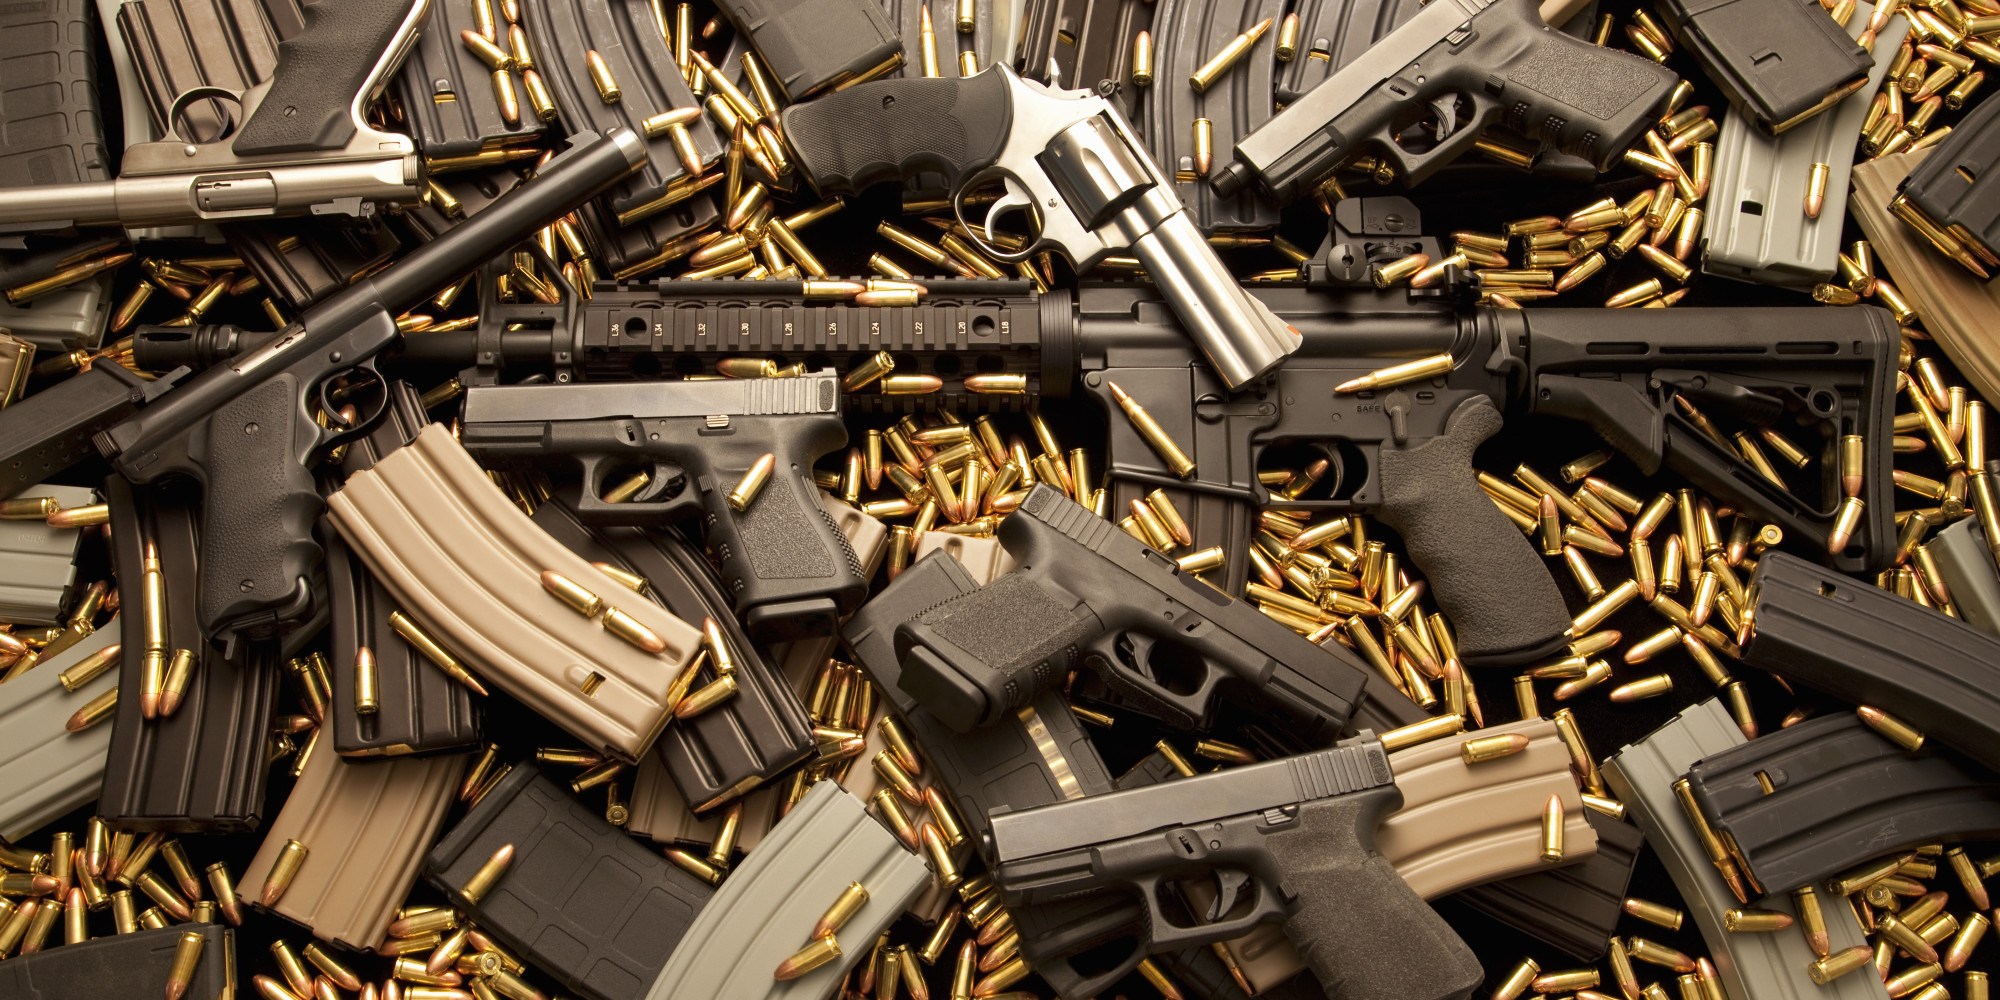
Gun Control – how far will we go as a nation to further limit the 2nd amendment? Will it stop at full automatics, or will it continue against semi autos, large capacity mags, and other accessories? Whatever you believe, one thing is certain – the upcoming election will be the most important one in the last century as it relates to gun control.
The tragedy in Orlando and other mass shootings in the U.S. and abroad has even some Congressional Republicans wavering on their previous reluctance in allowing any gun control legislation to pass. In my opinion, some form of additional gun control is inevitable. While the current Congress favors gun rights, this could all change in November. If you haven’t noticed, Americans have a very low opinion of Congress in general. They could vote out incumbents, mostly Republicans, just because they are mad at the current legislative stagnation. However, the main reason why this election is so important is that the next President will likely have the ability to not only tilt, but actually create a decidedly conservative or liberal Supreme Court, which would be in power for the next few decades at the least.
Related Liberal’s hidden agenda: more than just your guns
With Antonin Scalia’s death, three of the remaining eight Justices are older than 77. With the average age of Supreme Court Justice retirement at 78.7, you can do the math. Ruth Bader Ginsburg, who was installed by Bill Clinton, is 83. Stephen Breyer also from Clinton, is almost 78. Anthony Kennedy, who was a Reagan nominee, is almost 80. The remaining Supreme Court Justices are between 55 and 68. Let’s top it off with some recent reports that indicate Justice Clarence Thomas, 68, is said to be mulling retirement. As we know, he is the most staunchly conservative of the remaining Justices.
If you are a pro gun rights advocate, you should be very concerned. Don’t fool yourself into complacency. If you are a pro gun control advocate, you are probably salivating like a vulture circling a dying animal. Based on the above information, it is quite conceivable the next President would have the pleasure of nominating up to five Supreme Court Justices – one because of Scalia’s death, three because of retirement due to age, and one from a reported Clarence Thomas retirement.
If you buy into this line of thought, a pro guns right advocate might want to plan for the worst. For some, that might mean mortgaging the house and buying up as many ARs as possible, assuming they will be grandfathered post ban. It is hard to believe they would be not grandfathered since one might argue that an outright confiscation would cause too much of a civil unrest. So for this article I am assuming that every gun or accessory I mention will be grandfathered.
Related The vital self-sufficiency lessons our great grand-fathers left us
Additionally, I am not even accounting for any state law changes like the recent Federal Appeals court ruling from California, which removes the 2nd amendment right to carry a concealed weapon. That ruling alone is enough to push any gun rights advocate over the edge since it paves the way for other states to do something similar, until an inevitable Supreme Court hearing – so here we are again. Everything points back to the Supreme Court.
Planning for the worst with gun control
So what can you do to plan, or insure, against a worst case scenario resulting from extreme liberal gun control legislation? While I am only half-joking about mortgaging your house, I will outline some hardware and accessories to buy while you can, assuming you don’t live in some of the already prohibitive states like California, New York, New Jersey, and Connecticut. Be sure to check your state laws on what you can buy, carry or conceal before trying to buy or use the equipment below in the manner described.
When investing in a firearm for defense, you have to first ask yourself, “What am I defending against”? Would it be for close quarter battle (CQB), home defense, a Car Trunk Backpack, need for extreme stopping power during CQB, protecting a small perimeter, or to keep intruders at bay from a long-range? In this article, I pick some of my favorites for each purpose. Some guns and accessories I mention will be specific, and others will be generalized in categories. One thing to remember, semi-automatic weapons are inherently more expensive. So some of these guns, especially the long-range selections mentioned, are not for those with limited budget. Also as a disclaimer, I own at least some of the items below.
Related 4 Important Forgotten Skills used by our Ancestors that can help you in any crisis
Each of the guns I recommend below are semi automatics. Keep in mind that I am recommending them based on a premise of a ban, so I realize there are obviously other cheaper alternatives that are not semis, particularly in the home defense and long-range categories. Additionally, for most, with the exception of the 458 SOCOM and a few others, the ammo is readily available.
Close Quarter Battle – up to 100 yards
Sig Sauer MCX – Chambered in .300 AAC Blackout – This carbine received a lot of bad press recently due to the fact that it was the same one used by the terrorist in Orlando. Mistakenly referred to by the press as an AR (furthered by the ignorance that they believe AR stands for “assault rifle” instead of “Armalite”), the MCX in blackout is very effective and light, designed for CQB. The blackout ammo is very hard-hitting and the subsonic 220 grain is very quiet when coupled with a silencer. The MCX barrel can also be changed out quickly in favor of other calibers such as 5.56×45 NATO. Recent news articles have indicated that some British counter terror units are using the MCX. Add a Vortex 3x magnifier to your red dot of choice for a very high accuracy within 100 yards. The MCX costs roughly $1700, but the quality is worth the extra coin.
Springfield Armory SOCOM 16 CQB w/Vortex Venom Red Dot (.308/7.62 NATO) – this gun is nasty, from its looks, down to its hard-hitting 7.62×51 ammo. A child of the M1A, Springfield has a winner by shortening the barrel of the original M1A1 to 16”, installing a collapsible stock, and adding a vortex venom red dot as an option. This rifle will destroy anything in its sights. Wear ear protection though. 20 or 25 round mags are prevalent, but if you want to really equip this gun, Beta Mag makes a 100 round twin drum mag for it that will set you back $450 (and it would significantly increase the weight of an already heavy gun – but you can’t erase the fun factor of having one). The SOCOM 16 with Venom could top out over $2000, so it is hard on the budget, but worth it if you can afford it.
Related Secure your privacy in just 10 simple steps
Century Arms AK-47 – while not Russian made, this AK is one of the most recognized and vilified guns in the US because it is the one people see on the news when ISIS or some other terrorist footage is shown. Additionally, all of the Hollywood movie bad guys use them. They are on the list not so much for their accuracy, but more for their high-profile, which equates to the probability of being banned. These AKs are affordable, having a price point under $800. The 7.62×39 ammo is hard-hitting and relatively cheap, especially if you target practice with bullets that have steel casing such as TulAmmo. I would not, however, use TulAmmo in a life threatening situation as I have experience in its failure to feed on occasion.
CMMG Mutant AKM2 – This gun is appropriately named. The Mutant is an AK/AR-15 hybrid. A regular AK style rifle is extremely reliable, but it is not inherently designed for aftermarket sights or other attachments. The Mutant fires the omnipresent 7.62×39 AK ammo through a 16” barrel, but, as CMMG’s site says, “it offers the modularity of an AR-15”. With the ability to add aftermarket sights, combined with the fact that every rifle comes equipped with a MOE pistol grip, SV muzzle brake, Geissele SSA trigger, 30rd AK PMAG, and CMMG’s lifetime quality guarantee, the Mutant offers the best of both worlds. The $1700 cost is more on the high-end AR price point, but it would be nice to have one of these at your disposal if budget permits.
SIG Sauer 516 Patrol – chambered in 5.56 NATO with a 16” barrel, a quad rail, collapsible Magpul stock, and a four-position gas regulator (which has a silencer position), this gun, in my opinion is among the most versatile and reliable ARs in the market. Sig Sauer’s reliability is legendary, and the 516 does not disappoint. The standard 516 can be acquired for about $1600. There are also different versions that come with a fixed carbon fiber stock and/or an extended carbon fiber fore-end, but it will add $4-500 to the price. Personally, I like the standard version for long-term reliability. Maybe I am old school, but I can’t see the carbon fiber holding up to many sustained battles and abuse. You trade marginal weight savings for reliability. I may be wrong, but I guess time will tell. I would become a believer if I see the military adopt the carbon fiber version.
Related Secure your privacy in just 10 simple steps
Car Trunk Backpack
Keltec Sub 2000 chambered in 40 S&W; paired with Glock 22 (also 40 S&W); the Keltec is an extremely accurate carbine that uses Glock mags. It also folds up nicely to fit in a small backpack. Add a TruGlo green laser/light combo to the bottom Picatinny rail to make it even more effective. It also has a threaded barrel waiting for a silencer. The Keltec can be bought for less than $400 as of this writing – one of the single best values for a carbine in the market. You can also equip your backpack with a Glock 22 and use the same mags between the two. Glock has a high-capacity 22 round 40 S&W factory mag. Alternatively, Magpul is coming out with the PMAG27, a 27 round mag for 40 S&W. The Korean company KCI also has 40 S&W high-capacity mags, but I would only use them at the range. I have seen both good and bad reviews of KCI, so I wouldn’t trust them with your life until I see a better track record. Load up your factory mags with Critical Duty bullets, and you have a very effective defense while on the road. As a footnote, the Keltec also comes chambered in 9mm if you prefer that caliber. There are some who believe 9mm and 40 S&W will have very similar stopping power over short distances. As always, check your state laws before concealing firearms in your car or on your person.
Extreme Stopping Power, CQB
458 SOCOM – The 458 SOCOM caliber was a result of our Special Ops soldiers’ experience in Somalia during the 1993 Battle of Mogadishu (immortalized in the movie Blackhawk Down). Some soldiers noted that it took multiple hits of 5.56 to bring down the enemy since many of them were flyin high on “Khat”, an herbal stimulant from evergreen leaves that can cause hallucinations and manic behavior. They needed a bullet that would do the job in one hit, resulting in the 458 SOCOM. A SOCOM upper can be mounted to any standard AR15 lower, or you can buy a full factory rifle from Rock River ($1300) or Wilson Combat ($2500). You need to use 30 rd Lancer mags, which are a cross between a PMAG and steel mag. A PMAG will split open if you use it for this ammo. This bullet needs the steel support offered by Lancers. Additionally, the bullet size only allows for loading about 7-9 rounds in a 30 rd Lancer mag, which is probably why it never fully caught on with the military, and is reserved for special circumstances. The factory ammo is sometimes hard to get and expensive (up to $3 per round), but if you are a reloader, you can save quite a bit and the individual casings and bullets are more readily available. In any event, it is a great caliber to have when you need that extra stopping power.
Home Defense Shotgun
Fostech Origin 12 with 30 round Drum – this 12 gauge shotgun is down right wicked. Billed as the fastest semi auto shotgun in the world, the Origin 12 is Fostech’s answer to the Russian made Saiga 12. It looks like an AK on steroids, having an 18” barrel and collapsible stock. It comes with a 5 round mag, but when you add the optional 30 round drum mag ($400), you won’t have to shoot because the bad guy home invaders will run at the mere sight of it. There are numerous jaw dropping YouTube videos dedicated to this shotgun. Look it up. I guarantee you will be impressed, but you would need to part with $2500 to own it, not including the drum mag. If I was a liberal gun control proponent, this type of hardware would be on my radar.
Benelli Super Eagle with XRail – the Benelli 12 gauge semi auto shotgun is already used by many law enforcement officers. If you add a $800 XRail attachment, it ups the number of shots to 23 with a 26” barrel. If you get an integrated XRail, it comes with a 21” barrel and 26 shot capability, which would make the Benelli even more effective in a tactical environment. The integrated version, including the shotgun, runs about $3300. In my view, the XRail would clearly be in the sights of the gun control advocates.
Woodsman and Mountain Man Activities (whatever they might do)
Rock River Arms Lightweight Mountain Rifle – chambered in .223/5.56, this gun is light to carry in the mountains or woods, accurate, and most of all, cool looking. It not for a sustained battle though as the rail gets very hot to the touch, but it is fun to shoot. Use gloves.
Midrange 100 – 500 yards
SIG 716 DMR Gen 1 (.308/7.62) – buy the Gen 1 while still available. The pending Gen 2 version is more like a patrol style (16 inch barrel, collapsible stock, key mod instead of quad rail, two pounds lighter than Gen 1). If you haven’t noticed I am not a weight weenie. I always have felt that you should keep physically fit, and either lose weight yourself or pump iron, especially if preparing for battle. Don’t skimp on the hardware. The heavier Gen 1 serves a purpose. I would not use the Gen 2 for midrange because of the 16 inch barrel. Some may disagree, but that’s ok.
The Gen 1 comes with an 18 inch barrel, quad rail, Harris Bipod, and Magpul Precision Rifle stock – much more for the money, and definitely more accurate at the midrange. The 716 accepts standard PMAGS. In a pinch, while the gun will top out at 10-11 pounds, you could theoretically pick it up and use for CQB, but that is obviously not the main purpose. My dream sight for this gun would be the Trijicon ACOG 6×48 with the RMR red dot on top. Alternatively, any mid range scope would work for the budget conscious. The DMR costs around $2500 without the sights.
Wilson Combat Urban Super Sniper – barrel chambered with a .223 Wylde – this barrel is designed to be extremely accurate using either .223 or 5.56 ammo. It will run about $2500, but it will be hard pressed to find one as accurate for mid-range using a 5.56. That said keep in mind the Ballistics of a 5.56 bullet. This barrel is meant for tighter urban environments as the gun’s title suggests. It becomes significantly less effective past the mid-range, so you would not want to use this to hold off zombies past 300 yards unless you can get head-shots. Might work for slow movers, not the World War Z type though.
FNH M249S Saw – this gun got a lot of press at the NRA 2015 meeting in Nashville. Chambered in 5.56, the M249S is the semi-auto version of the military’s full auto version (originally introduced in 1988). It has the ability to accept belt fed or mag-loaded ammo, giving it an ability to fire a large quantity of ammo before needing to reload. It actually comes with an attached plastic ammo box to hold the belt fed ammo. WIth a 20.5 inch barrel, some would consider it capable of defending mid range. While I don’t doubt the fire power, I have some questions on 5.56 ballistics that give me pause to use this gun to defend against targets further than 300 yards. That said, the sheer volume of bullets that you can fire without reloading would put this gun on the chopping block. The Saw’s cost is approximately $8000, give or take a few hundred.
Long Range – over 500 yards (my definition of long-range – which is up for debate)
Barrett M107A1 – while cost prohibitive for many, I would be remiss to leave it out as the most effective semi auto long-range gun available on the market. With its 50 bmg bullet, this gun will stop most Mad Max style vehicles. Already prohibited in California via the .50 Caliber BMG Regulation Act of 2004, which prohibits the sale of guns chambered in the caliber, this weapon would certainly be on the chopping block of a liberal Supreme Court. If you go all out with the Barrett Optical Ranging System (BORS), which is an integrated ballistics computer, you can automate your ballistics calculations. This weapon can be yours for 12-15k, or you can wait for the SHTF and pick one up off an abandoned military vehicle. Keep in mind that the M107A1 is not only expensive to buy, but also expensive to shoot. That said, I would say anyone who owns one can’t help but smile every time the trigger is pulled, though the blast might be life altering.
Noreen Firearms “Bad News” 338 Lapua Magnum – the Lapua ammo has increasingly become a favorite of the snipers, but the military application has been limited because most Lapua rifles are bolt actioned. Enter the Bad News Lapua, which is the first semi-auto rifle chambered in this caliber. With a 26” barrel, a Magpul Precision Rifle stock, piston driven, and weighing in at 13 lbs, this gun is made to be mobile. In an ever-changing landscape, I could see the application up to 1500 yards. If I am not mistaken, the 338 Lapua caliber holds the record for the longest range hit at 2 miles (with an Accuracy International bolt-action rifle). While not designed to go as far or as hard-hitting as the 50 BMG, the Bad News offers a nice alternative for those that want a “cheaper” long range semi, topping out at $6000. The Lapua ammo, however, can run you up to $5.00 per round – so get into reloading to save some cash. It is a good skill to have, especially if the SHTF.
Nemo Omen – yet another effective gun for the longer range. The Omen is chambered in 300 Win Mag and would also be effective to 1500 yards. It is the “cheapest” out of the long-range rifles in this article at roughly $4000. The Win Mag ammo is readily available and popular with hunters as well. I would get the 20” barrel for a greater muzzle velocity. The mags, however, are not something readily available and are specific to the gun. So get a bunch upfront so you have them.
Keep in mind I realize bolt actions may be more precise and affordable. There are some like the Ruger Precision Rifle chambered in 6.5 Creedmoor and 308 Win that put out more than respectable groupings at long ranges. They can be bought for under $1200 as well, but I reiterate that this article is about insuring against potential bans.
Hunting Handguns
I believe a ban would not affect most handguns. It would most likely address high-capacity mags. However, there is one handgun that comes to mind as a potential target for a ban, and it is more related to the caliber, not the mag capacity. Magnum Research’s Desert Eagle 50AE would probably be on the radar due to the large 50 caliber bullet. The 50 AE is the most powerful semi-automatic handgun on the planet. It comes in an array of cool finishes, with my favorite being the Black Tigerstripe. The cost is around $1600, and the ammo is expensive and less available than its little brother chambered in a 44. Again, you would benefit by being a reloader.
Accessorize, Accessorize, Accessorize
For those with limited budgets, one way to help to insure yourself against gun control is to stock up on accessories, even if you don’t own the associated weapon. I believe the most effective thing you could do is to acquire some of the high-capacity magazines listed below. However, if you believe in the possibility of severe restrictions, there are other items to think about. What follows below are some suggestions without regard to price. With the exception of the Beta Mags, Fostech Echo Trigger, thermal sights, night vision, and silencers (I hate the politically correct word “suppressor”), these items can be bought relatively cheap (from $10 to $200).
Magazines
- Ruger BX25 or 2×25 – a 25 and 50 round .22lr magazine: Yes it’s a small-caliber, but it’s more about the capacity
- 30-40 Round 5.56 and AK Mags from Magpul, Lancer, Hexmag, and others: if you can’t afford them, go with the steel – they work well and can be picked up for half the price of a poly.
- 20 and 25 round M1A1 steel mags for the SOCOM 16 CQB
- 20 round 7.62×51 mags by Magpul for the Sig 716
- PMAG D-60: a 60 round 5.56 drum mag by Magpul
- Surefire 60 and 100 5.56 round mag: only about an inch and a half longer than a 30 round mag, the Surefire gives a lot of added capacity.
- Beta Mags: this company offers a ton of different 100 round twin drum mags, but they are expensive.
- Korean Drum mags: KCI offers 100 round drum mags for a number of different calibers at very reasonable prices. I would reserve them for target practice or to trade/barter (assuming you can legally do so in the future state of gun control).
- Origin 12 – 30 round mags: Specific to the Origin 12, but a must have if you own this gun.
- Glock high-capacity mags (all calibers) – factory and aftermarket: While I believe the factory Glock mags are the most reliable, I have seen good reviews of the PMAG and Elite Tactical Systems (ETS) high capacity mags. Both the PMAG and ETS mags can be bought at a fraction of the price of the factory Glock mags. The same goes for KCI, though these mags have mixed reviews.- Stripped or Complete AR15 and AR10 Lowers: Buy as many as you can. As you may already know, the lower is the part that is considered the gun. You can always build an AR after the ban, again assuming grandfathering. You can get some very cheap by Anderson Arms, or if you want the cool factor, get the Spike’s Tactical “The Jack”, which has a forged skull, or the “Warthog”. Keep in mind, however, that some lawmakers believe that collapsible stocks should be banned. If you subscribe to this belief, buy a complete lower that includes a collapsible stock.
- Foregrips: Believe it or not, foregrips have been scrutinized as some believe these accessories can increase the fire rate of a weapon. You can get a ton of these really cheap on Amazon.
- Sig Sauer Pistol Brace: this accessory initially took the industry by storm, but it is very controversial since the ATF says that if you use it as a shoulder stock on a buffer tube equipped pistol, it can reclassify your gun as a Short Barreled Rifle (SBR), which is subject to ATF registration and tax. Per Sig Sauer, the pistol brace is designed to stabilize the handgun while shooting with a single hand. In summary, while still legal, make sure you use it as designed or risk a felony. I believe there is a high probability this brace will be outlawed in the coming ban as it is already being questioned by the ATF. As a disclaimer, I do not hold out myself to be an expert on firearms laws, so check these facts for yourself.
- Fostech Echo Trigger: this trigger fires the gun not only when pulled, but also upon release. It is as close to a fully auto as you can legally get. There are other companies that make such a trigger, but I have seen reviews with some problems. Without getting specific, Fostech seems to have learned from other’s mistakes. This one has my head scratching regarding legality. While the ATF currently deems them legal, I have seen some YouTube videos, and once becoming proficient, you can reach a cadence that is pretty close to fully auto. You can switch to regular semi auto as well. These triggers are shipping later this year. I will be sure to get a few as I believe they have a high ban probability in the future.
- Silencers: there are a ton of different companies that producer silencers. I prefer SilencerCo’s new Hybrid, which will work with pistols as well as higher calibers such as the 458 SOCOM. If you are lucky enough to live in a state where they are legal, get a least one. I believe that after July 13th, 2016, a new ATF ruling allows you to obtain a silencer without a Chief Law Enforcement Officer (CLEO) sign off, though you would still need to get your fingerprints and photos when submitting your registration with the ATF. If you were smart enough to start a gun trust, you can avoid the fingerprints, photos, and CLEO sign off until July 13th (again, check with your local FFL to verify the ruling). Gun trusts can be started for as little as $75, but time is running out.
- Thermal and Night Vision Sights – less likely to be banned, but you never know. These sights give the operator a great advantage, and overzealous gun control legislators might believe they pose too much of a risk.
- Reloading dies, primers, and powder for AR calibers: again, less likely to be banned but who knows how extreme a ban is coming. If you are a reloader, better to be safe than sorry.
- Collapsible Stocks: mentioned previously as part of a complete upper, this type of stock is definitely on the radar of some liberal lawmakers.
- Ammo: stock up on the AR/AK calibers. If you have enough of a budget for the longer range 338 Lapua and 50 BMG, more power to you. Get it while you can.
In summary, while it is hard to speculate the extent of any proposed ban, if you are able to obtain at least some of the above hardware and accessories, you will be somewhat insured. Again, I realize that many of the guns in particular might be out of budget. There are cheaper weapon alternatives, especially in the AR market for CQB. If that is all you can afford, it is better than nothing. If you can’t afford the full weapon, by some complete and stripped lowers for the future.
If you are frightened after reading this article, I have achieved my goal. Get out and vote in November. The only thing certain is that this election is critical on many different levels.
Other self-sufficiency and preparedness solutions recommended for you:
Healthy Soil + Healthy Plants = Healthy You
The vital self-sufficiency lessons our great grand-fathers left us
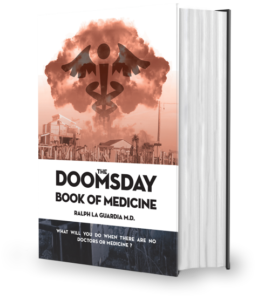
Knowledge to survive any medical crisis situation
Liberal’s hidden agenda: more than just your guns
Build yourself the only unlimited water source you’ll ever need
4 Important Forgotten Skills used by our Ancestors that can help you in any crisis
Secure your privacy in just 10 simple steps
Gun Control – how far will we go as a nation to further limit the 2nd amendment? Will it stop at full automatics, or will it continue against semi autos,