
In the 1960s, my father spit out the word “plastic” as if it were poison. To him, anything made of a substance other than real wood, metal or glass was junk. Now, I understand.
Our first greenhouse was entirely plastic, a snazzy do-it-yourself kit Darren ordered online for about $1,600. He eagerly awaited the day the UPS truck showed up with the soon-to-be mega-veggie-growing house. Like a kid at Christmas, Darren ran out to help the delivery man with the boxes, thinking they’d weigh a ton. His expectations were high.
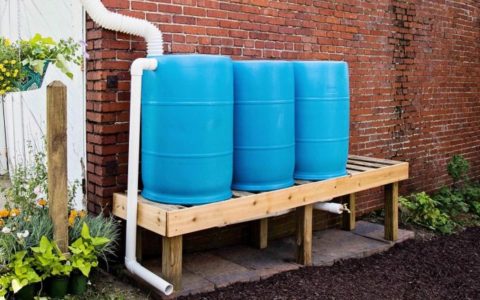
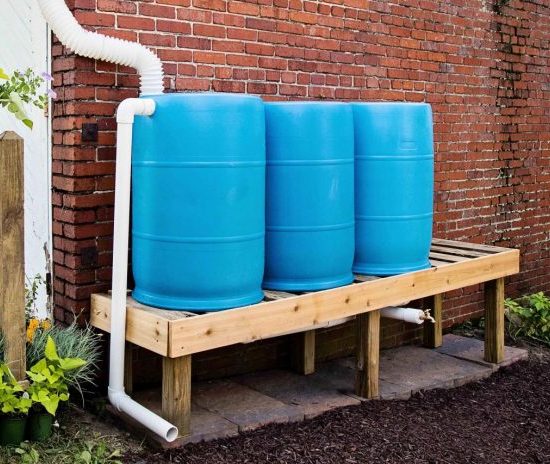
 Although he later called it a “toy”, Darren built a foundation for the 8’ by 12’ greenhouse and filled the north wall with black 55-gallon barrels to retain heat. The plastic shivered in the wind. Within two seasons, the windows were cloudy.
We’ve learned a thing or three since then.
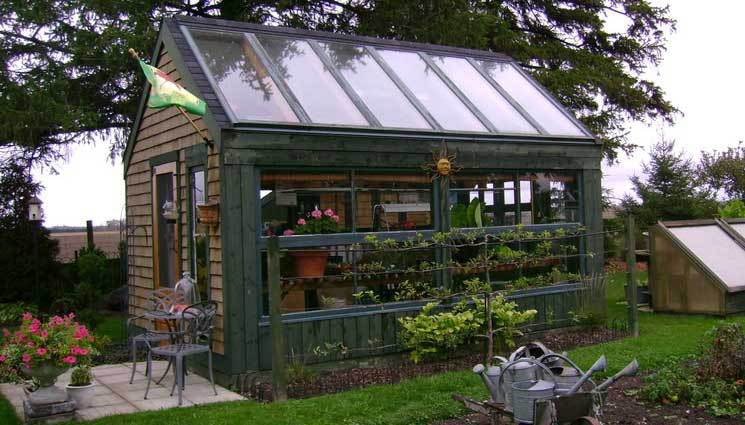
Rather than building a stand-alone greenhouse of plastic, you can have a sturdier, less-expensive and warmer greenhouse of real wood, metal and glass by attaching it to a south-facing wall of your home or other building.
Using some scrap material, old sliding glass doors and windows, and as few purchased supplies as possible (cinder blocks, wire cloth, 2x4s and roof tin), we built such a greenhouse last fall for about $400. All winter long, it provided more than enough greens for our heaping, twice-daily salads, and cost a fraction of that plastic model.
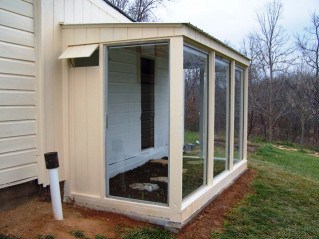
The finished greenhouse measures 15-1/2 by 5-1/2 feet along the south side of our unheated porch. Attaching it to the house, we used less materials and the greenhouse needs no artificial heat. The temperature in our part of the Missouri Ozarks rarely gets below 0, but, on really cold nights, we set the pail of woodstove ashes in the greenhouse for extra warmth. A few 1-gallon jugs placed on the stepping stones absorb heat during the day. But, that’s it – no electric or propane heat required.
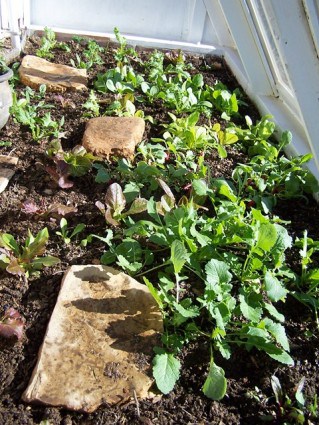
So far, these no-cost methods have kept the greenhouse at a perfect temperature for spinach, lettuce, kale, mustard greens, 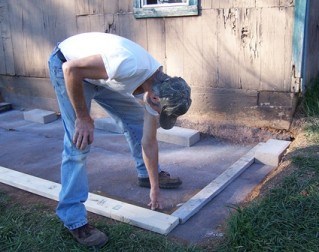 radishes and bok choy. The plants generate enough oxygen to compensate for that consumed by the glowing embers. I’ve heard, too, that a few candles will produce enough heat to keep the tender plants from freezing, although we haven’t needed to try that trick.
From the Ground Up
Our project began with a sketch, followed by marking the site and digging a level base. Shoveling by hand took almost two days. I thought we’d keep the excavated dirt for greenhouse soil, but it was mainly clay and rock, so was used elsewhere.
Once the ground was smooth and level, we built a foundation of cinder blocks topped with 5-inch x 5-inch beams. We banked the blocks on both sides with some of the excavated clay to keep them in place during construction.
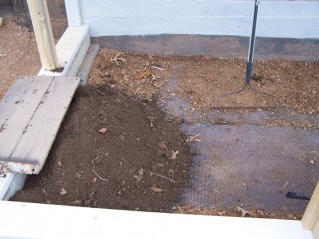 To keep out moles and other dirt-digging rodents, Darren “sewed” together two pieces of quarter-inch hardware cloth by weaving a wire along the edges of two pieces. The wire-cloth base may not be necessary in all parts of the world, but, here it is absolutely the difference between us crunching on spinach or crying over our empty salad bowls. The wire covers the entire floor and extends about 8 inches up the walls. We know it works, as mole tunnels girdle the greenhouse, yet no varmints get inside.
We added plastic (oops, there’s that word again) landscape edging along the inside of the foundation at soil level, but only because the edging was given to us and will help keep wet soil away from the lumber. It is certainly not mandatory, though.
From Doors to Windows
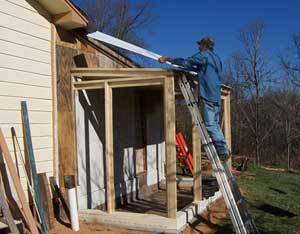
Next, the 2×4 studs went up, followed by rafters. Darren put on the tin roof while I painted the interior walls glacier white, snow-blinding bright. With a roof overhead, we headed to the woods with a wheelbarrow for topsoil, which we mixed with some of last year’s compost. We shoveled it in about 8” deep, adding flat rocks from the yard for stepping stones. Then came the sparkling clean glass. Dad would be proud.
 We carted home our used sliding glass patio doors from a junk shop for $10 each and $5 for a window, although I have heard of people just giving them away. Check with glass shops, contractors or online (freecycle.net or freecycle.org) for used doors. Also, non-frosted shower doors make great entry doors.
Our used patio doors are about 4 feet wide and 6 feet tall, the perfect size for three along the south face and one on the west. The east side has a homemade wooden door and another used window, about 3-feet wide and 6-feet tall. The old porch window opening is now a very handy, narrow doorway leading from the porch into the greenhouse with only a scruffy wool blanket as a door.
Recently, we added a shelf, the wire kind used in closets, to hold trays of seedlings. It’s up high enough to not shadow the plants below. We also lined the wall behind the shelf with aluminum foil to reflect even more light onto the seedlings.
An old 70-gallon stock tank we found for $20 in the local thrift store sits under a downspout where, in winter, it stays full of nutritious rainwater. All I have to do is dip in my watering can. I let the water warm up to the greenhouse’s ambient temperature before watering so the plants aren’t shocked by ice water.
Year-Round Usefulness
 Our first glass greenhouse here, a lean-to Darren built along his shop in late 2011, supplied us with delicious, organic greens from mid-December until May. By the time it got too hot in the greenhouse to grow food, our raised beds outside started producing. So, the greenhouse became a large and super-efficient compost bin. We kept it damp with rainwater, and in just 2-3 weeks our peelings and whatnot became compost – many weeks ahead of the outdoor compost pile, and without rodents.
Our new greenhouse has been staying cool enough, I think, for tomatoes. Well, I’m giving it a try anyway. I had enough leftover seedlings, so I planted five in the greenhouse this morning. I’ll post an update this summer about that experiment. If it works, we’ll have fresh tomatoes all winter. I understand tomato plants will keep on growing until they freeze. We’ll see.
Even if you hire someone for the actual construction project, round up some used windows or doors for a real greenhouse. They are inexpensive (sometimes even free) and surprisingly available. Our challenge was joining a square and level greenhouse onto a very un-square and out-of-level old porch. Perhaps you will have a less tetragonal starting point.
The best part of projects like this for us is being able to do all if it ourselves, keep recycled building materials out of landfills and put ourselves another leap toward self-reliance.