
Ever wondered what it’s like to pull a Houdini in real life? I have; not because of some flight of fancy or whatever, but because it’s something that it may happen to you. I like overseas holiday trips just like the next persons, yet I’m not very comfortable with the idea of visiting a country labeled as ‘dangerous.’
Last year, my wife booked us a vacation to Caracas, Venezuela (said it was a dream of hers to visit Caracas). Anyway, for those of you who don’t know, this year, Venezuela’s capital got first place in the ‘most dangerous cities in the world’ top (120 homicides per 100,000 citizens). Yeah, you can very well imagine that I was on edge the whole time.
Now, from what I gathered, guerillas have this method of getting rid of ‘evidence’ by binding the victim’s hands and tossing the unfortunate soul in a deep body of water. Charming, isn’t it? Well, after doing a little bit of research, I stumbled across a former SEAL Navy instructor’s interview in which he explained how special forces prepare for capture and execution.
I won’t bother you with the details, but he did indeed broach a subject which, to my opinion, may prove to be invaluable in an SHTF situation: not drowning when your hands and feet are tied. Sounds very far-fetched; I know. Still, this is the extreme survival series, which means one thing: very low prob, but good to know.
So, without further ado, here’s how to survive a tied and drowning scenario.
Step 1. Consider the bigger picture
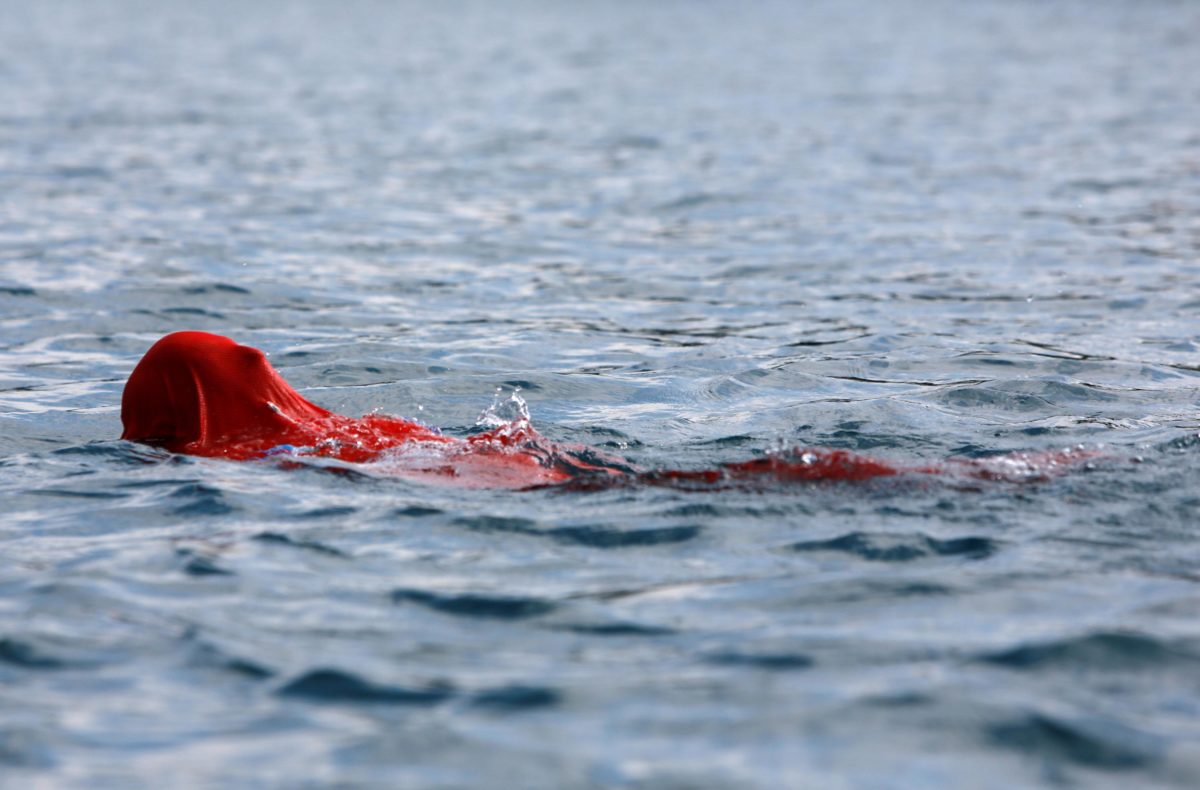
Say you were captured by some guys that want to use you as fish bait. Forget about what you’ve seen in the movies about cement shoes or Chicago overcoats – ain’t nobody got time for that! More than likely, your hands and feet will be tied with some sort of cordage (rope or zip ties).
According to the former SEAL instructor, the first thing you will need to do is to feign death by drowning -yes, acting is probably not your forte, but do keep in mind that your captors are packing a lot of firepower; emerge too soon, and you will probably wind up with a piece of hot lead between your eyes. So, the best thing to do would be to hold your breath for as long as you can.
There’s no guarantee that they will leave immediately after tossing in the water – it’s a gamble and, like it or not, your life is on the line. You should also consider the fact that your body can hit bottom in an awkward position.
Now, you should keep in mind that the biggest challenge, in this case, is panic. I know that it’s easier said than done, but be aware of the fact that is panicking leads to hyperventilation which, in turn, leads to getting more water in those lungs. So, keep calm, wait for the danger to pass, and then act!
Step 2. Getting a breath of fresh air
You may be able to hold your breath for a long time but, eventually, you’ll still need to grab some fresh O two. Here’s what you will need to do. First of all, make ensure that you’re in the right position (water surface on top and bottom on, well, the bottom, guess). You may need to do a couple of spins in order to reposition yourself. When you’re done, follow this sequence:
- Get all of the remaining air out of your lungs.
- Thrust to the bottom.
- When you reach the bottom, assume a crouch position.
- Push as hard as you can to get topside.
- Take a breath of fresh air before getting back underwater.
Bear in mind that you may need to repeat these steps at least a couple of times; the goal is to swim back to safety, not to stay underwater – talk about a no brainer!
Step 3. Keeping your head above water
Swimming is very easy – I mean, your body knows what needs to be done in order to stay above water. However, it may be trickier this time, considering that your hands and feet are tied. Indeed, it’s harder, but not impossible. Here’s what you will need to do in order to float:
- Use the above-mentioned steps to reach the water’s surface.
- Just before hitting the edge, bend your knees, while keeping your head in the water.
- Kick back and arch your back.
- Repeat the process to obtain buoyancy.
Step 4. Getting to shore
Now that you’ve mastered the flotation technique, it’s time to ‘swim’ back to safety. First of all, pop your head out of the water a couple of times to scout a safe patch of land. You should also make sure that there’s no one there. Otherwise, all your efforts would have been in vain. Once you’ve identified a safe spot, repeat the step 2 sequence to replenish your air supply. To travel back to shore, follow these steps:
- Assume the floating position (head below water, bend knees, and exhale).
- Kick backward and propel forward by straightening your back
- Repeat these steps to travel to safety.
Note: during your trip to the shore, you will need to stop a couple of times from getting more air. To do that without losing speed, when you’re at the top, flip over and inhale. After that, flip back to the initial position (head down). Repeat this a couple of times. This trick allows you to maintain travel speed while replenishing lost oxygen.
That’s about it on how to survive being tied and tossed to the bottom of the water. A little tidbit before I go: this method is part of a SEAL’s examination. As these units operate far behind enemy lines, the chances of capture are quite high. So, as part of their training, they are literally tied, gagged, and tossed in the water (talk about a rough school day!). What’re your thoughts on this? Hit the comments section and let me know.