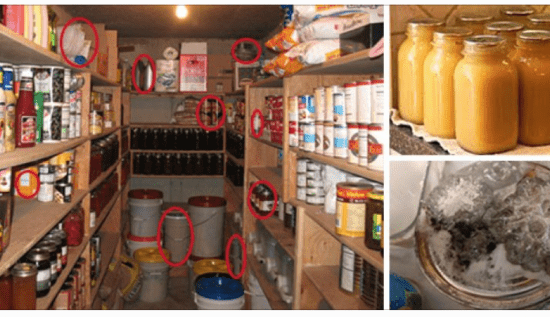

Even though there’s not much to it, I get more questions about how to store food than anything else. It’s something that anyone who is serious about getting food storage needs to think about because if you’re investing your time and money into food, you want to make sure you’re storing it properly!
Our society seems to be so concerned about supersizing everything these days, EXCEPT for food storage. While closets have been expanded to fit every handbag in America, the pantry has been shriveling away, and in some homes, it’s practically non-existent. This is one reason, among many, that I LOVE buckets! They have come to the rescue, and have allowed people the option to supersize their food storage, while at the same time using little space.
What Can You Store in Buckets?
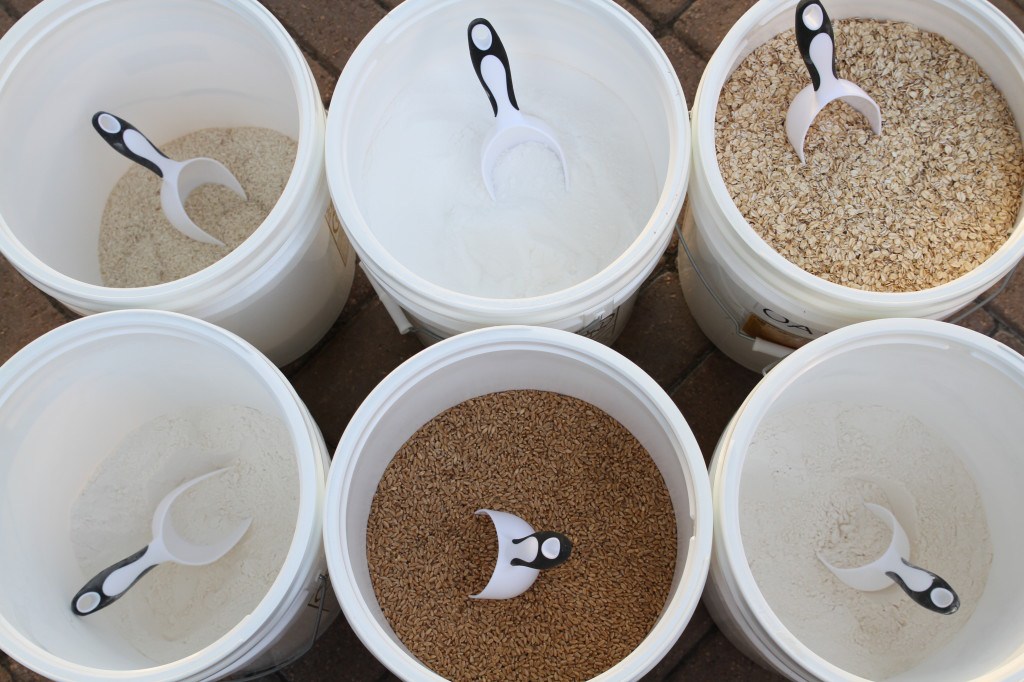
You can store pretty much anything that is dry and sits on the shelf (except your cat, my brother tried), but look below for more ideas. Make sure to stay away from foods with high oil or sugar content; those need to be vacuum-sealed in jars.
I store 5 different type foods in my buckets that you can see below (the ones with the ***). I reserve my buckets for foods I use frequently and need more of. One rule I have that helps me stay organized and rotate my food is that I store each type of food in only ONE type of container. For instance, if I decide to store my flour in buckets, I DON’T then go store it in #10 cans, flour bags, etc. By storing food in one type of container it helps keep things rotating well in my food storage system.
For food items that I use less of, I store mainly in #10 cans – like my beans, popcorn, hot chocolate, and freeze-dried foods. But if you use a lot of those items in your home, you might want to go ahead and use buckets.
Anyways, hopefully, that made some sense, just figure out a system that works best for you!
How Much Do You Need?
Now the fun part! You get to pull out your calculator and give your brain a workout. You first need to figure out how much food you want, then you can figure out how many buckets you’ll need!
Most bulk food you find is in 25 or even sometimes 50-pound bags. So if you needed 100 lbs of oats, you would need 5 buckets & 4 (25lb) bags of oats. Here’s some of the best estimates I could find, so figure out your plan and good luck with the math!
FOOD ITEM |
#10 CAN |
5 GALLON BUCKET |
*** Wheat |
5 lbs | 37 lbs – (12 buckets) |
*** Oats |
2.5 lbs | 20 lbs – (6 buckets) |
*** Rice |
5.3 lbs | 36 lbs – (4 buckets) |
*** Sugar |
5.7 lbs | 35 lbs – (6 buckets) |
*** Flour |
4.5 lbs | 33 lbs – (8 buckets) |
Popcorn |
5 lbs | 37 lbs |
Macaroni |
3.1 lbs | 21 lbs |
Beans |
5.6 lbs | 35 lbs |
Brown Sugar |
4.5 lbs | 33 lbs |
Powdered Milk |
3 lbs | 29 lbs |
Options for Storing Food in Buckets:
There are various ways you can store food into buckets, but I’ll talk briefly about the top 3 and let you choose.
1- Do Nothing
This method involves just that, you don’t do anything. You just put the food in the bucket and put the lid on (ok, maybe you do a little). If you’re rotating through your food on a regular basis (probably at least every 5 years), then you can maybe get away with doing this. You need to make sure the bucket and lid you use are sealed on properly to keep as much air, light, and bugs out. The bucket only provides one layer of protection against the elements, so it’s not the most trusted way of storing food, especially long-term.
2- Dry Ice
This way is similar to using oxygen absorbers, but instead, you are using dry ice. It’s a little cheaper and can kill off insect eggs at the same time, but it can be somewhat tricky. You want to make sure it’s done properly so you don’t have the opposite effect and leave a puddle of water at the bottom of your bucket instead. You only need about 1 ounce of dry ice per 1-gallon container, so if you’re up for some experimenting and playing with dry ice, feel free to give it a try. I just didn’t want to take a chance on all the food I had just invested in!
3- Mylar Bags w/ Oxygen Absorbers
This is the method I prefer and the one the pros use. Most companies you buy pre-packaged buckets of food do it this way. Plastic buckets alone are slightly porous and will still allow for air to transfer through them. Using Mylar bags with buckets cuts the oxygen down to almost nothing, helping to preserve your food for 25+ years.
For instructions, look below.
Storing Food in Buckets w/ Mylar Bags:
Gather your supplies. If you’re feeling extra energetic and want to hunt down leftover buckets from bakeries, restaurants, grocery stores, you can get them for FREE! I’m lazy, and I like them to all look exactly the same, so I got most my stuff from the links below and from Baytec Containers.
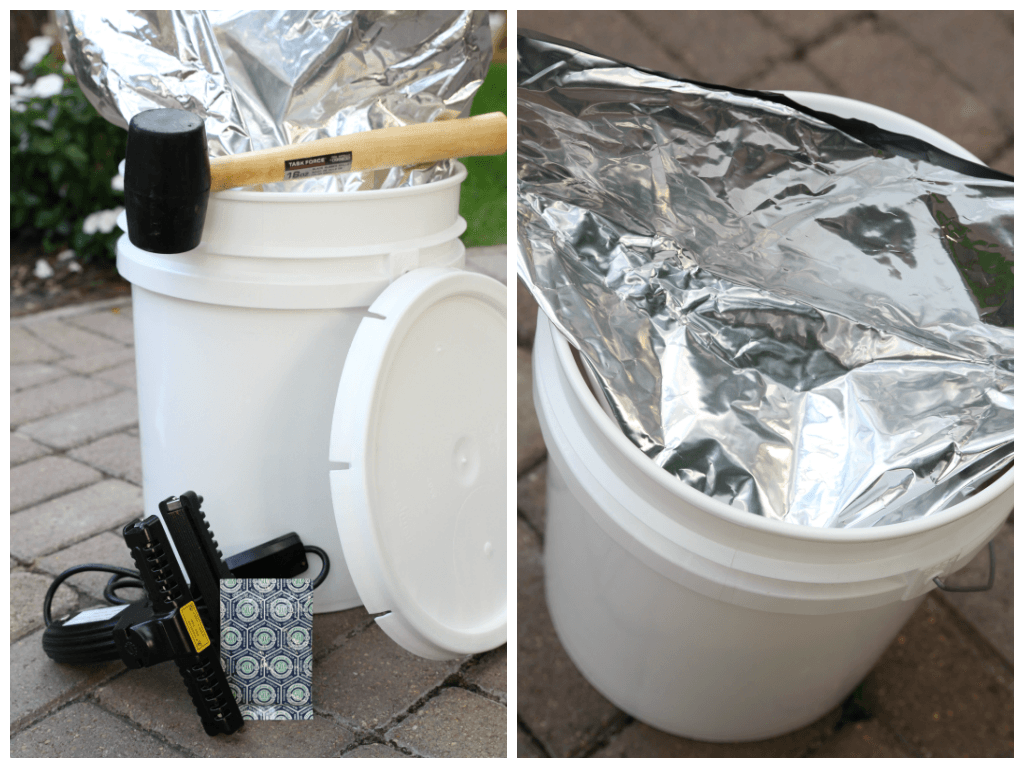
1- Get Your Supplies:
- BUCKETS – You want food grade buckets.
- MYLAR BAGS – 20″ x 30″ bag
- OXYGEN ABSORBERS – 2000 cc for a 5-gallon bucket
- SEALER – You can use a hand-held sealer, iron, or flat-iron.
- GAMMA LIDS – I use these only on my 5 buckets in the pantry.
- REGULAR LIDS – I use these lids on all my buckets, except in the pantry.
- RUBBER MALLET – Used to beat the lid on the bucket.
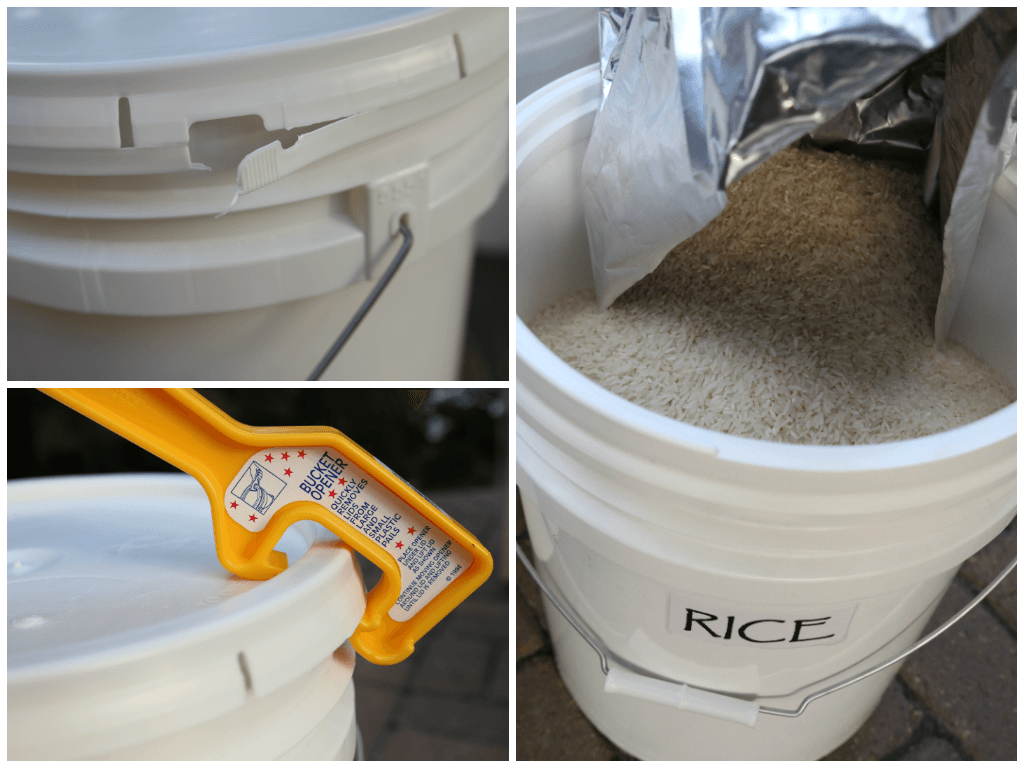
- BUCKET OPENER – Helps take the lid off when you’re ready.
- BULK FOOD – To fill your buckets.
2- Put Your Mylar Bag into the Bucket:
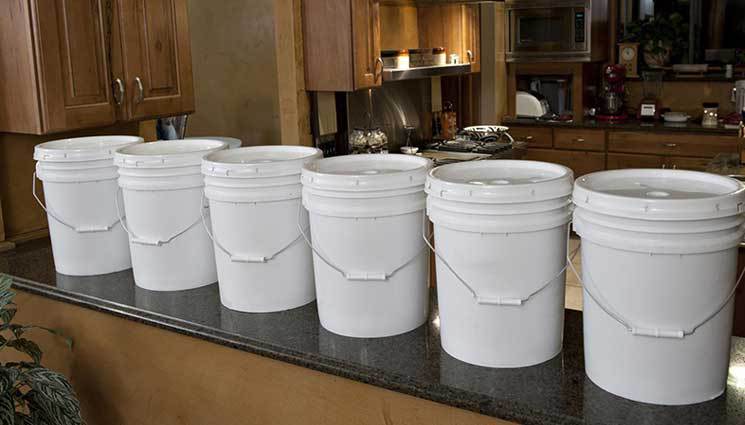
I prefer 5-gallon buckets, but you can use smaller containers if that’s too heavy, or if you don’t need as much food. If you’re extra buff you can impress us and get 6+ gallon containers, just don’t say I didn’t warn you! They can get extremely heavy, so 5 gallon is my max.
Once you have your bucket, get a mylar bag that fits the size container you are using and put it inside. Mylar bags gives an extra layer of protection that keeps the oxygen, light, humidity, and pests out. Anytime someone tells me they had a bug infestation in their food I ask if they used a mylar bag and the answer is always NO, so don’t disregard these bad boys. These bags combined with the bucket, make it nearly impossible for critters to get in.
3- Put Food Into the Mylar Bag:
You may want a helper for this part, preferably not one dripping in ice cream ???? I’ve never had one, but I’ve dreamt about how I would boss one around, especially as I’m pouring 50 lb bags of food into mylar bags while trying not to spill it all on the floor! Maybe one day…
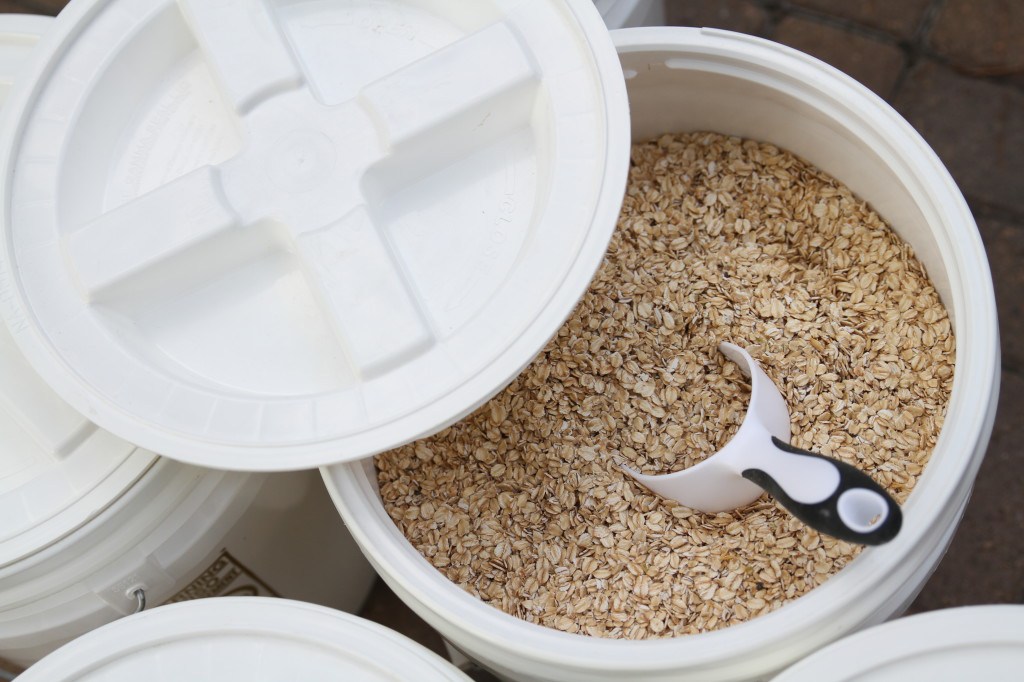
Anyways, fill the bag up as full as you can, just make sure to leave room so you can put the lid on!
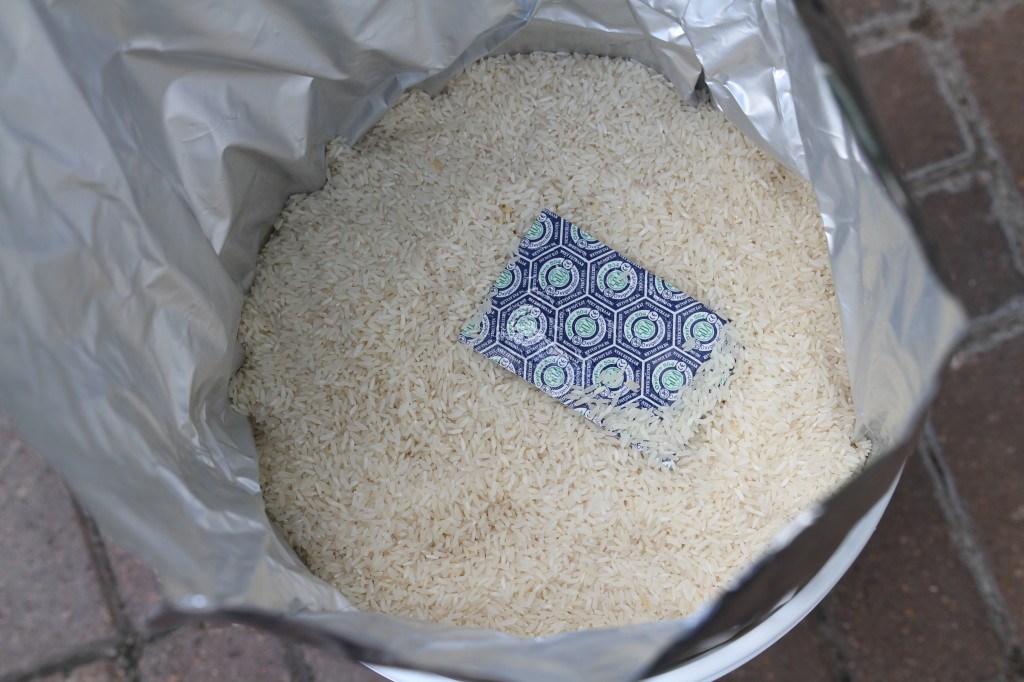
4- Add an Oxygen Absorber:
Do not add an oxygen absorber until you’re ready to seal! As soon as you open up a package of oxygen absorbers they start doing what they do best, absorbing oxygen. Make sure to have all your buckets ready to go with the mylar bags and food inside before you even think of opening the package up. As soon as they are opened, get ready to run around crazy throwing them into all your buckets. The goal is to have all your buckets sealed within about 10-20 minutes after opening the absorbers so they can have the maximum impact possible.
DO NOT USE OXYGEN ABSORBERS WITH SUGAR (unless you like eating bricks)
*For a 5 gallon bucket use a 2000 cc oxygen absorber or you can use 5 of the 300 cc ones.
Size Container |
Oxygen Absorber Needed |
| Quart Jar or 32 oz container | 100 cc |
| #10 can or 1-gallon container | 300 cc |
| 5 or 6 gallon bucket | 1500cc – 2000cc |
If you’re planning on using the leftover oxygen absorbers, you want to make sure you seal those back up ASAP. Often times I use the package they came in and re-seal it with my hand-held sealer, or you can repackage them in a vacuum-sealed bag, or store them in an appropriate sized canning jar with a tight-fitting lid. If possible, try to buy smaller packages of oxygen absorbers so they can be used all at once.
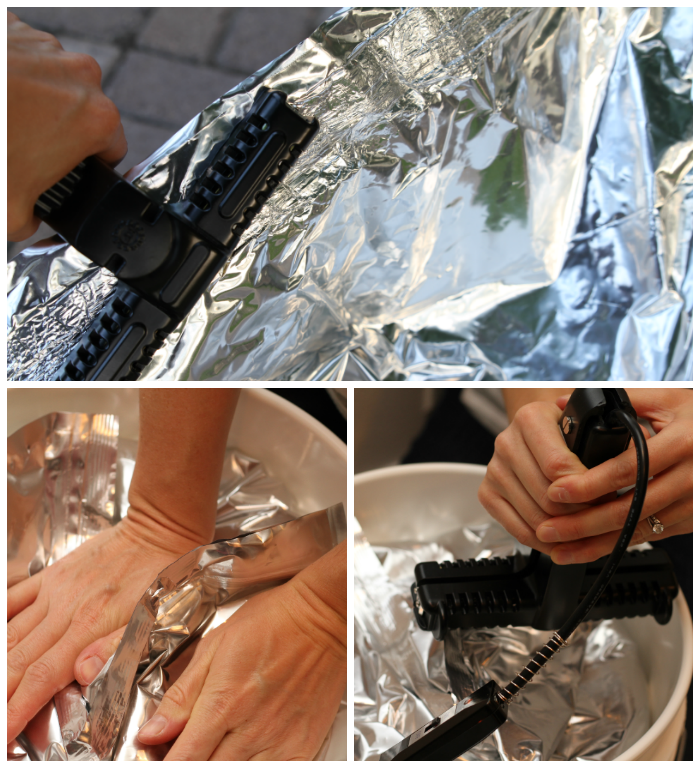
5- Seal the Mylar Bag
Once the bag is filled and the oxygen absorber is added, it’s time to seal the mylar bag. I went ahead and bought a hand-held sealer, which I love! Best birthday present I’ve bought myself so far. You just go along the very top edge of the bag and melt the bag together to form an airtight seal. I leave a little opening at the end, squish as much air out as possible, and then finish sealing the corner.
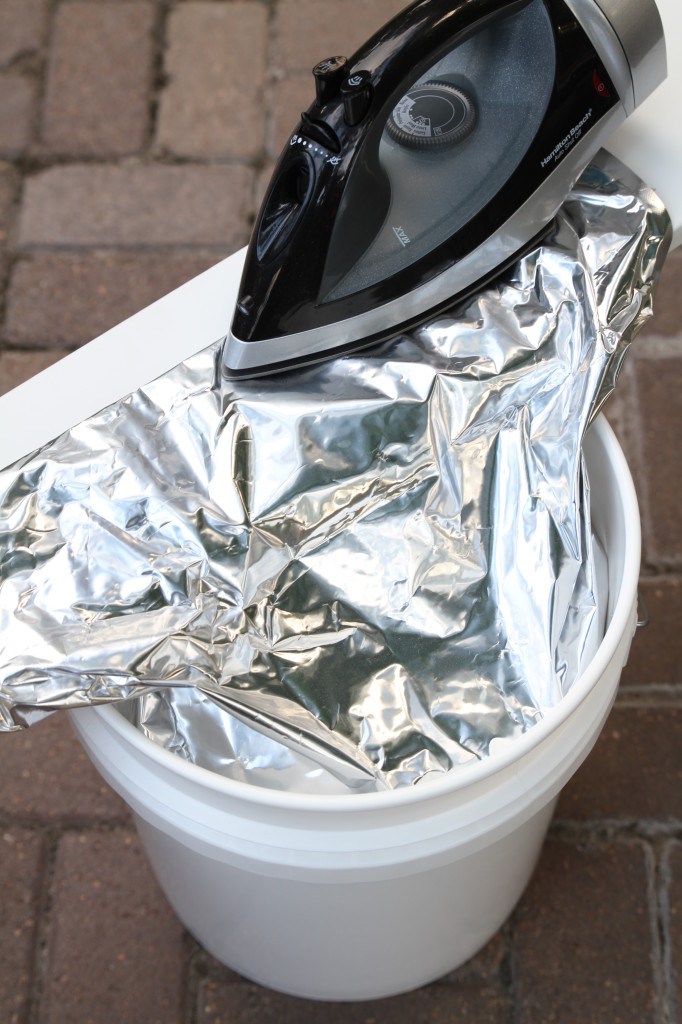
You don’t have to wait until your birthday to buy yourself a hand-held sealer – a clothes iron, or even a flat-iron you use for your hair will do the trick. Just lay a board on top of the bucket, lay the bag on top, and iron away! You might want to cut a strip of the bag off to test beforehand to get the correct temperature setting, or if your impatient like I am, just go for it.
Make sure your bag is completely sealed, you don’t want any air creeping in. If the temperature is too high it will destroy the strength of the bag, but if it’s too cool the seam will pull apart fairly easy.
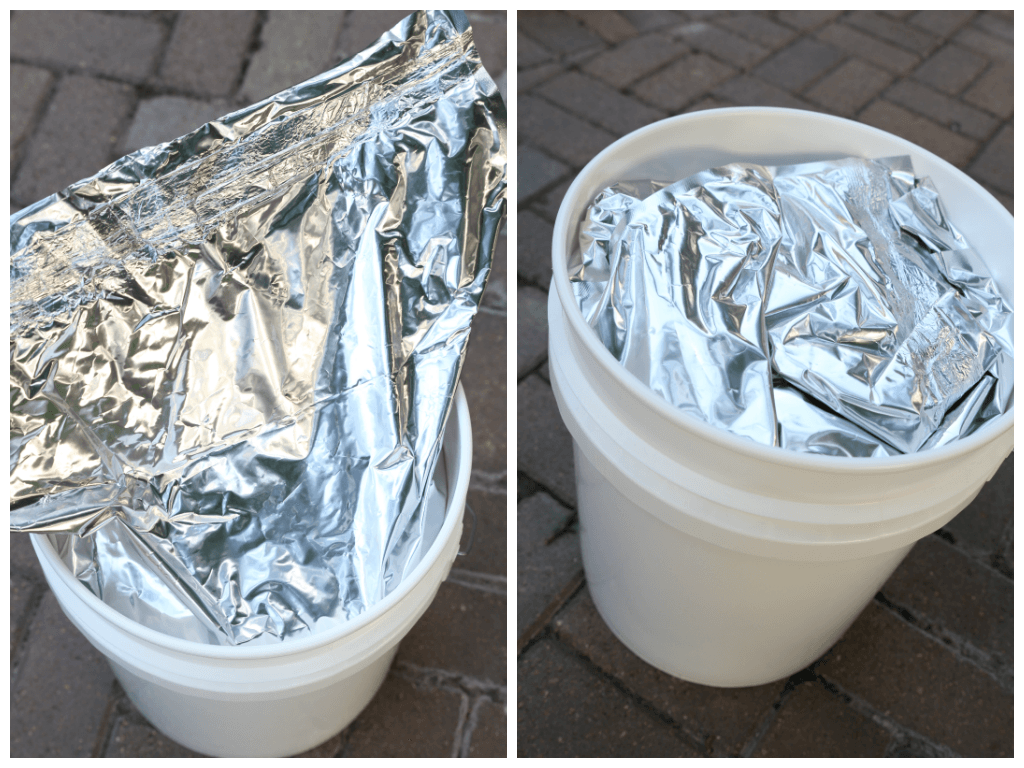
The bag may seem monstrous for the bucket, but that’s good. If you seal close to the top edge of the bag (above is an awful example), you can cut right below the seal when you open it and REUSE the bag! It can be reused over and over again, all you need to replace is the oxygen absorber.
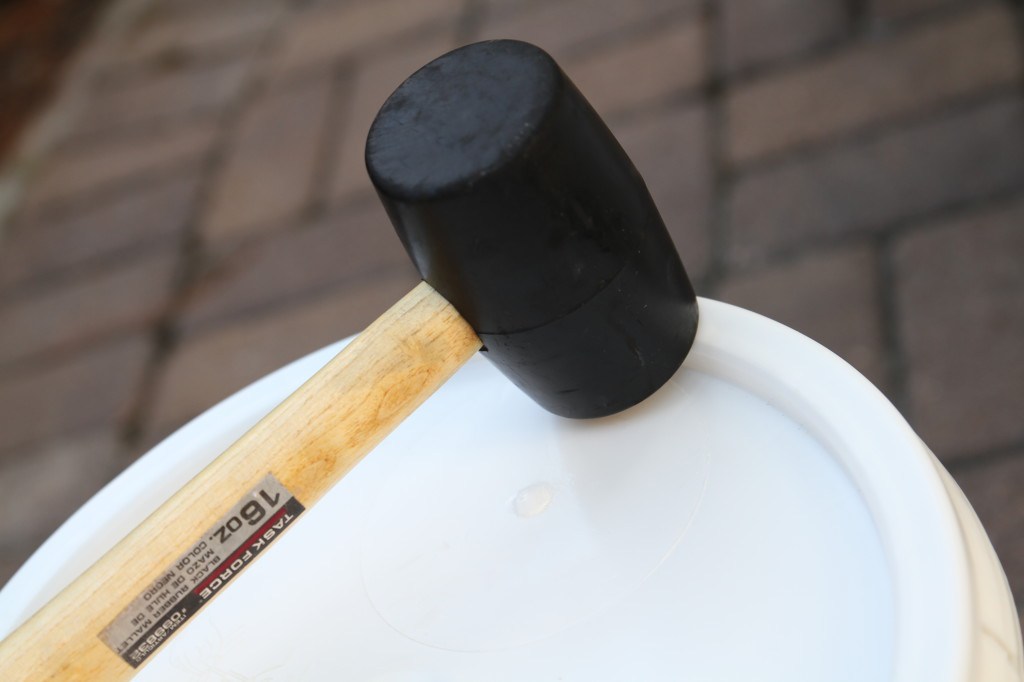
6- Beat the Lid in Place
You can try to tap the lid in place, but until you lose control and start beating the crap out of it, the lid isn’t going anywhere. This is a great project to do after you’ve walked in on your boys while they’re painting themselves to look like Darth Vader and giving their room a Death Star makeover!
Gamma vs Regular Lids: Which Lid Should You Use?
GAMMA LIDS – These twist on lids allow for easy access to the contents of your bucket which is one reason I prefer to put these on the buckets I have in my pantry. I can quickly twist the lid off to get the food out and then twist it back on. Some people put these on all their buckets, but the main issue is they are more expensive! They usually run about $4-6 more than regular lids, which can add up fast when buying 30+ buckets!
REGULAR LIDS – I prefer these for most my buckets because they are cheaper, stack easy, and create a good seal. If you are needing to get into your bucket often though, definitely go with the gamma lid if possible.
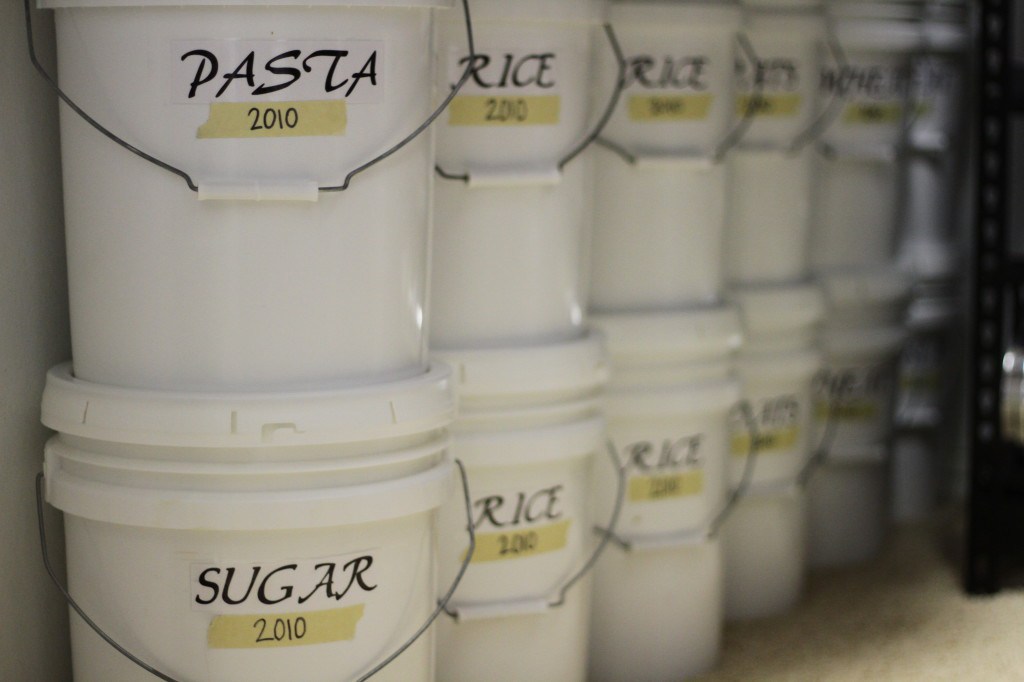
7- Label Buckets
I spent 2 hours peeling labels off my sister’s buckets, because we had to refill them and they needed a new year. After that, I had a brilliant idea! Instead of always needing to put a whole new label on, why not just put the year on some easy to remove tape. Ingenious, I know!!!
Since I already did the math and figured out what I want in each of my buckets, I went ahead and printed labels with the food item for each bucket. I don’t plan on changing the contents of the bucket so I went ahead and made sure to tape it on good! The year is changing every time it’s re-filled though, so I put the year on a separate piece of tape! Now I won’t ever be scraping tape and labels off buckets again! Maybe it doesn’t look as nice, but at least it won’t take me 2 hours to change the date!
8 – Store in a Cool/Dry/Dark Place ????
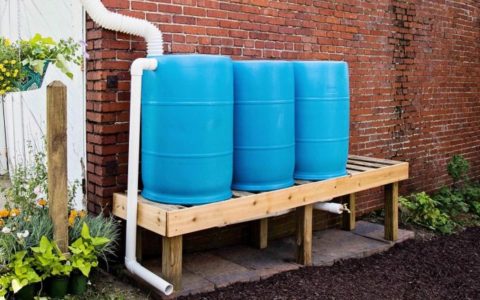
Just like everything else, you want to store your food in the coolest, driest, and darkest place you can find. This is sometimes where you have to be creative and maybe even consider storing some under the bed. When storing, you want to make sure they’re off the ground (so air can flow underneath), and I’m told you don’t want to stack them more than 3 high (they might crack). I like to be a rebel, so mine are stored right on the carpet, and I stack mine 4 high! The biggest concern is making sure they don’t topple over on anyone, especially the kiddos. So whether you decide to follow the rules, or be a rebel, just make sure to be careful!
Opening Your Buckets:
If the bucket lid is new, you’ll need to pull the plastic part off around the lid. Once that is off, use the bucket opener to pry the lid off. Remember to cut as little of the mylar bag as possible if you plan on reusing it. I then take the bag out and pour the food into the corresponding bucket in my pantry.

Using Your Food:
I have 5 buckets in my pantry, which contain ONLY the food I’m currently using. With these buckets, instead of the regular lid, I use the twist-on lids known as Gamma Seal Lids. Mine are all boring white, but you can be fun and get different colors to help keep them organized, or to just add some excitement to your pantry.
Other Options:
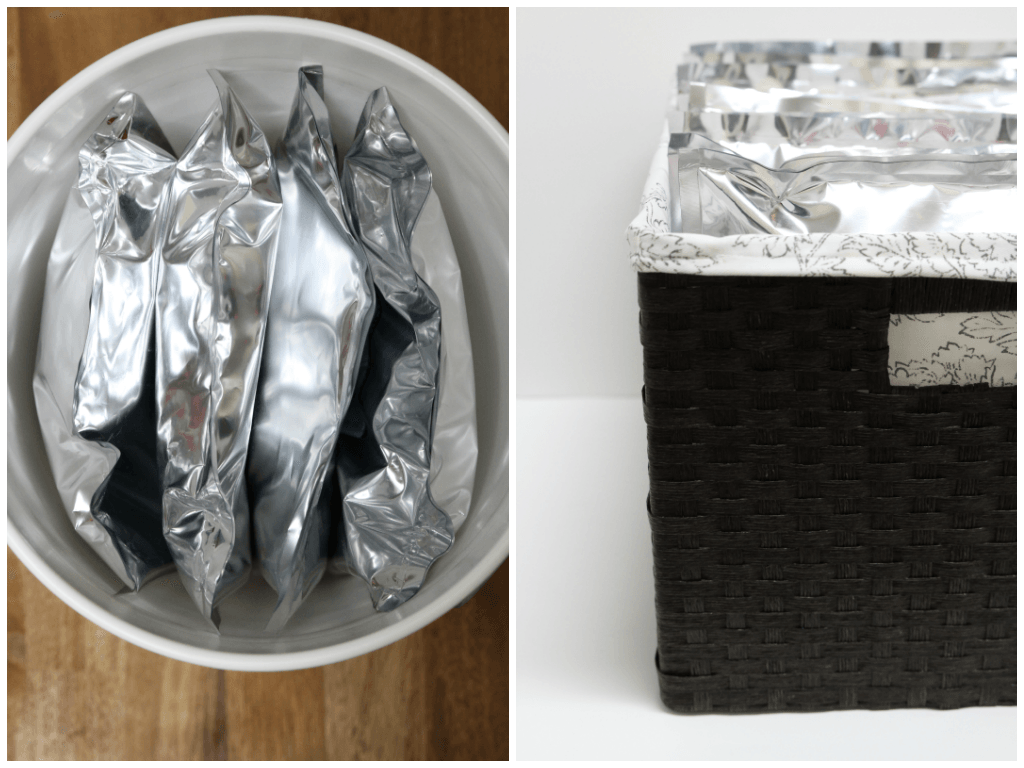
Some other options with storing food is putting multiple smaller mylar bags into one bucket. I don’t necessarily promote this method, because there’s a lot of wasted space and it’s hard to rotate, but I’ve had many people mention they do it.
I prefer to put smaller mylar bags of food into crates or boxes that allow for more bags and are easier to rotate. These smaller mylar bags can be purchased from places like the LDS Canneries and are a great option to use for storing smaller quantities of food like – brown sugar, powdered sugar, spaghetti, etc.
Don’t let me squish your ideas or creativity, have fun and come up with your own ways to super-size your food storage! Just make sure you share your ideas with the rest of us!!!