Home2018 (Page 10)

I sometimes have to go out of town on business just like millions of other people each year. The distance and locations all vary with the need, but in a lot of cases, I am unable to be as equipped as I would normally be around my home town. In some cases, I travel internationally, but that is rare. Sometimes I only travel an hour or two by car so I opt to drive. In this type of situation, I can take my Get Home Bag and usually a firearm (or two) with me. Most often it is several hundred miles away from home and to cities where firearms are not allowed. On business trips, it is harder to pack your survival supplies in sufficient quantities to last if some disaster happened and you needed to get home.

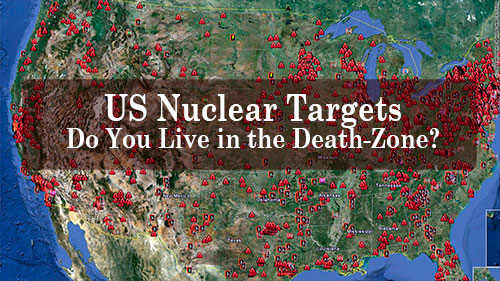
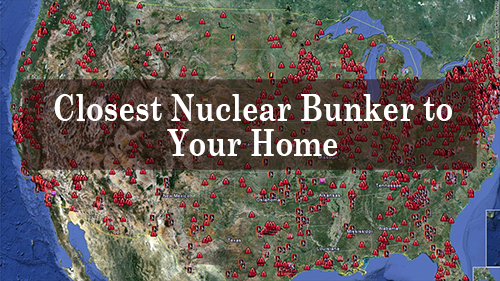
I started to consider what a person would need to think about and could possibly face if they were in a situation where an EMP was exploded over the US, total chaos ensued and you were forced to make it back home over a considerable difference. In my scenario, the distance would be about 700 miles and the assumptions with an EMP would be that there were not many electrical devices working. All cellular communications would be down as well as landlines were out of commission. TV and Radio networks had been taken offline even if some of the TV sets and radios themselves still worked. I don’t imagine every single electronic device in the world would go out forever, but it would be enough to create massive confusion, fear, and panic.

In addition to communication and access to news all access to money was cut off. Banks would slam shut and a bank holiday would be declared. Hospitals would quickly fill with the sick and injured and you would be on your own. How would you get back home and what would you need to consider if your home was 700 miles away and you had no survival supplies and no way to procure them.

Plan before you travel

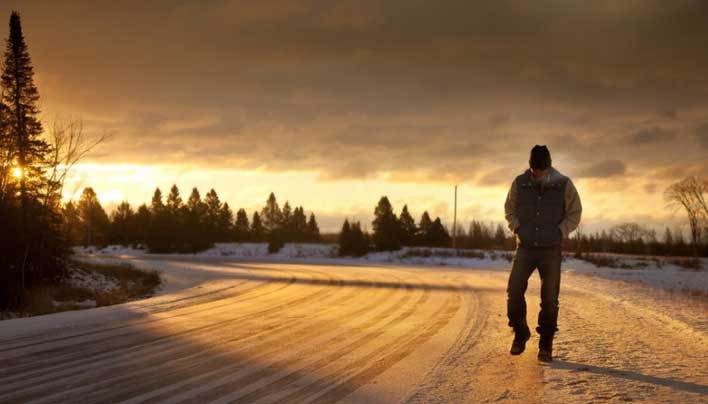
The average, healthy person on level terrain can comfortably walk about 20 miles in a day. In our scenario above, with no issues whatsoever, it would take you about 35 days to walk back home if you didn’t stop anywhere to take pictures. That is a very long time to be walking. There are a myriad of issues to consider in even starting a challenge like that. Most backcountry hikers, who have plenty of gear and some expectation they are going to be roughing it, rarely set out on trips that long. Even backpackers, who hike the Appalachian Trail stop into towns, eat hot meals and pick up packages of goods they have stored along the way.  How will you with minimal supplies even begin to hope to make it home alive? There are some items that I think you would need to have squared away in your mind first.

  • Should you stay in place or set out on foot?
  • What gear will you need?
  • How will you eat?
  • What route will you take?


Should you stay or should you go?

This will be the first mental challenge that you will be faced with and could determine if you will live or die. In all seriousness, the plans you make and more importantly your actions affect the situations down-line that you find yourself in. We have all probably heard stories about travelers who had a “gut-feeling” that they shouldn’t get on a plane and the plane ended up crashing. Similarly, your “gut” is going to be screaming at you in a disaster. It is the well-known fight or flight response and you will need to figure out for yourself what you will be capable of doing mentally and physically before you set out on any expedition.

Hiking for over a month is a very monumental task that not a lot of people (including me) have any experience with. In days long past, a travel plan like this wasn’t so far out of the norm. We haven’t always had cars, trains and wagons to get us around and people walked. This is certainly doable, but for a lot of very good reasons, people didn’t live as long back then. Journeys of this scale take time, planning and skills.

Deciding whether or not you would even consider a trek like this is something you can do now. I know that I personally would.  I don’t know if I would make it, but I would be on the road somewhere. In my situation above, I would stick around a couple of days most likely to procure supplies, get any information I could, plan and prepare. I think that a couple of days after an EMP attack everyone will be in shock, but that won’t last long. Eventually, people will panic and that is when you don’t want to be around. My wife already knows that if something like this happens, I am headed home but it might take me a while.

What gear will you need?

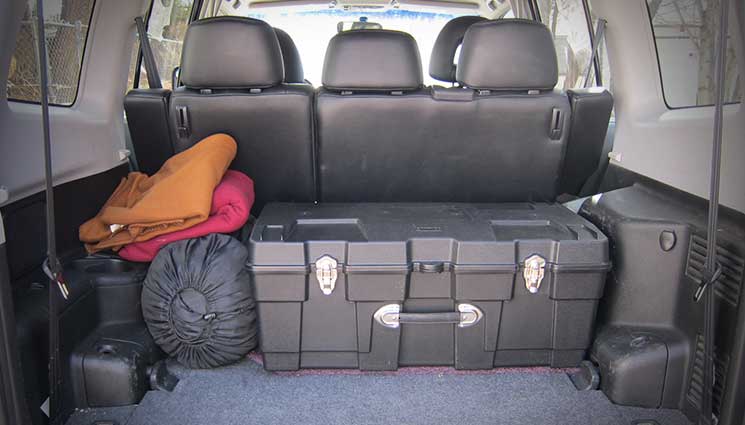
As I said in the introduction, if I am driving anywhere, I pack a lot of supplies that would help me get back home in a disaster scenario like this. If you weren’t able to pack your Get Home Bag or any firearms, what would you do?

It helps to consider the journey back home and the different factors that you will encounter. Is this winter or summer? Will you have extreme temperature that needs to be planned for. What will you use for shelter? Security?

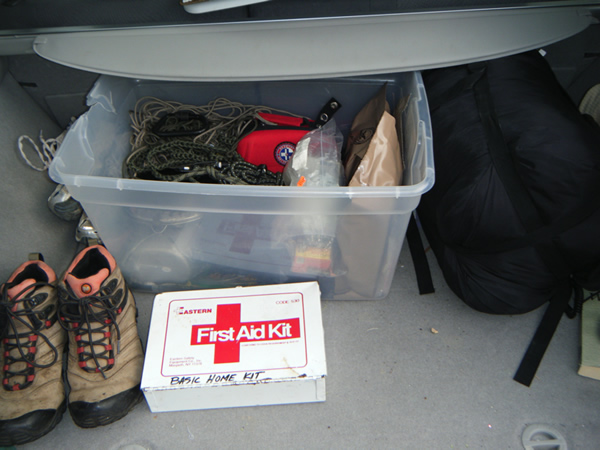
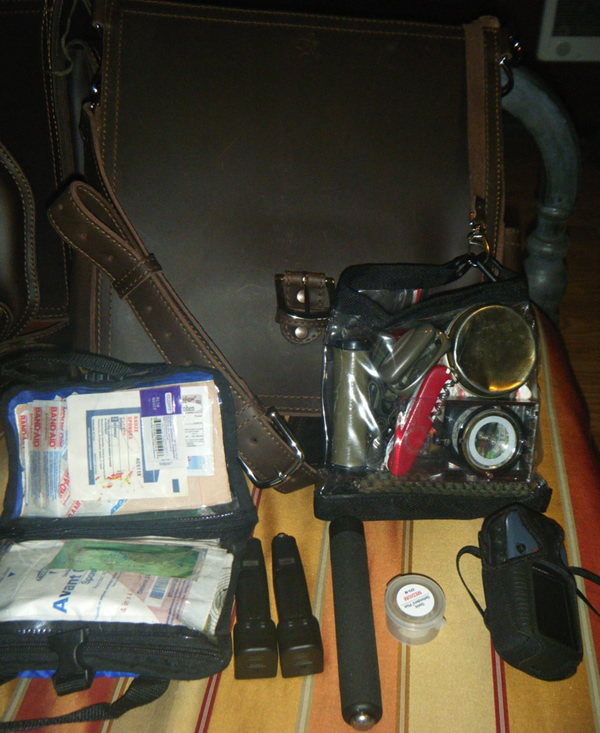
A good exercise if you find yourself in a scenario like this is to take stock of what you have. Empty your pockets of everything and conduct a simple inventory. When I travel, regardless of where I go I always have a bandanna, flashlight, multi-tool and small hank of paracord. These items can really come in handy, but they wouldn’t be the only things I would count on to get me back home over 700 miles away. Depending on the season, I would try to acquire additional clothing if I needed it, but usually, I pack appropriate clothes for wherever I am going. What I don’t normally pack are clothes designed for living out in the woods for a month. Some modifications might have to happen.

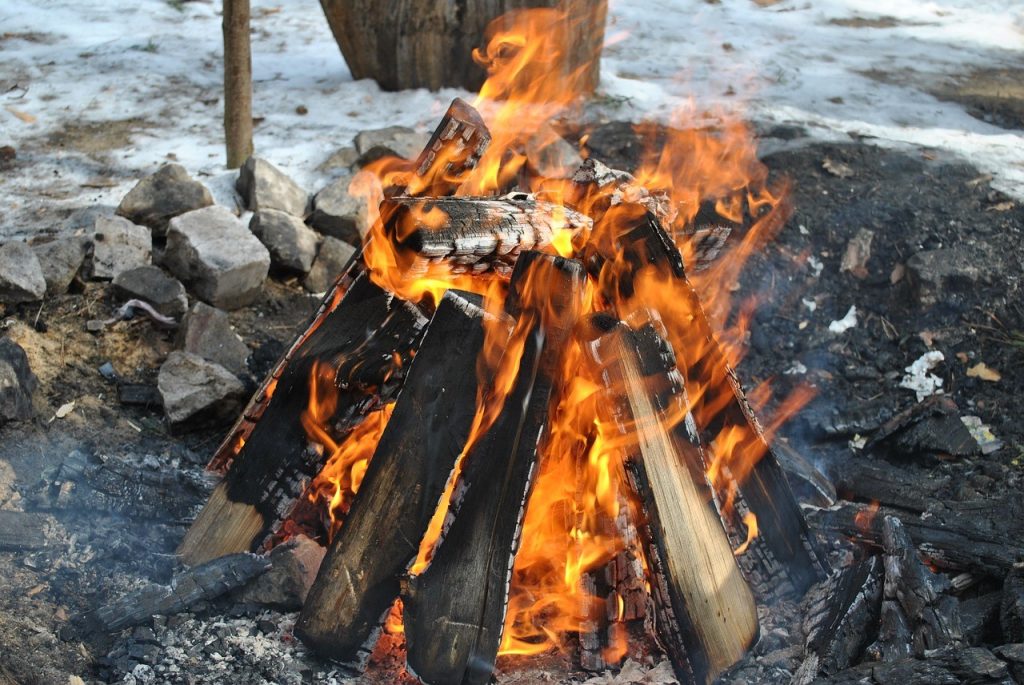
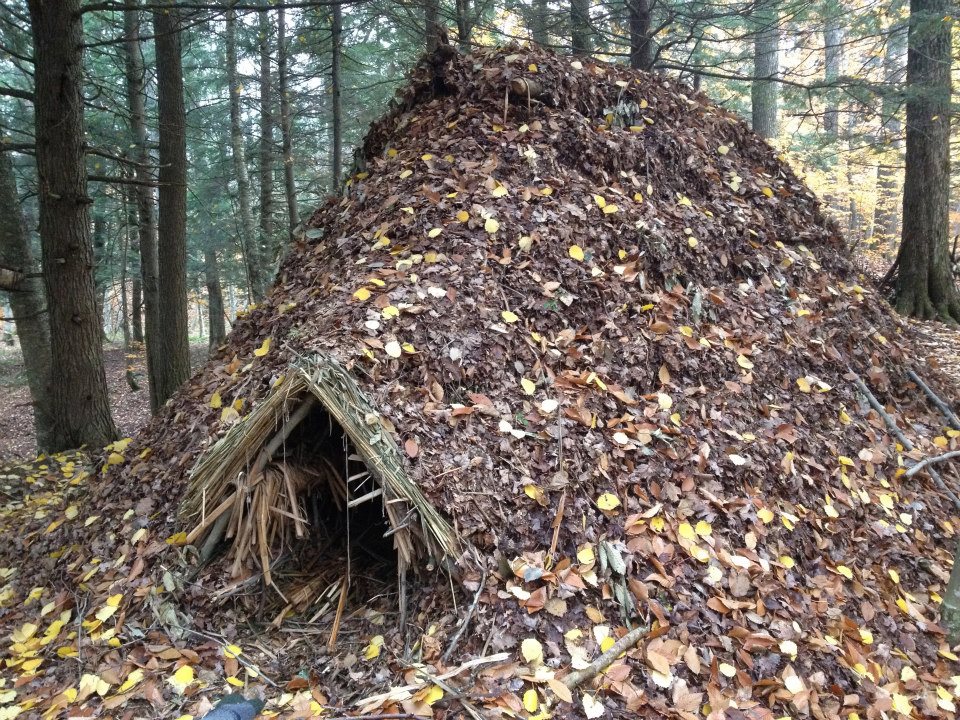
A simple tarp and rope/bungie cords will provide shelter for you and will keep the elements off your head while you sleep. A big sheet of plastic would do the same. Is it the same as a nice backpacking tent? No, but it works and is lighter and speaking of lighter… You need an easy way to start a fire also.

Great walking shoes that are already broken in would be a huge advantage. Actually, I think sturdy leather boots would be the perfect choice, but some people might have to hike back in dress shoes. If possible, I would look for boots as quickly as you can after deciding you are walking.

For security, you have to take what you can get if the grid crashes like this. At a minimum, I would find a large stick or pole. Baseball bat would be my second choice but may be harder to find than a good old wooden stick. This needs to be sturdy enough to use as a walking stick or club to crack someone’s head open with if necessary. Additionally, it can be used to support your tent.

Money could either be worthless or crucial to you getting supplies in an EMP event. If you have your head screwed on tightly and have cash on hand, you may be able to run down to the sporting goods store and buy some needed supplies before you make your trip. When I travel I always try to have cash in my wallet. It isn’t enough to buy out the store but could get me some crucial supplies.

I would caution you though to try and maintain a low profile. If you are all set up for a big backpacking expedition with the latest bag, gear, and clothes you may be a target. Someone might want what you have (because they can’t get it) and try to take it from you. It’s better to keep a low profile and low weight will help the trip too.

I would try to fit everything I needed into a standard size backpack that most everyone has. This way you will look just like everyone else headed home.

How will you eat?

This will probably be the toughest part about a journey like this in my opinion. I think most people can walk long distances. Most people will be able to carry or find some relatively decent source of water, but most people won’t be able to find food. What do you do?

There is no way you could ever pack enough food to last you your entire journey. You more than likely won’t be able to set up traps like Bear Grylls and catch rabbits or fish from a stream with your pocket survival kit, but I could be wrong. I think a lot of people are going to be going several days at a time without food. Could you hole up somewhere and catch wild game? Of course, you could and I am not knocking those skills. What I am going to try to do though is to get home as quickly as possible.

This may be where timing comes into play. Food from grocery stores will be wiped out in days. You could be one of the early birds and grab enough food to last you a week or so and set out. After that week, you will need to find food along the way. Will people have any to sell you or will there be some form of bartering set up already? I don’t know, but I think the sooner you can get home the better. As the realization that the power isn’t coming back on hits, people will be stingier with their food I imagine. The old rule is you can go 3 weeks without food but I don’t want to try and put that to the test.

What route will you take?

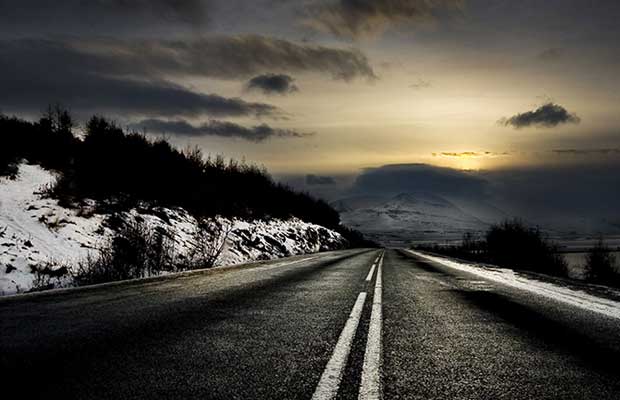
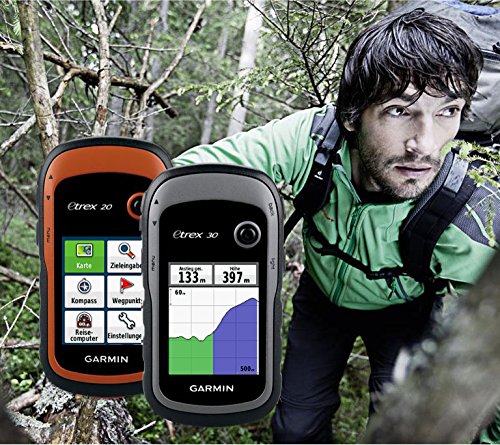
The final item to consider is how will you get back home. What route are you going to take to get there and this is where having maps will be invaluable for a couple of reasons. First, you want to plan your route and make sure you know which way you are going. I have on more than one occasion gone the wrong way and had to turn around and backtrack. It’s easy to do this for twenty miles in a car, but if you are walking and realize you took a wrong turn, that could waste a day.

The second reason is I would use secondary roads as much as possible and not highways. I would also try to steer clear of major cities in my path. A highway is faster if you are traveling 70 miles an hour, but it might not be the most direct route you can take. Maps that show the secondary roads to your home will be good to have. Some may even be able to help you determine good places to stay. I would personally camp outside of cities and avoid people as much as possible, but I would want the flexibility to change that plan if needed. Everyone’s circumstances will be unique.

Hopefully, this was useful and gave you something to think about as you plan for your next trip. Please let me know if you have other suggestions in the comments below.

I sometimes have to go out of town on business just like millions of other people each year. The distance and locations all vary with the need, but in a

It’s your home; you should feel safe and secure here. People are always worried about the safety and security of their family. Everyone wants to make sure that their family is safe in their homes. Family security always starts at home. If you feel your family is not safe at home, you need to take action immediately.

Most home safety improvements are just common sense put into action. Put a Home Security System in your plan. While you can’t ensure your home security by a single action, and no single product will completely protect you, taking the many smaller steps to provide the highest security of your home and your family, is worth it just for the peace of mind.

Here are some easy steps to make your home more secure.

Get a Burglar Alarm System

Burglar alarm system can detect intrusion – unauthorized entry – into your home. Burglar alarms have become standard equipment in stores and other businesses, and they’re becoming increasingly common in private homes as well. Most alarm systems are actually built around the same basic design concepts. While you can’t prevent any unauthorized entry at your home by simply setting a burglar alarm, you can make yourself, your family, the neighbors and the Police aware the instant it occurs. There are a lot of burglar alarm systems available in the market at various prices, and a lot of options. Do your homework.

If you can’t afford a real one you can buy a fake alarm system too, complete with a sign. One other note: Wireless is all the rage – no mods to the homes electrical system, wireless communications between the system and emergency response personnel, wireless control by you from anywhere. All pluses. One minus, wireless systems can be hacked. Repeat, do your homework.

Secure the Doors

Perform an inspection of all doors around your home. Doors frames should be strong; the hinges should be protected and make sure the wood is not hollow. All exterior doors should be solid and made from Fiberglass, solid wood, solid wood core or metal. If installing a new door and frame, consider a fiberglass door that swings outward rather than inward. Having a door open in this way helps absorb any forced entry.

There is a downside, it is easier for an intruder to pull open an outward opening door than push an inward open with you blocking. Install a deadbolt lock build into the doorknob. You can also add a dead-lock which is an exit only lock. While it might be noticeable in the entryway, it can’t be broken into without pulverizing the door. You should secure the sliding entryways doors by installing keyed locks at the best and base and install cylinder guards around the lock cylinders. Additionally, a large dowel along the bottom rail will delay an intruder, though a glass door is, after all, glass.

Get a Dog

Dogs are the first security system and have been called man’s closest companion for quite a long time which is as it should be. One of the fundamental jobs of the trained dogs has been to ensure its proprietors and prepare for undesirable individuals or animals. If a person your dog doesn’t know approaches you on your lawn, your dog starts barking and some dogs can become aggressive. Dogs, for one, are loyal to the death. A dog is probably going not just to assault any intruder to your home; they’ll make a plunge directly into the face of potential threat to secure you and your family if they need to. Dogs can act and react a lot faster than any human could.

Even a small dog can help keep you safe at home by being a reliable and very noisy alarm. Barking can hinder many would-be-criminals and, in the occasion that woofing doesn’t drive away interlopers, the noisy quarreling of any pooch is sufficient to influence neighbors to crest out a window to see what’s going on, potentially notifying police.

Get Familiar with the Neighborhood

Having friendly neighbors improves neighborhood security and makes things easier for everyone. Knowing your neighbors is always a good thing. Wouldn’t it be nice to know somebody was watching over your property when you’re on holiday or down in your rural home? A favor you can not ask of a stranger. You might also discover it means you can share backyard equipment like cloth hanging lines, childcare, recipes, movies or transport. Your neighbors will do something if they see anything suspicious around their home and yours. Neighborliness is a valuable part of everyone’s life, and there are compelling reasons to know your neighbors.
Say hello to your neighbors, go pick your child personally from the neighbor’s house, Attend neighborhood meetings. Be active in virtual neighborhood groups and be proactive.

Add Security Signs

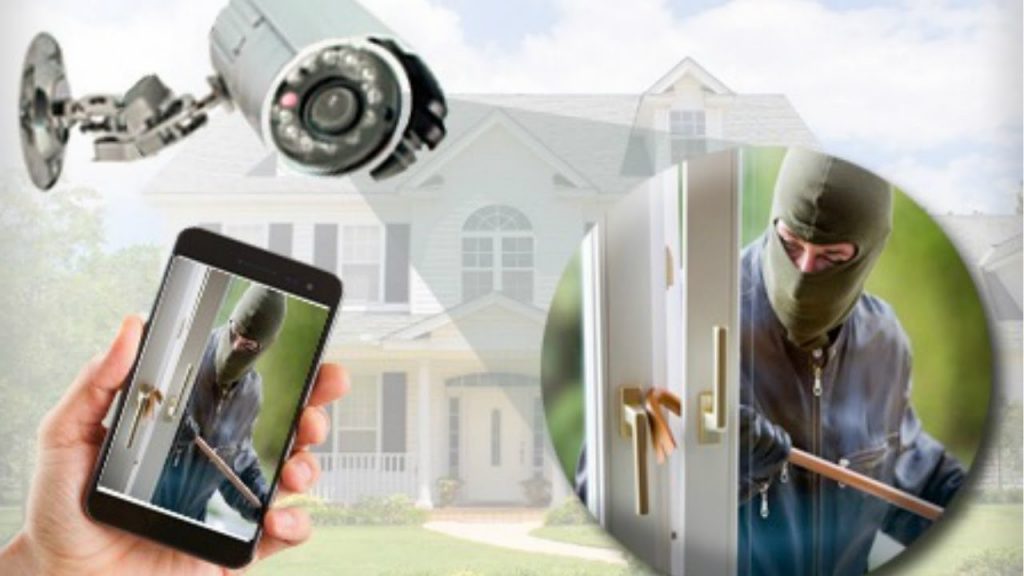
Yard signs and stickers that say a security system protects your home can scare off potential burglars. Those that say things like “We Don’t Call 911” may be your position BUT they are not as effective as ones from known security services. Usually, thieves search for homes with a simple entrance and escape route, yet security frameworks don’t take that into consideration. The clearest advantage of using yard signs and window decals rather than a security framework is that it’s substantially less expensive. Buying yard signs and stickers with home security logos will just set you back about $10, and a significant number of the most well-known security brands logos can be bought online. The sign helps, potential thieves may pass you by for an easier target.

Install Fake Security Cameras

This method is along the same lines as having fake home security signs, but it might be enough to keep intruders away. You can really purchase fake security cameras online beginning at around $10 to $20 and these will help deflect thieves from coming into your home.

They look like genuine security cameras and even have red squinting lights to add to the act. It’s just a cheap and easy idea to consider if you don’t want to invest in a more expensive security measure.

Put up Motion Detecting Outdoor Lights

Nothing makes burglars run faster than bright lights flooding the cover of darkness. You can find motion-sensing floodlights for $25 and up and these don’t require a full-fledged home security system. Motion sensor lights basically consist of a little focal point that detects quick changes in heat or movement.

You could get motion sensor lights in a standard hard-wired version, which are generally introduced by experts, or as a remote, battery-powdered set which could be easily set up; other versions could also be solar-powered. As for alarms, the device could produce a siren or be silent, depending on your preference. Motion sensor lights should be set 6-10 feet over the ground with the goal that it covers the main section spots and conceivable blindsides around your home. The area the gadget covers at that point relies upon how you set it up,  particularly how you set its angle and distance range. Point range could be balanced and set somewhere in the range of 180 to 270 degrees. The separation could likewise be balanced up to 70 feet or more.

These inexpensive steps will again, add peace of mind to your home and maybe, just maybe, prevent you and your family from harm. Be safe out there.

It’s your home; you should feel safe and secure here. People are always worried about the safety and security of their family. Everyone wants to make sure that their family

There are four things that I grab every day before I walk out of the house.  My keys will get me to work, my wallet has my cash, my knife is my do-all tool, and my phone that allows me to contact my loved ones.  Of those four things, the phone has by far the most uses.  Not only is a lifeline to family and help in an emergency, but it’s a portable computer that can Google any information so long as you have an internet connection.

If you’re stuck without an internet connection, however, your phone can still be a wealth of information.  It’s all about the apps you choose to keep installed.  Here are my ten favorite prepper/survival apps (and all are free!)

  1. Adobe Acrobat Reader

 If your phone can take an SD card, and they almost always can, then you can stick a large number of survival PDFs on that SD card and access them any time using Adobe Acrobat Reader.  It’s a quick fix that can help you if you take the time to prepare it ahead of time.

  1. Weather App

 I’ve fluctuated between a fairly large number of weather apps, and this is the one I’ve landed on as the best.  There are two major features that I really like – it has a radar function that is pretty accurate, and it’s good about giving me the most emergency alerts.  This one does require the internet to work.

  1. How to Tie Knots – 3D Animated

There are a number of knot-tying apps out there as well, and this is another personal choice.  Like most of the apps on this list, it downloads the entire set of files to your phone so you can use it without requiring the internet.  Knots are one of the most important skills you can have in a survival situation, and they’re among the easiest skills to forget, so it’s nice to have the reminder.

  1. HEREweGo Maps

Google Maps are my favorite for navigational purposes, but again, this requires an internet connection, and it certainly likes knowing your position at all times.  What I like about HEREweGo is that you can download a local copy of a very large local area and store it on your phone.  Google Maps has that feature as well, but it’s harder to use in my opinion, and HEREweGo is a little more user-friendly in terms of being willing to work without knowing where you are at all times.

(Note: if you’re willing to pay for it, there’s a number of topographical map apps that allow you to download large area topographical maps, but I can’t find a very good free one)

  1. American Red Cross – First Aid 

A first aid manual is something that is infinitely useful, and perhaps more useful at times than the actual supplies themselves.  The American Red Cross first aid app is even better than the phyiscal book, is fully downloadable, has no ads, and even contains quizzes that can help you learn the material.  If you don’t want to use it as a learning tool, it’s also quite useful just using it in a pinch, as it has a lot of search features that are quite helpful.

(Note: the ARC Pet first aid app is also very nice if you have a four-legged friend, and that’s something that you’ll have a lot of difficulty finding information about without this app.)

  1. Google Translate

I like the wide variety of languages available in Google Translate.  It’s not a perfect app by any means, but it allows you to communicate, even in a simplistic way, with almost any person on the planet.  Conversations will often be more about you typing something in your phone to show them, while they type something in their phone to show you, but it’s better than nothing.  If you travel a lot, or live in a diverse area, then this is something that you should definitely get for your phone.  Don’t forget to download the Offline translations for common languages.

  1. Compass Pro 

Compasses on phones are very hit or miss.  Map programs are certainly easier to use for navigational purposes, and the compass apps are not all that accurate, but I do use this one on my phone in a pinch.  This app has a paid version that takes away the ads, but it’s not essential.  I purchased it because I used this app quite a bit when teaching my children how to navigate with a compass.  This app is unique in that not all phones have  the mechanical requirements to run this app, so certainly try it before you buy it.

  1. PictureThis – Plant Identification 

This is a gardening app more than a survival app, but I have had some success using this app to take photo images of plants or plant parts, and having the app suggest potential plant matches for what I’ve shot.  Like all plant ID apps, this one can be hit or miss, but for my climate in the Midwest, this app has had the most relative successes compared to other apps.

  1. PowerPro Battery Saver

Need to conserve power?  You’ll want a battery saver app that can run in the background during these circumstances that will turn off all unnecessary applications and processes.  It might not make a huge difference depending on the model of your phone, but any help is useful in my mind.  PowerPro is the app I use, although there are others that all deliver similar results.

  1. Unit Converter – Smart Tools Co.


If you have any issues whatsoever in converting Imperial measurements to metric, then a unit converter app is essential.  I use mine all of the time.


Honorable Mention(s)

Audobon Birds Pro: A birding app that has a large number of search criteria and information on a variety of different birds.  I’m not sure how useful this one is, but it’s certainly nice to have on a hike when I see something unusual.

Survive – Wilderness Survival:  This is a game about surviving in the wilderness.  Essential?  Probably not. Fun?  Yep. The reason I included this on the list is that I find it a thought-provoking exercise from time to time, and I think that for teens and kids, it might be a path towards interesting them in some basic survival skills like making a fire or building a shelter.

Flashlight: Flashlight apps are largely unnecessary, as most current smartphones have this feature built-in, but in case yours doesn’t have this feature, get a flashlight app to turn the light on your camera on, and I think you’ll use it everyday.


There are four things that I grab every day before I walk out of the house.  My keys will get me to work, my wallet has my cash, my knife is my do-all tool, and my phone that

Being able to take care of one’s own self. I cannot express the importance of this simple phrase. We are a family of ten. Yes, ten. Our children consist of two girls and six boys and range in age from three to eighteen. The workload that is required just to keep our family clothed, fed and living in a clean environment is beyond my sole capabilities. There isn’t enough time in a day to accomplish the many tasks that are waiting for me as the sun comes up each day.

It is out of necessity that our children have learned to do many things for themselves. “Many hands lighten the load” comes to my mind on most days. I am so thankful for those small but many hands. Our family has made the concept of self sustainability a central part of our children’s training. I have felt an urgent need, from the birth of each child, to make sure that they are prepared for the many possibilities that may occur in their lifetimes. We want our children to be aware of, and have respect for, the dangers that exist in this world. Poisonous snakes (we live in central Texas), drowning ( we have a swimming pool) and fire arms (we hunt), make up a very short list. Having the wisdom to protect themselves from danger is not enough though. We also want them, as much as possible, to be able to care for themselves.

Nobody gets a free ride

From a very young age we have encouraged our children to meet their own needs. This hasn’t always been an easy thing for me to do. I get a lot of satisfaction from serving my husband and children and making their lives more comfortable in the process. Doing things for others makes me feel really good. However, I knew that this selfishness would be detrimental to their training. Thankfully, being in a large family and the life lessons that come from that, have done a lot of the training for us. Instead of sitting hungrily, waiting for me to finish teaching a math lesson, my children realized rather quickly that their stomachs would stop growling much sooner if they got a snack for themselves.

We also require, very early, that they get themselves a glass of water when thirsty, bathe independently (but supervised for the very young), and put on their own socks and shoes (backwards is fine) before going outside just to name a few. At the age of seven our children go through what I like to call laundry boot camp. It is at this age that they take on the sole responsibility of doing their own laundry. Several of my friends have expressed surprise that I require this of my children at what they feel is too young of an age. My response usually goes something like this, ” If they can work their video game controllers, then surely they can figure out how to work a washing machine”.

If our children express frustration with the difficulty of these tasks we assure them that they just need more practice. We are purposefully slow to intervene when we see them struggling with a task, thus affording them more independent practice. If they display anger, we will not intervene at all. This is to teach that there is no place for anger when things don’t come easy and we are mindful to tell them so. We always aim to push them just past their comfort zones when difficult situations arise. The look of great satisfaction that spreads across their faces when they achieve something that they never thought they could do is absolutely wonderful. Don’t get me wrong, we are a team and we help each other in many ways each day. Lots of jobs require more than one person. And the more mundane tasks always go more quickly with a little company.

However, I have repeated, “If you are capable of doing something for yourself, then you should”, more times than I care to remember. Society could stand to learn this lesson. Nothing makes me sadder than watching the pitiful tantrums displayed by selfish, impatient and unthankful children. I cannot help but think that these will be the future looters of our local businesses should a SHTF scenario arrive.

Living outside of the city, raising animals, butchering, gardening and allowing lots of free time (we love homeschooling) has caused our children to master many outdoor skills. We have paid close attention to identifying and providing the tools necessary for their individual talents. They routinely receive fishing equipment, pocket knives, fire starters and flashlights for Christmas gifts each year. They don’t want toys that entertain for a day. They would rather be provided with something they can use throughout the year when they escape into the woods each day.

Recognize their individual strengths

J5 Hyper V Tactical Flashlight – Amazingly Bright 400 Lumen LED 3 Mode Tactical Flashlight
My oldest daughter is our go-to for anything related to animal illness or injury. She is both gentle and patient. She has hand-raised several orphan animals, both domestic and wild. She has also brought many of our animals back from death’s door. One of my sons has mastered starting fires in less than prime conditions. I have watched him spend hours in the backyard perfecting his skill. Guess who we call on when we can’t get the fireplace going in a cold day?

Another son is content doing even the most mundane and repetitive tasks all the while remaining joyful and thankful. This is more helpful than you could ever know. It is because of his willingness to always offer help, even without being asked, that has caused him to be a jack of all trades. He is invaluable to us. In a SHTF scenario I could easily put them in charge of specific tasks that would utilize their individual skills, knowing that they would be up to the task.

We spend our summers doing lots of camping. All of our children are excellent swimmers and fishermen. Even our five-year old can clean a fish. The ones who are too young to clean fish happily pull the heads off of the minnows that they caught in their minnow traps, sprinkle on a bit of lemon pepper, lay them on a sheet of foil and place it on the fire. They also know how to make a fish trap, pitch a tent and cook outdoors. They are never more happy than when roughing it outdoors. Their eyes brighten when having conversations about how we would handle a crisis and who would be responsible for what should the SHTF someday. They are very happy with the skills that they have mastered, as are we. However, we have made it a point to make them aware of the great suffering and dangers that would occur in this nation should that day ever arrive.

Having the mental tenacity to do what needs to be done, when it needs to be done, and possessing the skills to do so is an incredible thing. These qualities are becoming increasingly harder to find. I mean, who cares about that college degree if you cannot even manage to get yourself to work on time, and then have the discipline to stay off of social media all day when you do finally arrive. Sadly, this is a true representation of many of the young people leaving college and entering the workforce these days. Many of them simply don’t possess any work ethic at all. I believe this is directly rooted to a lack of proper training. Training that should have begun when they were very young. It has been said that it is easier to mold a child than to fix a man. Our children have already, and will continue, to encounter this type of self-serving person.

I noticed many years ago that our children were very giving, even when there wasn’t thankfulness on the receiving end. I was glad that we hadn’t raised selfish children, but it did raise some red flags. How can we make sure our children are generous but not taken advantage of? I wanted them to be able to decipher between being helpful and being used or an enabler. This is where that trusty phrase “if you are capable of doing something for yourself, then you should”, comes back into play. If they can live up to that standard for themselves, then, so can others. Knowing when to say no is an important lesson as well. Ultimately, we have striven to teach them that each person is responsible for themselves. However, having a community, or family, of like-minded, self-sustaining and hardworking individuals to share in the work as well as the rewards is a wonderful thing indeed! Blessings!

Being able to take care of one’s own self. I cannot express the importance of this simple phrase. We are a family of ten. Yes, ten. Our children consist of

The average American spends up to 12 years in their car, and that means that you are probably going to be spending oh… around a sixth of your life in your automobile in various stages of transportation, idling, and using colorful language to describe your frustrations to your fellow drivers.

While I can’t help with making the daily grind pleasant, in this article we’re going to explore some things you can do to make sure that the events that happen in and around our cars are less stressful – and that’s a good thing, because less stress = longer lives = more time spent in cars.

With that in mind, let’s think back to Understanding Emergencies and Everyday Carry.

Emergencies

The vehicle has unique problems that are particularly challenging. That’s okay, though, because these challenges still fall into our previously established categories of emergency “types.” In doing this, we can maintain some consistency, while only modifying our metric of how protracted the event is.  So, in evaluating how we’ll address our needs, we’ll first define our most likely emergencies by their types.

Type 1: High Intensity – Short Duration

There’s probably no better example of this kind of emergency than a car wreck. These happen in the blink of an eye and produce an overwhelming amount of pandemonium – and then they’re over. Car accidents take on a variety of levels of severity, but we can easily say that if you’re in a car accident, the accident doesn’t “last” for hours (even if the impacts do).

However, even though the quintessential Type 1 Emergency is the auto-accident, there are others:

– Carjacking
– Car fires
– Submergence
– Environmental emergencies (earthquakes, floods etc.)

All deserve to be considered when we pack our cars with gear and our heads with the skills to mitigate these emergencies.  Keep in mind that these lists are going to be extremely short, as our everyday carry (EDC) structure will take care of quite a few of these problems.

Equipment

– Medical kit (discussed later)
– Water (potable)
– Flares
– Defensive tools
– Fire extinguisher (such an overlooked necessity)

Skills

– First Aid
– Defensive driving
– Good situational awareness
– Vehicle defensive skills

There are a few occurrences that will show you the ‘weak points’ in your defensive driving curriculum. Your ability to manipulate things like your seatbelt or clutch are likely to suffer, so it’s important to make sure you have a mental outline of what you’re going to do, and practice it.

For example, I don’t wear my seatbelt if I’m going under 20 miles per hour. If something happens, I want to be able to exit quickly and not fuss with it. While I don’t advocate this, it’s a part of my baseline from when I worked patrol. Establish one for yourself as well, based on your vehicle and your comfort level with the above situations. No matter what happens, there are a few basic things you’re going to want to do:

  1. Stop the vehicle from moving (if you can)
  2. Safely put the vehicle in neutral, and utilize the parking break. Note: This allows you to keep the vehicle running, in case you need to move again quickly, and minimizes the chances that the vehicle won’t start again if you’ve been in a collision.
  3. Safely exit the vehicle
  4. Move to a safer location (off the road, etc.)

So, for me, my order of operations is as follows:

  1. Move out of the area of whatever put you in danger (i.e., get the heck out of Dodge)
  2. Put the vehicle in Neutral and engage the parking brake
  3. a) Release your seatbelt slowly, cautiously, and without an excess of movement (this is a relatively small activity that can turn into a fine-motor-skill nightmare if you don’t practice it – especially if you’re hanging upside down, or some road-raged freak is trying to punch you through the window – both of which have happened to me)
    b) Remove your seatbelt deliberately and without any ‘sudden’ movements. This generally will cause the belt to “lock” and resist your movements. Don’t get trapped by being in a hurry!
  4. Do a mental sweep of the vehicle and the surroundings. Grab any equipment that you must have.
  5. Exit the vehicle after a second quick spot-check in the mirrors.
  6. Move away from any hazards, and place yourself behind something solid (jersey barriers, telephone poles, etc.)

This way, regardless of the emergency, I can get in and out quickly, am aware of the potential hazards before I get out, and I have anything I’m going to need to treat injuries or move on foot (second-line equipment) – which opens us up to address our second type of problem:

Type 2: Moderate Intensity – Moderate Duration

Before we start, it’s important to keep in mind that “intensity” is relative. There’s really not much about a flat tire that’s intense, and it’s usually resolved in a matter of hours. This seems really “ho-hum” because it’s common in our lives. You get used to being shot at or bombed, too, if it happens enough. So when we look at these problems, the key point is that these situations expose us and increase our likelihood of finding ourselves in a situational Type 1 Emergency (such as being struck by another motorist while changing a tire. Ouch.)

So, what are our Type 2 Vehicle Emergencies?

Things like:

Flat tires, overheating engines/coolant issues, fender-benders, dead battery, empty fuel tanks, and the like. These are mundane and inconvenient, and that combination makes them uninteresting. It’s also where the majority of our planning and equipment takes place. In everyday life, the Type 2 Emergency challenges our resourcefulness and our ability to adapt and provide for ourselves. In and around our vehicles, it simply asks of us, “What have you done to prevent or mitigate this?”

So, what should we carry for these emergencies?

  • Water
  • Coolant
  • Motor oil (2 qts)
  • Jumper cables
  • Food (I throw a couple MRE’s in the back)
  • Emergency blanket (Mylar, poncho liner, sleeping bag – whatever you like)
  • Flashlight (headlamp type – it’s ridiculously inconvenient to try to hold a light and work)
  • Spark plug (appropriate to your vehicle)
  • Vehicle tool Set
    – Screwdriver
    – Ratchet set with appropriate attachments for your plugs
    – Crescent wrench
    – Multimeter
  • Fuses
  • Tire iron and jack
  • Gas can

This is going to depend on your level of skill and comfort with working around common automotive problems, but being able to take care of some of these ‘easy fix’ issues will go a long way in getting you out of the Type 2 hold-up and on your way to bigger and better things.

Skills:

Be able to change your tire, test your battery, and if necessary, knock corrosion off it. Be ready to tighten wires. Know how to check your spark plugs and change them if necessary. Be able to check your oil, and know how to check your engine for blown seals.  Your goal with this type of emergency is “Get myself home” – if you are stuck, you’re not going to dry out, starve, or freeze.

By the nature of the “Understanding Emergencies” structure, there is no framework for a “vehicle-specific” Type 3 Emergency. At that point, it’s simply a Type 3 Emergency. But, there are things you can do to prepare during the intermittent 12-year stretch of life that you’re going to be spending on the road, just in case you’re away from home and something significant happens.

Type 3: Low Intensity – Long Duration

The third line equipment is generally your backpack and contains the type of equipment you’ll probably not use unless you’re displaced; a benefit of this line of equipment is that it’s easy to pack and keep in your car, and it’s portable in case you have to move away from your vehicle.

However, keeping a kit in your car also allows you to quickly move in case of an emergency such as a flood, fire, riots, or earthquakes – all of which could potentially be Type 3 Emergencies. However, there’s always the risk of car prowlers and theft. For this reason, I isolate my vehicle third-line kit into two categories:

  1. My backpack
  2. A bin

The backpack contains equipment to cook, collect, and purify water, build shelter, and stay warm. These are core proficiencies that will keep you alive; the notion is that with these supplies, I can scavenge for food and collect what I need from the environment. With that in mind, the bin is a mobile supply point. This is where I keep two categories of supplies:

  1. Consumables (water, food, and fuel)
  2. Environmental supplies (such as clothing, blankets, etc.)

Between these two additional resources, you can use your vehicle third-line kit to tailor your mobile third-line to your specific needs, if you find yourself in an emergency.

Vehicle Third-Line Contents:

Part II: Everyday Carry and Your Vehicle

The first consideration for EDC and your vehicle is a proverbial double-edged sword. Our vehicles can carry more than we can, but we can maneuver in places our vehicles cannot. For this reason, when I think about my vehicle equipment, I break it into a couple categories:

  1. Vehicle-specific equipment: This is the stuff that is carried to keep the vehicle moving for as long as possible over as much terrain as possible. This includes your spare parts, tools, some coolant, water, and the like.
  2. Augmented equipment: The equipment we can use immediately that will be no great loss if we have to leave it behind.

The vehicle is a solid place to keep your third-line equipment. This is the “get home” equipment that you could live off for several days without any scavenging or energy-intensive labor.  Of all your equipment, the third-line setup is the easiest to exaggerat, and make unappealing to carry. It’s also the most dependent on your level of skill and savvy with packing energy-dense foods, lightweight equipment, and water.

For this reason, please (x3) get some training. I don’t care if it’s from a Boy Scout – learn how to start a fire, collect and purify your water, and build a decent shelter. If you can do that, everything you carry will just help to assist.

Also, adjust according to your location. If you’re in Alaska, you should probably not try to survive with just a Mylar bag and extra set of socks.

Part III: Sustenance

Keeping yourself fed, especially by the time you realize there’s an emergency, is going to start becoming more and more tricky as the demand for food articles increases. In the wake of Hurricane Katrina, for example, looting cleared the shelves of anything potable and palatable in short order. If you didn’t steal, you were left with what you stocked on your own.

While it’s nice to have some things stuffed in the pantry, having some in your car is a good bet as well. There are a lot of different lines of logic on this, but my thought here is that you need food articles that conform to some very specific standards:

  1. Calorie dense
  2. Lightweight
  3. Long shelf life

For this reason, I like canned tuna, Clif bars, Military MRE’s/Mountain House meals, and trail mixes. Water is a bit trickier, as not all plastics are food-grade, and in thermal extremes, you begin to get leaching where the container actually starts depositing chemicals into your Dihydrogen Monoxide.

This applies to both aluminum and plastic containers, and this is speculative on my part, but I don’t trust BPA-free containers either. For this reason, I restock my water out of my home each day, and carry my water containers to and from.

In addition to this practice, I keep a Katadyne filter in my vehicle kit. This way, if there is an emergency, I can ditch the contents of my typical carry bag (books, etc.) and grab the necessities. With that said, I still keep all the 1st, 2nd and 3rd necessity items in my bags at all times – so I have a bare minimum of equipment even if I’m walking around campus, grabbing lunch, or hiking.

Layering your equipment in this way will supply you with a fast, reproducible, and modular way to organize and use your kit.

Conclusion

It is highly recommended that after reading this article you evaluate your current vehicle preparedness supplies and everyday carry items based on your skills and possible needs.  And regularly check on the condition and quality of your preps stored in your car, as they are subjected to considerably harsher conditions in Summer and Winter while enclosed in your vehicle compared to sitting on a shelf in your garage or home.

Learn new skills that will help you evaluate and mitigate situations and emergencies related to vehicles and prep the items needed to match your skills and possible emergencies.  All the gear in the world stuffed in a trunk will not help you if you don’t know how to use it.

The average American spends up to 12 years in their car, and that means that you are probably going to be spending oh… around a sixth of your life in

Knowing how to build the perfect campfire is one of the main ingredients of a successful camping trip and of survival in general. The campfire is at the apex of any backwoods gatherings. You will most likely need it to prepare food, keep warm, ward off predators, and maybe even purify drinking water, as well as to just create that ambiance for the bringing people together. In case you have never built one before, or you are an old hand at it, everything can be a bit more involved than it appears on the surface. A “must have” skill for ALL preppers, you may find some valuable takeaways in this article, especially if your wood is poorly seasoned or the prevailing weather conditions are all working against you.

The key to success in building the perfect campfire is to have the right supplies, skills and patience. You must also have in the back of your mind what you will need the fire for so you can start and maintain the perfect campfire (given Mother Natures changing moods.)

WHAT YOU WILL NEED

Tinder: These are the tiniest of fire igniting materials. Examples include wadded newspaper, wood shavings, cardboard, wax, commercial fire sticks and dryer lint.
Kindling: It is consider just tinder that is bulkier and more substantial. Good examples are twigs about the thickness of a pencil.
Firewood: Well seasoned firewood somewhere up to 5 inches in diameter. You should split larger-diameter logs to make them easier to handle and burn more efficiently, however that also means they are consumed faster.
A Fire-starter: While you can use matches, lighters tend to do better jobs in the wilderness. A flint rod may also do for camping fires as well as a number of methods you have seen on this site in the past. Add fire-starters that you are experienced with at your discretion as these may be better saved for use when your tinder is wet or green.
A Shovel or Spade: A shovel or small spade may be necessary if you will need to create a fire pit from scratch. Also handy for extinguishing a fire as well as leaving as little trace of your passing as possible.

STEPS TO FOLLOW TO BUILD A PERFECT CAMPFIRE

Step 1: Check If Campfires Are Permitted if You Are Simply Camping

Before lighting any fires, you must determine whether campfires are permitted in your camping area. Look for posted signs in the campsite warning against starting fires. You can also ask the campsite host or a ranger for any such laws prohibiting fires. Avoid any assumptions from what you see and ensure you get necessary permissions before you start a campfire. The beaches of California are littered with fire pits from a by-gone era (just a few years ago, until things started getting ridiculous.)

Step 2: Pick an Appropriate Fire Spot

Established campgrounds usually already have fire-rings or fire pits. This will make your work easier. If such rings are nonexistent, choose a spot that is about 15 feet from your tents, trees, shrubs and other inflammable materials, if at all possible.

Look for a natural, or man-made windbreak. These will make your efforts easier, provide some cover, and draped with a emergency blanket may even make your fire more efficient at heating the surrounding area. If such a place does not exist clear any dead leaves, grass, and other vegetation to create at least a few feet of bare soil. Also, dig down a few inches to create a pit that’ll contain the fire. This will protect the hot coals as well making stoking the fire for a longer burn much easier.

Step 3: Choose the Type of Campfire to Build

Campers can choose between three different campfires depending on their needs. We will discuss the steps necessary to make perfect fires of each of the three types. The types include a teepee campfire, a lean-to campfire, and a log cabin campfire.

  1.  Teepee Campfire

  • Step 1: Centralize Some Tinder in Your Fire Pit

All campfires tend to begin start with a foundation made of tinder. To accomplish this, gather a portion of your tinder. Bundle them and put them at the center of the pit. A trick to make the tinder material easier to bundle, try to lay it on top of some piece of a well-dried tree bark.

  • Step 2: Build a Teepee

Use a portion of your kindling to build a cone-like teepee shape with some of the tinder in its center. Use just about six of the kindling pieces. Add a layer composed of firewood to build a wider teepee around your first one. Stick smaller branches or twigs into the ground around the teepee to secure it.

Do not forget to leave a gate in the teepee. Later on you will use it to ignite the fire. Ensure the gate or opening is on the side of the teepee facing the direction of the wind. This will provide your young fire with the air it needs to burn well. Similarly, leave spaces between the pieces of firewood to promote air circulation.

  • Step 3: Light the Tinder

With a ready teepee, place a match or lighter beneath the centralized tinder and strike or ignite. The teepee structure will encourage the fire to burn vertically from the tinder to kindling and then to the firewood. If the flames fail to fan, light the tinder again.

  • Step 4: Add Kindling and Firewood As Needed

As your fire burns, the firewood would be consumed and eventually, the teepee will collapse. At this juncture, add more kindling and pieces of firewood to maintain the fire. A teepee campfire is suitable for cooking because as it burns elegantly and steadily for a limited period.

      B. A Lean-To Campfire

  • Step 1: Place Kindling With Tinder beneath It

To make a Lean-To campfire, start by placing a long piece of kindling in the dirt at a 30-degree angle to the ground. Bundle some kindling and put it beneath the lean-to kindling. For the purpose of a lean-to kindling, a thicker stick or a small/medium size log will suffice. The end of the kindling should point to the direction of the wind.

  • Step 2: Add Tinier pieces of Kindling

With your lean-to kindling ready, place additional pieces of kindling in your fire set-up. In this case, use much thinner sticks than those serving as a lean-to. Place them against the lean-to and tinder bundles. Make a tent-like shape by leaning kindling against the lean-to. Create a second layer by adding a little bit larger pieces.

  • Step 3: Ignite the Tinder

Ignite tinder just like we discussed for the teepee type. Once the tinder catches fire, the rest of the kindling will follow to create larger flames. Add more kindling as well as some well-seasoned firewood to fan the flames. Begin with a single piece of firewood and increase the number appropriately. This is the best campfire type for cooking.

      C. Log Cabin Campfire (Pyramid)

  • Step 1: Create a Small Kindling Teepee

Use the first step in making a teepee campfire in this step. The only difference is that you will need just two layers of kindling around the tinder bundle at the center of your fire pit.

  • Step 2: Setup 4 pieces of small logs around the Teepee

Gather four pieces of well-dried firewood and set them around the teepee. Use two of the largest pieces on opposing sides of the teepee and then set up two smaller pieces on the remaining sides to make some sort of a square structure with the firewood. The smaller pieces must rest over the larger pieces for the log cabin to be steady. Ensure you leave a gate on the side that faces the direction of the blowing wind.

  • Step 3: Lay More Firewood

Continue laying more firewood over the four pieces of firewood. In this case, use smaller and shorter pieces in a similar pattern to the square. Your goal would be to create a structure similar to a cabin around the initial teepee.

  • Step 4: Invest Smaller Kindling On Top Of the Cabin and Ignite

Once your log cabin is ready, place some of the lightest kindling on top of the structure to close off your structure. Only then can you use a lighter or a match to ignite the fire. Light the fire from several sides in order to encourage your fire to burn. Create a log cabin type of campfire if you want fire that will burn for longer and therefore keep you warm for longer periods.

EXTINGUISHING YOUR CAMPFIRE

Besides knowing how to build a perfect campfire, you also need to know how to extinguish it. The simple option is cutting off its supply of oxygen. You can put out all types of campfires by pouring water on to the fire, stirring the ashes and then applying more water. You should repeat this process as necessary until the ash is cool to touch. The bare minimum is to ensure that the fire and its members are out and utterly cold before you leave the camp.

Water will cause smoke – a better method is to bury the fire with dirt. It does not cause smoke and generally hides the evidence of the fire being there in the first place.


CONCLUSION

No matter the type of campfire you intend to create, you now have the right information to help you do it right. Ensure you never leave the fire unattended and you must put it out before you leave to prevent unnecessary accidents.

Knowing how to build the perfect campfire is one of the main ingredients of a successful camping trip and of survival in general. The campfire is at the apex of

Don’t Fool Yourself into Thinking You Have Nothing to Worry About

Preppers can fairly quickly find themselves at the mercy of our own minds. We create the need and the solution in our lives by analyzing threats and weighing the likelihood of various disasters – natural and man-made and then craft plans for how we will deal with those disasters when they come. The problem comes when we analyze the disasters and settle upon a strategy that we think will either protect us completely or mitigate all of the undesirable effects of that crisis we are planning for. This is an issue that I think a lot of Preppers face and ignoring it can get you in just as much trouble as someone who has never prepped before. You might meet the same fate, just at different times. The problem with Prepping is that you can never be finished.

I thought about this as I was compiling my latest list of items that I either needed to acquire or wanted to sort out in my life. I even started to draw small boxes to the left of the items on my list so that when I had finished the various elements of my survival checklist, I could mark each box as complete. A fully completed list meant that I was done, right? That I would never have to worry about any of these particular issues again is how some people choose to look at making lists.

All I need is 6 months’ worth of food

So the grid goes down like it did in American Blackout and you are locked up snug as a bug in a rug inside your house. The power has been off for a week so far, but you have that covered. You also had 6 months of food inside your pantry so you should be all set, right? Wrong… If the power never comes back on or we descend into something worse, what happens when your food runs out? What if your brother from the next state rolls into town and starts to eat your food too?

Having a stocked pantry doesn’t mean you will live forever. In order to be truly prepared, you have to be able to feed yourself forever. Does that look like starting a vegetable garden or getting started with small livestock like raising chickens? What about Aquaponics? The process of feeding yourself and your family never stops until you die.

The idea here is that you can’t go out and buy a whole pallet of freeze-dried emergency foods and expect that you are finished. Having a great supply of food so that you can outlast most any temporary crisis can give you a huge leg up, but is not a magic bullet.

I just need an awesome Survival arsenal and I can handle anyone

I own guns and I have written several articles about various aspects of gun ownership like “The Best Gun for Home Defense” and “How to Select the Best Handgun” and another about what I consider our “Obligation to Carry Concealed“. We talk about storing ammo and the different calibers you need for different aspects of security and survival but simply having a lot of guns does not mean you will be safe.

Guns are an important part of my survival plans, but simply having one strapped to my side doesn’t or should not give me a false sense of security. This is a tool and that is all. With a firearm I will have the opportunity to react in ways that I otherwise wouldn’t. This isn’t an invisible shield against violence; it won’t protect me from dedicated bad guys or the stupid actions I may take myself. There is so much more to security than simply having a bang stick and we are all wise to temper our bravado in the face of disaster just because we bought a gun. This can go the same way for bad guys too who get cocky when they have a firearm. Just because you have a gun that doesn’t mean someone can’t walk up behind you and put their own bullet in the back of your skull.

I have backup generator

A generator is another one of those great tools we talk about often and I have one. Does that mean I will have power for the rest of my life? Nope. Actually, I would be really happy with 500 hours of run time out of the generator. I have plenty of fuel stored up and oil, but mechanical things break eventually. If you don’t have spare parts or more importantly the know-how to fix a generator, you have to look at this as a finite resource.

A backup power plan is excellent and I have one myself with further plans for solar backup, but this isn’t something I can count on to completely replace all of the power we have grown used to. Even if it was, in a complete grid-down scenario people would know that you have power unless this was hyper secret. Small chance of that with a generator but eventually everyone will know you have power and then we get back to that survival arsenal we spoke about earlier.

I have a hidden survival retreat

A well-stocked retreat somewhere deep in the woods is the Holy Grail of Prepping Legend and Lore. Seriously, I covet those who have the resources to purchase a retreat property with all of their gear pre-staged in place even more those that are able to live at their retreat year-round. Even if you do have a compound with electric fence, intrusion detection, mines, roving guard dogs, sentries in the watch towers on Barrett 50 cal rifles, that still does not guarantee you will ever live in peace the rest of your life.

That is one helluva head start though!

My point is that nowhere and no situation will stay completely safe forever. Are you possibly months, or years away from worrying about the same thing people in New York will be faced with? Perhaps, but to think you will stay hidden away forever without any other single living person coming across your path is far-fetched in my opinion. If you have this retreat, you will still have to guard against others who find out about what you have and want to separate you from your castle.

I have a Bug Out Vehicle

Great! So what? A bug out vehicle is only as good as where it can get you. If you are stranded in the city because you didn’t get out in time, what good is that vehicle? If it is parked on the highway in traffic what does that do to your plans?

Having a bug out vehicle is important; especially if you need to get to your survival retreat up above but simply having a tricked out Ford F250 running diesel or bio-fuel doesn’t mean that you can’t be stopped. Having that big truck doesn’t guarantee you won’t have some type of mechanical failure or be disabled by someone else in a big truck.

OK, so what good is prepping then?

My whole point with this article is that you can’t become complacent. My list that I was filling out was for the day, not eternity. If I buy some extra food today, that is like a deposit in the extra time bank. By having supplies I am buying myself and my family extra time, but I can’t teleport us out of any emergency that appears with freeze dried food. I can’t change the fact that the electric grid is wiped out (as an example) just because I have 500 gallons of water stored.

I have said it before and I’ll say it again. Prepping is a Journey, not a destination. You will never be completely prepared for anything. You can only work at being more prepared than you were. You can strive for being better prepared than you were a year ago. What you can’t do is think that you are done and that you can sit back and relax. Prepping is done by people who see trouble ahead and take steps to deal with that trouble. Chances are, that trouble isn’t going to go away and neither should your dedication to staying ready and striving for more self-sufficiency and resilience. You very likely will never be as prepared as you want to be, but that journey will pay you back when the time comes.

Don’t Fool Yourself into Thinking You Have Nothing to Worry About Preppers can fairly quickly find themselves at the mercy of our own minds. We create the need and the solution

Some preppers base the security of their retreat on hiding it so that it won’t be found.

They glow with pride about how carefully they’ve chosen their retreat location, and its remoteness from main roads and likely off-road flows of people too.  They mutter about ‘OPSEC’ meaningfully, and talk about keeping an ultra-low profile, and won’t even tell you what state it is located in.

This is all good stuff and great to talk about, but it won’t keep you hidden.

We don’t mean to discourage any of these things, but we do mean to alert you to the fact that it is not possible to keep your retreat 100% hidden, all the time, from everyone.  Maybe careful measures will extend the time it takes for the first adversary to stumble across your retreat, but maybe also your location will be discovered by chance rather than by careful searching.

Sooner or later, you will be found.  And once one person finds you, he will tell someone else, and before you know where you are, everyone in the area will know about your retreat and come visiting.

Some Location Giveaways

Here are some types of unavoidable give-aways that will draw attention to you and your retreat.  Your concern isn’t just the people who stumble across your location by chance, it is also the people who are drawn to it due to some sort of indicator that calls attention to it, even from some distance away.

For example, what will you do for heat?  As soon as you start burning anything, you’re giving off odors that in a de-industrialized rural area will travel a long way.  One more smell in the city means nothing.  But in the countryside, anything out-of-place that doesn’t blend into the natural smells – and particularly a burning smell, something we are instinctively taught to notice and fear, will be much more prominent and will be noticed from a reasonable distance.

You’re not only giving off smells, you might be giving off smoke too, providing a visible indicator pointing to your location and visible for many miles around.

Talking about smells we instinctively react to, what will you eat?  Even if you only cook ‘low odor’ foods (rice and beans, perhaps) those odors will travel a long distance, particularly if the person smelling them has his sense of smell sharpened by hunger.

Don’t worry, we’re not going to ask what you do about bodily waste, but let’s just say there’s a reasonable chance there may be some smells associated with that, too!

What about energy?  Will you have a wind turbine?  If so, won’t that be very obvious, especially when the blades are turning, indicating that it is still operating and being maintained?

Solar cells neatly lined in rows on your roof and kept clean of debris also indicate that rather than being an abandoned old shack, your retreat is a cared for location with added value sophisticated contents.

It is true that generators can run incredibly silently, but it is also true that the outdoors itself can be very silent on occasion, making even the slightest out-of-place sound, like a generator running, draw attention to itself.

Will you ever leave your house?  In the winter, you’ll be making footprints in the snow.   Will you grow any food in the summer – any type of cultivation or other landscaping will of course be obvious.  Will you ever go hunting – the sound of each rifle shot might be heard for miles.

Will you have 24 hour blackout curtains on all the windows – heck, why not just build your retreat with no windows at all, then!  If not, your retreat will be a beacon of light at night.

The Unavoidable Paper Trail that Leads to Your Retreat

Think about everything that has happened from the moment you bought the property.  Your purchase of the property has of course been recorded in the county records.  If there were any existing buildings on the property, those are probably already part of the county records.

Maybe you bought some unimproved land and built your own retreat structure.  Did you file building permits with the county?  Do you have utility connections (visible or not)?  Maybe even internet or telephone service?  Did you have any contractors do any work on your house?  Or building inspectors visit?  Did you get mail or courier deliveries at that address?  Do you have occasional deliveries of propane or firewood or diesel fuel?  Does a septic tank service company visit to pump out your tanks?

Even if you think you’ve done everything off the record, sooner or later, the county assessors will update their database and discover the improvements on your property.  Their staff know the areas they are responsible for very well, and if they find a new driveway that didn’t formerly exist, they’ll want to know where it goes.  If they happen to see a contractor’s truck going in or out of the driveway, they’ll doubly want to know what is going on.  Or maybe they’re just doing one of their two/five/ten year revaluations of all property in the county, and someone notices from an aerial photo the presence of buildings and clear indications of agricultural improvements on a block of land they had formerly categorized as unimproved forestry land.

Have a look at, for example, this impressive site that records all details of every property in the entire state of Montana.  Chances are there’s a similar database either for your state or at least the county within your state, whether it be publicly online or not.

Other Problems

What do you say if meeting locals in the nearby town in terms of where you live?  Someone, and probably several or even many people, know that you’re out there, even if not exactly where – you’ll be the guy who lives somewhere up back of (some other place).

What about your travels to and from your retreat?  Have other people seen vehicles they don’t recognize (ie, your vehicles) in out-of-the-way places and wondered who you are and what you are doing?  Have you left tire marks, or do you have a formal driveway or some other indicator of a house on the property?

And so on and so on.  Will anyone else for 50 miles around you know about your retreat?  Unavoidably, and of course.

There are countless ways your presence will be inadvertently revealed, and your life will be a misery if you try to hide it.

The preceding examples show some things you have done or will unavoidably do that draw attention to your retreat.  But that’s not all.  Your retreat could also be found accidentally.

Accidental Discovery Too

We know that in a Level 2/3 situation, there will be an exodus of people from the cities.  Remember that for every rural dweller at present, there are about five or six city dwellers.  In theory, this suggests that the countryside might become five or six times more crowded with people than before, so this by itself increases the chances of someone stumbling across your retreat unexpectedly.

In addition to that, think of everyone you know who confidently says they’ll hunt deer or other wild game for food in a Level 2/3 situation.  Deer will rapidly become an endangered species, that’s for sure!  The woods will be crawling with hunters all eagerly looking for game to shoot, so if your retreat is anywhere close to any sort of hunting, expect an influx of hunters in your area.  Ditto for fishing.  Ditto again for any food bearing plants in the vicinity.  Maybe even for people seeking to fell trees for building materials or to burn.

There’s another potential source of disclosure too.  Google Maps, Bing, and other mapping providers are increasing the frequency of aerial mapping surveys, and the quality/detail of the images they post online.  Many counties have aerial survey maps online too.

Your retreat might be miles from anywhere, but that won’t stop a plane from snapping a beautiful aerial shot of your retreat from the air as it flies over doing a photo-reconnaissance sweep.  Your dwelling will be online for everyone, everywhere in the world, to see next time they open up Google Maps.

Okay, so this presupposes that Google Maps or any of the other online mapping services is still available in a Level 2/3 scenario – a dubious scenario, for sure.  But if your information is/was online, it is probably also printed out somewhere, and a more resourceful looter will access good old-fashioned printed county records to identify tempting targets to go hit.  If you were a looter, wouldn’t you consider an obscured out-of-the-way retreat to be more tempting than one close to three or four neighbors?

It also means that from whenever your retreat first starts to appear on these documents and online records, there will be a small but growing level of awareness of your presence, prior to WTSHTF.

Summary

Figure on being found, sooner or later.  You can not rely on remaining hidden.  Once one person finds you, expect them to share that information with more and more people.

Unfortunately, the more unusual your location, and the more creative you’ve been at obscuring it, the more ‘interesting’ it will be for people to talk about it, and the more curious they will be about exactly who you are and what you have.

By all means do all you can to extend the time until you are found, and hopefully to minimize the frequency of times you are found, but sooner or later, you will have uninvited ‘guests’ arrive unexpectedly.  You need to have a plan for what to do once the veil of obscurity is lifted from your location.

Some preppers base the security of their retreat on hiding it so that it won’t be found. They glow with pride about how carefully they’ve chosen their retreat location, and its remoteness from

We all get discouraged from time to time especially when events or results we expect are right around the corner, do not happen. This makes perfect sense with a diet when for example you reach a plateau and all the rice cakes and sacrificing desserts in the world won’t take off a single additional ounce. Another example could be a skill we try to master like golf. Sometimes, no matter how much effort we put into practicing, money we blow on the latest hi tech clubs, how much sweat blood and cursing we expend on that stupid ball, nothing seems to make your score any lower. At a point, you may start to worry if this just isn’t meant to be. That you were born to be a little chunkier, that golf is a lot harder than it looks and you will never be anything remotely close to the next Tiger Woods.

Losing your motivation or interest in something can be very discouraging. What used to occupy your waking hours with such intensity can vanish quietly without as much as a second thought. For some people, prepping is like that. In the beginning, there is a sense of urgency and we scoured the internet for tips on how to grow the best gardenhow to store food in plastic buckets. We research the best firearms for self-defense and start making our plan on how to be better prepared for any emergencies with the end goal of living completely off the grid on 50 acres in Idaho.  With our Bug Out Bag checklists we head to the camping section at Walmart or online to get the best survival gear and then over time notice that your expensive lifesaving gear that you had, has been sitting alone and quiet in the corner of the closet for a year.

What are you prepping for?

I have said this before on Final Prepper but I think it bears repeating and that is Prepping is not something you can ever master. This isn’t a skill that you get a certificate of completion for. There are no expert preppers out there regardless of what any blogger tells you. Prepping is a daily process of taking steps and making decisions that will improve your chances of surviving anything that life can throw at you. Prepping is a lifestyle, not a destination and if you are doing this right, you will always have something you can learn and something else to do.

Most people start out with a single point that drives them to prepare. Either it is the news reports that we hear, or dire warnings from a thousand websites, radio and internet hosts or the ads blaring from websites (mine included) about the “one weird trick” you need to have or the next “big thing” to worry about. For me, it was less specific than something like mutant zombie bikers from Mars, but I had several things that prompted my own personal journey into prepping. I quickly found out that regardless of what it is you think can happen or is likely to happen to you that would turn your world upside down; the survival requirements for everyone do not change.

In most instances. It doesn’t matter what the emergency is that you are faced with. In most survival situations, you are still going to need clean water to drink or you will die. You are going to need food or you will starve and you will need shelter and security or someone could kill you. You always run the risk of being injured or becoming ill, so a way to treat injuries or illness is also important. It doesn’t matter if this disaster you are faced with is an earthquake, an economic collapse, war, disease outbreak, revolution, depression, plague or a polar shift, global warming or alien invasion.

Preppers seem to easily become disenchanted with the whole idea of prepping if their big fear doesn’t materialize quickly. Preppers who are looking for either a government tyranny or an economic collapse are probably the worst at this; second only to people who believe whatever the latest disaster of the year is (y2KHale-bop comet2012 Mayan calendar). If you don’t see your envisioned future that you are prepping for materialize, or worse the day comes and goes and nothing happens, a lot of people feel foolish and think their prepping efforts were all a giant waste of time.

Prepping should be focused less on any event and more on situations. What if I have to leave my home and can never go back (for any reason)? What if I am unable to pay for my home anymore (maybe due to a job loss)? What if I am trapped in my home with no food (because of a winter storm)?

Does this mean you aren’t a real prepper?

It is more exciting I guess for the lack of a better word to crystallize your attention on one boogeyman or threat. It may even be easier to prepare when you have the face of what you are worried about so clearly in front of your mind, but it is a trap. If you focus your attention on one enemy, spend your energy and thought on one outcome, what will you do if something you didn’t expect happens? If you have worked yourself up for a complete and total economic collapse, but that never materializes; are you prepared to live life however you need to regardless of the economy?

Maybe that was a bad example, but I think the point should be that we have to prepare to survive. We shouldn’t be preparing for an economic collapse. We should be gaining skills to become more self-sufficient, not spending all of our time building a warehouse full of freeze dried foods. Now, I am not saying we shouldn’t take the bad realities of a possibility like an economic collapse into consideration. I am not saying that we shouldn’t store up food, but as much as possible we should be focused on what our family or we need to survive regardless of what happens. If we do have an economic collapse, you are going to need to eat and pay the bills aren’t you? If we have a global pandemic, you are still going to need to keep yourself healthy, just like you would if there was a hurricane or a flood, or an earthquake.

When you ask yourself why you are prepping or I guess when you start to question if anything you are doing is worth it. When you start to feel foolish staring at your stocked pantry and your hundreds of gallons of water, fuel, first aid supplies and survival gear stop and think. Think about how what you have done could help you and others in a thousand different ways. Think about how you will have options if the cold hand of fate comes knocking at your life one day way in the future. Don’t worry if it never does because that right there is the best outcome we could all hope for.

We all get discouraged from time to time especially when events or results we expect are right around the corner, do not happen. This makes perfect sense with a diet

Winter Property Assessments
When we think of winter prepper project idea, we commonly think of things that can help us beat or evade the cold and less about spending time outdoors. However, there’s a lot that winter (or early spring) can tell us about our properties, both for planting decisions, siting various things around our property, and for mitigating some of the weather that comes with winter and spring. A lot of it is information that’s hard to come by in late spring and summer. Winter is also an excellent time for indoor projects. This article will talk about the outdoors and assessments, but later I’ll hit a mix of projects we can tackle at the kitchen table.

Snow Drifts

Snow drifts can be useful guides for our homes – and an excellent test of how “tight” our winter gear is. Looking at where snow piles up and which sides it accumulates on tells us where the winds blow to and from in winter. That tells us:

  • Where not to site tender crops and perennials – Those winds will create a colder micro-climate even into planting season that can stunt or kill off our plants, or delay planting season for us. They can also wreck a borderline shrub or tree for our area, whereas with a little more protection our hardy kiwifruit or cherries would have been fine and full-sized.
  • Where not to plan our backup/outdoor kitchen (nothing like standing outside grilling in a gale)
  • Which direction to face doors on new construction of sheds and animal buildings, so that snow builds up on the opposite side, limiting how much we dig to open doors and how much cold air enters every time we open that door.

  • Where we want to put gates, so that something is helping to put them in the lee of an accumulation zone, again, to limit digging while caring for livestock.
  • Where we might want to create a windbreak or series of buffers for house doors – Stack wood, build a shed, or erect a screen of some kind around the doors in our homes, either panels of soda bottles or salvaged windows, or even just mesh screen, anything to diffuse the wind. It limits how much cold air enters with us, as well as can create an initial mudroom for brushing and shaking off snow before we even get to the drip zone of our house.
  • Where we might plant a windbreak of hardy, screening shrubs and trees to protect crops (there’s a specific way to plan those)

  • Where we want to stack wood, so that we don’t have to get a faceful of rain or snow or sleet collecting it, and so we don’t have to dig/chip it out as often.

Similarly to tracking winter winds, we also want to be aware of summer winds, especially in areas where summer and autumn storms will rip away flowers or drop not-yet-ripe fruit. There are other ways for finding those directions and wind strengths.

Pooling & Running Water

Water is essential for life, but too much of a good thing can be bad. Locating the paths water takes and the places it collects and stands can do several things for us. The key to reducing water damage to buildings, the land, and our plants, and to using it most efficiently, is to locate both the areas where it pools and stands, the areas it’s running fastest, and the points of origin. The origin points are both where it’s entering our property, and how it’s getting there.

Sketch a simple plat map of the property or areas on the property, and make notes during rains, snows, and melting periods. It’s as simple as looking, although some stomping to see how sodden an area is is invaluable. Winter and spring with their typically greater wetness levels are ideal for finding a property’s water trends.

Permie S’s  – Locating the pathways of water on our property allows us the opportunity to Slow It, Spread It, Sink It & Store It. That might be creating swales or keylines to increase infiltration or to move the water somewhere we’d prefer it, building hugel beds in a system to absorb some of it and redirect some of it, or seeing if we can harness it in pools or water catchment systems at the point of origin.

Frost Pockets – Those places that water pools in a storm or melt cycle are going to be the low spots. Low spots tend to collect frost early and late in the season, damaging plants that are located there. They’re also going to periodically turn into a skating rink in winter, which can make them a poor place to park vehicles or situate the shed with the feed in it.

Cold Water – Soil temperature affects plant germination and growth. Crops like corn won’t germinate at all in cold soils, and cold-soaking rains can stunt or kill off other warm season crops as well. While it’s less of an issue in later seasons, locating crop fields where they’re regularly inundated with cold spring rains and winter snow-melt runoff can damage our density and yields, or delay our plantings by weeks or a full month and a half in some places.

Oops – It looked dry enough, and it was solid getting out … right up until it wasn’t. Knowing the sodden spots of our property ahead of planting – now or in a disaster – can help us avoid losing time or seed on soils that stay soaked late in the season and re-soak quickly in rain storms.

Standing Water & Soaked Soils – Pretty much any seed can be pre-soaked to speed germination, but that’s a temporary thing, usually numbered in hours. Seed packages mention “damp” or “moist” soil because it’s one of those “too much of a good thing” cases. Inundated soils will increase rot in both seeds and seedlings, costing us days or weeks as it dries out. Our planting can also be delayed if we site our crops in areas that don’t consistently dry out until weeks after the traditional start date for our area just because we can’t get a tractor or push tiller in.

Wet fields can also lead to delays in harvesting first-cut hay, decreasing its quality and possibly preventing later cut(s). Cutting by hand is laborious and while it allows increased access over a tow-behind, there’s still loss potential from ground rot. Wet green hays that are baled also sometimes spontaneously ignite, which can cost us not only feed, but our livestock and sheds, if not our homes as well.

While most of the water checks can be done just by visualizing the surface, in this case, it would not hurt to walk around with some hollow bamboo or a steel pipe, a tulip planter, or a skinny fencepost shovel. We want to stab down into our soils every 2-3 days after heavy rains and during the periods leading up to our planting dates (and after) to see when exactly it dries out.

We also want to repeat this process after we seed if we plan to expand later, because little is worse than heavy rain cycles that leave us staring at wasting crops from our windows as our plots turn into bogs and lakes. Tracking the water on our property during the traditionally wettest periods of the year can help us avoid that.

Pasture/Paddock Damage – Areas that collect water are a bad idea for livestock. Sodden soils don’t hold grasses and dicots very well. Hooves and claws end up tearing the plants free and destroying the roots, even when the turf starts off in good condition. Likewise, damp ground increases bacterial and viral diseases and causes additional hoof, foot and feather conditions. Once those pastures and paddocks are bare earth, it’s hard to reestablish growth if livestock stay in place. Rebuilding the turf – even a mixed “weedy” field – requires feeding off hay and grains and in most cases reseeding.

Untreated pasture problems will only compound over time.

There are fixes that work for smaller animals such as chickens, but they commonly involve planting specific things that help absorb water (willow, bamboo) and then allowing those plants time to establish so the birds maintain their size without wrecking them, or mulching to depths of 6-18”. Deep mulching isn’t a terrible idea for chickens anyway, as it helps limit waste buildup and gives cooped birds an activity (poking through the mulch for critters) but that mulch does have to be replaced. It can be anything, from chips we do ourselves from firewood cuttings to pine needles and raked leaves, but in some warm, humid areas the sheer volume needed is going to be prohibitive.

In the long run, it’s typically just better to do something else with those areas.

Exceptions

There are always exceptions to a rule. In the case of frost pockets or saturated soils, especially the cold water of early spring and resulting from winter snow melt, we might decide the delays in planting and pasture rotations are worth it. One reason might be if the surrounding areas are elevated with thin soils, and end up dry for the rest of the growing season. We might install hugels or* swale systems on the slopes surrounding a pocket for our veggies, or plant them for silvopasture or fodder shrubs, and choose to take the delay for main crop calorie staples rather than have to find a way to irrigate those.

*OR; Or is an important word. In this case, it means one OR the other, not both unless you are a hydrologist who has crunched the numbers. We can create a potential for bad things to happen by combining the two – there is such a thing as too much of a good thing.

We can also buy growing season in sodden areas if we need to by switching to raised beds – conventional soil-filled bounded beds, unbounded Eden-style or lasagna-style low beds, or hugel beds – anything elevated and able to wick up only as much water as it needs. There are tradeoffs to anything in life, though, and raised beds and aquaponics are not going to produce large scale calorie staple crops for the most part.

Similarly, we might eschew one conventional wisdom about wind direction to take advantage of a different conventional wisdom or an entirely unrelated element of our property.

It’s about prioritizing what we need most. Knowing is half the battle, though. If we don’t know what conditions can hurt or help us, and where they are, we can’t even begin to prioritize which trees or woods to harvest and which to let stand, where we want to locate small livestock, a kitchen garden, pastures or annual crop plots, or perennials.

Winter Wonderland

We can take advantage of the winter wonderland outside our doors in a lot of ways, and in another article I’ll hit some that are ideal for a shed or kitchen table. The biggie in this article, though, are the ways winter’s snow and mud can help us plan.

Here are a few more projects to consider for wet and icy months:

  • Identify the slick spots and deep mud (before we run/drive across them to escape a fire or intersect a bad guy before he closes on our homes; shipping pallets or some logs may be all we need to avoid getting wet, muddy or bogged down in wet seasons)
  • Identify animal tracks and paths (wildlife, but also how many loose domestic pets we’ll have to deal with)
  • Lay out weed exclusions for beds before the weeds even sprout
  • Locate the sunny spots for greenhouses, cold frames and hoops
  • Get rid of hornets while they’re slower from the cold
  • Check the accesses to our non-faucet water options – Maybe it’s figuring out that we need to bed down our water catchment annually and come up with a new plan, maybe it’s making sure we can get to a creek without chancing frosty shores and thin ice, or devising a method for filling up our camelbacks and buckets without getting all that close. Especially if we really do plan on hauling water from creeks, physically troubleshoot it now, on the worst days, when there’s still 911 and a running vehicle available.

Running water is undercutting ice at the edge of a creek here – that’s a slick or collapse disaster waiting to happen even as narrow and shallow as they are if we’re planning to fill jugs and buckets here.

  • Check the roots of trees near buildings and fences during washouts and melts (Are any exposed enough to worry about coming down?)
  • Whack down invasives like privet, kudzu, and baby oak sprouts now when seeds are less risk and before they get any bigger – it’ll help keep you warm
  • Figure out the change-of-season habits for deer and rabbits (don’t count on rut patterns in deep winter)
  • Find the drafts/leaks in buildings, and deal with them (Draft/leak hint: When it’s snowy/icy, look for drips and steam in an otherwise socked-in section; warm air is getting out of those spots. Insulate or patch them.)

Our yards in winter and early spring can offer some of the best information about our properties. It’s worth taking a stroll and making some notes. There are also tasks that are just easier without insects, snakes and heavy growth, and while plants are dormant. Winter can still be a time to rest, but if we want our properties to be most efficient, a few outdoor tasks here and there can make a big difference in our planning.

Winter Property Assessments When we think of winter prepper project idea, we commonly think of things that can help us beat or evade the cold and less about spending time

Caching Supplies

There are numerous articles dealing with the caching of supplies on this and other Prepper sites. Within the context of abandoned mines, my principal suggestion is to evaluate caching locations that are not in the immediate vicinity of the mine workings. The simple reason as that recreationists visit abandoned mines and there is no point in setting a cache that can be discovered by people wandering around the site.

By most definitions, abandoned mines are located in and surrounded by rugged terrain. That gives you virtually limitless ways to conceal a cache that no one will ever find. Take your time. Plan the cache with an eye toward a secure location. One suggestion would be to set the cache some distance beyond the primary point of interest. Most casual visitors are only interested in seeing and photographing a historic mine site; then they are on their way. Mines that are more distant from well traveled 2-tracks, or that are not visible will be less frequently visited.

Planning Considerations

Out of 400 nearby mines, there are twelve sites on my preferred-use list if circumstances require that I abandon my home. A far greater number are ‘workable,’ but not desirable. Even where the use of 4WD is necessary, I can reach any of these twelve locations without consuming more than a quarter-tank of gas. Some are more difficult to reach than others. Some offer superior defensive advantages. Some are more suitable for long term occupation than others. Nevertheless, I would not hesitate to use any of these sites should the situation require it.

It is my choice to stockpile fuel reserves on my property, rather than near the mine site. Simply stated, they are all viable and I cannot predict which of these dozen sites I would want to use in a SHTF situation. I’m fortunate because I have a multitude of choices, but it is impractical for me to preposition fuel and other supplies at or near that many sites. Your options may be better or poorer than mine.

Here are some suggestions that you should factor into your planning:

  1. It is reasonable to assume that you will not be the only one to discover a prospective mine site retreat. You should, therefore, assess several sites.
  2. He who controls the high ground controls the land, especially in a SHTF situation. If the first to arrive is not you, then you will need an alternate location that is still within your driving range.
  3. The drive distance from your home to an abandoned mine may be considerably greater than mine, and the difficulty in reaching your site may be compounded by circumstances that are entirely unpredictable. Effective resource planning dictates that you include considerations for fuel and other basic needs along the way, not just at your chosen destination.
  4. A secure retreat does not necessarily require extensive space. Mine adits may be only a few feet wide, but can still provide hundreds of linear feet of usable area for a group.
  5. Planning factors for situating a camp site within an adit should consider the availability of light. Mines interiors are dark places.
    1. You want to be able to utilize as much ambient light as possible during daytime hours. Thus, an east or west facing adit will maximize the availability of light. South facing adits may be favorable during winter periods.
    2. You will want to be forward toward the entrance during daylight hours.
    3. Regardless of the time of day, cooking and warming fires should be set as far back from the entrance as is practical.


This adit is entirely unusable. A lower level stope has penetrated the adit floor from below and ore car tracks obstruct any possible use of the floor. Discussion of other characteristics are irrelevant.

The thought here is that you need to evaluate the availability of morning and afternoon light, the direction and flow of air in the adit, as well as the structural space where fires might be best located.

  1. Adits that have no air flow will require that your fires be located at, or outside of, the entrance. Depending on the terrain, you may still be able to use these sites. (More on that subject in the section that follows.) An example would be an adit that is situated near a wash, but that is surrounded by steep terrain.
  2. Campfire resources are generally abundant in the mountainous regions of the western U.S. Whether the fuel source is pine at higher elevations, creosote or mesquite at lower elevations, you should be able to locate fuel sources within a short distance of the adit. This has several practical applications. Foremost, it allows you to conserve your use of propane or other gas canisters.  Second, the adit enables you to collect and store a significant volume of fuel that can be kept dry and hidden from view. Regardless of your resources, plan to keep your fires as small and concealed as possible. Avoid wood that generates a lot of smoke. If you are not familiar with fuel resources in the area, you may have to experiment.
  3. Determine a safe way to dispose of ash and residue from cooking and warming fires. Do not plan to use an interior shaft for disposal. Shafts, winzes and stopes often contain very significant amounts of timber, and careless disposal of coals and embers can ignite a fire that could burn for weeks. Remember, ventilated mines will have a constant (and sometimes substantial) flow of air, and fire loves oxygen. Visualize a brilliant cone of flame erupting from a shaft and a column of smoke that is visible from great distance. I guarantee you this will get the attention of any functioning government in your area.
  4. Expect that your source of water will be some distance from the adit. Supplying your daily water needs will likely require transporting containers on a daily basis, either on foot or by use of a vehicle, between the source and the camp. Obviously, large groups consume more water, thereby increasing the frequency and/or volume needed for resupply. Anticipate your need for water based upon the group size, as well as the risk of exposure while you are replenishing your needs.
  5. Frequent resupply trips will increase your exposure. What if an unknown group suddenly sets camp next to the source? Can you wait them out?
  6. Anticipate that all sources of water will require some from of treatment to kill or remove harmful organisms.
  7. Even short term occupation of a mine adit requires that you consider the need for sanitation. You will need to provide some means of accommodating and disposing of human waste. A shaft or winze may be a tempting place and convenient place to dump bagged waste, but avoid it if at all possible. Bury your waste away from the adit. In any case, will want to have a portable potty somewhere in your camp. Enough said.
  8. As the accompanying photos show, most adits will have moderate to extensive debris in the form of dirt, rocks, trash and (possibly) timbers inside the passage. If you plan to occupy your chosen site for any length of time, you should plan to clean out the area where you will set camp. Constant back and forth movement will kick up dust and other irritants that will settle on your sleeping and cooking areas. In any case, a clean camp is good for morale. You will probably have the option of deciding where you want to move dirt and debris; that is, outside the entrance or farther back in the adit. It’s your choice. Prevailing air flow (inward or outward) may help that decision. If there is an interior winze or shaft, I would opt for dumping it to a lower level. The obvious reason is that it reduces your outside activity and minimizes the risk of detection. Resist any temptation to clean out the entrance of an adit once you have selected it, but before it becomes necessary to occupy it. Leave it in its original state. There is no point in making ‘your’ adit more attractive and easier to occupy by someone else. Don’t forget to bring a broom.


This photo illustrates another adit that is unsafe to enter. Note the collapsed post and cave in. The structural integrity of this mine is zero.

Locating and Evaluating a Mine Adit Site

There are several factors for determining whether any mine site is suitable for your needs. I have compartmentalized them into a series of S’s, followed by bullet notations.   These lists are by no means comprehensive. They represent my best effort for a geographic environment that I am most familiar with. Hopefully, they will be useful and inspire you to consider issues that are unique to the locale that you would consider.

Evaluating Seclusion

  1. Remote, secluded mines are less likely to be visited.
  2. The less well known they are, the less likely that someone will view them as desirable SHTF retreats.
  3. Mine sites that are unnamed on geological survey maps are generally preferable to named mines that were historically significant.
  4. Other, more secluded mine workings will be located near sites that are shown on maps. Many prospect adits are not recorded on current or older versions of maps.
  5. Mine sites that are protected (by favorable terrain features) from long distance surveillance are desirable.   In other words, your candidate site may not be visible at close range due to ground slope or intervening vegetation, but can be seen from two or three miles away at a high point, such as a mountain pass.
  6. A corollary to the above statement is that elevated mine sites may be detectable from some distance, but the trail leading to them may not be obvious at the viewer’s angle and distance. The point is that as long as there is no easily discernible way to reach an abandoned mine site, the risk of compromise may remain low. You must evaluate these potential exposures.
  7. Mine sites that are situated low on hillsides, or that are surrounded by steep, unapproachable ground can offer ideal seclusion, but may provide little advance warning of an approaching vehicle or group.
  8. In desert areas, concealment is easier to achieve where mines are located near washes. The simple reason is that they can support large stands of dense brush and trees.

This photo illustrates how an adit cans be used for camping. Note that the adit is not particularly wide and the ceiling is of moderate height. You can more through the area without crouching.

Evaluating Security

  1. Do not rely on the mine adit as your sole defense point.
  2. Set surveillance LP/OP points that maximize your awareness of approaching vehicles or groups.
  3. Select a site that is defensible. Evaluate and select defensive positions that can be reached day or night.
  4. If you cannot maintain around the clock surveillance, make the approach to your site as difficult as possible.
  5. If you have the means, utilize motion detection and/or noise producing trip-wire devices on trails leading to the adit.
  6. Utilize two-way radios for communication between the adit LP/OP sites and other outlying security points, but avoid standard GMRS/FRS frequencies that are available on common walkie-talkies.       Use the minimum wattage needed to maintain reliable communication. Programmable dual band (VHF/UHF) radios are available at a modest cost and feature selectable power output and switchable antennas. Equipment of this type enables you to have your own SHTF frequencies.
  7. When using radios, do not give specific geographic references that would help someone locate your site.
  8. Minimize outside activity.
  9. In the Southwest, 2-track roads and trails are frequently forced to use long stretches of dry washes. These serve to confine approaching vehicles.
  10. Empty food cans that are suspended on a line can be used as a type of trip wire warning system.  This may be a useful tool that alerts you to approaching foot traffic. Be innovative and put resources to their best use, even if you would ordinarily think of it as trash.
  11. An important factor that bears on site security is having a place to conceal your vehicles. You will want them nearby and visible to you, but not to others. Anything you can do that breaks up the profile and that masks color and reflective components is useful. The solution may require one or more of the following options:
    1. Cover the entire vehicle with dark blankets, topped off with camouflage netting or parachute material.
    2. Park next to or behind an existing structure, such as the wall of a building.
    3. Clear an area in thick brush that is large enough to park.

Frankly, it is advisable to use option ‘a’ plus whatever other means are at your disposal. Shiny reflective surfaces, such as chrome bumpers, wheels and windshields can reveal the vehicle’s location, even at night. Your objective is to be a hole in the dark.

Evaluating Sustainability

  1. No site, regardless how physically secure it may be, can fulfill your needs without water and food.
  2. Sources of water that I have found near mine sites include:
    1. Springs
    2. Surface streams
    3. Livestock water tanks (earthen water catchments) that are seasonal
    4. Shallow wells at the mine site (frequently with a rock or concrete collar)
    5. Working windmills that provide continuous flow to a metal tank or cistern
    6. Wildlife water catchments, sometimes referred to as “guzzlers,” may have been established by the BLM or a state Game and Fish agency in some areas near mines. Some will be marked on geological survey maps if they predate publication.
  3. Hunting can supplement your food stocks, but wild game can be rapidly depleted. Sustained human activity in any area will cause game to disperse.
  4. As you evaluate various mine sites and the natural resources that are locally available, you will inevitably be forced to determine two vital facts:
    1. What size group is needed to provide essential security, food and water gathering, and camp maintenance? Will the necessary sustaining activities at this location require more people than you can muster?
    2. What size group will the adit and local resources support? Will the adit accommodate 20 people, yet locally available water is only sufficient to sustain half that number?

These are tough questions, but they must be answered with absolute objectivity.

Evaluating Safety

  1. Adits that are at or very near the margins of a wash may be subject to episodic flooding. The presence of silt on the mine floor will confirm whether flooding has occurred in the past.
  2. Determine if there is plant debris high up in trees or brush near the adit entrance. This will provide a good indication of the high water mark from the most recent storm.
  3. Narrow washes that pass through steep terrain can experience catastrophic flows, particularly during monsoonal storms in the Southwest. I have found high water marks that were 10 feet or more above the top of an adit.
  4. Mine entrances that have the appearance of partial collapse are inherently unsafe and will be beyond your ability to repair.
  5. Before entering the adit, examine the area above the entrance. Is there loose material that could fall onto the mine opening?
  6. Assessing the safety of an adit will require that you illuminate and thoroughly examine the entire interior structure.
    1. Use high lumen flashlights and a continuous ‘look-ahead’ method so that you are constantly aware of what is in front of you.
    2. Begin your evaluation by determining if there is any wildlife present.
    3. Next, study the floor to identify open winzes, shafts or stopes that penetrate the adit floor.
    4. Determine if the floor is wet.
    5. Repeat this process by thoroughly examining the ceiling of the adit. Identify any raises that lead to an upper level. Assess the character of the rock. Is it highly fractured? Are there large sagging boulders extending downward from the ceiling?
    6. Evaluate all timber structures (posts and caps) in the interior. Wet or collapsed timbers should be viewed as an indicator of risk.
  7. The absence of posts and caps in an adit is an indicator of the stability of the country rock. Adits that have many posts and caps, or that are covered with a roof of planking suggest a high degree of overhead sloughing.

Concluding Thoughts

Over the course of 30+ years of exploration, I have lost count of the number of mines that I’ve entered. I have also lost count of the number that I refused to enter for safety reasons. The notion of entering an abandoned mine – much less living in one for a period of time – may be intimidating to many people. They are dark and mysterious places where unseen dangers (real or imagined) may lurk. It is unfamiliar ground to the vast majority of people. Nevertheless, the contemplation of extreme events, particularly if they threaten your survival, can challenge you to examine options that you would not ordinarily consider.

As a Prepper, you contemplate potential risks and choose to deal with them in a proactive manner. You understand that mere reaction is often inadequate and that it is never preventative.

Hopefully, this article series has provided you with information and tools that you had not previously thought about. I cannot say that using an adit will work for you, but this primmer can get you started on a safety-based course of study and evaluation that can give you the answers you seek.

I welcome in your observations and questions on this topic. Drop me a note any time.

Caching Supplies There are numerous articles dealing with the caching of supplies on this and other Prepper sites. Within the context of abandoned mines, my principal suggestion is to evaluate caching locations

What lured the early settlers and adventure seekers to the vast territory of the American West? In a word: Gold. Early exploitation of minerals and ores were greatly hampered by the lack of economical milling and transportation resources. Unprocessed ore was frequently transported overland in pack trains to seaport locations like San Francisco. From there, the ore might have been shipped around the horn to a mill on the east coast. As the railroad system expanded in the 1870’s and beyond, the extraction of less valuable metals, such as silver, copper and manganese became more viable endeavors. Eastern industrialists and speculators became more willing to invest in prospects – often without proper due diligence. Mining activity exploded and, as a result, there are many thousands of abandoned mines in the West and Southwest today.

How could that bit of history factor into your planning and preparation if you have to deal with a SHTF scenario? Let’s say you made the decision to shelter in place, but now your regional or area security has deteriorated, and you need to move yourself or family to a safer location; if only for a few days or weeks? What if you don’t have that ideal piece of land in the mountains with a lake or trout stream to retreat to? You have an exigent need to abandon your preferred location because it is about to be compromised.

The answer could be a specific type of mine structure known as an adit.

Within a one hour driving radius of my home there are more than four hundred abandoned hard rock mines. That may seem like a startling statistic, but historical records indicate that my state has more than 100,000 mines dating from the 1850’s through the depression era of the 1930’s. Some of these were good producers of ore and have extensive underground workings. Others never got beyond the ‘prospect’ stage of development, yet still managed to establish one or more tunnels, adits, shafts, drifts and/or stopes. Some of them have been destructively collapsed by the BLM in recent time, others are unsafe or possess unsuitable characteristics; but many surviving mines can be used for temporary occupation if you know where they are and have the means to get to them.

Mine entrances may be elevated on a hillside or at lower levels, near a wash or creek. In this example, the adit is at the base of a steep hill, but is several feet above a wide wash.

A cursory examination of geological survey maps in any western state will give you an appreciation for the number of hard rock mines (named or otherwise) that were developed in the west. Map symbols that denote the location of shafts, adits and tunnels provide only a partial census of mining activity. In other words, the number of mine workings greatly exceeds what you will find on any map or reference site. I should add that older geological survey maps tend to provide better information than ‘newer’ editions.

A Serious Word of Caution:

I would be completely remiss if I did not warn you that abandoned mines should be treated with utmost caution, at all times. If you are like the vast majority of people, you will have no working knowledge of underground mines. Frankly, the act of reckless exploration makes you the primary source of risk to yourself and others. People die in abandoned mines because they were uninformed, ignored indicators that would have been obvious to an experienced individual, or they were reckless thrill seekers.

This article is emphatically not about exploring deep subterranean passages or rappelling down vertical shafts; those are activities that, at best, should be left to experts or avoided entirely. Rather, this article attempts to provide you with an option for the use of a specific mine feature; one that bears no practical risk to the safety of you or your family if you use good judgment.

Stay clear of mines with vertical or incline/decline shaft entrances. Aside from the fact that they are not practical selections for shelter, many shafts are flooded at some depth. Moreover, shafts that have no protective collar at the opening may have loose, slippery material. Mine tunnels and adits frequently have vertical passages in the interior that connect to lower workings. Some of these may be hundreds of feet deep. Some adits may have been purposely collapsed, or the entrance may have been rendered unsafe by the passage of time.

This adit is about 20 feet in length and is located on the margin of a narrow wash. Note the presence of silt on the floor.

A good GPS unit could help you locate your hidden caches of supplies that you store for a SHTF scenario.

Determining whether a mine is ‘safe’ requires preparatory research, on site investigation and a thoughtful evaluation of its construction and current state, as well as an assessment of the resources that may be locally available. There are mines that I will have no qualms about using because I’ve studied them; but there are many that I would not enter for any conceivable reason. In the final analysis, you must determine whether a mine is safe to use and whether it would meet your temporary security needs. Importantly, you cannot wait until SHTF to begin thinking about the selection of an adit.

Basic Terminology

Listed below are a few important terms used to properly identify pertinent aspects of a mine. These are taken from the American Geological Institute.

  1. Adit – A horizontal mine passage driven in from the surface. Adits have a single external entrance point, but may connect to other interior mine workings, such as shafts. This is in contrast to a tunnel, which has openings to the surface at each end.
  2. Country Rock – The ground material around (surrounding) an ore body. In this case, ‘ground’ does not mean dirt. It refers to rock, such as basalt or granite.
  3. Crosscut – A horizontal underground passage driven perpendicular to the strike of an ore body. A crosscut does not have openings to the surface of the mine.
  4. Drift – Usually a horizontal underground mine passage driven parallel to the strike of an ore body.
  5. Dump – Waste rock removed by mining and deposited on the surface.
  6. Incline/Decline – A mine passage driven from the surface at an upward or downward angle from horizontal.
  7. Manway – A vertical underground passage with ladder for upward or downward movement of miners. This could be a winze, raise or shaft.
  8. Muck – Waste rock that is sometimes stacked internally or used to fill stopes.
  9. Pillar – Usually a column of ore left to support the roof in a stope (or room) or to support the country rock above an ore body.
  10. Post – A vertical support member (often timber) used to support a cap (often timber) that in turn supports the roof.
  11. Raise – An underground mine opening driven upward from below to access an overlying ore body or to provide access to an upper level.
  12. Shaft – A vertical mine passage opening to the surface for removal of waste rock, ore or entry of miners.
  13. Stope – An underground cavity left by removal of ore above or below a working level.
  14. Strike – The linear orientation of an ore body relative to the surface. For example, a north-south strike.
  15. Tailings – The finely crushed material left after a milling operation, not the same as a dump, dump rock or waste rock.
  16. Tunnel – A horizontal underground mine passage open to the surface at both ends.
  17. Winze – An underground mine opening driven downward from inside to access an ore body below, or to access a lower level of the mine.

There are many other terms that describe various characteristics of a hard rock mine, but these provide a basic description of features that are relevant to the assessment of a mine.

This adit contains an interior shaft with one or more lower levels. The pipe transported water from a sump area to the outside. Note also the ore car rails.

Reasons Why Mine Adits Might Be Considered

We’ve already established that your primary safe site is in jeopardy of being compromised. We can assume that you have no other quickly accessible and secure fall back location. So, what makes certain types of hard rock mines a suitable place of retreat?

A short list of benefits includes:

    1. Adits are horizontal at the point of entry and possess the general characteristic of having a flat floor. There may be rubble that needs to be removed, but the reason it is flat is because it served the needs of the miner. For example, there may have been ore cars that were pulled by mules, a mechanical winch, or engine at one time.       Mine scavengers will have removed most rails and ore cars long ago.
    2. Frequently, the entrances of adits were situated at a point that facilitated the easiest and most economical way to remove waste rock and ore bearing material from interior mine workings, such as shafts and stopes. That means the adit may be located at or near the same level as the operations that occurred outside. Moreover, the adit may have provided a convenient path for laying electrical cables, drainage pipes and air hoses. Because of this, adits may be relatively wide (eight feet or more).
    3. Adits that date from territorial days are frequently large enough to permit you to stand fully erect. Mines that date to the Spanish colonial era (1500’s to 1700’s) were dug by slave labor and are more likely to be very narrow, cramped passages.
    4. Many mines in remote areas are still accessible via 2-track or 4WD trails. You might have to hike the last couple of hundred yards, but the mine trail is still there. This means that your vehicle can be kept close to (and in view of) the mine entrance.
    5. In the mountainous regions of the West, adits are generally located on what I would call “steep ground.” That is, they are on the side of a hill or mountain. Importantly, that means it has some degree of elevation and a defensive field of view.
    6. The temperature in the interior of an adit is pretty stable. If you are several feet inside the entrance, the temperature may not fluctuate more than a few degrees during a 24 hour period. I have been deep inside some adits where the temperature was quite warm.
    7. It may be raining or snowing outside, but you will be dry.
    8. Many hard rock mines have small, lateral ventilation tunnels. These provide a flow of air that moves at a steady rate. If the mine has additional adits, tunnels or shafts, the flow of air will be in the direction of least resistance. This means that you can have cooking or warming fires inside the mine and the smoke will be dispersed away from you. As long as your fires are not at the mine entrance, no one outside would be able to see the light. The airflow would carry and disperse smoke to other surface openings, making it hard to detect (especially at night).
    9. Successful mines (those that produced ore) generally had an area outside the adit(s) and shafts that accommodated workshops, housing, and a place for dumping waste rock and mine tailings. Although the buildings may be long gone, it means there could be space to set up a bivouac or open air camp (but carefully consider whether you would want that type of exposure).
    10. Successful mines generally had a reliable source of water. Whether it was a creek-fed well or one powered by a windmill, there will be evidence of it. Just remember that in many areas of the arid southwest, water may be below ground level.
    11. Contrary to most imaginings, the vast majority of hard rock mines were not very large. In other words, there is a good chance that the adit might not extend into the mountainside more than 100 feet. I’ve visited quite a few prospects that are no more than 40 feet in length.       Once the prospector determined there was no economically viable ore vein, he abandoned it. Simple adits (those without additional shafts or interior working levels) are easy to evaluate.
    12. Even at relatively shallow depths, no one approaching the entrance of an adit will be able to see you. You have the defensive advantage.
    13. Many abandoned mines in the inter-mountain west are often located on federal or state land that is leased by ranchers for grazing. Cattle need water, so this means that operating wells may be located nearby.
    14. Some abandoned mines will have scrap material, including pipes, sheet metal, angle iron, nails and timbers that can be used for a variety of purposes.
    15. Depending on the depth and bearing of the ore body, successful hard rock mines often had more than one adit to reach the ore strike. While one adit might not be satisfactory (or safe) for use, there may be another suitable entrance nearby.
    16. Adits will sometimes have drifts that branch off in the direction of the strike. Storage or workshop areas may also have been dug into the country rock, providing added space on the same level.

This photo shows an area of the mine where waste rock (muck) was stacked in a stope. It illustrates that interior spaces can be used for storage of supplies, but may require using a portion of the mine that is on a lower level. If it can be reached via a short winze, you may consider using an extending metal ladder. Similar spaces may be available in adits or in drifts that branch off from an adit.

The Downside:

There are a lot of serious reasons to reject a mine site that you might be considering as a potential fall-back location. Here are a few:

  1. I’ve intensely studied more than 4,000 mines and, as noted, there are more than 400 within a one hour driving radius of my home. My definition of “suitable” and “ideal” may not match yours. There are several locations that I would be willing to use if the need arose, but their selection is based upon my personal knowledge of local terrain, water and game resources, remoteness and accessibility. The point is that you cannot simply select a mine site without having some working knowledge of the surrounding environment. Failure to do so is an invitation to disaster.
  2. A wet adit floor could mean that interior shafts and lower levels have become entirely filled with water. The mine may have flooded to a point that the water has reached the level of the adit and is now flowing to the outside.  It may be possible to set a camp outside of the mine entrance, but your use of the adit is limited to purely defensive (bunker) purposes. This also means that there is probably a flooded shaft somewhere beyond the entrance that you cannot see.
  3. Many adits have shafts and winzes that lead to lower portions of the mine and some of them can be hundreds of feet deep. If you are contemplating the use of a mine that contains these features, you absolutely must also consider the safety of your family. My earnest recommendation is to keep looking. You might feel comfortable sleeping in front a shaft, but do you want a child anywhere near one?
  4. There are a variety of wild animals that favor the safety and seclusion of a mine. I once encountered a hibernating black bear in an adit while backpacking in high country wilderness, and I’ve found rattlesnakes in more than one mine entrance. The point is that you may have to clear an adit of wild beasts, even though you didn’t find any the first time that you inspected it. Some mines will provide seasonal or permanent habitats for bats. I am a great fan of bats, but I would avoid mines occupied by them for health reasons.
  5. Selecting a mine adit that is near a well traveled 2-track road may compromise your security. Remember – other people may also be seeking the shelter and security of a mine. If your objective is safety through seclusion, don’t opt for mines that are situated near frequently travelled roads.
  6. Adits that contain wet timbers (posts and caps) may indicate water seepage through seams and fractures in the overhead rock.
  7. Collapsed posts and caps are an indicator that the roof of the adit may be unstable.
  8. Adits that were dug into highly fractured rock may slough material from overhead.
  9. Shafts and inclines/declines with ore car tracks and/or ladders constructed from timber should be avoided. These structures could easily be 70 to 150 years old. They may have been well built at the time of construction and they may appear to be in good condition, but no longer possess structural integrity.   All it would take is one loose or weak rung on a ladder to send you plunging down a shaft.
  10. Mines with incline (upward sloping) or decline (downward sloping) entrances have both practical and tactical disadvantages, even if the rate of slope is modest. In such environments, footing is less secure, moving loads into or out of the entrance are more difficult, and your angle of view from within the adit is either pointing toward the sky or down at the ground.

Accessibility

Generally speaking, abandoned mines are located in terrain that is not favorable to the use of towed trailers or motor homes, and many of the mines I have studied are not accessible to passenger cars (including some with all wheel drive) because of low clearance. In other words, you will need high clearance four wheel drive trucks to reach most mines. There are even a few that are best reached by OHV type vehicles, at least within the last mile or so. If you are a “flat-lander”, some of these trails may be intimidating. Heavy storms may lead to rock fall, wash-outs or minor land slides that weren’t there last time you used the trail. When in doubt, it is best to walk the road and clear any debris that might damage your vehicle. Take your time. Be safe.

Roads leading into mining areas may not be maintained by federal or state agencies. In some cases, 2-track roads are only maintained by local ranchers on an as needed basis, even though they are on ‘federal’ land.

Some mines will be located on patented, private land, but that doesn’t necessarily mean that the owner is present. While you are in the scouting and research phase you may want to determine whether the location that you favor is sitting on someone’s private (but otherwise unoccupied) property. In my own research I have located several abandoned mines that are on patented parcels in remote locations. I’ve corresponded with or spoken to some of these land owners and they are all good people. If you establish a fallback site that happens to be on private land, respect their property rights. Do no harm or damage.

Primary all weather roads on National Forests are pretty reliable; however, there is no guarantee that the Forest Service will allow access to forests during a SHTF incident – particularly if martial law has been declared. When you consider that the Forest Service is bent on preventing citizen access to our forests during ‘normal’ times, you would be wise to anticipate complete closure when SHTF. If the intended fall back site requires use of a Forest Service road, I would recommend that you find a ‘back door’ alternate route. If no such route exists, find another mine site.

If you are compelled to use a remote abandoned mine then you are beyond the stage of worrying about brush marks on your vehicle. A lot of mine trails have become overgrown with brush over the decades, which reduces the width of the trail. It will result in some scratches. My advice: Get over it. While we’re on that subject, I would also suggest that you resist the urge to clear the trail. Freshly cut brush and tree limbs are a dead giveaway that someone is using the road. It would be counter productive to leave your calling card where the trail branches off from a frequently traveled 2-track road. At minimum, leave the initial portion of the trail in its native state. You should also consider brushing out any tire tracks that indicate where you turned off.

You may want to consider creating some type of temporary roadblock on the trail leading to the mine site. Vehicles that are already constrained by narrow trails, thick brush or trees will have a more difficult time getting around an obstacle that you have placed on the trail. Anything that impedes or slows down approaching traffic will give you a tactical advantage. Just remember – you will have to clear the roadblock on your way out.

The term “accessibility” can be stretched to include your ability to depart from the fall back site once it is no longer needed. In this context, accessibility implies that you have enough fuel to go both directions. These sites do not come with convenience markets or gas stations, so you will need to bring or pre-position the fuel and supplies needed when you are ready to exfil.

It should go without saying that once you have established your site you should remain in place and limit movement as much as possible. Vehicular movement can be spotted from a distance of several miles when an observer has favorable elevation. The glint from your windshield will alert others to your presence. Button up your site and stay put.

Google Earth can be an invaluable research tool to help you locate and assess the terrain and resources near a mine site.

What lured the early settlers and adventure seekers to the vast territory of the American West? In a word: Gold. Early exploitation of minerals and ores were greatly hampered by