A ghillie suit is something I have been meaning to buy forever. When it comes to camouflage for hunting or sneaking up on people, there isn’t much better if you are using this the right way, but I never pulled the trigger so to speak on any of the pre-made varieties I have come across. I was watching Doomsday Preppers last night and one of the small nuggets of usefulness I was able to pull out of last nights show was how to make a ghillie suit yourself.
The steps below are fairly easy and we even found a video that shows you everything you need. If you don’t want to do this yourself though and still prefer to buy a ghillie suit already assembled, you can do that instead and get into the woods faster. Either way, a ghillie suit is a great addition to your prepping supplies if staying hidden is important.
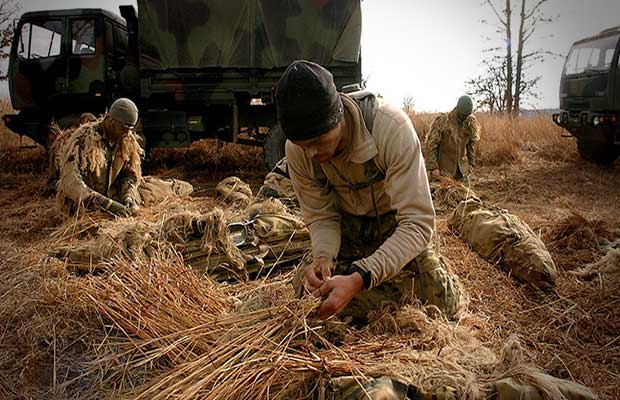
Commercial two-dimensional camouflage is great for blending into a variety of backgrounds, but it does nothing to offset your most game-spooking signature: your silhouette. Veteran hiders—military snipers, undercover surveillants, and hard-core hunters among them—rely on 3-D camouflage, entire suits made of billowy material that blurs their outline and allows them to disappear in plain sight. These suits are derived from those created by early Scottish game keepers, called ghillies. Make your own in one day with an old jacket, burlap, netting, dental floss, sewing needles, and glue.
Materials you will need:
- Used set of Camoflauge BDU’s
- Jute or burlap strips
- Netting
- Shoe Goo or Zip Ties
Step 1 – Add the Netting
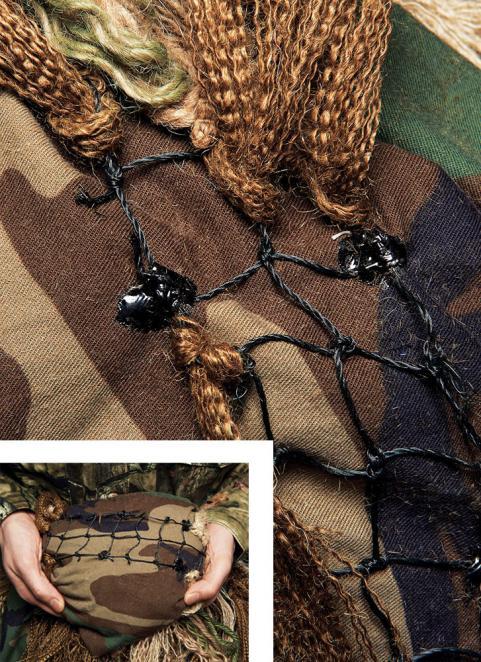
The perfect base is a used BDU uniform jacket, available at military surplus stores. Buy a roll of replacement fishing net and cut it into strips at least two squares wide. Using dental floss, sew these strips down the sleeves and the front of the jacket, leaving 6 to 8 inches between strips. Then seal the stitches with shoe glue.
Step 2 – Ready the Burlap
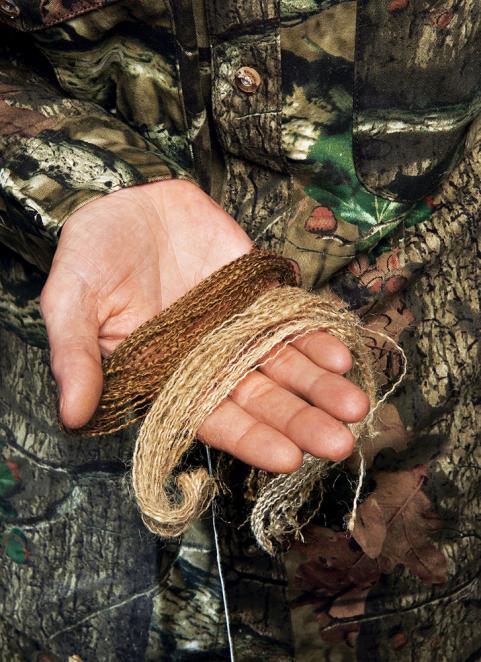
A traditional ghillie suit is covered by strands of burlap. You can get material from bulk coffee bags, but any burlap bag or roll of netting will work. You need between 4 and 8 pounds of material for each suit.
If you can’t find burlap, buy braided jute twine in natural colors and separate each braid into individual fibers.
Step 3 – Separate the Strands
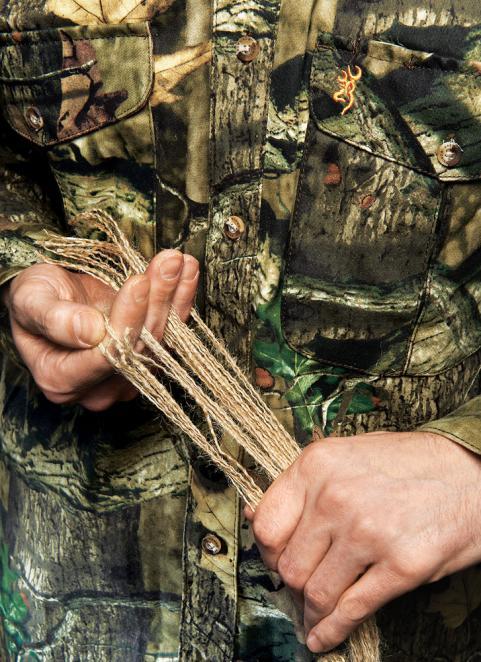
Unraveling the burlap or jute material into individual strands is the most time-consuming part of making the suit. Cut strips of burlap and then unravel the cross-linked fibers and separate them into strands of equal length. The longer strands will go on the sleeves and the front of the suit. Shorter strands will overlap down the back.
 Separate the strands
Step 4 – Tie in the Burlap
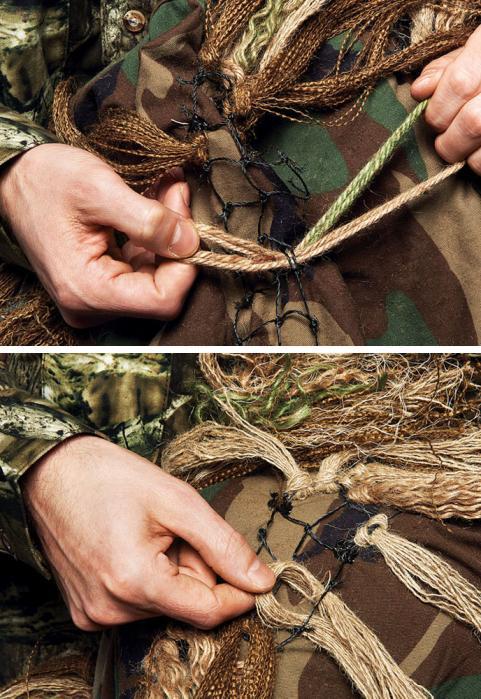
Now you’re ready to tie the strands of burlap or jute into the netting. Take 10 to 15 strands and fold the bunch in half, then push the loop under each vertical square of netting. Draw the hanging ends of the bunch through the loop and pull tight. Start at the bottom and work upward, ensuring that each row overlaps the one beneath it.
Tie In the burlap
There are also a ton of videos on YouTube about how to make a ghillie suit and this one is pretty basic, but shows the steps nicely and you get to enjoy a rocking song to go with it.
Other self-sufficiency and preparedness solutions recommended for you:
The vital self-sufficiency lessons our great grand-fathers left us
Knowledge to survive any medical crisis situation
Liberal’s hidden agenda: more than just your guns
Build yourself the only unlimited water source you’ll ever need
4 Important Forgotten Skills used by our Ancestors that can help you in any crisis


