Work Smarter Not Harder – In The Garden

Sometimes in the preparedness folds, we really get wrapped around axles. We have so much that we’re learning and trying to do, and we’re regularly doing it on a budget – which is just one more thing that circles around our heads and beats us up.

We can limit some of the pains of preparedness by changing how we look at things, but also how we do things. Gardening and larger-scale growing is routinely on our to-do list. It’s something that’s going to come as a shock for those who don’t practice ahead of time, no matter how many tricks get applied. However, we can save some time and stress on our bodies with a few low-cost and low-skill tricks and tools, and see increased yields. Bigger yields means lower dinner costs and potentially some increased food storage, letting us expand our preparedness in other ways.

Here are a handful of quickie, usually highly inexpensive – easy garden hacks to save time, money and labor. As you read them, don’t forget: Paper products are compostable.

Mulch

Mulch makes life easier.

Mulch can be straw or wood chips, lightly soiled animal litter, mown or whole leaves, the tips of branches we’re pruning, or shredded white paper. Shredded paper will settle into a mat that makes it tough for weeds, but “loose” mulch routinely does better with a weed suppression barrier down first. We can use newsprint, cardboard, or phone book pages as a weed suppressor and to keep small plants free of dirt kicked up by rain. We won’t get the same moisture-holding and soil aeration improvements, we will still have to weed some, especially if we already have beds that are weed prone, but it lessens our time spent sitting or crouched and bent over.

Mulch lessens the pains of gardening. We don’t weed as much, our plants do better, and we don’t have to water as much.

In some forms of mulch gardening, the mulch stays right there year-round. Some styles use a mulch that in hot, damp climates rots enough during the off-season and is tilled in that winter or early in spring. In others, we scoot aside just enough to drop seeds or transplants in during succession plantings, add amendments like cured manure or compost or pH-raising pine by raking it just into or over the surface, and add mulch more slowly.

Plastic bottles

olla-drip-irrigators-easiest-way-to-do-it-plantcaretoday_com

Sub-irrigated planters for buckets and storage tubs and conventional planters can be made using bottles for the tubes instead of aquarium or garden hoses or PVC.

We don’t store water or foods in milk jugs because they’re porous and can leach previous content out slowly, but they have their place among soda and juice bottles in the garden.

Various bottles can be used to make mini-greenhouses, cloches, scoops, and seed spreaders, as well as mouse and rat traps (2Ls can work for small squirrels and chipmunks, too, or slow them down enough for the garden terriers to get there). They’re great for vertical strawberry and herb and lettuce towers. We can use them to keep cord from tangling, and punch various holes to use for spreading amendments and treatments. Whack them in half, use sourdough starter and water or beer, and they catch horrific numbers of slugs.

For time savers and back savers, though, bottles really excel at helping us water.

Sub-irrigated planters for buckets and storage tubs and conventional planters can be made using bottles for the tubes instead of aquarium or garden hoses or PVC.

Whether we grow in raised beds or tilled rows, mulched beds or multi-layered hugel or lasagna beds, we can use bottles as a spin on olla irrigation, too. We can drill holes all over, as shown in the graphic from http://plantcaretoday.com/soda-bottle-drip-feeder-for-vegetables.html, bury it near our plants, and use a hose to fill it quickly. A similar version plants the bottle cap-down, with holes drilled in the cap and the sloping neck, and the inverted bottom cut entirely or with just enough remaining to make a flap. Those are even easier and faster to fill, with less aim needed.

The water from those will then sink out slowly, watering deep at the roots and watering our plants, not the weeds or walkways. Less water is lost to evaporation, and we don’t have to deal with timers or hose connections, or PVC to avoid standing out there forever to slowly sink in water. We pour it in, fill it up, and move to the next. If it’s really hot and dry, we might need to repeat, but it’s a low-tech, low-expense way to work faster than standing there with a hose or moving hoses back and forth so we can mow.

Maybe that means less time on our feet overall, or maybe that lets us progress to our weeding and suckering or the next round of planting.

Seeding time – The Dibble

A dibble is basically just something that makes a hole for us. Usually, it’s a somewhat shallow hole and it’s usually intended for seeds but we can work with that. There are two general types, rolling or boards, although with leek dibbles (which work with any transplant), you walk around with a rake or double-handle tool poking your holes. Boards are typically set up with dowels that will poke holes, or come as cutouts and we use something to poke holes to our desired depths. Rolling dibbles tend to be drum or wheel style.

drum-or-rolling-dibbler-and-dibble-board-www_ncat_org

There are two general types, rolling or boards.

Plans are out there for dibblers that can run from almost nothing if you salvage parts or make minis out of coffee cans and 12” PVC or make a single, double- or triple row dibble wheel out of bikes from Craigslist. Drum styles can cost as much as $100-200 to make at home if you’re inclined to go that route instead. Some of the really fancy board dibblers even get marked in colors so one board can be used for spacings from 1” to 6”.

In no-till schemes where you drag a pointed hoe to clear a spot for seeds, dibble wheels tend to be handy. In tall raised beds and window boxes or trays, a board dibbler may be more beneficial.

Using dibbles at whatever scale we choose to lets us quickly mark the space for seeds and transplants. Even if we have to go back with a post hole digger for some of those transplants, time spent upright instead of crouched tends to make for happier backs.


Seeding time – Furrowing rake

A furrowing rake is the simple DIY result of adding tight, relatively stiff hose or PVC to an ordinary hay or garden rake, and using it to drag lines along a prepared bed. It’s typically done so that the extensions are movable, letting us go as tight as the 1-1.5” gaps of the rake tines out to the full 1-2’ width of that rake.

We can get as complex as we like, adding marker lines to tell us how deep we’re aiming, or using multiple depths so we can plant cutting salad greens in the shallowest grooves and have deeper grooves for our peas. We can drag it both down and across a bed to create a grid, with seeds going at the cross points.

rake-with-hose-for-seed-spacing-1-themarthablog-dot-com

A furrowing rake is the simple DIY result of adding tight, relatively stiff hose or PVC to an ordinary hay or garden rake, and using it to drag lines along a prepared bed.

Taking a few minutes to prep some moveable rods or pipes and lay out our grid – while standing – limits how much measuring we do while we’re bent or crouched, saving time and pain with a very quick and low-cost trick.

Seeding tubes or pipes

Dibbles and furrowing aren’t the only way to limit how much time we spend crouched over during seeding time. Even a congestion-planting scheme that calls for under-seeding doesn’t have to be done from a stool or our knees.

There are a couple of tiers of standing seeders for small plot growers, from this really simple version http://knowledgeweighsnothing.com/how-to-build-a-back-saving-pvc-corn-bean-seed-planter/ to this more advanced DIY https://thinmac.wordpress.com/a-homemade-seed-planter/.

Those aren’t really necessary, though. All you really need is a pipe smooth enough for seeds to roll through cleanly and sturdy enough to stand up straight.

If you want to work with tiny seeds as well as larger ones, maybe you lay on skinnier aquarium tubing to attach to a tool handle or yardstick (with rubber bands, even), and make yourself a pasteboard, tin-can or paper funnel and tape it in place. Use the back-end of a teaspoon or the little measuring spoon from somebody’s aquarium chemicals to fish out 2-5 seeds at a time.knowledgeweighsnothing-com-pvc-seed-hack

Seed tapes and mats

If we’re not digging the various seeding tubes, we can also use our rainy days or blistering hot days to make seed tapes out of strips of paper, or larger seed mats out of unfolded paper napkins and paper towels like these http://annieskitchengarden.blogspot.com/2009/09/september-22-2009-home-made-seed-mat.html & http://simple-green-frugal-co-op.blogspot.com/2009/12/construct-your-own-seed-mats.html . We don’t have to mix up some kind of funky glue like with some of the DIY-ers show. The toothpick dab of white Elmer’s the first site shows is water-soluble and works just fine.

When we’re ready to plant, we just zoom along exposing our soil or following her mix, lay out our mats, and cover them again. We can work in fair-sized lengths that we roll up around an empty tube and then just nudge along using a broom or hoe, or use a square or two at a time that lets us stagger our planting for a staggered harvest or interspersed companion flowers.

Seed mats and strips can also be made out of a single thickness of newspaper pages for larger seeds like peas and beans as well, although we’ll want to make a small 1/8” slit or poke a pencil-tip hole through to give our seeds a head start on busting through the heavier paper.

Since we’re planting 3-6” or as much as 8-12” apart in those cases, whether we do rows or congestion beds, working with a larger paper size makes sense. The newspaper sheet will decay over the season, but being thicker, it does offer a nice head start for our seeds over the weed seeds that may be lurking below. Being thicker, it also does better if the seed gets that head start of a slit.

No more removing gloves. No more exposing seed packets to dirt and moisture, or unfolding and refolding and sticking them in a pocket as we try to keep track of where exactly the tiny black seeds landed in our bed. And since they’re evenly spaced instead of scattered in lines and areas, it’s minutely easier to tell which tiny baby dicot we should be plucking when the weeds start – at least we can work quickly in some of the gaps.

In the garden – Avoid the crouch-ouch

So why the focus on things that improve soils without hauling lots of bales, limiting all the bending, limiting the bending and time we spend watering (or pumping water), collecting trash to make all kinds of weird contraptions in the garden? It’s not just me being a greenie, I promise.

Especially for seniors and those with nagging pains and injuries, the ability to work standing upright or from a chair without leaning over or reaching far can not only increase the joy of gardening, but in some cases go as far as making gardening possible again.

Arthritic hands, shaking from an injury or age, and loss of full motor function from an accident can make it frustrating and painful even to fetch out and drop a lima or pea, let alone broccoli and spinach, and unless they’re willing to just punch some holes in a baggy and shake, just forget about iceberg and romaine and strawberry spinach.

The ability to work slowly over winter or summer to prepare for spring and autumn leaf and root crops, the ability to use a tube and funnel, then shake or scoop seeds using something they can actually grip is enormous.

Reexamine how you garden

Even for those in good health or who just like to be out there, some simple and inexpensive DIY projects and some trash collection and reuse can save a lot of time.

That might make a difference in garden size now, while we’re working and balancing families. It will definitely make a difference later, when we’re depending on those gardens to feed us or add a little forkability and crunch to our starvation-staving diet (I loved that article, BTW).

Saving backs and creating easy-to-use tools can also let us involve our parents and kids a little more in some cases, giving them independence and sharing the satisfaction that comes from a meal we procured for ourselves. There’s little better in life than seeing that pride returned to your parents and grandparents, or watching it bloom in your children.

It also sucks to fail, especially when we have a lot of time invested in something.

Water reservoirs, reduced weed competition, proper seeding coverage, and workload-friendly seeding methods can help increase our rate of success, which encourages us to do it again.

Work Smarter Not Harder – In The Garden

Surviving on the road is something every prepper dreads. But, it’s necessary in case of a major disaster or catastrophe that causes you to evacuate your home. In 2004, a record-breaking tsunami struck South Asia, killing more than 300,000 people. The next year, we witnessed the destruction of New Orleans caused by Hurricane Katrina. Then, there were the Southern California wildfires, recorded as the worst in US history. These wildfires caused the evacuation of more than one million people.

During all of these disasters, no one had access to local utility services. Stores were shut-down or ran out of emergency supplies, including food and water. If this happens to you, it’s crucial to your family’s survival to be prepared to survive on the road. So, here’s a list of ten items you need to survive on the road.

1) Bottled Water – You know just how important clean water is while on the road. Make sure your bottled water comes in “food grade” storage containers. Experts advise storing one gallon of water, per person, per day.

2) Procurement Supplies – However, when on the road, it may be difficult to tote around gallons of bottled water. So, as a prepper, it’s just as important to learn how to use contaminated sources to procure your own water. Here are two common methods:

– Distilling Water: This method requires that you boil the contaminated water. Then, you collect the steam that comes from a “run-off.” This results in clean water dripping into a clean container.

– Filtering Water: With this method, you simply pour the contaminated water into a “filter” system. Your homemade or manufactured filter system will help to procure the water.

3) Non-Perishable Foods – These are foods that never require refrigeration. The food is packaged and/or processed to give it a long shelf life. Some of these foods include canned foods, dehydrated foods, and freeze-dried food, which has a 25-year shelf life.


4) Battery-Operated Flashlight – You should have multiple flashlights on hand. There’s no telling where you may end up at night. Not to mention, some natural and man-made disasters can cause darkness, smoke, etc… even during the day. So, make sure your flashlights are heavy-duty, with the ability to withstand moisture. Also, pack extra batteries for your flashlights.

5) Fire & Other Light Sources – When you’re trying to survive on the road, you’ll need various light sources. If you’re on the road for a long period of time, candles may be your own source of light. This is especially true if you run out of batteries for your flashlight. Be sure to pack candles that burn for longer periods of time than traditional candles. You should have a large supply, along with other light sources. Some of these include matches and lighters. These will also come in handy if you need to start a fire to cook or stay warm.

6) Battery-Operated Radio – While on the road, your only source of communication may be your radio. If radio news stations are still broadcasting, you can stay updated on the current status of the emergency situation. Battery-operated radios are very common in these situations if you have enough extra batteries on hand. However, there are other non-electrical options, such as a wind-up radio. They generally last about 30 minutes without having to be cranked up again.

7) First Aid Kit – Every savvy prepper owns a basic first aid kit. Check yours regularly to ensure that it stays well stocked. Most kits come with basic supplies. But, there are a few things you may need to add in order to be prepared to survive on the road. Some of these include:

– Fever reducer
– Pain reliever
– Antiseptic spray
– Hydrogen peroxide
– Rubbing alcohol
– Anti-diarrhea medication

8) Shelter – No prepper should ever be caught trying to survive on the road without shelter. Most use heavy-duty tarps. Experts advise that you choose a dark-colored tarp, so you stand out less. You never know. The emergency situation may require that you hide out for a while. Tarps can be used to build shelters outside, as well as underground.

9) Sleeping Bag – Many natural disasters affect the weather. That’s why it’s very important that you’re prepared to survive extreme weather conditions while on the road. Pack sleeping bags made specifically for cold weather. Prepare for twenty degrees below zero to be safe.

10) Outdoor Clothing – The clothing you pack should be appropriate for heavy, outdoor use. Be sure you have an assortment of clothing to last for a while. Pack wool socks, thermal underwear, hooded sweatshirts, sweat pants, jeans, heavy-duty boots, and a heavy coat.


Other Self-sufficiency and Preparedness solutions recommended for you:

The Lost Ways (The vital self-sufficiency lessons our great grand-fathers left us)
Survival MD (Knowledge to survive any medical crisis situation)
Backyard Liberty (Liberal’s hidden agenda: more than just your guns…)
Alive After the Fall (Build yourself the only unlimited water source you’ll ever need)
The Lost ways II (4 Important Forgotten Skills used by our Ancestors that can help you in any crisis)
The Patriot Privacy Kit (Secure your privacy in just 10 simple steps)

Surviving on the road is something every prepper dreads. But, it’s necessary in case of a major disaster or catastrophe that causes you to evacuate your home.

On National Geographic’s American Blackout we got to see a lot of common problems presented as the result of a power grid collapse that lasted 10 days. One problem that everyone faced, but didn’t receive a lot of air time was the lack of drinking water. National Geographic did not demonstrate any methods for obtaining water other than going to the store, or as in the case of the people trapped in the elevator and eventually the roof of a building, collecting some from a bucket that had been left in the rain. Since water is one of the most important elements for our survival I wanted to go over some methods of storing water and treating water that could help you in a disaster situation. You must have water if the grid goes down and you expect to live.


If you find yourself without power as they did in American Blackout, food and water were their priorities. Safety and security weren’t big issues until people started living without food and water. The nice veneer of society will vanish in a few days max even if we are only living through a power outage. Can you imagine if there was sickness or a disease pandemic? Can you envision how chaotic a hurricane knocking your town into the ocean would be? The situation presented in American Blackout gave us a lot to learn I think, but as far as disaster goes, a power grid failure would not be anywhere near as severe as a lot of other possibilities.

Now, I am not try to trivialize the scenario at all. A national power grid failure would be catastrophic but only because people aren’t prepared. I think it’s very telling when you consider how many lives might be altered forever just by not having some electricity. I think it is sad that our world is so dependent upon electricity that millions potentially would starve, riot and die because they were forced to live like our not too distant relatives did. Can you imagine the pioneers if you presented this situation to them? OK, just imagine how horrible it would be if there was no electricity… No what?

Where to find water

Water is everywhere normally unless you live in the desert. That is one reason why not too many people I know recommend living in Phoenix if the grid goes down. For the rest of us that live in closer proximity to lakes, rivers, ponds and streams we have a lot of options for finding water if we are faced with the task of collecting enough to drink. In American Blackout, the people who lived in the city had no water in the pipes because the electricity needed to pump water up into tall buildings was nonexistent. That doesn’t mean there isn’t any water in the city though.

I was surprised they did not have someone manning a hydrant letting people fill up jugs of water. The sheer volume of water contained in the fire hydrant systems of large cities if used properly could have probably lasted a week. Could you have taken showers and washed your car? No, but it is a source of water that could have been tapped into if you pardon the pun.

WaterfromHydrant

Water Hydrants are a source of water in an emergency

I could go into making a solar still or collecting the condensation off the leaves of plants with a bag or getting water from a tree even, but that is for another post. I want to talk to the majority of us that have water all around us and we simply need to get it and make it safe for drinking. In that I’ll start with the obvious and that is you should have water for everyone in your family on hand at all times. Water is cheap (relatively) and it is easy to find. You drink it every day now and there is no reason to be without a minimum of one week worth of water no matter who you are or where you live.

Water in a suburban setting is most easily collected from rain. Once you have rain barrels set up you don’t have to do anything. When it rains, your barrels will fill up and all you would have to do is make sure it is filtered or disinfected. Water can be used from any stream or creek or lake. What about the golf course down the street? You can drain your water heater in a pinch just by opening the drain valve at the bottom. The trick is to look around you for locations that have water in your neighborhood that you might need to access in a grid down scenario, but don’t neglect stocking up on your own. The stream down the road might be dry.

How to carry water

DeerCart

A cart like this with some modification is an excellent option for carrying heavy water with ease.

Humans on average need a gallon of water per day to stay hydrated and provide cooking and hygiene. I think that amount is slightly off because it can’t be the same amount for small children, but who cares. We will use it for a guideline and obviously that guideline has to be adjusted for the scenario you find yourself in. If it’s the middle of summer, temperatures are soaring and you are doing a lot of manual work that amount could easily double. What if you are sick and are throwing up? It’s best to always have more than the average amount of water on hand and you need to have a plan for getting water and bringing it back to your location.

Let’s say you live near a body of water (lake, stream, well, fish pond) and the power is out. How are you going to get water to drink? You could just walk down there and fill up your Nalgene bottle and walk back, but that is going to take a lot of time and energy for something that won’t last long. You need a way to carry a considerable amount of water at one time to reduce your trips and cut down on your risk of being caught out.

You need to plan now for containers that will hold several gallons of water at a minimum, but carrying these will be difficult without a wagon, cart or improvised method of weight distribution. One of my readers commented that they were planning on using a deer cart to tote their bug out gear and I think that makes a great option for carrying water too. Like the woman in the picture above, running out for a drink of water might not be as simple as it used to be. You have to plan to carry enough back so that you won’t need to go out for another couple of days hopefully.

How to treat water

There are many ways of filtering water and making it safe to drink and I have listed several down below.

BerkeyFilter

Berkey Filters are excellent Prepper resources.

Filters – Hands down my favorite method of treating water. Why? Because it is the simplest and takes the least amount of energy for the return on investment. I recommend two types of filters to be part of your preps. For my home, I use a Berkey Light water filter. I simply dump a couple of gallons in the top and clean water comes out the bottom. Obviously, you want to ensure you are filtering as much gunk out of your water before you bring it into your filter so as to keep your filter elements clean for as long as possible.

For portable alternatives, I have a pair of MSR water filters. These work great and have kept us in plenty of cool clean water on several backpacking trips with our family. You just pump the water through the pump and clean fresh water is delivered to your water bottle.

Boiling Water – Boiling is probably the oldest method of disinfecting water but it works! All you need is a container (preferably not plastic) and heat. Bring your water to a boil and let the water boil for a couple of minutes and that’s it. The boiling will kill any bacteria and you can drink the water. Let it cool off first

Ultra violet light – there are UV pens that they sell for camping that are supposed to kill any bacteria in water. I have never used these so my assumption is that it may kill the bacteria, it won’t help the taste or make the water technically cleaner. Saving your life is what is most important though so if you have to drink some water that has stuff floating in it…as long as you don’t die from a water borne illness you can live to fight another day.

Chlorination – Chlorine Bleach is probably the most common household item that you will have that can be used to disinfect your drinking water but it is a little tricky. Chlorine is affected by the temperature of the water you are treating. Always try to filter any water that may be cloudy with contaminants such as lake water first. You can use paint filters or a bandana if necessary. If the water is room temperature (meaning not cold or hot) you would add two to four drops of chlorine bleach per quart. Shake well and let the container sit for 30 minutes. After 30 minutes, smell the water. It should smell like chlorine and this is normal. If it doesn’t smell like chlorine add another drop or two and let it sit for 30 additional minutes. By drops we are talking about an eye-dropper size drop, not a dollop.

Distillation – Distillation is another option but requires more equipment than the average person will be able to acquire much less put together in an emergency. Another option is the SODIS method which uses UV light (sunlight) to treat water stored in clear containers. There is a lot of information about this method online and here.

If you find yourself without power as they did in American Blackout, food and water were their priorities. Safety and security weren’t big issues until people started living without food

Urban Camouflage and Concealment

It makes me laugh when I see a lot of SWAT Teams and PSD guys wearing Tactical Black and other colors that look cool but do nothing but make them stand out. In reality, black is one of the worst colors to wear. Ask yourself, what is black in nature? Look around you and what in your surroundings are black? I expect very little… In urban areas, most walls are white, gray or cream… Light colors! The colors you wear should blend in with your background whether its day or night.

At night dark colors stand out, especially when moving past light backgrounds and in urban areas most backgrounds are light colors. Even in rural dry areas when moving through low bush and fields the silhouettes of people in dark colors are easy to see at a distance.

You do not have to have expensive patterns to give you good camouflage and concealment, a gray dress shirt and a pair of light khaki pants is way more effective than tactical Tim dressed in SWAT black!

Movement and Rural Camouflage

Modern humans are positively disadvantaged when surviving in and moving one foot in rural and wilderness areas. Most people these days have never spent a night outside without any cover, let alone in bad weather. When you’re in the woods or bush you need to get comfortable in the environment. I remember one of my military instructors telling me that to be able to fight in an environment, you must first be able to live comfortably in that environment, and this is true. If you’re having difficulty living day-to-day how can you operate?

6000768

Camouflage your face, neck and any areas of the exposed flesh with mud, ash or charcoal from fires. Or use a balaclava or scarf to cover your face and wear gloves.

You need to start using all your senses as the animals do, learn to identify sounds, smells, movements and what they mean. You need to especially be able to identify things associated with people, like footprints, cigarette stumps, broken twigs or foliage, fences, straight lines, domestic animals, aircraft, vehicles, talking, etc. Think about human smells like fires, food, fuel, human waste, and tobacco; if your senses are sharp in bush or wooded areas you should be able to smell or hear people before you see them.  When moving you must do so quietly and regularly stop to look, listen and smell for any indication of people. If you identify people in your proximity are you going to take cover, evade or ambush?

You should always consider camouflage and wear clothes that blend in with your environment, in urban areas wear light blues and grays in rural areas browns and greens. As I have said before there is no need for military camouflage clothing as this will just draw attention to yourself.

Basic fieldcraft, things are seen because of these reasons: Shape, Shadow, Silhouette, Shine, Spacing & Movement.

  • Shape: Disguise your shape; use foliage or rags to break up your outline.
  • Shadow: Keep in the shadows and always be aware that you are not casting a shadow that could be seen by your opposition.
  • Silhouette: Don’t stand out against skylines, lights, white walls, etc.
  • Shine: No chrome, shiny watches, mirrored glasses, sparkly jewelry and the like.
  • Spacing: If moving with others, remain spread out, but not too regularly and do not bunch together.
  • Movement: Move carefully, as the sudden movement draws attention and is the main reason camouflaged personnel and animals are seen.

The basic guidelines for camouflage are

  • Learn to blend in with your surroundings.
  • If you are using foliage to conceal yourself or your position don’t use too much or too little.
  • If you are in a long-term hide remember to keep your camouflage fresh, dead foliage will alert people to your position.
  • When moving avoid skylines.
  • Don’t use isolated or obvious cover; it’s the first place others will look. Consider hiding in thorny bushes or nettles as most people will not expect anyone to hide there.
  • Camouflage your face, neck and any areas of the exposed flesh with mud, ash or charcoal from fires. Or use a balaclava or scarf to cover your face and wear gloves.
  • Take all noisy objects from your pockets, such as keys and coins and make sure nothing on your person rattles.
  • Make sure there are no shiny surfaces on your person, equipment or clothing.

realtree-camo-pattern-max-1-xt-05

Guidelines for Movement

You should always move quietly and cautiously and avoid stepping on dry twigs or breaking through foliage and undergrowth as this will make noise and leave an easy trail to follow. If you know you’re going to a rural area or possibly going to be in an escape and evasion situation avoid smelly foods, strong soaps and aftershaves, as these will be easy to smell by those used to being in the bush. Always be careful not to leave signs you were in an area such as footprints, broken foliage, human waste or trash.  Trash and human waste should be carried out of a hostile area and disposed of when safe to do so.

You should always move in “bounds” from one piece of cover to another. Your bounds should never be more than, say 50 yards, especially at night. When you stop at the end of each bound you should use your senses to try to detect any human presence then plan your next bound. Moving in short bounds is the safest way to move through populated areas or places there are unfriendly forces. Remember, always be prepared to take evasive action or defend yourself.

61w8LlcrfyL._SL1002

Camo Face Paint Sticks – 3 Pack – 6 Colors

The speed at which you travel will depend on whether it’s day or night, the type of terrain you’re in, people or police patrols in the area. Never push yourself to your limit, you always need to have energy in reserve so you can run in an emergency; tired people are also rarely mentally alert. If you must run from your opposition try to do so only for a maximum of a few hundred yards, then slow down and move quietly, cautiously and cover any signs of your direction of travel. Do not use obvious routes, which tend to be the easiest routes to use; head up hills and into thorny areas, etc.

There are no set time periods for halts but you should try to take ten minutes in every hour on long journeys. Tracks, paths, and roads make for fast, easy travel and can aid navigation but can also be very dangerous as your opponents will watch them closely. To be cautious walk a few meters off to the side of any roads or tracks.  Places to expect sentries are at the entrances to urban areas, on bridges, crossroads and on high prominent terrain.

Avoid being silhouetted when crossing skylines and hills, go around them rather than over them where possible. If you need to cross an obstacle or skyline then keep low and crawl, if it’s a fence, crawl through it or under it. If you have to cut through a fence, cut through the lower strands and then disguise the hole with undergrowth or tie the wire strands back together, never cut through the top strands as this will be easily noticed.

realtree-camo-pattern-realtree-max-4-04

Moving at night

You need to learn to treat the night and darkness as your friend, darkness affords you cover. Many people are afraid of being in the dark especially in rural areas or derelict buildings; you should use this to your advantage. If you are moving you should always try to stay in the shadows, if you get caught in a beam of light or car headlights you should freeze, the chances are that you will remain unnoticed. You must have your immediate reaction drills for encountering a person, being caught in the light of the hostile fire at the forefront of your mind. Being caught off guard will get you captured or killed.

There are both natural and man-made noises that are useful to you because they can cover up or disguise the sounds that you make when moving. The best time for moving covertly is during bad weather; rain will cover the noise of your movement and any ground sign you leave. Bad weather also keeps people undercover, lowers the morale of those standing guard, learn to love bad weather.

General guidelines for rural movement

  • Wear clothing that blends in with local people and the terrain.
  • Do everything possible to disguise evidence of your passage; cover footprints, never break twigs or undergrowth and repair broken foliage.
  • Avoid contact with all people unless absolutely necessary.
  • Litter, food and human waste must be buried or carried with you.
  • Learn about tracking, then you’ll be aware of what anyone following you will be looking for.
  • If moving with others spread out and when crossing obstacles such as rivers or roads etc. take up positions to be able to give warnings of any threats that might be approaching. Also, stay low move fast and cross one by one.
  • Always be ready to take cover from gunfire or people you may encounter by surprise.
  • Remember certain smells indicate human activity; odors float downhill in cool air and rise in warm air.
  • Watch for stones, leaves or logs that have been moved, the undersides of these will be darker in color and damp environments, this can be an indicator of human activity or the location of hides.
  • Always look for straight lines as they are rare in nature and are usually man-made.
  • Learn to identify unnatural vegetation, such as green leaves among dead branches or areas of too much foliage as this could indicate human activity such as hides or ambushes.

These are some basic guidelines to get you thinking, these skills can’t be learn sat in a comfy chair, you need to get out and learn and practice them. Everything I have written about here is simple and the main thing required is situational awareness and common sense!

Modern humans are positively disadvantaged when surviving in and moving one foot in rural and wilderness areas. Most people these days have never spent a night outside without any cover,

This is the second article looking at ways we can cut our dependence on commercial feeds for our livestock. The first article primarily dealt with historic feeds and ways of storing them and some of the feeds that are rarely seen in small-scale production in the U.S. As stated in the first article, our modern livestock – even a lot of the dual-purpose homesteading breeds – are accustomed to certain types of feeds, heavy on mass-production mono-culture grains and hay. Those feeds tend to produce the fastest results and be cheap and easy to access.

However, they do contribute to the financial cost of keeping livestock and they require certain cultivation methods that may not be available to everyone. Substituting fertilizers and water-hungry crops for tubers and less-common grains may be part of the solution to making our livestock resilient to a small personal crisis or a major regional disaster. It can help us weather some of the ups and downs in pricing, as with droughts that send livestock feed and grocery bills skyrocketing.

There are some other ways we can increase our self-sufficiency and resiliency, though, even if it drops our livestock’s production to historic levels and takes a little longer to finish our meat stock. There is no one way to do anything, and no solution is going to work for everyone. However, having some backup ideas and methods in place as alternate feeds is rarely a bad thing, especially if we’re counting on meat rabbits and chickens, eggs, and milk in a collapse or Great Depression situation.


Rule of Thumb – Rabbits to Goats, Chickens, & Pigs

There are a couple of rules of thumb that can apply to our livestock and what we provide as a base feed or supplement. The first is that if hares can eat it, so can goats. Happily, chickens and pigs will eat almost anything – especially if they see other livestock going after it. Most feeds safe for rabbits will apply to them, too.

The Rabbit Food Pyramid

The Rabbit Food Pyramid

The rabbit point comes in because of all the lists available out there for pet or show rabbits. Some of the feeds for rabbits come right out of our kitchen gardens. Some of the feeds in those lists lack the roughage both hares and goats need to keep their guts processing. Others offer some excellent ways to increase the feed availability for livestock using something that already exists.

One example is trees and tree hays. Rabbits and goats can happily consume a wide number of trees, some of which may already be on our property and in need of pruning, such as willow, apple, maple, elm and mulberry.

Tree hays are little different from using a fodder like locust and calliandra that’s fed green. We can treat a surprising number of trees just like we do grasses and dry limbs at peak nutrition to pull out for hay or add to our silage. Like grasses, tree leaves are at their highest nutrient content before they flower and start directing energy toward fruits.

That allows us to selectively harvest small green boughs that would be pruned in another season normally, selecting for branches with lower impact on our future fruit harvest. And since the flowers themselves are sugary powerhouses and pollen is an excellent protein source, collecting limbs that bear those is only a bonus.

rabbits eating tree leaf and branch

Rabbits, tree branches and leaves


The richest tree fodders can only be used in limited number to modern rabbits, because they have sensitive digestions. Once it’s hay, instead of a leaf or three for a large meat rabbit, up to 20-40% of their grass hay can be replaced by tree hay. The larger branches themselves can go to rabbits, goats and chickens, too, even a couple of inches across should you prune something that large. They’ll strip the bark in some seasons, and rabbits will use chunks to help keep their ever-growing rodent teeth under control.

Soaking tree hays can help increase the interest and palatability for finicky livestock. Individual leaves can be soaked, or branches can be righted and stuck in a bucket of water for 24-48 hours to soak up liquids. Chickens won’t eat quite as many of the tree hays, even soaked, and pigs regularly need them soaked and sometimes mixed in with something like turnips and grasses. However, both are a little more willing to eat silage.

Don’t use the whole branches for silage, just the leaves and the tenderest tips that cattle in bare lots are willing to nibble.

Tree Fodder & Fruits

Cattle - lucerne tree fodder

Cattle consuming tree lucerne


There are actual trees like the black locust and smaller options like pea shrub that are being studied and cultivated as livestock feed replacements, especially in places like Africa with limited irrigation and poor soils. There are mixed feelings about keeping livestock on tree fodders, there are mixed research results, and studies tend to focus on one aspect of feed or another – it’s hard to get a comprehensive paper on DM, protein, digestibility and palatability all at once. Still, if livestock is part of the plan, it might not hurt to look into some of them. A lot of U.S. climates can mimic climates found somewhere in Africa – where a lot of the research starts and focuses still.

Fodder and forage trees and shrubs can be managed for human harvest and transport, or planted along outsides of fences or inside curbing poles and fences that limit livestock’s reach. Quickly rotated pastures can also allow the trees and shrubs to mature and grow back.

Native trees and shrubs that can be used for grass and hay replacement for rabbits and goats include American sycamore, blackberry, dewberry, raspberry, roses, hackberry, gooseberry, alder and mesquite. Livestock can eat currants, but currants and some of the other soft berry shrubs tend to not respond as well to “pruning” as brambles and gooseberry.

Other options for livestock include planting trees that drop seed or nuts, either for human harvest and fodder, or for livestock to forage on its own. Elm samaras can be collected green or brown to use as a fatty nut or seed supplement as well. Acorns are another example. There are a wealth of oaks out there that produce at different times, produce in ebb-and-flow cycles, develop acorns for two years instead of one, and produce different sized acorns. Most nuts are too valuable for livestock, but somebody with thriving hazelnut/filbert thickets might run in goats and then pigs or chickens.


Goat climbing and eating black locust

Goat climbing and eating black locust

There are the conventional fruits such as apples and pears. For me, the focus on fruit trees for livestock is largely on storable fruits that can go from tree to cellar. Most tree fruit is going to be too rich for domestic rabbits and a lot of cattle and horses, but pigs and chickens seem just fine with even large portions of meals made up of pears.

“Weedy” fruits like wild plum and mayhaw need absolutely no help from me to grow, but will produce some goat forage and fruits for pigs and chickens. Shrubs like chokeberry and chokecherry can be used alongside chicken tunnels and moats and runs, with the birds helping themselves to berries that protrude or drop within reach, and humans harvesting the berries they can’t reach – berries which don’t look like “normal” human or livestock foods and that dry well for later feed.

Rule of Thumb – What we eat, they eat

A lot of livestock feeds are already made from things that humans can consume – corn, soy, wheat, sunflower, millet. In the first livestock feed article, we pointed out things like tubers that store well. We can also take a look at local foraging options, and encourage what are basically weeds to use as feed. I wouldn’t try to forage for a goat’s entire diet, although there are things I can plant (and protect) that they can forage for themselves.

Sheep eating Kudzu

Sheep eating Kudzu

Cattail in the four or five human-edible stages is happily and healthily consumed by everything but cattle and horses. Reed grasses (avoid European phrag like the plague) provide a storable seed. Chickens and hogs will dig chufa. Don’t plant the stuff for heaven’s sake, but if kudzu is nearby, it makes a nice flower jelly and its leaves are readily palatable to even cattle.

Wood sorrel, henbit, low clovers, plantain, purslane, and dandelions are so routinely cursed by gardeners and lawn-growers, but they provide an enormously beneficial mix of protein- and micro-nutrient heavy foods, with the benefit of being enormously palatable as well as cold hearty. That means we can stick them under some plastic or grow them in tiers of soda bottles in our windows in winter, and be providing fresh foods to our livestock, even in just dribbles. That keeps our livestock healthier and more ready to transition back to pasture grazing.

Wood sorrel, henbit and chickweed are also tall enough and “heat”-tolerant enough that we can use them in grazing frames inside chicken runs, letting the birds munch them down as far as they can reach but having them grow back faster because the birds can’t get all the way down to the roots. They’ll hold up to grazing and manure better than just wheat or barley grasses.

Chicken grazing frame

Chicken grazing frame

Cheno-family lamb’s quarters, mallow, amaranthus pigweeds, shepherd’s purse, most of the sonchus thistles, any strawberry plants to include the invasive “weed” variant with little or no flavor, and wingstem or Iron weed can all be consumed by rabbits, goats and chickens. Most can also have leaves and stems dried to provide roughage or healthy supplements throughout winter and early spring.

Check out what Sam Thayer says about your area and your local foraging guide. Nettles have to be treated for livestock the same way they are for us, and some wild edibles are too time consuming, but there are others that can increase our feed (and pantry) potentials without a great deal of work because the weeds grow like … well, weeds.

Alternative feeds for your livestock

Using a mix of intentional forage and fodder trees, increasing the use of fruit trees and shrubs to harvest green grass and dry hay replacements or increase silage content, and looking at the wild edibles in our areas as a way to increase livestock feeds can make a difference in both resiliency and livestock costs, especially if we’re running small flocks and herds.

You need to slowly transition livestock to new feeds, especially if they’re accustomed to 1-2 base feeds, but livestock is just like humanity – we all do best with a variety of foods. Livestock is especially dependent on gut microflora to help them break down foods. I’m sure you’ve heard the “starving with a full belly” nugget. Before commercial feed and penned livestock was so prevalent, there was also “spring sickness” or “green dribbles” that came in part from livestock being able to access pasture again after winter, eating their heads off, and ending up with upset stomachs. Slowly transitioning livestock and keeping them on a variety of feeds can help limit those conditions because their guts stay primed to consume them.

Some other nuggets to research, especially for game birds like ducks and young poultry that need higher proteins, include black soldier fly farms, algae and duckweed aquariums, and worm bins or troughs. Fast-breeding minnows will change the flavor of eggs and meat, but can be kept in pretty small tanks with low energy needs. There’s also barely-sprouted grains (the ones that barely have any “tail” showing when they’re offered). I’m not a major fan of sprouted fodder systems (the kind that grow root mats and green shoots in trays) as a primary livestock feed for anything more than a couple of chickens or rabbits, but then, I’d also rather grow and re-grow rotating flats of mixed weeds and wheat grass for them in winter because it’s a lot less costly and labor intensive. Just remember that while some livestock like chickens and rabbits can be vegans and have lower protein needs, the game birds like ducks are not really grazers – they need seeds and-or live foods and the higher calories and proteins those offer.

There are a world of livestock feed options that don’t begin with slicing an alfalfa bale or cutting open a bag of pellets. Even if we choose to stay with grains and conventionally farmed feeds, having the alternative foraging and fodder options gives us a fallback and gives us something to shoulder as we walk around, giving our livestock extra nutrients and variety that can help keep them healthier.

This is the second article looking at ways we can cut our dependence on commercial feeds for our livestock. The first article primarily dealt with historic feeds and ways of storing

Air conditioning is a pretty modern convenience. There are still lots of countries where A/C is a luxury found only in hotels, restaurants, and the homes of the rich. Little beats retreating to a lake, basement or cellar for the afternoon, but we can look at them and back in history to the 1950s and earlier to figure out how we can make our lives a little bit more comfortable when we have outages or grid-down situations. There are a ton of ways we can help cool our bodies and little changes to activity and habits that can be incorporated for beating the heat in our homes, too, but for this article, I’m going to concentrate on the dwelling space itself.

Generate Shade

The more of our buildings that we can ring with shade of some kind, the cooler the building will stay. Even so, just shading the entrances and windows of homes, cellars, and workshops can help reduce the heat inside. Shading entrances is especially good in air-conditioned or cooled spaces. It helps reduce the sudden inversion that happens when the doors open. That can be huge for a cellar being filled with harvest.

There are three ways we can generate shade around our homes: window awnings, porches, and trees.

house

Shading windows with a short but deep awning and sheer tier curtains to reduce heating from sunlight.


Shading with window awnings helps reduce the amount of sunlight that enters the home. Old-style window awnings are deep. They’re designed to protect starting fairly early in the morning, all the way through midday into afternoon.

However, they were typically placed so they don’t actually cover much of the window. That protects from the brutal summer sun when it’s taking a high arc, while allowing for natural light early in the morning and late in the evening as the sun is setting, and for more natural light during winter when the sun’s path is at a lower angle.

Covered porches have the same effect – creating a buffer around doors if not the whole side or house. The deeper the porch, the less light will get through. There are programs available online that can help people at various latitudes figure out exactly what depth is most ideal by the compass directions, but generally 6-8’ will reduce summertime heat while still allowing for decent winter light to enter.

Deciduous trees are ideal for the southern face of a building and are regularly used on the east and west sides as well. They shade in the summer and then allow light to pass through their empty limbs in winter.

summer-house-veranda-villa

Image: The more shade we can generate, the cooler our interiors will stay.

Seasonal Window Dressing

Window dressing didn’t start out as the “just window dressing” that makes some of us crazy now. A lot of history is in all those fancy-do’s we drape around. While lace became vogue and sheers and tier curtains became the providence of rich folks, they started out as a way for poorer folks to gain some comfort without spending as much on fabric.

Sheers allow both light and airflow to enter the home, while the pale and white colors reflect back a lot of heat for us. Tier curtains originally protected the lower half of a window that wasn’t originally shaded by deep awnings or a shallower porch.

Today we also have light-blocking or “blackout” curtains. They’re typically a white backing that faces outward to bounce light and heat outside again, and any color at all that appeals on the inside. We can replicate them with white or pale green-sign Dollar Store/Tree shower curtains, or the real deal can be found even at Dollar General.

curtains

Blackout curtains reduce noon to daybreak, but because they also impact airflow, they’re more for our air-conditioned world with selective, judicious seasonal use in an outage or grid-down scenario.

Those light-blocking curtains with a solid surface are designed for an air-conditioned world, however. Pier 1 to Dollar General, they dampen airflow as well as light. If we’re going to be opening windows, we’d be better off hitting Goodwill/Salvation Army or a fabric store and picking up the oldest, thinnest white or pale-colored sheets or loose-weave blankets they have. Sheets have the bonus of a band at the top that makes for easy hanging, but there is iron-on fabric/sewing tape that can help even the most needle-challenged soul make some curtains.

Bonus Tip: We can get dark fabrics, sheets, blankets, towels, and shower curtains to get the reverse effect and create more passive solar heating in winter.

Elevated homes

In the time before air conditioning, a lot of homes were raised, with open airflow underneath. It’s still seen in some places, although it’s now more common in areas that flood or get damp in North America now.


-summer-house-veranda-wooden-house

Even outside of flood plains and when windows were expensive, simple Southern shacks were elevated slightly to increase airflow and decrease inside temperature.

We can’t do much about getting a preexisting home up off a foundation, but if we decide to build from scratch or buy a new one, it’s worth thinking about. Trailers are elevated, but even modern trailers aren’t usually insulated to the same degree that a house can be, even retroactively. Unless it’s the only thing besides a windowless brick that fits the budget, being elevated isn’t enough of a selling point to go for a trailer.

Thick Construction

Houses used to be nice and sturdy, built thick and dense. In some cases, that can create an oven, but with some shade and some windows for airflow, dense construction can create very much a cave-like atmosphere. That functions both ways, heat and cold, working to keep the house or building a more constant temperature.

We can sometimes cheat our way to denser walls and ceilings even in a home we already own. The thicker we pack our insulation – and the higher the grade of the insulation we use – the more solid our walls become. It’s not that difficult to pop off drywall and replace insulation, or add additional layers to it, overlapping the edges and layers as often as possible, and it can make a big difference in our daily life energy costs as well as during grid-down times.

If we don’t want to do the whole house, we might consider doing it either on the south or west side where the sunlight and heat are most brutal, or we might consider re-insulating the ceiling of a basement to create a heat-relief cave. We could also consider buffing up the insulation if we have an interior washroom, an isolated kitchen, or some other space that generates a lot of heat.

Airflow

We can’t do much about lifting our ceilings or putting in more or wider windows without a lot of expense, but both contributed hugely to cooling homes pre-A/C.

Tall ceilings allow heat to rise and collect up out of the human-use space nearer the floor. The advent of fans increased this hugely. A fan blowing just down or across us from the ceiling or a stand feels pretty darn good. Switching the rotation or blades so that fans are actively drawing air upwards instead of blowing down was a big help.

Even with A/C, a floor fan tilted to blow cool air up away from the floor and into our living space helps lower our electrical power use even in modern times.

Fan

Even a small fan set to blow back up from the floor can make a huge difference in our power draws (and bills). They function similarly to the historic use of ceiling fans to draw heat up but instead, they keep cool air from settling at our ankles.


Fans can also be placed in windows. In cool weather, they’re set to draw air inside. In warmer weather, they get flipped to help shove hot air out – especially helpful in the kitchen, just like when we set off the smoke detector while frying chicken.

Fans in windows can be a big help anywhere, and make a ton of difference for homes with few windows, a lot of turns, and little natural airflow.

Homes were originally designed not to block airflow, with room flowing into each other, large pocket or double doors in central areas, and copious windows that were arranged for cross ventilation. If we have the chance to buy or build, or renovate, they’re something to add to the list to check for. We can also find out where the weight-bearing walls are and remove one or widen doorways into arches to improve airflow.

Fans can also be used to help direct airflow from one end of the funky corners or dead spaces we get a lot in modern construction to another, but with kids and pets, the oddball placement required usually isn’t worth that one. However, since fans run off so much less power than an A/C, it’s an idea to stick in the back of our heads for an outage.

Whole House Fans

These aren’t just an attic fan. These are a specific cookie that does a specific job, and does that job best under specific conditions.

This guy http://www.greenbuildingadvisor.com/blogs/dept/musings/fans-attic-do-they-help-or-do-they-hurt does such a good job explaining a whole-house fan and the conditions, I’m just going to thumbnail it. There’s also a comparison here http://www.airscapefans.com/learn-about/whole-house-vs-attic-fans.php.

Basically, a whole-house fan is specifically for cooling the house, not the attic. A whole-house fan gets turned on at night with all the windows open. It’s function is to suck all the hot air from the day up into and then out of the attic. The vacuum draws in the cooler nighttime air, especially early in the morning when it’s coolest. Then the windows and vents in the house all get shut, holding that cool air for as long as possible. The denser the construction, the better the insulation and tightness of windows, and the more shade in the afternoon, the better it works.

It’s not like opening the house to cool off when we’re pretty sure we’re running the A/C almost all day tomorrow, because the A/C is actually more efficient without having to pump out all the moisture we’re going to let in.

This isn’t a “today” deep-summer fix for most of us who deal with 90-100+ temperatures, although it can reduce temps by 10-15 degrees even into afternoon, which helps keep us from running our A/Cs at times when it’s more comfortable (reducing power costs). However, in an outage of any duration, a whole house fan – which is pulling a lot less energy and requires a less robust generator – dropping the house from more than 95 degrees F down to 85 or 80 is something of a gift. Even if it only lasts to midday and then we have to reopen the house and run house fans with the temperature creeping up into “totally miserable”, it gives us more time to do canning chores and it can make for much, much more comfortable sleeping.

Alternate Sleeping Quarters

When it was really brutally hot and sticky, folks used to take to their fire escapes and front porches to sleep. Hammocks and cots indoors or outside under mosquito netting or a fly film pavilion help by increasing airflow compared to a standard mattress.

Air mattresses and air beds are fabulous little creations that can help keep us indoors, but accomplish almost the same thing – a fun fact I learned very recently as furniture made it one way, the wrong way, and faced delays in a move. They need to be fairly decent, though. I’m partial to Coleman. I’m not allowing another Intex into my house. Others’ results may vary.

air-bed

Air beds aren’t just for camping. A good air bed or air mattress on top of existing box frames or mattresses can help reduce heat while sleeping, providing more relief in summer the way hammocks once offered a cool-air option on the porch for sticky southern nights and afternoon siestas.


I have no idea how exactly air beds/mattresses manage it, but I can guess that the big pocket of air they store acts like insulation and then becomes a cold sink. I came to this conclusion because I’ve found that air beds are cooler than air mattresses. With an air mattress, I’m comfortable a few degrees warmer than usual. With an air bed I’m sleeping like a baby and reaching for a light blanket at the temperatures where I’m normally tossing and turning on our (stupidly expensive, was-going-to-be-perfect) $1K mattress system and crazy expensive stay-cool pillows. It was significant enough a reduction while I was by myself for a month, I threw one on the guest bed and I just sleep there when I’m hot (most nights).

Cooling Homes & Selves

There are lots of ways we can cool ourselves as well as our homes. Certain animals, the elderly, young children, and people with respiratory issues (even just allergies) are more sensitive to heat and heat stresses, and it’s important to know ways to help them and have somewhere for them to retreat from the heat. That might mean rigging an Egyptian cooler so there are cool, damp cloths for wiping down, or it might mean putting together enough of a battery bank or quiet generator to keep fans going. We’ll adjust, to some degree, but if a crisis hits during summer or it’s just a temporary outage, knowing some ways to cool a house can help with the adjustment.

This is about houses, but I can’t miss the chance to plug water. In high heat, I consume a gallon and a half of just water, and another gallon of things made with water. Getting some fans, getting fixed-shut windows opened, and installing screens are important, but we also need to be budgeting for water, whether it’s storage or catchment or our backup well or spring systems. Being 10 degrees cooler isn’t going to save us from dropping due to dehydration.

The more of our buildings that we can ring with shade of some kind, the cooler the building will stay. Even so, just shading the entrances and windows of homes,

Bug Out Bags come with their own set of problems just as complex in some cases as the myriad of reasons why you could be forced to rely on a Bug Out Bag in the first place. There is the type of bag to purchase, the specific gear to load in there and a million voices telling you what is best and what isn’t needed. Not to be left out of the discussion, Final Prepper has had its fair share of comments about the subject both from the perspective of how much weight to pack in your bug out bag and our very own Bug Out Bag checklist for those of you just starting out.

Regardless of where you get opinions or advice, everyone who is discussing a Bug Out Bag usually recommends you storing food in there. We casually throw out the obligatory, FEMA recommended 3 days or 72 hours’ worth of food advice but have you ever wondered what food to pack in your bug out bag? Does it matter anyway?

I like to make the connection between planning for your bug out bag and planning for a hiking trip into the woods because I think almost all of the same considerations should be taken for each situation. The motivation for strapping the pack to your back is different in each scenario, but the realities of packing everything you would need to survive for three days hiking the Appalachian Trail or running from mutant zombies from mars are very similar.

When you are looking for food ideas for your bug out bag there are four things I think you should take into consideration. The first is caloric value, the second is weight and the third is spoilage and lastly, you have preparation effort. For these food ideas, you need to seriously consider if the food you have planned for your bug out bag is going to be the most beneficial to you.

Caloric Value – A normal person hiking all day burns a heck of a lot of calories. I don’t have to tell you that hiking even on flat ground with a 30-50 pound pack on your back is going to make you work harder than that desk job you have. How many calories you will burn and conversely have to consume will depend on the shape you are in and what you are doing. For a very generic example, I used a calculator on HealthStatus.com to see that if I hiked for 10 hours I would burn close to 6000 calories. You may weigh less or hike fewer hours so you will have to see what your caloric needs would be, but the food you are packing should be able to give you back those calories each day or else your body will start eating itself and you don’t want to be anything less than 100% healthy if you are bugging out.

Weight – This should be pretty simple. The more your food weighs, the heavier your bag will be. A high calorie to weight ratio is smart and with the choices below I think there is a good balance. Some people think you should just pack 3 MRE’s in your BOB, but MRE’s aren’t weight conscious at all. On our last backpacking trip, I saw about 6 cans of food laying off to the side of a trail. I can only imagine the person who was carrying that weight and what they were thinking.

Spoilage – Where are you storing your Bug Out Bag? Is your food sitting in the hot sun of your car trunk every day for 3 months? You need to take care to only pack foods that won’t spoil, or plan for storing your bag in a location that won’t cause your food to spoil more quickly.

Preparation Effort – I know that when you are backpacking, you are outside in the fresh air with nothing but nature around. It’s a nice little creature comfort to make meals that taste great and have some fresh ingredients. Your Bug Out Bag food shouldn’t be gourmet. As much as possible, the preparation of these meals should be easy and kept to a minimum.

Before I get into the food ideas for your bug out bag, let me state that these choices aren’t always going to be what the normal healthy person consumes on your average day. The Bug Out Bag is what you grab when there is a need to get out of harms way very quickly. This isn’t camping or taking a leisurely stroll in the woods. Some of the food choices could be improved, but we are going for quick and simple calories mostly in a format that doesn’t spoil too quickly, doesn’t take a lot of preparation and doesn’t weigh a ton. So, with all that said, here are some ideas we came up with for your bug out bag food supplies.

G.O.R.P – 130 Calories per ounce

G.O.R.P – If you don’t know stands for Good old raisins and Peanuts and has been a hiking staple for years. G.O.R.P is calorie-rich and is simple to make. Unless you have chocolate in there, it shouldn’t melt in the trunk of a hot car either. The thing you want to avoid is what we did and that is to buy a giant bag of G.O.R.P thinking everyone would be eating off the big bag. After two days of hiking (we had also brought other snacks) the bag wasn’t getting any lighter and I think we still brought half of it home with us. Pack individual zip-lock bags for each person. One cup of GORP (depending on the ingredients you have in there) can provide as many as 700 calories.

Mountain House Freeze Dried Meals

I have taken Mountain House meals with me and my family on every camping trip. They are the best at filling us up and for the taste, they aren’t too shabby either. For breakfast, my favorite is the Breakfast skillet and dinner is a toss-up between Chilli-Mac or Lasagna with Meat sauce. To get these down to the smallest footprint, you can poke a hole in the bag with a pin, press out any air and cover the hole with a piece of tape. For optimum freshness, I would only do this right before you were leaving. An added bonus with these meals is that you don’t need anything but a long spoon. Simply heat some water and pour it right into the bags, seal for the recommended time and then eat up! You can cut the bag down to size with a knife to make it a little easier to eat out of without getting chili-mac on your hands.

Peanut Butter – 170 calories per ounce

Peanut butter is a great food item for your pack because of its high calorie to weight ratio. 1 tablespoon of peanut butter packs a whopping 190 calories and if you bring some crackers, this food will keep you going. This is one MRE food item to consider because all MRE’s have a pack of either peanut butter or cheese. You can also buy MRE items individually so I know someone will sell you a bunch of Peanut butter packets if you are looking for them.

Mainstay Emergency Food Rations – 3600 calories in a pack

Mainstay Emergency Food Rations are standard in my Get Home Bag as well as my Winter Survival Car kit and would make perfect sense in a Bug Out Bag as well. These are exactly what they say they are and that is survival rations. They are even less gourmet than the other options on this list, but they have some advantages. They are already packaged in waterproof containers, they can withstand extreme temperatures without spoiling and they take zero preparation. Just break open the pack and break off two bars (800 calories).

Mac & Cheese – 105 calories per ounce (with oil and summer sausage)

Mac and Cheese is probably the cheapest camping food you can get and you really only need to boil water to cook this. If you have some extra olive oil or meat to add to the pot, like summer sausage you can really amp up the taste of this meal. One box of macaroni and cheese, prepared with 1 ounce of olive oil and 2 ounces of summer sausage provides a whopping 1,100 calories and weighs just 10.5 ounces. I know that olive oil and summer sausage aren’t really spoilage friendly foods so I didn’t add them to the list, but if you have any preparation time, they might make good additions.

Snickers Bar – 140 calories per ounce

Now we get to the part where I said not every choice would be the healthiest you can imagine but a snickers bar does pack a lot of calories in a small size and could be a morale booster as well.  You could easily substitute bars that were made specifically for hiking like Cliff Bars or Power Bar. A single King Size Snickers weighs less than 4 ounces and packs 510 calories.

Lipton’s Pasta/Rice Sides – 110 calories per ounce

Another great add hot water option that makes for easy preparation. Lipton’s Pasta sides make a filling meal and are cheap like Macaroni and Cheese.

Instant Mashed Potatoes – 115 calories per ounce

Instant mashed potatoes are right in the same family as Macaroni and Cheese or the Pasta Sides. Just add water to a pot and let these rehydrate.

Drink Mixes – Gatorade, Coffee, Tea

I know it sounds like a comfort item but drink mixes are great for kids who may not want to drink as much water as they need plus they can add back vital minerals and electrolytes lost from sweating. If you don’t think carrying a big pack around the hillside isn’t going to make you sweat even in relatively cool weather, you really need to try it. For those of us with a caffeine habit, Starbucks Via packets are an excellent choice for your bug out bag. Tea bags offer the same level of comfort and when you can its nice to sit down or wake up to a nice hot cup of coffee.

Pop Tarts

Pop-Tarts are a good breakfast option for kids as well as adults. They need no cooking or preparation, just open the bag and eat up.

Your Turn! What ideas or suggestions do you have for your bug out bag food items?

When you are looking for food ideas for your bug out bag there are four things I think you should take into consideration. The first is caloric value, the second

Do you raise honey bees? If so, you should know that their usefulness extends well beyond the production of honey. In addition to pollinating your plants and ensuring a healthy ecosystem, bees also produce honeycomb.

While it may not sound fancy, honeycomb produces many pounds of beeswax which can then be used around the home. Here are some of the best ways to use beeswax on the homestead – no matter where you live.

beeswax

What is Beeswax?

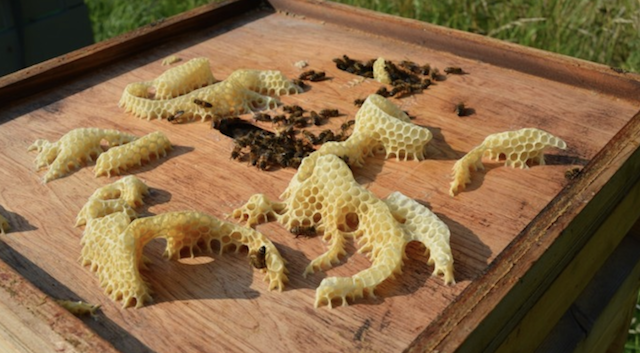
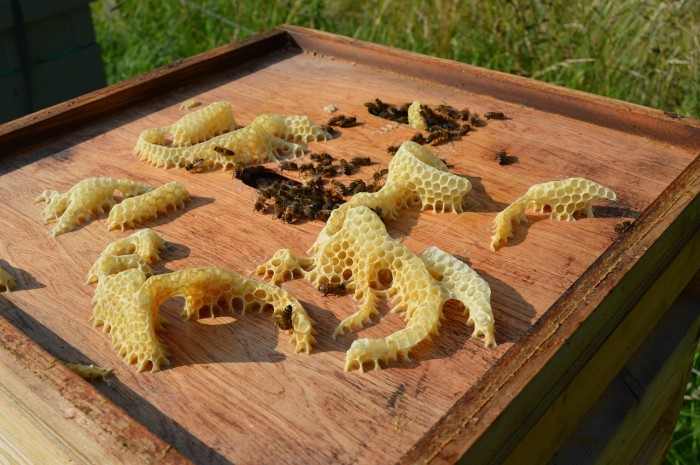
Beeswax is made from the honeycomb of honeybees. Bees consume about eight times the amount of honey that will need to produce one pound of beeswax. This one pound of wax requires an impressive 150,000 flight miles! Why waste it?

When bees mix pollen oils into honeycomb, this turns the naturally white wax into a luxurious yellow or brown color. When purchased commercially, beeswax can be bought in yellow, white, or bleached shades. While yellow wax will be that which was extracted directly from the honeycomb, white and bleached beeswax have been altered.

Beeswax is a medical aid for a variety of conditions, such as lowering cholesterol and relieving pain. It can also be used to reduce swelling, treat ulcers, eliminate diarrhea, and treat hiccups. White beeswax, as well as yellow beeswax treated with alcohol, are also commonly used as stiffening agents in cooking.

Beeswax works well around the homestead because it contains a mixture of crucial elements like creotic acid, hydrocarbons, alcohol, minerals, esters, pigments, and water. These combinations give it a low melting point, making it possible to work with it without needing special equipment.

How Do I Find Beeswax for the Homestead?

Beeswax is produced by honey bees, used to create honeycomb for their hives. Each hive will contain several sheets of beeswax comb. If you raise your own bees for honey, you can easily harvest the beeswax to use around the homestead. If not, contact a local beekeeper.

Extra beeswax is usually not thrown away after the extraction process but instead melted into blocks to be used later on. It can also be purchased in bulk online or at local craft stores.

If you are harvesting beeswax from your own hives, you will want to allow gravity to remove as much honey from the wax as possible after extracting your honey. Place your wax in a five-gallon pail and top it off with water before pouring it through a colander to wash it. Then, place the washed wax in a double boiler to melt it.

You should always use a double boiler to melt beeswax and avoid melting beeswax directly on a n open flame. It’s extremely flammable, so don’t leave the room while you are working.

Afterwards, you can strain the melted wax through a few layers of cheesecloth to remove any particles. This can then be produced into a block mold to use around your homestead.

How to Use Beeswax on the Homestead

Beeswax has multiple purposes, with a delightful scent and a unique texture that makes it ideal for a variety of homestead tasks. You can use it by itself or with a combination of other ingredients to create products that have multiple uses around your home and farm.

1. Beeswax candles

It never hurts to have extra candles lying around the house for emergency situations. Plus, beeswax candles make excellent gifts! You can use rolled sheets of beeswax or beeswax tapers, or simply melt down beeswax chunks from your own hives. Add essential oils for a lovely scent.

Related Knowledge to survive any medical crisis situation

2. Sewing buttons

You can use beeswax in sewing to help make it easier to attach buttons. All you need to do is cut your thread to the length needed, then wrap the thread around a block for wax and sliding it along the wax. Push it down with your finger, and the thread will be much easier to knit.

3. Unstick a drawer or zipper

Just a little bit of beeswax can help make your drawers (or even your windows!) slide a bit easier. Just use a few drops of wax to lubricate the sashes. You can even put beeswax on the teeth of your zipper to make it easier to open.

4. Wax wooden furniture

If you have furniture or even structural elements (like ceiling beams) that you want to have a little extra shine, consider mixing equal parts of linseed oil, turpentine, and beeswax. Warm the mixture and apply with a rag.

5. Coat your cooking pans

Don’t worry about using butter or other unhealthy oils to coat your pans. Use beeswax! Just rub a small amount inside your favorite frying or sauce pan before use. Make sure the pan is slightly warm.

6. Seal envelopes

Don’t let your tongue get tired with all the mail you need to send – particularly all those cards at Christmas time! Instead, use beeswax to seal the envelope and you’ll save yourself a lot of effort.

7. Beeswax food wraps

Instead of relying on plastic, use beeswax. You can make your own reusable beeswax food wraps that are eco-friendly -and also better for your health.

8. Preserve a bronze or patina

You can also seal color and shine into copper by rubbing it with warm beeswax. Just polish off any excess with a rag.

9. Use beeswax for canning

Beeswax was used for hundreds of years to prevent jam spoilage during preservation. All you need to do is apply a coat of wax over the food between uses.

10. Clean your grill

If you like to grill – but hate the clean-up process – use beeswax. Make sure it’s warm, but then you can apply it to your grilling rack before use. It will prevent the buildup of food residue, but remember not to use beeswax while the grill is hot – it can flash up on you.

11. Loosen rusted nuts and lubricate screws

If your old screws aren’t twisting quite the way they should, you can use beeswax to smooth the drive and remove corrosion. All you need to do is rub a bit of wax over the threads to keep them lubricated.

Related Build yourself the only unlimited water source you’ll ever need

12. Clean your iron

If your iron has developed heat marks and is leaving stains on your clothes every time you use it, you might want to wipe it down with some beeswax. This should remove any residue.

13. Wax your own cheese

If you make your own cheese on the farm, regardless of whether it is from cows, sheep, or goats, you can make your own natural covers with beeswax. Allow the cheese to dry before applying hot wax. This will give it a proper seal.

14. Fix frayed rope

If you find that the rope you like to use around the homestead is beginning to unravel, you can fix it by wrapping a waxed piece of string around the tip of the rope a dozen times. Tie the loose ends and trim any excess.

15. Dye fabric

Beeswax can be used in a method of fabric dyeing known as batiking. This involves covering fabric that is not meant to be dyed with removable wax. You’ll need a bit of paraffin, too, but otherwise beeswax will do the trick for you.

16. Use beeswax on your saws

If you are preparing to use a hand saw in new wood, consider using some beeswax. If you rub the wax on the sawteeth, it will help them cut through wood more easily.

17. Condition wooden cutting boards

Before you break in your new wooden cutting board, condition it with beeswax. Combine a half-teaspoon of wax to a cup of mineral oil, and heat it up until the wax has melted. Apply it to the board using a soft cloth.

18. Make a pain-relieving salve

Beeswax has anti-inflammatory properties that make it an excellent item to reduce your aches and pains. Mix chickweed, wormwood, olive oil, and beeswax to create individual tins of pain-relieving salves.

19. Use beeswax as a fire starter

If you like to camp or simply enjoy having fires at home, use beeswax. You can brush melted beeswax into tiny squares of cardboard. Pack them with you, and they’ll help you start your next fire in a pinch.

20. Prevent rust

Apply beeswax to your favorite cast iron pans, hand tools, and shovels. This should prevent them from rusting out.

21. Polish concrete

If you have concrete surfaces, like countertops, in your home, you can use beeswax to give them a natural luster. All you need to do is rub melted beeswax on the surface, let it dry, and then wipe it away.

22. Soothe itchy skin

Did you accidentally come into contact with poison oak, poison ivy, or another itch-inducing substance? Consider using beeswax to heal the itch. You might want to mix it with some olive oil or chickweed powder to make it more effective – and easier to spread.

23. Propagate your plants

If you enjoy grafting new plants, consider using beeswax. It can easily hold two parts of plant material together, making it a natural and non-toxic solution.

24. Beeswax cosmetics

Beeswax is used in many popular toiletry and cosmetic items, including lip balm, hand and foot cream, and body butter. You may need to add ingredients like coconut oil, shea butter, or magnesium flakes, but otherwise, they’ll come together quickly and work like a charm.

25. Waterproof leather

Before you hang that saddle up, pull out the beeswax. By combining equal parts of tallow, neatsfoot oil, and beeswax, you can make a salve that can be rubbed on your saddles, gloves, or work boots.

Are There Any Drawbacks to Using Beeswax?

The short answer – not really! Because beeswax is a natural product, it is safe when used in most functions around the homestead. However, if you plan on consuming beeswax in any form, make sure you consult a medical professional first.

While it’s believed to be safe in treating most conditions, as well as when applied to the skin, it’s good to consult a doctor if you have any preexisting conditions or concerns.

Should I Use Beeswax on the Homestead?

Beeswax is a great tool to have around any home – but particularly around the homestead. If you live in a rural area or want to become more self-sufficient, beeswax is an excellent tool that has a long shelf life.

You won’t have to worry about running out any time soon! Consider using beeswax for these twenty-five most common tasks around the homestead today.


Other self-sufficiency and preparedness solutions recommended for you:

The vital self-sufficiency lessons our great grand-fathers left us

Knowledge to survive any medical crisis situation

Liberal’s hidden agenda: more than just your guns

Build yourself the only unlimited water source you’ll ever need

4 Important Forgotten Skills used by our Ancestors that can help you in any crisis

Secure your privacy in just 10 simple steps

While it may not sound fancy, honeycomb produces many pounds of beeswax which can then be used around the home. Here are some of the best ways to use beeswax

Nothing beats mom’s homemade food. Unless you live alone or don’t have any cooking skills or no emergency food left in the pantry. Well, you know how it goes – when life wants to throw crap at you, it uses a shovel. However dim the perspective may be, Mother Nature will always provide, if you know how to ask.

In today’s article, I’m going to talk about one of the most interesting birds out there – the pigeon. Some love them because they’re friendly and chatty and pettable, others not so much. I personally neither like nor hate them – they’re okay as long as they stay away from my car!

Anyway, even though the perspective of catching your own food is not something one would do out of pleasure, there are times when stop caring about those things and do what’s best for your growling stomach. If you find yourself without food, you can always enjoy a nice and tasty pigeon stew or steak.

The idea of eating pigeon meat may appear as revolting. However, history reveals that pigeon meat is not only palatable but a delicacy which once adorned royal feasts. During the 19th century, around Boxing Day, young couples and families would head out of the house to do a little bit of ice-skating.

As the weather was nippy, the skaters needed something hot and tasty to put some color back into those flushed cheeks. The snack of choice was the so-called Pigeon Pie Mystery. Fast-forward in time, pigeons have become associated with nasty things like car-wreaking, necrophagic behavior, and uncleanliness.

Despite these objections, pigeon meat is safe to eat, but you’ll need to catch them first. Sure, they may be friendly and a bit curious, but that doesn’t mean they’ll allow you to gut them.  In today’s article, I’m going to show you a quick and rather ingenious way of trapping pigeons, using common household items. Enjoy!


Gathering the materials for your first pigeon trap

For this project, you will need the following materials:

  • Plastic straw rope (you can replace it with dental floss or any kind of cordage).
  • An old plastic bottle.
  • Plastic bucket.
  • Wire cage (it doesn’t have to be new; if you can’t find one around the house, you can always go and buy one from your local flea markets or thrift shops).
  • Styrofoam board (should be about the size of the wire cage).
  • Crafts knife.
  • Pole.
  • Glue.
  • Small wooden board.
  • Hammer and nails.

Are you done gathering the necessary materials? Wonderful. Here’s how to piece together your first pigeon trap.

Crafting the backyard pigeon trap

Step 1. Remove the part of your wire cage. For this project, you may want to get one of those rectangular cages (mine is an old chicken coop I found in the attic).

Step 2. Glue the Styrofoam board to the top part of your cage. Allow the glue to work its magic before proceeding to the next step.

Step 3. Using your crafts knife, cut a hole in the Styrofoam board. The hole should be wide enough for your plastic bucket to pass through with any problems but, at the same time, prevent the pigeon from escaping.

Step 4. Once you’re done cutting the hole in the Styrofoam board, use the same knife to cut two small entrance on each side of the plastic bucket. If you really don’t want to sacrifice a bucket, you can go for one of those one-kilo yogurt containers. Just be sure you keep the lid.

Step 5. Apply some glue over the edges of the lid and place in on the bucket. Allow the glue to dry.

Step 6.  It’s now time to craft your wooden lever. Nail the small wooden board to the top part of the pole. Make sure that the board can move up and down freely.

Step 7. Plant the pole-and-board lever into the ground, just above the Styrofoam board opening.

Step 8. Make one small hole in the front part of the board and another one in the back.

Step 9. Draw some cordage through both holes. Ensure that the cord drawn through the hole made in the front back of the board is long enough as to allow the bucket to reach inside the cage.

Step 10. Tie the front string to the bucket’s handle.

Step 11. Fill your plastic bottle with water and tie it to the back string.

Step 12. Place a couple of seeds, kernels or breadcrumbs on the bottom of the bucket, and wait. Congrats! You’ve just built your first pigeon trap.

More on the makeshift backyard pigeon trap

The idea behind this simple trap is simple: attracted by the seeds or kernels placed on the bottom of the plastic bottle, the pigeon will land on the edge of the Styrofoam board. Bear in mind that pigeons are cautious by nature, meaning that they will take a good look at your thingamajig before stepping inside the trap.

If you cut only one small hole in the side of the bucket, the pigeon will not approach the seed, because it will realize that they’re no way out of there. That’s why you should have two openings.

Once the little sucker starts eating, it will probably figure out that everything’s okay and will step on the bottom to stuff its beak with them goodies. The second it steps inside, the bucket will be lowered inside the coop, trapping the bird.

You should pay extra attention to how the bucket’s lowered inside the cage. For this trap to work, the cord’s length should allow for the bucket’s body to reach the inner part of the cage, with the lid blocking the opening made in the Styrofoam board.

I can’t give you any precise measurements – it’s a trial-and-error process. One last thing: the plastic bottle’s contents. It would be wise to fill it with water instead of sand or earth; the trap’s sprung by the pigeon’s own weights. Putting anything heavier inside the bottle will make the trap useless.

That’s it on my makeshift pigeon trap. What do you think? Hit the comments section and let me know.


Other self-sufficiency and preparedness solutions recommended for you:

The Lost Ways (The vital self-sufficiency lessons our great grand-fathers left us)

Survival MD (Knowledge to survive any medical crisis situation)

Backyard Liberty (Liberal’s hidden agenda: more than just your guns…)

Alive After the Fall (Build yourself the only unlimited water source you’ll ever need)

The Lost ways II (4 Important Forgotten Skills used by our Ancestors that can help you in any crisis)

The Patriot Privacy Kit (Secure your privacy in just 10 simple steps)

Nothing beats mom’s homemade food. Unless you live alone or don’t have any cooking skills or no emergency food left in the pantry. Well, you know how it goes –

I know it isn’t just me.

Every prepper I know loves a good disaster movie.  Heck, it doesn’t even have to be that good for some of us to watch them.  We just enjoy sitting back and watching a fictional disaster unfold so that we can strategize how we would handle it, mock the hero for his or her poor decisions (you know, those dumb moves that a prepper would never make), and feel absolutely justified with regard to our lifestyle choices.

A movie is like the prepper version of a sporting event, where we can cheer, jeer, and scheme our ways through some imagined event. It engages our love for critical thinking while allowing us to take a break from our everyday activities.

Viewing a disaster movie or series actually serves a greater purpose than pure entertainment.  It’s a great way to introduce the preparedness mindset to your family.

In our house, we often pause the movie (I swear, the kids do it too. It isn’t just me lecturing them!) so that we can discuss what the character’s next move should be.  It encourages family members to think a situation through and try to predict the outcome of the boneheaded decisions that characters often make.

Just in time for your next Survival Movie Marathon

Below are some of our favorite survival-themed movies.  They aren’t all cinematic epochs, but there are lessons to be learned from them.  Often those lessons are “Here’s what you should never, never do in the event of a giant earthquake.” The shows can provide launching points for discussion with the kids. I shouldn’t have to say this, but before someone complains and thinks that I watched “The Road” with a 5-year-old, you must use your discretion and not scare the pants off of small children.

There’s a mixture of genres on our list: dystopian, wilderness survival, rebellion, natural disaster, manmade disaster, and even some sci-fi.  The common thread is that there are good lessons about humanity, how a crisis can bring out the worst in some folks, how you always have to think a step ahead, and how you must always have not only Plan B, but sometimes, C, D, or even the whole darned alphabet.

This list only contains movies. If you’re looking for a series to binge-watch instead, let us know in the comments and we’ll make a list.

50 Movies for Preppers

I chose only movies that can be found on Amazon or Netflix for immediate streaming.  Don’t worry, there’ll be another even longer list in the future!

In absolutely no particular order, just in time for your next Survival Movie Marathon:

  1. Zombieland (The first rule of Zombieland?  Say it with me, everyone: CARDIO!)
  2. How It Ends: A Netflix original about an apocalypse of unknown origin. I like that it starts off with the guy being anti-gun but shows his quick evolution.
  3. Waterworld (The planet is completely covered with water, ala a futuristic Noah’s flood, but with more boats)
  4. The Hunger Games (The first in the series, this movie takes place in a dystopian future where young people are pitted against one another in an effort to keep the majority of the country from rebelling against the pampered few in charge.)
  5. World War Z (Another zombie movie – this one features a virus run amok, civil breakdown, and a family struggling to survive.  My biggest issue with this movie was the whole “The UN will save you” and “Get your vaccines” theme.)
  6. Divergent (It’s another story about dividing and conquering in the quest for control)
  7. Red Dawn (’84) (The original tale of teens fighting an enemy occupation.  WOLVERINES!)
  8. Red Dawn (2012) (The remake with a new enemy and better clothes)
  9. Adrift (Based on a true story, a young couple manages to sail into a hurricane which all but destroys their boat and injures the guy. Talk about a survival mindset with this woman.)
  10. Tomorrow When The War Began (This is an Australian flick about some kids who come home from a camping trip only to discover that their country has been invaded by a foreign army)
  11. The Maze Runner (This is another dystopian teen movie, but it’s a good way to make survival skills look cool to teenagers)
  12. Swiss Family Robinson (This is from the 60s but a great family flick. It’s interesting to see how a shipwrecked family reuses things from the boat to make their survival tree-house more comfortable.)
  13. Aftermath (Maybe not the world’s finest film, but a good look at how hysteria prompts perfectly normal people to behave horribly.)
  14. L.A. Apocalypse (Even Hollywood knows that Los Angeles would be a terrible place to be in the midst of a disaster.)
  15. The Book of Eli (Brutal, but with a beautiful message.)
  16. The Day After Tomorrow (No!  Don’t burn the books!!!)
  17. 2012 (Mostly, I just love the Woody Harrelson conspiracy nut character who turns out to be right about everything.)
  18. The Road (So horrifying and dark I could only watch it once.)
  19. Elysium (The Earth has been all but destroyed, and the elite look down from above…as always.)
  20. Terminator Salvation (The most “survivalist” of all the Terminator movies, it takes place after the whole shindig at Cyberdyne, when machines rule the world)
  21. Alive (The one about the plane crash survivors who ate their teammates.)
  22. Cast Away (Love this! It points out the value of creative problem-solving but also explores the mental toll that survival can take on a person, particularly if they are alone.)
  23. Poseidon (2006) (There is so much “what NOT to do” in this movie!)
  24. Defiance (A story of resistance against a much greater fighting force)
  25. The Revenant (A man who makes his living in the outdoors is mauled by a bear and left for dead by his “friends.”)
  26. The Edge (This wilderness survival saga emphasizes skills and smarts over the usual macho special effects ninja stuff)
  27. The Grey (Plane crash, frigid elements, very uncool fellow survivors, and hungry wolves.)
  28. Against the Sun (Holy cow. Being stranded at sea. NOT the way I’d want to go.)
  29. Snowpiercer (I have to admit, I didn’t really love this movie. But it’s a good illustration of how power can corrupt even a good person.)
  30. Panic in Year Zero (A family heads off to go camping shortly before a nuke hits Los Angeles. A good example of the “Golden Horde” here, even though the nuclear stuff wasn’t super accurate.)
  31. Behind Enemy Lines (A soldier who was shot down in enemy territory must use his skills to survive until he can be rescued.)
  32. Into the Wild (A young guy gives away all his stuff and hitchhikes to live off the land in Alaska.)
  33. Contagion (Two awesome lessons in this movie: how easily a virus can be spread and how important it is to be able to lock down and shelter in place in the event of a pandemic.)
  34. Outbreak (Another deadly virus movie that emphasizes the ease at which a pandemic can take place.)
  35. V for Vendetta (Dystopian cinema at it’s finest. I absolutely LOVE this movie. Not really about survival, but about the value of freedom and the importance of standing up for what is right)
  36. War of The Worlds (The original invasion of Earth by aliens. The classic has the added bonus of not having a highly annoying character played by Tom Cruise, who you will itch to slap in the newer version)
  37. How I Live Now (A girl moves to the English countryside, but soon the idyllic setting is marred by war and a military state. She has to hide out to survive.)
  38. Soylent Green (Too many people on the planet means not enough food. Watch as the horrifying truth comes out about what people are actually being fed.)
  39. Children of Men (There is only one last ray of hope in a world where no babies have been born in nearly 20 years.)
  40. Extinction (Aliens have invaded and a dad will do whatever he must to save his family. Twist at the end)
  41. Goodbye World (You’ll be envious of the awesome SHTF set-up these people have.  That is, until you find out they are completely unarmed and horrified that someone has a gun. IT’S AN APOCALYPSE, PEOPLE!)
  42. The Postman (There’s often civil unrest after a war. This movie is about hope in the American West after civilization has basically been destroyed.)
  43. Remnants (Solar flare. Continuity of government plan. Total chaos in the streets.)
  44. Deep Impact (Doomsday is approaching in the form of a giant comet that is due to impact Earth and cause an extinction level event.)
  45. The Host (Don’t pre-judge this movie based on the fact that the author also wrote The Twilight Saga. It’s about a group of survivors who create a sustainable lifestyle after aliens eradicated most of the humans. And of course, the subsequent rebellion against the aliens.)
  46. Dante’s Peak (When the volcano near a small town is discovered to be no longer dormant, it’s time to get the heck out of Dodge.)
  47. Solar Attack (A solar flare is racing towards earth, changing the climate, and promising massive devastation if not extinction. The plan to stop it is kind of silly, but there’s a lot of interesting information about CMEs (Coronal Mass Ejections)
  48. Cat.8 (Who’s surprised that the government uses some technology they should never have invented and causes Armageddon?)
  49. 127 Hours (A hiker gets his hand stuck between two rocks. Waits. Waits. No help. Not many people would have the courage to do what they’ve gotta do to survive.)
  50. Birdbox (Yes, the premise is kind of stupid. But the survival aspects of letting the wrong people in, gangs of crazy people, and operating by the new rules of a chaotic situation are well-illustrated.)

What are your favorite prepping or survival movies?

I know you’ve got movies to add to the list!  Please share them in the comments below. Remember, they don’t have to be examples of GOOD survival skills. They can also be cautionary tales!

I know it isn’t just me. Every prepper I know loves a good disaster movie.  Heck, it doesn’t even have to be that good for some of us to watch them.

Your garden is beautiful, and you’re putting so much energy and money to keep it in that condition! However, you’re upset with those growing bills, especially during summertime! And you suspect that the garden is the main causer of those spendings. What is there to be done? We have the answer! It is energy-efficient landscaping!
It will help to reduce your bills, make your garden more eco-friendly. Plus, a well-designed landscape may save up to 30% of the energy that an average household consumes. 

1.    Reduce Using of Gas
If you use gas-powered garden equipment like gas weed eater it’s better to reduce the amount of usage! Gasoline is far more expensive than electricity. Plus, your neighbors will thank you since electrical-powered devices are much quieter. 
Such tools are a great option for those who take care of the environment because gas-powered equipment releases carbon monoxide into the atmosphere.

2.    Use of Water
Plants need water to be green and beautiful. In summer they must be watered really often to survive. A lot of gardeners use water inefficiently, they waste resources and, as a result, money. 
To save water do not use a hose in your garden, it’s better to employ can so that you control the amount of water. But if you can’t do without a hose, a trigger will help to reduce the usage of aqua.
In summer you should water the plants early in the morning or in the evening. This way soil and plants will absorb aqua better, and it won’t be wasted through evaporation. 

There are other ways to save water:
•     Utilize natural resources – rainwater; put a barrel and collect some
•     Use “greywater”: collect water from showering, sink and even laundry. Just make sure you won’t use such water for fruit trees and vegetables. 
These water-saving methods are environment- and budget-friendly. Do take them into account!
 
3.    Take Care of the Soil
The quality of the soil is crucial for energy-efficient landscaping. You should know different types of soil so that you make it “healthy.” However, there is a basic rule. Use fertilizers, but do avoid chemicals! Compost is the best decision!
It’s not only safe to fertilize edible plants, but it’s also completely eco-friendly. 

Other steps to improve the soil:
•     make good tilth
•     maintain the soil pH
•     rotate the crops  
 
4.    Use Solar Lights
If you like resting in the garden after a tough day, you need some light. And here solar lights come and reduce your bills! They are really energy-efficient since they use small batteries, they convert sunlight into electricity and shine bright. They last long and do not use a lot of energy. Solar garden lights are not that expensive, they are easy to install, and there won’t be any wiring.
But not only that! Drap colorful solar string lights around trees and bushes, they will look lovely! Solar lights are an up-to-date, appealing and budget-friendly solution for your garden! 
 
5.    Choose Plants Carefully
Drought-resistant plants are an excellent solution for an energy-efficient garden! They are really eco- and budget-friendly. Such plants don’t demand much watering. If you use rainwater or “greywater,” your expenses will be significantly reduced due to low water consumption. Plus, you won’t have to take much care of them. Hence, there is no need to use a mower so often. If you have a gardener to do your job, with drought-resistant plants you’ll forget about this. See how much you could possibly save?!
Big shady trees are also a great solution! Spots under such trees will remain cooler. You could plant some vegetables, and they wouldn’t need to be watered so often during hot summer days. 
Besides, deciduous shade trees help to keep your house cool. Just make sure you plant such a tree near the house side which gets more sunlight. We call it landscaping for energy-efficient homes. Take it into account if you’d like to reduce your bills.
We do hope our expert tips prepared with help of garden care expert Dmitri Kara will be helpful and you’ll be able to make energy-efficient landscaping in your garden!
 
As you can see, there are a lot of ways to make your garden energy-efficient. It’s also an excellent opportunity to demonstrate your love for nature. Do you have any tips on effective gardening? We’d appreciate it if you share them with us in the comment section!


By ARCHIE ADAMS 

Archie was a builder for more than 40 years. Mainly after his retirement the enthusiastic electrical works in garden and writes for a blog Homemakerguide.com to keep himself occupied. His many years of experience can get you the right tool reviews whether it is a drill, welding machine or so. An impressive fact to note about him is that almost everything in his house is a representation of his skills made by his hands.
 

Why do you need energy-efficient landscaping? Because you’ll spend less energy and money to keep your home and garden! Find top tips on energy-effective gardening here!

Honey contains a treasure chest of hidden nutritional and medicinal value for centuries. The sweet golden liquid from the beehive is a popular kitchen staple loaded with antibacterial and antifungal properties that has been used since the early days of Egyptian tombs.

Honey’s scientific super powers contribute to its vastly touted health benefits for the whole body. The healthy natural sweetener offers many nutritional benefits depending on its variety. Ready for a natural sweetened life?

RAW HONEY

There are various types of honey. The best for overall use that is, for eating and for medicinal purposes, is raw honey. Raw honey is honey that has not been processed by man, it is the same honey that is found in the beehive and is not pasteurized with heat; it may however be strained or altered.

Raw honey contains many spores and pieces of wax from the honeycomb as well as bee parts, etc. Raw honey has the benefit of helping people who are suffering with allergies to local plants and many times is used by patients to treat their allergies.

If this is done, it has to be raw local honey, which is usually made from either a blend of local hives honey or comes from a single source hive that has collected nectar from local sources and has not been treated with heat to pasteurize it.

Raw honey also has the highest antioxidant properties of all honeys. For our purposes as preppers, raw honey is the type of honey that we should use; it has its enzymes still intact.

Heating above 125 degrees F for a half hour usually destroys the enzyme content of most foods. Enzymes are very beneficial to your health and will aid both in digestion and overall health.

Most farm stand and farmer’s markets and local beekeepers honeys will be raw and unpasteurized. If you have any doubts, ask the person selling it, but as a general rule they are not pasteurizing their honey.

PASTEURIZED HONEY

Pasteurized honey is like pasteurized milk, it has been heat treated, usually at 161 degrees F or higher. Pasteurization is done to kill the yeast spores that are present in honey and responsible for its fermentation if the water content of the honey reaches 25 percent or higher.

That is the reason why you keep your honey covered, to prevent it from drawing in water vapor from the surrounding air and diluting the honey until it reaches that critical 25 percent when the yeast spores will reactivate and begin fermentation.

Commercially produced honeys are often pasteurized because this also dissolves any sugar crystals that frequently develop in honey, giving it a granular appearance. People often see crystallized honey and think it has spoiled, but this is not the case, and simply heating it in a pan of water will melt the crystals back into solution. The reheating of crystallized honey is done simply by placing a jar of honey in a small pot filled with water and placing that inside of a larger pot and heating it.

STRAINED HONEY

Strained honey is honey that has been strained through a mesh cloth of some type. This removes many of the particles and contaminants in honey. It does not affect the enzymes and other properties of honey and is merely cosmetic.

FILTERED HONEY

Filtered honey is heated to about 170 degrees F in order to make it more liquid to pass through the fine filter. The filtering process removes all of the particulate matter, pollen grains, and air bubbles, and it is very clear and more liquid than untreated honey. This is the kind also very often found in supermarkets. It also tends to crystallize much less than raw honey, so is felt to be more attractive to shoppers than raw varieties.

CREAMED OR WHIPPED HONEY

Creamed or whipped honey is another type of honey that has been processed to remove many of the large sugar crystals and therefore is much less likely to crystallize. The process involves the pasteurization of raw honey and then the blending of it with 10 percent creamed honey to form a honey with very small crystals that usually will not coalesce into larger crystals. This type of honey is very spreadable and is often used by people for toast and sandwiches.

HONEYCOMB OR COMB HONEY

Comb honey is honey that is still in the wax honeycomb from the honey bee’s hive. Chunks of the honeycomb are cut out and packaged raw. It is identical to raw honey with the only difference being that it is still in the honeycomb. It is sometimes known as “cut comb honey”.

MANUKA HONEY

Manuka honey is the most powerful of the various medicinal honeys produced around the world. It originates from New Zealand and is made from the flowers of the tree of the same name. Manuka honey is a monofloral honey, meaning it originates from just one type of flower, as opposed to poly oral honeys which are the product of many different flower nectars.

Another name for the Manuka tree is the Tea Tree and it primarily grows in wild stands in Australia and New Zealand. The name Tea Tree originates from the famous Captain Cook who discovered Australia and upon landfall is said to have made a tea from the leaves of the Manuka tree. It is the same tree from which Tea Tree Oil is made.

Manuka honey has the highest viscosity (thickness) of any known honey and also therefore has a very strong antibacterial effect. Hence its use in the treatment of wounds, where it has been shown to prevent infections as well as promote rapid healing.

I have used it many times and can attest to its superiority over other types of honey. It also has been shown to be quite beneficial for use for skin ulcers as well as for burns, and even has been shown to be effective against MRSA (Methicillin Resistant Staph. Aureus).

As a Final Prepper, I highly recommend buying a few jars of this honey and using it exclusively for wounds, burns, and ulcers and use other less expensive honeys for eating and other purposes. It has an “earthy” type of taste to me and I am not particularly fond of it as a food, but that is just my personal preference.

Due to the limited number of Manuka trees there is naturally a limited supply of this honey available annually, hence it is much more costly than other honeys.

Beware of counterfeit types of this honey and buy it from a reputable dealer preferably from “down under” in New Zealand or Australia. Most of the honey sold worldwide as Manuka is counterfeit and made from oral sources other than the Manuka or Tea Tree.

Manuka honey’s strength and healing powers are actually measured by a system known as UMF or Unique Manuka Factor; the higher the value given in UMF labels, the stronger the healing properties. It is usually in a factor of ten range; for example ten plus, twenty plus, etc.

PURE HONEY

Pure honey is honey that has not been adulterated or changed by the addition of glucose, dextrose, molasses, corn syrup, starches, invert sugars, our, or any other foreign substances. The Chinese have been notorious for adulterating their honey and I would highly recommend not buying any honey from China for that very reason.

Unfortunately, there appears to be a lot of tampering with honey, especially from foreign sources.

If you can, buy local honey from a reputable beekeeper. There are many around and this should not be a problem. Finding a local beekeeper and recruiting him into your survival group is probably a very good idea.

Local honey will also have bene ts for any of your survival group members who have allergies. Again, crystallization of honey is not a sign of adulteration and comes about simply from honey’s sugar super saturation.

One not very scientific method for determining if honey is pure is to stir it into a glass of water. The adulterated honeys will dissolve much more quickly than pure raw honey, which tends to coalesce into clumps and take a little time to dissolve properly.

The Grading of Honey

A word about honey grading: Honey grading is primarily done on the basis of the water content of the honey as well as its particulate content and its color.

There are four grades of honey; A, B,C, and substandard. Grade A honey has the lowest water content, the least particulate matter, and is the clearest in color. Lesser grades have more of all of those factors.

Honey quality can also be easily evaluated by certain characteristics. The honey should flow off of a spoon in a straight stream without breaking up into drops. It should also bead up upon hitting a surface, and when owing onto a surface should form temporary layers that eventually disappear. This attests to its proper viscosity.

If your honey does not do these things then it probably contains too much water and is not suitable for long-term storage.

The color of honey tells you something in general about its flavor. The lighter honeys have a milder flavor and the darker-shaded honeys have a more robust flavor.

The overall color of raw honey is determined by the oral source of the bee’s nectar. However, long-term storage may darken a honey, especially if the honey is stored at a high temperature. Honey also lightens in color after it has undergone granulation. This is the reason that most forms of creamed honey are so light in color.

Over time many honeys tend to crystallize. This is normal and does not hurt the quality of the honey and can easily be reversed by gentle heating as described above. Depending on the type of honey, some such as Manuka, crystallize rapidly compared to Tupelo honey, which takes a very long time to crystallize. Crystallization means that the honey forms actual white-colored sugar crystals on the surface, this does not affect the quality or taste of the honey, and you should not discard honey that has done this.

How to Store Honey

  • Honey should be stored in either glass containers or food grade containers to prevent the leakage of any chemicals from a plastic vessel.
  • You should keep your honey in a cool, dark place out of direct sunlight and away from any heat source like a furnace or space heater.
  • Honey should always be in a closed container with a tight lid to prevent absorption of any humidity which will change the honey and promote its fermentation.
  • You should always use a dry spoon when scooping any honey from its container in order to prevent the introduction of any water into the honey.
  • Some honey purists feel that stainless steel spoons and other implements should not be used with honey, due to some subtle changes in the taste of the honey. Honestly, I have tried tasting honey with a wooden ladle and with a stainless steel spoon and I cannot tell any difference, so in my humble opinion, it doesn’t matter at all.

As a Final Prepper I would stock up on a large supply of raw local honey from a reputable source like a local beekeeper. You might even consider enlisting a beekeeper into your survival group. Or having some of your group members learn the art of beekeeping due to its incredible usefulness for a variety of survival uses from medicinal to nutritional, as well as pollination of your survival garden and orchard.

Since raw honey stored properly will last forever, and due to its multiple uses, I would keep as large a supply as you can afford. Honey will very likely be an important barter item in the post-apocalyptic economy.

Since raw honey stored properly will last forever, and due to its multiple uses, I would keep as large a supply as you can afford. Honey will very likely be