Home2020December

What can be composted?

  • Leaves
  • Grass clippings
  • Brush trimmings
  • Manure (preferably organic)
  • Any non-animal food scraps: fruits, vegetables, peelings, bread, cereal, coffee grounds and filters, tea leaves and tea bags (preferably minus the staples)
  • Old wine
  • Pet bedding from herbivores ONLY — rabbits, hamsters, etc.
  • Dry cat or dog food
  • Dust from sweeping and vacuuming
  • Dryer lint
  • Old herbs and spices

Today, we’re talking dry leaves. Ready? Let’s!


A gardening enthusiast, whether it be for commercial or personal use, often incorporates compost in hopes for the best results possible for their crops. Compost is created through a natural process when recycling organic material turns into a rich supplement for the soil. It’s so good for gardening that it’s been nicknamed by some as “black gold”.

However, compost can be rather costly to purchase, averaging in most areas about $25 to $35 per cubic foot. And, if you have a large garden area, that can add up very quickly.

So, many people turn to making their own compost. In fact, there are several tools available to help make your own. But, what if you want a lot of it for spring planting, and you are entering the cold winter months?

Fortunately, you can make compost even in the winter…and lots of it. And, it’s easy and it only requires 2 ingredients! One is fallen leaves, which are abundant heading into winter. If you don’t have your own, a trip down the road you might spot several brown bags stuffed with leaves, just waiting to be picked up. If you ask, they probably won’t mind if you pick them up, rather than the garbage truck.

The other ingredient is used coffee grounds.

Composting Leaves with Coffee Grounds

You should first determine how many leaves and coffee grounds you will need. So, plan out what you will be planting in the spring to gauge how big of an area you will need. I will be doing a very small area for the purpose of demonstration in this article. But, even for a relatively small garden, start collecting leaves ahead of time.

Now, on to the coffee grounds. I doubt too many of you drink enough coffee to gather up the amount of coffee grounds you will need for this project…unless you start collecting months prior to composting.

I called our local Starbucks to see if they would collect a couple days worth of used coffee grounds for me. I fully expected them to be confused. But apparently, they save used coffee grounds for gardeners. If your local Starbucks does not save these, call another one nearby, or any coffee house. You can stop in there a few times a week to collect their grounds, if you are hoping for a large garden. So, not only is this composting easy, but it’s free!

The Basics of the Composting

Composting takes a little bit of “brown” and a little bit of “green” to create a rich supplement for gardening. Dried, or fallen leaves fall into the “brown” category, while the coffee grounds play the role of “green”. Yes, even though coffee grounds are actually brown, and leaves are often green.

The “brown” in composting is producing carbon, and the “green” brings the nitrogen. And, both are necessary components for the compost to thrive. Organic matter will eventually compost down without help in time…lots of time. However, not everyone wants to wait that long.

The Process of Composting with Leaves and Coffee Grounds

It’s a very simple process. The hardest part just might be deciding where you want to put it. But, a good option would be right where you plan on planting in the spring. The leaves and coffee ratio is 4 to 1 parts. So, if you have a lot of material, use a shovel to make it easy.


Make a layer (remember 4:1 ratio) of leaves on the ground, or in a shallow and long bin or a raised garden bed. Sprinkle, or use a shovel to make a layer of used coffee grounds over the leaves. Lightly sprinkle the pile with water, unless you are starting with a wet pile. Repeat each step until you run out of material, or think you have enough. Make sure that each layer is damp as you go. Just remember, as it goes through the process, the pile will appear to shrink. Once you have your pile all set, turn the pile every few days. Check to make sure it looks and smells fine, and isn’t drying out too much. If it is, dampen it again. You could also start with mulched leaves, which will significantly speed up the composting process. However, if you are going to use mulched leaves, change the ratio from 4:1 part, to 1:1 part.

Extra Tips in Composting

There are other “browns” you could use in place of or in addition to leaves, such as:

  • Shredded paper/cardboard
  • Hay
  • Mulch
  • Wood chips

And other “greens” that could be used in place or in addition to used coffee grounds include:

  • Vegetable
  • Vegetable or fruit peels and skins
  • Used coffee filters
  • Manure
  • Tea bags
  • Grass clippings


However, using any of the following is NOT recommended:

  • Pet fecal matter or waste
  • Meats or bones
  • Fats or oils
  • Dairy
  • Diseased plants
  • Anything with pesticides

Pay attention to the smell of the pile. It should have an earthy aroma. If it starts smelling bad, add more nitrogen, or “green”. Also, pay attention to the texture. If it’s slimy, add more carbon, or “brown”. Don’t confuse slimy with dampness. You want it to be damp, just not slimy.

Winter Composting

Even though the process will slow down in really cold regions, that’s OK. You should continue to add some “brown” and “green” to the pile every occasionally throughout the winter, even if it freezes. It will thaw eventually, and the thawing and freezing ebb and flow will contribute to the compost breaking down faster come springtime.

In the spring, throw some hay over the pile to help protect it until you are ready to use it, because it will let off an aroma when thawing, attracting critters.

Use it within the soil when you plant your spring crop.


Other self-sufficiency and preparedness solutions recommended for you:

The vital self-sufficiency lessons our great grand-fathers left us

Knowledge to survive any medical crisis situation

Liberal’s hidden agenda: more than just your guns

Build yourself the only unlimited water source you’ll ever need

4 Important Forgotten Skills used by our Ancestors that can help you in any crisis

Secure your privacy in just 10 simple steps

What can be composted? Leaves Grass clippings Brush trimmings Manure (preferably organic) Any non-animal food scraps: fruits, vegetables, peelings, bread, cereal, coffee grounds and filters, tea leaves and tea bags

Prepping in some cases is about taking proactive steps to avoid or mitigate the risk of danger. Usually when we think of prepping nirvana the vision is a remote location, far away from the hustle and bustle of any city. Something like the Walton’s home that is far away from any neighbors and a trip into town isn’t something you make for a single carton of milk like we currently do. The ideal location provides safety from the threats we routinely discuss on Final Prepper, but there are a lot of factors to consider if you are looking for your own survival retreat.

Some of you may be thinking that the hour is at hand and any chance of finding a survival retreat for your family has passed. That train has left the station and if you aren’t already in your off-grid sustainable home, it’s too late. I don’t know if that is the case for everyone. I do believe that even if SHTF happened right now there would be ideal (as possible) locations that people could move to. Now, this movement might be a long and tortuous process. You may be moving not because you have stuck that For Sale sign in your yard, but you might be moving cross-country as part of a bug out after a collapse has happened.

Assuming for a minute that you have the resources, desire and time to move to a new survival retreat, your safe place from the rest of the world, what types of features should you be looking for to make your new home most suited for long-term survival and self-sufficiency? The items below are not in priority order, but I think they cover a few of the bases.


Water Sources

You know that you must have water. There is plenty of good property for sale in the desert that is pretty affordable, but without water how long can you live there? The perfect survival retreat property has at least two sources of water year round. A well is one desirable feature but if you are buying land outright with no improvements you may have to have someone come out and so an assessment on your property. Assuming you have a good source of ground water you could drill your own well or have someone take care of that for you. Rain barrels are a great alternative, but what if it doesn’t rain enough to replenish the supplies you need?

In addition to a well, running water in the form of a spring, river, stream or even stationary water from a pond will greatly extend your ability to provide water for your family, livestock and crops. It should go without saying that all water on the surface will need to be disinfected prior to drinking. Well water will need to be tested also to make sure it doesn’t contain toxins from farm runoff or pesticides aren’t present. The USGS has a good page explaining different sources of water for the rural homeowner and important considerations.

You need to have great soil conditions to grow food to feed your family and livestock.

Soil Quality

So you have a great piece of land nestled back in the forest and water flows freely from a creek on the property. You still have to eat don’t you? For most people that includes some form of crop production that will likely account for most of the food you consume. You can have thousands of chickens but you will need to grow crops to feed them as well as yourself. Man cannot live on chicken nuggets alone contrary to what millions of children across the world think.

Testing the soil quality on a piece of land is an important consideration before you purchase any property. There are soil testing kits you can purchase online that will quickly tell you the soil conditions. Once you know the type of soil you have, you can work to amend it if necessary. There are a few common issues:

  • Soil is too acidic – Adding lime, poultry manure or wood ash to your soil can make it more alkaline and raise the pH to a healthier level.
  • Soil is too alkaline – Many gardeners swear by coffee grounds as an inexpensive, safe and readily available way to lower pH levels.
  • Soil is lacking nutrients – Organic matter can include anything from compost to bone meal to lawn clippings, depending on your specific needs.
  • Soil is too sandy or dense – Adding peat moss is an inexpensive and effective way to loosen up clay soil, while compost can build up and enrich sandy soil.

If you don’t have the ability to purchase a soil testing kit, you can go the DIY route as well. The video below shows you how.


Growing Season

Along with soil quality, you will need a long growing season to maximize the amount of produce and crops you can grow. Each part of the world is different and most sustain some form of plant growing, but there are differences. You can read more about growing zones on the USDA website or view the map below to see where your survival retreat property falls.

How long will you have each year to grow crops?

Location

Strategic Relocation has a myriad of data points and analysis on the best locations to move for survival.

This is usually the first criteria that people consider when they are looking for a new home and you might say some of the items above fall into the location aspect. The location of your retreat does matter greatly from a couple of standpoints. Ideally you want to be further away from high concentrations of people. The golden horde affect will be a very real risk I believe in the face of large disasters, wars or economic issues. Look at the migrants fleeing Syria right now landing in Hungary to see a real-live example of the migration of people away from troubled areas. The further away you are from large centers of people the better off you will be from the risk of a swell of people on foot in a tragedy.

Do you have plenty of timber on your property? How far away are you from neighbors? Will there be any developments that put a big neighborhood or shopping complex in your back yard? Who owns the property near you?

Location also matters when you are considering paying for this new survival homestead. Are you able to find work that will pay the bills? Even if you buy your piece of land and pay cash for it, there will always be taxes. You will likely need to purchase some supplies and that requires money. Perhaps you have a source of income that isn’t dependent upon location and that might be the best. What about schools, access to healthcare? All of these are considerations you will need to make. Strategic Relocation is a great resource that takes a lot of the finer points and makes them easy to search. We also have access to a free download that allows you to use Google Maps to mine data on threats as well. Read more about that here.


Moving is never easy, but if you are planning to move primarily for the security of a survival retreat, the decisions are harder than simply moving to a better neighborhood across town.

What other factors would you consider before you moved?

Prepping in some cases is about taking proactive steps to avoid or mitigate the risk of danger. Usually when we think of prepping nirvana the vision is a remote location,

To start today’s discussion of EMP shielding, we are going to go back to 1755.

As you may know,
our polymath founding father Benjamin Franklin conducted many experiments with electricity in the mid-18th century.

Franklin’s kite experiment is perhaps the most iconic, but in 1755, he discovered a way to shield objects from electrical charges. He did this by lowering an uncharged cork ball suspended on a silk thread through an opening in an electrically charged metal can. In his words:
The cork was not attracted to the inside of the can as it would have been to the outside, and though it touched the bottom, yet when drawn out it was not found to be electrified (charged) by that touch, as it would have been by touching the outside. The fact is singular.

Franklin had discovered the behavior of what we now refer to as a Faraday cage or shield. Faraday, a British scientist, is given credit for inventing the shield in 1836. To do so, Faraday duplicated Franklin’s original experiments.It gives me pride knowing that one of our nation’s forefathers discovered something that may protect us from threats today – without even knowing it. That’s certainly the spirit this nation was founded upon.

What is a Faraday Cage or Shield?

In the simplest terms, a Faraday Cage or shield is an enclosure that blocks electromagnetic fields. They can be tiny, or large enough to hold people and even larger for massive equipment.

They are formed by a continuous covering of conductive material (typically metal), or using a mesh of conductive material. A shield uses a continuous covering while a shield created with mesh is typically called a cage. This is mostly semantics, with many calling all such units cages. Potato, potato.

Besides being of interest to those of us in the preparedness community, Faraday cages are used in many fields. They are used in certain medical procedures to keep from interfering with equipment outside of the cage. Law enforcement uses them to protect recovered wireless devices from being wiped or altered during investigations. These are just a couple of examples.

In addition, Faraday cages help many of us along in our preparedness journeys.

We know that a powerful EMP, especially one produced by a high-altitude nuclear weapon could mean our grid and electronics could all go down.If this happens, having electronics shielded beforehand could be a life-saver.However, we also know that our government has not heeded calls from the EMP Commission and others to harden our grid and critical infrastructures. Countries like China, Russia and even North Korea have all taken measures to do this while our government focuses on more important threats.

What this means is that without a grid, many of our electronics (especially ones that make communication easy in our modern world) will be useless. That means no cell phone calls, no texting, no email, no social media. An old smart phone used for storage of survival knowledge might be a good idea to shield though. Just don’t expect any service. GPS also will not work on any phone, as they don’t actually use satellites for positioning, but cell phone towers.


What should you shield in a Faraday Cage?

This will vary depending on your own personal situation, but I advise you to shield only the most critical items first. You can always add to your cage or add more cages as you go. Here is a list to get you thinking about your own needs:

  • Flashlight (especially LEDs; batteries do not need protection)
  • A small transistor radio (CB, digital scanner and ham radios too, if you have them)
  • A device you can store and access digital files on
  • Walkie-talkies and two-way communication devices
  • Night-vision and laser optics (binoculars, rifle scopes, spotting scopes)
  • Electronic medical equipment
  • Spare critical electronics for vehicles

This by no means an exhaustive list.

How to build your own Faraday cage?

It is quite easy to build your own Faraday cage. Many common items can be used or repurposed for EMP shielding.

Most ad-hoc cages are built with conductive metals. Two common items used are metal ammo cans and galvanized trash cans.

While all-metal items like these are great at protecting items inside from electro-magnetic fields, they still will conduct electrostatic charges. This means that any electronics directly in contact with the metal could be fried if electrical charges are present. So it’s a good idea to insulate these containers to prevent this situation, with something like corrugated cardboard.

I’ve even seen a few Faraday boxes built out of storage containers and crates for housing large electronics or even entire vehicles. Many of these are made of steel, which is okay, but you need to make sure it has no openings. So, knowing how to weld (and insulate) on a commercial scale will be critical there.

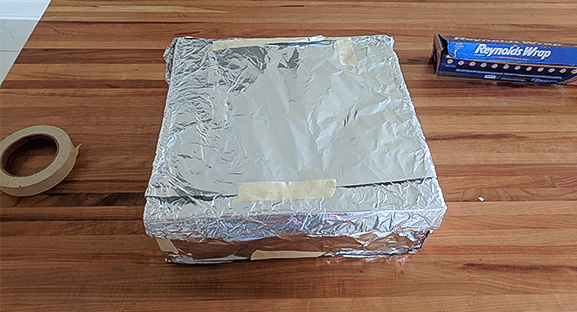
Pro-tip: aluminum foil is your friend. Get the heavy-duty foil. You can use foil to make any container – like a shoe box – into a Faraday cage. You can even wrap a few layers of foil directly around a device for a quick, impromptu shield (be sure to insulate the device first, and be careful to tightly seal with no gaps). They even make aluminum foil tape that can be useful in sealing up a cage made from an ammo or garbage can.

Which reminds me:
the opening to your cage is your weakest link. Be sure to make sure the opening has no gaps – airtight if you can. You can do this by using gasketing material or extra foil. If you can avoid opening the cage until you absolutely need what’s inside, that’s the best course of action.

Final tip: consider “nesting” for extra protection. The more layers of conductive material we put between our electronics and any outside electromagnetic fields, the better protected they are. This is a good idea for particularly sensitive instruments and electronics with a lot of components.

An example of a nested Faraday Cage would be an ammo can inside an insulated trash can. The devices inside the ammo can would have two layers of nested protection.

How to test your Faraday Cage?

Now that we’ve gone through the trouble of building a Faraday Cage, we want to be sure that it will effectively protect the devices inside.

However, there is a lot of contention about the best way to test our cages for their shielding effectiveness. Obviously, we can’t test it under the actual conditions we are preparing for, so we make an approximation.

The most scientifically legitimate way of testing a Faraday cage that I’ve seen involved using an RF meter and placing it inside the cage to be tested. A good one can cost a few hundred dollars. Unless you’re a radio operator, this may be an unnecessary expense.

The simplest and easiest way to test your EMP shielding at home is to use a quality radio. Simply turn it on, tune it to a station with a strong, clear signal, then place it in the cage and seal it up. If you can still hear the station, your cage fails the test. But if it goes quiet or static, it passes this at-home test.

If my cage passes the test, is it EMP Proof?

The answer to this one is tricky. We’ll refer to a resource a reader like you sent in. It comes from a three-part series on EMPs and their effect on professional and amateur radio broadcasters.

Will a model ABC123 smart phone survive an EMP at a given location?

Maybe.

Every MegaHertz of spectrum will have some energy in it from an EMP. Predicting the total energy arriving at a distant location requires modeling the propagation efficiency for every frequency. Then the modeler will add up all of the voltages from all of the frequencies to obtain the peak Voltage applied to the victim device.

Due to this infinitely large number of parameters which determine the strength of the Voltage imposed on any distant electronic device, it is computationally prohibitive to predict, with precision greater than the nearest order of magnitudethe level of stress which any particular piece of equipment will be forced to endure.

Thus, the answer to so many questions is “maybe.”

While we might not be able to accurately model an EMPs effects on our particular cages and shields, I believe that some protection is better than nothing.


Government Doing Testing Of Its Own

While we’ve been busy testing our Faraday cages for this article, the federal government has been doing some more EMP testing itself.
From November 4-6, the Department of Defense, along with the Army Military Auxiliary Radio System (MARS) and amateur radio operators, conducted a
simulated “very bad day” scenario. This kind of scenario is defined by those involved as any event in which the national power grid fails along critical forms of communication.

This simulated exercise also included a simulation for a Coronal Mass Ejection (CME) event, also known as a solar storm (which we know can produce EMPs).

According to a MARS operator, this simulation is a routine training event they conduct 4 times annually. This info surprised me, because I believe that the government is ramping down measures related to the EMP threat. We saw the EMP commission close its doors less than two months ago, along with other disappointing developments. But this makes me feel
slightly better – knowing that routine exercises like these still exist.

That about wraps up our primer on Faraday cages. I hope you’ve found this to be inspiring and helps you along in your preparedness journey.

To start today’s discussion of EMP shielding, we are going to go back to 1755. As you may know, our polymath founding father Benjamin Franklin conducted many experiments with electricity in the

“By failing to prepare, you are preparing to fail”, were the wise words once uttered by one of our Founding Fathers, Benjamin Franklin, and they are the words that have helped prepare me for a countless number of scenarios. Preparing for D-day, or Doomsday, might sound funny to some, but there is nothing funny about good planning and tact. There are so many people who go about living their day-to-day lives without any concern as to what may happen tomorrow. They are casually living in the moment and basking in all of its glory. The act of preparing for the worst possible scenario does not make you a naysayer, instead, it makes you a visionary. You choose to look past the present and plan for the future. This is the principle that many, if not all, preppers operate on.
Doomsday could arise due to a different number of factors, however, the commonality between these numerous outcomes is the fact that you will have to keep yourself, your family, and those you love, safe and secure.

Adequately preparing for doomsday before it happens is the key to surviving whatever calamity the world throws at you. This could be in the form of a natural disaster, nuclear fallout, or even a zombie apocalypse. In any case, when the day comes, you want to make sure that you are secure enough to live to see tomorrow. Let’s take a look at five security measures that you can implement to help you stay alive during doomsday.

Strengthen Your Doors

The importance of your doors can never be overstated. Aside from the fact that they have symbolic value as the entryway into people’s homes, your doors are also meant to keep intruders out. There will never be a point in time where this will be more necessary than when Doomsday hits. The door to your home (home is relative in this situation) is an integral part of your defense, and it should be the most secure part of your “fortress of solitude”. This will deter any unwanted guests, and make sure your security stands strong against any attempts at forced entry.

In order to strengthen your door you should first evaluate the material that your door is made of. Most residential doors are made of wood, steel, or fiberglass. In most cases homeowners will not have to replace the doors they already have, unless the door is made from an extremely low-grade material or if it is not a solid core wood door. This is an important step that should not be overlooked, because the rest of the tips that will follow will mean very little if your door can easily be kicked in. Have you ever read “The Three Little Pigs”? That story will probably sum up the aforementioned point much better.  After evaluating your doors you need to focus on the locking mechanism and additional features that you can employ to make sure it makes it harder for intruders (and zombies) to gain access to your home.

Doors in most commercial homes lack basic strength to withstand brute forced entry.

It is advisable to make use of ANSI grade 1 deadbolt locks for your doors. Grade 1 deadbolts are made to withstand 10 strikes of 75 pounds of force, and they are effective at keeping doors secure. In preparation for a doomsday event, it will be best to make use of multiple deadbolts within your door to increase the security that they give you. In addition to using these deadbolts, you can also improve your door by using reinforced steel or wooden bars and rods (Zombie Bars). In order for this to work properly, you will have to install additional pieces onto the wall on either sides of the door so that your security bar can be held in place across the door. Implementing security bars and multiple grade 1 deadbolts will make your door extremely hard to get into, and that is what you want. In addition to these methods, you can also increase the security of your locking mechanism, to cater to any zombies that prefer to pick the lock rather than kick the door down. This can be done by using additional security pins, changing the materials of the spring in the lock, by using anti-pick locks, etc. In addition to this being a good opportunity to prepare for the worst-case scenario, it also gives you the chance to re-evaluate your home security.

Strong Chains And Padlocks

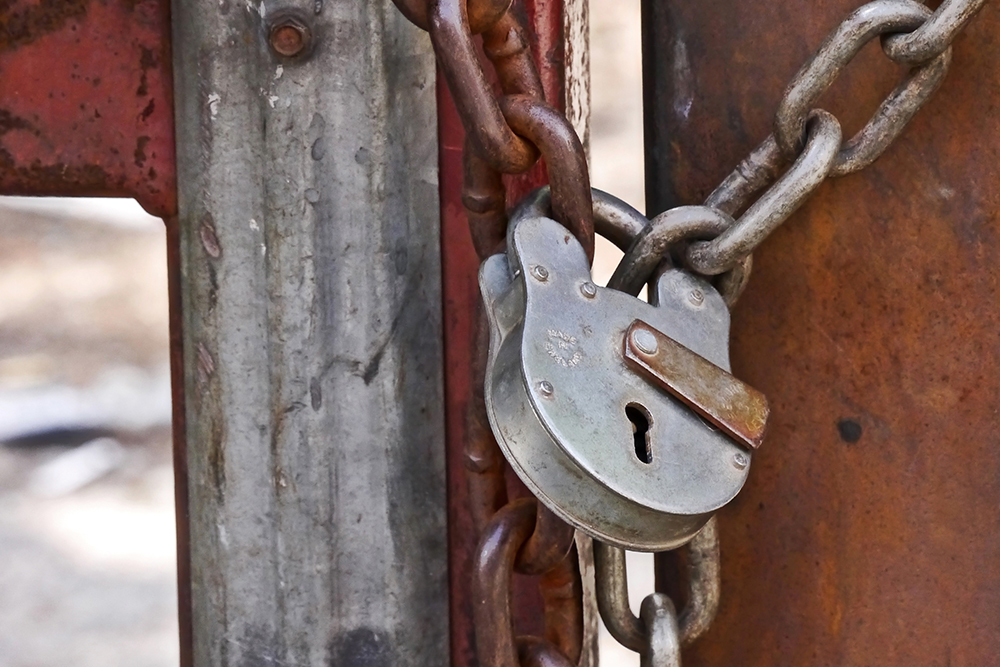
Another security measure that will help keep you alive involves making use of strong chains and padlocks. Chains and padlocks can be used in conjunction with the measures outlined above to make your door even more secure, but they can also be used on the go or to bar access to storage units. Not many things are certain about Doomsday, but you can be sure that people will be on edge, and that everyone will be looking to grab whatever they can, however they can. As such, it is of extreme importance that people utilize chains and padlocks to keep their valuables secure when they are on the go. It is also important to take into account the fact that people will need to stay mobile, depending on the state of things in their neighborhood. As a prepper, it is best not to wait until it’s too late, so invest in some good chains and padlocks today.

Chains and padlocks can be used in conjunction with the measures outlined above to make your door even more secure, but they can also be used on the go or to bar access to storage units.

When you set out to buy chains and padlocks, you want to make sure that these are strong and resistant to cutting attacks. It is best to employ the use of hardened steel chains with hexagonal links. These kinds of chains are highly resistant to bolt cutters and they help keep your items more secure. When you are choosing a padlock, you want to make sure that you pick a padlock that is made of boron carbide alloy (extremely strong and long lasting). Make sure that the padlock uses ball bearings to hold the shackle in place rather than a levered mechanism. And finally, make sure that the padlock has a hard and thick shackle.

Padlocks and chains can prove to be quite handy in varying situations. They give you the opportunity to secure your belongings when you are on the go and they can also give you added security when you settle down in a bunker somewhere.

Secure The Perimeter

Securing the perimeter of your property, or wherever you are camped out, is crucial to your survival. It helps warn you of impending danger as well as ward off the danger. There are several ways to secure the perimeter, but it is important that you keep some key factors in mind. It is imperative that your perimeter is kept well lit so that you can see any threat from a mile away and so that you can adequately prepare for it. In addition to this, you should make sure that your perimeter is either walled or fenced off. When walling off your property/space, make sure that you account for length. There will be no point to putting up a wall to protect yourself if that wall is easily scalable. However, sometimes it is not about the length of the wall, but about the material of the wall. Some walls can be retrofitted with spikes, cables etc. that make it a more arduous task to attempt to scale it. This will undoubtedly deter anyone (zombie or human) that thinks it would be a good idea to try and get over your wall.

The act of securing your perimeter also applies when you are on the go. It is important to have a security structure in place that warns you when danger is approaching and one that also helps you keep danger at bay. This can be accomplished by rigging booby traps or setting up makeshift fences with varying materials to keep your immediate vicinity secure while you are mobile.

Sustainable Defense

Now, this security measure is among the most important. This is because all the steps that are listed above will mean very little if you cannot sustain them. It is crucial that you have a sustainable defense plan. This is to ensure that you can continue to take care of yourself and those around you. A good chunk of the preparation process is learning. Yes, as mundane as it sounds, learning as much as you can is one of the best security measures to help keep you alive. It is important to learn as much as you can about the things around you and the components that go into making bullets, medicine, how to manage electricity, etc. It is essential that you learn how to properly obtain and store these items for long periods of time, since they are bound to come in handy. These are crucial security measures that will help keep you alive. One half of this equation is aimed at making sure that you are not caught with your pants down. The other half of the equation makes sure that if you are caught with your pants down, you can still get out of it alive.

IMAGE_4

It is important to realize that when Doomsday hits, in all its gruesome glory, there will be any unknown variables that the majority of people will be struggling with. There will be lingering questions about power, water, food, and shelter. It will be imperative that you have measures in place so that you are taken care of for the long haul.

Get A Dog

Yes, you read that right. One of the best ways to keep yourself secure in a doomsday scenario is to have a dog. If you dispute this fact, make sure you watch “I Am Legend” and you will see why dogs come in handy in all manners of situations. Dogs are reliable and they are good traveling and hunting companions, as well as being an additional method of securing your belongings since they will alert you to the presence of anything. Also, should the need ever arise, dogs are capable of holding their own in a fight and they make for amazing combat partners. Dogs have a heightened sense of awareness and having one around in a dystopian doomsday world will most likely increase your chances of survival and keep you around much longer.

One of the best ways to keep yourself secure in a doomsday scenario is to have a dog.

Conclusion

There is no prepper out there eagerly waiting for the world to crumble just so that they can yell out “I told you so”. That is not the reason why this is done. Prepping is done to make sure that everyone is prepared for the worst-case scenario, should it ever happen. Adhering to these 5 security measures will undoubtedly prolong your life during doomsday. However, do not be fooled into thinking that these are the only things that will help you stay alive. If this time ever comes, survival, safety, and security should be at the top of your list of priorities. This mindset will see you through a great many ordeals.

“By failing to prepare, you are preparing to fail”, were the wise words once uttered by one of our Founding Fathers, Benjamin Franklin, and they are the words that have