Why written emergency plans (EP) are better than just having one on your mind
Terrorism attacks, accidents or natural disasters can occur any time and if you are unlucky enough, leave you dead or in a hospital and in a dire financial situation. Fortunately, most emergencies are somewhat foreseeable such as flooding, wind and solar storms and hurricanes and to some extent, health problems. As it were, constant disaster preparation is a life philosophy of every prepper, and one of the ways to prepare for an emergency is to have a logical emergency plan for you and your family.
The purpose of this post is to analyze why written emergency plans are better than just having one on your mind. But before we even go there, why do you need to plan for emergencies in the first place?
It reduces potential losses and damages – Emergency planning may involve, for instance, buying and placing fire extinguishers all over your house and teaching family members how to operate them. Thus, they will be able to stop fires before they spread and raze the whole house.
It’s a confidence boost – With an EP, you and your family will know what exactly to do in case of an emergency. In the event of a disaster, they will be calmer and organized as opposed to the panic, chaos, and feelings of helplessness that accompany unpreparedness. Isn’t that what makes preppers ‘better’ than other people? Well, more dependable for sure.
Helps you get through emergencies – Planning for food, clean water, and medical supplies for sick members of your family makes it easier to go through difficult situations and saves you much-needed money.
Having said that, we can now agree that emergency plans are too important to be stored in memory or on your phone or laptop. You need to put it in writing for the reasons discussed in the next section.
5 Reasons Why Your Emergency Plan should be in Writing
Below are some reasons why hard-copy emergency plans absolutely rock:
For Easy and Fast Reference
Keeping your EP in hard copy and making enough copies for everyone enables them to quickly check what to do or who to contact in an emergency. On the flipside, keeping emergency phone numbers or procedures in your memory may cause panic when, in the face of disaster, you forget some numbers or steps. As a matter of fact, it is quite hard to focus or remember things in such occasions. Additionally, when your family members are not privy to your plan, they might get panic attacks or get hopeless when faced with a calamity, which can, in turn, affect your psyche and your reflexes.
It is even worse if you keep your plan on your phone or computer as it could go off exactly when you need it the most. You might also not be in a position to access your electronics and as you know, emergencies and time wait for no man. With printed copies, which by the way should always be in your and every other family member’s sight, you won’t have a problem with communication and managing disasters as they happen.
Writing Keeps You Focused and Self-Aware
When you write, your brain is focused on the act of writing and strives to create a logical flow. As such, you are able to write what’s on your mind without filtering any thoughts. Most importantly, old-school writing (using pen and paper) will help you remember disaster preparation concepts that you’ve learned whether from life experiences or government programs. You will also retain knowledge by noting it down as your brain will go into overdrive trying to decide the words to use, committing to long-term memory in the process. In an unfortunate situation, you will be able to remember at least some parts of your plan even without referring to the binder.
When it comes to emergency planning, we recommend that you first write all your concerns and aspirations in case of emergency on a draft paper then compile them into an organized document.
For Fast Review and Corrections
When you plan things in your head, the chances are that you won’t be able to see any faults in your thoughts. On the other hand, when noting down your plans, you can always review later to check for mistakes and do corrections. In this context, you can do further research and consultation with experts, authorities and your family and compare their thoughts, opinions, and suggestions with your plan. Also, keeping a hard copy of your emergency plan close to you gives you the chance to read it over and over at different times and with time, you might be able to see some mistakes you overlooked and amend them in time.
It’s Easy to Make Helpful Notes and Schematic Drawings While Writing
As mentioned in the first point above, the act of writing focuses your thoughts on one idea at a time. Sometimes, as you jot down a fire management strategy, for instance, you can almost ‘see’ a certain thing or action in your mind that would be convenient in such a situation, such as an available door for quick exit.
Depending on the clarity of the mental image, you can make a drawing to show how one can move from different rooms in the house to the exit door and on to safety. Whether you are a good artist or not, as long as you can focus on a single image and make a draft, it can always be improved and polished by another person. Furthermore, it would be easier explaining to your family the movements and procedures to follow in case of a disaster using images and drawings as opposed to only words
If Something Happens to You, Your Family Can Use Your Plan
Keeping everything to yourself or on your phone, which probably requires passwords for every action, will only make things difficult for your people in case something bad happens to you. For one, they probably won’t be aware that you had an emergency plan in the first place. Secondly, if they can’t access your plan, they will come up with their own which could be ineffective due to panic. Sadly, statistics from the US government show that only 33% of Americans have communication plans in case of emergencies.
In essence, by writing a comprehensive emergency management plan in an easy to understand manner, you not only make things simpler for yourself but to your family, neighbors, and friends too. They will know exactly what to do in case of anything and everything and who will be in charge of what, thereby minimizing confusion, chaos, and stress.
Conclusion
It is often said that failing to plan is planning to fail and as a prepper, it’s hard to argue with that. Emergencies and disasters are messed up by themselves. You don’t want to add disorganization and disorder to it. Create a plan for such occasions, put it down on paper and circulate it to every member of your family and close friends. With that, you will be able to at least minimize the disastrous consequences of those bad days on you and your family’s lives.
Why written emergency plans (EP) are better than just having one on your mind
Terrorism attacks, accidents or natural disasters can occur any time and if you are unlucky enough, leave
There are a lot of ways to eat food if the grid goes down, but almost without fail the best way is hot. Oh, sure you can swallow a lot if you are on the run. MRE’s were designed to be eaten cold. Canned food is edible right from the can, but I haven’t met a meal yet that didn’t taste better with a little doctoring. Maybe its some spices or cheese, but heating almost anything up makes it taste better. The warmer your meal is, especially in colder months, the better you feel when you are eating it. A warm MRE meal can actually taste great. OK, it can taste pretty good if you heat it up.
With the need for warm meals you are looking at some type of system for getting that food warmed up. We have discussed how if the grid goes down, how you might find yourself where there is no kitchen to cook your meals. Yes, you can use a fireplace, but what if you don’t have any wood? What if you want to keep your fire smaller to help avoid detection.
This is when knowing how to make a survival stove system can come in handy.There are hundreds of examples of stoves out there. I have a jet-boil, which isn’t really a stove, but I can boil water for soup or cook foods quickly with just a little gas. There is always the rocket stove if you have the time and wood available, but I just found a great tutorial for how to make a small alcohol stove out of two coke cans. If you can’t find two coke cans laying around somewhere you are hurting.
Alcohol stoves use denatured alcohol for fuel and are very common with ultralight backpackers because of the huge weight savings. You can pay a pretty high amount for these stoves, but that isn’t necessary if you have some time and a willingness to try your hand at creating something. These can be made simply with just a couple of tools you may already have and give you an excellent source for cooking or even heat in a pinch.
Alcohol stoves use denatured alcohol for fuel and are very common with ultralight backpackers because of the huge weight savings. You can pay a pretty high amount for these stoves,
Natural and man-made disasters happen often without warning. Hurricanes, blackouts, terrorist attacks — you name it, anything could happen in a blink of an eye. In such situations, a well-prepared bug out bag with at least 72 hours worth of supplies is crucial to survival should events force you to evacuate from your home and expose you out there. And since every luggage space and weight counts, your bug out bag essentials should be lightweight, heavy-duty, and versatile. Add to or personalize this bug out bag checklist depending on your needs, but make sure you have all the bases covered. Read on to learn more about what to pack for survival.
Never Forget Water
Water should be at the top of every emergency survival list as the human body can only go on for three days without hydration. Prepared For Survival says a minimum of one liter a day per person is a must, along with water filters and purification tablets to treat water for additional supply.
Fuel With Food
While a person can survive longer without food than without water, you will need every ounce of energy to get you through any crisis. Opt for food stock items that are high in calories but do not require much space or preparation. Canned goods like beans, meats, and the like can be opened and eaten while on the go. Another option are preparing your own emergency food supply to which you just add water.
Survive With A Knife
And no, not a pocket knife. It may be more convenient to tote around, but you will need something more substantial for serious chopping of food, cutting of ropes, and even defending yourself when the situation calls for it. Bring one with a length between 4” and 6”, according to this Instructables knife guide.
Tools To Start A Fire With
With fire’s many important uses — cooking food, boiling water, providing warmth and comfort, and sending out a rescue signal — you better bring waterproof matches or lighters to ignite sparks. For an excellent homemade fire starter, use cotton with petroleum jelly, which, according to The Prepping Princess, can also be used to prevent wind burns, lubricate tools, and so on.
Heal Quick With A First Aid Kit
You can buy this at drug stores or better yet, create your own. In any case, Red Cross recommends first aid kit essentials such as medications, bandages, gauzes, and the like that should enable you to deal with illnesses, wounds, fractures, and so on while waiting for further medical assistance. Red Cross also advises that you update your stock regularly.
A Dose Of Survival Clothes
Rich Johnson of Getting Out Alive emphasizes the importance of the right gear for staying dry, keeping warm, and protecting your vital body parts such as your head, hands, and feet. For these, he suggests that you ready your clothing made of wool or synthetic material for insulation, head cover, trail shoes or boots and socks, and leather gloves.
Makeshift Shelter To Survive Any Weather
Away from the comfort and security of your home, you need to protect yourself from the heat or the cold so you can better go about your activities or simply rest. Decide on a lightweight sleeping bag or camping tent. For more affordable options, Creek Stewart of Willow Haven Outdoor recommends packing a tarp or a poncho. Don’t forget to include a rope or parachute cord and duct tape to secure your shelter.
Bring On The Lights
Aside from flashlights, consider glow sticks and LED lights, headlamps, and key chains, as Prepared For Survival suggests. Secure a supply of high-quality batteries; bringing lighting items will be in vain without those.
Communication Devices
It is crucial to still be able to receive and transmit data even if the usual modes of communication fail. Choose the right phone, radio, or walkie-talkie for you that will suit your desired specifications and budget. As with lighting items, prepare a good supply of batteries.
A Stash of Cash
Lastly, you should have cash on your person. Again, cash, not a credit card. Have it ready in smaller bills. Prepare change as well.
Once you have determined the bug out bag contents that you need, choose a portable backpack that is big enough to hold all of them. Since you would never want your bag to give up on you, invest in a backpack durable enough to withstand extreme conditions, but comfortable enough to carry for extended periods of time. Bags with plenty of compartments provide strategic ways of stuffing your survival essentials into your bug out bag.
With a clear understanding of these emergency survival staples, you will be able to customize your bug out bag essentials based on your needs and wants. So what are you waiting for? Put your bug out bag together now so you can confidently face whatever disastrous event that may occur any time in the future.
Natural and man-made disasters happen often without warning. Hurricanes, blackouts, terrorist attacks — you name it, anything could happen in a blink of an eye. In such situations, a well-prepared
Living below poverty level, has, in a sense, forced me to prepare for anything coming my way. Learning the value of plants has saved me more than once. The one thing I believe all preppers should know is the art of herbal medicine. Mother Nature has always been a tried and true way to heal what ails you. Native Americans did it, the Chinese do it, and every holistic doctor out there can tell you that Mother Earth has provided for her children like any good, nurturing mother. No matter where you’re located, you can always locate plants for cultivation. Plants found in your garden that you’ve probably thrown away as weeds, (I hate that word!) have amazing curative powers. Even if you live in an area that is densely populated, you can still find plants such as Purslane, Dock, Bindweed, Dandelion, Plantain, Chickweed and more. But the number one rule of herbal gardening and gathering is: KNOW YOUR WEED.
1. Know Your Weed – Mother Nature can be tricky when it comes to identifying her bounty. For example, Purple Loose-strife, excellent for treating diarrhea associated with typhoid fever or dysentery, has a copycat called Rose-bay Willow. To rookie Rose rustlers (my word for plant foragers) the two plants are one and the same. This could be potentially dangerous, as each plant contains different properties. The best thing to do if you’re unsure is to bring a field guide with you for quick identification.
2. Pick One Mile From Highways – For obvious reasons, lead levels being one of them. Also, you might want to keep a low profile and stay clear of areas that are out in the open.
There’s so many reasons why you should start learning how to forage for medicinal and edible plants, but the main thing, is to start NOW. You’re going to find that once you start, there’s no turning back. When I first started, foraging became my obsession. Every plant I saw I HAD to know whether it was edible, medicinal or both, and then how to use it. I learned something new every day. But during times of trouble, not only will you always have food and medicine; you also have healing knowledge to barter with. Think about it. With no way to go the pharmacy and pick up a prescription, people will be willing to give you everything you need for that knowledge.
A wild plant field guide could be an invaluable resource if traditional food supplies dried up.
Take those suffering with asthma, for instance. Without the use of inhalers, what will they do? They will come to you because you know of a plant called New England Aster that will ease that elephant sitting on their chest. People will hear through the grape-vine of your amazing healing knowledge and be willing to barter with you for medical help. Much like the olden days when you could trade fur pelts and even a good meal for medical care. But in order to have that knowledge, you must start now.
Let’s do a little recap of the benefits of plant foraging. Besides the ‘now’ factor, knowing where to look and what to look for is extremely important. You don’t want to poison yourself or others. Just remember that most plants have look-alike impostors.
Stay at least a mile away from highways to keep lead levels down and out of the sights of strangers.
Mother Nature’s pharmacy has literally hundreds of plants and herbs people can use for healing. In this section, I’d like to talk about six of them that everyone who is a prepper should know and be able to identify. The first is:
Aloe Vera- I think everyone should have this plant for its miraculous healing properties. Just break open one of its fleshy leaves and use the gel inside for pain relief and a soothing feeling. By extracting the gel of a large leaf into a glass of water you have yourself a mild laxative as well.
Aloe Vera has miraculous healing properties.
Dandelion- Not only are Dandelions delicious, its leaves full of beta-carotene and Vitamin C, this awesome herb also has bile stimulating properties which in turn enhances the body’s ability to get rid of toxins. This comes in handy if having trouble locating fresh; running water and your body is constantly bombarded with bacteria.
Lemon Balm- I highly suggest growing this aromatic plant. I was delighted with this plant this year which yielded a bounty of fragrant, lemon leaves if when used as a tea, can calm and sooth agitation and irritability. It can be used just before sleeping as it has a calming effect. Lemon Balm is also good for stomach ailments. Not good for pregnant women, though, as it will stimulate the uterus.
Have a sour stomach? Try Lemon Balm.
New England Aster- This beautiful, aromatic flower grows just about anywhere, but mainly in such places as abandoned lots and fields. It has a variety of amazing uses, especially for those suffering from asthma or COPD (Chronic obstructive pulmonary disease). New England Aster is primarily used as an expectorant, relieving cold induced coughs and expelling phlegm. Eating its fresh flowers produces a relaxing, sleepy feeling.
Blood Flower- Now here’s a handy plant for those of you eating poisonous berries or other plants you’re not sure about. Related to the milkweed, its milky sap can be used as an emetic. (It makes you puke). Not only that, but the sap can also be used to relieve the pain of stinging nettles and bug bites.
Catnip- Besides driving your cat crazy, medicinally, I think it will blow your mind. It relieves cold symptoms much like NyQuil, it can stop bleeding and swelling, and it’s also a fever breaker as it promotes sweating. Part of the mint family, this plant can relieve gastrointestinal problems, menstrual cramping, and migraine headaches.
The sap of the blood flower can also be used to relieve the pain of stinging nettles and bug bites.
Sage- My last pick for ‘must know’ plants is Sage. Most of you, when you think of Sage, thanksgiving stuffing comes to mind. But when it comes to super healing plants, this is my top pick. Sage is anti-fungal, anti-inflammatory, and anti-oxidant. Before the invention of the refrigerator, sage was used to preserve meat, perfect if you’re hunting for meat. Sage fights colds, aids in digestion, fights diarrhea, reduces inflammation and swelling, dries up phlegm, relieves cramps, can be used as a salve for cuts and bruises, kills bacteria, and it’s even said to bring the color back to graying hair.
I hope by now I’ve convinced you of the importance of knowing your plants in a world that could turn on us in an instant. The time to learn is now, and the benefits are invaluable. Next time you get an urge to pull a weed, why not look it up and be pleasantly surprised by what that weed can be used for.
Living below poverty level, has, in a sense, forced me to prepare for anything coming my way. Learning the value of plants has saved me more than once. The one
In a high percentage of survival situations; you might argue all of them, clothing is a major component. For your Bug Out Bag we generally see recommendations of a change of clothing, or clothing to protect you from the elements, should you be stranded. Clothing is a part of a larger area of concern and that is shelter because clothing can help protect you from the elements. It is not the same as having a building to go into, but the proper clothing can save your life. We talked about this in our article on controlling your core body temperature and I think most people understand that you need to have the right clothes for whatever you are doing.
For example, in the winter you may have shelter in the form of an abandoned building, but no heat. Perhaps you are under a tarp camping in the woods. The right clothes can keep you warm enough so you survive. If you are hiking, you would wear hiking shorts or pants, hiking boots or shoes and a comfortable shirt, possibly a hat to protect your face. All of this makes sense because we can see ourselves in situations where that fleece can keep us warm, or those hiking pants could dry quickly or that hat could protect us from the sun or rain.
Logic tells us what to pack in survival situations if we are getting a load of gear ready, but that same consideration isn’t given to everyday situations. We routinely leave our houses without any of the same thought about what we are wearing and how that may help or harm us in an emergency. The concepts of EDC are lost below the waist and it’s as though we forget that disasters don’t really call you up and let you know when they are coming. Why do we only think of survival if we are packing for it?
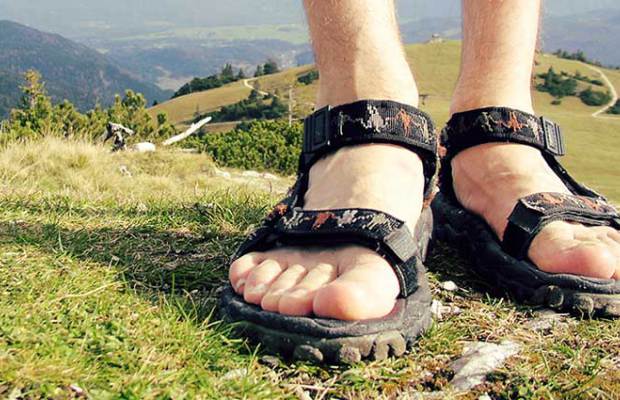
Some people wear flip flops everywhere. Image Source: Vuurwapen Blog
A pet peeve of mine is people who wear flip-flops during a normal day. I don’t mean at the beach or pool. I am talking about people, and you may be one of them, who wear these every single place they go. These days, there is no occasion sacred enough to shame people into not wearing this stupid footwear. It used to be for the overwhelming majority of Americans, that flip-flops were a great beach shoe or something you wore in the shower in the military so you didn’t get athletes foot. Now, flip-flops are everywhere. People wear them to weddings, work, semi-formal dances, airports, churches, funerals, concerts, the mall, at the gym, to their gynecologist, and on and on. Honestly, I think this is the dumbest form of protection for your feet that you can choose regardless of how cute they are ladies.
This probably lumps me into the “In my day…” territory of grumpy old curmudgeon’s throughout the eons and that’s fine. I have felt this way ever since the “Business Casual” trend brought about changes like this, but in the years since flip-flop use has become even more common. I’ll admit I am biased in my derision of this fashion trend because women do catch somewhat of a break. Men, in my opinion should never wear flip-flops unless you are near a visible body of water or you are a lifeguard. This includes boys too.
Now, I fully appreciate that sandals have been worn for thousands of years. Even the mighty Spartans and Gladiators fought in sandals and did just fine, right? The Viet-Cong wore flip-flops and did a pretty bang up job of dealing the United States a major thumping. However, I don’t think I would get too much push back on the statement that sandals aren’t the most ideal shoe if you are going to be in a fight or running. Do guerrillas in sub Saharan Africa wear flip-flops? Maybe, but still does that make them the best footwear?
I have to believe that if you are prepping for some type of emergency situation for your family, not having footwear that will be up to the task could be a big Achilles heel in your preparations. (pardon the pun) This got me to thinking about what the best footwear would be in a survival situation. To further clarify what I mean. What do you want to be wearing if you are faced with a survival situation? It isn’t enough in my opinion to have your spare pair of boots loaded into the trunk of your car. What if something happens while you are in the mall in your flip-flops?
In my day-to-day duties, I can easily wear my pick of lots of acceptable shoes. I can wear boots, dress shoes, sneakers, loafers, anything. With the outfit and occasion I wear something that is appropriate but it covers the following conditions.
Can you run in it?
My daughter and I like to talk about Zombies. They are simply the motivation in her mind for some of the things we do and I don’t think there is anything wrong using this as a device to get her to visualize things. One of the things we talk about is will her shoes be good for running from zombies. This started off as a joke I would use, but I think it has her thinking on a practical level now and she will routinely tell me about choices she made that will “be good for running away from the zombies”. She knows that zombies aren’t real, but she can appreciate the fact that if you have to run, you want something that can actually stay on your feet. Nothing like losing a shoe in the middle of fleeing from a herd of zombies and having to say time out, need to put my shoe back on.
This applies to a myriad of other scenarios too. What if you are in a mall and some lunatic goes on a rampage. Would you rather be running out of that store in a good pair of sneakers, or slipping around on the floor in your flip-flops? Making these choices when you leave the house can affect how you are able to respond in an emergency.
Does it protect your feet?
When I am flying I think about all of the people wearing flip-flops and sandals and think about what if we have to crash-land? Granted, having an airplane crash is pretty slim odds and they are even slimmer if you consider crashing and walking away from it, but anything is possible. Let’s say you crashed in the mountains and the pilot was able to bring it in so that most everyone survived. Would you want to be navigating panicked people, through the wreckage, possibly fire in flip-flops? Maybe the scenario is a hurricane and there is a lot of glass broken, sharp edges of sheet metal and exposed wires. Would you want to be in some cute little shoes to navigate that destruction?
Will it stand up to abuse?
Finally, will that shoe take a beating? I can appreciate a good-looking shoe on a woman, but they aren’t practical at all. What if the grid went down while you were on a business trip and for some reason you had to walk back home over a great distance. Would your shoes that you are wearing hold up? A lot of shoes today look nice, but the quality of construction is so cheap. They aren’t meant to be abused or last a long time. If you only had one pair of shoes to last you for years, would you want it to be the ones on your feet right now? Those nice canvas slip on shoes wouldn’t last against a sharp stick much less sharp metal. The high heels that you love to wear look great, but could you walk 500 miles in them?
So, what am I trying to say? Am I advocating the abolishing of all flip-flops and high-heel pumps? Absolutely not. I am not saying that everyone needs to be walking around in steel toed combat boots all of the time, but if you are routinely in shoes that you don’t think would be good in a survival situation, it may be worthwhile to consider different options for when you get dressed. At work, I would make sure I have comfortable shoes appropriate for the dress code that can get me back home safely and without injury. They might not be the toughest shoe, but they do offer protection from sharp objects like debris and are comfortable enough to walk a long distance.
When I travel, along with any dress shoes I pack hiking shoes or boots in the winter. These will be what I wear if I really have to hike back home. Regardless of the distance or disaster, I want something that will protect my feet and enable me to worry about other things. If I am on a plane, I don’t take my shoes off and get comfortable because something may happen that causes my shoes to get kicked away and then what would I do if I needed to evacuate quickly? Just think about the situation you may be in before you plan your wardrobe. You may be thankful you chose a different shoe one day.
In a high percentage of survival situations; you might argue all of them, clothing is a major component. For your Bug Out Bag we generally see recommendations of a change
Before I start this article, I want to make it plain that I am not a combat trained individual, at least in a military sense. I am a retired deputy sheriff with 25+ years service, a long time prepper, and a person with an innate distrust of our government and politicians, the latter two with good reason: first, personal experience, and second I am a wide-eyed, open-minded individual that has been lied to, brain washed and tricked repeatedly over the span of my life.
My law enforcement experience has given me training in many areas that are pertinent to this article, as viewed from the “other side.” As a solo resident deputy in a very rural area, I took calls ranging from loose dogs up to and including homicides, frequently in remote areas, and I had to have the tools and equipment to handle all aspects of the call, usually with little assistance. I had to carry with me everything I might need and being a prepper really paid off in many cases. It is my firm belief that the day is coming when we conservative patriotic Americans are going to find ourselves on the receiving end of actions initiated by our government and the associated agencies they have created, DHS, FEMA, TSA, NSA, and all the associated agencies that have recently been armed. These agencies may act independently or with the assistance of the UN or foreign governments and troops, but there should be little doubt as regards their targets! Factor in the new breed of law enforcement officers, those that will gleefully do what they’re told even when they know their actions are unconstitutional, the ones that go to work hoping for a shoot out, and We the People had better be ready, far beyond planning to make it for two or three days or even long-term, if the supplies and other “stuff” we have amassed become “public property.”
As to the theme of this article: I have talked with and worked with many preppers and survivalists over the years, and many, if not most, will “publicly” deny making preparations to do battle with an out of control government, or with UN troops, or whoever. In private, this is not the case. The out of control government scenario is discussed, planned for and prepared for, even expected. Many of those involved in the discussions have prior military experience, combat experience, and others are law enforcement, often with SWAT experience, while many others are free thinking Americans that see the need to be prepared for all eventualities. While the level of training will vary widely, one thing all have in common is an innate distrust of our current government and the feeling that things are going to change, for the worse; people are scared and they realize they will be dependent on themselves and their friends and families to survive. The rise of citizen militias in the 90’s, continuing to this day, and the view of these by our government speaks’ volumes for the fears of Joe America. Add to this the phenomenal success of all manner of prepper and survival books, from basic field craft to guerrilla warfare and improvised explosives and it’s easy to get a feel for what is happening with many people. Fear is a great motivator!
So its’ finally happened…..a big time SHTF event, with little forewarning; it is basically an overnight happening. For whatever reason, the government has declared martial law, the provisions of the NDAA have been implemented, and along with all the executive orders floating around, Americans have become prisoners in their own country; patriotic American citizens have been declared the enemy….you have become a criminal and a target! The internet is down, radio and TV programming is being handled by the DHS, which means you hear only what they want you to. People in need are being told to report to fusion centers, relocation or refugee centers, prisons’ by any other name, the centers which the government swore did not exist, and many people have no choice but to comply. Their existence depends on society in general and the government in particular. Credit cards won’t work, few people have physical money, limited foods, little training and no hope or ideas. Locations have been set up to receive guns and ammunition, excess food stuffs, stores of gas and oil, any and everything you have worked for and stored over the years. And this all happened overnight? Hardly, it’s a plan coming together….But you won’t need your “stuff” in the immediate future, as driving for personal use is severely restricted and the government promises to take care of any needs you or your family might have in the immediate future! The old adage “There are two types of people, those who think the government will take care of them and those who think!” comes to mind. The people running these sites are from the myriad alphabet agencies written into existence by our government, and as it was known that law enforcement and the U.S. military, for the most part, would be unlikely to go against the Constitution and their own people, U.N. troops and other “foreign” troops, who have no such qualms about violating rights, are in evidence and assisting. Roundups of known and suspected ‘dissidents and terrorists” have begun, and house to house searches have started! Now the truth about the UN troops and foreign troops being in America comes out, but our government claims “It is fortuitous that we had these people training in America, because they can now help us in our time of crisis!”
As you, your family and your friends and associates have no intention of reporting anywhere, nor any intention of turning in anything, you have to do something. And you are sure, at least sure enough to spur you into action, that you and your politics are known to the government, making you an almost certain target. It is readily apparent that this is not an unexpected, isolated event, but a prepared and choreographed operation. You have got to bug out, have to leave……attempts to contact others in your group are unsuccessful, all circuits are busy, and heavy interference makes radio communication problematic, so you and your wife and possibly your kids, have to go it alone. The patriot grapevine brings news that lethal force has been and is being used to displace and round-up non compliant individuals and several gun battles have erupted, leading to numerous deaths, mostly on the part of government officials that met unexpected resistance from people and groups that refused to comply with “hand it over demands.”
You had the foresight to cache some supplies and hardware at a “central” location, and as this is also the rally point for you and your friends, you head there, taking with you as much as you can carry. Your ATV’s and trailers will not be used: roads, main, secondary or backwoods, will possibly be under surveillance, and the route chosen to get to the rally point is through very rough country; this will be shanks mare all the way. Thank God for good boots!
Garmin GPSMAP
As the rally point/cache location was set up with the one tank of gas rule in mind, it is approximately 25 miles from your home. A short distance with a vehicle, but on foot it is a trek. So what do you take, your Bug Out Bag/72 Hour pack? These are better than nothing, but were never intended for what you are facing. You will be hiking cross-country, possibly through areas patrolled by hostile forces, possibly being pursued by these same forces. With personal safety and preservation in mind, what do you take to insure your safety and the safety of your family during your trek? Unless you plan on running helter skelter through the woods trusting to luck that you will not been seen, you are going to need more than a 72 hour pack…..a “battle pack” will be needed to make the rally point without getting captured or killed!
Start with the Basic Bug Out bag…it is highly unlikely it will do more than let you “camp out” for a few days. It is far better than nothing but may offer false security.
So, dump it and get a bigger pack, one with a frame. Grab your first aid kit, double the contents, and make sure you have at least two blood stoppers and a combat application tourniquet; there should be blood stoppers and a CAT for each person in the group. Add more water and a compact water filter if you have one. Food will be important, but not that important so three or four MRE’s or similar, a bag of snacks and you should be good. While matches and other fire starting equipment should be carried, you WLL NOT be sitting around a campfire! Socks, gloves, a med weight jacket and a rain poncho, cold weather clothing if appropriate and shoe strings. Don’t forget a hat or beanie and face camo! A map of the area you will be crossing through and a compass, and POSSIBLY a GPS. The civilian GPS system might not be working or reliable in a SHTF scenario, so the map and compass are vital. Night vision if you can afford it is a definite plus and a good set of binoculars are invaluable. A thermal blanket or smock is not a bad idea because you won’t be carrying a sleeping bag, but you should have a military type shelter half. There are some very good ones that come in a variety of camo patterns. Don’t forget hand-held radios and spare batteries! A hatchet and a machete or large knife will be a near requirement as your trek progresses.
You have a combat harness, right? Every good prepper has one! A harness, or a vest, complete with a combat knife, field dressing and a compass pouch and a small flashlight, a belt with canteen(s) or a water pack, two pouches for rifle magazines, a pistol, holster and a pouch for spare magazines completes this set up. Many people are dispensing with the harness and are going with a combat vest or plate carrier. These have good points, but they can be heavy and hot and they can be problematic with a pack.
Back to the back pack: You are not going to war, you are not entering into battle, but there is a very real possibility that you will b
BaoFeng UV-5R Dual Band Two Way Radio
e defending yourself and your family from hostiles. Your sole goal is to reach a predetermined location that offers relative safety and comfort. What you have with you will be ALL that is available, at least till you reach your first way point cache…hopefully you have a couple, and hopefully they are spaced to allow you to reach them in a reasonable time. Having several caches that are so far apart as to require a vehicle to reach then is not going to work in this scenario! And don’t space the caches’ at a distance based on hiking to them in good weather, lightly loaded, wife and kids in tow and under other ideal conditions. While you MIGHT make 8-10 miles a day under ideal conditions, conditions are not likely to be ideal. The caches’ should contain items which you might determine to be beneficial, but which you don’t want to or can’t carry. Sleeping bags, extra ammo, food, water and first aid supplies and extra clothing, boots and batteries come to mind. A spare rifle or other firearm is not out-of-place, because your primary weapon can easily be damaged or lost.
In addition to the food, water, and shelter items in your pack, you are going to want more ammunition, as much as you can reasonably carry. Not at the expense of other needed items, but in addition to. In the event you and your family have to defend yourselves, the well can run dry quickly. Have a small cleaning kit and make sure each person has a multi tool.
As I said before, you are not going into battle or starting a war, in fact, your main focus should be on avoiding any type of conflict. If you go against armed and trained forces, chances are you will wind up dead! Even against a second-rate group of “government brown shirts” you might be in trouble! This brings me to the last portion of the pack: Every prepper, especially if they anticipate bugging out, being on the run or being pursued, needs to put together several anti pursuit packages. When you are evading, especially if being pursued, anything you can do to slow the pursuers down will be to your advantage. If you have to stop and sleep and you probably will, you need something to tell you if you are being stalked. Anti intrusion devices can run the gauntlet from simple noisemakers to actual booby traps that can cause injury and death. Noise makers are available commercially, or you can make your own, other “items” can be made, but you should have them and know how to use them! Types and plans for making them are available, and while possession and manufacture might be a violation of various laws, we are talking about a world “wrol” Without Rule of Law…….Capture or arrest will certainly mean detention, more than likely death, so violations of law will probably be a moot point! You need to avoid capture by any means possible. Anti pursuit devices are limited only by a persons’ imagination, and as can be seen in any of the “police actions” America and the Soviet Union have been involved in over the past years: booby traps are a force multiplier! For vehicles, caltrops, welded metal “jacks,” are effective and easily made, and will slow vehicles with tires. Wires stretched across trails and roads are effective to a degree, especially against ATV types of vehicles. For foot pursuers, trip wires. Real or decoy, dead falls, punji stakes, home-made mines, again, imagination is the limiting factor, but you need the knowledge and materials before the bubble pops. Remember, your life and the lives of your family members might depend on your ability to slow pursuers!
Contact! A Tactical Manual for Post Collapse Survival
In the event you are forced to fight, hit and run tactics will be your best option. As your “group” at this stage will be very small, standing and fighting will be suicidal. A “Bounding Over Watch” type of tactical retreat will be required to allow disengagement and movement. This is a very basic type of military maneuver, there are many others, but most people are not trained and proficient in military maneuvers, but, they should have at least a basic knowledge of them. There are many books available that describe military tactics, and while actual hands on is best, learning through reading is second best. Many militia groups DO train in military tactics, and it would definitely be beneficial to get the training if possible. To give the reader an example of what the powers that be think of Joe American getting training like this, several states, California being the one I am most familiar with, makes it a criminal offense for two or more people to get together and train, as shown in the following penal code section from California: Obviously, the politicians are afraid of trained citizens!
11460. (a) Any two or more persons who assemble as a paramilitary organization for the purpose of practicing with weapons shall be punished by imprisonment in a county jail for not more than one year or by a fine of not more than one thousand dollars ($1,000), or by both that fine and imprisonment.
As used in this subdivision, “paramilitary organization” means an organization which is not an agency of the United States government or of the State of California, or which is not a private school meeting the requirements set forth in Section 48222 of the Education Code, but which engages in instruction or training in guerrilla warfare or sabotage, or which, as an organization, engages in rioting or the violent disruption of, or the violent interference with,
school activities.
(b) (1) Any person who teaches or demonstrates to any other person the use, application, or making of any firearm, explosive, or
destructive device, or technique capable of causing injury or death to persons, knowing or having reason to know or intending that these objects or techniques will be unlawfully employed for use in, or in the furtherance of a civil disorder, or any person who assembles with one or more other persons for the purpose of training with, practicing with, or being instructed in the use of any firearm, explosive, or destructive device, or technique capable of causing injury or death to persons, with the intent to cause or further a civil disorder, shall be punished by imprisonment in the county jail for not more than one year or by a fine of not more than one thousand dollars ($1,000), or by both that fine and imprisonment. Nothing in this subdivision shall make unlawful any act of any peace officer or a member of the military forces of this state or of the United States, performed in the lawful course of his or her official duties.
(2) As used in this section:
(A) “Civil disorder” means any disturbance involving acts of violence which cause an immediate danger of or results in damage or
injury to the property or person of any other individual.
(B) “Destructive device” has the same meaning as in Section 16460.
(C) “Explosive” has the same meaning as in Section 12000 of the Health and Safety Code.
(D) “Firearm” means any device designed to be used as a weapon, or which may readily be converted to a weapon, from which is expelled a projectile by the force of any explosion or other form of combustion, or the frame or receiver of this weapon.
(E) “Peace officer” means any peace officer or other officer having the powers of arrest of a peace officer, specified in Chapter
4.5 (commencing with Section 830) of Title 3 of Part 2.
To close, start thinking outside the box! Most preppers do, but relatively few go to the lengths I have outlined. The rules are changing, have changed, and an enlightened and informed populace is not something the PTB can tolerate! This explains the need for control or heavy censorship of social media. Almost any site you go to is going far beyond telling people to prep for just natural disasters, temporary grid down events, temporary financial bumps…… Civil war, potential invasions and other “tin hat” theories are now something regularly discussed as more than theories. Not long ago, EMP/CRE events were fantasies among everyone but preppers, then the government admitted the possibility, Koppel wrote a book, and everyone was aghast and on board. We have entered a political era where an out of control executive branch is doing an end run on the constitution, with the assistance and cooperation of a compliant and incompetent justice department and a weak and ineffective congress! It is abundantly clear, or should be, that a line is being drawn, and “We the People” are being dared to cross it. The amount of injustice a government will heap on people is directly proportional to the amount they will allow! We are fast approaching the allowable limits!
The Prepping Community’s most active discussion revolves around preparing for disasters. Not that disasters or zombies are our only focus. The broader topic of prepping involves a lot of discussion and debate on various subjects. At the end of the day though, it comes down to how prepared you are when that disaster that forms the motivation behind our prepping, strikes. We can talk tactics and strategy all day long. We can debate which firearms are best or even necessary if the grid goes down. We can plan to defend our neighborhoods from looters or scoff at the notion that something like that could be necessary. We could write tomes on a thousand ways to build a fire out of nothing more than belly button lint and a tennis shoe, but when the disaster happens you are going to be playing the hand you are dealt. At that time, you will not be able to run to the store most likely for those last-minute supplies and what you have in your pantry or stored in your basement will be what you have to ride out that disaster.
Whatever skills you have learned will be at your disposal, but those plans for that tactical pistol class you kept putting off will be just that, plans. The best intentions to take that Wilderness First Responder class that you had meant to look into for the spring would be of no value to you. The garden you had been putting off for 10 years never got created and now, that grassy patch in your backyard is still not producing anything that will keep you alive.
Time’s Up! How Prepared Are you?
One of the motivations that drive my prepping efforts is the concern that if something happened today I would only have what I have. Don’t get me wrong, I wouldn’t be that bad off, but I wouldn’t have everything I think would be ideal in my ideal situation. I also know that having a couple of years’ worth of freeze-dried food doesn’t ensure you will live through any disaster, but every little bit helps.
Prepping is a series of steps that you can take toward a set of goals. You can start at a million different places and I know that there are different situations each of us face that make our personal preparation story different from person to person. However, there are some things that I think are universal that we all need in order to live.
There are certainly other things you need to live in an ideal state. For example, the list above doesn’t take hygiene or medical needs into consideration. You certainly won’t find an entertainment option above; that is unless your idea of fun is shooting water bottles, but the list above is what I consider the most important categories for survival.
If disaster happened today, how prepared are you? If you faced TEOTWAWKI this afternoon as you pulled into the driveway, how would you fare? Try this exercise when you get home tonight. Sit down with a piece of paper, take a look at all of your various prepping supplies, grab a pencil and ask yourself the following questions.
Before you start, here are the ground rules:
Assumptions – First off, when the disaster strikes, you are not able to run out to the store for anything. Some crisis has happened. The power is out and you are unable to leave your immediate area out of safety concerns. You are unable to bug out at the present time and are forced to shelter in place. There is no imminent danger but all services are completely inoperable.
Rain barrels are a simple way to easily collect rainwater. This can be used for gardening or for drinking after purification. Sure beats under the bed.
Water
Q. – How much water do you have stored for each person you are prepping for?
Q. – Do you have a source for water when your stored water runs out? Do you live near a lake, pond or have a stream nearby?
Q. – Do you have a means to purify your water?
How prepared are you when it comes to water?
Now that you have asked yourself the questions above, where do you stand in the water category?
The recommended amount of water stored is one gallon per person per day. If your water supply is contaminated like the several instances that happened, specifically Charleston, VA will you have water to drink, cook with and bathe?
Water Containers should be clean and ideally have not had any other chemicals or liquids in them.
Unless you have a NORAD style bunker under your home, I would bet money you don’t have a ridiculous amount of water stored so whatever you have will run out.
Bodies of water and even rain barrel systems provide the best redundant source of water, but you will need to figure out how you will carry water to and from. I recommend a heavy duty yard cart to easily carry the weight of even a few dozen gallons.
There are many ways to make water safe that are detailed on several posts from Final Prepper. My personal preferred method is gravity filters. For home use that can easily handle several gallons at a time, I have a Big Berkey. If I am on the go, such as bugging out, I think a filter like the Platypus GravityWorks makes getting safe water, nearly effortless. This method could work for home too, but the Big Berkey has a much higher capacity.
Do you need to stock up more or are you OK? If so, for how long? Evaluating this list of questions myself, I admit I am not where I would like to be ideally. I have several hundred gallons of capacity, and plenty of renewable resources, but I would like to increase my in-home storage. I am also looking to increase rain storage capacity with a 250 gallon tank. Something for me personally to work on.
How prepared are you when it comes to food?
Food
Q. – How many calories do you have stored for each person you are prepping for?
Q. – Do you have a source of food once your stored food is gone?
Q. – Do you have capacity to store foods that do not require refrigeration?
How prepared are you with food?
Now that you have asked yourself the questions above, how are you doing in the food department?
By having a stable amount of food stored up prior to any disaster, you will have more time to work on those renewable sources later.
Averaging 2000 calories a day for a grown person who isn’t doing intense physical labor is our baseline. I know I eat more than that on any given day, but I certainly don’t need to. Inventorying your food with an eye towards calories takes some work but can open your eyes. For example, one of the easiest ways I think you can quickly and economically stock up on food is to buy 50 Lb. bags of Rice. Each bag is about $20 and has 504 servings. Divide that by the number of people in your family, then the number of times a day you plan on eating rice and you will get an idea of how many meals (at least the rice part) will provide.
Freeze Dried foods are sold different ways. In some cases, like with Mountain House and other backpacking friendly meals these are sold to feed one or two people so those are easy to count. MRE’s would be simple too, but if you have bulk freeze-dried foods you will need to do a little more math. I purchase mine with the understanding that I was buying a person’s rations for a set period of time so I already have that amount calculated.
What about canning food or keeping it after you don’t have the Sam’s Club? Do you have canning supplies? Do you have years’ worth of lids or reusable canning lids?
Do you have a garden that is already producing fresh vegetables, that you actually eat? What about seeds to last a few years? Have you looked at the calories of your seeds and how much that will provide assuming you have zero crop issues?
Once I went over my own inventory, I think we are pretty good in the short-term for food although, even a great garden that is producing gang busters isn’t going to be enough. Additionally, our garden plot right now wouldn’t support us so it would need to be doubled most likely. The good news is that we have the room and capacity to do that if needed and enough food stores to last.
Shelter
Q. – How close do you live to major metropolitan areas?
Q. – Do you have a safe room or other hardened structure?
Now that you have asked yourself the questions above how are you in the shelter category? In my assumptions above, I said that you were forced to shelter in place so what could we consider if your home really was your round the clock location?
You are forced to shelter in place, but that doesn’t mean others will. If you live close to major cities, you could have to worry about the Golden Horde. How does this factor into your plans?
Being prepared means options – A small camping stove like this and some spare fuel canisters could heat meals or boil water.
In the assumptions there is no need to defend your property now, but as much as possible, how will you harden your home to prevent access by bad people?
Most backup power solutions revolve around generators and keeping a lot of fuel stored. Do you have both? Do you have a solar option that is robust enough to do more than charge a cell phone, in 8 hours? What will you do when the fuel is gone?
For some, cooking outside will be difficult. What if you live in an apartment? I would look into camping stoves or stocking propane for that grill on your deck.
Backup heat is best from a wood burning stove, but many of us don’t have that capability. Kerosene heaters and when all else fails, wearing warm layers would be necessary. Do you have plenty of each if that is the case?
Shelter is a mixed bag for me because I do live in a suburban setting like so many of you. Our home can only be made so safe and that is a concern that would require me to escalate actions according to the situation. I won’t be barricading the front door and windows with sandbags just yet, but that would be a worst case option. Cooking wouldn’t be an issue for us because I have several methods and plenty of wood. Heat would be an issue with our existing gas log fireplace. Even if the gas was out, the chimney would need to be cleaned before I could safely burn wood in there again. It does me no good to burn the house down.
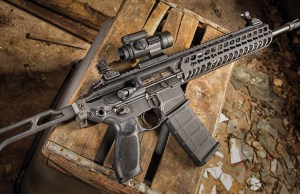
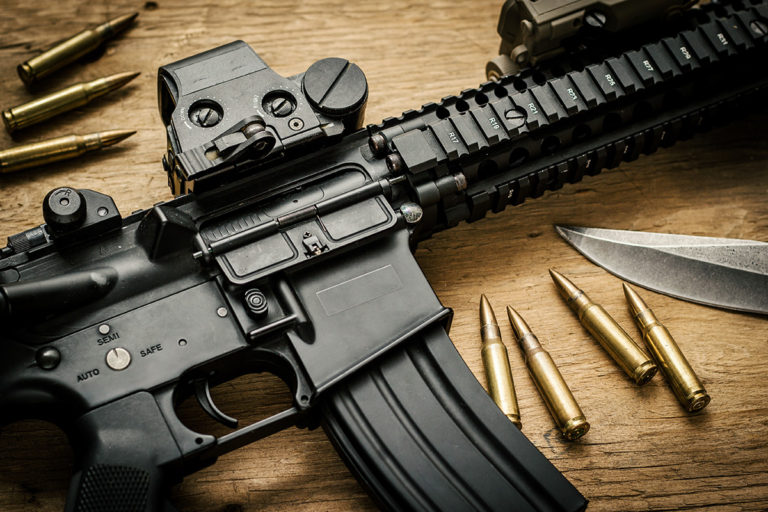
The AR-15 is a very popular choice for a Prepper firearm.
Security
Q. – Do you have any experience with firearms and/or specialized training? Air-soft doesn’t count guys.
Q. – How many able-bodied defenders do you have in your prepping group?
How prepared are you with security?
Now that you have asked yourself the questions above how are you in the security category? In my assumptions above, I said that there is no imminent danger but all services are completely inoperable so I can imagine that with that chaos, there would be danger eventually.
When bad times happen, bad people do bad things. I know that sounds trite, but it is one of the most easily predictable human behaviors. Chaos and fear will cause irrational behavior and even deadly attacks can be viewed as justified in the eyes of a mother with hungry children. Charity and grace is something we have addressed in other posts, but you will need to be able to defend yourself if you truly expect to make it through TEOTWAWKI. If you do not accept that simple principle, you will be taken advantage of.
Gerber eFECT Military Maintenance Tool
You have to be able to use any firearms you have. That means three things to me.
You must have the will to use them if needed to defend your life.
You must know how to use them properly in high stress situations.
You must have ammo to use them at all.
There is strength in numbers. No matter who that group is, generally speaking the more people you have to defend yourself, the better able you will be to defend yourself.
Security is one area I think I am pretty well off in one sense but still have a way to go in a lot of other ways. My “group” is largely my family and not a bunch of Navy Seals. We have training and capacity, but it isn’t like I have a bunch of guys who will go screaming off into the woods to attack anyone. Security for now will be focused on defense and I still need to work on offensive capabilities and training.
What’s your score?
Yes, this is a nod to the scoring system that National Geographic’s Doomsday preppers had on it, but that system was problematic to me. Even so, I think it does make sense for each of us to try and figure our how long we could survive. I put my own efforts at well over a year but that is what I think on paper. Reality gets a vote so I could be wrong. We could have some pest infestation in our garden, or while I was taking a siesta, deer could eat all my tomatoes. You never know, but starting to visualize where you are now will help you get to where you want to be.
The Prepping Community’s most active discussion revolves around preparing for disasters. Not that disasters or zombies are our only focus. The broader topic of prepping involves a lot of discussion
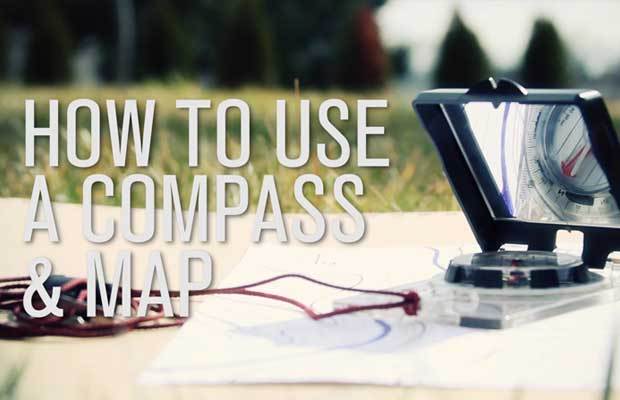
Most preppers are familiar with this concept, but have you ever really tried to navigate to a point using only a compass and a topographic map? If your grand plan for some catastrophic disaster is to Bug Out into the woods, you had better have maps of your area for starters, but these won’t do you much good without a compass and more importantly, the know-how to use it along with a map to find out where you are and get you to where you want to go.
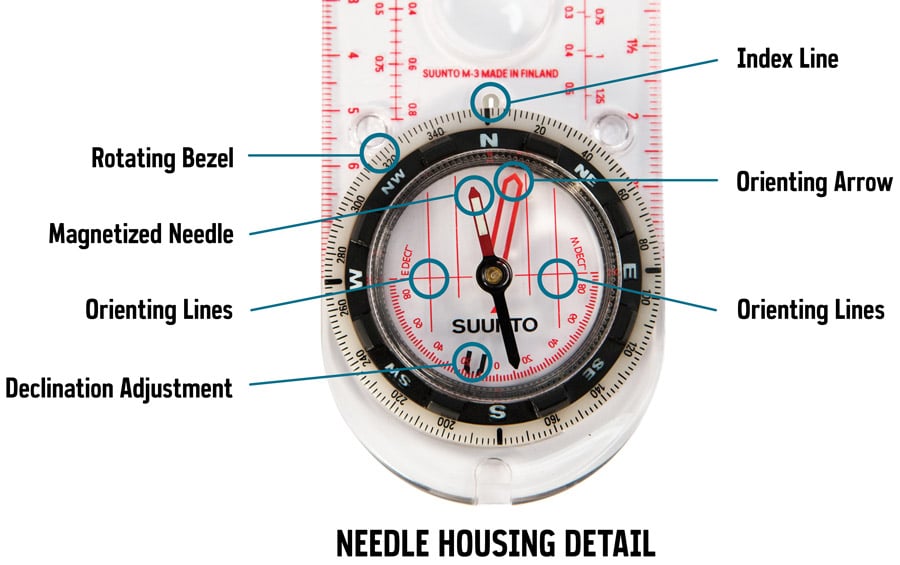
Before we start with the how-to’s let’s see the main parts a compass has:
Index line: fixed within the outer edge of the compass housing as an extension of the direction of travel arrow. It marks the bearing you set by rotating the compass housing.
Magnetized needle: floats on liquid so it can rotate freely, the red end should always point to magnetic north.
Orienting arrow: fixed within the compass housing, aligned to north on the housing
Orienting lines: fixed within the compass housing and designed to be aligned with the vertical grid lines on a map. Half the lines are colored red to indicate north.
Main uses for a compass:
Heading: know the direction you are traveling in
Map: align your map to match your surroundings
Bearing: determine which direction or destination lies in relation to your location
Follow a bearing: follow a straight line
How to find out your heading
First, hold the compass in front of your chest with the direction of travel arrow pointing in the direction you’re heading.
Then rotate the bezel so that N aligns with the red end of the compass needle
The result is the number (in degrees) on the rim of the bezel at the index line is your heading.
Set the map with the compass
Lay the map in front of you (the map should be flat)
Put the compass anywhere on top of the map
Turn the map and compass until the needle on the compass aligns with the north-south gridlines on the map. The red end of the needle must be pointing to the top of the map.
In this video, Krik of Black Owl Outdoors uses a Silva Ranger CL compass, explains the basic pieces of a compass, shows you how to orient the map to your location, determine the direction of travel you want to go and then navigate through the terrain to your destination. This is a great video that will introduce the concepts of orienteering to you.
Most preppers are familiar with this concept, but have you ever really tried to navigate to a point using only a compass and a topographic map? If your grand plan
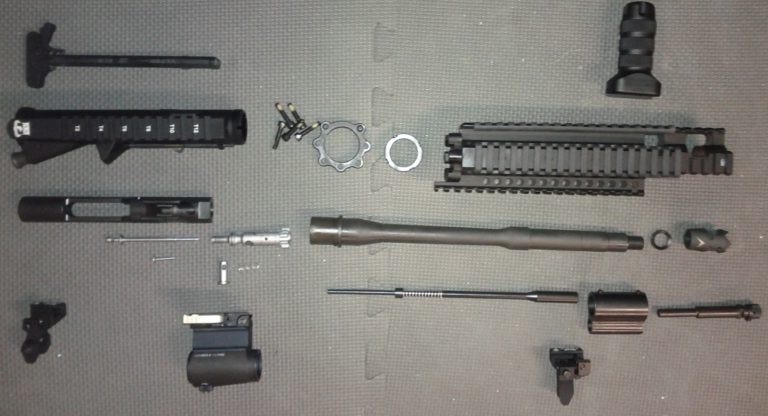
In the previous article, we discussed what gunsmithing is, and saw that it had three components, tools, knowledge and skills. We started out by looking at some of the universal basic tools of gunsmithing. In part two, after some final thoughts on tools, we’ll look at knowledge and skills needed in gunsmithing.
Other Tool Considerations
In most cases, a firearm will come with everything securely fastened in place. If you remove a screw which was “Loc-Tited” in place, you should have a little tube of Loctite on hand to allow you to refasten it. If a part is “staked” in place (surrounding metal is “mushed” into the part), don’t remove it unless you know what you are doing and have the appropriate staking tool.
A set of magnifying glasses or an Optivisor can help you see small details better, and safety glasses will ensure you can keep seeing anything. If lighting at your work station will be a problem, a small, bright “headlight” would be in order. I find the Bushnell headlamps to be small, light, very useful and dirt cheap.
So far we have discussed a good beginning set of general tools for testing, basic maintenance, disassembly and reassembly. If you get good quality tools and shop wisely, you should be able to get started for well under $400 (not including headspace gauges) and probably under $200 if you go with medium quality. As to “specialty” tools for each firearm you intend to work on, the trick is to have the ones you need and not waste money on ones for tasks or firearms which are not in your current plans.
If you are going to start changing things while you are inside the firearm, the general tool list gets bigger (and more expensive too). Here is a gunsmith tool set recommended by AGI, one of the better “distance” gunsmith schools, for a “professional” gunsmith. The video on the page has more information about the recommended tools than does the printed list and is interesting to watch.
All of the tools they include are “general purpose” tools, so their set does not include any specialized tools for particular models or classes of firearms, which is completely understandable. They don’t have a clue what firearms you will work on or what procedures you will do. I think the $2000 estimate mentioned is quite low if you get good quality tools (some of the ones they show look like they could have come from a “bargain bin”), and if you add specialized tools, the total tends to really zoom upwards. In case you were wondering what the top end training package which includes all these tools as well as all the training runs, it is $15,000. But unless you are becoming a “professional” (when there are tax deductions and professional discounts available), you don’t need all these tools or education to begin with. Get the basics, and add the other items as you need them.
Some of the tools you can get from common tool sources, or Amazon or eBay. For some of the more esoteric ones you will probably have to go to a gunsmith tool supplier. Brownells used to be the standard for gunsmith tools, and they are still around today, although the ratings of some of their tools seem to indicate the quality of some items may have declined. I really don’t know of another “go to” place for specialty tools, although many of the standard tools and a few specialty tools are available from online firearms stores such as Midway or Optics Planet, or my new favorite, Primary Arms. Let your fingers do the walking through the internet.
It is a good idea to have a specific container and location for your gunsmithing tools. If you mix them in with your “regular” tools, you will tend to use them for non-gunsmithing tasks, and they can get scattered or worn out early. If your set is fairly small, a portable tool case or pouch may do. For a medium-sized set, a multi-drawer toolbox or two is just the ticket. I used a four drawer toolbox for assembly, disassembly, lubrication, adjustment and measuring tools and supplies, and a three drawer one with tools and supplies for making modifications, which worked out perfectly for my needs and still could be carried in one trip. For a large or professional set, you want a room or part of a room, with workbench, power tool stands, peg board and tool drawer systems.
Knowledge
This one is tricky. For convenience, we divide this into “general” and “specific”. General knowledge is the “basics”; including types of firearms and how each type works (or is supposed to work), basic tools and their usage, “universal” disassembly, reassembly and minor modifications. This will be covered in a good gunsmithing curriculum, or you can get a good handle on this from books, internet articles and online videos.
Gunsmithing the AR-15, The Bench Manual
“Specific” knowledge is knowledge some of which you don’t need – until you do. For instance, details of a specific model firearm you don’t have any immediate plans to work on or a specific procedure which you don’t currently plan to perform. Since it is somewhat impractical to learn it all (and remember it 10 years later when you finally need it), generally this is best covered (or relearned) by reference books (paper or online) which you refer to as needed. If you plan to specialize (use some specific knowledge a lot), then learning that subset of specific knowledge would seem the only practical methodology. In this case, you may be able to get it from self-study, or you may be better served going to classes in that area of study.
For classes in gunsmithing, there are a number of possibilities. If you have a local gunsmithing school or junior college/trade school/specialty school which offers courses, that may be a viable option. It will be expensive and probably take up to two years for a degree, although a “certificate” may be a shorter time option. If you don’t have live classes locally, then generally attending classes “away” is not practical, since not only are there the tuition costs, but lodging and other expenses. Not to mention existing and temporary employment. In the “old days”, they had mail order courses, which have been replaced with online training and DVD based training. If you can keep engaged, some can provide INFORMATION as well as or even better than local “live” classes (you can repeat something as many times as you need), but there are some severe weaknesses. Many of these don’t have a method for you to get questions answered, and none provide guided “hands-on” experience.
As a point for comparison, AGI’s basic “108 hour” video course is about $5000. On the other hand, Phoenix State University claims their online training is “the best and quickest and cheapest”, at $99 for the basic certification, $149 for the intermediate one and $199 for the top one. I’ve always heard that “if it sounds too good to be true, it probably is not true”, and that seems to be the case with PSU, based on the huge number of similar complaints (them not providing what was promised and using delaying tactics until the grace period for a refund has expired) I found about them. A legitimate online course seems to run about $1500.
The instructions which come with specialized tools you buy is “knowledge”. As a hint, store them in a good location. When I dusted off my set, I found that I had forgotten not only how to use some of the specialized tools, but even what they were for. If the instructions had not been in one of the drawers of the toolbox, I might still be trying to figure a couple of them out.
Skills
“Skill” is the difference between “knowing how to do something” and “being able to do it”. If you have a fair amount of mechanical experience, you might be able to become competent at many gunsmithing skills fairly quickly through trial and error. If you are not mechanically-minded, you will likely need to be shown how to do something, and then practice it. The best place for this is gunsmith classes which have guided “laboratory” sessions. If you have a school locally, at a reasonable price, you are lucky. Otherwise, online or video classes may be able to show you what to do, but you won’t be able to do it until you have done it, and that may take someone who has done it before watching over your shoulder or even guiding your hands. You may be able to find a local gunsmith who will work with you; perhaps even set up an apprentice relationship.
The other option is just to try things on your own. Here’s a hint: the first time you try something, don’t try it on an expensive firearm or critical firearm part… In fact, go to gun shows and get the cheapest beaters you can find, even non-working or partial ones, to practice on. To learn skills, videos are often better than written descriptions; being set up in front of the TV screen is about as close as you can get to a live expert present.
To be clear, there is no “distance” course which can provide you skills. The best ones can guide you in attaining the skills on your own.
Parts
A functioning firearm generally has all the parts it needs included. But parts break or wear out. And if you take the firearm apart, small parts can get lost. Sometimes stock parts are sub-standard, such as the MIM (Metal Injection Molded) extractor in modern Remington 870s replacing the machined part in older production. Many aftermarket companies put out parts which are easier to use, more accurate, more durable or just cooler looking. Improving the functionality of a firearm, such as replacing the safety with an extended version, is often wise. For disaster planning, having some spares for firearm parts which are at risk of breaking or loss is wise. Things like a firing pin, extractor, and springs and pins seem a good choice, and usually are not terribly costly. Some sources even have gathered together a set of parts in an “Oops Kit”.
Gunsmithing, Why Bother?
You may have noticed that I am suggesting that you spend money on tools and possibly education, and perhaps worse, a significant amount of time. Presumably you are already spending money on getting survival supplies and time learning survival skills; I’m not saying this is MORE important than any other skill or equipment. But if you plan on relying on firearms in a crisis situation, you had better be able to keep them working, and if one happens to stop working (or if you come across one which is not working), get it working again. It might even save you money in the long run if you don’t have to always go running to an expensive gunsmith when a firearm needs repair or modifications for optimal utility. It can be a source of extra income or an alternate career. Even if you can’t see gunsmithing as a worthwhile part of your personal survival plans, remember that gunsmithing will be a “primitive profession” which will have a lot of value in bartering in a post apocalypse world.
In the previous article, we discussed what gunsmithing is, and saw that it had three components, tools, knowledge and skills. We started out by looking at some of the universal
What is “Gunsmithing”? It is the process of repairing or modifying firearms. You can do it on your own firearms without any problem, and you might be able to do it for friends and family, especially if you don’t get paid for it. But if you do it as a “business”, then you will need to be licensed by the Bureau of Alcohol, Tobacco, Firearms and Explosives (BATFE).
There are three aspects necessary to do successful gunsmithing: Knowledge (what to do), Skill (capability to do it) and Tools (what to do it with).
Tools are perhaps the “easiest” aspect to achieve. After all, it is a binary condition. You have the tools you need or you don’t have them. If you need a tool and don’t have it, all you need to do is track it down, and be able to afford to buy it (or rent it or borrow it) or be able to make it.
Tools for Disassembly and Reassembly
Gunsmithing tools are often similar to “regular” tools, but sometimes there is that slight, critical difference. For instance, the “first” type of tool to consider is the lowly screwdriver. No you can’t go down to the big box store and buy their no-name cheap screwdriver set. Or go to the fancy tool store and buy their top-of-the-line screwdriver set. Most “regular” screwdriver sets have a limited number of sizes AND their blade shape is a blunt wedge (taper ground). And this is a recipe for disaster when working on firearms. They have a lot of screws, often of the slotted persuasion, and in a wide number of sizes. Your “standard” tapered screwdriver set probably won’t have a blade of the right thickness or width, and without this degree of fit, the screwdriver will mar up the slot. Even if by some lucky coincidence the screwdriver is the right size, the tapered sides of the blade have a tendency to cam the blade out of the slot, which messes up the top edge of the slot. And firearm screws are often blued so any marks you make tend to really stand out. If you are looking at a gun with buggered up screws, the odds are someone who did not know what they were doing (and had the wrong tools) has been monkeying around inside of it (or failed to get inside).
What you need is a screwdriver set with a wide number of sizes AND parallel sides (called “hollow ground”). Because of the number of sizes, the best choice is usually a set with one or more handles and a large number of bits.
Their beginner’s sets are not cheap, and their top of the line set with 75 standard, 4 Phillips, 17 hex (Allen), 11 Torx®, and 13 specialty bits for sights, scope mounts, grip bushings, Ruger ejectors, and other unique applications, along with 7 assorted handles, runs $320. You can get cheaper hollow ground sets, but they usually won’t have the variety of bits and may be of lower quality than the Brownells sets, but can still be quite adequate. It is a reasonable methodology to start out with a small set, and add additional bits as you need them, although when you find you need a bit, you “should” stop what you are doing until you can get the correct bit. But this is often unacceptable in the real world. If you are gunsmithing professionally, get every bit you can; otherwise, get any new bits you need every time you access a new firearm. If there is a bit which you use “a lot”, having a spare of that bit is wise. Note that if you don’t have the right sized bit, you can grind a bigger one to size.
You may find some Phillips screws, particularly in rifle stocks, and Allen (hex) screws have become fairly common. Thus having Phillips screwdrivers (or bits) and a set of Allen wrenches is recommended. Allen bits are available, but the “L” shaped wrenches tend to be more durable.
Another thing found in abundance in firearms are “pins”. These can be solid or “roll” pins. To get them out and back in, you need the “second” type of tool to consider, a set of punches in various sizes. For solid, flat end pins, you use flat face, constant diameter “pin” punches. For roll pins, roll pin punches with a little bump in the middle of the face are strongly suggested. If you will be doing a lot of roll pins, a set of roll pin “holders” would make things easier; since each holds the pin in position and drives it part way through. Occasionally you will have a pin with a rounded end, and a “cup” face punch is optimal for these. If you have a pin which is stuck or extra tight, a “starting” punch is often suggested, but I don’t trust these. They are tapered, and although they do reduce the chances of bending or breaking a punch, only the face is the correct diameter, and I’m concerned they could deform the pin hole. Pin punches come in various lengths; shorter ones tend to be more durable, but if not long enough to drive the pin all the way out, less useful. A non-marring (brass) pin punch set may be useful, but for me, the deformation they could suffer outweighs the low mar factor they offer. However, a non-marring “drift” punch of brass or nylon (or both) should definitely be included.
Weaver Deluxe Gunsmith Tool Kit – beginner set with basic tools.
By themselves, punches are of limited use. When driving a pin in or out, you need a way to provide some impact force to the punch, and you need something to support what you are driving the pin out of, and a place for the pin to go without running into anything. These aspects are provided by a small hammer or mallet, with brass and sometimes rubber or plastic faces, and a “bench block” with holes you can drive the pins into.
To handle small parts, a selection of hemostats, large tweezers and precision “needle nose” pliers is in order. I also include a pair of parallel jaw pliers, a small Vise-Grip and a strip of thick, raw leather (to protect the part from the Vise-Grips) in my pliers assortment, but these are usually not required for normal disassembly or assembly. Assorted picks and probes can help you get gunk out of a tight space as well as help to manipulate small parts.
These are the “universal” basic disassembly/assembly tools. Specific firearms sometimes have specialized tools which make it easier (or in some cases “possible”) to disassemble or reassemble that firearm or class of firearm. If you will be working on that particular firearm, some of its specialized tools could be considered “basic”.
Tools for Maintenance and Testing
In order to keep a firearm functioning optimally, you need to maintain it. Maintenance usually involves cleaning it after use (or after it is exposed to an adverse environment). A cleaning kit is in order to clean out the bore. This includes some solvent, a caliber specific set of patches (squares of cloth), “mops” (fuzzy cylinders) and (soft) wire brushes, and a rod to push these items through the bore. Cleaning rods can damage the muzzle (and thus accuracy), so some sets have a bore guide included in them; some others use a coated rod or a very soft rod material. Some sets, particularly those intended to be carried with you, use a cable to pull the cleaning elements through the bore instead of a rod used to push. Alternatively, some people prefer to use a “bore snake” these days, claiming these pull-through combinations of mop and brush are quicker and safer (than rods). To clean the rest of the gun, a selection of brushes and cloths is in order.
The bore of a firearm is critical to its performance, so a way to check out its condition is necessary if you are considering acquiring a particular firearm. And for that matter, after you clean the bore, you want to check that you did a good job and that no damage has occurred over time. The reasonably priced way to do this is with a bore light; a lighted bulb which fits, or a drives a fiber optic tube which directs the light, into the bore. Alternatively, you can use a mirror, prism or “light pipe” to direct an external light source into the bore. For the well-heeled, there are even “bore camera” systems. If you see crud in there, you need to do (or redo) bore cleaning to get the crud out so you can see if there is any damage under the crud.
Once you get a firearm clean, you want to lubricate it with the appropriate grease and/or oil, and perhaps give it a wipe down with oil or other protectant to provide some protection against rust to the finish.
If the firearm is operating correctly for you, then it is sort of “self-testing”. If there is a new (to you) firearm for which you want to verify the functioning, or an existing one which it seems might be having problems, testing is in order. For testing feeding function safely, some “dummy rounds” are wise. Polymer dummies are cheap, but I prefer machined aluminum ones, or even better (if you can still find them these days), ones made of actual brass and bullets, but of course, no primer. Avoid ones which are “painted”, as the paint tends to flake off in the firearm. If you reload, you could even make your own; just mark them so you can tell them from active ammo at a glance. For testing the hammer and/or trigger function safely, a brightly colored “snap cap” (or six, for revolvers) would be useful. In order to verify a firearm is correctly headspaced and thus safe to fire, “GO” and “NOGO” gauges for that caliber are useful but costly. A complete set for a caliber, with GO (measures against the minimum factory specification), NOGO (measures against the maximum factory specification) and FIELD (measures against the maximum safe headspace after lots of use) will probably run $90 or more. You can buy the gauges individually, but do NOT mix brands of gauges for a caliber.
This is a good starting set of tools. Tune in next time for a discussion of Knowledge and Skills.
What is “Gunsmithing”? It is the process of repairing or modifying firearms. You can do it on your own firearms without any problem, and you might be able to do
Guns and ammo are undoubtedly at the top of the list when it comes to many preppers’ inventory. Lots of us in the prepper or survivalist scene love our guns and gadgets. But simply buying a gun and putting it in the closet or the nightstand drawer does not guarantee anything. In fact, handguns can be potentially, more dangerous to the owner than the bad guy. In particular, if the owner never practices with them.
We all have busy schedules and life gets in the way sometimes preventing us from getting to the range to train. Or some people’s budgets may not allow them to shoot as often as they would like or need to.
But folks, there is a solution… Wanna know the secret to becoming a better shooter? Actually, there is no secret, but dry fire, can significantly increase a person’s shooting ability.
Practice Practice Practice
What is dry fire? Dry fire is simply practicing everything related to running a firearm, without actually firing a live round. You can practice everything from drawing your pistol from the holster, to reloading, trigger press/squeeze, target transitions, shooting from awkward positions, engaging multiple targets, moving while shooting, from behind barricades, etc, etc. It’s endless what you can do. And one of the best attributes of it, is that it costs nothing! Only as much time as you want to put into it.
To be good at shooting, you need to be consistent. You have to do everything the same every time you do it. How do you improve consistency? Repetitions, depending on how good you want to get, as many reps as you can possibly do, perfectly. I’m sure you all have heard the saying, practice makes perfect? Well, to be analytical, if you are doing something wrong and practicing it 1000’s of times, you are practicing to suck. You have to be sure you are practicing the technique correctly in order to be perfect. Please be aware of that.
For all the beginners and even intermediate shooters, I recommend getting some professional instruction. That way you can be sure you are doing everything correctly. Any of the big shooting schools in the country is money well spent. But also don’t overlook possible local instructors, just do your homework and vet them so you know your not gonna get robbed of your money and getting crap instruction. The NRA is also a good resource.
S.T. Action Pro Inert Safety Trainer Cartridge Dummy Ammunition Ammo Shell Rounds with Nickel Case – Pack of 10
If you live near a gun club that has monthly USPSA (United States practical shooting association) or IDPA ( International defensive pistol association) matches, seek out the grand master, or master class shooters for possible help working with your skills. Grand master and master class shooters are very highly skilled shooters. A person does not make those levels unless they want to get there. I.e. they put in the time and work to reach those levels. YouTube can be a good source of info as well, but that is only after you have a grasp of the basics after having had professional instruction so you understand what the video is explaining.
Dry fire can be done pretty much anywhere, but there are some safety rules you MUST adhere to. The priority safety rule when it comes to dry fire is to not have ANY ammo in the same room. Double and triple check your weapon that it is empty of any live ammo. I do recommend snap caps or dummy rounds to help replicate the weight of a loaded handgun. But one must be diligent in making sure there is no live ammo in the dry fire area.
Practicing using a wall that will stop bullets is also a good idea, like a basement wall or foundational wall as they’re usually some form of concrete or stone. If you don’t have a wall like that to practice with, be aware of what’s behind the wall you are using, just in case. Now, the whole dry firing training, consists of NOT using live ammo, but it’s always better to be safe when it come to firearms.
Safariland 6280 Level II SLS Retention Duty Holster
OK, on to the meat and potatoes! You can print out any variety of targets downloaded from the web. You don’t even need to tape or pin targets to the wall. You can use a light switch, or a mark on the wall. I use post it notes as you can get them in all sizes, they adhere to the wall well and remove without ruining the surface of the wall. I use the smallest size post it note I can find which are 2″x2″. I also like them because I set up different arrays to practice different things. Or you can hang a full size silhouette target. I like the idea of aiming small.
Once you have your target/s up, it’s up to you to decide what to work on. A good place to start is the fundamentals. Learn to establish a good grip on the weapon. Draw quickly and smoothly. Another saying in the training industry you may have heard is, slow is smooth and smooth is fast. WRONG! I vehemently disagree! Smooth may be fast but slow is slow! I don’t care how smooth your draw is, if it’s slower than your adversary, YOU LOSE! It’s good to start slow, to learn the movements and feeling, but ultimately the goal is to start to speed things up. Shooting a round on target at 7 yards from the holster in under a second is very achievable! It just takes practice.
So a suitable basic drill is to establish a good grip on the weapon, smoothly and quickly draw from holster, acquire a good sight picture, that means front and rear sights are equal height, and there is equal light or space on each side of the front sight, in the notch of the rear sight. Take that sight picture and align it on the target. Slowly take up the slack in the trigger, and break the trigger without disturbing the sight picture. Now, re-holster and do it again, and again, and again. Dry fire is a great way to develop the toughest part of shooting, the trigger press. Without the BANG of the round going off, the tendency of beginners to flinch will be absent.
The idea is to do it until it becomes subconscious. That is ultimately the level you should achieve. To be able to run the gun subconsciously. You shouldn’t have to think about how to operate and shoot your weapon. If something bad happens in real life that warrants you drawing your weapon, you’ve got a lot of other information to process without having to think about how to run your weapon. One piece of gear I recommend getting at some point is a shot timer. It can give you cues when to start your movements, you can set par times to help develop your speed. It is a great way to measure progress. Not to mention you can use it when you live fire as well.
All professional competitive shooters practice dry fire. The average ratio for most pro shooters is for every time they press the trigger on a live round, they press the trigger 5 times in dry fire. Even the special ops guys do dry fire. When they practice new drills, or tactics, it’s done dry first, until they get it right. Then they do it with live fire to practice the real thing. If you carry concealed, practice drawing from your concealed holster. If you have battle nylon, like a battle belt or a holster mounted on a plate carrier, put them on and practice dry firing from them!
Most of us love the guns, but how many practice with them? By that I mean actually train with them. Going to the gravel pit and blasting off rounds as fast as you can pull the trigger is not training. That’s just making noise and it is not developing any skill. It would be cheaper to just buy firecrackers if all you want to hear is noise. Have structured practices to develop your skill. You can also do the same with rifles. So if you get bored with the pistol, pull out the AR or AK! If someone dry fires for 15-30 minutes a day, 3 days a week, in one month you will see a notable improvement the next time you go to the range.
Guns and ammo are undoubtedly at the top of the list when it comes to many preppers’ inventory. Lots of us in the prepper or survivalist scene love our guns
Packing heat is always a good idea because you never know what this world is going to throw at you next. Revolvers make an excellent choice as a Concealed Carry Weapon, backup or self-defense piece. Here are seven reasons why the wheel gun excels.
Dependability
Revolvers have the earned reputation of being dependable under pressure.
A wheel gun can put up with a lot more abuse than an auto-loader. Drop it in the dirt. Roll it around in the mud. It is still going to function. Semi-autos are a lot more finicky about dirt and dust.
Even a cheap revolver is going to shoot a round that fits correctly in a cylinder chamber. New ammo or reloads, it does not matter. You can mix loads too. Load the first one or two out the barrel with a hot JHP to avoid over-penetration. Then, lower power loads behind that like lead ball to fill the rest of the cylinder.
Auto-loaders definitely express preferences in ammo. I once had a 1911 that digested factory JHP and FMJ just fine. Drop some hand-loaded round ball and it jammed every time.
Revolvers do not jam. Auto-loaders can. Misfeeds can be caused by a bent lip that you didn’t notice before slapping a new mag home or a weak mag spring. Auto-loaders are also susceptible to “limp wristing”, a problem that a revolver never has.
Fits your hand better
Even a cheap revolver is going to shoot a round that fits correctly in a cylinder chamber. New ammo or reloads, it does not matter.
Revolvers come in all sizes from the diminutive North American Arms .22 and .22 Mag to the behemoth North American Arms BFR in .45-70
Auto-loaders do get small, but not as small as the NAA revolver.
The BFR is not suited for concealed carry, unless you are about 12 feet tall. A lot of people say the NAA revolvers are also not suited for concealed carry. If you must have maximum concealment and minimum size, the NAA offers fit both categories. If the choice is between no gun or an NAA revolver, these pocket powerhouses win every time.
Auto-loaders do not reach the sheer size of the BFR either.
A new generation of auto-loaders with different grips is out. Revolvers have had this for years and the choices are much broader.
A good revolver will also fit in the best hunting backpacks as a backup.
Shooter Friendly
Light loads are the perfect way to get used to shooting a revolver and to teach newbies. Shoot light and carry hot.
The revolver is more shooter friendly than an auto-loader. Because the revolver does not require recoil or gas to cycle, you can load revolver rounds very light. If you load auto-loader rounds light, you run the risk of a jam. The slide may not come all the way back. It may come back just far enough to begin the ejection of spent brass, but not complete it. There is another jam.
Light loads are the perfect way to get used to shooting a revolver and to teach newbies. Shoot light and carry hot.
Auto-loaders have a slide that comes back to cycle the weapon. More than one person has been pinched by the slide, usually because of limp wristing.
Easier to repair
A revolver has just a few parts. Most revolver parts can be milled in short order by any good metal shop.
Greater Durability
Revolvers have the least chance of failure of any handgun except single shots and the derringer.
The revolver is older than the auto-loader. What we know from a century of using both firearms is that the revolver lasts longer. Shooting does wear both firearms, but a well-built wheelmen will last longer than all but the most expensive semis.
The move to polymer parts on handguns in the semis is another reason many of these guns will not last as long as a wheelgun. Plastic, call it what it is, won’t hold up the way steel does.
Put another way, revolvers have the least chance of failure of any handgun except single shots and the derringer.
Safer
The revolver does not have a safety by and large. A few, like the Heritage rim-fire, do have a safety, but this is not common. Why no safety? Not needed. To make the revolver fire, the hammer-firing pin has to hit the primer hard enough to effect a detonation.
Double action revolvers do take some strength to pull that trigger to cock the hammer. Single action means you have to manually cock the hammer.
If the hammer is back, you know the gun is ready to fire. In a semi auto, especially with no exposed hammer, you have no idea if the gun is ready to fire.
Easier to Clean
Cleaning a wheelgun means running a patch down the barrel and through the cylinder chambers. Cleaning an auto means field stripping and putting it back together. For experienced shooters, this is not a problem. For someone who is new to guns, it can be daunting.
Law Friendly
Getting a permit to carry a revolver is easier in states that link a carry permit to the type of gun. Even New Jersey is more likely to issue a permit for a wheelgun than an auto. If you live in a state where the permit is keyed to you instead of the gun, a revolver still makes a good choice.
Conceal-ability
Hiding a revolver is easy. Modern holsters hide the profile very well. The holsters also come with features that make the holster snag in your pocket when drawing. You come out with the gun, the leather stays behind.
Revolvers also carry well in a shoulder holster, if that’s your thing.
I carry a Cobra hammerless snub .38 in a Bianchi 152 holster. The pistol is rated for +P ammo. The little holster fits most snubs. This is the second .38 snub I’ve had as a carry piece. The first one was traded to lady who wanted something for her purse and had a rifle I wanted. If I ever trade this one, its replacement will be a .357 snub hammerless or shrouded hammer. That way I can carry .38 Smith & Wesson, .38 Short Colt, .38 Special or .357.
Packing heat is always a good idea because you never know what this world is going to throw at you next. Revolvers make an excellent choice as a Concealed Carry

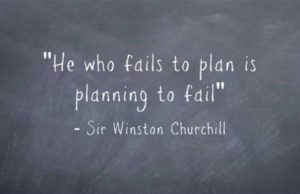

 Keeping everything to yourself or on your phone, which probably requires passwords for every action, will only make things difficult for your people in case something bad happens to you. For one, they probably won’t be aware that you had an emergency plan in the first place. Secondly, if they can’t access your plan, they will come up with their own which could be ineffective due to panic. Sadly, statistics from the US government show that only 33% of Americans have communication plans in case of emergencies.
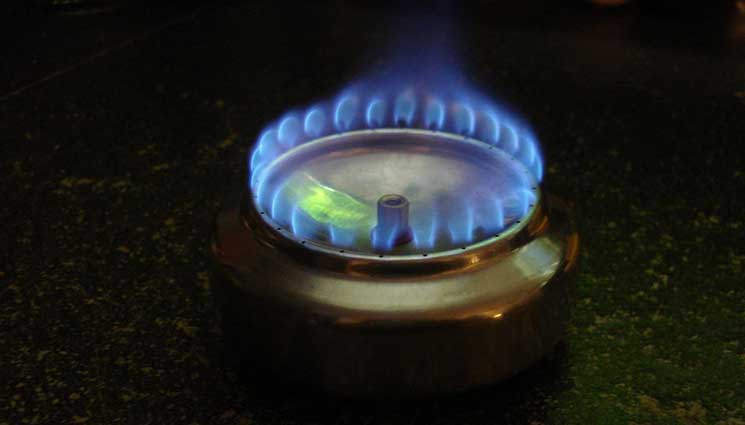
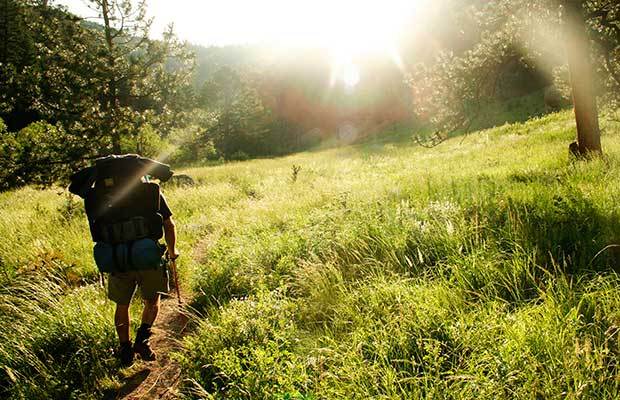
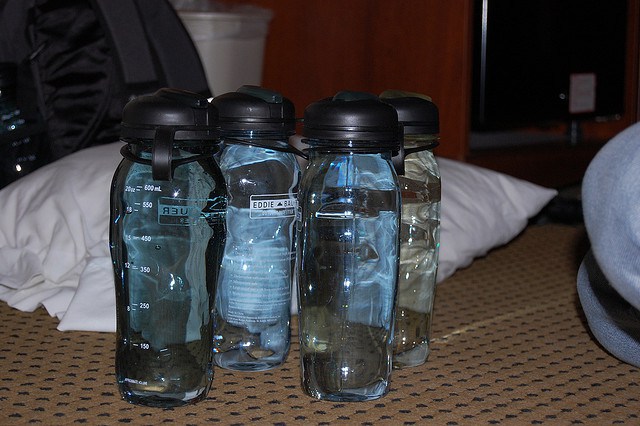

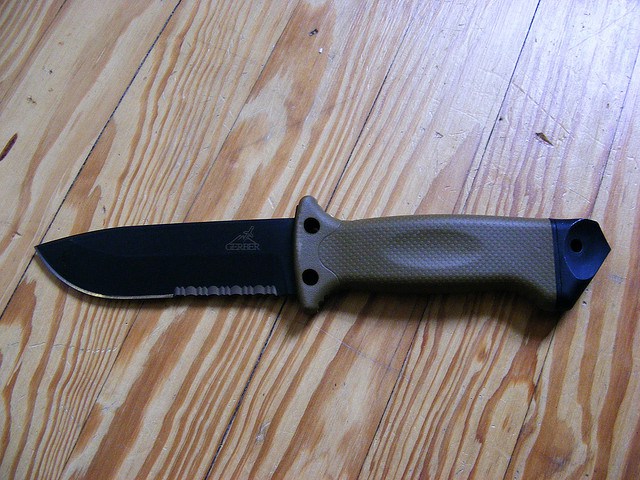
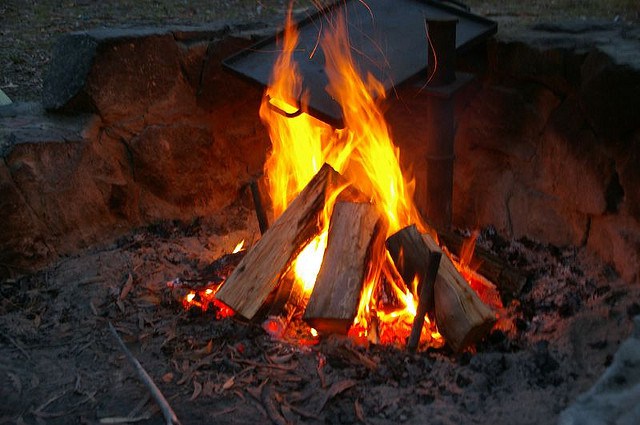
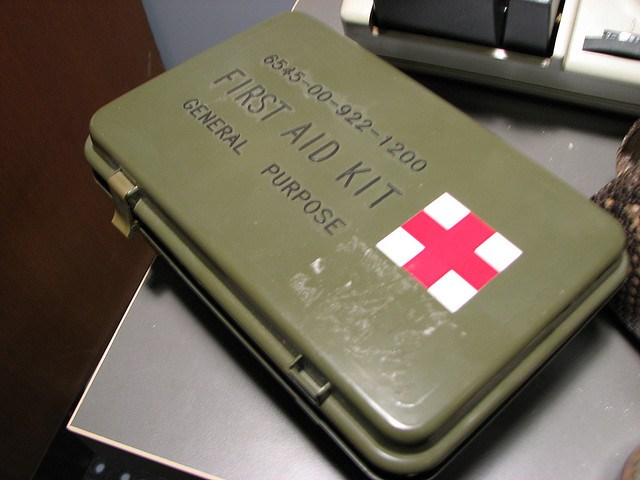
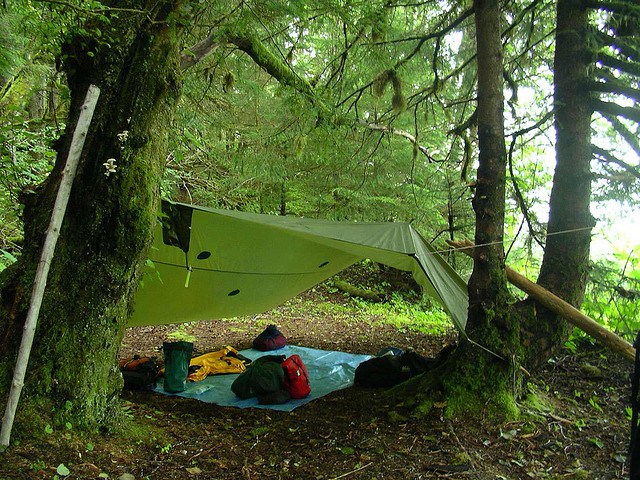


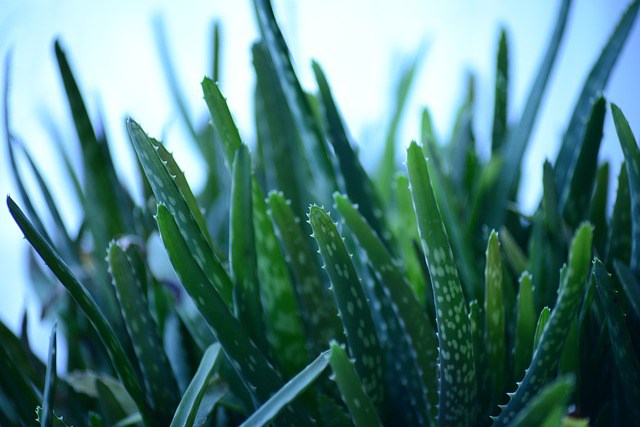
![lemon-balm-785195_640[1]](https://www.finalprepper.com/wp-content/uploads/2016/02/lemon-balm-785195_6401.jpg)
![604px-Asclepias_curassavica_Mexican_Butterfly_Weed_W_IMG_1570[1]](https://www.finalprepper.com/wp-content/uploads/2016/02/604px-Asclepias_curassavica_Mexican_Butterfly_Weed_W_IMG_15701.jpg)