Home2021December

Potassium permanganate is arguably one of the most useful ones as a survival material.

The compound’s 4 oxygen atoms are the secret to its action and its applicability in survival. Potassium permanganate contains much oxygen making the compound an oxidant. It is this oxygenation potential that is one of the reasons why potassium permanganate is such a valuable chemical for survival.

Potassium permanganate, as a minor side note, is excellent at taking stains off objects. For example, using a potassium permanganate solution, you can remove the ‘foxing’ from an old book. But at the same time, if you have it on your skin, you end up with brown stains that are very difficult to wash off — as I figured out once before.

Use #1: As Water Purifier

Studies, from “The Pharmacological Basis of Therapeutics”, have shown that a dilution of 1:10,000 (potassium permanganate to water) kills most bacteria within an hour.

You may be asking, can I sterilize drinking water with potassium permanganate? Not only that you can, but you can also do it at the source. For example, if you have a well, you can control bacterial growth by feeding the well a solution of around 4-7 g permanganate per gallon.

Related: How to Purify Water with Charcoal

Use #2: As Wound Disinfectant

Potassium permanganate is found more readily outside. The oxidizing aspect of the chemical means it’s an excellent disinfectant, as described earlier.

A diluted potassium permanganate solution can be used to treat anything from trench foot to wound cleaning to sterilize contaminated water. These can also be used for the prevention of bacterial infections in fish.

Related: How to Prevent Wound Infection Using Saltwater

Use #3: To start a fire

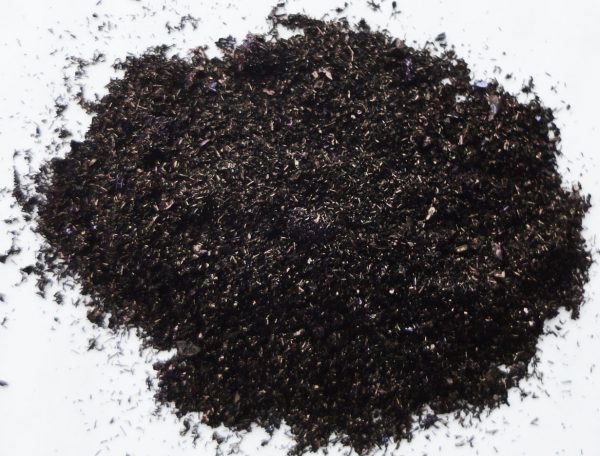
Potassium permanganate is a great fire starter. What you need is about 10g (1/3 oz) of it and some glycerin (about 1 ml or 1/4 teaspoon) to start a fire with potassium permanganate. It can work with water and sugar too. Place your potassium permanganate or tile (as shown below) in a small ceramic bowl. Then drop the glycerol onto the potassium permanganate and stand back. The dish will start smoking within a few seconds to a minute and then a sudden purplish flame will appear. The flame can be used to light a bigger fire.

Create a small mound of potassium permanganate and drop the glycerol into a small reservoir in the middle of the mound

Stand back and watch as the chemicals react and create a flame

Use the flame as a firelighter

Use #4: Improvised munitions

You may also use potassium permanganate as an improvised munition using the same concept as in Using # 3. You can use a mixture of sugar and potassium permanganate as a simple munition. To do this, grind the sugar finely and permanganate separately (for obvious reasons it is important to grind these separately). So blend the two together using a soft brush — the brush eliminates friction — that should produce a low-level munition. Wrap the powder together into something like a little pipe, with a fuse capped tube.

Related: What the H is Potassium Permanganate and Why Do I Need it?

Use #5: More medicinal uses

Wounds, like blisters, and even open wounds, can be treated by taking a dilute bath of potassium permanganate for infection. For the solution adopt the 1:10,000 law. Likewise, you can also treat eczema, dermatitis, and fungal infections with a dilute potassium permanganate solution that you use every day to wash the infected area. Referring back to the Pharmacopoeia from 1968, it recommends a cure for weeping wounds 1 in 5000 to 1 in 10,000 and similar for urethral irrigation for water infections — so specificity for alternative therapies should be around the range of solutions.

Use #6: As a mouthwash

IMPORTANT NOTE: Concentrated solutions of potassium permanganate are poisonous, so be careful!

Potassium permanganate is a disinfectant and can also be used as a mouthwash. The disinfectant action works by leveraging the oxidizing properties of potassium permanganate to destroy microorganisms. The mouthwash solution of potassium permanganate should taste mildly sweet, with an astringent aftertaste. Research on the antiseptic effects of potassium permanganate and its use in treating periodontal disease is continuing. The mouthwash concentration in the trials is a solution of 0.01%, this is 1g of potassium permanganate per 10,000ml of water (that’s about 2 gallons of water). The trial suggests gargling the solution with 10 ml, twice a day.

Potassium permanganate at room temperature and normal light conditions are stable as a solid but it is less stable as a liquid. And the easiest way to make up solutions in small batches that can be used up quickly is to use 100 mg potassium permanganate to around 1 liter of water (around 0.2 gallons) in the above example.

Some final uses:

  • According to the British Pharmaceutical Codex of 1968, potassium permanganate solution is used as a first-aid treatment for snake bites. However, it caveats this use is not clinically proven, but that it will destroy any venom that is on the skin’s surface.
  • Potassium permanganate can be used to neutralize mustard gas, even if it has been in the ground for decades by pouring on a solution around the infected area.
  • Back in the day, potassium permanganate was used as a treatment for poisoning. The dosage varies depending on what you read, but most publications recommend a 0.2% solution as a stomach wash, post poisoning.

Potassium permanganate is arguably one of the most useful ones as a survival material. The compound’s 4 oxygen atoms are the secret to its action and its applicability in survival. Potassium

A frequent topic in Preparedness and Survival circles is the subject of Bugging Out and more specifically the question of whether you plan to Bug Out or will you Hunker Down. This simple question easily elicits all manner of responses and you will rarely find consensus on which is the better option. The only good thing about this question is there are only two options and one of those has to be the correct one in someone’s eyes. A 50/50 shot of getting this right isn’t too shabby if you are looking at odds, but there will be those who maintain an absolute position on one option or the other.

To Bug out or not bug out, like most questions that we must ask ourselves as we prepare for emergencies is an individual question and there is no universal wrong or right. This question is probably only second in notoriety to “What caliber is the best defensive round”.

If you can imagine going into a big underground bunker full of Preppers who are getting ready for the next Emergency and shouting that question; you will get as many answers as you have people. In reality, there are only a few common calibers but each person will have their own reason, preference, or bias toward one and they will tell you in a very matter of fact tone, their choice and more importantly why you should take their word as the Gospel. Actually, it is probably simpler but just as much fun to pose this question in a survival forum and watch the sparks fly.

The factors that drive each person to reach their own personal decision are too numerous really to discuss in detail, but I will attempt to add my own opinionated two cents to the (already well covered, I know) argument and in doing so, completely invalidate everything I just said above. The reason is that I believe there is only one real answer to this question in almost any situation and my way is the right way. Most of the time.

Before I get too far ahead of myself, you may be asking “What the heck is he talking about?” so a quick definition is called for here. “Bugging Out” is the act of packing up your supplies and leaving home to go to another location. This may or may not coincide with the belief that you will never come back. A common example of Bugging Out is people who are forced to leave town due to a natural disaster like flooding or a Hurricane. They pack up their cars and get out of dodge. This is one of the reasons FEMA and other places recommend having a Bugout Bag or BOB with supplies that will keep you alive for 72 hours so that you can leave at a moment’s notice.


Bugging In or Hunkering Down is the complete opposite of Bugging Out. When you Bug-In you are staying put in your home with your supplies intending to ride out the storm of chaos that is coming. Thus the question is asked in preparedness circles usually in the context of political, biological, or terrorist types of chaos: “Will you Bug out or Hunker down?”

To answer this for yourself, you have to ask several questions to determine which is the better option for you in your circumstance. The questions are pretty basic and revolve around:

  • Your Situation – What pushes your button internally that says “We have to leave”?
  • Your Location – This can apply to both where you are and where you plan to go
  • Your Health – Are you physically able to leave and possibly walk the distance
  • Your Dependents – small children or old relatives. Pets?
  • The Threat – What is the threat we are planning to leave for?
  • Your Destination – Where is the place you are going to?


Your Situation – can greatly affect the decision to Bug-Out or not and you have to decide when you will actually make the choice to go. If you are planning for an economic collapse, what events will trigger you to leave home and head somewhere else? How bad would things need to get before you made that call? What if you are away from home? In that case, you will be more concerned with getting home. What will your family do until you arrive? Is it the middle of winter and there is 2 feet of snow on the ground? Do you have a means of defending yourself and your family?

Your Health – Are you physically able to get up and strap a backpack to your back, walk out the door and never come back? Would you be able to run if needed? Do you require medication that must be refrigerated or taken daily? In some cases you simply won’t have a choice, you will need to Bug-In and plan accordingly.

Your Dependents – Do you have smaller children who may not be able to travel long distances. Are your children still in diapers or do they have special needs? Even healthy children below the age of 10 would have a tough time coping with a Bug-Out situation if the event lasted a long time and there was no stability. Are you pregnant? Do you have pets that you would never leave in a million years or that you would not be able to transport?

Your location – Are you located in a major city or a rural area with miles around you and nothing to look at. Do you live in a place that would allow you to live if the grid came crashing down tomorrow? I am not discussing whether or not it would be difficult, but could you plant a garden, or do you live in a high-rise apartment in Chicago? Would you possibly need to walk with millions of other people out of the city? If this is the case, where would you go?

The threat – This one may be the easiest to answer but you will most likely have more than one answer given the specific threat. If we are talking about a flood or natural disaster and you have plenty of notice you may decide to leave. If we are talking about a viral outbreak or Mutant Zombie Bikers from Mars you may decide to stay. Has your city descended into chaos with riots and fires and mobs of people looting?

Your destination – Where are you heading? Do you have a place to go with a survival kit filled with supplies to last you? If the threat is a natural disaster like a hurricane and you have time, you can probably go stay with relatives for a few days. This may be one of the first things you should think of. Will you pack up the family, load down the car, and hit the highway? Where will you go? For me, I think this was the first factor I built all of my other choices off of. I do not live on a retreat in Idaho with 50 acres of land and an underground bunker complete with livestock and solar power. I do live near a large pond in a relatively small city with enough land to have a garden that would feed my family. I don’t have any retreat property (yet) so I don’t know where I would go. I would not go driving off into the sunset to try and live off the land unless I was desperate. This may be the circumstance that you are facing too and when the time comes you have to decide.


One factor I really like about the Preparedness and Survival community is the wealth of knowledge and experience we have out there. Just like me, everyone has an opinion. Some are based upon experience and others have made decisions after much reflection. Regardless of the experience, one has you have to ask yourself questions when making a decision like this as it could affect everything you have and/or love. No expert can tell you what will work best for you and your family in your situation.

Taking all of the criteria above into consideration, I think for the average person with no place to go Bugging in is the best option. You will not be able to walk into the forest, killdeer, and squirrels and live like a boss. That simply isn’t happening for the “average” person. For one thing, you won’t be alone. There could be millions of others with you too.

I have thought long and hard on this question and I know that if circumstances in my life were different I would most likely have a different answer. As it stands now, my vote is for Bugging In. I have all of my supplies here and we live in a relatively rural area. I am not naïve to believe that we would be insulated from the chaos but I think we would have a better chance here with some shelter as opposed to walking in the woods sleeping under a tarp. As much as I like camping, a home is a better place to defend.

Could that change tomorrow? Sure it could. I am constantly evaluating my situation and when things change, my plans change. Who knows, I might update this site before it’s all said and done with one last message.

“So long folks! I am outta here.”

A frequent topic in Preparedness and Survival circles is the subject of Bugging Out and more specifically the question of whether you plan to Bug Out or will you Hunker

Beef jerky…the stories I could tell you about this stuff. I’m just going to say that I would marry beef jerky if that were possible (thinking about moving to state or country). Anyway, beef jerky’s awesome and, from where I stand, has but one caveat – not enough of it to go around. I mean, c’mon, I know it’s supposed to be emergency food or trail food, but who in God’s name eats just one 20g bag? It’s like saying “hey, it’s game night, and I’m gonna drink just one beer or eat one bag of chips.”

As far as a survival food is concerned, jerky’s the right call since it’s packed with just enough protein and fats to keep that engine of yours running. Sure, they’re salty AF and feels like you’re chewing on a rubber band, but it’s amazingly delicious. Since most of you are busy with your jobs and have neither the time nor the mood to replenish your beef jerky stocks, I thought about sharing with you my mouthwatering homemade beef jerky recipe.

It’s super easy to make and, most importantly, it mostly requires ingredients you probably have in your pantry. Why make beef jerky at home when you can always order some online? Because, let’s face it – as cheap as store jerky is, it’s pretty hard to find one that’s exactly the way you like it. Some are chewy, others salty as Hell and some, well, taste like crap.

First of all, preparing your own beef jerky puts you in full control of the dish, from choosing the beef cuts, all the way to the cooking part. Second, by choosing to cook rather than buy, you can make it as salty or sweet as you like. Last, but not least, beef jerky’s one of those recipes that don’t require an advanced degree in rocket science in order to prepare.

So, without further ado, here’s how to make some delish beef jerky at home.

Ingredients and Utensils

For this recipe, you will need the following:

  • Angus beef sirloin. I use around two pounds of beef for this recipe. Once you get it dried, you end up with one large zip-lock bag of beef jerky.
  • Worcestershire sauce (three-quarters of a cup).
  • Soy sauce (three-quarters of a cup).
  • Smoked paprika (one tablespoon).
  • Honey (one or two tablespoons).
  • Ground black pepper (two teaspoons).
  • Hot chili flakes (one or two tablespoons, depending on preference).
  • Garlic powder (one teaspoon).
  • Onion powder (one teaspoon).

That’s it for the ingredients. As for kitchen utensils, you will need a large bowl to mix your ingredients, an oven tray, baking paper, a pair of scissors, and, of course, a zip-lock bag for the jerky. All done gathering your utensils and all of the ingredients? Take your time. I ain’t going anywhere. When you’re ready, here’s how to put everything together.

Preparing mouthwatering beef jerky

Step 1. Take your beef cut out of the bag and wash it thoroughly. Dry with a couple of paper towels or place in a strainer.

Step 2. In a large bowl add your Worcestershire sauce, soy sauce, smoked paprika, honey, ground pepper, hot chili flakes, powdered garlic, and powdered onions. Whisk the ingredients using a fork or, well, a whisk.

Step 3. Cover the bowl with some plastic wrap and place it inside the fridge for half an hour.

Step 4. It’s now time to tend to the meat. Using a very sharp butcher’s knife, cut the meat into thin strips – if it’s easier, make stake-sized bits.

Step 5. Take a big zip-lock bag from the pantry and put the beef inside.

Step 6. Get the bowl out of the fridge and pour over the beef. Seal the bag and place in the refrigerator. Leave the meat to soak up all those juices for at least a couple of hours. Ideally, you should leave it overnight. Remember – the longer you marinate your meat, the tastier it will be. I usually keep it in the fridge for one or two days.

Step 7. When you’re ready to cook the meat, preheat the oven to 176 degrees – yup, you’ll need ultra-low heat. The idea is to dry the beef cuts, not to bake it.

Step 8. Take the marinated beef out of the bag.

Step 9. Place the meat on an oven tray covered with baking paper. Use a paper towel to soak the excess marinade.

Step 10. When the oven reached the desired temperature, stick the tray in the oven and cook for 4 to 5 hours. Every hour or so, flip the beef cuts.

Step 11. When they’re done, take them out of the oven, allow the cuts to cool down, and cut them into thin strips using a pair of scissors or a knife. Bag and tag!

Another Way to Prepare Beef Jerky

Don’t go anywhere, because this was just the warm-up. Okay, so you now know how to prepare beef jerky at home. But can you do the same, say during a shit hits the fan situation? Beef jerky is, more or less, the beauty of the best – thought it looks totally unpalatable, it’s actually delicious, nutritious, and, on top of that, it can be made anywhere and with any type of meat.

Now let’s imagine for a moment that you’re lost in the woods and you run out of food. Obviously, you’ve got to do something about it. Now, if you still have your bug out bag with you, whip out a snare and wait. Keep in mind that beef jerky can be made with any kind of meat.

However, if you want your trail snack to contain all the proteins and fats your body needs to keep on going, you would want to stick with red meat or fish. When you’re done with the gutting and butchering parts, here’s what you will need to do in order to prepare jerky.

Step 1. Find a clean spot to set up your working area.

Step 2. Use your survival knife or a very sharp rock to cut the flesh into very thin strips (half a centimeter). Don’t forget to cut across the grain, not with the grain (those muscle fibers will make meat harder to chew).

Step 3. While the meat’s still wet and tender, season it with your condiments of choice. I like to keep stuff like ginger, cumin, sugar, salt, pepper, and chili in small pill bottles. You can also make your own mix which you can use to season the meat. Put a little bit of sugar if you have some in your bug out bag.

Step 4. It’s now time to create some sort of drying rack. Look around for twigs, long stick or branches. If there’s nothing available, you can always hang the meat cuts by a low-lying branch using heavy duty zip ties. Just be careful to place that meat within eyeshot because it’s bound to attract some unwanted attention (flies, mosquitoes, and, yes, even bears).

(Optional) If you want to a little smokey flavor to your meat, place it over a small campfire. Don’t leave there too long, though. You’ll want to dry your meat, not cook it. Of course, there’s nothing wrong with some BBQed game, but it tends to spoil faster.

Step 5. If you manage to improvise a drying rack, flip the meat every couple of hours. Depending on weather conditions, like wind, humidity, and temperature, it can take up to four days for the meat to lose all moisture.

Yes, I know it’s a painstaking process. More so because you’ll need to be on the lookout for critters. On that note, when it’s time to hit the sack, don’t forget to bring the meat inside your tent or improvised shelter. Obviously, you won’t be able to keep an eye out while you’re asleep.

Step 6. After a couple of days have passed, take a look at the meat. You’ll know it’s ready to eat when the meat has a brittle aspect. If you prepare jerky from red meat, the color you’re looking for is a purple-brown. On the other hand, if you’re using white meat, the jerky will turn pink-grey when it’s done.

Step 7. All that remains to be done is to cut the meat into thinner strips and to store it in a zip-lock bag or an airtight container.

Wrap-up

Taking all these facts into account, I would have to say that jerky is indeed the ultimate survival food. Given the right storage conditions, a batch of jerky can last for at least a couple of months, if not for a whole year.

Now, as far as the oven-drying version is concerned, I would advise ditching the salt. Yes, I know that salt and jerky is a marriage made in Heaven, but the soy sauce adds and smoky taste to the meat, which means that it doesn’t need extra. Of course, if you’re not a big fan of soy, you can always replace with two tablespoons of rock salt.

I don’t know about you, but I like to add some kick to my jerky. If you want your snack to be spicier, you can add half a teaspoon of Tabasco in addition to the chili flakes. Yes, I know it sounds pretty hardcore, but hey, at least your jerky won’t be bland.

One of my friends told me that it’s also possible to prepare beef jerky using a dehydrator. Remember my powdered eggs recipe? Well, the method’s more or less the same. The only advantage of using a dehydrator instead of a regular oven set on ultra-low heat is that it reduces the cooking time by at least one, maybe two hours. If you have one of those gadgets in the kitchen, you should definitely try it out.

One more thing – the meat itself. Though I highly recommend using sirloin for this recipe since the cut will be, well, chewier, you can use whatever meat you prefer. Just be sure it has the same amount of fat as sirloin. Haven’t tried it yet, but from what I heard, jerky prepared from fish like rainbow trout, tuna or salmon is absolutely divine. Trouble is that it’s very hard to get ahold of a good recipe and most of the stuff on the market looks way too nasty.

So, here’s where I take my love. Hope my little winding has managed to convince you that making your own beef jerky is better than having to go through hundreds of Google pages in order to find the right one. As always, don’t think of cooking as something you need to do – have fun around the kitchen. Play some tunes. Work on your air guitar skills; whatever floats your boat. What do you think about my beef jerky recipe? Hit the comments section and let me know.

Beef jerky…the stories I could tell you about this stuff. I’m just going to say that I would marry beef jerky if that were possible (thinking about moving to state

Weeds aren’t just a nuisance if you’re trying to keep your yard tidy and attractive. They can reduce the yield of your crops and even encourage the spread of disease and parasites.

The trouble is, unless you’re talking a very small yard pulling up weeds by hand is just too labor intensive. To control them you need herbicides. Unfortunately many herbicides can be bad for the environment, including other plants and livestock – and anyway, what do you do if a crisis has already hit and none are available?

This is where a versatile household substance comes in. Vinegar is a great product to use to get rid of your weeds, and it’s as effective as any store-bought product. A herbicide with vinegar kills weeds, and although there are a few exceptions and limitations, vinegar usually does the trick.

Vinegar is a natural product, and the typical acidity is 5%. That is the acidity you want. Do not go over or below this. The number indicates the amount of acetic acid in the vinegar.

Acetic acid, from any source, will kill all weeds by extracting the moisture from the plant. Besides 5% vinegar you can also find it at strengths of 10% or 20%, but these may be too aggressive.

Due to the high concentration they are considered strong acids, and they’re only recommended for mature and firm weeds. If using these products you need to be very careful and treat them the same as you would other caustic substance.

Besides vinegar, you can also use salt. It is one of the safest and most natural herbicides you can use. Salt is great because it is super cheap, works quickly, and suppresses regrowth, and overuse will not harm the environment. But it has some flaws: you cannot use it on lawns or for large weeds.

It is best to spray the solution of vinegar and salt over the weed on a hot day. The effect of the sun and heat will increase the effect of the vinegar solution and kill your weeds within 24 hours.

Although this is a powerful combination, some plants are not as susceptible to vinegar. A waxy coating or fuzzy surface may interfere with the vinegar solution effect. This is the part where dish soap comes in.

Just one tablespoon of dish soap per gallon will make the solution “stick” to the plant and allow the vinegar to do its magic. Although the dish soap will not have a major impact on the weed itself, it helps the other ingredients to dehydrate the weed.

Once you have your solution ready, you can use it with a spray bottle for small areas or a pressure sprayer for wide areas.

NOTE:

When it comes to safety you can wear gloves and glasses, but this is a natural product (except for the dish soap), and there is no need to use safety gear. Of course, if your skin is sensitive you should protect yourself.

Preparation time: 10 minutes

Makes: 1 gallon

Ingredients:

  • 1 gallon distilled white vinegar (5% acidity is enough)
  • 1 cup table salt
  • 1 tablespoon liquid dishwashing soap
  • Standard garden sprayer (available in any garden store)

How to Make the Herbicide

  1. Pour the vinegar into the container.
  2. Add salt and stir until the salt is dissolved.
  3. Once the salt dissolves, add the liquid dishwashing soap. The dishwashing soap allows the other two ingredients to stick to the weed and kill it.
  4. Spray the mixture over the weed just like any store-bought product.
  5. Allow it to stand for a few days. The weed will start to dry out within 24 hours. After a few days, it will be completely dead.

The vinegar and salt both work against the weed by dehydrating it. The dish soap will help these two stick to the plant, making them more effective. The solution also prevents any future growth from occurring.

NOTE: This solution may destroy other delicate plants, so you cannot spray all over the lawn as your grass will be destroyed as well. The best application is for sidewalks, driveways, and other areas without any flowers or lawn.

Knowledge is a man’s best friend. That’s just a small sample of what natural remedies can do! There are many other herbs and many other uses!

Want to read more about powerful plants that you can use as natural remedies?

Check out the examples in this short FREE guide. This is herbal medicine in a nutshell.


If you understand how useful this knowledge is and will be in the near future, you will definitely feel way more prepared next time a man-made or a natural disaster disrupts our lives, no matter for how long.


Weeds aren’t just a nuisance if you’re trying to keep your yard tidy and attractive. They can reduce the yield of your crops and even encourage the spread of disease