Home2021

Potassium permanganate is arguably one of the most useful ones as a survival material.

The compound’s 4 oxygen atoms are the secret to its action and its applicability in survival. Potassium permanganate contains much oxygen making the compound an oxidant. It is this oxygenation potential that is one of the reasons why potassium permanganate is such a valuable chemical for survival.

Potassium permanganate, as a minor side note, is excellent at taking stains off objects. For example, using a potassium permanganate solution, you can remove the ‘foxing’ from an old book. But at the same time, if you have it on your skin, you end up with brown stains that are very difficult to wash off — as I figured out once before.

Use #1: As Water Purifier

Studies, from “The Pharmacological Basis of Therapeutics”, have shown that a dilution of 1:10,000 (potassium permanganate to water) kills most bacteria within an hour.

You may be asking, can I sterilize drinking water with potassium permanganate? Not only that you can, but you can also do it at the source. For example, if you have a well, you can control bacterial growth by feeding the well a solution of around 4-7 g permanganate per gallon.

Related: How to Purify Water with Charcoal

Use #2: As Wound Disinfectant

Potassium permanganate is found more readily outside. The oxidizing aspect of the chemical means it’s an excellent disinfectant, as described earlier.

A diluted potassium permanganate solution can be used to treat anything from trench foot to wound cleaning to sterilize contaminated water. These can also be used for the prevention of bacterial infections in fish.

Related: How to Prevent Wound Infection Using Saltwater

Use #3: To start a fire

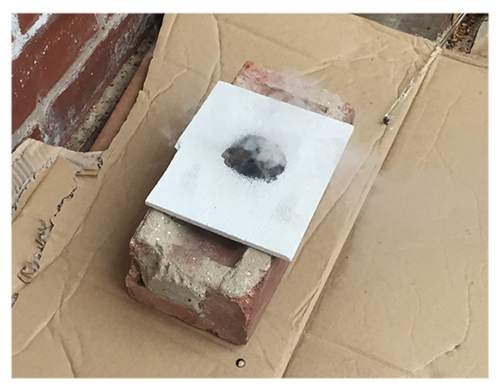
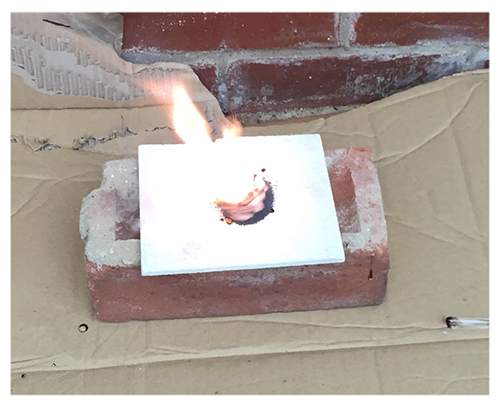
Potassium permanganate is a great fire starter. What you need is about 10g (1/3 oz) of it and some glycerin (about 1 ml or 1/4 teaspoon) to start a fire with potassium permanganate. It can work with water and sugar too. Place your potassium permanganate or tile (as shown below) in a small ceramic bowl. Then drop the glycerol onto the potassium permanganate and stand back. The dish will start smoking within a few seconds to a minute and then a sudden purplish flame will appear. The flame can be used to light a bigger fire.

Create a small mound of potassium permanganate and drop the glycerol into a small reservoir in the middle of the mound

Stand back and watch as the chemicals react and create a flame

Use the flame as a firelighter

Use #4: Improvised munitions

You may also use potassium permanganate as an improvised munition using the same concept as in Using # 3. You can use a mixture of sugar and potassium permanganate as a simple munition. To do this, grind the sugar finely and permanganate separately (for obvious reasons it is important to grind these separately). So blend the two together using a soft brush — the brush eliminates friction — that should produce a low-level munition. Wrap the powder together into something like a little pipe, with a fuse capped tube.

Related: What the H is Potassium Permanganate and Why Do I Need it?

Use #5: More medicinal uses

Wounds, like blisters, and even open wounds, can be treated by taking a dilute bath of potassium permanganate for infection. For the solution adopt the 1:10,000 law. Likewise, you can also treat eczema, dermatitis, and fungal infections with a dilute potassium permanganate solution that you use every day to wash the infected area. Referring back to the Pharmacopoeia from 1968, it recommends a cure for weeping wounds 1 in 5000 to 1 in 10,000 and similar for urethral irrigation for water infections — so specificity for alternative therapies should be around the range of solutions.

Use #6: As a mouthwash

IMPORTANT NOTE: Concentrated solutions of potassium permanganate are poisonous, so be careful!

Potassium permanganate is a disinfectant and can also be used as a mouthwash. The disinfectant action works by leveraging the oxidizing properties of potassium permanganate to destroy microorganisms. The mouthwash solution of potassium permanganate should taste mildly sweet, with an astringent aftertaste. Research on the antiseptic effects of potassium permanganate and its use in treating periodontal disease is continuing. The mouthwash concentration in the trials is a solution of 0.01%, this is 1g of potassium permanganate per 10,000ml of water (that’s about 2 gallons of water). The trial suggests gargling the solution with 10 ml, twice a day.

Potassium permanganate at room temperature and normal light conditions are stable as a solid but it is less stable as a liquid. And the easiest way to make up solutions in small batches that can be used up quickly is to use 100 mg potassium permanganate to around 1 liter of water (around 0.2 gallons) in the above example.

Some final uses:

  • According to the British Pharmaceutical Codex of 1968, potassium permanganate solution is used as a first-aid treatment for snake bites. However, it caveats this use is not clinically proven, but that it will destroy any venom that is on the skin’s surface.
  • Potassium permanganate can be used to neutralize mustard gas, even if it has been in the ground for decades by pouring on a solution around the infected area.
  • Back in the day, potassium permanganate was used as a treatment for poisoning. The dosage varies depending on what you read, but most publications recommend a 0.2% solution as a stomach wash, post poisoning.

Potassium permanganate is arguably one of the most useful ones as a survival material. The compound’s 4 oxygen atoms are the secret to its action and its applicability in survival. Potassium

Beef jerky…the stories I could tell you about this stuff. I’m just going to say that I would marry beef jerky if that were possible (thinking about moving to state or country). Anyway, beef jerky’s awesome and, from where I stand, has but one caveat – not enough of it to go around. I mean, c’mon, I know it’s supposed to be emergency food or trail food, but who in God’s name eats just one 20g bag? It’s like saying “hey, it’s game night, and I’m gonna drink just one beer or eat one bag of chips.”

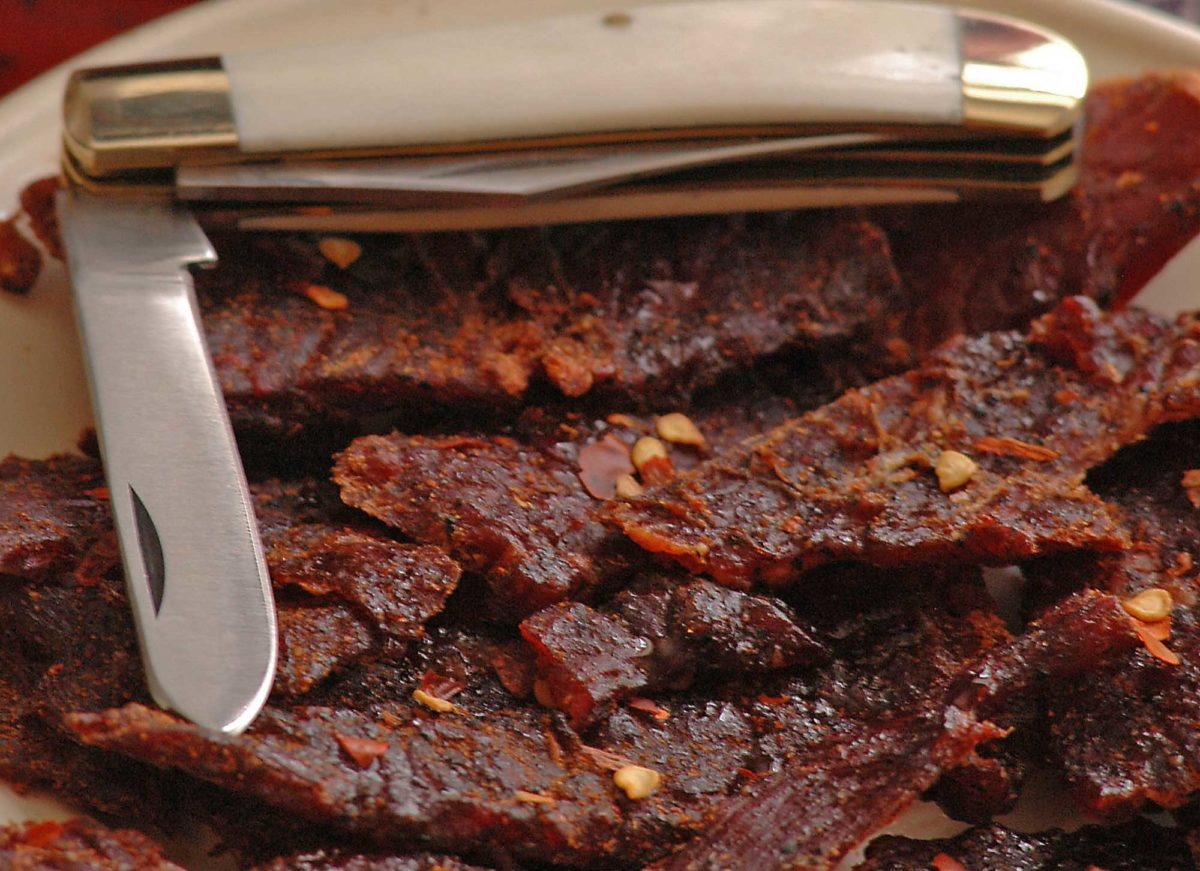
As far as a survival food is concerned, jerky’s the right call since it’s packed with just enough protein and fats to keep that engine of yours running. Sure, they’re salty AF and feels like you’re chewing on a rubber band, but it’s amazingly delicious. Since most of you are busy with your jobs and have neither the time nor the mood to replenish your beef jerky stocks, I thought about sharing with you my mouthwatering homemade beef jerky recipe.

It’s super easy to make and, most importantly, it mostly requires ingredients you probably have in your pantry. Why make beef jerky at home when you can always order some online? Because, let’s face it – as cheap as store jerky is, it’s pretty hard to find one that’s exactly the way you like it. Some are chewy, others salty as Hell and some, well, taste like crap.

First of all, preparing your own beef jerky puts you in full control of the dish, from choosing the beef cuts, all the way to the cooking part. Second, by choosing to cook rather than buy, you can make it as salty or sweet as you like. Last, but not least, beef jerky’s one of those recipes that don’t require an advanced degree in rocket science in order to prepare.

So, without further ado, here’s how to make some delish beef jerky at home.

Ingredients and Utensils

For this recipe, you will need the following:

  • Angus beef sirloin. I use around two pounds of beef for this recipe. Once you get it dried, you end up with one large zip-lock bag of beef jerky.
  • Worcestershire sauce (three-quarters of a cup).
  • Soy sauce (three-quarters of a cup).
  • Smoked paprika (one tablespoon).
  • Honey (one or two tablespoons).
  • Ground black pepper (two teaspoons).
  • Hot chili flakes (one or two tablespoons, depending on preference).
  • Garlic powder (one teaspoon).
  • Onion powder (one teaspoon).

That’s it for the ingredients. As for kitchen utensils, you will need a large bowl to mix your ingredients, an oven tray, baking paper, a pair of scissors, and, of course, a zip-lock bag for the jerky. All done gathering your utensils and all of the ingredients? Take your time. I ain’t going anywhere. When you’re ready, here’s how to put everything together.

Preparing mouthwatering beef jerky

Step 1. Take your beef cut out of the bag and wash it thoroughly. Dry with a couple of paper towels or place in a strainer.

Step 2. In a large bowl add your Worcestershire sauce, soy sauce, smoked paprika, honey, ground pepper, hot chili flakes, powdered garlic, and powdered onions. Whisk the ingredients using a fork or, well, a whisk.

Step 3. Cover the bowl with some plastic wrap and place it inside the fridge for half an hour.

Step 4. It’s now time to tend to the meat. Using a very sharp butcher’s knife, cut the meat into thin strips – if it’s easier, make stake-sized bits.

Step 5. Take a big zip-lock bag from the pantry and put the beef inside.

Step 6. Get the bowl out of the fridge and pour over the beef. Seal the bag and place in the refrigerator. Leave the meat to soak up all those juices for at least a couple of hours. Ideally, you should leave it overnight. Remember – the longer you marinate your meat, the tastier it will be. I usually keep it in the fridge for one or two days.

Step 7. When you’re ready to cook the meat, preheat the oven to 176 degrees – yup, you’ll need ultra-low heat. The idea is to dry the beef cuts, not to bake it.

Step 8. Take the marinated beef out of the bag.

Step 9. Place the meat on an oven tray covered with baking paper. Use a paper towel to soak the excess marinade.

Step 10. When the oven reached the desired temperature, stick the tray in the oven and cook for 4 to 5 hours. Every hour or so, flip the beef cuts.

Step 11. When they’re done, take them out of the oven, allow the cuts to cool down, and cut them into thin strips using a pair of scissors or a knife. Bag and tag!

Another Way to Prepare Beef Jerky

Don’t go anywhere, because this was just the warm-up. Okay, so you now know how to prepare beef jerky at home. But can you do the same, say during a shit hits the fan situation? Beef jerky is, more or less, the beauty of the best – thought it looks totally unpalatable, it’s actually delicious, nutritious, and, on top of that, it can be made anywhere and with any type of meat.

Now let’s imagine for a moment that you’re lost in the woods and you run out of food. Obviously, you’ve got to do something about it. Now, if you still have your bug out bag with you, whip out a snare and wait. Keep in mind that beef jerky can be made with any kind of meat.

However, if you want your trail snack to contain all the proteins and fats your body needs to keep on going, you would want to stick with red meat or fish. When you’re done with the gutting and butchering parts, here’s what you will need to do in order to prepare jerky.

Step 1. Find a clean spot to set up your working area.

Step 2. Use your survival knife or a very sharp rock to cut the flesh into very thin strips (half a centimeter). Don’t forget to cut across the grain, not with the grain (those muscle fibers will make meat harder to chew).

Step 3. While the meat’s still wet and tender, season it with your condiments of choice. I like to keep stuff like ginger, cumin, sugar, salt, pepper, and chili in small pill bottles. You can also make your own mix which you can use to season the meat. Put a little bit of sugar if you have some in your bug out bag.

Step 4. It’s now time to create some sort of drying rack. Look around for twigs, long stick or branches. If there’s nothing available, you can always hang the meat cuts by a low-lying branch using heavy duty zip ties. Just be careful to place that meat within eyeshot because it’s bound to attract some unwanted attention (flies, mosquitoes, and, yes, even bears).

(Optional) If you want to a little smokey flavor to your meat, place it over a small campfire. Don’t leave there too long, though. You’ll want to dry your meat, not cook it. Of course, there’s nothing wrong with some BBQed game, but it tends to spoil faster.

Step 5. If you manage to improvise a drying rack, flip the meat every couple of hours. Depending on weather conditions, like wind, humidity, and temperature, it can take up to four days for the meat to lose all moisture.

Yes, I know it’s a painstaking process. More so because you’ll need to be on the lookout for critters. On that note, when it’s time to hit the sack, don’t forget to bring the meat inside your tent or improvised shelter. Obviously, you won’t be able to keep an eye out while you’re asleep.

Step 6. After a couple of days have passed, take a look at the meat. You’ll know it’s ready to eat when the meat has a brittle aspect. If you prepare jerky from red meat, the color you’re looking for is a purple-brown. On the other hand, if you’re using white meat, the jerky will turn pink-grey when it’s done.

Step 7. All that remains to be done is to cut the meat into thinner strips and to store it in a zip-lock bag or an airtight container.

Wrap-up

Taking all these facts into account, I would have to say that jerky is indeed the ultimate survival food. Given the right storage conditions, a batch of jerky can last for at least a couple of months, if not for a whole year.

Now, as far as the oven-drying version is concerned, I would advise ditching the salt. Yes, I know that salt and jerky is a marriage made in Heaven, but the soy sauce adds and smoky taste to the meat, which means that it doesn’t need extra. Of course, if you’re not a big fan of soy, you can always replace with two tablespoons of rock salt.

I don’t know about you, but I like to add some kick to my jerky. If you want your snack to be spicier, you can add half a teaspoon of Tabasco in addition to the chili flakes. Yes, I know it sounds pretty hardcore, but hey, at least your jerky won’t be bland.

One of my friends told me that it’s also possible to prepare beef jerky using a dehydrator. Remember my powdered eggs recipe? Well, the method’s more or less the same. The only advantage of using a dehydrator instead of a regular oven set on ultra-low heat is that it reduces the cooking time by at least one, maybe two hours. If you have one of those gadgets in the kitchen, you should definitely try it out.

One more thing – the meat itself. Though I highly recommend using sirloin for this recipe since the cut will be, well, chewier, you can use whatever meat you prefer. Just be sure it has the same amount of fat as sirloin. Haven’t tried it yet, but from what I heard, jerky prepared from fish like rainbow trout, tuna or salmon is absolutely divine. Trouble is that it’s very hard to get ahold of a good recipe and most of the stuff on the market looks way too nasty.

So, here’s where I take my love. Hope my little winding has managed to convince you that making your own beef jerky is better than having to go through hundreds of Google pages in order to find the right one. As always, don’t think of cooking as something you need to do – have fun around the kitchen. Play some tunes. Work on your air guitar skills; whatever floats your boat. What do you think about my beef jerky recipe? Hit the comments section and let me know.

Beef jerky…the stories I could tell you about this stuff. I’m just going to say that I would marry beef jerky if that were possible (thinking about moving to state

Weeds aren’t just a nuisance if you’re trying to keep your yard tidy and attractive. They can reduce the yield of your crops and even encourage the spread of disease and parasites.

The trouble is, unless you’re talking a very small yard pulling up weeds by hand is just too labor intensive. To control them you need herbicides. Unfortunately many herbicides can be bad for the environment, including other plants and livestock – and anyway, what do you do if a crisis has already hit and none are available?

This is where a versatile household substance comes in. Vinegar is a great product to use to get rid of your weeds, and it’s as effective as any store-bought product. A herbicide with vinegar kills weeds, and although there are a few exceptions and limitations, vinegar usually does the trick.

Vinegar is a natural product, and the typical acidity is 5%. That is the acidity you want. Do not go over or below this. The number indicates the amount of acetic acid in the vinegar.

Acetic acid, from any source, will kill all weeds by extracting the moisture from the plant. Besides 5% vinegar you can also find it at strengths of 10% or 20%, but these may be too aggressive.

Due to the high concentration they are considered strong acids, and they’re only recommended for mature and firm weeds. If using these products you need to be very careful and treat them the same as you would other caustic substance.

Besides vinegar, you can also use salt. It is one of the safest and most natural herbicides you can use. Salt is great because it is super cheap, works quickly, and suppresses regrowth, and overuse will not harm the environment. But it has some flaws: you cannot use it on lawns or for large weeds.

It is best to spray the solution of vinegar and salt over the weed on a hot day. The effect of the sun and heat will increase the effect of the vinegar solution and kill your weeds within 24 hours.

Although this is a powerful combination, some plants are not as susceptible to vinegar. A waxy coating or fuzzy surface may interfere with the vinegar solution effect. This is the part where dish soap comes in.

Just one tablespoon of dish soap per gallon will make the solution “stick” to the plant and allow the vinegar to do its magic. Although the dish soap will not have a major impact on the weed itself, it helps the other ingredients to dehydrate the weed.

Once you have your solution ready, you can use it with a spray bottle for small areas or a pressure sprayer for wide areas.

NOTE:

When it comes to safety you can wear gloves and glasses, but this is a natural product (except for the dish soap), and there is no need to use safety gear. Of course, if your skin is sensitive you should protect yourself.

Preparation time: 10 minutes

Makes: 1 gallon

Ingredients:

  • 1 gallon distilled white vinegar (5% acidity is enough)
  • 1 cup table salt
  • 1 tablespoon liquid dishwashing soap
  • Standard garden sprayer (available in any garden store)

How to Make the Herbicide

  1. Pour the vinegar into the container.
  2. Add salt and stir until the salt is dissolved.
  3. Once the salt dissolves, add the liquid dishwashing soap. The dishwashing soap allows the other two ingredients to stick to the weed and kill it.
  4. Spray the mixture over the weed just like any store-bought product.
  5. Allow it to stand for a few days. The weed will start to dry out within 24 hours. After a few days, it will be completely dead.

The vinegar and salt both work against the weed by dehydrating it. The dish soap will help these two stick to the plant, making them more effective. The solution also prevents any future growth from occurring.

NOTE: This solution may destroy other delicate plants, so you cannot spray all over the lawn as your grass will be destroyed as well. The best application is for sidewalks, driveways, and other areas without any flowers or lawn.

Knowledge is a man’s best friend. That’s just a small sample of what natural remedies can do! There are many other herbs and many other uses!

Want to read more about powerful plants that you can use as natural remedies?

Check out the examples in this short FREE guide. This is herbal medicine in a nutshell.


If you understand how useful this knowledge is and will be in the near future, you will definitely feel way more prepared next time a man-made or a natural disaster disrupts our lives, no matter for how long.


Weeds aren’t just a nuisance if you’re trying to keep your yard tidy and attractive. They can reduce the yield of your crops and even encourage the spread of disease

With the holidays fast approaching I know how frustrating it can be trying to get loved ones that perfect gift that is not only practical but will benefit them in ways a flashy pretty piece of jewelry or a cool video game can’t. Having first-hand experience with getting high-dollar prepping items for non-preppers who not only don’t appreciate them but also shake their head in disdain is a feeling all too familiar to me. So here I have compiled a list of 11 gifts for non-preppers under $50 that can put that loved one in a better predicament of preparedness without them even knowing it. This list is non-exclusive that will make for great prepper gift ideas for both guys and gals of all ages!

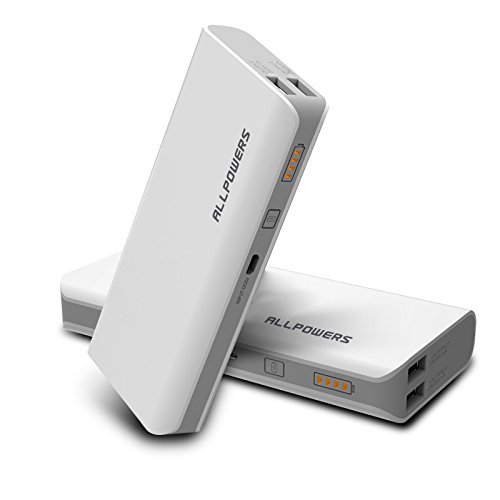
Portable Powerpack

Portable Power packs come in all shapes, sizes, colors, and capacities. I have found these not only extremely well received by non-preppers but unprecedented by most in the overall preparedness value it brings. The typical iPhone battery is about 2,000 mah of power. With power packs ranging from 2,000 mah to the 50,000 “All Powers” external power packs. The user can charge their portable electronics many times over. Not only are their uses for small electronics great but also they provide so much diversity in regards to their many colors, sizes, and applications.

15600mAh Portable External Battery Charger Power Bank with iPower and Quick Charge Technology

Giving your loved ones the ability to meet all their small electronic needs is a huge prepping multiplier! We all know inclement weather, terrorism, earthquakes, accidents, and overall disaster will happen it’s never been a matter of if but when. According to current statistics, there are over 260 million cell phone users in the United States of America! With this knowledge in mind equip your loved ones with the ability to send that text message, write that tweet, update that Facebook status, hashtag their ideas, post that controversial idea, record that memorable moment. But most importantly give them the life-saving power they need to get in contact with Emergency services and loved ones in the event something goes wrong! You will be happier and can rest assured knowing you have set them up for success.

Foldable solar panel

Small foldable solar panels are not only “hipster and progressive” (air quotes emphasized for meaning attractive to a younger audience) in many aspects but provide a wealth preparedness capabilities unparalleled in many respects. Not only do foldable solar panels provide an unlimited amount of electricity when the sun is out but are very easy to store and user-friendly to use. Requiring virtually no maintenance upkeep, they can be that lifeline you can depend on when everything around you is falling apart. They can be used and implemented anywhere at any time as long as there is light, even under bad forecast they can provide you the life-saving power you or someone you know may need in the event of a disaster.

Now couple this with an external power pack and now you have an unlimited power source that can keep you off-grid indefinitely! You will be hard-pressed to find something that brings more independence and stress-free-living than being able to personally provide for all your small electronic power needs free from the power grid!

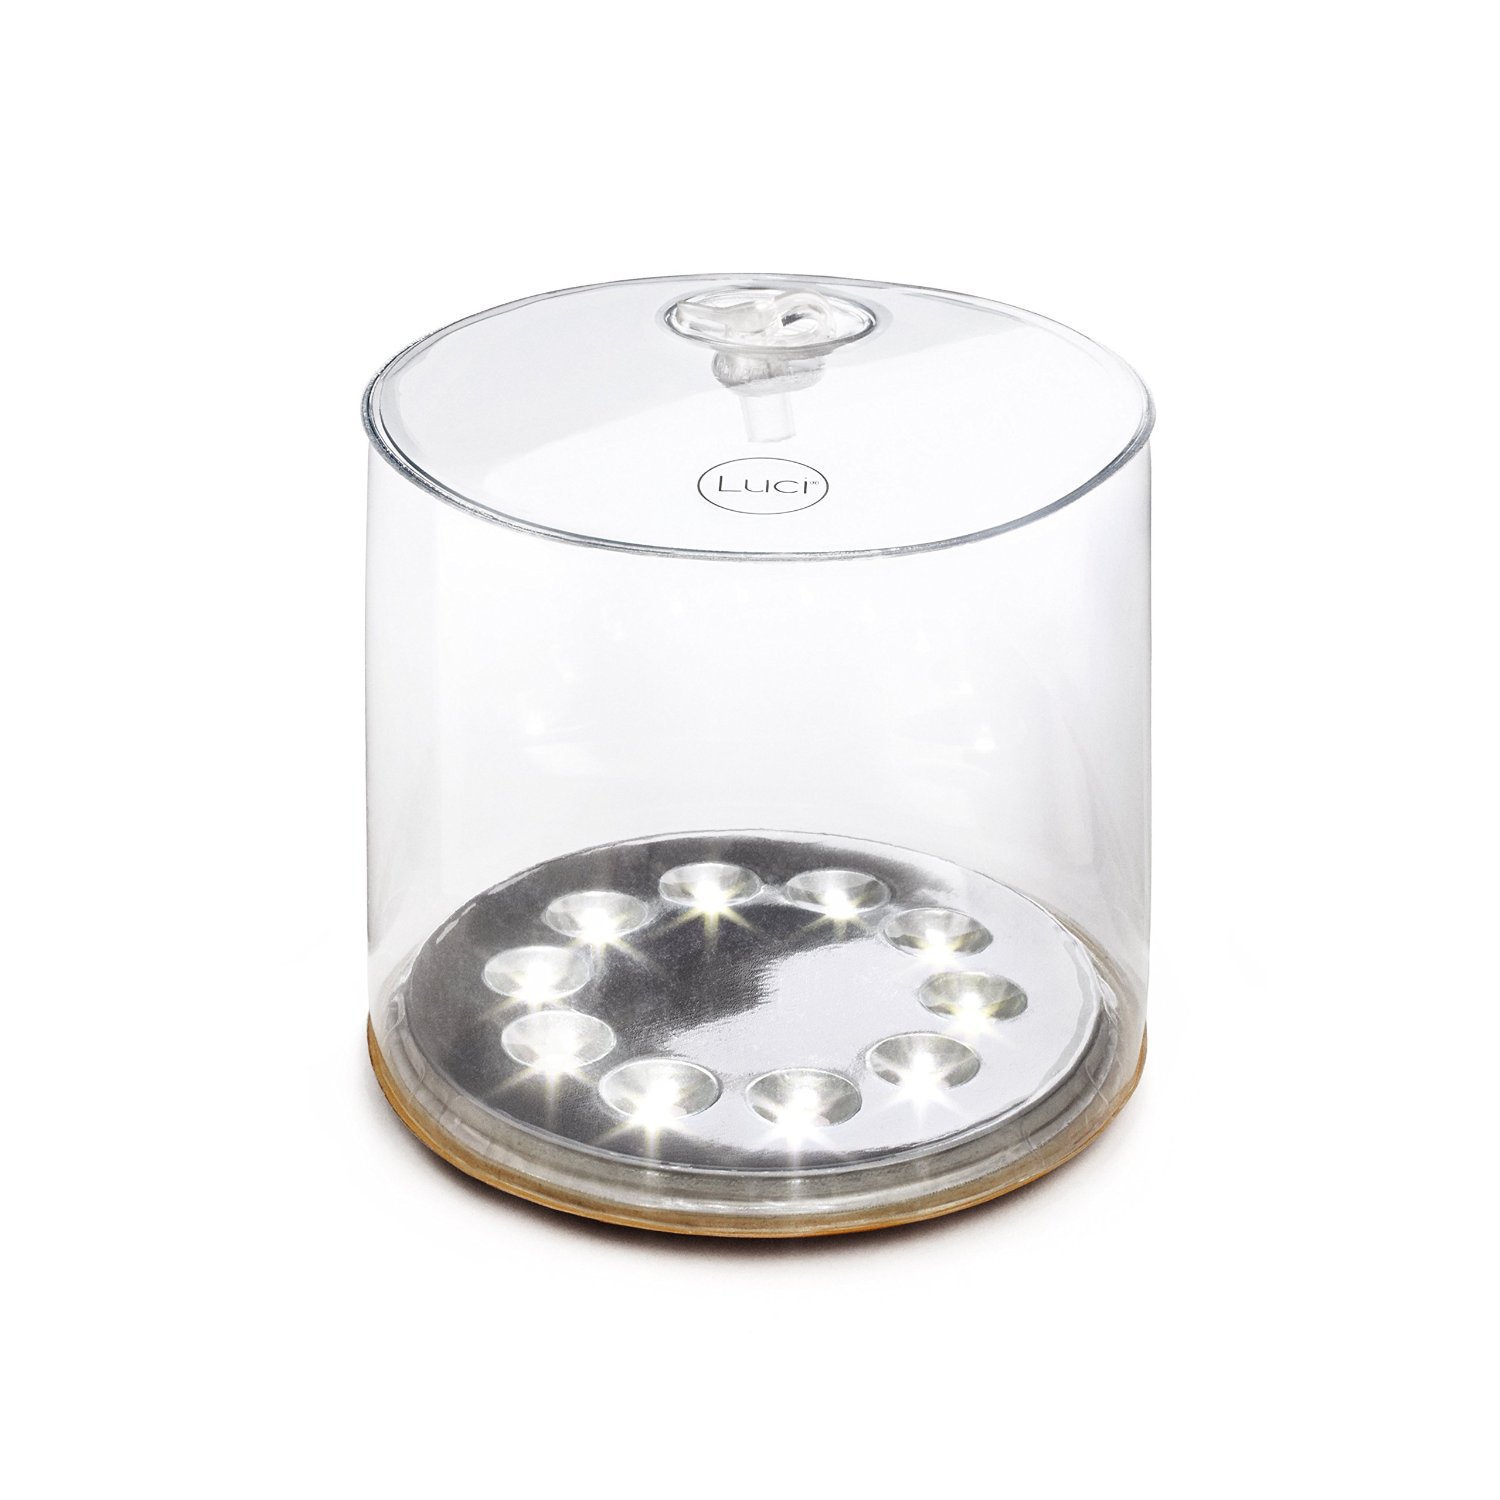
Solar flashlight/ Lantern

Light more often than not is something that is taken for granted by the average person. Fortunately, most of us live in a world where we can flip and switch and magically we have light. While this is ideal it’s not always the case when disaster strikes. Solar Lighting not only gives the user the ability to have light where they may otherwise not have it but also allows them to have lighting abilities indefinitely because they are not susceptible to depleted disposable batteries, or oil sources like what we see with traditional flashlights and oil lanterns.

MPOWERD Luci Original – Inflatable Solar Light

Natural sunlight light can be taken advantage of during the day and can be used at night. Also, like the already mentioned items, many of them have the ability to be also used as an external power pack giving them more than one use. We don’t realize the importance of light until the light goes out and we hear that boom in the middle of the night! Remember two is one, one is none.

Cutting Tools

When you say cutting tools you are referring to a broad diverse spectrum of “sharp objects”. This was done purposely – everyone is different and requires different types of cutting tools. What I would give a college sorority girl who drives a Toyota corolla and has no preparedness inclination versus an avid hunter that drives a lifted 4×4 truck and stays off the beaten path for days at a time is going to be different in style and ergonomics, but the methodology and application will be very similar.

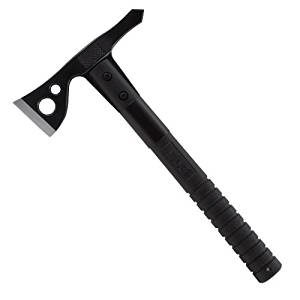
SOG FastHawk

Examples for a self-defense situation I would be more inclined to give a college sorority girl a “Honeycomb Hairbrush concealed stiletto dagger” or a “Cat personal safety keychain”. They are completely concealable very fashionable that can go with any purse or outfit. These items will provide quick control for an unprecedented attack while serving primarily as an everyday use item. While for my avid hunter, Military, or EMS person I might give a “SOG FastHawk Hatchet” that can be used as a self-defense tool, extrication device, wood cutting tool, etc. As you can see cutting tools have a wide range of styles and uses, that can serve a diverse array of preparedness needs without coming across as such.

Portable water filter

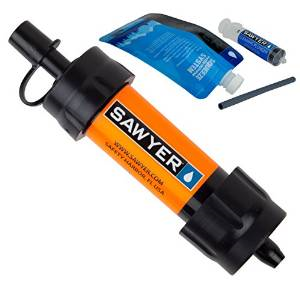
Portable water filters are one of those small cheap out-of-sight-out-of-mind water applications that quite frankly will at a minimum sustain life! These make a perfect gift for all people regardless of age, gender, or lifestyle. I can say from personal experience being well-traveled around the world these have been game-changer. Being in other countries where the tap water was considered unsafe due to viruses and bacteria I never had to worry about where I got my drinking water. Especially with products like the “Sawyer mini Water Filter” that will easily screw onto any commercial water bottle I was able to fill up my bottle (from any local water source) attach the filter and keep moving without any fear of contracting any water-borne illnesses.

Sawyer Products Mini Water Filtration System

Most commercial portable water filters on the market today will remove over 99% of all bacteria, such as salmonella, cholera, and E.coli and remove over 99% of all protozoa elements such as giardia and cryptosporidium. The “Sawyer Mini Water Filter” Claims it can filter up to 100,000 gallons and weighs only 2 ounces. According to science, the average adult human body is 50-65% water. On average the everyday American uses about 80-100 gallons of water per day. While this is taking other water usages into calculation one can still see the importance of water especially when considering that in a disaster the average person will be expending more calories and using more water. No matter where you are whether that be in a local park, traveling in another country, or in the safety of one’s home drinking clean potable water is an absolute necessity and water is unequivocally the giver of life! Make having clean and potable water a necessity!

Waterproof speakers with external charging capabilities

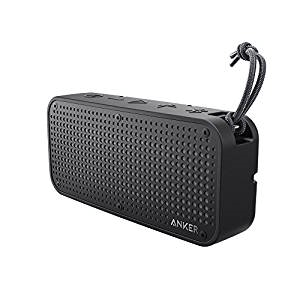
The waterproof speakers with external charging capabilities are what get the person from the sidelines into the action in regards to preparedness. This is a gateway preparedness gift. Regardless of whether you are an NCAA Cheerleader, Surfer, camper, Military Service member, or everyday person the ability to access to and have all their music and electronic needs met is an extremely good selling point. According to a Nielsen’s Music 360 2014 study, 93% of the U.S. population listens to music, spending more than 25 hours each week jamming out to their favorite tunes.

Anker SoundCore Sport XL Portable Bluetooth Speaker

The waterproof speakers encourage the user to take their lives off the beaten path, to push beyond the realms of their typical everyday habits. The external charging capabilities give the user an added layer of support and comfort being outside in those environments. Now add a foldable solar panel and the possibilities for adventures off the beaten path are endless. It’s much easier to engage someone in a “what if” scenario or talk about preparedness if you are already off the beaten path, outside the “safety confines” of the power grid simultaneously creating your own endless energy while listening to their favorite music. I’m just saying!

Seed Bank/Plant

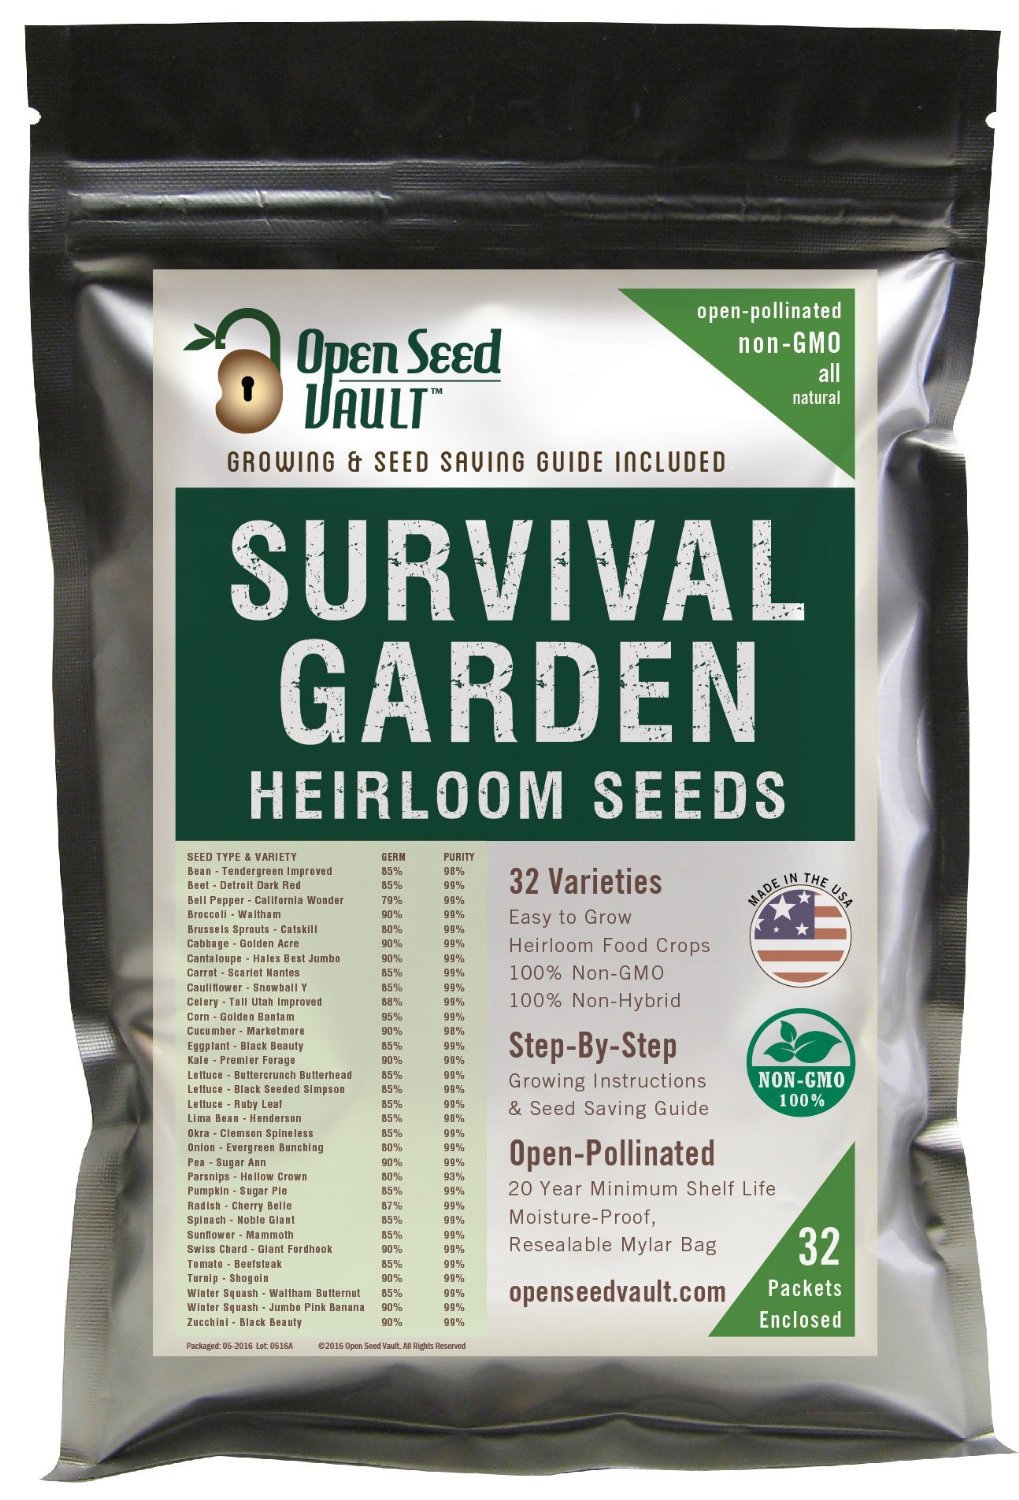
Seeds and plants are one of the only preps “gifts” that will give back in dividends that will well exceed the initial cost. Being able to take a handful of seeds or a plant and create an endless life-sustaining ecosystem is truly beyond words. Permaculture does more than just provide a means by which to feed one’s self. Permaculture in many respects is one of the most rewarding pursuits we can do as human beings. Giving us the ability to create and take care of life, being independent of the corporate bureaucracy of Big Ag, and allowing one to create their own sustainable paradigm.

15,000 Non-GMO Heirloom Vegetable Seeds Survival Garden

The lessons gained from the successes and losses of growing.  Not to mention the invaluable skill set that has been slowly taken out of our modern-day society. Living in a day and age where we have become so dependent on a system that could care less the consequences of their actions and practices should worry us all. So stay one step ahead of chaos get someone you care about a small seed variety pack or a tomato plant. If you really like them get them a moringa tree!

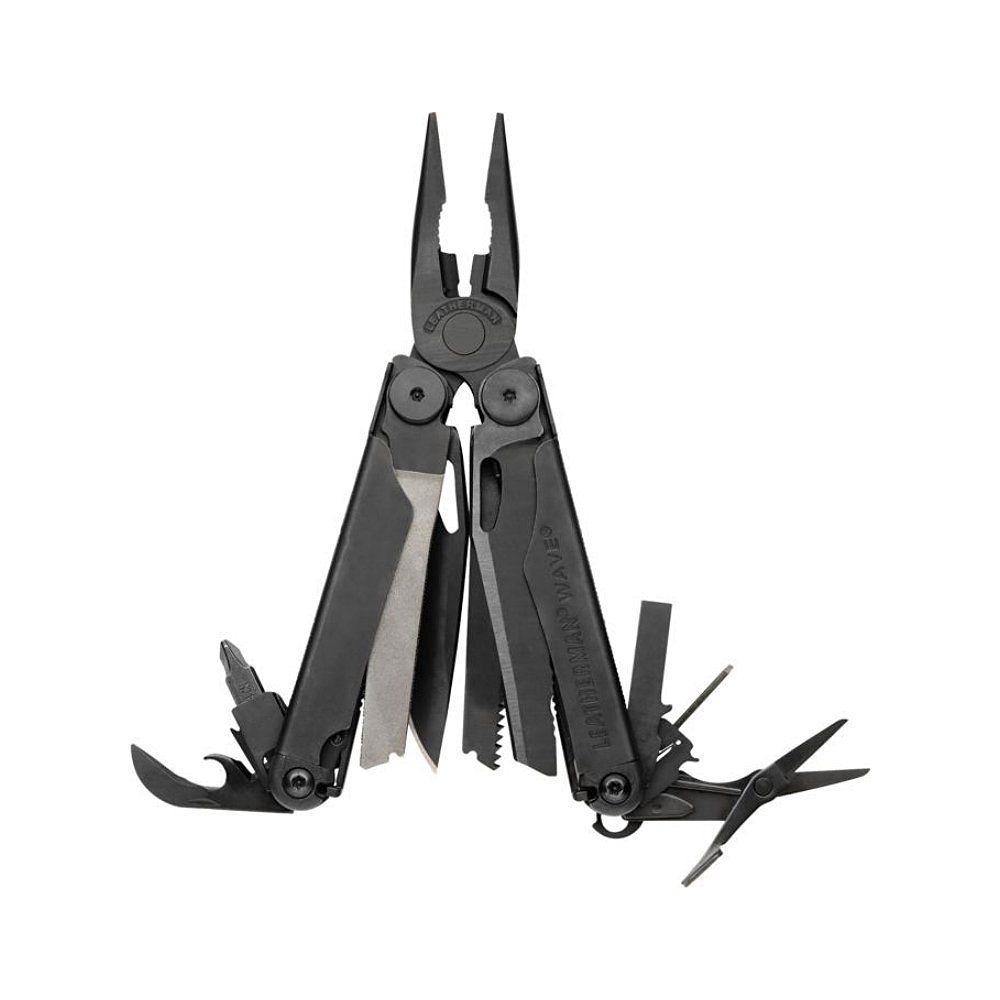
Multi-Tool

Multi-Tools are invaluable to anyone, they provide hundreds of functions and are more compact than a wallet or small makeup case. Yet it provides the essentials to most day-to-day maintenance. Whether we are talking about opening a bottle or performing a plumbing task using pliers and a cutting tool. The Multi-Tool is a silent hero; it can be carried as an EDC or left in the glove box of a vehicle until needed.

Leatherman – Wave Multi-Tool, Black with Molle Sheath

It’s a jack-of-all-trades but master of none. You won’t necessarily build a house with it but it can get you out of pretty much any tight situation you might find yourself in. To top it off, in modern-day 2016 Multi-Tools are no longer big bulky steel bricks carried in the same old leather or webbing straps. They come in all styles, colors, and designs. They even have the bracelet Multi-Tools!

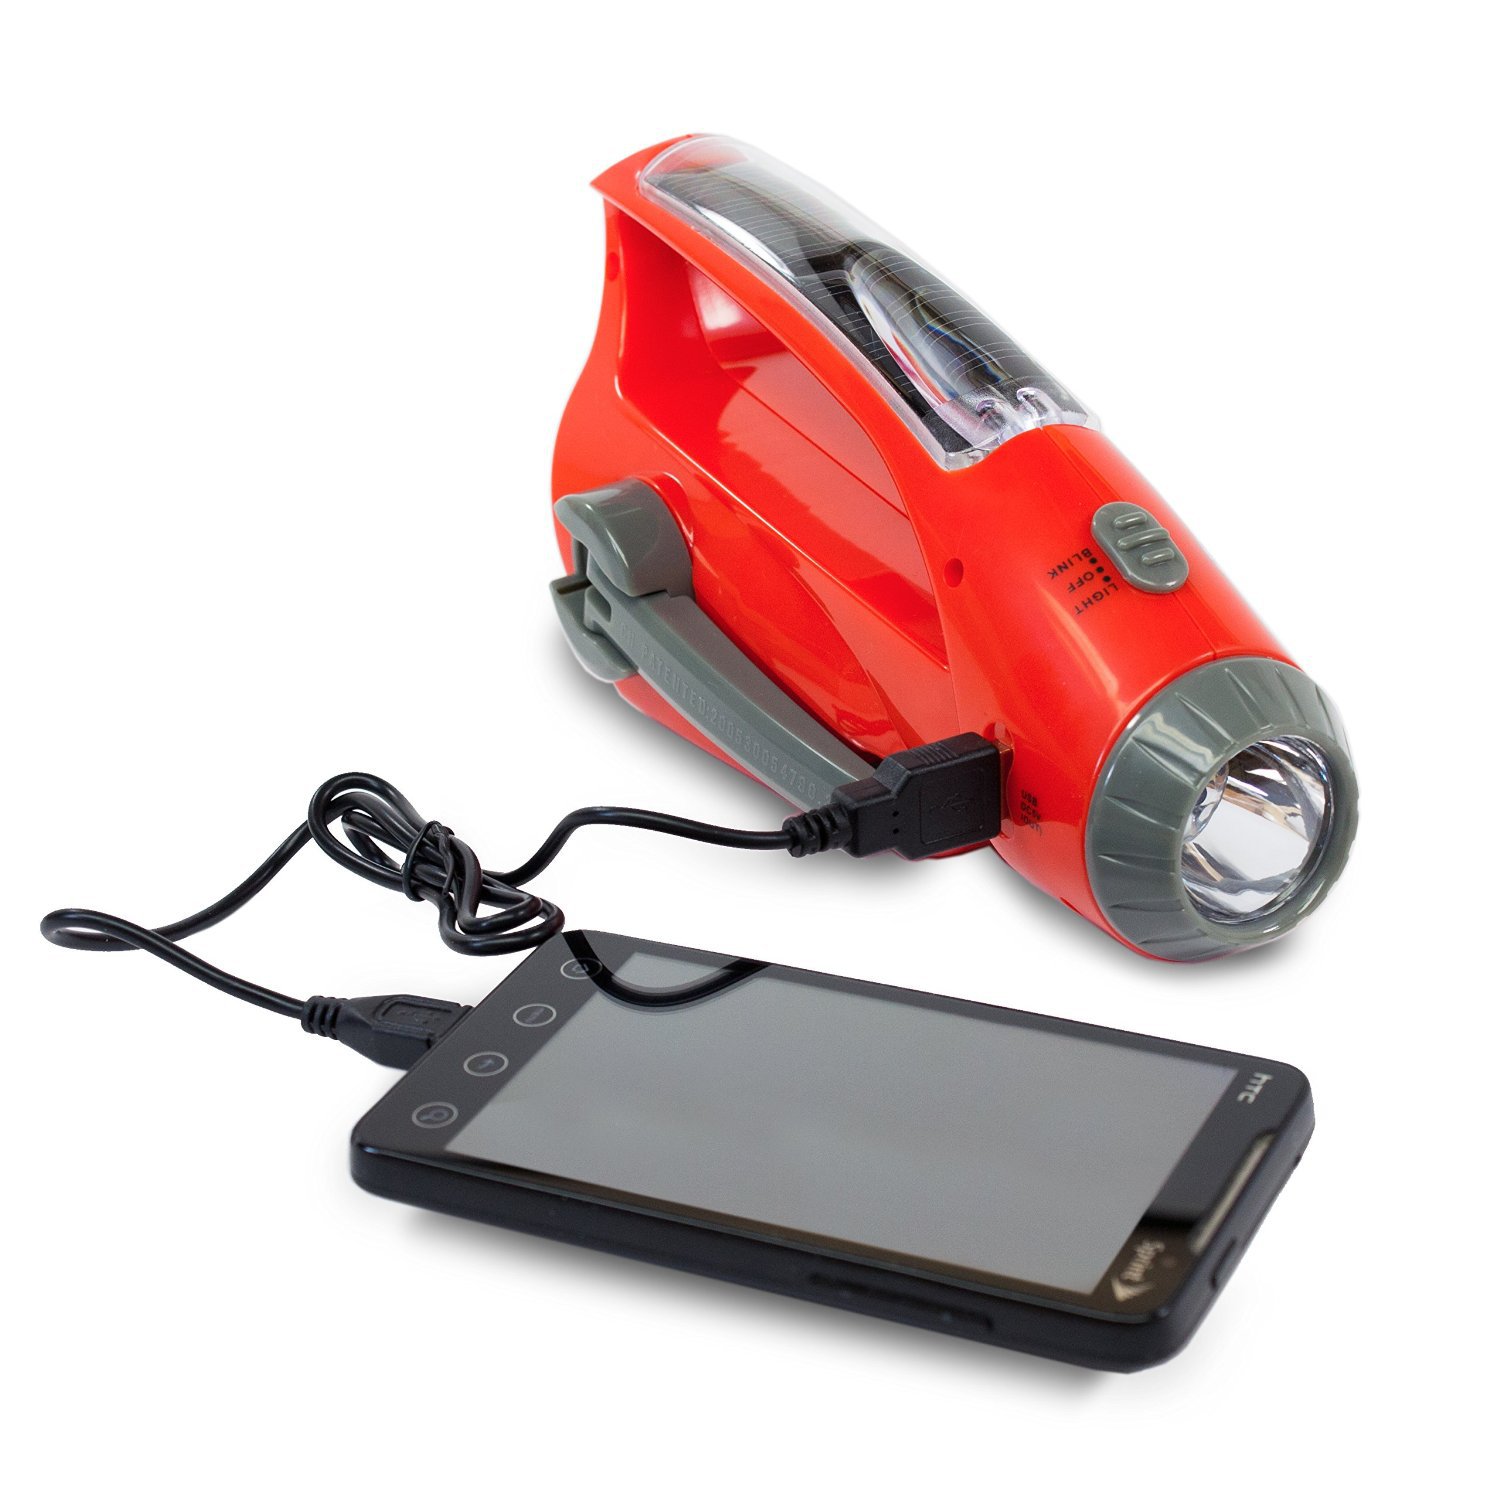
Hand-Crank Emergency Power Source

I’ll let you choose what features are important to you but having a power source independent of another source but your will is absolute by its own definition! We don’t get to choose when disaster will strike, or how it strikes, or what is affected. What we can do is decide for ourselves how prepared we will be. Having the ability to provide an indefinite amount of light, power, and communication, etc. day and night are what preparedness is all about.

Emergency Radio & Portable Phone Charger (3 in 1) Solar, Hand Crank Dynamo and USB Power

How many times have we looked down at our cell phone and realized we have a minimum battery life, now throw a wrench in your charging plan? That’s where these devices swoop in to save the day. Many Hand-Crank Emergency Power Sources charge at the same rate as plugging it into a wall outlet. So in a few minutes, you can bring a phone back from the dead regardless of the time, emergency, or situation you find yourself in!

Emergency Car Kit

Do you know a loved one with a vehicle? Do they have an Emergency Kit in their vehicle? If they don’t they are wrong and so are you! In the United States alone, approximately 7 tire punctures occur every second, resulting in 220 million flat tires per year. Approximately 50% of Americans don’t know how to change a tire (That’s just reported). I could talk to you for days on this subject but at the end of the day, one must ask him or herself some simple questions. In an emergency situation will you depend on technology (AAA), the kindness of a stranger, or empower yourself and loved ones to be self-sufficient?  I can’t tell you how many people I have helped that have found themselves broke down on the side of the road. It breaks my heart because I know somewhere down the line they were failed! Don’t fail yourself or your loved ones. Give them and yourself the tools for success and most importantly train them to do the basics!

Candles/Fire-Starter

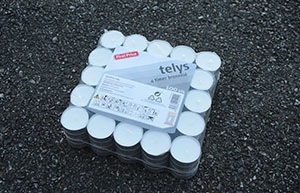
Last but certainly not least we have candles and fire starters. I put these two in the same category because they go together very interchangeably. For the record, U.S. retail sales of candles are estimated at approximately $3.2 billion annually, excluding sales of candle accessories (Source: Mintel, 2015). Candles are used in 7 out of 10 U.S. households and are seen as an acceptable gift by both men and women. Not to mention Candles come in an endless variety of shapes, sizes, and uses. We see this from votives to floating candles to those that are used in religious and ritual-like settings. Regardless of why or how you use candles the ability to hold a flame is paramount in a disaster situation! So if holding a flame is paramount starting a flame is essential. Now I’m not advocating going out and getting everyone a Ferrocerium rod bushcraft kit with char cloth all included. Nor am I saying go out and get your 19-year-old college sorority daughter a pack of cheap plastic bic lighters either. The great thing about fire starters nowadays is that they come in all styles and colors. You have the Colibri Scepter lighter that looks like a tube of lipstick for the ladies to the custom Harley Davidson zippo for the seasoned veteran biker. In my humble opinion, I would say that candles and fire starters are not only the easiest, and least expensive gifts to give but will arguably be, the first thing one reaches for in the event of a disaster. The ability to have a lite candle not only helps our physical needs in regards to light and heat. But the psychological ones are just as important if not more. The flame’s soft illumination reaches the soul; it can deliver hope and instill a calming relief.  This coupled with the aromatherapy of a scented candle can literally make all the difference in a disaster setting!

This completes my Top 11 gifts for your non-prepper friends and family. While the old slogan “it’s the thought that counts” may resonate with a lot of people it’s important to realize that your feelings and thoughts won’t be the deciding factor in who lives and who dies. Their ability to react logically and swiftly with the right tools will be the deciding factor. While you may not be able to control one’s actions you can equip them with the right tools and get the brain working in the preparedness mindset without them even realizing it and that is the purpose of this article. I can tell you from personal experience when I realized this reality. I was there when the May 3rd Tornado hit the Midwest in 1999. Not only do I remember the destruction that it left in its wake in my small Cleveland County, Oklahoma town. I remember my mother reaching under the bathroom sink to grab three candles so she could provide just a little light to her 3 confused and frightened boys. I remember her lighting these candles she had received as a gift. I don’t remember who gave them to her, but I can tell you I will never forget the smell of that first apple cider candle she lit, nor will I forget the impact of what a simple candle can do for a small frightened family in a ravaged home. I don’t personally think that individual who gave us those candles envisioned the scenario that they would be used for. Nor do I believe they knew the impact that such a small gift would have on someone’s life. But what I can say unequivocally was that small flame ignited hope, determination, and most importantly an unquenching desire to seek knowledge on all that is preparedness and to teach others everything I can. So wherever you may be, wherever life might I have taken you I want to say from the bottom of my heart; Thank You.

With the holidays fast approaching I know how frustrating it can be trying to get loved ones that perfect gift that is not only practical but will benefit them in

Most of us are already acquainted with Listerine’s distinctive taste. The intense tingle of Listerine is a common part of our everyday routine, whether it’s in the morning or before bedtime.
But did you know that besides a mouthwash, Listerine still has many other uses? The unique antiseptic properties of Listerine can lend to many other applications, particularly in circumstances of survival.

lmw-ad-cuts-and-scrapes1: Topical antiseptic

Listerine does such a fantastic job of helping to clean the mouth, it should come as no surprise that it also works well to disinfect minor cuts and wounds. This is due to the high alcohol level of Listerine.Listerine may not work as well as dedicated antiseptics, nor be as easy to use (alcohol can really sting!), but it definitely works in a pinch to kill bacteria, minimize chances of infection and speed up healing times.

2: Astringent

Because Listerine is high in alcohol, it can be used as an astringent to your skin. The alcohol can help contract the skin, which is useful to treat acne or mild irritations of the skin, including small cuts or bug bites. Listerine is especially effective at reducing itchy pain when treating bug bites.

3: Hand sanitizer

Will the sanitizer gel run out of hand? Pour a little Listerine into your mouth, then rub them in. Due of its watery consistency, listerine may not be as easy to use as normal hand sanitizer, but it is successful when there are no standard hand sanitizer or hand-washing facilities available.

4: Treat dandruff

And maybe dandruff isn’t the highest priority in circumstances of survival, except for those that are especially vain. Yet dandruff is also followed by an irritated, itchy scalp. To help relieve this discomfort, wash your hair as normal, but use four parts of water with one part of Listerine for a final rinse, take extra care to make sure that the Listerine reaches your scalp.

5: Alleviate toenail fungus

toenail-listerineA toenail fungus infection often doesn’t become painful until the infection is severe. However, by soaking your feet in a Listerine bath for at least 30 minutes per day, you can help fight off the infection early. If vinegar is available, combine it with the Listerine in equal parts for a more efficient treatment.


6: Help a sore throat

Depending on the cause of the sore throat, gargling with Listerine probably won’t cure the ailment. However, using Listerine can provide temporary relief from the discomfort. Alternatively, proactively gargling with Listerine can help prevent a sore throat and/or cold.

37: Cookware cleaning agent

Most cooking and eating utensils and implements can be easily cleaned with soap and water. However, some specialized cookware, such as cast iron, should not be cleaned this way as the soap will ruin the seasoning. Use Listerine instead.

8: Treat skin rashes

Apply Listerine gently to irritated and scratchy skin to soothe the burning and/or itching sensation. Listerine is especially effective for poison oak and poison ivy exposure.

9: Insect repellent

Put some Listerine in a spray bottle and spray plants, skin or other areas where you want to keep away bugs.

10: Protecting blisters

You can keep a blister from getting infected by dabbing a cotton swab soaked in Listerine several times a day on the blister. Listerine’s antiseptic properties will help prevent infection.

11: Flea killer

Clean a pet with Listerine helps to prevent a flea infestation.Start by bathing your pet in a traditional water and shampoo bath for the most effective treatment. Speed up the usual bath by mixing in a spray bottle equal parts water and Listerine. Sprinkle your pet liberally all over your body, but be particularly careful around their ears, as the Listerine will sting their eyes. Have the spray application set for about five minutes, then use a fine brush, comb the fur of your pet to remove the dead fleas.

Depending on the severity of the infestation, it may be appropriate to do this treatment once a day for several days to eliminate all the fleas completely.


12: Remove ticks

Listerine is particularly despised by ticks and for good reason: within seconds it will kill them. If a tick that has bitten you and taken hold of you, you should soak a rag or paper towel in Listerine and smother the tick with it for at least five seconds. If, by then, the Listerine application has not killed the tick, it will at least make the tick let go.

13: Deodorant

listerine-deodorantIt’s a bit unconventional to use a minty tasting or smelling liquid as deodorant, but it works. Just pour some Listerine on a towel or cloth and dab your armpits or other areas a few times. The alcohol in the Listerine will kill the odor-causing bacteria.
14: Odor removal

Mix Listerine with equal parts vinegar and apply to smelly areas. The alcohol in the Listerine and acid in the vinegar will help remove odors by breaking down the compounds and bacteria causing the foul smell.

15: Temporary toothache relief

When you are getting toothache, you will probably need some serious dental treatment. However, to buy some extra time before proper treatment can be obtained, spray your mouth with Listerine as intended. The Listerine can help calm the painful tooth and offer a mild relief from the pain.


16: Laundry detergent deodorizer

Adding Listerine to your normal laundry cleaning routine will make your clothes fresher by killing odor-causing bacteria.

17: Stop the growth of mold and mildew

Start by diluting the Listerine with two parts water and one part Listerine, then placing in a spray bottle. Spray the mixture anywhere you need to prevent and/or slow the growth of mold and mildew.

Most of us are already acquainted with Listerine’s distinctive taste. The intense tingle of Listerine is a common part of our everyday routine, whether it’s in the morning or before

It can become costly to plan for an emergency or large-scale catastrophe, but it doesn’t need to be. Although investing in high-quality equipment is important, some preparation items are consumable or are less important in terms of cost. For these consumable prep pieces, your local dollar store can be a gold mine.

Zip Ties

Not only are zip ties useful for strapping together cables and hoses, but they have a very wide range of other uses. Many dollar stores have a range of zip ties of varying sizes and will also have bags of a range of different sizes and colors.

Batteries

23 Prepping Items that You Can Find at Dollar Store

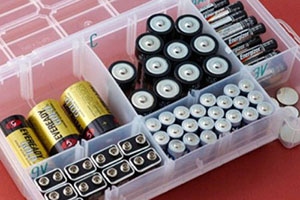
Batteries from the Dollar store are cheaper and do not last as long as their name brand counterparts. Stocking up on dollar store batteries has one benefit, which is that they are perfect for barter and trade.

Batteries are going to be almost a form of currency when the lights go out, and when the chips are down, you don’t want to trade away high-quality batteries when you could instead barter with dollar store batteries.

Cordage

You will find a fairly varied variety of cordage at your local dollar store, from garden twine to chain. You may also find objects such as baling wire, brass wire, or image wire that can be useful for trapping or repairs for emergency survival.

Stationary

At a dollar store, you will also find pens, pencils, paper, sharpies, notebooks, etc. for a fraction of the cost of going to a big box or stationery store. Another thing I almost exclusively get from my local dollar store is stationary.

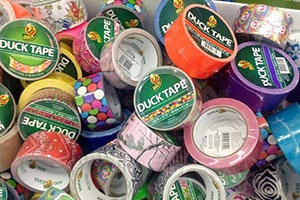
Duct Tape

23 Prepping Items that You Can Find at Dollar Store

The dollar store does not sell duct tapes with high-quality brand names, but what they sell will be more than enough.

Dollar store duct tape will do the job with most applications, and as with many things on this list, dollar store duct tape is perfect with exchange and bartering.

First-aid Supplies

From band-aids to gauze and even some over the counter medications, it is possible to outfit a basic first aid kit from your local dollar store.

Toiletries

My go-to for buying toiletry products for camping, hunting, disaster, or travel toiletry kits is the dollar store. Soap, shampoo, conditioner, toothpaste, toothbrushes, floss, deodorant: all available at the dollar store in travel sizes.

Tarps

These are inexpensive and thin poly tarps and will not stand up to a great deal of violence. In case I need to cover a broken window, pit, dirt pile, etc, I like to have these on hand. These tarps I consider to be one-time use and disposable.

Flashlights

23 Prepping Items that You Can Find at Dollar Store

This is another perfect barter item, because after a large-scale disaster, dollar store flashlights are so cheap and flashlights will be in short supply.

The flashlight with the batteries included would always be cheaper than buying the batteries alone.

Disposable Lighters

You can get all manner of disposable lighters at the local dollar store, including windproof outdoors lighters. These are also great for barter and trade.

Canned Goods

Dollar stores are full of inexpensive canned goods that are typically products that are generic. Sometimes, they would also have dry products such as pasta, rice, sugar, salt, cereal, etc. While these items are not of the same quality as their brand-name counterparts, they are definitely good enough for the apocalypse.

Cleaning Supplies

The world ending is no excuse to stop cleaning up after yourself.

The dollar store is where I buy 90% of my cleaning supplies and I like to keep a good stockpile for disasters as well.

Hand Sanitizer

23 Prepping Items that You Can Find at Dollar Store

Usually, here you’ll also find the small travel-sized bottles of hand sanitizer at a dollar store.

These are great for adding into first aid or hygiene kits.

Toys and Games

Most of the toys you will find in a dollar store are of very poor quality, although some playing cards or travel-sized board games can be found. These are perfect for a bug out bag or camping/survival pack to fit into.

Sewing Supplies

These are not sewing needles or threads of skilled quality, but they can do the work in a pinch. I’ve made a few sewing kits from supplies I purchased from my local dollar store, and these little DIY kits can’t be beaten for daily rips, tears, or missing buttons.

Candles

 Prepping Items that You Can Find at Dollar Store

You can never have too many candles and like a lot of items on this list, they make outstanding barter items.

You can also find them in a lot of different sizes and types.

Candies

Without some sweet, sweet candy, no good emergency kit is complete. The dollar store is a perfect place to pick up a wide range of not just candies, but also chocolates. Not only will these give you a post-apocalyptic moral boost, but they will also be another great item of trade.

Rubbing Alcohol

Rubbing alcohol is not only a disinfectant but can also be burned in certain alcohol stoves.

Travel-sized Containers

23 Prepping Items that You Can Find at Dollar Store

There are also occasions where we need small containers to store liquids while we are assembling emergency kits.

The tiny travel-sized containers in the dollar store that you will find are also ideal for the job.

Bungee Cords

In a survival scenario, bungee cords have a myriad of uses and are also susceptible to wearing out, so getting a lot of them is often a good idea. The dollar store variety may not have the durability of brand names, but for light-duty applications, they are fine.

Water

23 Prepping Items that You Can Find at Dollar Store

In different sized containers at your local dollar store, you will also find bottled water. The purchasing of bottled water in greater amounts elsewhere is less costly.

Nonetheless, if you want to fit a car kit, Get Home Bag, Bug Out Bag, or your EDC bag, then the dollar store is a great place to buy smaller amounts of bottled water.

Trash Bags

In survival scenarios, trash bags have a vast amount of applications, but what you would most likely use for post-disaster use is for their intended use. I like getting several boxes filled in my emergency kits, in several different sizes.

Battery Banks

Our devices are like an extension of our bodies and it is very important to make sure they remain charged. Sometimes, the dollar store would have either battery banks or emergency chargers for sale until used. These are excellent not only for keeping our smartphones at 100%, but also as a barter piece.

These 23 items are by no means the end of all the preparation items that can be offered by your local dollar store. The products listed here are those that I have personally purchased and used for myself and my family to create different kits.

It can become costly to plan for an emergency or large-scale catastrophe, but it doesn’t need to be. Although investing in high-quality equipment is important, some preparation items are consumable

Food is one of the crucial items for your bug out bag and INCH bags. You should know the difference between a bug out bag and an INCH bag.

An INCH bag stands for I’m never coming home. Essentially, it is a larger survival kit with all of the necessary items you will need to survive the SHTF scenario. The plan is to sustain you indefinitely or until you can reach a safety point, such as a predetermined location.

On the flip side, a bug out bag (BOB) holds three days of rescue items. They are ideal for civil unrest, hurricanes, fires, snowstorms, and other disasters. You do plan to return home when the coast is clear.

There are hundreds of choices when it comes to what types of food you can put in your bags.

There are a few things you want to consider when making your choices:

  • Calorie Ratio to Weight of Item: That can of soup might sound like a good idea, but it weighs a lot. You want food that has a small weight with higher calorie. You want as many calories per ounce as possible.
  • Macronutrients: You want more fats and proteins than carbohydrates. However, don’t forget the carbs because they do give you bursts of energy that you need for your journey ahead. Fats and proteins fill you up faster and add more calories.
  • Shelf Life: Yes, a fresh apple would take amazing, but you can’t store them in your bag waiting for an SHTF You need food that lasts for a long time. It is important that you keep a list of expiration dates, so you know when to rotate the items.
  • Preparation: The food items you select shouldn’t be hard to prepare. It is nice to have some comfort foods, but the food you select should be easily prepared. All you might have access to is a campfire or no form of cooking at all!

The List

  1. Raisins and Peanuts: If you’ve spent any time hiking, you know that raisins and peanuts are a standard food item. They are rich in calories and require no preparation efforts. You can pick the kind that has chocolate peanuts – everyone loves chocolate! However, it can melt if you are in the heat. It is best if you get individually locked bags rather than those huge bags. One cup of peanuts and raisins equals close to 700 calories.
  2. Freeze Dried Meals: Many preppers like to keep freeze dried meals in their bags. They will fill you up quickly. All you have to do is pour some hot water into the bags. Then, you seal up the bags for the recommended time. Some meals are enough for more than one person.
  3. Peanut Butter: A tablespoon of peanut butter can have up to 190 calories. That is a lot! Instead of lugging around a jar of peanut butter, look for individually peanut butter packets or cups.
  4. Dried Fruit: There are so many choices for dried fruit, from apricots to apples. They are full of sugar, so it can help to give you a boost of energy when you’re feeling low. Your local store should have a great selection. Pineapples, bananas, mango, and berries won’t weigh too much in your bag.
  5. Protein Bars: When you are walking for a long time, you need energy and protein to keep going. Protein bars are a favorite among hikers. You can eat them on the go. Most of them are pretty delicious. The only downside to protein bars is that they can get messy, especially if they contain chocolate. You can fit a few protein bars into your bar, taking up very little space.
  6. Beef Jerky: Jerky is another food item that doesn’t take up too much space or weight of your bag. You can munch on jerky as you are walking. Beef jerky is sold in dozens of flavors and packaging. It is a great source of protein. However, beef jerky also has a higher level of sodium, which could cause dehydration if you eat too much. Make sure that you limit yourself.
  7. Emergency Meal Bars: These bars are similar to MREs and protein bars, rolled into one. Emergency meal bars can have 2,500 calories in one bar! The flavor isn’t always amazing, but your goal is survival. Taste isn’t most important. They store easily in bags and make a good choice for an INCH bag to save space.
  8. Granola Mixes and Bars: Stores have whole sections devoted to granola bars and mixes. You can find bags with different things in the granola, a great choice for breakfasts and snacks. Granola bars are great food ideas for on the go. Even kids love granola bars! They store easily and come in multiple, delicious flavors. Some have nuts, oats, chocolate or raisins!
  9. Tuna and Salmon Pouches: You want different sources of protein for your bags. Cans of tuna are out of the question; they tend to weigh your bag down. The stores sell pouches of tuna and salmon, not mixed. They are great eaten cold or warmed up. You can put some tuna on a cracker for a snack. The pouches of tuna and salmon are relatively inexpensive, costing around one dollar each. They also come flavored, such as BBQ and lemon pepper.
  10. Dried Soup, Chicken and Beef Bouillon: If you want to make soup on the go, you need some bouillon cubes. They can easily be stored in envelopes and paper bags. All you have to do is add hot water. Just like MREs, you can find packets of dried soup that just requires hot water to reconstitute.
  11. Instant Oatmeal: If you have a tin cup to heat water, you can make yourself instant oatmeal. Instant oatmeal contains mostly carbs, but it is a great kick start to your day. There are multiple flavors available, taking up very little space in your bags. I would suggest keeping them in a plastic, zippered bag. Instant oatmeal pouches are easily torn.
  12. Meal Replacement or Protein Powders: Protein powder tends to be disgusting, but it is a source of protein and nutrients for you. All you have to do is add the powder to water. Add scoops to a plastic baggie and store them in your bag. You can also keep electrolyte powders in your bag that you just add right to the BOB bag. They will keep you hydrated.
  13. Instant Noodles: Who doesn’t like Ramen noodles? Instant noodles are super lightweight, but they make a great meal. Instant noodle packets are high in carbohydrates. The flavor packet has salt. Eating actual meals can feel comforting after a long journey or a hard day.
  14. Sardine Tins: There is some weight to sardine tins, but the tins themselves are quite small. There is a lot of protein, calories, and fats in these little cans. The weight might be worth it if you want an extra source of nutrients.
  15. Salami or Pepperoni: The idea of pulling out a log of pepperoni or salami might seem comical. However, you can find bags of sliced pepperoni. It does contain more salt than other meats, but you want some variety in your BOB and INCH bags.
  16. Tortillas: Bread is too bulky to take with you, so tortillas are a better choice. Tortillas contain plenty of carbohydrates, and you can use them with other food. It is a great addition to tuna or salmon to complete your meal.
  17. Ready to Eat Rice Pouches: Rice pouches are great for quick dinners now, and they are a great addition to your BOB for a real meal. Remember, these pouches have a lot of sodium and carbs. You shouldn’t pick rice pouches for an every meal type of item. However, you can add them with your tuna pouch to make a complete
  18. Instant Mashed Potatoes: When you want to have some comfort food, mashed potatoes fit that bill. Since you can’t bring along potatoes and create homemade potatoes on the trail, it has to be instant mashed potatoes. All you need is hot water. Add some instant mashed potatoes with a can of shredded chicken for a delicious dinner.
  19. Spam Pouches: Here is another idea for a source of protein, even if it is slightly strange. You have to enjoy the taste of Spam to want to include it in your BOB or INCH bag. Spam pouches can be heated in a cup of hot water.
  20. Dehydrated Hummus: Hummus is a favorite treat for many people. It is usually kept refrigerated, so most people don’t think about it as an option for a BOB. You can find packs of dehydrated hummus that requires you to add water.
  21. Crackers: Many of the items on the list are better with crackers. Yes, they are a bit bulky, so you have to consider what type you are bringing and the amount. Crackers make life better! They give you a better way to eat your dehydrated hummus and peanut butter pouches.
  22. Bags of Beans: Pinto beans are a favorite among preppers. They do take the effort to prepare, so that should be a factor. You need a pot that you can put over a fire. A bag of beans will need to cook for at least an hour in water over a fire. However, there is plenty of protein in a single bag of beans.
  23. Cereal and Breakfast Bars: If you need a boost of energy, cereal and breakfast bars are great choices. They typically contain oats and some fruit. They can give a bit of flavor and excitement to your pack!
  24. Sunflower Seeds: When you are on your journey, you want a lightweight and delicious snack that contains healthy fats. Sunflower seeds are a comfort food that can soothe stress and satisfy your hunger until you find somewhere you can set up camp to cook. Other seeds to consider are chia and flax seeds, which are lightweight and contain extra oil.
  25. Dehydrated Vegetables: Did you know that you can dehydrate your vegetables at home? All you need is a dehydrator, Mylar bags, and oxygen packets. Dehydrated veggies are easy to reconstitute with water and make great additions to dinners and lunches.
  26. Chocolate: There isn’t much protein in chocolate, but it contains sugar which gives you a burst of energy. The energy wears off quickly, but it will satisfy your cravings. It is a welcome relief after just eating canned and prepackaged food for multiple days. If you don’t want just to take plain chocolate, Tootsie Rolls are a great choice. Tootsie Rolls are great for hot summer months. Believe it or not, World War II soldiers carried them to eat. You want to make sure that you grab the long ones to conserve space
  27. Nuts: I mentioned peanuts and raisins, but there are other nuts you can try. Pistachio, almonds, and cashews are almost the top choices. You do have to be careful and look at the sodium content. Salted nuts do help to replace the salt lost because of extra sweating, but it can make you more thirsty. Too much sodium leads to dehydration.
  28. Cereal: Chances are you won’t have access to fresh milk while on the go. Dried cereal still adds carbs to your diet and gives a feeling of comfort. If you have kids along on the journey, Cheerios are a beloved cereal.
  29. Honey Straws: Honey is a delicious, unique source of sugar and energy. You need the energy to survive an SHTF Honey straws or hard sugar candies can give you that little burst that you need.
  30. Coffee Singles: Even if you are on the go, you still want to have some caffeine and coffee on the go. You can purchase instant coffee and Coffee-Mate To Go for flavoring and sweetness. Make sure that you have a cup with you that lets you heat your coffee over the fire or however you want to cook your coffee!
  31. Pop Tarts: I know you are thinking that those aren’t healthy at all. You would be right. Pop Tarts are mostly artificial sugar. However, they give you some energy and carbs if you need a pick me up. Plus, kids are pretty quick to eat them.
  32. Peanut Butter Crackers: I mentioned peanut butter and crackers separately, but you can purchase these together to save space. Premade peanut butter cracker sandwiches are found in the store and are relatively cheap.

There are so many choices for foods you can include in your bug out bag and INCH bags. You don’t want to pick all of these items. Find the ones that you think makes the most sense and you find the most enjoyable. Remember, a BOB is enough food to last you 72 hours. Most experts recommend a week or two of food for an INCH bag. After that, you should have supplies to start gathering your food by hunting and fishing.

Food is one of the crucial items for your bug out bag and INCH bags. You should know the difference between a bug out bag and an INCH bag. An INCH

One of the central pillars of preparedness is being able to feed yourself. Preppers focus some of their attention on stockpiling food as well as creating renewable sources like gardens or livestock (chickens and rabbits) as protection against the possibility that the local grocery store is no longer able to provide something to eat. The average person it has been said only has about 3 days’ worth of food in their homes and if that is true, feeding your family in certain disasters could prove to be possibly your biggest problem.

We have already seen time and time again, scenes of grocery store shelves stripped clean anytime there is a concern in the public. Greece was just the most recent example of this behavior preppers warn against. Starvation would surely be a horrible way to die and it seems as though collectively we all consider this a threat that must be dealt with to ensure the safety of our loved ones. The question is how you will deal with the risk of not being able to feed your family. Will you stock up on food now while you are able, or will you try to swim through the crowd of potentially thousands of other people raiding the local grocery store in the hopes that you can secure enough food to last your family through whatever disaster you are facing?

For many preppers, this may not be as grave of a concern from your perspective. If you have been diligently preparing, you may already have quite a large supply of food that would conceivably last you and anyone else in your home a long time. You might have plenty of food stocked already so you plan to sit back in the safety of your home while everyone else goes crazy; fighting over the last can of olives. But as you are sitting back feeling confidently comfortable, gazing at your full pantry, those 5-gallon buckets of Winter Wheat and metric tons of beans, have you ever considered how long that food will actually last you when you start needing to eat it?

Determining how long your food storage will last

The default amount of calories we consider to be recommended for an adult is approximately 2,000 calories per person. I know there are differences in age, activity level, and gender, but for simplicity’s, sake let’s just take that amount as our baseline. For general health, each member of your survival group will need to consume on average 2,000 calories per day to simply maintain a “healthy” weight.

Rice and beans are a great long-term stable food supply for preppers. They have an impressive storage life as long as they are kept cool and dry and they are very cost-effective as well. You can purchase a 50-pound bag of rice for around $20. Rice and Beans together give you carbohydrates and protein. Each 50-pound bag of rice has approximately 500 servings and there really isn’t anything like the satisfaction you can get from staring at a shelf full of rice and beans. But how long will that last your family?

A 50-pound bag of rice has about 500 servings.

Each serving (1 cup) of rice is 206 calories

Each serving of pinto beans has 245 calories

If you ate three meals of Rice and Beans in a day you would consume only 1353 calories. (451 X 3). If you had a family of 4, that 50 pound bag would last you about 41 days but that isn’t all the calories you would need. To just stay healthy and not lose any weight you would need to come up with another 700 calories per person, per day.

Calories are more important to measure than servings

Well, you could supplement that rice and beans with the wild game you plan on hunting, right? Did you know, a 0.5-1 pound roast venison tenderloin has a whopping 127 calories? That doesn’t get you much further toward your calorie targets, does it? What about chicken? One grilled chicken breast has only 141 calories.

Now let’s make the assumption that life without grocery stores is going to require more work out of you. Possibly much more work. So, the 2,000 calories per day amount aren’t likely to be a realistic count of the number of calories you will actually need. You might be digging latrines to deal with sanitation, hunting for food, or foraging in the forest all day. You could be patrolling your neighborhood or lugging water from a mile away. You would be washing clothes by hand, chopping wood; building fires and the 2,000 calorie amount would likely be more like 3,000 or 4,000 for some people just to maintain their weight. How long will your food last now?

To really get a good idea of how much food you have, you need to look at how many calories that food you plan on eating is going to give you. You can’t simply look at serving amounts and call it done because a serving of a fruit roll-up might make you think you will get a meal out of it, but they won’t come anywhere near close to what you need.

In addition to food make sure you plan on a good source of vitamins to augment austere eating conditions. This won’t be as good as the real thing but could help stave off some health effects of a less than ideal diet. You should take the time to conduct at least a cursory inventory of your food stockpiles, check the serving size and calorie amounts. You can get really detailed and put this into a food storage spreadsheet if you like, but that will give you a true picture of the amount of time your food will last the number of people you have. Instead of looking at this from a poundage viewpoint, you consider calorie counts. That way it will be easier to forecast how long your food will last and adjust for different people in your care.

What happens when we start to starve?

The more food you have, the better off you will be in a collapse scenario where we have no hope of the lights coming back on. Gardens and livestock greatly add to this cumulative total you have, but unless you have a very productive garden or a large supply of animals, the food you have on hand is likely to start running out. At some point in time, if the supply of food is interrupted, rationing might be a consideration you need to make.

Another consideration is the needs of the various people in your group. You may find you have hard choices to make. Someone who is old for example, who is less active may not get the same share of food as a younger person who is working outside all day. You may have to choose between roles and which people in which roles are given extra allotments of food. What if someone is out digging graves all day? Do you believe that someone who is sitting inside or not working as hard should get the same ration of food or the same dispensation of calories? If so, how long before the person who is working physically harder starts to decline in health? How long could you shovel or defend your home in a starvation state?

We talk about food storage as a solution to the grocery stores closing, but that will only buy us time in a true collapse. Yes, it will help your family tremendously to have additional food stocked up, but it will run out if the crisis lasts long enough. When calories are seriously limited, health starts to decline.

When we don’t get enough calories for a long enough time, our organs begin to shrink and gradually start to lose function. We can have bouts of chronic diarrhea, anemia, reduction in muscle mass, and the weakness that goes with that.

We have all seen images of refugees on TV. Poor children covered in flies with distended bellies staring blankly at the camera might elicit a sense of guilt in us today as we sit on the sofa and flip through the channels. In Haiti, there are areas where people make and sell mud pies for people to eat because there is no other food and the worms in their stomachs would rob the person of any nutritional value from real food before it could help them.

What will you do when these poor souls are your children?

Kwashiorkor and Marasmus

Kwashiorkor and Marasmus are two conditions that are seen with acute malnutrition. It causes the swollen bellies you see on TV and I can see this appearing in our country where we to go through some horrible SHTF event. The pictures you see on TV could be not from around the world, but in your own backyard.

As in other places in the world, this will lead to violence and death as everyone fights for food resources to fend off dying.

“Kwashiorkor is the most common and widespread nutritional disorder in developing countries. It is a form of malnutrition caused by not getting enough protein in your diet. Foods that contain protein include meat, milk, cheese, fish, eggs, soy, beans, nuts, seeds, and some types of grains like quinoa.”

Children who are deprived of calories for long enough will never reach their full potential for height and growth. These two conditions are treated in the beginning by simply getting more food with a healthy balance of protein. In more severe cases, you can’t just give a starving person a cheeseburger. You will have to introduce food slowly and something like powdered milk is good (reconstituted of course) to start them out until strength has increased and more food can be slowly added to their diet.

Anyone who has children will tell you that they will do anything to take care of their family. This manifests itself in a lot of imaginative ways, some violent. Before you have to get to that place where you are thinking of doing whatever is necessary to feed your family, make plans now to have as much food security as possible. A good strategy of food storage to include foods you eat every day, long-term store-able food, and renewable sources will put you in a better position to provide for your family. Think about this now so you have to worry about this less when it actually is an issue.

What are your food storage plans and how long will your food hold out?


Other self-sufficiency and preparedness solutions recommended for you:

The vital self-sufficiency lessons our great grand-fathers left us
Knowledge to survive any medical crisis situation
Liberal’s hidden agenda: more than just your guns
Build yourself the only unlimited water source you’ll ever need
4 Important Forgotten Skills used by our Ancestors that can help you in any crisis
Secure your privacy in just 10 simple steps

One of the central pillars of preparedness is being able to feed yourself. Preppers focus some of their attention on stockpiling food as well as creating renewable sources like gardens

Let’s face it, food can be heavy and bulky, even if it’s MREs or dehydrated. Other things may take precedence, like equipment and medicine for someone with special needs, or maybe you are just not able to carry much when you bug out. Carrying some fishing line and a few hooks is much easier than carrying cans of fish! While you may not feel confident that you can catch enough fish to survive, adding plants and occasional meat will keep you alive and even thriving.

A lack of food doesn’t have to mean your starvation. Nature provides food in abundance if we know where to look, how to get it and what to do with it once we’ve got it.

Different foods are available in different seasons and every area has its own wild food so you will have study up on what grows where you are, both plant and animal. Now is the time to find out what all those plants and animals are and how you can use them. The more sources you have for food, the better your chances of survival, not to mention you’ll be happier with a bigger variety of food.

Here are some basic guidelines to get you started, but don’t stop here. Go looking for information that’s specific to your area. Be sure you can identify plants. Most plants are not poisonous, but it only takes one to cause real trouble. Don’t rely on just one guide, but compare several. Look in books and on the internet, and, if you’re lucky enough, get someone who knows to show you.

Winter:

The Forager’s Harvest: A Guide to Identifying, Harvesting, and Preparing Edible Wild Plants

Summertime is the most abundant, but don’t think that just because it’s winter you’ll never find anything to eat. Roots of certain plants are still available in many areas. Even if the ground is frozen, you may be able to dig roots from under the tree canopy because the ground is covered with leaves and needles, creating a protecting mulch. What plants? Look for dandelions, daylilies. You may find cattails standing in partially frozen or thawed water. It will be cold work to get them, but cattail roots can be eaten if you boil and remove the fibers. Dandelions are the hardiest of small plants, with long taproots which can be boiled and eaten or roasted and ground into “coffee.” Daylilies have tubers that taste something like potatoes. There are no doubt other plants in your area with edible and otherwise useful roots or tubers.

You can fish and hunt in the winter if you are prepared, which means that you will need fishing line and hooks and a method of killing game, whether it’s a gun, bow and arrow, spear or a good slingshot. What’s in your area? Whether it’s squirrel, deer, pheasant or robin, find out the best way to hunt and prepare it.

Spring:

If there is dock growing in your area, it’s the first “green” out. Learn to recognize it and you’ll have a tasty dish before anything else appears. Spring is the time to stop digging dandelion roots and let the leaves grow. Use them raw or cooked, plain or fancy. Dandelion blossoms are edible, too. Lambsquarter is young and tender, wild lettuce and mustards are waking up. Learn what they look like and try them out this spring.

crispus-87928_640

In late spring, watch for maple “helicopters,” those whirly seed bearing things. They are not only edible, but delicious when young and tender. Look for more edible trees in your area.
Chicken eggs are not the only edible eggs. If you observe birds nesting and can get to the nest the first or at least the second day, the eggs will be perfectly edible. Scramble, boil, fry or use them to leaven bread. Also look for duck and goose eggs in the spring. Larger eggs will go farther, of course, but may be harder to find.

Summer:

This is nature in all its glory. You may see purslane, mallow and more to go along with the rest. Dandelion leaves will be bitter now, so best leave them alone until fall, when you can dig roots again. Check out your local flora because there is a lot growing, from wild fruits to greens. Avoid digging roots of any kind in the summer so plants can produce above ground. Almost every area has wild fruit of some kind.

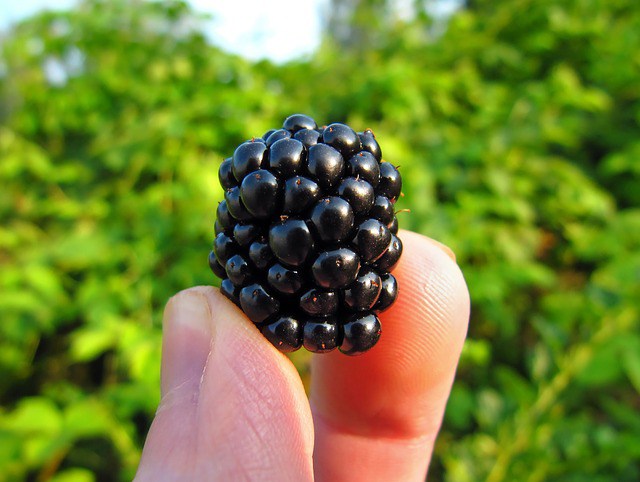
blackberry-577057_640

Wild Blackberry grow abundantly in some areas.

Hunting is not usually done in the dead of summer for a couple of reasons. First, animals are raising their young then and if you kill the mother, the babies will die, too. Secondly, disease is more common in the summer and eating a diseased animal can be deadly. If you stick to fish and eggs when you can find them, you’ll be much safer.

Fall:

Fall is harvest time in wild nature as well as in your backyard garden. Everything that didn’t mature during the summer is maturing now. Here’s the flour for the bread mentioned above. Lambs-quarter seed will ripen slowly. Dock will have already seeded out. Other wild grains will be there if you look for them. Now is the time to do your homework so you’ll know what they look like. Gather them in abundance if you can, then winnow and grind them (with two stones if you must). Using birds eggs for leavening and adding some hulled wild sunflower seed can make bread that is so satisfying you may not need anything else.

You can start digging dandelion and other roots now, too. Fall is a time of real abundance in a way that summer can’t be. It can provide boiled roots, baked bread, and still enough fresh food for a salad or pot of greens. If you are out there in the fall, prepare like our ancestors did and gather a lot more than you think you will need. If you’re there through the winter, you’ll be glad for the variety.

Sure, you won’t be the only one out there looking for food, but if you’re smart, you will know more than most about which wild plants are edible and how and when to use them, and you’ll have enough experience in fishing and hunting so the thought doesn’t scare you.

Food is critical to survival; carrying it on your back is not.

Other self-sufficiency and preparedness solutions recommended for you:

The vital self-sufficiency lessons our great grand-fathers left us
Knowledge to survive any medical crisis situation
Liberal’s hidden agenda: more than just your guns
Build yourself the only unlimited water source you’ll ever need
4 Important Forgotten Skills used by our Ancestors that can help you in any crisis
Secure your privacy in just 10 simple steps

Let’s face it, food can be heavy and bulky, even if it’s MREs or dehydrated. Other things may take precedence, like equipment and medicine for someone with special needs, or

The traditional way to create a long-term supply of food is to store bulk staples such as rice, pasta and dried beans. It is cost-effective and works well, but you may be faced with a pretty boring diet. That’s not good for morale, and while well picked staples will reduce the risk of malnutrition you’ll soon find there are things you ‘re lacking.
Now for the good news: You can quickly add a whole variety of items to your collection to make it more fun, savory and nutritious. Unlike buying rice in 50 pound bags, when you do your daily grocery shopping, you can also create an emergency fund by only picking up a few extra products each week. Here’s our list of top 24 hoardable foods:

1 – Meat

Fresh meat is a non-starter for emergency supplies, since without a freezer it can not be kept for a long time – so you can not rely on your freezer surviving the apocalypse. Nevertheless, it is worth searching for alternatives, because meat is the best protein source. Canned fish and meat can last for years, is easy to cook – you can eat it straight out of the box in an emergency – and will make pasta or rice dishes even more interesting. Jerky is also good – it can be soaked and added to meals, or eaten as a snack.

2 – Eggs

Eggs are another great protein source, and are very flexible. The trouble is, they’re corruptible. You can potentially preserve eggs for about nine months and a year by covering them in a thin layer of beeswax or baby oil and then store them in a cool, dark place, but there are also some refined egg products that can safely last for years. Freeze-dried egg powders can for most uses substitute fresh eggs, such as baked or scrambled eggs.

3 – Whey powder

Protein-Powder-24 Food Items To Hoard

Cheese makers split curdled milk into curds – the thick portion that ends up as cheese – and whey. New whey is a cloudy, watery liquid that has low fat yet high protein content. Whey is in reality the basis of most protein supplements. Powdered whey is applied to your grocery store; it quickly dissolves and can be used to make protein-rich foods, soups and sauces.

4 –Cheese

If you like cheese, it’s one of those foods that you’ll always miss while you’re gone. Fortunately, there are ways to store cheese without refrigeration for the long term. Canned processed cheese has at least two years of shelf life, and typically much longer. Wax-coated cheese will also remain good for years if stored properly – Parmesan will last for 25 years or more!

5 – Fats

If you follow our advice on survival foods, you’ve already stored plenty of oil in your diet to add a simple source of fats. Add to that some other fats will allow you to change your tastes and add more energy. Try canned butter, ghee, lard and Crisco – yes, that turns out to be good. Olive oil is also fine but it only lasts a few years before it is rancid.

6 – Breakfast cereal

Even in the toughest of times, a bowl of your favorite breakfast cereal provides a familiar, soothing start to the day off. Cereal can be surprisingly nutritious too. Wholegrain-based one’s like shredded wheat have a lot of fiber; even common sugar-based ones are a great energy source. In cold weather, hot oatmeal is a great boost.

7 – Dried milk

You can’t have cereal without milk, so stock up on powdered milk too. It can be stored for several years, and has lots of uses. You’ll usually get the best shelf life – and the best value for money – if you buy #10 cans.

8 – Potato flakes

If you have potato flakes and hot water, you can make mashed potatoes. These aren’t just a tasty addition to a meal – they’re also a great source of carbs (which means energy). You can also add potato flakes to stews and soups to add some extra body.

9 – Potato flour

More potatoes! But then, why not? Potato flour is made from whole potatoes (skin and all), so it’s quite nutritious. It makes a great thickener and you can bake with it, too. Potato flour is also useful if you are gluten intolerant.

10 – Cornmeal

cornbread 24 Food Items To Hoard

Corn has more energy than wheat and more protein than rice. Cornmeal can be stored for two years or more, and you can turn it into cornbread, pancakes, grits or polenta.

11 – Cider vinegar

Vinegar is practically a magic potion – it has a whole range of uses around the home and in an emergency. Apple cider vinegar tastes great, too; mixed with oil and seasonings it’s a good simple dressing, and it makes a huge difference to sauces.

12 – Chocolate

Compact, long-lasting, loaded with healthy antioxidants and energy dense, dark chocolate is a perfect survival food supplement. It also tastes amazing, which doesn’t hurt. Buy quality chocolate; avoid cheaper brands that contain hydrogenated vegetable oil, which is bad for your heart.

13 – Baking soda

If you have flour in your stores, or you manage to get some crops coming in and grind your own, you’ll need leavening agents to make bread rise. Baking soda lasts longer than yeast, because it’s a chemical and not a living organism.

14 – Honey

You probably already have sugar in your stores, but add some honey too. It lasts practically forever, tastes great and contains natural antibiotics – in an emergency you can put it on a would to prevent infection. Cover it with a dressing to stop dirt sticking to it.

15 – Molasses

Molasses-24 Food Items To Hoard

Like honey, molasses is packed with energy. You can use it for baking, or add a big spoonful to chili or stews.

16 – Pickling salt

Normal iodized table salt isn’t suitable for canning or pickling – it has too many added chemicals to fortify it or keep it flowing freely. If you plan on preserving your own produce, store the right salt.

17 – Dried fruit

Raisins, fruit strips and other dried fruit products have most of the nutrients and energy of fresh fruit, but they last for years and don’t take up much space. Avoid over-processed products and stick with all-natural ones. Best of all, if you have a dehydrator and vacuum sealer you can make your own.

18 – Jelly and jam

If you’re making bread, you’ll want something to put on it. You can also use jelly to make simple puddings – stir a spoonful into a bowl of cooked, sweetened cornmeal for a quick and tasty option.

19 – Peanut butter

This is also great on bread, with or without jelly, but it can make some great sauces too. You can make a basic satay sauce with peanut butter, sugar and soy sauce; it goes well with chicken.

20 – Coconut milk

coconut milk 24 Food Items To Hoard

If you like Indian or Thai food, coconut milk is a big help in creating tasty sauces. It has lots of energy, is a good source of healthy fats, and contains several essential nutrients. Like most canned goods, it should last at least two years but is generally fine as long as the can isn’t leaking, rusted or swollen.

21 – Powdered drink mixes

Staying hydrated is the top survival priority – but drinking plain water for weeks on end gets dull, and some people get nauseated by it. Add variety with hot and cold drink mixes. Hot chocolate and bouillon are excellent in cold weather; Tang or Gatorade are good for cold drinks.

22 – Seltzer water

Canned seltzer water lasts pretty much forever and adds variety to your drinking routine. It can also help treat constipation.

23 – Protein bars

If you need to bug out in a hurry you’ll need compact, high-energy food to take with you. Grab your chocolate, but some protein bars are good, too. They’ll make your diet a bit more balanced, and keep your stamina up.

24 – Seasonings

Whatever you eat, the right seasonings will make it much more enjoyable – and that makes a difference. Eating boring food for weeks is depriving. As well as adding some of your favorite herbs and spices – garlic powder, ground paprika, cayenne pepper, chili powder, dried oregano and even a bottle of soy sauce – you will already have salt stockpiled.

Any food that can be stored securely is going to make a valuable addition to your inventory, so keep a watch for promotional deals that could have a place in your shelves. If you have any other food ideas that you can stockpile, please join in the comments below!


Self-sufficiency and preparedness solutions recommended for you:

The vital self-sufficiency lessons our great grand-fathers left us
Knowledge to survive any medical crisis situation
Liberal’s hidden agenda: more than just your guns
Build yourself the only unlimited water source you’ll ever need
4 Important Forgotten Skills used by our Ancestors that can help you in any crisis
Secure your privacy in just 10 simple steps

The traditional way to create a long-term supply of food is to store bulk staples such as rice, pasta and dried beans. It is cost-effective and works well, but you

Water will be at the top of your priority list in any emergency situation. Without water, the chances of survival are calculated in days – and not many of them. It’s crucial you have access to reliable clean, secure water supply. How much, then? At a minimum, for at least two weeks, a gallon a day for everyone in your group. This means 56 gallons of water for a family of four and this is a bare minimum. A gallon of water is not much because you need to use it for drinking, cooking, and washing.

Stashing a few extra Highland Spring bottles in the refrigerator obviously won’t meet your water needs for long, so you need to lay in a decent supply for real planning. Which means selecting the right containers, filling them with safe water and storing them in a cold, dark dry place. Do that properly and you’ll have a water buffer that will keep you in the game until you can find a safe source, whether it’s a well, a catchment system for rainwater or something else. Unfortunately, when it comes to storing water, there’s a lot of bad advice going around.

Here are some common myths, and the facts behind them:

Myth #1 – “I don’t need water storage because I have access to a well/pond/river”

girdled-road-reservation-south-fish-stocking-pond-630x350

Some people believe they don’t need to keep an emergency stockpile, because there’s plenty of water nearby. Seeing the logic in this, is easy. After all, if you have a pond with a few thousand gallons of water in it on your property, what’s the point in stashing some barrels in the basement? If your regular supply of water comes from a well, you are independent of the grid anyway and need not take any extra precautions.

The logic is quite clear-but that’s wrong. You don’t know what constitutes an emergency. What if a nuclear power plant fails to contain and your pond gets coated lightly with radioactive dust? You won’t want to go outside until the level of radiation has dropped – which probably means a couple of weeks – and it will be contaminated even if you could get at your water supply. When filtering, radiation can be eliminated so you end up with a toxic filter. Your well? It may be polluted by an industrial incident by drilling, or even leached chemicals.

In a SHTF scenario, rivers and ponds will be a magnet for people less prepared. In the short term, you can not rely on them safely. To be secure, you need water source that you monitor access to, and where it was stored, you need to know it was secure.

Myth #2 – “A water tank or stash of barrels will leave me prepared for anything”

1379554863-hawg_collage

Storage tanks, barrels, or 5 gallon containers are all excellent ways for storing bulk water. When you want a few hundred gallons of clean water to hand, the way forward is huge tanks. Most preppers claim that this is what they need to keep them alive before they can put together a way to obtain clean water from a sustainable source.

Yet what if you need to move? You keep a bug-out bag with food, ammunition, and medical supplies in stock. Planning to take water, too? You need to, because when you’re on the move it’s just as necessary-but you can’t take a 55-gallon drum with you.

If you leave by vehicle, a few of five gallon containers will do well, but the worst case scenario is that you will have to bug it out on foot. If that happens, you’ll need containers of water which you can take with you. A camelbak or similar hydration device is a great idea, particularly if you go hot weather on foot. But it’s not enough, so bring even military water bottles – a few one-quarter canteens would be a handy extra backup.

Myth #3 – “Water will deteriorate in storage”

top_10_myths_of_sustainable_water_treatment

Having a decent supply of water that’s kept fresh is a smart idea. You may have one or two five-gallon jerrycans, for example, which are drained, rinsed and refilled each month. This gives you the supply of a few days which can be drunk straight out of the container. However, there is no need to think about the bulk room. Water does not deteriorate. It is H20 and that is it. You can store water for years, and it will always hydrate you just as well.

On the other hand, it may not be suitable to drink straight away after long-term storage. Microorganisms will grow in it, particularly if the containers were not sterile when you filled them. That doesn’t mean that you really need to throw it out. Compared to water from any other source, it can be made healthy by boiling, filtering or chemical purification. A chapter explaining the process of sterilizing containers and long-term storage of water can be found in The Lost Ways.

The benefit is that if you know it was healthy when you stored it, there’s no chance it’s polluted with chemicals, animal waste or some other hazard – you only need to destroy everything that’s grown in it.

Myth #4 – “Water needs to be treated before storage”

There is a common belief that before water is stored it must be treated. This is absolutely not true. Tap water is perfectly safe almost anywhere in the U.S. so when you fill the containers, there’s no point in doing anything. It has got at the water treatment plant after the filtering and purification, it is clean enough for storage.

lifesaver_bottle_portable_water_filter_system_6

Bear in mind also that even if you purify the water before storing it, microorganisms can still grow in it over a long period of time. Chemical purifiers will last for a while, but they will eventually evaporate. If water has been stored for months or years, then you should treat it before using it, so why waste time and money before storing it? Either way, you’ll have to do it again later, so you could cut out the duplication as well as just do it when necessary.

If water is dirty or has a lot of growth in it, chemical purification is not really enough-you should also filter it. If you obtain a high efficiency filter chemicals will not even be necessary. Like a Lifesaver filter, microorganisms with more than 99.99 percent efficiency will be removed, as well as any dirt, debris and suspended pollution clear. But do that again before you use the water and not before you store it.

Myth #5 – “Water can be stored in any container”

plastic-barrels-molded-from-food-grade-polyethylene

Any clean container can be used for short-term storage of the water in a real emergency situation. However, you need to be a little more selective for long-term storage. Most disposable plastic containers are not intended for long-term use, such as milk jugs. Many of them are now biodegradable so after a few months they will begin to break down.

As they do that, chemicals will dissolve into the water and while they probably won’t poison you, avoiding them makes sense. Those containers will inevitably start leaking, and you will lose your water. Disposable bottles of water or soda are also a bad idea. They are clear, and let light through; light stimulates the growth of microorganisms.

military-water-containers

Plastic barrels made from food grade polyethylene are perfect storage containers. For water barrels, the normal color is blue; this blocks most of the light, and what it let through is in wavelengths that tend to slow down bacteria and algae rather than encourage them.

Military water containers are also good; they are completely opaque, so there’s no light coming in at all. Picking solid food grade containers of good quality will help to keep your water supply safe in the long run.


Other self-sufficiency and preparedness solutions recommended for you:

The vital self-sufficiency lessons our great grand-fathers left us
Knowledge to survive any medical crisis situation
Liberal’s hidden agenda: more than just your guns
Build yourself the only unlimited water source you’ll ever need
4 Important Forgotten Skills used by our Ancestors that can help you in any crisis
Secure your privacy in just 10 simple steps

Water will be at the top of your priority list in any emergency situation. Without water, the chances of survival are calculated in days – and not many of them.

Survival bread used to be a common staple and it still is popular today as survival food. It can also be called other names like hardtack, pilot bread, and army bread. No matter what you call it, survival bread is a timeless recipe that can provide you with a cheap nonperishable option in emergencies.

The Easy Survival Bread Recipe

What you will need:

  • 2 Cups Oats
  • 2 ½ Cups Powdered Milk
  • 1 Cup Sugar
  • 3 Tablespoons Honey
  • 3 Tablespoons Water
  • 1 3oz Pkg Lemon Jell-O

Follow some quick and easy instructions to have it ready in less than thirty minutes:

Preheat the oven to 350 degrees. Combine the oats, powdered milk, and sugar in a medium bowl. Combine water, honey, and Jell-O in a medium pan, bring to boil, and then remove from heat. Add the oat/milk/sugar mixture slowly and mix well. Shape the dough into a thin brick-sized loaf and put it on a cookie sheet. Bake the loaf for 15 to 20 minutes. Allow the loaf to cool and then wrap in aluminum foil.

Why Make Survival Bread

Food storage can be a major problem and survival bread is just one of the many solutions to that problem. Our ancestors figured that out, as you can tell by survival bread’s storied history. Why reinvent the wheel when it comes to long-term food storage? The bread is shelf-stable and will stay edible indefinitely. The loaf is packed full of nutrients and calorie content- enough for one adult for an entire day.

The loaf is very dry, but that is one reason why it has such a long shelf-life. Water can help make survival bread more palatable and easier to chew. One of the names for survival bread is ‘hardtack’ because it can be tough to chew.

A few more reasons to chew on:

  • Survival bread keeps indefinitely
  • Making it gets you to practice in the kitchen (a rare occurrence, if you are like me)
  • It fits in any long term food storage plan
  • It pairs well with just about anything
  • The ingredients are cheap and useful for other baking needs or prepping projects

Give the recipe a spin and let us know what you think in the comments below.

Survival Bread with Jello?

It sounds odd, but the Jell-O adds a little bit of flavor and helps the breadstick together in its hard loaf form. You can actually use whichever flavor Jell-O you prefer, but I like Lemon, personally, and think it goes well with the texture of the bread. It doesn’t serve up a tart dessert treat like lemon meringue pie, but it does the trick. The honey also does wonders with helping hold the loaf together and adding much-appreciated flavor.

Survival Bread in a Can

It used to be widespread, but finding canned survival bread these days can be elusive. Every once in a while, you can find some online. You cannot control the moisture content in a pre-made product, obviously. In order to get the bread to come out of the can, they have to increase this moisture content- which has the drawback of giving it shelf life. Still, the shelf-life is a whopping 30 years, which is a whole lot longer than typical bread.

If you can find some online it may be worth picking up since it is so easy to add to your food storage plan. In a world of fast-perishing foods, survival bread in a can must not make much of a profit for food producers since it is a scarce commodity now.

The Final Word

Survival bread is a great inclusion in any long-term food storage plan. You can tweak the recipe to your family’s liking to be sure that everyone enjoys the bread. Break it out when you are heating up some MREs or canned goods as a side item. Pair survival bread with peanut butter for a great emergency snack. It is easy to make, tastes good, and is shelf-stable, add it to your plan. Keep exploring; stay prepared, and be safe.


Other self-sufficiency and preparedness solutions recommended for you:

The vital self-sufficiency lessons our great grand-fathers left us
Knowledge to survive any medical crisis situation
Liberal’s hidden agenda: more than just your guns
Build yourself the only unlimited water source you’ll ever need
4 Important Forgotten Skills used by our Ancestors that can help you in any crisis
Secure your privacy in just 10 simple steps

Survival bread used to be a common staple and it still is popular today as survival food. It can also be called other names like hardtack, pilot bread, and army