Home2019June (Page 2)

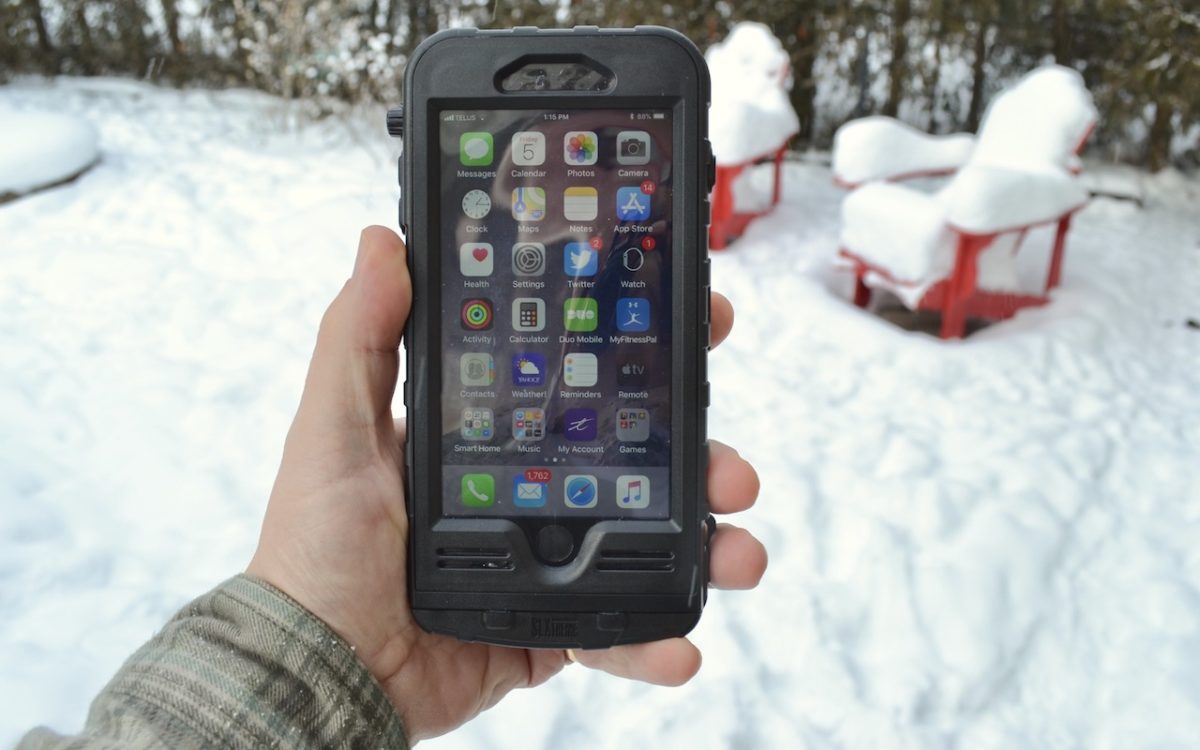
I’m painfully aware of the fact that smartphones and prepping don’t mix, but part of being a prepper means using anything you have on hand in order to survive. Smartphones themselves make for an interesting case study – for some, it’s a big no-no, because the battery, unreliability in case of an EMP attack, cheap components that make them very fragile, but I urge you to reconsider. In all aspects, smartphones are the epitome of communication technology and, as a result, they have a lot to offer.

Sure, I won’t stake my life on one single piece of plastic with a display and a camera that makes the most awesome pictures period, but in checking out the mobile applications market, I’ve discovered a very interesting aspect. If you know where to go, what to download, and use, your smartphone can be turned into a tool as versatile and dependable as a survival knife.

So, for today’s article, I have compiled a small list of my favorite ‘survival’ apps for smartphones. Enjoy!

Facebook

Yes, I know that most of you would hardly associate duck faces, food pics or check-ins with survival. However, Zuckerberg’s wunderkind does have its merits. If you still have an active Internet connection, you’ll be able to find out in a jiffy where you are.

Moreover, in case of a natural or man-made disaster, Facebook allows its users to mark themselves “safe” which basically discloses the location, as to allow their loved ones to know that they’re out of harm’s way. Careful about permissions – data mining’s real and hardly a trifle. Still, a very good survival app.

Red Cross First Aid

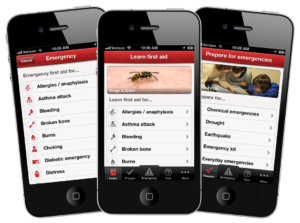
A great cross-platform app (means it’s available for Android, iPhones, and Windows phones) which boasts two types of first-aid modules: one for learning which teaches you useful stuff like performing CPR, treating wounds or dealing with allergic reactions and a second one that kind of synthesizes all teaching modules. The latter can be very helpful in case you need to render first-aid since you won’t have time to scroll through pages of text.

Compass Steel 3D

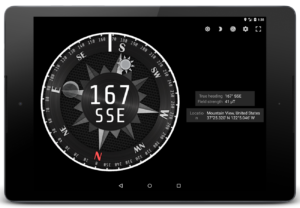
As everyone needs a compass and this smartphone delivers. Compass Steel 3D is a lightweight compass app with tons of features like calibration, sun and moon direction, sunset and sunrise time. Given the fact that it relies solely on your phone’s accelerometer (the sensor that changes the screen’s orientation based on position) means that you really don’t need an active Internet connection.

Offline Survival Manual

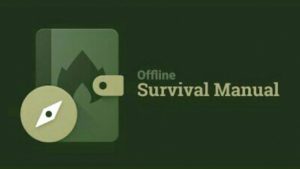
Everything you need to know about survival in lieu of an Internet connection. Offline Survival Manual is what a like to call an encyclopedia – it covers a lot of common prepping topics like first-aid, food, water, but also offers unique content such as mental preparedness tricks and basic med guides.

Scanner Radio

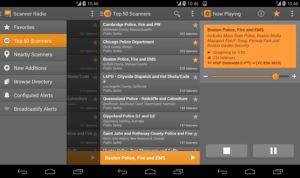
What’s the use of having a short-range communication device like a walkie-talkie if there’s no one to speak to? This is where his nifty app comes into play – using GPS, Wi-Fi or mobile data; Scanner Radio will snoop around the area for active radio stations. It can also pick up radio chatter from the authorities or from people using this device.
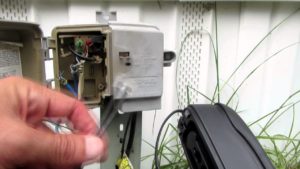
Battery Doctor

Every smartphone out there has a built-in application that keeps an eye on battery level. Most target notorious battery drainers such as screen brightness, applications running in the background or the Internet connection. Battery Doctor takes this to an entirely different level – it now only kills redundant apps, but it also boasts a super power-saving mode that can extend the life of your battery by several days at least. This would come in handy for phones that drain batteries like there’s no tomorrow or for situations which call for an amp of juice in your smartphone.

Flashlight

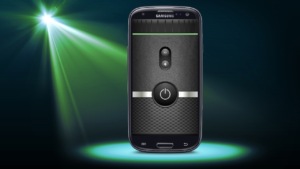
A simple name to serve a simple purpose – illumination. Indeed, your phones come with its own flashlight options, but apps such as this one can improve the brightness by a factor of ten. Careful about that battery life, though. You should only use Flashlight in case you run out of matches, lighters, light sticks, flares or tac light batteries.

Wild Edibles

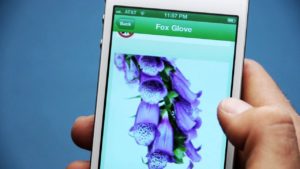
Now, this is what I call a must-have for preppers. Wild Edibles has a database of over 200 edible wild plants. It also comes with useful information about location, how to identify, harvest, and what to do in case you eat the wrong ones. If that wasn’t enough for you, Wild Edibles also has a plant recognition algorithm that uses your smartphone’s camera to identify the plant in front of you.

Guardly Mobile Safety

This is the cheapest alternative to a personal emergency beacon. Let’s assume for the fact that you missed a call or a message. In case this happens a couple more times, this application will relay your GPS location to the authorities or to your emergency contacts.

Knots 3D

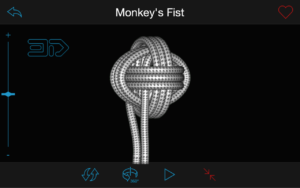
How can you not know how to knot? Well, apparently there are many people who get even their shoelaces wrong. That’s why Knots 3D is a very handy survival app – its large database shows you how to tie even the most intricate know, using a step-by-step video approach.

Smart Tools

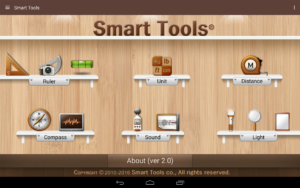
Every prepper needs a toolbox, but a real one would be a little impractical to carry around. This is where Smart Tools comes into play – need to measure something? Fire up the ‘meter’ option and get crazy. The app has tons of other features such as mirror, flashlight magnifier, compass, GPS, and even a sound meter.

OpenSignal

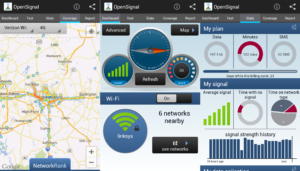
This app is very similar to Scanner Radio, with one small difference – instead of picking up local radio chatter, OpenSignal scans for nearby radio or Wi-Fi towers. It also has a smart built-in tool that boosts your phone’s signal in case the radio tower is out of reach. Sorry, iPhone people – this one is for Android users only.

That’s about it for my top 12 favorite survival apps for smartphones. Think anything’s missing from the list? Let me know in the comments section.

If you know where to go, what to download, and use, your smartphone can be turned into a tool as versatile and dependable as a survival knife.

Editor’s Note: Today’s article is courtesy of Alex Ramsey. 

The best way to increase your chances of surviving a venomous snake bite is to have a contingency plan in place. Remember, that your end goal should be to receive anti-venom because without a dose of anti-venom you have almost zero chances of surviving a poisonous snake bite. Today we discuss steps you can take to act quickly to survive a venomous snake bite. As a bonus, at the end of this article you’ll also learn how to get rid of Copperhead Snakes.

Call emergency services immediately

Don’t make the mistake of trying to drive yourself to a hospital or waiting to see whether or not you’ll display any symptoms of being poisoned. If you plan to survive a snake bite and live to tell the tale, time is of the essence. Instead, call 911 as soon as you’ve been bitten.

Better yet, if you’re with a family member or friend, direct them to call emergency services right away. Ideally, have your companion stay on the line with emergency services as they may be able to give your friend instructions on how to best look after you. If your symptoms worsen, while your companion is on the phone, emergency services may choose to send a helicopter to transport you to the nearest hospital, which will have anti-venom in stock.

Describe The snake that bit you

An accurate description of the snake that bit you will help emergency services locate the appropriate type of anti venom.

Make sure that either you or your companion gives emergency services an accurate description of the snake that bit you. That way, emergency services will be able to ascertain what type of snake bit you and will be able to select the appropriate type of anti venom.

If possible, disclose how long the snake was, how thick the snake’s body was, the color of the snake and whether or not the snake had round eyes or slit style eyes. If a snake has a triangle-shaped head beware as venomous snakes often have triangular heads. If the offending snake is still around, try to get your companion, if you have on to take a photo of the snake which bit you. Either that or kill it and there will be no question of the species.

If you live in an area that is frequented by snakes, it’s well worth learning how to identify the different types of poisonous snakes in your area. That way, if you’re ever bitten by a venomous snake, you’ll have a far better chance of correctly identifying the offending snake.

Stay as still as possible

Did you know that the faster you move, the faster the snake’s venom will be absorbed by your body and the faster the venom will affect your body? That’s why if you’re in an area with phone coverage, it’s far wiser to get emergency services to rescue you, rather than attempting to walk back to your car.

Leave your snake bite alone

Some research suggests that an ice pack will reduce your body’s circulation and will decrease the spread of venom, throughout your body.

While you may be tempted to suck the venom out of your leg or cut your wound open, in order to try to remove as much venom as you can, doing so will only worsen your condition. Also avoiding crafting a tourniquet as a tourniquet will only speed up the symptoms of your snake bite.

However, if you have an ice pack handy, it is a good idea to hold the ice pack against your bite. As some research suggests that cold from an ice pack will reduce your body’s circulation and will decrease the spread of venom throughout your body. Remember that you’ll significantly increase your chances of survival by keeping calm and waiting for emergency services to reach you.

What if you’re unsure of whether you’ve been bitten by a venomous snake or not? If you can’t tell the difference between a venomous snake and a non venomous snake it’s still wisest to call emergency services. As emergency services should be able to ascertain whether or not the snake that bit you is venomous.

Remember that you’ve got nothing to lose by contacting emergency services but if you fail to make the phone call, it could cost you your life.

How To Get Rid Of Copperhead Snakes

If you live in an area that is rife with dangerous Copperhead snakes, simply continue reading to discover how to prevent snakes from exploring your property, as well as how to safely remove any Copperhead snakes that have already invaded your property.

Make sure your property isn’t attractive to Copperheads

Make sure that your lawn is cut short and that there is no garbage in your yard. Copperhead snakes are known to hide in long grass and are attracted to garbage as it is a possible food source for hungry snakes. It’s also worth cutting down or trimming any bushes that are on your property. As they are also attractive to snakes who are looking for a safe hiding place. Also make sure to seal any possible entry points to your home, to prevent snakes from making their way into your home itself.

Invest in a non-lethal snake trap

By far the safest way to get rid of a Copperhead snake on your own, is to place non lethal snake traps around your property. Such traps are a humane way to catch any snakes which are hiding on your property. Once caught, call your local council to find out how you should dispose of the live snake that you’ve caught.

Alternatively, you may want to call a snake removal specialist to remove of the snake which you’ve caught for you. If you do choose to release a Copperhead on your own, it’s worth driving to a remote area, so that the snake you release won’t make its way to another family’s property.

Call a snake removal specialist

If you don’t want to run the risk of being bitten by a venomous Copperhead, don’t hesitate to call a snake removal specialist. Who has the appropriate skills to safely catch and release a Copperhead. Keep in mind that the sooner you call a specialist, the less likely the snake on your property is likely to breed.

After all the last thing you need is a pregnant Copperhead residing on your property.

About the author: Alex Ramsey – Work hard & live to hunt! Countryman Hunter, Archery, shooter, Freelance outdoor writer and loves the USA. Founder of Thebigdeer.com where he shares his hunting experiences with all. Alex’s site is all about guns, showcases real gear & real reviews to help you become more prepared.

Your end goal should be to receive anti-venom because without a dose of anti-venom you have almost zero chances of surviving a poisonous snake bite.

During the last couple of days I came to realize that I’m kind of hooked on technology – if I want to search for anything like a recipe or the answer to any kind of question, I usually end up using my smartphone or laptop.

Sure, there’s nothing wrong about taking full advantage of modern tech. I mean, without my PC and Internet I wouldn’t be able to share my thoughts with you people. Still, the idea of being surrounded by too much tech should be a reason for concern considering that it takes one blackout to witness firsthand what life B.E. (before electricity) felt like.

In one of my articles (can’t remember exactly which one), I talked about how awesome it is to have powerless tools around the house. Of course, you can always use a manual food processor when the power’s out or a manual drill over an electric one, but some things just cannot be replaced. However upsetting this though may be, we kind of need out smartphones for a lot of things, not just taking pictures or playing Candy Crush while riding the subway.

Okay, so we established that mobile tech is one of those things that we can’t do without. The question at hand here is what in the Hell are we going to do when there are a power outage and our phone’s close to dying? In a previous article, I’ve shown you a clever way of charging your phone using a 9V battery and a car charger. That is, indeed, a neat trick, but hardly the only way to juice up your phone without using the outlet.

Well, after doing a bit of research, I’ve stumbled upon more flaky ways to recharge that smartphone of yours. Think the 9V battery hack was weird? Get of a load of these.

Harnessing the power of…cranks!

A hand-cranked flashlight is, without a doubt, one of the most useful items to be had in case shit hits the fan. Still, a flashlight is not enough. In general, those gadgets come with all sort of wicked options: AM\FM radio, music player, photovoltaic cells, USB ports, all of them sucking up that precious juice generated by the owner who has nothing better to do than to spin that lever.

Yes, I know that this might come off as a no-brainer, but many who own a hand-cranked gizmo overlook this option for some reason.

So, is the power out? Not a problem if you’re phone on the brink of death. Just plug your USB cable into your hand-cranked gizmo and start, well, cranking. It’s possible to use such a device to fully charge your phone’s battery, but I don’t see how you’ll be able to reach 50 percent without your arms going numb.

There’s another trick you can trick to boost the efficiency of your hand-cranked device. As many of these gizmos pack solar cells and capacitors, it would be wise to leave it in the sun before attempting to use the crank. Sure, it won’t fully charge your phone, but at least it will spare you a couple of hours of cranking.

Hack your landlines!

If prepping was a patient with OCD, I would say that he had a thing for landlines. Don’t get me wrong; landlines are a great way of staying in contact with the outside in case of a natural or man-made disaster. In case of a power outage, landlines will still have some juice inside. Why not take advantage of this?

Here’s a clever trick of how to get some of those amps inside your dying phone. Keep in mind that this project requires a bit of tinkering. However, when you’re done, that phone box of yours will double up as an emergency phone charger. Now, for this project you will need:

  • Phone cord.
  • USB cable.
  • 5V voltage regulator. There are usually 52V inside that phone box, so you will need this regulator in order to make the outlet compatible with your smartphone’s battery. Otherwise, you’ll end up frying your phone. Voltage regulator looks, more or less, like TV or computer chips, only a lot bigger. They have three prongs for input, output, and grounding. You can probably find them at your local hardware store, in the electronics section (the one you need is labeled ‘7805’).
  • Knife.
  • Soldering iron.
  • Electrical tape (optional).


Here’s what to do in order to hack your phone box

Step 1. Start by exposing the cables of your phone cord. Leave a plug on the other end, because that one will go in the phone box. There should be two wires: red one (this will be your input) and a green one (grounding).

Step 2. Next, expose the wires of your USB cable using the knife. You’ll see four cables: red, blue, green, and black.

Step 3. Put the voltage regulator on your work table. To ensure that you solder the wires to the correct prongs, flip the chip (the ‘7805’ should be facing you).

Step 4.  Solder the phone cord’s red wire to the first prong (that’s the left one).

Step 5. Solder the phone cord’s green wire to the regulator’s grounding prong (that’s the middle one). You’re doing great! Halfway there.

Step 6. Solder the USB cable’s black wire to the regulator’s middle prong. Yes, you can solder it on top of the phone cord’s green wire.

Step 7. Solder the USB cable’s red wire to the regulator’s output prong (that would be the one on your right).

(Optional) Use some electrical tape to cover the soldering points on the regular.

Step 8. Plug the phone cord into the box and the USB cable in your smartphone. Congrats! You now have an emergency phone charger outlet.

When life gives you lemons, make electricity.

Lemonade is not the only thing that you can make out of lemons. In case of a major emergency – say you want to send out of short message or call the authorities, it may be possible to reboot your phone using fruit-generated electricity.

Yes, I know exactly how it sounds, but it works. Don’t expect to get a full charge on a single lemon (you’ll need at least 1,000 of them to get your phone’s power cell to 100 percent). Anyway, here’s how to boot up your phone by harnessing the power of electrochemical reaction. Start by gathering your materials. For this project you will need:

  • Zinc or galvanized nails.
  • Copper nails (you can replace them with coin or paper clips).
  • Copper wires.
  • Mini-USB cable.
  • Six lemons.

Here’s how to piece together your lemony phone charger

Step 1. Expose the USB cable’s wires using a knife. Leave the mini-USB plug on the other end. You should see a red and a black wire with orange strips.

Step 2. Arrange your lemons in a circle.

Step 3. Insert zinc nail on the left side of the lemon.

Step 4. Insert a copper nail\paper clip\coin on the right side of the lemon.

Step 5. Connect or solder the USB cable’s red wire to the zinc nail inserted in the lemon on the left side.

Step 6. Connect or solder the USB cable’s black wire with orange strips to the zinc nail inserted in the lemon on the right side.

Step 7. Connect or solder the copper wire of the left lemon with zinc nail inserted in the lemon behind it. Repeat this operation to close the circuit.

Step 8. Plug the mini-USB into your phone and wait for the magic to happen.

(Advice) If you don’t have lemons around the house, you can try with oranges or other acidic fruits.

Onions make me cry, but at least I have a full battery

Because I’m madly in love with these strange science projects, I found another way to charge my phone using stuff found in the fridge. In this case, the one giving away its life so your phone might live to tell the tale is the onion. Don’t cry for me, Duracell. As in the case of the lemon charger, the onion one relies on electrochemistry. Here’s what you’ll need to whip up an onion-based electricity generator:

  • One onion (the bigger, the better).
  • Any kind of beverage containing electrolytes (I used a bottle of Gatorade for this project, but you can use anything you like or have around the house).
  • One large bowl.
  • One phone charger.

Sounds delightful, doesn’t it? Here’s how to make your first onion charger.

Step 1. Using a Philips screwdriver or an awl, poke two holes on either side of the onion.

Step 2. Fill your bowl with Gatorade or your favorite electrolytic beverage.

Step 3. Place the onion in the bowl and allow it to soak for at least 15 minutes. The holes you’ve just poked will allow the Gatorade to get inside that onion fast.

Step 4. Once the time has passed, take the onion out of the bowl and place it on a clean towel.

Step 5. Use the towel to dry your onion.

Step 6. Stick the USB end of your charging cable into the onion. Doesn’t matter where you insert it.

Step 7. Connect the mini-USB end to your phone and let the magic happen. If you’re still not convinced, drain your battery completely and connect to the Gatorade-soaked onion to see what happens.

Wrap Up

I feel compelled to stress out once more that these should not be, under any circumstances, considered permanent solutions. The only thing that comes close to an outlet is one of those portable batteries.  If you don’t have one, you should consider making a small investment. Check out your local auto stores for those jumper packs – great for starting your car when the battery’s dead, but can also help you charge other devices such as laptops, smartphones, radios or tablets.

I strongly advise you to exercise extra caution when crafting those onion or lemon-based generators. Technically speaking, they should work. However, don’t be surprised if your phone suddenly goes up in flames. If you don’t have other means of charging your smartphone, better get a meter in there to see if the voltage is fine.

Another thing to keep in mind is that phone box chargers are very tricky. Well, you don’t need a Ph.D. in astrophysics to solder a couple of wires, but it is rather difficult to get ahold of that voltage regulator.

Sure, there are plenty of websites that sell them by the dozen, yet in case of a blackout, this is not really a viable option. If you can’t find any at your local store, it may be possible to salvage one or two working ones from an old VCR or a tape recorder. I wouldn’t go tinkering around TVs because they use entirely different regulators. You can also try your luck with an electrical-powered short-wave radio.

That’s about it on alternative ways to juice up your smartphones during a blackout. What’s your take on this? Hit the comments section and let me know.


On a different note, here’s some other self-sufficiency and preparedness solutions recommended for you:

The Lost Ways (The vital self-sufficiency lessons our great grand-fathers left us)
Survival MD (Knowledge to survive any medical crisis situation)
Backyard Liberty (Liberal’s hidden agenda: more than just your guns…)
Alive After the Fall (Build yourself the only unlimited water source you’ll ever need)
The Lost ways II (4 Important Forgotten Skills used by our Ancestors that can help you in any crisis)
The Patriot Privacy Kit (Secure your privacy in just 10 simple steps)

Being surrounded by too much tech should be a reason for concern considering that it takes one blackout to witness firsthand what life B.E. (before electricity) felt like.

The big and bad books of prepping say that every mistake, no matter how small it is, can cost you your life. Well, even though I’m going into my five years of prepping, I’ve discovered that even in our cozy corner of the Internet there’s room for exaggeration.

Sure, getting snowbound with no food, water, or communication device can kill you, but, c’mon, who’s stupid enough to brave the elements without even taking the smallest safety measures? As my grandma used to say, nobody’s born knowing, and, like it or not, at some point you’re going to make some mistakes. No, it’s not the end of the line, but you should give it your best to learn from them before venturing out into the world again.

Anyway, for today’s article, I was thinking about making a small list of big and small prepping mistakes. Most of them are, of course, the fruits of my own experiences and misadventures, while others are stuff I’ve heard throughout the years from friends, family members, and prepping forums. So, without further ado, here are some of the most common prepping slipups and how to fix them in a jiffy.

Playing the Lone Wolf part

Over the past couple of years, I’ve noticed that most preppers tend to use the first-person singular when they talk about their prepping habits: “I went to the military surplus store and bought X item.”, “I create a B.O.B for each family member.” This shows that a good deal of preppers is way too comfortable playing the Lone Wolf part, making no efforts to involve their family members. I can understand that to some degree – some of them may be too busy or simply don’t care.

Others are far too young to partake in the discussion that revolves around disasters, death, disease, and whatnots. However hard this might be for you, stop what you’re doing. It’s in everyone’s benefit to know what to do in case of an emergency.

You should also stress out the idea that prepping’s is never about digging fallout bunkers or arming yourself to the teeth whenever the East passes a fart. It’s about using your noggins to deal with everyday issues like changing a light bulb, replacing some electrical wires, reaching your workplace in time if you miss the bus or making a light source when you’ve run out of candles, matches, lighters, and batteries for your tac flashlight.

Being too comfortable around one water source

Tap and bottled water are great. Still, you shouldn’t take either one for granted. If you have an electrical pump in the basement, one chink in the power grid and its buh-bye water. Of course, you can always run out of bottled water, and it happens a lot faster than you think.

You really don’t need to be facing a life-threatening situation to realize just how quickly those bottles disappear from your household emergency kit – baby formula, for instance, has to be prepared by bottled or otherwise sterilized water. Wound cleaning requires the same kind of water.

And when the shit really hits the fan, it will be hard to replenish your stock considering that others will do the same; or you may be stuck in the wilderness with no access to a store or supermarket. That’s why it’s important to learn how to conserve and, if necessary, stockpile water from other sources.

Common household items like the toilet tank, pipes, and water heater can be great water sources during an emergency. Collecting rainwater or siphoning the clear liquid from tree holes are valuable skills.

Apart from finding water, you should also learn how to make it safe to it – boiling, adding water purification tablets, distillation.

Being too cocky or overly-cautious

In my opinion, life’s more about finding the middle ground, rather than being bias. Dunno if it’s healthy or right or wrong or moral, but it did offer me some measure of accomplishment.

You really don’t need to be standing in front of a tornado to realize that there’s a time for caution and a time to take charge. In our humble abode, being too cocky or overly-confident about your survival skills is stupid. Why? Because you’ll end up making mistakes that even a newbie avoids.

I believe the same thing can be said about being way too cautious in a situation, always overanalyzing things when you’re supposed to do it. There’s a surefire remedy for this – assessment. Yes, I know it’s one of the most boring things you learn as a prepper, but it’s one of the building bricks of survival. Assessing a situation allows you to understand it and to find suitable solutions.

Long-term vs. short-term prepping

Let me put it this way – what’s the use of preparing for a snowstorm when you don’t even have a complete first-aid around the house? Or, better yet, why bother building a safe room in the house when you don’t even an emergency supplies stockpile? Of course, long-term prepping is very important, but we shouldn’t lose track of the things we must do right and now. Once you’ve checked everything off the short-term prepping list, you can move out to other stuff. Remember your priorities!

Home cooking

For someone who usually ends up ordering things online just because he’s not in the mood to cook, I have to say that homemade meals are the best. And yes, from-scratch cooking is a very valuable skill, especially if you’re stuck somewhere where there’s no access to the Internet or phone signals (or don’t have anyone around to cook your meals).

For some, cooking’s right there next to rocket science. Believe me; it’s not that hard. If you follow the recipe to the letter, nothing can go wrong. More than that, if you have someone around the house who really knows how to cook, you should do well and stick around. You might learn a thing or two. Always start small and work your way towards more refined dishes.

That’s about it for my list of common prepping mistakes. What do you think? Hit the comments section and let me know.

The big and bad books of prepping says that every mistake, no matter how small it is, can cost you your life.

Everybody has his guilty pleasure – mine is powdered eggs. Yes, I know that nothing beats fresh-laid chicken eggs, because they’re packed with calcium, albumin, and so on and so forth. But what can you do? The heart asks pleasure first, as the saying goes, and I wouldn’t even consider coming down for breakfast if I’m all out of powdered eggs for my killer omelet.

There are very good reasons why I chose this instead of regular eggs, apart from the fact that they tout more or less the same nutritional values as their ‘living’ counterparts – they can be stockpiled for months if not years; can fit into any B.O.B, no matter how big or small it is and, most importantly, powdered eggs will be worth their weight in gold during an SHTF situation when all supermarkets will run out of the fresh variety.

Now, before showing you how I managed to make my first few jars of powdered eggs, I should warn you that this recipe will require a small investment because you’ll need a contraption called a dehydrator.

Wait! Don’t close this article yet. I was talking about a maybe a few tens (bought mine from Costco for $30). That’s about it as far as the financial part is concerned. Trust me when I say that this investment will pay off – imagine not having to hunt online discounts on survival foods such as powdered eggs. And, most importantly, if you know how to cook ‘em, you won’t notice any difference in taste.

Anyway, here’s what you will need to do in order to obtain a near-endless supply of powdered eggs.

Gathering your ingredients and kitchen supplies

To pull this off, you will need the following:

  • Eggs (I used two dozen for my first batch).
  • A teaspoon of vegetable cooking oil or butter.
  • The dehydrator.
  • A food processor.
  • A blender or fork for whipping up the eggs.
  • Canning jars.
  • Skillet.

Done gathering the ingredients? Great! Here’s what you’ll need to do next.

How to prepare powdered eggs

Step 1. Start by cracking open the eggs in a large bowl.

Step 2. Whip up the eggs using a mixer or a fork. I would advise you to use a blender since it’s quite tricky to whip up that many eggs using a simple fork and takes less time.

Step 3. Put the skillet on the cooking machine and add a little bit of veggie oil or butter. If you don’t have a non-stick pan, use both or stick to butter.

Step 4. Set the heat to medium-low and wait for the oil to heat up. If you’re using butter, you should put the whipped eggs inside when the butter’s all melted.

Step 5. Add the whipped eggs.

Step 6. Wait until the eggs begin to bind, then use a wooden spoon or spatula to sort of shred the omelet mass. Keep stirring and separating the eggs. It takes about 10 minutes or so. Yup, basically it’s like doing scrambled eggs. Now, if you want your eggs to be extra puffy, you can add a splash of milk to the bowl while you’re whisking them.

Step 6. Move the scrambled eggs to a clean plate with a bit of paper tissue underneath and allow them to cool.

Step 7. Once the eggs have cooled down, transfer them to your food processor and set it on “pulse.” Give your scrambled eggs a couple of spins. After a couple of seconds, you should have a puffy mass of diced eggs.

Step 8. Turn on your dehydrator and set it to 125 degrees Fahrenheit. Wait for it to reach the desired temperature (mine has a green LED bulb in the front which sort of lights up when the device reaches the right temp). Don’t forget to remove the dehydrator’s lid before heating it up.

Step 9. Transfer the eggs from your food processor to the dehydrator. Put on the lid and wait. It takes about four or five hours for the machinery to remove all the moisture from the eggs. Once they’re done, the eggs will have a brittle aspect.

Step 10.  Put the eggs back into the food processor and give them a spin or two to turn them into powder. Enjoy!

There’s another way of making powdered eggs. Works great if you’re on the run or not in the mood of going through all the steps. As you will see, the dehydrator you’re just bought comes with a fruit roll sheet (yup, you can use it to get the moisture out of fruits and make your own trail mix).

Now, get half a dozen eggs and whisk them. Put the fruit roll sheet on top of your dehydrator and set it to 145 degrees Fahrenheit. When the thing’s beginning to heat you, dip a paper towel in some veggie oil and grease the surface of your fruit roll sheet.

Add the whisked eggs (careful not to spill your mix inside the device). You don’t need to put the lid on. Leave it like this for 14 to 16 hours. Swing by from time to time to see if everything’s okay. When they’re done, they’ll have the same brittle texture as in the steps described above. All you need to do now is to transfer them to your food processor (don’t bother waiting for them to cool down), give them a good shake, and that’s it.

As for storing, you can use regular canning jars or zip-lock bags. If you want to make survival packs for your bug out bag or household survival kit, you can try using a vacuum sealer.

For the cooking part, all you’ll need to do would be to rehydrate them – I personally like to add them to a small pan with boiled water and sort of make poached, scrambled eggs. Yes, I know it sounds unappetizing, but nothing a little bit of salt, pepper, and a slice of homemade spam can’t fix.

Hope you’ve liked my article on how to make powdered eggs at home. If there’s anything more to add, be sure to hit me up in the comments section.

Powdered eggs will be worth their weight in gold during an SHTF situation when all supermarkets will run out of the fresh variety.