Preparing for an uncertain future means many things to many different people.
To some it’s about storing bottled water and other essential items, while to others it’s about learning how to make a shelter and fire. Some people believe it’s mostly about securing their finances against market fluctuations, while others feel it’s about defending themselves and their property.
Regardless of what first comes to mind when you consider this important issue, we’re all going to have to eat after a disaster strikes. None of us will be able to survive the coming crisis without the vitamins and minerals that come from food. And that food must be packaged and stored properly if it’s going to remain nutritious for many years.
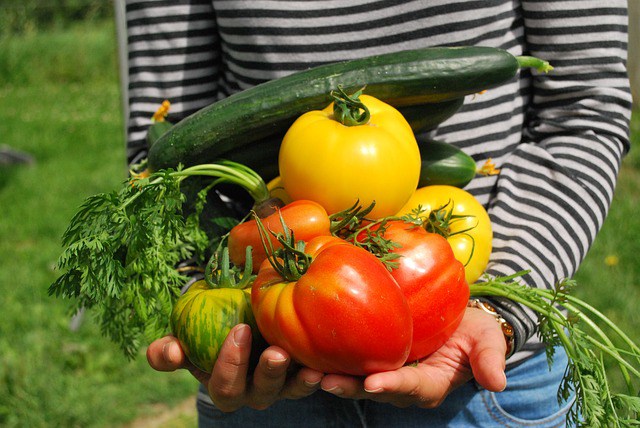
Of course, there are other factors involved in stockpiling survival food for the future. We’ll eat anything if we have to, but good-tasting food will make the situation much better, as will a significant amount of variety. The food also needs to be nourishing because a crisis will produce stress and we’ll need all the nutrients we can get to deal with that. With the electrical grid likely to be knocked out for a while following a disaster, the food we store should also be simple to prepare.
And despite how good our food tastes, how much variety we incorporate into our stockpile, how nutritious it is and how easy it is to prepare, it needs to be packaged and stored in a manner that will ensure its longevity. None of us knows how long it will be until a major emergency occurs, and none of us has any idea how long that emergency will last.
Let’s take a look at several long-term food storage components, starting with the most common mistakes people make when they begin their stockpiling process.
10 FOOD STORAGE ERRORS TO AVOID
Do you know who the biggest believers in the importance of storing food and water for emergencies are? It’s probably the victims of disasters that have occurred in this country over the past 15 years or so, including Hurricanes Katrina and Sandy, tornadoes in Oklahoma, Alabama and elsewhere, and snowstorms in the Great Lakes regions.
 Few people would disagree that it’s a good idea to store emergency food and water, but the folks who are most convinced are the ones who wish they had been prepared for the tragedies they experienced. Many of them are now ready to face the next crisis because they realize from first-hand experience how crucial it is to be prepared.
What some people are not quite as sure about, however, are the best types of food to stockpile, as well as the strategies for storing it in a manner that will maximize its usage once it comes time to access it. There are many mistakes made in this area, and the downside is significant. A lot of hard work can go to waste because just when emergency food is needed most, people can discover that their stored food has gone bad.
There are a number of examples regarding how this can happen. Someone could have huge amounts of grains stored, for instance, but quickly learn that too much of a good thing is not really that good. Balance and variety are essential, and not merely for your digestive system. They are also a psychological help to you and your family, especially if the emergency situation lasts for days, weeks or months.
Another very important factor is the type of containers in which you store food. If there is exposure to air and moisture, it can ruin your food storage tactics. In addition, where you keep those containers is crucial because high temperatures and light can negatively influence vitamins, proteins and fats.
Other factors include your food’s nutritional quality and how frequently you rotate it. You also want to make certain that the majority of food you store does not require refrigeration because a power outage would spoil those foods quickly. Finally, keeping some food at multiple locations is important, because your home could be destroyed in a disaster, or you might not be able to get back to it right away.
Here are 10 common food storage mistakes:
1. Ignoring the importance of nutrition in stored food. This happens more frequently than one might think. Sometimes we’re so concerned about the volume of food we store that we forget about vitamin and mineral content.
2. Using sacks or other containers that are not airtight. This is wrong for a variety of reasons. Air and moisture will greatly decrease the shelf life of stored food. In addition, containers that are not airtight increase the chances that insects or critters might get into your food.
3. Failing to keep food containers in a dry, cool place. Moisture and heat are two of the worst enemies of stored food. The storage temperature for most food should be between 40 and 70 degrees Fahrenheit.
4. Failing to keep food containers out of the light. You definitely want to head to the
dark side when it comes to storing food. Light can deplete the vitamin content of food.
5. Storing too many items that need refrigeration. As mentioned, it’s very likely a crisis will include the loss of power, which means your refrigerated items will spoil quickly without a generator.
6. Failing to include enough variety. After a couple of days of eating the exact same thing, you and your family are going to want something different.
7. Failing to include at least a small percentage of “comfort” foods. In addition to satisfying your sweet tooth, comfort foods will give you and your family a big psychological lift in a crisis.
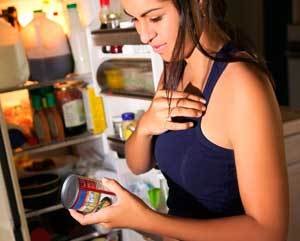
8. Failing to check expiration dates and rotate stored foods. In each container, organize food by expiration date. When an item’s expiration date is approaching, eat that food – or donate it to a shelter – and replace it with newer food.
9. Failing to keep your stockpile discreet. Advertising to others that you have a stash of survival food could make you vulnerable when a crisis hits. Keep your preparations on the down low.
10. Storing all the food in one location. This is the classic case of putting all your eggs in one basket. If your home is destroyed in a disaster, you’ll be glad you kept food and water at a secondary location.

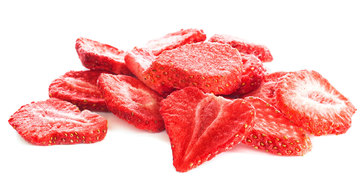
Some folks believe that freeze-drying is the way to go with long-term food storage. While it’s effective, it’s also very expensive and strips the food of some of its vital nutrients.
Another common technique in the food storage industry is the cheaper “rapid dehydration” method that sucks all the water out quickly. But it can also pull out flavor and nutrients. Low-heat dehydration is a proven technique that keeps flavor and nutrition locked in, and that food will last just as long as freeze-drying without costing an arm and a leg.
Two main advantages to dehydrating food are that it can stay fresher longer and can be stored and transported more easily. Water in food can carry bacteria, which will make that food go bad sooner, and it also weighs down that food.
If you are a do-it-yourselfer, dehydrating food would be a great way to prepare it for your stockpile. It will be more compact and easier to store as you keep it at home, and it will be lighter and more easily packed if you need to bug out. And anytime you want a quick and nutritious meal prior to a crisis situation, all you have to do is rehydrate it and eat it without having to bother looking for an expiration date.
Figure on dehydrated meat lasting only about two months, but many dehydrated fruits and vegetables will be good for a year or so. If you dehydrate herbs, they can probably last for several years.
In order to dehydrate some of your food, you can either use an oven set at a low temperature or invest in a modern, electronic dehydrator. That way, you can make food with an expiration of one month last about 12 months. You don’t want to go much beyond a year in most cases because at that point, even though the water has been removed, it’s likely the nutrients will start breaking down.
Regardless, storage is the key. Once you’ve dehydrated various foods, place them in airtight, plastic containers such as Mylar bags. You may think you’ve squeezed all of the oxygen out of a bag, but there is probably a small amount left, so use an oxygen absorber.
As far as rehydrating that food is concerned, all you have to do in most cases is place it in boiling water and stir, providing a little time for it to thicken.
THE IMPORTANCE OF TASTE
Yes, we will eat anything if we’re starving, but consuming foods that don’t taste good to us is a real challenge. Just when we need that food the most, tasteless food could be tough to swallow – literally and figuratively.
Make sure that the food you put into long-term storage includes top-quality ingredients. Think of the recipes that have proven to be your family’s favorites through the years, and focus on them.
THE IMPORTANCE OF NUTRITION
Everybody knows it’s important to eat food that’s good for you. Well, that’s going to become even more important after the stuff hits the fan. Being able to perform at peak capacity under pressure will be essential when we’re dealing with a crisis, and eating healthy food will go a long toward accomplishing that goal.
Be certain that your survival food is jam-packed with nutritional value, preferably food that takes 100 percent non-GMO fruits and vegetables as
its starting point and ideally food that is grown, harvested and made from scratch here in America.
THE IMPORTANCE OF VARIETY
Have you ever noticed that many foods taste great if you haven’t had them for a while, but not quite as good if you ate them recently and definitely not as good if you ate them yesterday? Our taste buds – not to mention our minds – react differently to foods based on how long it’s been since we’ve eaten them.
Variety in survival food is extremely important… for taste, for nutritional value and for the psychological effect. Make sure you stockpile a nice variety of food for breakfast, lunch and dinner, not to mention snacks and desserts. These foods might include oatmeal, powdered milk, soups, stews, rice, pastas, potatoes, and plenty of fruits and vegetables.
THE IMPORTANCE OF PACKAGING
Another key factor to consider with long-term food storage is packaging. There’s not much point in stockpiling survival food if your food isn’t going to survive. It needs to stay good for a long time.
It’s vital to keep air and moisture out and to have a durable package that can take a few bumps over the years without bursting. The best way to ensure that result is to use space-age Mylar packaging that gets placed inside airtight containers, so look for sealed Mylar pouches with less than 2 percent oxygen content.
Mylar is what NASA uses in spacesuits to protect astronauts from solar-thermal radiation. So, you know your food will be protected against all the elements Mother Nature could throw at it. This barrier against air, moisture and light – the three things that will destroy food over time – is possible even with re-sealable pouches.
THE IMPORTANCE OF SIMPLICITY
Now, none of that time-consuming packaging process makes any sense if it doesn’t contain great-tasting, nutritious food capable of lasting a long time and that is simple for you to prepare. A majority of your stockpiled survival food should require only boiling water, simmering and serving.
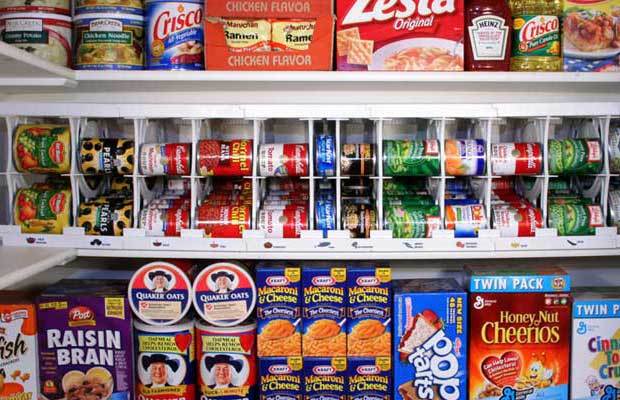
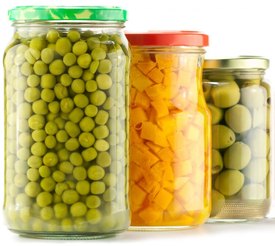
WHAT ABOUT CANNED FOOD?
 Some survival websites will tell you that canned food is very good for long-term storage, while others will tell you it’s not. Although it can have some drawbacks – weight and portability, for example – canned food is probably better than many people think… especially if you’re hunkered down and don’t have to lug it around.
While you would not want to live exclusively on canned foods, they have their place, especially when one is on a tight budget. Many folks are living paycheck to paycheck during these rough economic times. They barely have enough money to feed themselves and their families, let alone stock up on foods that can sometimes be expensive.
As a more economical option for part of your emergency food supply, put together a stockpile of canned foods. Many of the same foods that people eat on a regular basis are available in canned form, including vegetables, soups, meats, fish, stews, beans, pasta and many more. Canned foods can be nutritious and rich in protein, which people will need for keeping up their strength when they’re dealing with a crisis.
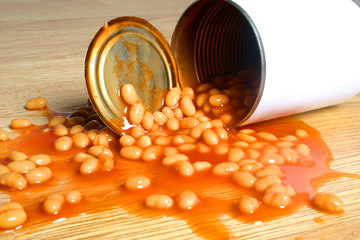
Of course, there is the issue of shelf life when it comes to canned food. Cans also take up a lot of space, and they are heavy. If you have to grab your emergency food supply quickly and head out the door, cans are not your ideal choice. In addition, epoxy resins containing Bisphenol A (BPA) are frequently used as coatings on the insides of cans, which has raised some health concerns. And while it’s extremely rare, some people have contracted botulism from canned food.
But below are seven reasons why you might want to consider having at least some canned food in your survival stash:
1. Price. When you purchase items in bulk, you can save up to 75 percent by acquiring most canned foods rather than freeze-dried or dehydrated foods. Even if you’re not able to buy in bulk, you will still save money with canned foods.
2. Long Lasting. Many canned foods have a shelf life of between one and several years. You should still rotate your supply occasionally and eat the food if the expiration date is getting close, but there’s peace of mind knowing that most canned foods last a long time.
3. Variety. People will eat the same thing over and over again if they’re hungry enough, but everyone appreciates having choices. You can acquire a wide variety of canned foods that should keep pretty much everybody in the family happy for a while.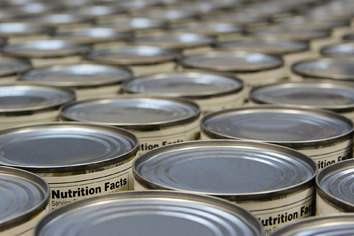
4. Calories. The last thing you should be worrying about in a survival situation is weight watching. So what if some canned foods are high in calories? Focus on what will be important in that situation, not on how you’re thinking right now. You’re going to need those extra calories when you’re in survival mode.
5. Water. There’s very little water in freeze-dried and dehydrated foods (although there is usually a small amount), but most canned foods contain the water that will make preparation easier. Yes, that also makes them heavier, but that shouldn’t matter if you’re able to stay put to ride out a crisis situation.
6. Familiarity. Most families normally eat foods such as chicken, beef, ham, fish, vegetables, stews, beans and pasta, all of which are available in canned form, plus many more. In a time of crisis, familiarity will go a long way to “normalizing” what you and your fellow family members are going through.
7. Safe Storage. Bugs and rodents can sometimes infiltrate boxes and bags, but seldom do they break through a can.
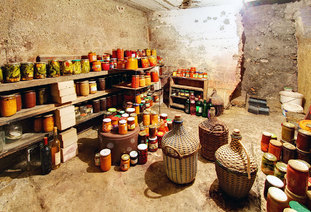
MULTIPLE LOCATIONS
Regardless what kind of food you stockpile and how you store it, do whatever you can to keep survival food (and other essentials) in more than one location. Those who have gathered large amounts of bottled water, canned food, toiletries and a host of can openers, flashlights, batteries, radios, blankets, clothing, first-aid kits and weapons need to keep a portion of those items in multiple locations.
A home is a great place to stockpile food, and that’s where many people keep their largest supplies because that’s where they and their families are most likely to be when the stuff hits the fan. And even if they’re not home at that exact moment, they will probably be in a position to return there shortly.
Homes are not only where most people keep the majority of their emergency supplies, but also where they’ve spent time and money to secure their belongings. If a breakdown in society occurs following a disaster, they want to be as prepared as possible to protect their families and possessions.
But what if their homes are destroyed or severely damaged by whatever crisis occurs? If that’s the only place where we have our emergency goods including food stockpiled – and we either can’t get to them or they’ve been destroyed by the disaster – we will have wasted a huge amount of time and money preparing for the exact scenario in which we find ourselves.
It is absolutely essential that you keep supplies in multiple locations. If you have a year’s supply of goods at home, keep six months’ worth in at least one other place. If you have six months’ worth of goods at home, store at least three months’ worth at a secondary location.
Now the question becomes, exactly where should your second and perhaps third locations be? There are several important factors to consider. For one, these other locations need to be close enough to get to, yet far enough away that they’re unlikely to be affected by the same disaster that just did a number on your home.
Just as important, these locations have to offer the same features that your home does – a cool, dry place where food and water won’t be negatively affected by sunlight, moisture and extreme temperatures.
Of course, it’s up to you to decide where those second and possibly third locations will be, but among the possibilities are a storage unit that you can rent, a root cellar or storage bunker on your property but away from your house, inside a separate building that you own in town, within a building that a trusted friend owns, or buried in a remote area where only you would think to look.
Finally, as all good preppers know, don’t advertise the fact that you have stockpiled food and water in your home and at other locations. People
will remember that, and you could have some unwelcome visitors following a disaster.

INCLUDE COMFORT FOODS IN YOUR SUPPLY
The word “comfort” sure is comforting, isn’t it? When you think of that word, you might imagine lying in a hammock on a warm summer day, or relaxing on a porch with a beverage on a pleasant evening, or sitting by the fireplace with a cup of coffee when it’s cold outside.
Yes, it’s important to keep your body healthy by eating nutritious food that will provide you with the energy you need. That will be especially true during a crisis when you might be on the move and when your stress level will be higher.
But giving your family members and yourself an emotional lift once in a while with some foods you and they love will do wonders for everyone’s state of mind. And you can’t underestimate the value of keeping attitudes upbeat at a time when depression could easily set in.
So, what is meant by comfort foods? Anything that goes down easy, tastes great, is easy to prepare and reminds you of a time when things were better. Are most of them “healthy” and “natural?” Probably not, although some are. Some are probably high in calories and carbohydrates, and some include a little too much sugar.
But if a vast majority of the foods you are consuming are nutritious, you can afford to eat a snack once in a while that may be better for your attitude than it is for your cholesterol level.
If you asked 15 different people to list their top 15 comfort foods, you’d probably get 15 different lists. But there would certainly be some overlap. Here’s one list that comes to mind.
Hard candies. Some people’s favorites are caramel and butterscotch, but you might prefer cherry, root beer, butter rum or other flavors.
Chocolate pudding. This might be the universal kid-favorite comfort food, but adults love it, too.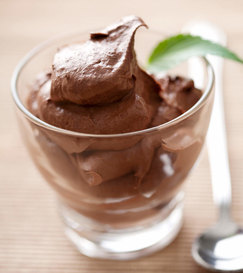
Popcorn. You don’t have to be watching a movie to enjoy it, but it’s difficult to watch a movie without it.
Pizza. Are you kidding? Few people don’t like pizza, despite the great debate about which is better – thin crust or deep dish.
Mac and cheese. Another item that few kids will turn down. Many children love it when mom adds hot dog slices to their mac and cheese plate.
Candy bars. Yes, there’s too much sugar. But you don’t have to live off of them. But once in a while, a Three Musketeers, Snickers or Milky Way really hits the spot.
Peanut butter. Most people use this as a spread, but have you ever put a spoonful in your mouth and just savored it?
Hot chocolate. There should be a federal law requiring parents to serve this when their kids come in from playing in the snow.
Honey-coated banana chips. Those who’ve never tried them before rave about them after finally tasting them.
Freeze-dried yogurt bites. Ditto.
Granola bars. These are almost too healthy to count as comfort foods, but they’re included because they taste great and are so easy to open and pop in your mouth.
Trail mix. Dried fruits and nuts are tasty, and many enjoy the kind of trail mix that cheats by including M&Ms and chocolate chips.
Coffee or tea. For some folks, coffee is not a comfort food; it’s an absolute necessity. For others, it could be a pleasant reminder of more normal times.
Hostess Twinkies and Cupcakes. A nutritionist just rolled over in her grave, but as long as you don’t fill an entire bug-out bag with them, you’re probably OK.
WHAT ABOUT PET FOOD STORAGE?
Regardless of whether a disaster causes us and our families to hunker down or bug out, our pets are going to stay with us and receive as much care as we are capable of providing them. These furry creatures are part of the family and are treated that way.
Now, you might keep much of your family’s emergency food supply in space-age Mylar bags, which is a great idea because you may want that food to last a very long time. But most of your animals are probably not going to live another 25 years, crisis or no.

THE BAGS ARE LOADED
There’s good news for you. The bags in which your pets’ dry food are sold are perfectly capable of keeping that food fresh for a couple of years. The only thing to be concerned about here is making sure there are no rips or tears in the bags before you purchase them.
But just because you don’t need to remove your pets’ food from those bags and place it in Mylar bags doesn’t mean you can just toss the bags into the crawlspace and forget about them.
Give a mouse or another rodent access to a bag made of paper and he won’t need long to scratch his way in. Unless your goal is to keep mice happy and healthy following a crisis, this is not the way to go.
USE AIRTIGHT CONTAINERS
You need to pack your pets’ dry food bags in airtight plastic containers then place those containers in a cool, dark place, away from sunlight. And once you open a bag, the oxidation process will start, so make sure to use all of its contents within six months at the most.
Also, you need to rotate this pet food periodically. If the expiration dates on the bags are difficult to read, write the date that you placed it in storage on the bag with a black Sharpie. Then use the oldest food each time, assuming it has not expired.
One note to consider here. If you feed your pets “natural” dry food, you may be giving them something that is healthier for them than “regular” pet food. But due to its lack of preservatives, natural pet food will not last as long.
CONSIDER CANS
Many people prefer dry pet food to canned food, but canned food does have the advantage of lasting longer… sometimes up to five years. The storage principle is the same here. Keep it in a cool, dry place. Although cans are much more difficult to infiltrate than bags, you should still keep them in an airtight container.
FREEZE-DRIED OPTION
Another option is freeze-dried pet food. Assuming nearly all of the moisture has been removed, it should stay good for a number of years. But the plastic packages it normally comes in are not meant for long-term storage, so transfer the food to Mylar bags and then store them in airtight containers. Toss an oxygen absorber into the container while you’re at it.
HOMEMADE NEEDS HOMEWORK
For you DIYers who make your own pet food, you’re probably doing your pets a favor by feeding them a diet that does not contain additives and preservatives. But as with store-bought “natural” dog food, you really need to do your homework before canning that food in order to figure out how long it will stay good.
CONCLUSION
Whether you build your own food stockpile or purchase a ready-made solution, the bottom line is you actually have to do it, not just talk about it. And when you do, make sure it’s stored in a manner that will ensure its value and longevity. Then and only then can you rest easy, knowing you’ve done what you could to prepare for whatever comes your way.
Preparing for an uncertain future means many things to many different people.
To some it’s about storing bottled water and other essential items, while to others it’s about learning how to

 Add the netting
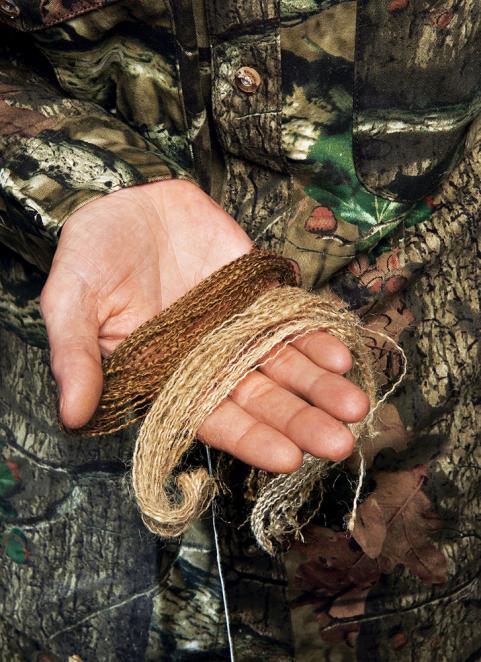 Ready the Burlap
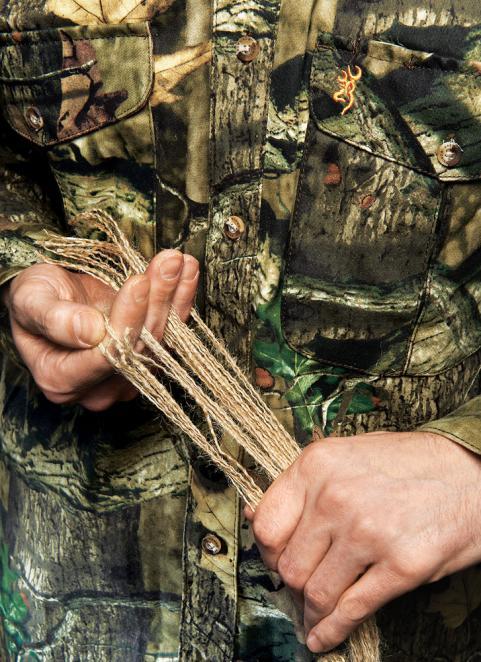 Separate the strands