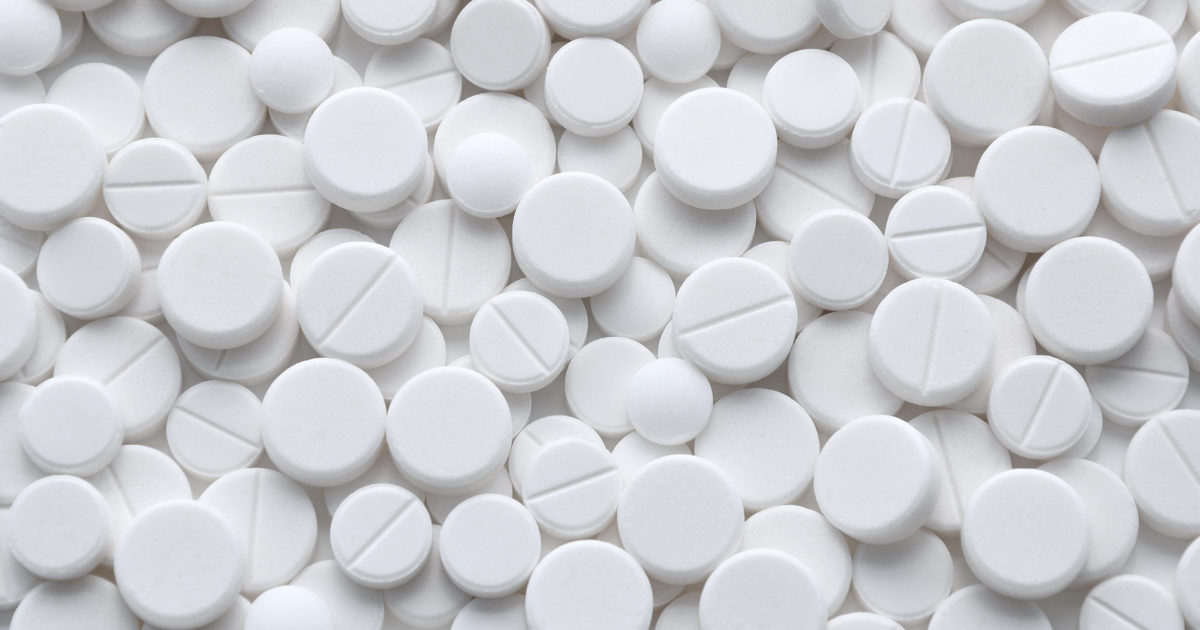
HomePosts Tagged "homesteading" (Page 3)

There’s nothing aspirin can’t solve. Headache? Take an aspirin. Fever? Take an aspirin. For everything else, there’s MasterCard. Joke aside, this little pharmacological jewel is not only a great remedy for all sorts of pains and pangs but also a great helper around the house. Last I heard, some people use common aspirin to make pot plants stay green for a long amount of time.

And, quite recently, I’ve discovered that this wonder pill can really do amazing thing around the veggie garden. Not only that, but it also works on life stock (my father-in-law uses aspirin to treat whooping cough in cows and sheet).

Anyway, getting back to the subject at hand, aspirin’s really great for your veggie and flower gardens. Wouldn’t have believed that the same thing used to cure anything from fevers to hangovers could do them plants so much good. So, after getting some kickass results with my cabbage patch, I thought that the most sensible thing to do would be to share some of the reasons why I’ve decided to use the stuff in the first place.

So, without further ado, here are 4 reasons why you should stockpile and use aspirin in your veggie garden.
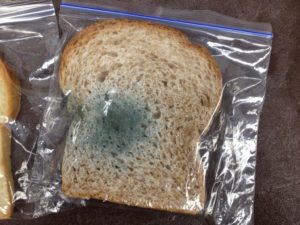
  1. No more fungus

No, I was talking about foot or nail fungus, but about that greenish stuff that chokes plants and makes gardeners cry. I’ve literally tried every damned anti-fungal solution on the market, but nothing seemed to work. That’s when a good friend of mine, who’s also a pharmacist, told me that I should add one or two aspirin tablets to the watering can. Apparently, salicylic acid is fungi’s number one enemy (has something to do with how the acid disrupts cells inside the fungal growth).

Anywho, if you want to get rid of all the fungus from your veggie garden, use aspirin in conjunction with water. Do keep in mind that the results are not instantaneous – in my case, I had to wait around two and a half weeks to see the results.

  1. Cut flowers will last even longer

I have to admit that I have a thing for freshly-picked flowers. Ever since I can remember, our family always had at least one vase with pretty flowers around the house – mom likes roses, just like my grandma. Still, the only trouble with cut flowers is that whatever you do, they will eventually wilt and day. And this happens faster than most of us realize.

Even that Valentine’s Day bouquet doesn’t last longer that one, maybe two days, provided that you don’t drown it. I read somewhere that flower dealers (yes, I know exactly how it sounds), use a sugar and salt combo to prevent wildflowers from wilting too fast.

I think that’s a load of crap – I’ve tried on many different types of flowers: roses, orchids, tulips, lilies. It doesn’t work. And no, it’s not about balancing the ingredients. Sure, among other things plants take from the soil is salt and glucose. But they also need plenty of other stuff to survive and thrive.

In searching for a better alternative, I tried adding a tablet of aspirin to a vase halfway filled with water. This time, my flowers of choice were Carson roses.  One week later, lo and behold, the roses were still clinging to life, more alive and greener and red than ever before.

  1. More veggies in the garden

In my opinion, starting your own garden is a gamble – you’ll never know what that land will yield or if anything will grow at all. Yes, I know that there are some veggies like potatoes or onions that can be grown anywhere, but this is not always the case.

After harvesting my very first crop, I’ve discovered, much to my dissatisfaction, that I ended up with a basket filled to the brim with nice and round onions, and another with some things that looked like Area 51 experiments. However, the thing that puzzled me the most is that the crops were two weeks late, although I followed the instructions to the letter.

The main issue was, of course, the soil. It needed a little bit of help to yield a better crop. After doing a little bit of online research, I’ve discovered that a surefire way to turn any kind of soil into a veggie-making mean machine was to add some aspirin. So, if you’re having the same problems, try this nifty little trick: dissolve four aspirin tablets in approximately four gallons of water.

Use this mixture to water your plants daily for at least two weeks. It may strike you as a little odd, but apparently, aspirin has a way of encouraging plant growth better than any chemical or organic fertilizer. According to the big and scary book of science, salicylic acids stimulate the soil to generate more vitamin C. And, wouldn’t you know it, even plants like a vitamin C infusion, not only human bones.

  1. Makes for stronger roots

Roots are everything to plants – strong and long one means that the plant will go to get all moisture and nutrients it needs in order to survive and thrive. Unfortunately, with all the chemicals used to stimulate plant growth, roots have become brittle, weak, and unable to properly feed the plant. And that’s bad news for you if decided to ditch supermarket veggies.

Apart from using only organic stuff, you can try and give those roots a little nudge. Yup, you’ve guessed it – aspirin is that swift kick in the keister each plant needs to develop stronger roots. Here’s what you will need to do. Head to the drug store and get some uncoated aspirin (the variety that doesn’t offer gastric protection). Before planting the seeds, dissolve one tablet in one gallon of water and pour the mixture into the hole. Allow the soil to absorb the mix. After that, you can plant whatever your heart desires.

So, what are your thoughts on using aspirin in the garden? Hit the comments section and let me know.

There’s nothing aspirin can’t solve. Headache? Take an aspirin. Fever? Take an aspirin. For everything else, there’s aspirin.

During the last couple of days I came to realize that I’m kind of hooked on technology – if I want to search for anything like a recipe or the answer to any kind of question, I usually end up using my smartphone or laptop.

Sure, there’s nothing wrong about taking full advantage of modern tech. I mean, without my PC and Internet I wouldn’t be able to share my thoughts with you people. Still, the idea of being surrounded by too much tech should be a reason for concern considering that it takes one blackout to witness firsthand what life B.E. (before electricity) felt like.

In one of my articles (can’t remember exactly which one), I talked about how awesome it is to have powerless tools around the house. Of course, you can always use a manual food processor when the power’s out or a manual drill over an electric one, but some things just cannot be replaced. However upsetting this though may be, we kind of need out smartphones for a lot of things, not just taking pictures or playing Candy Crush while riding the subway.

Okay, so we established that mobile tech is one of those things that we can’t do without. The question at hand here is what in the Hell are we going to do when there are a power outage and our phone’s close to dying? In a previous article, I’ve shown you a clever way of charging your phone using a 9V battery and a car charger. That is, indeed, a neat trick, but hardly the only way to juice up your phone without using the outlet.

Well, after doing a bit of research, I’ve stumbled upon more flaky ways to recharge that smartphone of yours. Think the 9V battery hack was weird? Get of a load of these.

Harnessing the power of…cranks!

A hand-cranked flashlight is, without a doubt, one of the most useful items to be had in case shit hits the fan. Still, a flashlight is not enough. In general, those gadgets come with all sort of wicked options: AM\FM radio, music player, photovoltaic cells, USB ports, all of them sucking up that precious juice generated by the owner who has nothing better to do than to spin that lever.

Yes, I know that this might come off as a no-brainer, but many who own a hand-cranked gizmo overlook this option for some reason.

So, is the power out? Not a problem if you’re phone on the brink of death. Just plug your USB cable into your hand-cranked gizmo and start, well, cranking. It’s possible to use such a device to fully charge your phone’s battery, but I don’t see how you’ll be able to reach 50 percent without your arms going numb.

There’s another trick you can trick to boost the efficiency of your hand-cranked device. As many of these gizmos pack solar cells and capacitors, it would be wise to leave it in the sun before attempting to use the crank. Sure, it won’t fully charge your phone, but at least it will spare you a couple of hours of cranking.

Hack your landlines!

If prepping was a patient with OCD, I would say that he had a thing for landlines. Don’t get me wrong; landlines are a great way of staying in contact with the outside in case of a natural or man-made disaster. In case of a power outage, landlines will still have some juice inside. Why not take advantage of this?

Here’s a clever trick of how to get some of those amps inside your dying phone. Keep in mind that this project requires a bit of tinkering. However, when you’re done, that phone box of yours will double up as an emergency phone charger. Now, for this project you will need:

  • Phone cord.
  • USB cable.
  • 5V voltage regulator. There are usually 52V inside that phone box, so you will need this regulator in order to make the outlet compatible with your smartphone’s battery. Otherwise, you’ll end up frying your phone. Voltage regulator looks, more or less, like TV or computer chips, only a lot bigger. They have three prongs for input, output, and grounding. You can probably find them at your local hardware store, in the electronics section (the one you need is labeled ‘7805’).
  • Knife.
  • Soldering iron.
  • Electrical tape (optional).


Here’s what to do in order to hack your phone box

Step 1. Start by exposing the cables of your phone cord. Leave a plug on the other end, because that one will go in the phone box. There should be two wires: red one (this will be your input) and a green one (grounding).

Step 2. Next, expose the wires of your USB cable using the knife. You’ll see four cables: red, blue, green, and black.

Step 3. Put the voltage regulator on your work table. To ensure that you solder the wires to the correct prongs, flip the chip (the ‘7805’ should be facing you).

Step 4.  Solder the phone cord’s red wire to the first prong (that’s the left one).

Step 5. Solder the phone cord’s green wire to the regulator’s grounding prong (that’s the middle one). You’re doing great! Halfway there.

Step 6. Solder the USB cable’s black wire to the regulator’s middle prong. Yes, you can solder it on top of the phone cord’s green wire.

Step 7. Solder the USB cable’s red wire to the regulator’s output prong (that would be the one on your right).

(Optional) Use some electrical tape to cover the soldering points on the regular.

Step 8. Plug the phone cord into the box and the USB cable in your smartphone. Congrats! You now have an emergency phone charger outlet.

When life gives you lemons, make electricity.

Lemonade is not the only thing that you can make out of lemons. In case of a major emergency – say you want to send out of short message or call the authorities, it may be possible to reboot your phone using fruit-generated electricity.

Yes, I know exactly how it sounds, but it works. Don’t expect to get a full charge on a single lemon (you’ll need at least 1,000 of them to get your phone’s power cell to 100 percent). Anyway, here’s how to boot up your phone by harnessing the power of electrochemical reaction. Start by gathering your materials. For this project you will need:

  • Zinc or galvanized nails.
  • Copper nails (you can replace them with coin or paper clips).
  • Copper wires.
  • Mini-USB cable.
  • Six lemons.

Here’s how to piece together your lemony phone charger

Step 1. Expose the USB cable’s wires using a knife. Leave the mini-USB plug on the other end. You should see a red and a black wire with orange strips.

Step 2. Arrange your lemons in a circle.

Step 3. Insert zinc nail on the left side of the lemon.

Step 4. Insert a copper nail\paper clip\coin on the right side of the lemon.

Step 5. Connect or solder the USB cable’s red wire to the zinc nail inserted in the lemon on the left side.

Step 6. Connect or solder the USB cable’s black wire with orange strips to the zinc nail inserted in the lemon on the right side.

Step 7. Connect or solder the copper wire of the left lemon with zinc nail inserted in the lemon behind it. Repeat this operation to close the circuit.

Step 8. Plug the mini-USB into your phone and wait for the magic to happen.

(Advice) If you don’t have lemons around the house, you can try with oranges or other acidic fruits.

Onions make me cry, but at least I have a full battery

Because I’m madly in love with these strange science projects, I found another way to charge my phone using stuff found in the fridge. In this case, the one giving away its life so your phone might live to tell the tale is the onion. Don’t cry for me, Duracell. As in the case of the lemon charger, the onion one relies on electrochemistry. Here’s what you’ll need to whip up an onion-based electricity generator:

  • One onion (the bigger, the better).
  • Any kind of beverage containing electrolytes (I used a bottle of Gatorade for this project, but you can use anything you like or have around the house).
  • One large bowl.
  • One phone charger.

Sounds delightful, doesn’t it? Here’s how to make your first onion charger.

Step 1. Using a Philips screwdriver or an awl, poke two holes on either side of the onion.

Step 2. Fill your bowl with Gatorade or your favorite electrolytic beverage.

Step 3. Place the onion in the bowl and allow it to soak for at least 15 minutes. The holes you’ve just poked will allow the Gatorade to get inside that onion fast.

Step 4. Once the time has passed, take the onion out of the bowl and place it on a clean towel.

Step 5. Use the towel to dry your onion.

Step 6. Stick the USB end of your charging cable into the onion. Doesn’t matter where you insert it.

Step 7. Connect the mini-USB end to your phone and let the magic happen. If you’re still not convinced, drain your battery completely and connect to the Gatorade-soaked onion to see what happens.

Wrap Up

I feel compelled to stress out once more that these should not be, under any circumstances, considered permanent solutions. The only thing that comes close to an outlet is one of those portable batteries.  If you don’t have one, you should consider making a small investment. Check out your local auto stores for those jumper packs – great for starting your car when the battery’s dead, but can also help you charge other devices such as laptops, smartphones, radios or tablets.

I strongly advise you to exercise extra caution when crafting those onion or lemon-based generators. Technically speaking, they should work. However, don’t be surprised if your phone suddenly goes up in flames. If you don’t have other means of charging your smartphone, better get a meter in there to see if the voltage is fine.

Another thing to keep in mind is that phone box chargers are very tricky. Well, you don’t need a Ph.D. in astrophysics to solder a couple of wires, but it is rather difficult to get ahold of that voltage regulator.

Sure, there are plenty of websites that sell them by the dozen, yet in case of a blackout, this is not really a viable option. If you can’t find any at your local store, it may be possible to salvage one or two working ones from an old VCR or a tape recorder. I wouldn’t go tinkering around TVs because they use entirely different regulators. You can also try your luck with an electrical-powered short-wave radio.

That’s about it on alternative ways to juice up your smartphones during a blackout. What’s your take on this? Hit the comments section and let me know.


On a different note, here’s some other self-sufficiency and preparedness solutions recommended for you:

The Lost Ways (The vital self-sufficiency lessons our great grand-fathers left us)
Survival MD (Knowledge to survive any medical crisis situation)
Backyard Liberty (Liberal’s hidden agenda: more than just your guns…)
Alive After the Fall (Build yourself the only unlimited water source you’ll ever need)
The Lost ways II (4 Important Forgotten Skills used by our Ancestors that can help you in any crisis)
The Patriot Privacy Kit (Secure your privacy in just 10 simple steps)

Being surrounded by too much tech should be a reason for concern considering that it takes one blackout to witness firsthand what life B.E. (before electricity) felt like.

There’s no better nor frustrating way of knowing that it’s six in the A.M and you need to go to work then having to waddle all the way to the bathroom in order to massage those gums.

Have you seen The Green Mile? No matter how hard I try, I still end up crying like a toddler at that scene where Paul and the others escort Coffey to the electric chair. Well, that’s how all of my mornings fell, more or less – dead man walking the walk just to have his brain zapped by yet another glorious 9-to-5 bull session.

Anyway, rant aside, during one of the tedious morns, while shining my chicklets, a thought crossed my mind – is there any other way of using toothpaste besides, well, brushing your teeth?

As always, yours faithfully hoped on the computer and did a little bit of snooping. Of course, as you’re probably painfully aware by now, not everything you find on the Internet should be taken for granted (there was this guy who wrote this ginormous article on how common toothpaste brands such as Colgate or Lacalut can magically heal anything from brain cancer to athlete’s food).

So, after weighing in the facts and laughing my can off in the process, I’ve discovered a couple of nifty and very real ways of using toothpaste outside the bathroom.

Because talk’s cheap and so is the author, let’s get down to business. Here are 10 ingenious ways you can use toothpaste in any SHTF situation.

Acne buster

Do you think that only pre-pubescent guys and girls have to deal with acne? Dead wrong! Acne is a long-term skin condition. Very long-termed, I might add, and this is not coming from a guy who wrestled with acne until his late 30s. Anyway, besides taking your prescription meds (which is a must), you can try rubbing a bit of toothpaste on some of the more problematic areas.

You don’t need much; just a squirt the size of a pea. Gently massage the area, rinse with cold water, and you’re all set to go. It won’t make acne vanish overnight but, in a couple of weeks, you’ll see fewer whiteheads and pimples on your face. This trick is also great for people with oily skin – rub a bit of toothpaste, and your skin will become smoother than a baby’s bottom.

Getting rid of mosquito bites

If it’s one thing I hate more than doing taxes, it’s mosquitos. Summer comes, those dreaded seem to pop out of the ground to spread their reign of terror. Sure, a can of bug repellant will do the trick, but I usually find myself covered in tens of mosquito bites, long before I get around to using the bug spray. A mosquito bite shouldn’t be a reason for concern (unless you live near the Nile area), but there’s nothing you can do about the itching.

Probably most of you end up with bites ten times their original sizes because you can’t simply stop scratching yourself. Well, after trying everything from soothing sprays to medicinal alcohol, I’ve discovered that you can get rid of the itching if put a pea-sized amount of toothpaste on the bite area. I would go with the peppermint variety because it has that cool feeling to it. Works just fine on other types of insect bites.

Treat burns

A great way to relieve pain and to prevent blistering is by putting a little bit of toothpaste on the scorch mark. Before applying sterile gauze, submerge the burn area in cold water and apply a tiny amount of toothpaste. Since the stuff has powerful antibacterial properties, it will keep the nasty germs at bay and, in addition, create a waterproof barrier.

What can I say? It’s a win-win situation. Word of caution, though – this works for minor burns (a drop of hot oil or wax on hand, applying too much pressure on cigarette butt). For more severe burns, ditch the toothpaste, and get your can to the hospital.

Plugging empty nail holes

For me and my family, spring is more about redecorating than actually doing any cleaning. So, old pictures end up in the attic, and new ones take their place. However, there are instances when the pic we choose for a room really doesn’t match the décor. The result – we end up with one more empty spot and a nail sticking out of the wall.

Most times, I let them nails alone because pulling them would not solve anything except ending up another hole in the wall. If you have the same problem, try this simple hack – get a little bit of toothpaste and plug the hole. Use a hair dryer or something to harden up the paste. You can leave it like this if your rooms painted in hospital-white or take a brush an apply a coat of paint. Easy-peasy!

Poison Ivy treatment

Because mosquito bites are the least of your worries when you’re out camping or hiking. Two words: poison ivy. Apart from the fact that you feel that your entire skin’s on fire or something, not even the best cream will make the itching go away. Now, if you want to skip the step whereupon you’re forced to wear gloves or something as not to upset those pustules, try applying a little bit of toothpaste on the sting area. Of course, the skin sores won’t go away overnight, but you would feel less itchy.

Defog your goggles and windshield

Having to wear prescription glasses since adolescence sort of made me come up with cookie solutions to the cleaning and defogging issues. Back in my days, lenses were made from regular glass. Sure, they were heavy as shit, but at least there was no fogging. Fast-forwarding a bit, nowadays prescriptions are lighter, cheaper, more resilient to scratches, but they do tend to fog out more frequently compared to their glassy counterparts.

Anyway, if you want to prevent fogging, which becomes particularly dangerous when you’re behind the wheel, rub a little toothpaste on the lenses and rinse before leaving the house. I wouldn’t recommend doing this more than a couple of times per month since excessive use of water, and other stuff can wipe away the anti-glare and blue light coatings.

No more bruising

Bruising’s the inevitable denouement of any kind of sudden pressure exerted on the tissues. Remember when we were kids, and we used to come home covered in scrapes and bruises after a whole day of biking?

Well, times might have changed, but habits have not. I for one can’t let the week go by without a brownish patch on my arms and legs. A quick fix for bruises – making a thick paste out of water and toothpaste and applying it to the future bruise area.

The ingredients inside the toothpaste will restore circulation, preventing major discolorations and cutting down on recovery time.

Word of caution though – if you see more of those bruises on your body and know for a fact that you haven’t hit yourself within the last couple of hours, you should ditch the toothpaste remedy and go see a doctor. It may be the beginning of a simple iron deficiency or something life-threatening.

Makes for stronger nails

Brittle nails can be solved by dunking your hands in a bowl of water mixed with toothpaste. Yes, I know it sounds a little bit far-fetched, but do keep in mind that nail brittleness has all sorts of causes, one of them being germs. Since toothpaste contains quite a bit of that stuff, it will eliminate most bacteria, leaving your nails stronger, longer and shinier (was kidding about the longer part).

If you’re that kind of person whose nails tend to exfoliate no matter what you do, I would advise taking some calcium supplements or eating calcium-rich foods. Of course, you should also use this at least twice a week.

Revive your CD and DVD collection

Growing up in the era of computers and laptops, I managed to amass a collection of CDs, DVDs, Blue-Rays, and, yes, even floppy disks. Although most youngers don’t even know what a floppy was or how hard it was to store docs and games on them, from my experience I found them to be more resilient compared to optical storage devices such as CDs or DVDs.

Not even keeping them inside their original cases doesn’t seem to safeguard them from scratches. Sure, losing a CD or two is no big deal, considering that most of them are probably filled with all kind of crap we don’t need.

Still, it becomes truly tragic when we lose stuff like those CDs\DVDs where we stored family vacation photos or the holy wedding DVD (guilty!). It’s a gamble, but there may be a way to access that CD or DVD long enough to copy the data to your laptop or computer.

Take a closer look on the back side of the recording device and notice where the scratches are. Put a little bit of toothpaste on that area and wipe thoroughly with a clean cloth. As I’ve said, it may or may not work, but what have you got to lose?

Remove ink and tobacco stains from hands

Since everybody’s now bonkers about working on the computer, the ink has become less and less popular. Still, for those of you for who the fountain pen still means anything, ink spots from the fingers can be very difficult to remove.

A quick workaround would be to run some toothpaste on the stain and rinse with clean water. Works for clothes too. As for tobacco stains, you will need to prepare a mixture consisting of water, toothpaste, and baking soda. Stir and use a toothbrush to put the stuff on your fingers. Give it a good scrub and, voila – no more stains.

That about wraps it up on my cookie 10 alternative uses of toothpaste. If you were still in doubts about toothpaste should be stockpiled or not, here’s the answer to your question. As always, if you feel that I’ve missed anything, don’t be shy and hit the comment section. Would also love to hear about more how you people use toothpaste in the field.

Before you go, you may also like:

This is more than just about your guns…
How to survive any medical crisis situation with ease
10 Easy Steps to Secure your privacy
Secret Military Solution For Power Independence

DIY Unlimited water source
Why a food reserve is way better than the Federal Reserve
Lost Skills of our Ancestors that still work today

A thought crossed my mind – is there any other way of using toothpaste besides, well, brushing your teeth? I found not one, but ten.

Diatomaceous Earth – the best thing to have around the house for some, and a thing loosely associated with alchemy, black magic or natural healing to others. As for yours truly, D.E. is probably the best eye-opener I had since discovered that bread could be made from anything, including wild herb-like dandelions. In today’s article, I’m gonna talk about how my life has changed after discovering this off-white powder.

Now, for those of you who don’t know or simply don’t care D.E is a powdery substance made from fossilized diatoms, which are microscopical algae-like organisms. This stuff’s been around since the dawn of the 19th century when it was discovered by mistake by a German peasant who was trying to sink a well near his home.

Ever since then, D.E. has been studied and used for various purposes. In fact, Alfred Nobel aka the Dynamite Dad had been experimenting with diatoms for the purpose of stabilizing nitroglycerin. D.E.’s also used in the beauty industry for manufacturing toothpaste. Farmers also used a refined form of D.E to prevent caulking and to keep pests bay.

Anyway, my interest in D.E. began when I was doing a bit of research on ways to purify water in the field. A couple of clicks later, I ended up reading tons of material about D.E. being used to clean pools and that most water purification tablets are made from this stuff.

From that day forward, I have tried using diatomaceous earth for more than just water filtration. It’s true that baking soda’s the most versatile household ingredient, but that’s before I discovered D.E. Here are a couple of ways I managed to use this powdery delight around the house.

  1. Saving a shit-load of money on kitty litter

I’ve already told you that I’m the proud owner\slave of two wonderful cats, which means that I usually have to stock up on kitty litter as often as I can. The trouble is that you can’t just make two cats share a litter and you really can’t leave them uncleaned for more than two days.

Anyway, after spending literally hundreds of bucks on jumbo kitty litter bags, I stumbled upon this great way of using D.E. as a substitute for silica shards. What I do is make my own cat litter using wood shaving and sawdust, which I sprinkle with D.E. Since the stuff’s great at sucking out every bit of moisture, it entirely eliminates the smell as well as clutter.

  1. Making deodorizers

Yes, I know you can probably get rid of all the foul smells around the house using vinegar, but D.E. is much cheaper. More than that, it doesn’t leave behind that stingy odor, especially when you use it on stuff like carpets, drapes or upholstery. To make your own D.E. deodorizer, grab a canning jar, fill it with water, and dissolve one tablespoon of diatomaceous earth. Place inside the fridge and use it when necessary. It really works wonders on those garbage pails and the back of the refrigerator.

  1. Helping my chicken lay better eggs

It may sound far-fetched, but this stuff’s actually very beneficial to chickens and poultry, in general. If you want to up the nutritional value of your eggs, mix D.E. with chicken feed. They’ll taste better, look great, and have a harder shell. You can also spray some D.E. around the chicken coop to get rid of the smells and to keep away pests.

  1. Being able to make my own cosmetic products

I have to admit that being able to make my own cosmetic stuff was something I’ve been dreaming since my college days. Still, have to say that the perspective of getting caught up in that New Age BS was not my kind of gig, neither was setting up a lab in the basement. Well, after learning a bit about D.E. I’ve managed to get my hands on a couple of great recipes for stuff like toothpaste, deodorant, and facial mask (yes, I use those because my pores refuse to close).

Anyway, with a handful of D.E., a drop or two a peppermint oil, and some vegetable glycerin, you can make one Hell of a toothpaste. Apart from being a great antibacterial agent, D.E also has a scrubbing effect. If you want to add some extra kick to your toothpaste, consider putting some baking soda into the mixture. As for deodorant, you can whip up a good batch by mixing D.E with cornstarch, arrowroot powder, and coconut oil. For facial masks, just add a couple of tablespoons to a glass of water and stir until you get a thick paste. Have fun!

  1.  Removing just about any stain

In a previous article, I’ve told you a bit of how great salt is when it comes to removing stains and smudges. Well, that stuff got nothing on D.E. – this thing can get rid of any stain or dirt, no matter how stubborn it is. From experience, I’ve learned to rely on D.E., especially in dealing with oily stains. So, if the washing machine is of no help, just use a mixture of water and D.E. on the stain. Rub it in, allow it to work its magic and wash.

  1. Great for removing scale and grime from the bathroom

If my wife’s really mad at me, she doesn’t have to yell or anything. She just tells me that the bathroom could use a bit of cleaning. And nothing’s more frustrating for me than having to deal with scale and grime, especially around the bathtub. Tried every cleaning product there is. Didn’t solve anything apart from the fact of sparring me a trip to the gym that day.

Well, since D.E. is very abrasive, I figured that maybe it would help me get rid of the scale. And it did! So, if you want an efficient abrasive cleaning solution, mix two tablespoons of D.E. with some water and use a sponge to spread it around. Give it a good rubdown, and you’re good to go.

That’s if for how D.E. changed my homesteading life. What do you think about this off-white magical powder? Let me know your thoughts in the comments section.

Before you go, you may also like:

This is more than just about your guns…
How to survive any medical crisis situation with ease
10 Easy Steps to Secure your privacy
Secret Military Solution For Power Independence

DIY Unlimited water source
Why a food reserve is way better than the Federal Reserve
Lost Skills of our Ancestors that still work today

Diatomaceous Earth – the best thing to have around the house for some, and a thing loosely associated with alchemy, black magic or natural healing to others.

Everyone simply adores it and, truth be told, a meal would never be the same without it. I was, of course, referring to salt or, as I like to call it the uncrowned king of spices (that’s because salt is not actually a spice nor a condiment, but a mineral). Anyway, no matter how bad the food tastes, a pinch of salt can make all the difference in the world.

Of course, without this wonder mineral, we wouldn’t have yummy stuff like beef jerky, jerk-style chicken or the wondrous pickled meat. Come to think of it; our own body would have a hard time coping with, well, like it didn’t have enough sodium chloride. Lest not forget about the marvelous sayings this mineral inspired such as “take everything with a pinch of salt” or “being the salt of the Earth.”

Entire books and stories could be written on the topic of salt and for a darn good reason. As for the subject at hand, yes, it is true that sodium chloride can be of help in many SHTF situations, and not just for curing meat or making pickled veggies. Because I’m such a big fan of salt and salty stuff (though my doc told me I should use less) I’ve decided to write this wonderful piece on survival uses of salt.

Little Black book 2

Call it my tribute to the spice that crowns every dish, regardless if it’s a stove-cooked meal or a fancy plateau whipped up by a chef with two Michelin-stars. Now, if you thought that salt’s only useful for brining, pickling or putting taste back into food, you’re dead wrong. After doing a bit of research, I can wholeheartedly say that I’ve stepped into a whole new salt-using dimension. Don’t believe me? Check it out for yourself. Here are 12 ways salt can save your sorry can a shit hits the fan situation.

  1. Gum-massaging early in the A.M.

Fact check – no matter how hard you try or what toothpaste use, you can never get that great shade of dentist white- that’s mostly because they use stuff like hydrogen peroxide and light-accelerated bleach. Great if you want to get rid of tobacco stains or plaque, but wouldn’t be recommended it in the long-run since all teeth whitening agents are notorious for weakening the enamel.

Anyway, a very quick, easy, and all-out natural way of getting in a couple of shades of white is by using salt in combination with baking soda and your favorite toothpaste. There are many to do this, the most straightforward one being garbling a mixture of water and equal parts baking soda and salt. If you want to make your own teeth-whitening substance, take a bell-glass and add one tablespoon of salt (aim for the fine grain variety) and one tablespoon of baking soda. Put a bit of water on your toothbrush and sprinkle some of this one top. Wash, rinse, and finish off with regular toothpaste. You’re welcome!

  1. Removing clingy stains

There’s nothing more frustrating than having to toss a T-shirt back into the washing machine just because that pesky stain didn’t come off. Leave the washing machine alone! Here’s the prepper’s way of removing any kind of smudge – while the stain’s still fresh, sprinkle some salt over it. Take a paper towel, dip it in water, and start rubbing. After a couple of seconds, you’ll see that the stain is gone. Works for all kind of smudges – ketchup, blood, dirt, mayo, blueberries. If you have chunky salt, you can try throwing one inside the washing machine for extra cleaning power.

  1. Putting out a fire

Sodium chlorine is held in very high regards not just for its food-rejuvenation properties, but also for being a great fire retardant. If you get yourself lost in some neck of the woods and need to put out a fire fast, forget about sand, dirt or water. Just toss a handful of salt, and everything will be over faster than you realize (I was talking about the camping fire, of course).

  1. Making the itch go away

Stung by poison ivy? Can’t resist scratching that mosquito bite? No problem. Just rub a bit of salt on the sore spot, rinse with a bit of water, and it all goes away. By the way, salt and water can also be used for throat soreness – just garble a bit of salted water two or three times a day and you’ll be on your feet before you know it.

  1. Removing fish scales

In an SHTF situation, fishing can become your only food source. Sure, mostly anyone can reel in a fish with the right tools, but removing the scales – now that’s an art. I managed to cut myself more than a few times while attempting to scale a fish. That’s until I’ve learned this nifty trick – fill a bowl with ice-cold water and add two tablespoons of regular salt. Put the fish inside and allow it to soak overnight. When it’s cooking time, take the fish out, give it a good rinse, and peel off the scales (yes, the scales peel off like snakeskin or something).

  1. Preventing candles from dripping

At some point, probably each of you had to wait out a blackout by the light of a candle. Have no problem with using them, especially in cases that call for this sort of approach (wink-wink), but no matter what I do, I can’t seem to stop that irritating hot wax from reaching my pants. So, if you’re a candle-yes, wax-no kind of a person, you may try soaking the candles in salted water. Leave them overnight, take out, rinse, allow to dry, and that’s basically it. You will have noticed that there’s no more dripping. Awesome!

  1. Patching up plaster or sheet-rock walls

Though it’s safer to call in a pro for this kind of job, you can patch them up yourself in the meantime using water, salt, and corn starch. Do keep in mind that this neat trick works only on plaster or sheet-rock walls (wouldn’t try it on carpentry or heavy masonry). Get yourself a bucket, add some water, and equal parts salt and corn starch. Mix until it becomes pasty. Use a trowel to spread the mix over the wax and cover with a thin layer of paint. Easy-peasy!

  1. Dealing with mosquitos and other pests

And because I’ve mentioned something about mosquito stings and itches, here’s a great way to keep them at bay. Get yourself one of those spray cans and pour inside a water and salt mix. Spray yourself with this mix and around your campsite. Works for ants too. On that note, if you want to keep ants outside your tent, draw a thin salt line around the sleeping area. Will keep out ants, bugs, and even mischievous ghosts.

  1. Open wound management

Yes, I know that the last thing you’ll want to do is to put salt on a wound, especially a nasty one, but this is exactly what you will need to do order to keep infection at bay. Put that salt shaker aside, because that’s not how this thing works. Let’s backtrack a bit. Your blood serum contains sodium chloride, which is used to maintain vital organs like the liver, heart, and kidney in working order.

Docs use so-called isotonic salt solutions (sodium chloride concentration equal to that of your blood serum) to flush out wounds and, if necessary, replace lost levels. And because bacteria abhor salt, a water and salt mix is very useful in the treatment of severe wounds. Here’s what you will need to do in order to flush out an open wound in the field: grab a plastic bottle and fill it with clean water. Add a teaspoon of rock salt and shake the bottle until the salt dissolves. Put on the cap and use your survival knife to make a small hole in the middle of the cap. When you’re done removing any debris from the wound, flush it with this saline mixture before applying sterile gauze, clean cloth or anything you have on hand.

Little Black Book

  1. Removing nasty smells from shoes

If you’re just like me (thanks mom for the awesome glands!) then you know just how difficult it is to remove nasty smells from your shoes. Tried every footcare products out there – all of them are worth zilch! Do you know what removes pungent smells from your favorite blue suede shoes, apart from not wearing them in the first place? Yup, you’ve guessed it – water and salt. Here’s what you need to do. Dissolve one tablespoon of salt in half a liter of water.

Fill up a spray can with this mix. Spray the inside of your shoes and allow the water to evaporate. You can do the same with new shoes. One other advantage of using salt in footcare – it severely cuts back on blistering. Just use the same solution to spray your soles before wearing those shoes. Might be a good idea to do is if you’re planning on breaking new shoes any time soon.

  1. Whacking driveway weeds

I really lost track of all the times I had to get down on my knees to pick up those f-ing weeds that seem to sprout out of every crack in the driveway. What’s even worse is that, if you wait too long before rooting them out, those things can make a hole in the driveway. So, to prevent those weed from growing, grab a little salt from the kitchen and put some in every crack you see. You should also consider mixing up some mortar to patch up those cracks.

  1. Extend milk’s shelf life

I know that the fridge is milk’s BFF, but even this cookie refrigeration contraption can’t keep milk fresh forever. Nothing can, by the way, but there’s a clever trick that can help you extend the milk’s life by at least a couple of days – putting some salt inside the container. Yes, I know it sounds strange, but salt does have this kick-ass property of preventing milk from getting sour. Just be sure you don’t use too much. Otherwise, you’ll probably end up with something that can hardly be called palatable.

So, that’s about it about using salt in a shit hits the fan situations. I’m aware of the fact that some of tips and tricks I’ve shown can hardly be associated with disasters, natural or otherwise, but hey you don’t need a nuke or EMP to be up your neck in crap. Anyway, hope you’ve enjoyed my article on how great salt is (I can never seem to stop praising it). As always, if you feel that something’s missing from the list, be sure to hit the comments section and let me know.

Before you go, you should check out these 7 most wanted goods this month:

Book of Income (Get an extra $6,840 per year out of your Social Security benefits) [Complementary Book Inside]
Cash for Patriots (Trump’s shocking new plan to help distribute cash to American Patriots)
Cancer Curing Vaccine (U.S. Government Document Admits We’ve Had It Since 1962)
Secret “$50 Marijuana Stock Blueprint” (Turn a single $50 bill into a massive fortune)

Little Black Book (46 Ways to Collect Consistent, Work-Free Income) 
Klebsi Plague (If you were born before 1961 you are at immediate risk)
Marijuana Millionaire Playbook (Now is the time to bet big on Marijuana) [Complementary Book Inside]

Call it my tribute to the spice that crowns every dish, regardless if it’s a stove-cooked meal or a fancy plateau whipped up by a chef with two Michelin-stars.

Wait! Before closing this article, hear me out. Yes, I know it sounds utterly disgusting, but you would be surprised to discover than dandelions are, at the same time, yummy and quite healthy.

In fact, according to some researchers who have nothing better to do than to test out just how edible wild plants are, dandelions are packed with zinc, potassium, iron, and calcium. If that wasn’t enough to convince you, then get this – dandelions are the second-best source of natural beta-carotene after carrots.

Even more, research indicates that tinctures and teas made from the stems and flowers can reduce blood pressure and help patients with diabetes better manage their blood sugar.

Anyway, because I’m always on the lookout for ‘exotic’ emergency food recipe, I’ve stumbled upon this little jewel while doing a bit of research on healing plants. It’s true that dandelion tea is great for the digestive system, but when mixed with a bit of flour and baked until golden-brown and crispy, it becomes a treat worthy of a king’s feast.

Interestingly enough, although tea made from dandelion flowers is a bit on the bitter side, bread is very sweet. Don’t know if it’s because of the extra honey or the taste of baked dandelions. Anyway, here’s how to prepare a loaf of delicious dandelion bread (has quite a ring to it, don’t you think?).

Gathering the ingredients

To make dandelion bread, you will need the following:

  • One cup of freshly-picked dandelions.
  • Half a cup of honey.
  • Three tablespoons of veggie oil.
  • One egg.
  • Half a teaspoon of salt.
  • One and quarter cup of cow’s milk.
  • Two cups of regular flour.
  • Two teaspoons of baking powder.

Are you ready with the ingredients? Well, time’s a-wasting. Let’s get cooking!

How to make dandelion bread

Step 1. Go out the back and pick up some dandelions (just enough to fill a cup). Discard the roots because you’ll only need the flowers and the stems. Head to the kitchen, toss them in a strainer, and give them a good wash. Make sure that there’s no dirt left on them.

Step 2. Place your dandelions in a bowl and grab a cutting board and a sharp knife.

Step 3. Use your knife to separate the flowers from the stem. You can toss the stems into the garbage or add them to the compost pile. Your choice.

Step 4. Mince the dandelion petals. Don’t worry about getting a couple of stems in the mix.

Step 5. Pre-heat your oven. Aim for 400 degrees Fahrenheit.

Step 6. Grab a large bowl from your pantry. Add the flour and your minced dandelion flowers. Give it a good stir and add a pinch of salt. Last, add the baking soda and continue mixing.

Step 7. Get a deep plate. Add your milk, honey, oil, and egg. Use a whisk or a fork to combine the ingredients. You can add a little more honey if you like your bread sweet.

Step 8. Pour the milk, egg, honey and oil mixture over the dandelions and flour. Use a fork or your hand to incorporate all of the ingredients. If the mix feels too gooey, add a quarter cup of flour and keep mixing.

Step 9. Grab a bread pan from your pantry and put some baking parchment inside. To prevent the parchment from sticking to the pan, brush the inner part with sunflower oil before arranging the paper.

Step 10. Transfer the mix to the baking pan and use a spoon or spatula to spread the mix.

Step 11. If you like all-cereal bread, you grab a handful of sunflower seeds or your favorite mix and sprinkle some on top of the bread.

Step 12. Stick the pan inside the oven and set your timer to 15 minutes. Bear in mind that, in some cases, it may take a while longer. The bread loaf should have a golden-brown color.

Step 13. After the surface begins to change color, lower the oven’s temp to 350 degrees Fahrenheit. Close the hatch and leave it in for another 20 minutes. There’s a quick and easy way to find out if your dandelion loaf’s done. Works for any kind of pastry, by the way.

Grab a toothpick or a clean piece of wood and stick it in the thickest part of the dough. Take out the stick and look at it. If there’s dough on it, leave the loaf for another 10 to 15 minutes in the oven. Don’t forget to lower the temperature to 300 degrees Fahrenheit. If the toothpick comes out clean, it means that it’s ready.

Step 14. Take the loaf out of the oven and allow it to cool for a bit before cutting it.

Congrats! You’ve just made your first dandelion bread loaf. What I like about this recipe is how easy it is to make it. With regular bread, you would need to use yeast in order to make the dough grow. More than that, it takes a bit longer to prepare, since you need to allow the yeast to act before placing it in the oven.

Word of caution before preparing this recipe – take care when choosing your dandelions. Unripe dandelions aka those that kids pick up and blow on it to make the flowers fly are very toxic.

Only use mature flower – you can easily recognize them by their yellow tint. Giving them flowers a quick wash will get rid of most dirt and earth. However, I would recommend submerging them in cold water and leaving them to soak overnight. Give them a rinse before adding them to the flour and baking soda mix.

Dandelion bread’s very tasty and pairs off nicely with smoked salmon and Velveeta cheese. It makes for an excellent breakfast with a thin layer of butter or margarine, of course.

As for storage, I placed a couple of leftovers in a vacuum-sealed bag (be sure to check out my piece on vacuum sealers) and tossed them in the pantry. Two weeks later, the bread’s still crunchy and highly edible.

Like my kick-ass dandelion bread recipe? Hit the comments section and let me know what you think.

Dandelions are packed with zinc, potassium, iron, and calcium. If that wasn’t enough to convince you, then get this – dandelions are the second-best source of natural beta-carotene after carrots.

A best friend in need (BFIN) is a great friend indeed – especially if it can suck the air out of every bag, helping you organize the shit out of your B.O.B.

I was, of course, referring to the vacuum sealer (although that could have easily described every guy’s first-gold-digger-mistaken-for-true-love relationship), a great piece of technology that makes packing a piece of cake. Sure, many of you would come off telling me that this nifty gadget’s been around for quite a while and that I should get out more, but better late than never, as our grandparents used to say.

Indeed, I have to admit that the vacuum sealer’s been somewhat of a late-coming revelation, but that’s mostly because I had the impression that there’s nothing more than I could’ve learned about neat packing.

I was dead wrong. Anyway, I stumbled upon this gadget during one of my trips to the downtown thrift shop – paid around 15 bucks for the sealing machine and two dozen packs of sealing bags. I guess you can also order it online or find it at a hardware store or something, but if you come across one in a thrift, don’t miss out on the opportunity.

So, after packing everything that can be packed, I decided to write this piece to share with you people just how helpful such a doodad can be, especially if you have trouble organizing your stuff. And because nobody likes very long and tedious foreplay (unless there’s booze involved), here are a couple of cookie ways of how to use a vacuum sealer around the house.

  1. Creating weatherproof containers for your meds

Why waste a truckload of bucks on the weatherproof first-aid kit when you can create one using vacuum sealer bags? Thank you, Internet, for telling me this after spending 150 bucks on a heavy-duty kit from my local drug store.

Anyway, if you really want to make a medkit that can withstand anything from heavy rains to snow storms or any Kingdom Come events, grab everything you need and place them in one of these nifty bags. Be careful when sealing your items, especially when it comes to stuff that doesn’t take kindly to moisture. A great workaround would be to seal your medical supplies with a small desiccant silica gel pack.

That should get rid of any remaining moisture. Now, if you really want something hospital-grade, you can try out this nifty trick – get yourself one of those cosmetics bags (you can usually find them in any supermarket, especially around Father’s Day) or a padded Pepsi cooler. Next, take everything out of your regular first-aid kit and separate them. Put your pickup scissors in one sealable bag, sterile gauze in another, painkiller meds in the other, and so on.

Make sure that every object is sterile before placing them in the sealable bags. Vacuum the air out of each bag, place packs in your cooler or cosmetics bag and, voila, you now have a hospital-grade first-aid kit. What I like to do is leave a small gap in the upper part of the bag, in cases I need to break open the pack really fast (you should do this for stuff like gloves, gauze, and pickups). You can seal off the rest completely.

  1. Storing important documents and copies

As you know, one of the most crucial aspects of preparing a bug out bag is ensuring that you have at least one folder or something that contains copies after important items such as house deed, medical insurance, driver’s license, and whatnots. Sure, you can go ahead and buy a folder or something for your documents, but watch out for drizzles or snow.

One clever way of making sure that your docs remain intact no matter what would be to put them in a vacuum sealer bag. I did this for all my docs and copies, Yes, you can seal even the originals. Now, if you have very old documents, it would be a good idea to laminate them instead of placing them in vacuuming bags.

Apart from the fact that they look really neat and ready to be framed, the lamination foil also protects them from stuff like oil, moisture, dirt, dust or anything that may hasten the paper’s weathering rate. I found out that vacuum sealing is a great way to safeguard old docs, books, sketchbooks, and notebooks from those blasted paper moths which literally eat everything in their path (that’s how I lost my Don Quixote princeps edition).

  1. Keeping valuables away from prying eyes

If you have valuable objects like jewellery, gold & silver bullion, Tim Hortons discount tickets, you should consider vacuum sealing them before stashing them in your hiding place of choice. In this form, they’re way easier to retrieve and, believe it or not, vacuum protects valuable objects from things like moisture, dirt, dust, mold, mildew, and, of course, people who ask far too many questions.

If you have gadgets that are no longer of use to you, don’t throw them away if you can salvage the component. Put them in a sealable bag and stash them in your garage or something. Remember that in an SHTF situation, an older but functional phone battery can become more valuable than a bar of gold – priorities! It’s always a question of priorities.

  1. Crafting tailored MREs

Nothing beats that feeling of having a well-organized B.O.B, especially when it comes to the food part. MREs come in all shapes and sizes, meaning that sometimes it’s pretty challenging to keep everything nice and tidy. A great workaround would be to make tailored, vacuum-sealed MREs.

Here’s the deal: no two preppers have the same tastes in food. I, for one, like homemade meals ready to eat and would gladly get rid of stuff like crackers, biscuits, beef jerky, trail mix or potato chips. Whatever your SHTF culinary preferences are, sealing the food in vacuum bags will help you save a lot of space, which you can use for other gadgets and trinkets. Just be sure to toss a pack of desiccant silica gel in each food bag before using the vacuum to suck the air out.

  1. Weatherproofing hiking and camping supplies

Yes, I know you can use cheap garbage bags to weatherproof your clothes and undies, but do bear in mind that a thin plastic sheeting won’t keep your stuff dry for long, especially if there’s extra moisture in the air. One way of making sure that your clothes retain that out-of-the-wardrobe freshness would be to vacuum seal each piece of apparel before tossing them back into your B.O.B or hiking pack.

  1. Creating cheap storage containers for oil, vinegar, salt, and sugar

Among other emergency food, oil, vinegar, salt, and sugar are known to last almost indefinitely, provided that they’re stored in the proper conditions. With a vacuum sealer, you can create ultra-safe containers for your foods.

Sugar and salt are easy to pack, but you may want to pay extra attention when vacuum sealing oil and vinegar (you should consider looking for bags that come with bottlenecks and stoppers). Moreover, you can also make B.O.B versions by using smaller sealable bags.

  1.  Making awesome marinades

As you know, some types of meats like wild game, need to sit in a marinade for at least a couple of days before it can be cooked. Sure, you can put everything in a zip-lock bag before sticking it in a freezer, but there’s always that small chance of air getting inside.

Another reason why it’s better to use vacuum sealer bags has very much to do with refrigeration. Zip-locked marinade needs to stay cool. Meat and marinade that have been vacuum sealed can be kept basically anywhere because there’s no air left to oxidize the meat. Go ahead and have fun with your vacuum-sealed marinade. Just be sure to cook it soon.

  1. Easy icepacks

Don’t have anything on hand to put the ice in? No problem! Take the ice out of the freezer and toss in a small vacuum bag. Seal, make sure there are no leaks and use immediately. You can also stockpile icepacks for later use.

  1. Making spice and condiment packs

Remember the last time you were out camping, and you had to carry all these spice and condiments packs because you didn’t know for sure which one would pair best with the meat?

Well, if you have one of these awesome gadgets, you can make your own condiment packs and spice mixes. Even better is the fact that you can make person-tailored portions. For instance, if you’re more partial to mustard than to ketchup, you can put a little extra for yourself.

Same goes for the other members of your family or hiking group. As for the spice pack, the vacuum sealer eliminates the need to carry all these small packs of salt, pepper, paprika or whatever. Save yourself the trouble of having to carry those around by creating your very own spice mix. Here’s my all-time favorite:

  • Dried minced onion (around three tablespoons).
  • Dried thyme (one tablespoon).
  • Allspice (one or two tablespoons).
  • Black pepper (one tablespoon).
  • Cinnamon (one teaspoon).
  • Cayenne pepper (one or two teaspoons).
  • Sea salt (one teaspoon).
  • Garlic powder (one teaspoon).

Crush everything into a fine powder, add to your sealable bag, give it a shake or two, and enjoy.

  1. Storing bed sheeting and linen

I used to have an entire wardrobe filled with bed sheets and linen. Yes, I know everyone has trouble organizing it, which is exactly the reason why I went ahead and tried to vacuum-seal everything inside.

It’s best to do this after ironing them (allow them to cool down before bagging and tagging to ensure that there’s no moisture inside the pack). You can throw a pack or two of desiccant silica gel if you like. Anyway, I very much prefer vacuum-sealing my bed stuff because you can store them virtually anywhere, leaving you with extra space for new clothes or whatever.

It’s best to take this one step at a time. First vacuum-seal your winter linen, while keeping the spring\summer stuff within reach. When the time comes to use them again, pop open the bags, and seal the rest. You can do the same with jackets, parkas, hunting socks, scarves, gloves or anything wintery.

That’s it for my list on how to take full advantage of your vacuum sealer. As I’ve mentioned, the machine itself is very cheap (you can probably find one in a thrift store as I did). Still, you may have some trouble finding suitable bags – try Amazon or inquire at the store. You can always buy plastic rolls, cut them to shape, seal one end with a laminator or something if you’re looking to upscale or downscale project. Missed anything? Hit the comment section and let me know your thoughts.

A best friend in need (BFIN) is a great friend indeed – especially if it can suck the air out of every bag, helping you organize the shit out of

I admit that I’m somewhat of a hoarder when it comes to food. No shame in this, only the fact that I’m on round-the-clock freezer and fridge cleaning duty. Yeah, I know it’s kind of a bummer to take a garbage bag and throw away that awfully good food just because you consider your family’s needs nor the fridge’s capacity (true story).

Anyway, after cleaning the fridge this morning, a thought stroke me: what if there’s some magical way of telling if the food’s safe to eat or not? Well, that would spare the trouble of having to clean the damned thing each week, not to mention the fact that I would probably save a lot of money.

As a prepper, you probably know by now that food past its prime is unsafe to eat, no matter how SHTF-ish the situation gets. This is the reason I’ve spent the rest of my day searching for a way to tell apart rotten from safe to eat food. Yes, I needed to ask Google for directions because I’m really bad at colors and, because of this damned cold, my sense of smell is close to nonexistence.

So, before you grab your garbage back to summer-clean your fridge, freezer or both, you may want to take a closer look at my kick-ass list on how to figure out if your food’s still good or packing a six-shooter.

  1. Soggy edges

Could never tell for sure how off my veggies were. I always assumed that as long as they don’t give off a funky smell, they’re good for eating. Dead wrong! Apparently, soggy edges, especially in green-leafed veggies like lettuce, kale, spinach, watercress or cabbage is, in fact, the first sign of spoilage.

Yes, I know that it’s a no-brainer, but as I discovered, people usually disregard this part, telling themselves that the veggie’s safe to eat if you cut around the soggy part. So, if you see any sogginess, brown patches or if the vegetable sort of deflates, it means that it has gone bad and, therefore must be thrown in the trash can.

  1. Discoloration

Of course, nothing spells “spoilage” better than an unnatural color. However, in some cases (red bell pepper) it’s hard to tell if that’s part of the vegetable’s life cycle or a tell-tale sign of spoilage. The best way to see how fresh your veggie is would be to make a small nick on the green part. Pull it aside. If it’s green on the inside, it means it’s safe to safe. On the other hand, if it has a brownish tint to it, do yourself a favor and throw it in the trash.

  1. Molding

While you’re cleaning your fridge and freeze, you may want to take a closer look at the bread and any other pastry you may be hoarding. See, no matter how well you keep your bread, there’s always that chance of mold growing on it. If you see any, throw it away as fast as you.

Heard a doozie some time ago that moldy bread may be safe to eat, at least for a couple of days, if you remove the moldy part and stick the loaf in the oven for 10 minutes. That’s a big no-no, and I would advise you to throw away the bread as well as the other stuff it came in contact with.

  1. Limpness

Veggies such as green beans have a limp-type of aspect after being kept in the fridge for too long. If you see any of that, it means that the legume is way past its prime, meaning that it has lost all nutritional value and could severely compromise your health if consumed. Yes, I know that most of you are in the habit of quick-freezing green beans and other stalky veggies.

Still, the freezer’s not always the best option for long-term food storage. Sure, it can extend the shelf-life by a couple of weeks or even months but, eventually, all of it will go bad. In case of veggies look for paleness and a thick layer of ice. As for meat, ice plus a violet tint equals garbage bag.

  1. Foul smell

The nose always knows! If you pick off any strange odor coming from your food, then it’s more than safe to assume that it really has gone bad. Meat will give off a rotten smell, while veggies will smell just like forest fungi. The same smell can emanate from eggs and eggplants. Keep in mind that eating rotten stuff can result in food poisoning or worse.

  1. To float or not to float?

In some cases, it’s quite difficult to figure out if they’re spoiled or not. Take eggs for instance. If there’s no expiration label on them, it’s nearly impossible to tell the difference between a fresh and an old one. Luckily there’s a test you can use to figure out if the eggs are safe to eat or not. Fill a bowl with cold water and place all your eggs inside. If they went under and lay flat on their sides, it means that they’re fresh. If not, then you should consider going to the store to buy a new carton.

  1. Discoloration in meat

There’s a bit of an argument on this one. While some say that meat discoloration is solely the result of poor packaging and exposure to air and, therefore safe to it, others argue that meat turned grey or brown should be tossed in the trash. Can’t say for sure which side is right, but my humble opinion, it’s not a good idea to begin experimenting on food. Best to throw away anything that has an unusual color.

That’s it for my short and sweet guide on how to tell if the food’s still edible or not. As always, if you feel that’s, I’ve missed something crucial, do hit the comments section and speak your mind.

Before you grab your garbage back to summer-clean your fridge, freezer, or both, you may want to take a closer look at my kick-ass list on how to figure out

In a mood for a sing-along? I got just the tune for you – the blackout golden oldie. Yes, it’s a catchy song, and goes along with great with the other great things in life like running of food, water, and brooding in the dark. The piece I did on the makeshift stove using cooking oil inspired me to do a little snooping around for quick and easy-to-do light sources.

Of course, nothing beats a flashlight or an emergency candle in case the power goes out, but what are you going to do when there’s no more juice in that lantern and the last piece of flick died out like the ambitions and desires of a crestfallen lover? Make some more, of course, because that’s we preppers are good at.

In today’s article, I’m going to show you a fast way to create 24-hour emergency candles by harnessing the raw power of your favorite dish – bacon. Yup, you’ve read that right. Bacon’s not only great for breakfast, but can also be used to make portable and highly efficient light sources. So, enough chit chat! Let’s take a look at how bacon candles are made.

Gathering your materials

To pull this off, you will need:

  • A pack of bacon (go for a family pack).
  • A bell glass jar.
  • A wick or a piece of string.
  • A pencil.
  • A cooking pan.
  • A funnel.
  • A strainer.

Ready with the ingredients? Great job! Here’s what you’ll need to do next. Tr

Making Bacon Emergency Candles

Step 1. Put half a tablespoon of cooking oil into your pan. Don’t put too much though because the bacon will leave enough grease.

Step 2. Fire up your stove and start cooking the bacon. Your goal is to melt each and every bacon piece. Don’t trouble yourself too much if a piece is too stubborn because you’re later going to strain the “brew.”

Step 3. When the last bacon piece has melted, kill the fire, and allow the mixture to cool down. Careful while handling that pan because you can get some nasty burns from hot grease.

Step 4. While waiting for the mix to cool down, prepare your candle. Now, depending on how much bacon you’ve used, it may take more than one jar. No problem there – the more, the merrier.

Step 5. Untighten the lid and store it for future use.

Step 6. Tie a knot around the pencil and rest it on the jar’s rim.

Step 7. Make sure that there’s enough of the string inside your jar. Be sure to place the wick right in the center. For reference, leave at least one inch from the rim of your jar.

Step 8. Check up on your grease. Don’t leave it to cool down completely because you won’t be able to pour it into the jar.

Step 9. Grab a container from the pantry and place the strainer on top.

Step 10. When you’re done, use the funnel to fill up the glass jar with the grease. Ensure that the pencil holding the wick remains in the middle.

Step 11.  After you pour the last drop of fat inside the jar, allow the container to put down completely. Stick it in the fridge and wait for the fat to harden.

Step 12. When the grease has hardened, take a pair of scissors and cut just below the know you made. Congratulations! You’ve successfully made your first bacon-powered emergency candle.

More on grease candles

The best thing about this candle-making recipe is that you can pull it off with just about any kind of grease. I prefer bacon because it’s ludicrously cheap and I usually have enough to go around the house. It’s possible to make these beauties using other fat from other animals. Duck meat, for instance, is a great source of fat. Didn’t try it myself but I don’t see any reason why you can’t use other types of fat.

As I’ve mentioned, during the cooking part, it may be possible to get stuck with undissolved bacon chunks. I wouldn’t advise you to continue cooking the mix as you will probably end up setting fire to the kitchen. Use the strainer to pick up the rogue chunks or a pair of thongs to remove the pieces directly from the pan.

Ideally, you should use special wicks. They’re not that expensive, and they do a far better job compared to other textiles. However, should you find yourself short on wicks, you can always replace them with thin pieces of strings or shoelaces (just be sure to snip off both ends before using them).

Word of caution of using shoelaces as wicks – some of them have a rugged coating on them. Great for weather-proofing, prevents warping, but not so great for burning. Stick with regular cotton shoelaces. Of course, you can always a piece of paracord or another kind of cordage.

Yes, I know that the idea of staying on a bacon-candlelit porch may be enticing, but I would advise you not to take them outdoors as there’s a fair chance of being overrun by bugs, especially mosquitos.

The pencil part is not mandatory. You can use anything to keep the wick aligned, like a toothpick or a small twig.

Yes, it is possible to make candles that last longer, but you will need more bacon and a bigger jar. Still, I don’t see the point of making bigger ones as the entire idea is to make something light enough for your B.O.B or backpack.

Be extra careful when handling the bacon pan. That stuff burns like Hell. You should also keep the fire on low or medium-high to prevent the hot grease from jumping off the pan. In case you get a grease burn, stick your hand in running cold water and keep it there for at least 15 minutes. You may need to apply a sterile bandage afterward.

That’s about it on homemade candles! Be sure to hit the comment section and let me know how your project went.

Of course, nothing beats a flashlight or an emergency candle in case the power goes out, but what are you going to do when there’s no more juice in that

One thing you learn as a prepper is that any new skill you acquire will come handy one the day, cooking including. Sure, not all of us have the talent of whipping up a terrine or a souffle, but at least we learn to go by without actually having to starve to death or wasting away money on takeaways.

For my part, I actually managed to pick up a thing or two about the art of preparing delish and nutritious meals during one of those long blackouts. Yes, I’m still here, and no, the city council hasn’t gotten around to fixing the problem yet.

Now, for most of us, cooking’s not that big of a deal – get online, pick a recipe, follow the steps, and, Shazam, dinner’s ready! Still, the rules of engagement tend to change a bit if you’re forced to do the same thing during a power outage.

No electricity means that you will not be able to use the mixer, microwave, electric oven, toaster, and whatever cooking appliance running on electricity. Such a situation calls for some serious improv and, in today’s article, I’m going to show you my favorite blackout dishes and how to cook ‘em.

So, without further ado, here are my top 7 choices in no-power food.

  1. Oats

Yes, I know they’re not palatable, but they do wonder for the body. Most importantly, you can prepare anywhere and at any time, power or no power. Just let them soak overnight in a bowl of water. You can serve them for breakfast or dinner with assorted nuts, honey, and dehydrated fruits.


2. Gazpacho

Great Spanish dish and stupidly easy to make. I personally like to have fresh gazpacho year-round, since it’s packed with vitamins and minerals. More than that, this over glorified tomato soup is a wonderful thirst quencher during those hot summer days.

So, grab yourself a couple of diced tomatoes cans and empty them inside a large bowl (don’t forget to drain all of the juice). All that remains is to add one chopped onion, a thinly-sliced cucumber, a dash of cayenne pepper, salt, and pepper. If you’re looking for a bit a hit, you can add one teaspoon of Tabasco. Finish the dish by adding a little bit of olive oil, chopped parsley, and some lemon juice. That’s it!

3. Corn salad

This is what I like to call the lazy man’s easy way out of the kitchen. I usually like to prepare this dish when my wife’s away – kids love it, and it takes me about five minutes to get everything ready. So, it’s a win-win. Take a can of corn, drain the excess liquid, and put the contents inside a large bowl.

Chop any veggies you have left in the fridge (I like to add onions, red and yellow bell peppers, and tomatoes to my salad). For extra flavor, you can add a can of black beans. Toss it around a little, add a sprinkle of olive oil, and serve. If you fancy a bit of dressing, you can quickly make one by combining apple cider vinegar, olive oil, dried basil, pepper, and salt in a bowl.

4. A simple salad with apples and white beans

By far, my wife’s favorite Sunday morning salad. Super easy to make: pour the contents of white beans can in a large bowl and add some apple chunks. To finish the dish, you need only add some olive oil, fresh thyme, a handful of walnuts, salt, pepper, and scallions. Give it a good mix and serve.


5. Good, old grains and beans salad

This is one of the first recipes I learned during the first bout of blackouts. It’s very handy to know since anyone has at least one can of beans and a grain sack around the house. Take out your portable stove from the B.O.B and boil water in a small pan. Add the grains and let them cook for about 10 minutes.

Drain the grains and allow them to cool down. In a large bowl, combine one can of beans (works great with both black and grain beans) and the pre-cooked grains. Add salt, pepper, and a sprinkle of olive oil. If you wanna add consistency to your dish, throw in a couple of diced veggies, and chickpeas.

6. Chickpea or white beans spread

If you ever get tired of PB & J sandwiches, you might want to give this recipe a try. Empty the contents of a chickpea or white beans jar inside a bowl. Use a fork or potato masher to make them into a coarse paste.

Add some olive oil, parleys, a little bit of mint, half a tablespoon of garlic powder, and some oregano. You can serve this spread with white bread, toast, and even crackers. I personally like to serve it with oven-baked white bread – if you want to get all fancy, take a clove of garlic and smear each slice of bread before adding the spread.


7. Tuna salad with canned corn and green lettuce

Personally, I prefer this recipe over all those BS, new age stuff with salmon or whatever. Grab yourself green lettuce and wash it thoroughly with cold water. Using your hands, rip it into big chunks. Add a can of tuna over the salad (don’t drain the oil inside) and a can of sweet corn.

To finish this dish, pour half a tablespoon of olive or sunflower seed oil, salt, and lemon juice. Toss it around and serve. This is what I like to call the ultimate detox dish – very healthy and tuna being packed with omega-3 fatty acids and all that, it’s a breath of fresh air after eating spare ribs and burgers.

Hope you’ve enjoyed my list of blackout dishes. Think I’ve missed something? Hit the comment section and let me know.

No electricity means that you will not be able to use the mixer, microwave, electric oven, toaster, and whatever cooking appliance running on electricity. Such a situation calls for some

You know ‘em, love ‘em, and, most of the time, you buy them by the pallet. No wonder MREs are so popular since they make excellent snacks while providing your body with all the proteins and fats it needs to keep on rolling. But let me ask you a question here – is it really necessary to go to the military supplies store to buy MREs every time you run out? The answer’s “no” because these delish treats can be baked in the comfort of your kitchen. What’s even great is that you already have all the ingredients this recipe requires.

When I was doing my research for the first piece on pickling meat (be sure to check it if you haven’t done so already), I discovered, much to my bemusement, that there are lots of preppers out there who wanna know the best places from where one can buy Meals Ready to Eat. Can’t say that I wasn’t tempted in pulling a fast one by doing a piece on top 10 places that offer great bargains on MREs, but, then again, I really wouldn’t want you guys to spend more of that hard-earned cash.

I came to realize that my folks were baking MREs, long before the stuff hit the market. So, is this a family recipe? Yes, it is! An old one, at that. Mom told me she picked it up from my great-grandmother’s recipe book, who was a sister of mercy back in WW1. Apparently, this stuff would sell like hot cakes during the Great Depression, mostly because they go along so well with a glass of beer or moonshine or whatever (that raised a couple of eyebrows, back in the time).

After baking the first batch, my wife and I did the math: we spend somewhere around 20 on the ingredients for 8 jumbo-size MREs (although we could have made more if yours truly wouldn’t have sampled the mix too many times). That kind of money will probably get you around 4 or 5, and we still got enough left for another batch.

Still not convinced? Keep on reading for our killer survival ration baton recipe.

Why should I bother baking when I can always hop on the Internet to buy some more?

Because, contrary to popular belief, knowing your way around the kitchen is as important as learning how to swim or perform CPR. And we’re not talking here about whipping a quick breakfast or curing meat for long-term storage.

Nope, far from it! Cooking’s a no-brainer if you know how to follow a couple of simple steps.  And by that, I mean that you’ll be able to whip up a delicious and nutritious dish in no time, even if you’re that kind of person who sees the kitchen as just a room. Since I know most of you guys enjoy a good survival ration baton every now and then, I’m going to show you that it’s easy-peasy.

As I’ve said, the recipe involves ingredients found around the house – honey, assorted nuts, sugar, oats; stuff like that. There’s nothing fancy about this recipe, and it will only take you a quarter of an hour, tops. The result – 8 crunchy and sweet energy bars, each of them packing at least 3,000 calories. Check out it for yourself.

Get ready to ruuuuuumble!

As I’ve told you, all the ingredients for this recipe will cost you around 20 bucks, at most.  If you’re not too keen about going shopping, you can always order them online. Now, for 8 survival ration bars you’re going to need:

  • 5 cups of dry milk powder.
  • 3 tablespoons of honey.
  • 3 tablespoons of water.
  • 1 cup of granulated or white sugar.
  • 1 pack of gelatin (at least 3 oz)
  • 1 cup of peanuts or assorted nuts.
  • 2 cups of dry oats (you can also use normal oats).
  • 1 cup of dried cranberries (if you’re not too fond of cranberries, you can replace them with trail mix or assorted dried fruits of your choice).

Managed to grab all the ingredients? Neat! Let’s start making some survival bars.

Step 1. Preheat you over. Aim for 350 degrees.

Step 2. Grab a large bowl from your pantry and mix the following ingredients in order: milk, oats, nuts, and sugar.

Advice: use a wooden spoon or spatula to mix the ingredients (avoid using metal because the resulting mixt will have a bitter taste to it). Don’t stir too fast. You’ll want your mix to be a little chunky. What I like to do is to sort of dip the spatula and bring everything from the ground up top. Do this for a couple of minutes to make sure that there are no air bubbles left.

Step 3. Time to prepare the gelatin for the bars.

  • Grab a small pan and empty the gelatin pack’s contents inside.
  •  Add three tablespoons of water (don’t add more otherwise you would end up with mush).
  • Add three tablespoons of honey to the pan.
  • Crank up the heat and bring the mixture to a boil.

If you want to add a dash of color to your energy bars, try using some edible paint. Go crazy with them.

Step 4. It’s now time to put together everything – the dry and the moist ingredients. One thing you shouldn’t do would be to let the gelatin and honey mixture cool down completely. If you do that, you won’t be able to mix them with the dry ingredients.

So, toss the spatula aside, and ready your hands. Yes, you’re going to use the hands for this part. It’s much easier and, why not, fun. Don’t forget to wash them hands before messing with the mix.

Just like before, stick your hands inside the mix and bring the stuff on the bottom right to the top. Do this for a couple of time to make sure your dry ingredients are thoroughly mixed.

When you’re done, grab the gelatin pan. Pour a little over the mixture and use your hands to knead the stuff. Continue pouring and kneading until there’s no more gelatin.

Advice: the first time I tried doing this one on my own, the dough turned out to be way too dry even after pouring the entire contents of the pan. To make is moister (wipe that smirk off your face), add a little bit of lukewarm water or even a tablespoon of milk.

Knead, knead, and knead again, until everything’s hunky-dory. If you want your batons to be extra puffy, cover with a clean cloth and it aside to rest for around half an hour. Plastic wrap also works if you don’t have a cloth.

Step 5. Place some baking paper on an oven tray and pour the mix right in the middle. Then, using a spatula or your hands, spread it around as to cover the entire surface of the tray. Over should have reached the desired temperature by now.

Step 6. Use a pizza knife or the other end of a wooden spoon to separate your energy bars. I like to make them rectangular, but you’re free to try out any shape you like (next time, I think I’ll make them in the shape of hearts or Christmas trees just because I can).

Step 7. Stick the tray into the pre-heated oven and bake for 20 to 25 minutes (might takes less if you have one of those convection ovens). Here’s what I like to do in order to see if the bars are ready to be taken out of the oven.

FYI, this trick works for all your baking needs (cake, cookies, pastry). So, what I do is take a toothpick or small piece of wood (grandma used a clean straw from the broom), and sort of poke a small hole in the middle of the dough. Take out the toothpick and look at it – if the dough’s still clinging to the toothpick, it means that it’s not yet ready. On the other hand, if the toothpick’s clean, take it out of the oven before it hardens.

Step 8. Take the tray out of the oven and allow the power bars to cool down before bagging them. You can store them in zip-lock bags or airtight plastic container.

More on home-made MREs

That’s about it for the baking part. It’s exactly what I’ve been telling you – simplicity itself. Now, some of you are probably wondering about shelf life.

Well, since this recipe calls only for ingredients with very long shelf life, in theory, they should last for quite a while if you’re careful enough to store them in a proper environment. Still, if I were you, I would bake a fresh batch every couple of months or so just to be that the B.O. Bs are up to speed.

For those of you with peanut allergy, I would advise you to replace them with dehydrated fruits. You can also use more oats if you like that stuff.

Also, if the good, old doc told you to cut back on the sugar, you can always 86 the sugar from the recipe and stick to honey, pun intended. I wouldn’t use artificial sweeteners like stevia because that would give the bars and unpleasant, metallic-like taste.

The best thing about this recipe is that no matter how clumsy you are in the kitchen, you’ll still be able to make it to the finish line. First time I tried baking MREs, I poured the mixture from the side, instead of putting it in the middle of the tray. Yeah, I ended up doing more cleaning than actual baking.

If the power goes out, which tends to happen of a weekly basis where I live, you can still bake these thingies if you have a gas oven, a thing I highly recommend.

Another thing you can try out is to try an all-nut version (without fruits). Of course, that would definitely make the calorie count go through the roof..

So, have fun with your baking and don’t forget to hit the comment section to show me how your MREs turned out. Ta-da, guys!

Is it really necessary to go to the military supplies store to buy MREs every time you run out? The answer’s “no” because these delish treats can be baked in

Power’s out; car won’t start, pantry’s empty – anything can happen. You either need to learn how to make do without or to take the high road which, in this case, means making it yourself. I’ve spent many sleepless nights thinking about how to be even more self-sufficient. Sure, learning how to whip up a quick dinner or to repair stuff around the house helps, but something was missing.

Then it hit me: what if took a breather from shopping and instead tried to make my own things at home? “How hard can it be?”, I told myself. Well, everything’s hard if don’t know what you’re doing. Luckily, I have this magic lamp called Google which revealed a couple of very handy instructions on how to make day-to-day items.

So, for my first no-shop month, I started with one of the most common things found around the house: soap. Yes, I stopped stockpiling it for a while and instead I tried a quick and easy recipe I got off the Internet. Have to say that I’m quite impressed with how it turned out, considering that I had no clue as to how soap-making works.

Pity that my great-grandmother passed away. Mom always used to talk about how she spent hours toiling in the shed, making soap and all kind of cosmetic stuff. Apparently, the bars my great-granny made were so good, that you could hardly make any difference between her home-stuff and supermarket soap.

Anyway, because I know that most of you people would rather make than buy, I’ve decided to share with you the recipe I’ve uncovered. As I’ve told you, it’s super easy to make, and with a couple of other ingredients, you won’t even know the difference. So, enough chit-chat! Let’s get cooking.

Materials needed

  • An old newspaper (to cover your work area)
  • Canning jar (I used a quart jar for this project).
  • Gloves and goggles.
  • Spoon.
  • Thermometer.

As for ingredients, you will need:

  • Coconut oil (about 2/3 of a cup).
  • Olive oil (2/3 of a cup).
  • Liquid oil of choice (you can use sunflower, almond or grapeseed oil; aim for 2/3 of a cup).
  • Lye (around ¼ of a cup).
  • Distilled water (2/3 of a cup).

How to make

Step 1. Cover the table with the newspaper and put on your protective gear.

Step 2. Put the canning jar on your work area.

Step 3. Pour the water into the canning jar.

Step 4. Slowly pour the lye over the water, while stirring with your spoon. Don’t get too close, as the fumes resulting from the reaction are toxic.

Step 5. Wait for the mixture to settle. You can proceed with the next step when the water clears up.

Step 6. In a pan or bowl, mix your coconut oil, olive oil, and the third oil of your choice (I used sunflower for this recipe).

Step 7. Stick the pan of mixed oils in a microwave for about one or two minutes. When it’s done, stick the thermometer in and check the temperature. It should be between 95 and 105 degrees. This is the sweet spot of soap-making – it the temp’s lower, you’ll end up with mush.

Step 8. After the oil mixture reached the right temp, pour it in the canning jar over the lye and water. You may want to add an extra ¼ cup of lye to ensure consistency. Slowly add the lye while stirring with your spoon.

Step 9. Stir the mixture for about five minutes. It should have a nice, vanilla-like color. You know it’s done when it starts to thicken.

Step 10. Add herbs or oil of your choice. Stir until they’re incorporated.

Step 11. Place the mixture into molds (I used an old baking tray for this experiment).

Step 12. Cover with plastic wrap and store in a dry and dark place.

Step 13. Check the mold every 24 hours.

I should warn you though that home-made soap is not something that magically appears overnight. In fact, the curing process takes about two to four weeks depending on environmental factors such as moisture and heat. So, if I were you, I wouldn’t hold my breath. Another thing you should know is that your kitchen or garage will end up smelling like a funeral home after doing this, mostly because of the lye.

Last, but not least, always remember to measure your stuff before adding them to the canning jar. If you pour too much or too little, you’ll end up with a mushy thing that won’t cure. As for the aesthetic part, you’re free to choose the shape of your soap.

Sure, the rectangular part would be the most obvious choice since it’s easier to handle, but you can opt for any shape that comes to mind. Just be sure to make hand-size bars. What I did after the soap has cured was to drill a hole near one of the edges and draw a string through it. That way, I don’t have to worry about dropping the soap while bathing (no, it’s not what you think).

As for the storage bit, once you’ve cut them into shape, you can store them in an airtight container. Make sure that the place you’ll be keeping your bars of home-made soap is dry.

Now, if you want to add a bar of soap into your B.O.B or household survival kit, wrap it in food foil before tossing it inside. It may be a good idea to throw in a desiccant pack or two to prevent the soap from drawing too much moisture from the air.

See how easy it is to make your own hygiene products? Well, this turned out rather well, if I can say so myself. In fact, this project gave me enough confidence to try out some other stuff. I have this buddy of mine who uses natural glycerin and herbs to make ointments and beauty cream. Maybe I’ll try a recipe or two and let you know how it turned up.

Power’s out; car won’t start, pantry’s empty – anything can happen. You either need to learn how to make do without or to take the high road which, in this