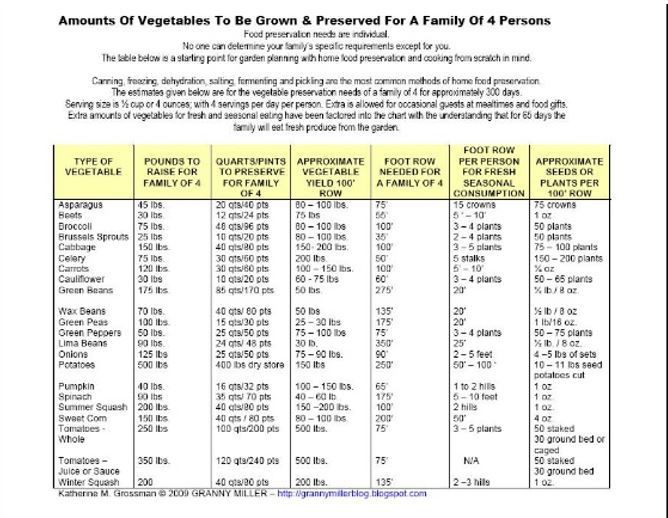
How Will I Know When the SHTF?
‘When the SHTF I am bugging out man’! ‘If the SHTF you will be glad you have one of these’. ‘You won’t be able to do that if the SHTF’. ‘When the SHTF you better be prepared’! If you have been anywhere near prepping, survival, self-sufficiency or emergency preparedness content, movies, TV shows, books or blogs, you have heard someone say a sentence that went roughly like one of those above.
Do you know what everyone means by SHTF?
Just in case there are some of you out there who do not know what this handy little acronym stands for, it is S**t Hits The Fan. When the SHTF basically all hell breaks loose. The exact meaning of SHTF varies by person and sometimes SHTF is used interchangeably with TEOTWAWKI. As in ‘If there is an EMP device exploded over the US it would be TEOTWAWKI’. TEOTWAWKI is another acronym for The End of The World As We Know It which is also used to describe a million different things to different people. One thing we do know though is that when it comes to SHTF or TEOTWAWKI they both mean that bad things happen and most likely our lives will be changed dramatically in some way for some period of time.
I think one of the aspects of prepping has to be with an eye toward a SHTF type of event. We prepare for minor inconveniences like being stranded on the side of the road, or living without power for a couple of days, but with relatively simple steps these two examples are by themselves minor in the grand scheme of things. If you have prepared, there is really nothing to worry about if the power is out. Will you have to adjust and make do? Probably but if you have prepared for a power outage the adjustment could be very minor. Would you be inconvenienced? Most likely, but you will survive.
Most preppers I have talked to are at some point along an arc of preparedness. (I am copyrighting that phrase right now) One end of the arc is no preparedness at all. The other end of the arc is our individual version of being totally prepared or at least extremely prepared. I say extremely prepared because like I have written before; I don’t believe you can ever finish prepping. There should be a point when you are pretty darn set though when you compare yourself to the rest of the world.
The prepared end of the arc is our supplies, skills and gear for really bad things. This is the SHTF that people are preparing for and it is this concept that many are striving for all along. To be actually prepared as well as possible to handle or maybe more accurately, live through a SHTF event. Our preps would ideally help make that possible. The prepared end of the arc deals with Long-term and abundant food storage, plentiful and renewable sources of water, shelter from the elements while at home or in a bug out scenario and survival firearms for each member of your group. Personally, I don’t want to ever need to use my supplies on the ‘Prepared’ end of the Arc but they are there if the time comes.
What does SHTF look like?
And so we get to the big question that I have heard asked a million times. Well, not a million but a lot and that is ‘How will I know when the SHTF’? How will I know when it’s time to bug out and move our family out of harm’s way? How will I know when I need to hunker down, board up the windows and keep watch overnight? The reason so many people want to know this is that they don’t want to be caught unaware. You don’t want to be the last person trying to get out of your town before the roads are too clogged with traffic, or the one who shows up at the grocery store after they have taken everything except the mops back in housewares. Anyone who is prepping for SHTF is doing so because we want to avoid it as much as possible so knowing how to identify the actual moment that the S**T Hits the Fan is pretty important.
The problem is that unless we are talking about huge, cataclysmic national events, defining the moment that it happens is too late is difficult across the scale of everyone in the country. If a huge terrorist attack happens in Los Angeles California but nowhere else, would you as someone living in Las Vegas do anything besides watch the news? If a nuclear bomb went off in New York, would you as someone living in Tennessee go anywhere? I think the answer to almost any situation where we are asking if the SHTF moment has arrived is unfortunately, ‘It depends’.
What does this event mean to me?
There is a famous Supreme Court case, Jacobellis V. Ohio in which the subject was a movie that had been deemed obscene. The movie theater owner who showed the movie had been convicted and his case made it to the Supreme Court where Justice Potter Stewart, in his concurrence with the other judges ruling for overthrowing the case, said with respect to hard core pornography, “I know it when I see it”. There are other details which you can read here, but the point I am trying to make is that there is no universal SHTF moment or series of actions. You can’t point to a terrorist attack and say that for everyone it is a SHTF moment. Now, it most certainly will be for people involved in the event and surrounding areas of course but it may not impact you at all. If it does however, you will most likely know it when you see it.
Well, thanks that wasn’t helpful at all! Maybe you were hoping I would give you a checklist of items to look for to determine when the S had actually HTF? OK, I can do that but each of these would be examples that have to be taken in context. All of that would also need to be considered with your own personal situation. Some items to look for:
- Loss of Electricity on a regional scale for more than one week
- Media blackout
- Martial law declared
- Door to door gun confiscations – yes they have happened before.
- Stock Market takes a dive of 10% and they halt trading the next day.
- Bank holidays are declared and you are not allowed to remove money from your bank. If you are you are limited to a small amount.
- Attack on US soil – This would be most likely blamed on terrorists of one shape or another
- Virus outbreak rates that continue to go higher and occurrences start to increase in your city.
- EMP device that causes massive power outages (multi-state)
- Nuclear reactor meltdown
- Natural disasters that impact you locally (fires, tsunami, hurricane, flood, etc.)
These are all examples that in the right context could be signs that we are in a SHTF moment. On the other hand, some of these could be single events that for a large part do not impact you or your family. I have said before that everything depends on the disaster and if something like this is happening to you, in your town things may be totally different from others across the country not affected. Naturally a stock market collapse or EMP doesn’t fall into that category but regional issues would. I always advocate watching the news media – not to hear about the latest starlet who is acting trashy but to get a feel for what is going on in the world. Maintain an active awareness of the news and be prepared to act fast if you get wind of events that you are considering as being a real SHTF event for you.
Will there be a national SHTF event? Who knows? It could be that we have minor SHTF events that happen to us and that doesn’t make them any less real or dire. You could have your own personal TEOTWAWKI moment that doesn’t impact anyone else and you will still need to react.
I believe we have an intuition but we have to tune ourselves to hear it. I think one aspect of that intuition is what prompted me to begin prepping and I believe that for many others out there you have that same feeling. That small voice telling you to prepare; that gut instinct that something is rotten in the state of Denmark. When it comes to your town, I think you will know it when you see it if you are prepared to look for it. Don’t expect the news, FEMA, your governor or me or any so-called expert in the world to tell you when it’s time to go. You will be able to make that decision for yourself.
‘When the SHTF I am bugging out man’! ‘If the SHTF you will be glad you have one of these’. ‘You won’t be able to do that if the SHTF’.


 Other experts focus on short-term survival; I recall an episode of Bear Grylls where he is shown


 4 SENTRY ALARM MINES .22 Cal trip wire alarms MULTICAM PREPPER PACK
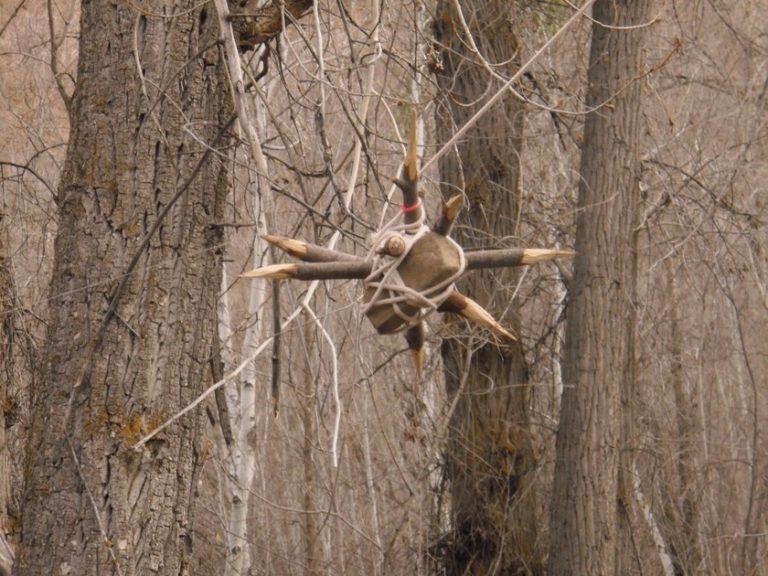 Homemade booby trap found in the woods of Provo Canyon.
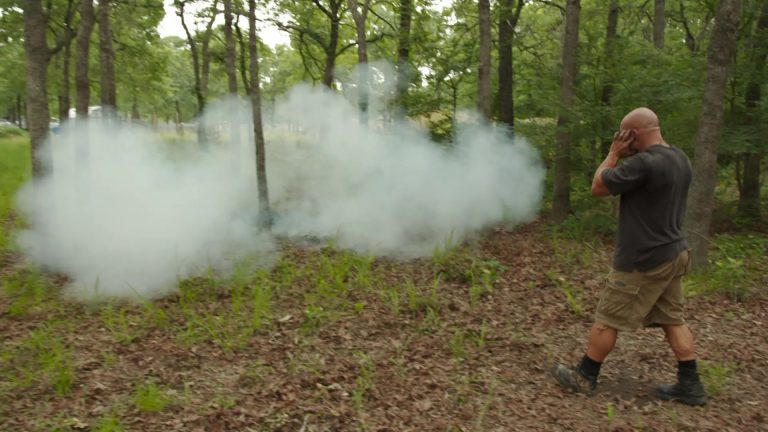 The most common booby trap as far as prepping is concerned is probably the tripwire.
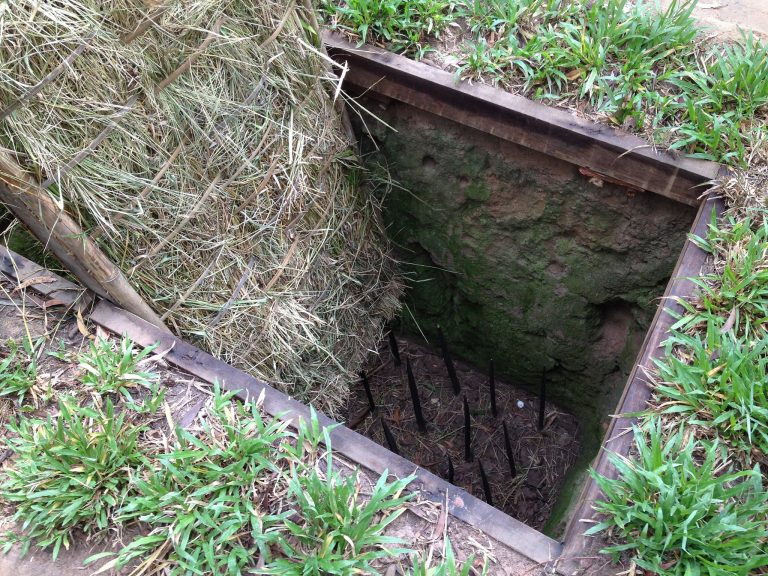 Spike booby trap used during Vietnam.