HomePosts Tagged "Top Menu" (Page 33)


The Boy Scouts and Girl Scouts are two universally known organizations that many kids participate in growing up. As prepper parents, enrolling your kids in the Scouts is one of the first steps toward a preparedness lifestyle that we can do for our children. But not every experience in the Scouts is the same. Here are some excellent ways to get the most out of Scouts for your child.

Be The Troop Leader

Our lives are busy. We need to work, upkeep the yard and house, get groceries, run errands, and more. So naturally, parents often see activities for their kids as short-term daycare. It’s a great way to get a break from entertaining them and get needed stuff done. But doing so is a missed opportunity for many reasons.

As a prepper, there is no one better suited to lead a Scout troop than you. You’re already attuned to wilderness and preparedness ideas. So when you lead the kids in different activities, you’ll have a great depth of experience to draw from.

The Scouts are wonderful at providing their leaders with a vast array of ideas, activities, and badges to earn. So many that any one troop can only cover a small fraction of them. This leads to a huge degree of different experiences between troops. By being the troop leader, you can choose the best badges to work on for younger troops that will teach them the values you want. In an older troop, you can help guide them and encourage them to pick the badges that most reflex preparedness.

Leading a troop is also a great way to spend quality time with your children. Your kid will become more emotionally invested in the Scouts and the lessons learned there when you show them how much you like it by doing it with them. They’ll respect you more as they get to see you become a leader in the community, not just at home.

You also have the amazing opportunity to guide and shape the next generation as they learn from you. If everyone went to Scouts and grew up to be preppers, the world would be a much better place.

As a prepper, there is no one better suited to lead a Scout troop than you. You’re already attuned to wilderness and preparedness ideas.

Volunteer Frequently

If your schedule doesn’t allow for being a leader or co-leader of a troop, then do your best to volunteer frequently. Running a troop is hard work. You need to plan ahead and have everything prepared for each meeting. Almost every troop has two leaders, but the burden is still felt. So, I guarantee that your child’s Scout troop is always excited to accept volunteers at every meeting. They’re probably already begging for it.

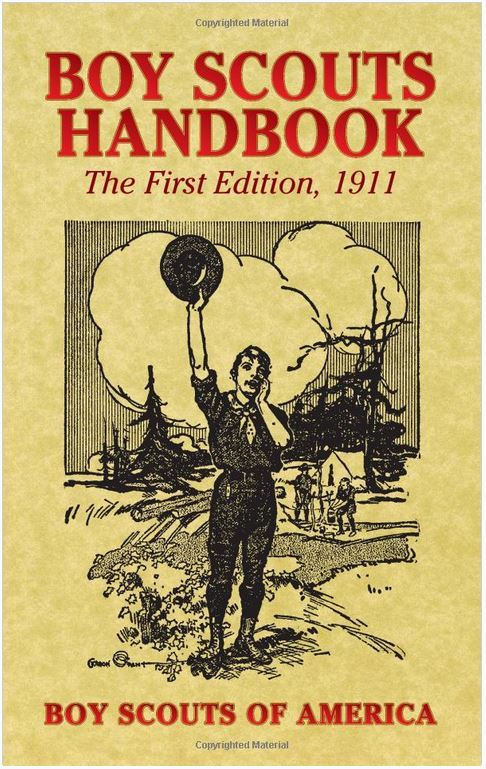
Boy Scouts Handbook: The First Edition, 1911

By volunteering, you gain all of the benefits for your child as being the leader, except to a lesser extent. Some leaders will gladly let you pick the badge or topic for a meeting or two. This lets you guide which areas your child is learning.

If that’s still too much commitment, then just being at the meeting to help corral the children when necessary will lift a huge weight off the leader’s shoulders. It will allow them to focus on being prepared for each activity while you handle the dirty work.

It also reinforces the importance of Scouts and the lessons learned even if you’re just sitting on the sidelines and helping to pass out snack. When your kids are older, they will remember and thank you.

Attend Every Meeting

One of the good things and bad things about Scouts is that it meets much less frequently than other activities, such as sports. This makes it easier to make each meeting as they’re often once every two weeks or even once a month. But it also makes it easier to miss as you’re not in the weekly routine of it.

Make Scouts a commitment. Make it a priority to never miss a meeting for any reason. Because they meet so infrequently, each meeting is ever more precious and valuable.

In addition to making sure your child attends every meeting, make sure to attend them yourself. This way, you’ll always be around to volunteer when needed. You’ll also have a great influence with the leader in picking badges if they see your face every meeting.

Attending every meeting yourself is also a great way to make new friends. What better friends for you than parents of children that are the same age as your child in the same activities? You can start with play dates for the kids and then do picnics with your families together. Some of my best friends I met through Scouts when I was my children’s leader.

By being the troop leader, you can choose the best badges to work on for younger troops that will teach them the values you want.

Ask To Be In A More Active Troop

Every troop is different. They do different activities and meet at wildly different days and times. When you first sign up for Scouts, most people just give them your contact information and let the organization arrange which troop your child lands in. Often times they do this by geography and your kid will be in a troop with the children living closest to them.

This may be great. Or, you could end up in a troop that meets less and does less interesting badges. But just like picking which teacher your child get each year, you have a strong say in it. Don’t let the random whims of a stranger decide the fate you’re your child’s Scouting future. Take the wheel and find the best one for you.

Contact the Boy Scouts local council or Girl Scouts service unit manager and let them know you want your child added to a troop that meets more frequently and does more activities. If you ask nicely, they’ll be happy to assist you.

This is a little more challenging if you’re joining a newly formed troop as they don’t have the history to know. But this is especially important to know when joining an existing troop. The unit managers will know which leaders are more active in the Scouting community and will give great recommendations.

This will also serve your child’s future in Scouting. More active and exciting troops will often last longer before the kids start dropping out. Staying in the same troop with the same kids and leader always provides for the best experience.

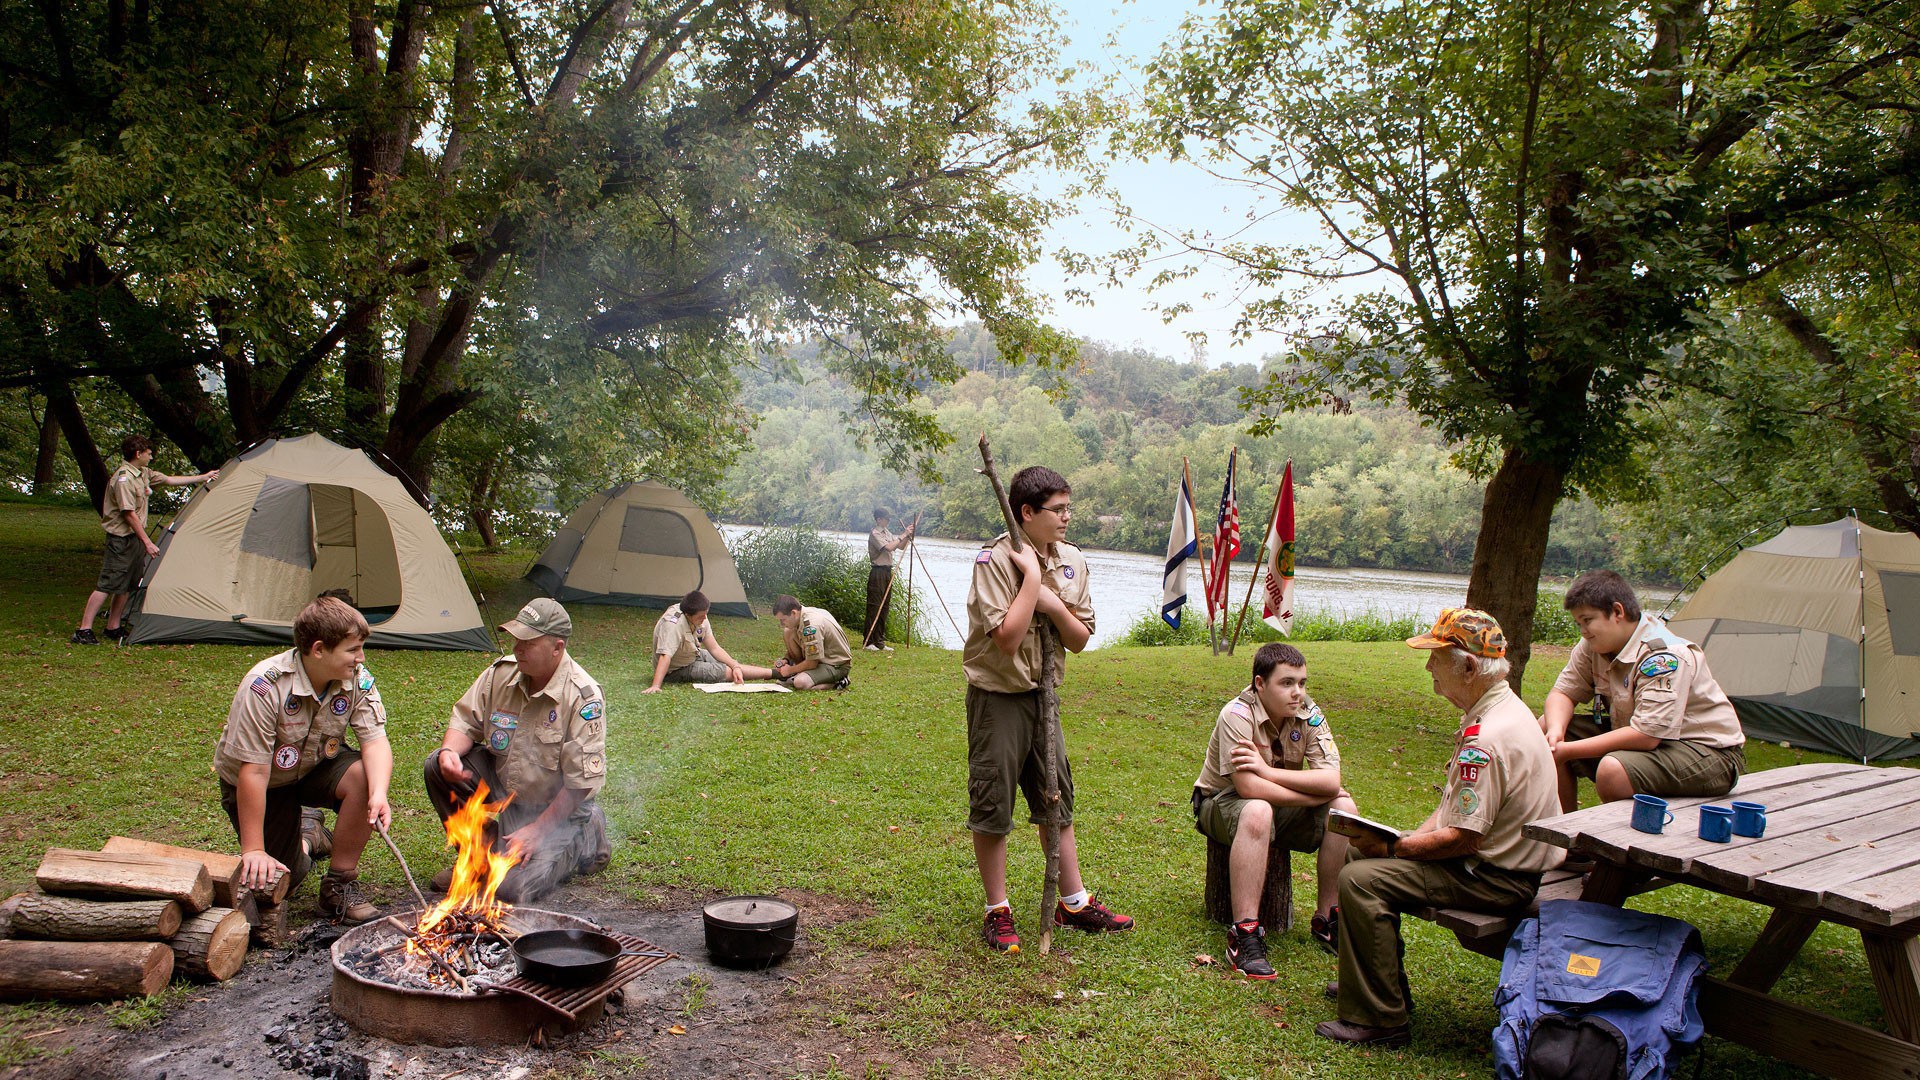
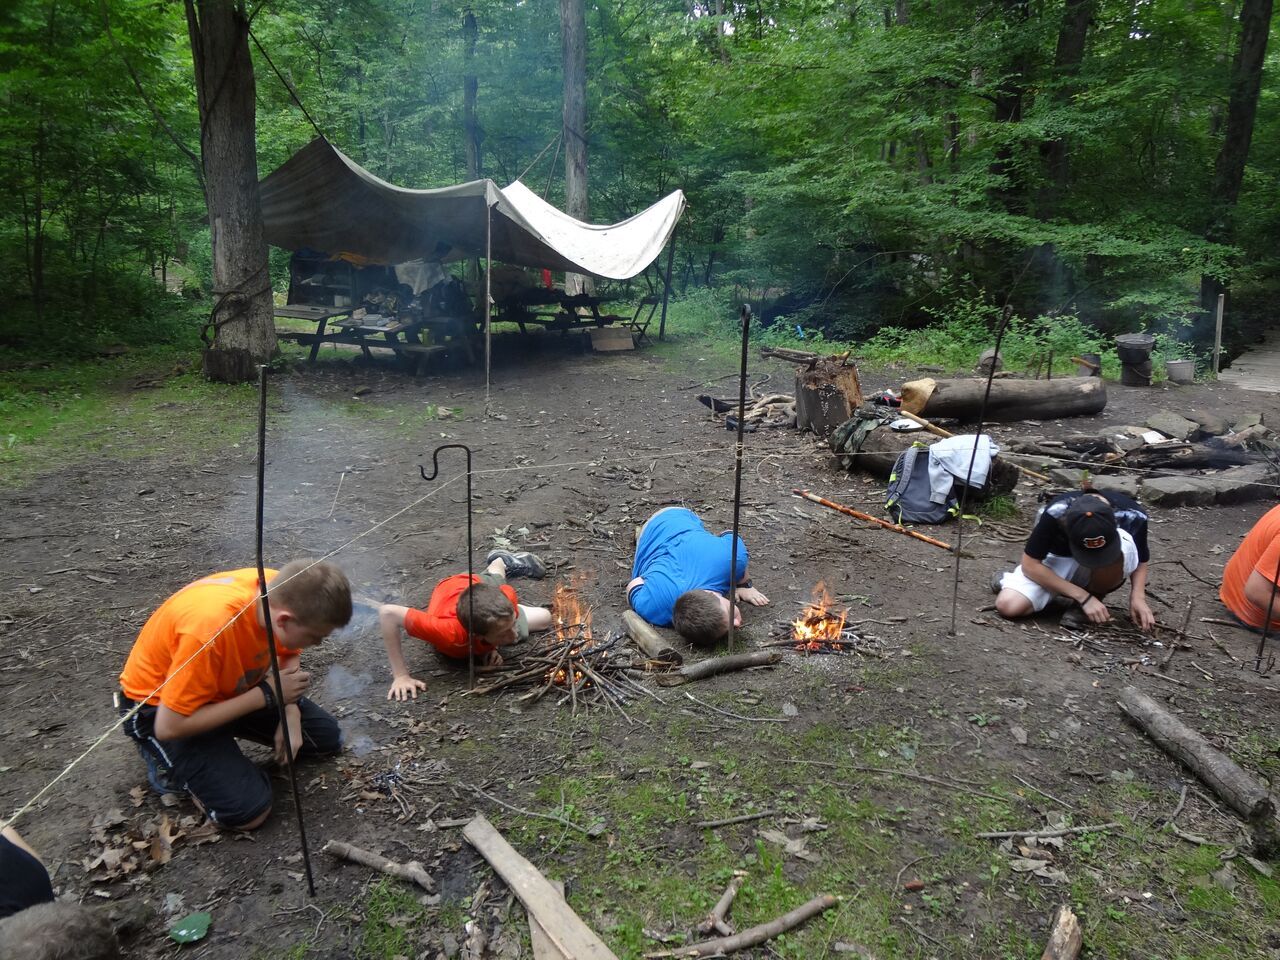
Send Your Kids to Scout Camp

Most Scouting troops only meet during the school year. Thankfully there are a number of Boy Scouts and Girl Scouts summer camps throughout the country. Day and overnight summer camp are amazing experiences for children. There’s new activities like archery, boating, and obstacle courses that are rarely done during the year. Your child will spend more time outside enjoying the wilderness. It’s also a great chance for your kid to make new friends from different cities that they’d never meet otherwise.

Also, since these camps are tied to the larger Scouting organization, you’ll be confident that they’ll teach your kids the same values of preparedness. You’ll also find they are often cheaper than the YMCA camps as you’ll be able to use your fundraising dollars towards it, like Girl Scout cookie sales.

  The Boy Scouts and Girl Scouts are two universally known organizations that many kids participate in growing up. As prepper parents, enrolling your kids in the Scouts is one of


From August 25th 2012 until over a year later, I slept and lived in my car in Los Angeles, California. I moved to Los Angeles for a dream and did not realize how expensive it was to live there. So I began planning in my head and thinking how I might save money and how I might get out of the frustrating living situation I was in at the time.

I decided living and sleeping in my car would be an idea that would satisfy both of those things I wanted for my life in Los Angeles. It was truly a survival experience.

Throughout my time sleeping and living in my car, I learned a tremendous amount. It was a very tough time as well. But it did in fact help me achieve my goals of saving money and being able to live on my “own” in my car. It didn’t come easy getting that life though. There were many learning experiences.

There are many different aspects when it comes to sleeping and living in your car successfully.

Living in your car takes a plethora of survival skills. It truly is a “survival” experience attempting to live in your car.

How to Live In a Car, Van, or RV

I was doing this so I could save money and get ahead in life. You have to sacrifice in life if you want to get ahead in life. That’s what I have learned. Especially in this economy today, you never know when hardship may hit and having these survival skills in your pocket may just save your life one day when you experience hardship.

I saved a great deal of money and had extra money I wouldn’t have had if I was paying rent somewhere.

I am going to go over a few key aspects it takes to successfully live in your car. Even if you never have to live in your car in your life, it’s good to be prepared. You never know what life may throw your way one day.

What to do for Food:

When it comes to food, there are many options when living in your car. My purpose living in my car was saving as much money as I could. So I keep that in mind when thinking about food.

  1. Canned Foods: There are canned foods such as beans, pastas, and tuna. Have a can opener ready or preferably have an easy to open top. That makes things much easier. Like canned fruits or fruits in plastic cups work as well. They store well too.
  2. Peanut butter and Jelly sandwiches are easy to make in a car. Just have a plastic knife to use to make it.
  3. Homeless shelters: Sometimes or much of the time homeless shelters give free food away as well. Just find one in your local area.
  4. Protein Bars: These are pre-packaged, somewhat healthy and easy to eat on the go.
  5. Fast Food: This is a somewhat cheap and accessible option but I generally went for the foods that were in a grocery store as they were cheaper.

In grocery stores, they usually have a bakery or already-cooked foods section and these are somewhat affordable as well. I used to get 2 pieces of fried chicken and some potatoes and it was decently priced and nice to have some “real” food for a change sometimes.

A good sleeping area can make or break you living in your car.

Where to Sleep:

Where to sleep is probably one of the most key elements of sleeping in your car. A good sleeping area can make or break you living in your car. You have to find a place that is safe but also a place where you can stay on the down-low enough to not be noticed.

I personally slept at a 24-hour grocery store I used to work at. I lucked out. But I’d say if you can manage to sleep at a 24-hour store somewhere that would be good. Or in a neighborhood that is safe where you can stay under the radar.

Once you do find that place you have to make sure to do everything you can to not be noticed.

Your car has to be primed and ready.

I had dark tint on my windows some of the time I slept in my car. If you don’t, you can put dark towels up in front of all windows. You have to be conspicuous though and make sure no one is around when you put them up. Just go to your spot, park, shut the car off and set the towels up. That is what I did. Make sure you choose the same place for sleeping every night. It makes things a lot easier. Don’t tell anyone where you sleep.

Have the radio off long before you get to your spot so you don’t draw any attention to yourself. Additional tip: do not open your doors once you get to your spot or get out of your car at all. It only draws more attention to yourself.

Where to take Showers:

Keeping your hygiene good is absolutely key to sleeping and living in your car and staying unnoticed. The more you are noticed the worse it is for you. You have to give an appearance you are not homeless. If not, you will be kicked out of a lot of places you may hang out at. I took showers at a gym. I got a monthly gym membership. It was only $40 a month. So it was not much. I got to both work out and get clean. I recommend having a backpack with everything you need for the shower and a combination lock to lock up your stuff while you are in the shower.

Where to Spend Your Spare Time At

There are a few options of where to hang out on your day off work or when you have free time.

Fast food chains. They usually have free WiFi for laptops. If you keep a low profile, it’s likely you will go generally unnoticed. Just make sure to keep to yourself for the most part. I didn’t even buy anything much of the time and no one cared to be honest.

Public libraries are great places to hang out in your spare time especially if you have a laptop. There is free WiFi that does not expire like many food places. There are usually a good amount of seats. It is nice and cool inside or warm depending on the climate where you live.

Malls are a decent area to hang out at as well. To find a seat and read a book or walk around. Just as long as you don’t have to pay for parking to be at a mall then it’s great.

The gym is a great place as well. You can work out for a while to kill time and be inside.

Also, if you have made any friends or anything like that, then that will help a ton as well.

Creativity can go a long way toward finding room in your car for necessities.

Key items to Keep in your Car:

  1. Gallon of drinking water: It’s important to always stay hydrated when living in your car. You are always going, always on the move much of the time. There were many times it was after work and I hadn’t had any water. It was always nice to have my gallon of water in the backseat under a towel. It costs about $.25 to fill it up at a grocery store.
  2. Pain medicine: Very useful when you have any kind of pain. There were many times while I was living in my car, it was late at night and my head was throbbing. It was nice to reach in my little soccer bag and take some pain medicine and be able to sleep peacefully after that.
  3. Car Fan: At night time I find it tough to sleep without some background noise, so a car fan came in handy. It costs about $20 at an automotive store. It is enough wattage to be on all night and not kill the battery. Many nights it is too hot to sleep in a car without a fan. In the summer time, if I didn’t have a fan I would have suffered greatly.
  4. Power Inverter: This is a device you can plug into your cigarette lighter and charge your laptop, cell phone, or any other electronic device as long it is a small enough wattage. It costs about $20 at many stores. Be careful what you charge. Some things will kill the battery if you charge it too long. Try to charge things while driving when possible because it doesn’t use the battery. The one I had had was 100 watts, which means anything you charge has to generally generate less electricity than that.
  5. Sleeping Bag: A good sleeping bag is key in any environment. Even in Los Angeles, in the winter and many times other seasons of the year as well I needed it. If I hadn’t had a good sleeping bag, I would have frozen and been very uncomfortable the entire night.
  6. Snacks/ Food: It is important to always have some sort of food in your car. Preferably on the floor on the passenger seat side as I did. I used that section for my food. It was easy when I got hungry, I could just reach over and grab a banana to eat when I needed it. It’s crucial to always have at least some stuff ready to eat anytime you may need it. Not eating can cause many problems. There were many times after work I was extremely hungry and was leaving work and had a piece of fruit I reached for and ate right from my car.
  7. Jumper Cables: Sometimes for a couple different reasons, I found that my car battery died and I needed a jump. Most likely because I left the lights on or I charged my electronics too long without driving. It was a pain standing in front of a store asking people if they had jumper cables. I eventually got some jumper cables so when my car battery died, all I had to do was ask anyone who had a car around me if they could give me a jump rather than also having to ask them if they had jumper cables too.
  8. Vitamin C: Living in your car is not a normal thing obviously. There is more wear and tear and hardship than if you had a place to live. So it’s important to keep your immune system up. Vitamin C boosts the immune system. Anything you can consume with a lot of Vitamin C is great. Oranges or any drinks that have vitamin C in them are great. You cannot afford to get sick in your car when you already have enough other things to worry about.
  9. Spare Keys Container: Having spare keys around are very important while sleeping in your car. You never know when you may need them. I kept a spare key for my car always in my wallet. Also, I went to an automotive store and got 2 containers for about $10 that store keys and have a magnetic cylinder on the back so you can connect it to any metal at the bottom of your car for when you lose or lock your keys in your car. Make sure to put it where no one can see it. Make sure no one knows it is there. Only you.

There are many important aspects to surviving living in one’s car. These are a few of the key ones. The key thing is keeping a low profile in all you do. That way, you can have the longevity to stay in your car as long as you need to.

You have to stay mentally strong and continually aware and focused of everyone and everything around you. Keep your head up. Always know it is not forever and is only a temporary situation.

  From August 25th 2012 until over a year later, I slept and lived in my car in Los Angeles, California. I moved to Los Angeles for a dream and did

I wrote an article titled Pray for the Best but Prepare for the Worst and in it and I asked a question of the reader. The question was about how you view prepping. One of the possible suggestions was that you may look at prepping as some type of insurance policy. One of our readers, Larry had this to say:

“I like the idea of looking at prepping as a kind of self-insurance policy. It’s the best kind of insurance; even if you never need it you still have something to show for all of the “premiums” paid over the years.”

I thought that was great conclusion and I agreed completely. Larry took my hypothetical to its logical conclusion and he is totally correct in that this insurance (prepping) actually gives you something even if you never have to use it. With traditional car or home insurance you pay money for peace of mind; for the off chance that something may go wrong. If nothing goes bad, your money or investment is gone isn’t it? You may pay for car insurance for years without ever using it and for those of us who haven’t been in a wreck, how many years of insurance payments have you made? I know that in the entire time my wife and I have been married we have never claimed anything on the car insurance. Part of me says, what could I have done with all that money but still I have and see the wisdom in insurance. I do agree it is smart and something we need to do for those just in case times.

I know there are some who may say, well you can get a Whole Life policy and if you want, you can get your money back at maturity. Others will say what if something would have happened to your cars or home – you would have appreciated that insurance then, right? Fair enough, but the point I am trying to get to is that some people (maybe your spouse?) look at prepping as a giant money pit and that this stuff we are purchasing, or storing up could be worthless if nothing bad ever happens. Why buy any supplies on the slim chance that you will need them? To me prepping is so much more than a simple insurance policy for disaster. It is an investment for your family. I believe that if you do this right, prepping could be the only investment that never fails on you and always pays dividends.

You Need To Diversify

Most of you will remember Y2K and the noise that we heard for years leading up to that time in our lives. As a brief recap, there was a general consensus from “the experts” that at the stroke of midnight on December 31st 1999, the computers all over the world would flip to 2000 and not know what to do because the year would be 00. This would confuse them so much because they would think it was 1900 or 1400, not 2000 and everything would cease to work. Planes would fall from the sky and power plants would shut down. Cats and Dogs would be living together and mass Anarchy would ensue. By now you all know what happened when the clock struck midnight.

Y2K – The disaster that wasn’t

I remember the run up to that New Years because of all the buzz that we had been subjected to for years about that date and the potential for pandemonium. Also, because I grew up listening to Prince’s ‘1999’ and felt that it was my duty to send this year out with a bang. I wondered what type of epic party we should have to commemorate the end of the millennium and pay homage to this anthem of my youth. The evening of December 31st rolled around and we had invited some friends over. I didn’t buy into the hype of Y2K too much but since I was the responsible father and husband (and thus I didn’t really party at all like Prince was telling me too) I had some candles, canned food and a few gallons of water stored. With our survival supplies safely tucked away in the cabinets of our laundry room, we watched the countdown. As the ball dropped in Times Square I was glued to the TV waiting for the end of the world to happen. I expected the TV to flick off, the power go out and the street lights to stop shining on our street. Instead, the ball hit the bottom, everyone yelled Happy New Year and I kissed my wife.

I was a little disappointed.

Not at only being able to kiss my wife, but the hype we had been hearing about for years turned out to be largely unwarranted it seemed. Nothing at all happened and while that is a good thing, there were people who had seriously worried about this event. They had purchased all of the survival weapons they needed, backup generators and months’ worth of food. Most of the same things that I recommend more or less on Final Prepper. The problem was they purchased everything for a specific event and when that event didn’t materialize the way they expected, some of these preppers felt like fools.

Since that time, I have heard from more than one person who got their start in prepping by finding someone who was selling all of their Y2K purchased supplies cheaply on Craigslist. Since the world didn’t end, why would they need a generator anymore? If the computers didn’t think we were all still in the 1900s why would they need all that survival food? Forget the garden; grocery stores are still open so why bother?

You have to have a long-term investment strategy

I want as many people as possible to be prepared and that is the main purpose of Final Prepper. There are reasons that people find our site and get into what I like to call the lifestyle of Prepping because I for one don’t think you should plan for any single event. Prepping for me is a way of living for all manner of circumstances. You don’t have to have the world end on you to need some preparations and the computers don’t have to stop working for you to experience an emergency.

Preparing for a single event does two things in my opinion. First, it blinds you to other possibilities and narrows your focus when you should be expanding it. I really like the TV show Doomsday Preppers even though it has a lot of flaws. I like this show because I get ideas from the people and situations portrayed, but I don’t agree with how they showcase a lot of these people. I think that in an ideal world each of these preppers should have someone there to tell them if they are doing anything that is going to reflect poorly on them. Can’t anyone stop them from making those mistakes? I digress… Each prepper that is shown is preparing for something. The “event” usually falls into one of several buckets (economic collapse, nuclear war, natural disasters on steroids caused by global warming, pandemic) and all of their preps seem to be geared toward surviving these specific events.

What if none of those things ever happen? Will you or their families looks at all of these efforts as a waste of time? Remember the last event that was supposed to wipe out the world? 2012 was the new Y2K. The Mayan calendar ended at the year 2012 and so the world was supposed to end also, but just like Y2K, nothing happened. The people who planned for this event and told their friends and family about this event appear to have egg on their faces right? Now all the supplies they bought are worthless because the world didn’t end. I don’t agree at all but to counter this I think you have to look at prepping differently.

This highlights the second problem with prepping for a single event. If that event doesn’t happen you give yourself the chance to feel like you failed, or that you overreacted and others will have a way to say you were wrong. Unless you have really thick skin, this can get almost anyone down and demoralize you when that shouldn’t be the case at all if you are prepping.

I have said it before on Final Prepper that I am not prepping for any one specific thing. I am prepping for anything. It doesn’t matter what happens (or doesn’t) my preps are geared to keep my family alive and safe. If nothing ever happens, the primary preps I have made are still valuable and my investments in time and money aren’t wasted.

All of the food we have purchased can be eaten and is eaten so that it is rotated. The worst case scenario is that we have to eat some freeze dried food for dinner. Our water, even if we never run out can still go into our garden to grow the crops we eat or to hydrate our animals. Our firearms that have been purchased will almost never lose value and can be sold if I so choose but most likely will still be used to hunt with each year and provide protection for my family. The backup power is always available for camping or social events and the outdoor gear is perfect for guess what? Getting outdoors. Its the same with extra medicine, first aid supplies, tarps, duct tape, tools and vehicle survival kits.

I can’t think of anything except maybe a gas mask that would not have a use in the real world regardless of whether we ever see a disaster or not. All of our supplies have multiple uses and I will not feel like a failure if nothing ever happens. I won’t be disappointed if our economy doesn’t collapse. I will not feel like I wasted money if the zombies never show up on our street.

Prepping is something I do to invest in the security and safety of my family. Prepping is what I do to enable our family to be more self-reliant and that will never be a bad strategy in my opinion.

I wrote an article titled Pray for the Best but Prepare for the Worst and in it and I asked a question of the reader. The question was about how

I am always refining my prepping plans and the associated tools and gear I think will help improve my situation if the worst should happen. Some people go through life believing that nothing bad will ever happen but that isn’t the audience of this site. You are here because you want to proactively take steps to ensure that if something bad does happen, you will have a plan for how to survive or even just cope better than people who do nothing.

Coping without power is one area of my preps that I have a few different options but my 100,000 KW solar array that pivots with the rotation of the Earth is still just a pipe dream for me. I do have a generator and a decent supply of fuel and oils to keep that going for a while, but generators have their own drawbacks. For starters, they need fuel and in a real disaster, getting fuel might be next to impossible. Secondly, they are noisy and when the power is out, the sound of a generator carries for miles.

Maybe you don’t worry about the noise, but it is something I consider. Solar is about the best option I can think of for grid down power but to replace the electric company you need a pretty expensive system. Also, you can’t take a decent sized solar array with you easily. There are smaller more compact options though and I am always curious to hear about them.

The Dynamo Plus is a lightweight battery pack with an integrated 25W, flexible solar panel. The P3 Solar rep told me that this system was being used by the military and I can believe it from my initial use and experience. When I opened the pouch I was already thinking about how this would work in my bug out bag.

The two best features of this offering are the battery and the solar panel, but the entire kit comes with just about any connector you could reasonably need for charging a device.

When I received the Dynamo Plus it was already charged to about 75% but I wanted to test out just how many devices I could charge off the battery in a single charge so I plugged the battery into the wall and brought the charge up to 100% pretty quickly. It must have been very nearly already fully charged.

The next day I threw the battery into my bag and went to work and proceeded to run my iPhone into the ground. It’s funny how downloading a couple of movies will drain the battery and I wasn’t too far into Hotel Transylvania (before anyone comments, it was for my kids) before my iPhone 6S shut off due the battery being dead.

Using the P3 Solar to charge your devices

I hooked my phone up to the Dynamo with the included adapter cable and stared charging. My phone was completely charged in about 2 hours. Speaking of cables, the Dynamo Plus comes with quite a few of them for various needs.

  • Wall Charger: AC/100V-240V
  • Car Charger: 15V/1A
  • Jumper Cables: 12V—200A auto start
  • Notebook Connectors: 8 sizes supported
  • Solar panel Converter: 14.5V regulated
  • Just about any Apple cord you could need.

The battery still showed almost ¾ of a charge so I decided to drain the battery on the family iPad too. Again, Hotel Transylvania was played, repeatedly in this case to drain the battery and then I started charging the iPad.

The charge on the iPad only got up to 64% but that was on top of the iPhone’s full charge. I didn’t try another phone but I would assume on a full charge this battery could top off a few phones or one iPad completely. Either way, this was a good option to have if the power went out. But the real benefit isn’t just the battery; it is the ability to recharge that battery with the sun.

So, with the battery completely dead, I set up the solar panels in the yard and walked away. Once the cable was connected the battery started showing it was charging by the lights on the side almost immediately. My plan was to leave the panel in the sun for 4 hours to see if I could charge it fully, but something else happened.

Backup Battery for your car

As fate would have it, one of my kids was trying to start a car that I have that has been sitting for a couple of months and the battery had died. This was the perfect opportunity to try out the jump starting feature of the diminutive Dynamo Plus system so I unhooked the battery from the solar panel and grabbed the jumper cable adapter.

I had only been charging the battery in the sun for about 2 hours so I didn’t know if I would even have enough juice to jump the car, but after connecting the terminals and giving the key a twist, she started right up. Pretty impressive.

What is even more impressive in my opinion is that it did it again. Right after we jumped the car the first time, I took it out to wash it and mistakenly turned off the ignition. Fortunately my wife was right down the street and instead of using the jumper cables I had her bring me the Dynamo which still had only been charged for two hours and it fired up my car again.

Overall Impressions of the Dynamo Plus

Having a source of solar power and a battery that can hold a substantial enough charge to power multiple devices or even jump-start your car is a good prepper supply item in my book. If the power goes out, we can pull this handy device out to top off our phones, recharge batteries for ham radios or headlamps or GPS units or run radios or laptops.

My only problem was with the cable that connects the jumper cables to the battery unit. The plug sets deeply into the battery unit and when I pulled it out, I must have pulled the wire because my ground wire pulled out of the socket. I think I can fix this with some simple solder work but it is something you want to be mindful of. Don’t pull the wire.

The battery also has a light on the end so it can also double as a flashlight if you need it to. The whole package sells for $399 on the Amazon site and if you are looking for a backup battery option with solar charging ability to boot, the Dynamo Plus might be worth looking at. I consider this a great addition to my overall preps.

I am always refining my prepping plans and the associated tools and gear I think will help improve my situation if the worst should happen. Some people go through life


In an ideal world when a SHTF scenario takes place you’d be wearing your bullet proof vest and have immediate access to your hand gun and assault rifle. Unfortunately this may not be the case because of several factors. The laws in your country might prohibit you from carrying any weapons or the place you are attending might not allow you to carry weapons, such as universities and hospitals. So how do you defend yourself using unarmed combat skills if you get stuck in such an unpleasant situation? This article will go through the steps involved in defending yourself from the initial assessment of the threat, how to avoid or eliminate the threat with your bare hands or with any improvised weapon that you’re likely to come across in everyday life.

Assess the threat

As with everything else, the first step is to assess the situation. The extent of your assessment will obviously depend on the prevailing circumstances. You can’t take out pen and paper and start drafting an action plan if there’s a hyped up guy slashing with a machete right in front of your face. Each situation warrants a different level of assessment. An imminent threat requires split second decisions that are mostly based on muscle memory acquired through hours of training whilst a hostage situation requires careful planning. Whatever the situation, the aim of your assessment is to identify any weaknesses of your opponent, availability of improvised weapons and escape routes. We’ll cover all these aspects in the sections below.

Basics of Self Defense

When faced with a threat you have two opposing options; fight or flight. Backing off from a confrontation might make you feel like a pussy but it’s better to feel that way for a few days rather than being killed or injured because of your pride. If you decide to run away from a confrontation/threat you have to be sure that you can run faster than your opponent, avoid any weapons he may attack you with whilst you are running (mostly applicable to firearms), and find adequate shelter before he catches up with you. If this is not possible then you’d better stand your ground and fight because once you turn your back on your opponent you’ll become much more vulnerable.

The human body has multiple weak spots that you can target to your advantage.

Once you’ve decided to fight, or are forced to fight your way out, there are some basics you have to keep in mind. The fundamental principle of self-defense is to reduce to the least extent possible the damage your body receives in the attack. Key areas to protect are your entire head and face and vital organs in your torso. However do not underestimate the importance of your limbs. You won’t be able to attack with enough force if your arm/s gets injured and you’ll have problems standing and moving about if your leg/s gets injured. How you protect yourself will depend on how you’re being attacked. We’ll go through these in the coming sections.

The next principle is to stop your assailant from what he is doing. This is achieved by hitting a delicate part of your opponent’s body with a tough part of your own body (or any hard object that comes to hand). Your attack should be vicious and aggressive. This is not the time to have sympathy. You want to cause intense pain and damage in as little time as possible in order to neutralize the assailant.

Tough Parts of the Body

  • Knuckles
  • Elbows
  • Knees
  • Sole of the foot
  • Forehead

Delicate Parts of the Body

  • Temple
  • Eyes
  • Nose
  • Jaw
  • Neck/throat
  • Solar plexus
  • Ribs
  • Kidneys
  • Groin
  • Knees (when hit from the sides)

Unarmed Assailant

When your assailant is unarmed it’s a fight on equal par and the outcome will depend on strength, stamina, technique, aggressiveness and as always a bit of luck. Although it’s important to be aggressive don’t forget about defending yourself and protecting your vitals. If you get injured, you drastically reduce your chance of winning that fight. Once into the fight do your utmost to knockout (make unconscious) your opponent or cause an injury that makes him harmless. Do not start throwing useless punches and kicks in the air like a drunkard. Instead aim all your shots and focus on making contact with most if not all your attacks. Hit with all your strength but make sure not to lose your balance. Do not opt for fancy spinning kicks and that stuff unless you’re a professional kick boxer. Aim your kicks to his knees to knock him off-balance and aim your punches to his face and ribs if you get the opportunity. Do not unnecessarily expose yourself whilst attacking and always be ready to block his attacks. Follow these basics and you’re likely to be the one standing next to an unconscious body.

Armed with a Knife

When faced with an opponent with a bladed weapon you must concentrate on that weapon and move in such a way that it never contacts your body. Keep at a distance and let your opponent slash and trust in vain. You have to wait for your opportunity to move in swiftly and grab hold of the hand holding the weapon. Do not grab the weapon from the blade. Your best chance of moving in is when he has swung the blade and is about to slash back. Once you gain hold of his weapon bearing hand hit him with all you’ve got but never let go off the hand. When you feel that he’s become weak enough, grab the weapon bearing hand with both your arms and twist it ferociously to break as many bones as possible. At this point he should drop the weapon or loosen enough his grip such that you can safely take it away from him. Once the weapon is in your hand, it’s up to you how to proceed but keep in mind there might be repercussions, both legal and psychological, if you decide to end his life.

Armed with a Firearm

An assailant with a firearm is much more difficult to disarm due to the extended range and deadliness of the weapon. Here your initial approach will be drastically different in that you want to come in physical contact with your assailant. You’ll have to do this gradually whilst distracting your assailant with conversation or a decoy. Once close enough your objective will be to grab the gun by the barrel and hold the gun pointing away from you and ideally away from other people. Movies and some martial arts experts demonstrate techniques to disarm an assailant with a gun pointing towards your head/torso. I am not judging the capabilities of these individuals but I strongly suggest you do not try this technique. All the assailant has to do is squeeze the trigger. This only takes a split second and your attempt to twist the gun might actually be what causes the trigger pull. The approach I suggest is much safer. Wait for a moment when your assailant points the gun in another direction. This is likely to happen whilst he is shouting instructions and uses the armed hand to point towards what he’s talking about. As soon as the gun is pointing in a safe direction, grab the gun by the barrel (obviously without any part of your hand obstructing the barrel’s end) and hit the assailant with all you’ve got. It’s interesting to note that if the firearm is a pistol it will shoot the loaded round when the trigger is pulled but it will not cycle another round since you will be hindering the slide’s motion. Be careful in the case of a revolver due to the hot gases escaping from around the cylinder. If it is a long firearm, grab the barrel with both hands so that you can exert more leverage. Obviously in the latter case you’ll have to attack with your lower limbs.

Arm Yourself – Improvised Weapons

Even a fire extinguisher makes an effective weapon. Spray the compound to blind your attacker and then bash them over the head with the empty cylinder.

This article is about unarmed combat in view of situations where you’re not carrying any weapons. This however doesn’t mean that you shouldn’t try to arm yourself with whatever might come handy. The following are a few ideas of easily obtainable weapons in everyday life.

Sticks such as a broom, billiard or long umbrella-You can swing such sticks to keep your assailant at bay but usually such sticks are fragile and immediately break upon impact dealing very little damage to the target. Instead use ‘weak’ sticks like you would use a lance. They will be less likely to break and will deal a lot of damage due to the low surface area which results in a lot of pressure.

Metal pen-This has a very short reach but you could easily incapacitate someone by stabbing him in the eyes or neck. You can also use a metal pen for pressure points techniques to subdue an assailant. This however requires training.

Stones or any other hard object such as a soda can (full)-These can be used as projectiles especially when you have an ample supply of them. If you’ve got only one it might be better to hold on to it and use it for battering your opponent.

Chair or stool-These can be used as a shield and to keep your assailant at bay as well as for striking. Obviously they can be thrown in the typical western movie style.

Fire extinguisher-You can direct the escaping gas (CO2 will be extremely cold), water, foam or powder in your assailants face. You can also use the cylinder as a battering device or throw it at him. You could even approach the assailant from above and simply drop the fire extinguisher on him.

Stiletto Shoes-If you or anyone accompanying you is wearing stiletto shoes, take them off. You’ll be able to move with more agility (be careful if there is glass or other sharp or hot objects on the ground) and you can use it for stabbing just like you would with a metal pen.

Conclusion

You never know when things are going to turn sour. We do our best to always be prepared to defend ourselves but we might end up in a threatening situation whilst we’re officially unarmed. That doesn’t mean we’re all gonna die. It means that we have to prepare for that scenario like we would for any other. Always be alert of your surroundings and book yourself for a few self-defense classes and keep practicing those techniques. You’ll be glad you have if the need ever arises.

  In an ideal world when a SHTF scenario takes place you’d be wearing your bullet proof vest and have immediate access to your hand gun and assault rifle. Unfortunately this

If you own a firearm and spend any amount of time on the internet each day,  you probably not heard that the ATF wants to change the classification of a certain type of round (M855) to “armor-piercing” and effectively make this round illegal for “production, sale and use”. I won’t get into the specifics of the language or why the M855 ammo is not significantly more armor piercing than just about any other round for the AR, or even how great the M855 round is. If you are curious, ITS Tactical has a nice write-up about that side of the argument. The fact remains that the government has placed that M855 ammo in its sights and wants to keep that out of your hands. What does this mean to preppers?

For starters it means that you will most likely have to pay more for ammo for some period of time. Why? Because any time there is any news like this ammo prices go through the roof. People believe that the government is going to ban everything, that they are coming for your guns and you won’t be able to buy any ammo before long. Is that true? I don’t know but it is like anything else in the world, when there is a greater demand, the prices go up and unless the supply ramps up to meet increased demand, there are shortages.

There are also people out there who snapped up as much ammo as they could when the news of this first came out and they aim to make a profit on the panic. The media isn’t helping this by all but encouraging runs on ammo suppliers. I can’t tell you how many articles I read over the last few years when we had the last panic and the supplies of ammunition disappeared about how it was the gun owner’s fault; that we were causing the scarcity of supply and not the government who was buying billions of rounds. I don’t have any problem with some entrepreneur taking an opportunity to make an extra buck and if I have to pay more, it is my fault for not buying when I could have at a lower cost.

I can imagine the same complaining will accompany this latest news and just a quick check on two ammunition sites bulkammo.com and ammotogo.com, their supply of .223 seems to be lacking along with the noticeable increase in the price of the M855 rounds. That doesn’t mean they aren’t experiencing brief fluctuations in supply.

What can you do?

First of all, don’t panic. I imagine that there are those of you who already have a supply of ammunition stored up. If you have been watching for years how this is playing out in the media, you might have thought long before now that it would make sense to build up your supplies. There are others out there, maybe who just purchased their first AR-15 and were stocking up.

You have a choice right now to either buy ammo at a higher price or wait; it’s that simple. Does that suck? Sure, but it isn’t anyone’s fault besides yours that you don’t have ammo already. Complaining about people who buy a ton and sell it at a profit is a waste of your time. There are no guarantees in life and cheap, freely available ammo was never promised anyone. Yes, I know that forces are behind the scenes manipulating the supplies, but you have to get over that.

Secondly, don’t give up on buying ammo. When the last ammo shortage hit, there was definitely a shortage of supply and prices were higher, but I was still able to find ammo and some wasn’t that much more expensive. While I had to shop around more, I was able to build my supply, albeit at higher prices. That is the nature of the game. I could have simply just refused to pay higher prices and complained about everyone else buying hundreds of rounds of .22. I had not reached my minimum amount of ammo for each caliber yet, so I wanted to continue to build my supplies. Naturally, this took me longer because of the shortage and having to look harder, but I was still able to increase my supply.

A prepper should be always looking to improve their supplies so that disruptions like this affect us less.

Don’t stop looking if Walmart is empty. Almost every time I looked for ammo at Walmart, they had empty cases and this lasted for several months. I heard of people figuring out the truck delivery schedule and camping out in the parking lot, but that seems crazy to me. I had the best luck at gun shows. The prices were comparable with the online retailers but you didn’t have to pay shipping. Regardless of the price increase, they still had the supply. Someone will want to sell you ammo and you can find it if you look.

Another thing I tried to do was to not use my supply when I went to the range. On range day, I would go to the store (after things had settled down a little and ammo was available) and purchase the rounds I was going to shoot that day. If they didn’t have a certain caliber, I wasn’t shooting that gun. That way, I never depleted my supply.

Make your voice heard

Finally, if this issue has got you fired up, let your representatives know. You can either contact your congress critter directly or support agencies that are fighting issues like this. The one I chose to support is the NRA who for better or worse is the most prominent voice in the fight for any 2nd Amendment issues like this. Your membership helps fund their efforts to prevent any erosion of our rights.

Examples like this are just one of the reasons we stock up on items so that we have an ample supply in case there are disruptions. Just imagine if there was a shortage of milk or eggs. What would you do? Does this proposed ammo ban mean they are coming for our guns? Who knows? I am only concerned about my supply and right now that is pretty decent, but I have spent years getting to where I am. Bumps in the road like this will happen with everything and I think the best idea is to not get upset, keep your head down and keep prepping.

If you own a firearm and spend any amount of time on the internet each day,  you probably not heard that the ATF wants to change the classification of a


Foraging for Wild Carrot (Queen Anne’s lace), Sumac and Cattails

My study, fascination and field knowledge started early with plants and herbs. I was intrigued by the “Old and Unique” Shaker women’s ways and the vast knowledge of a plant or herb’s medicinal properties and applications.

My Father, was a quiet but powerful inspiration to me as he would busy himself in the “Seasons of Growing” and harvesting beautiful plants and flowers. I remember the very first organic garden he helped me plant with great patience. I can still see and feel the memory every time my bare feet touch the newly upturned coolness of the sandy loam in the hot and hazy weather.

This article will feature two of my favorite wild edible plants, Wild Carrot, species- Daucus carota and Sumacs- Rhus spp. I believe it is of great value and importance to know about the wild edible plants in your vicinity and how foraging for edible plants can benefit you. You may need this information if one were to be lost or stranded in the woodlands for some time.

Wild Carrot (Queen Anne’s Lace)

Wild Carrot (Queen Anne’s Lace) in an Illinois field before a storm

I will start with Wild Carrot, species- Daucus carota. This lovely white flowered plant is also affectionately called Queen Anne’s Lace, Bird’s Nest (for the dried brackets) and Bishop’s Lace. This plant is a somewhat biennial herbaceous plant that will grow to 1 or 2 feet high. The little flowers in the bracket are white and flat in a lacy clustered umbel. The leaves are tripinnate and very fine with stiff bracts that have three forks.

It is of extreme importance to remember that Wild Carrot has a firm stem that have small hairs all around it. The edible root smells of carrot.

One of the most crucial things I learned about this plant may also be a lifesaver in a field study especially if you are in need of food! The plant has a tiny red to purple flower in the direct center of the lacy cluster. This little flower derives its color from anthocyanin to attract insects, is worth noting in the field. You must be able to identify this when searching for Wild Carrot because it resembles Poison Hemlock. Poison Hemlock’s root smells vile and leaf stalks are hairless! A small amount of Hemlock can cause paralysis and death! Please always remember this in your field study of wild plants.

I also want to remind everyone because of misidentification, beginners should make no attempt to use Wild Carrot until you can distinguish it from Poison Hemlock and Fool’s Parsley! Once you feel comfortable in your knowledge of this plant you will find it to be useful. It grows abundantly throughout fields and waste places in Midwest, southern and northern regions of America. It will flower from May to October.

Sumacs- Rhus spp.


Sumacs are lovely summer to autumn shrub like or small trees with large feather compound leaves, pithy twigs and milky sap. The densely packed red fruit clusters are small, hairy and dry.  The silhouette of this plant in winter is distinctive for it holds onto its clusters.

Sumac can be used as a refreshing drink with vitamin c. Its acidic nature makes it taste like a pink lemonade. I would always find this abundant plant on upland open fields and forest borders in IL, IN, KY, TN and northern GA.

In the summer when the berries are ripe and before the heavy rains wash away the acid, collect the entire fruit cluster and rub it gently to bruise the red berries. You then can soak for 10 to 15 minutes in cool water. Then gently remove the cluster and pour the pink juice mix through cheesecloth to strain out any tiny hairs and berries. You can drink as is or sweeten to taste this refreshing drink.

Smooth Sumac in a Kentucky Autumn Field

Cattails


Cattails- Typha spp. is one of the most interesting plants found profusely in brackish and shallow water. It flowers May through hot July forming extensive tall stands in wet areas.

I love that Cattails have so many uses as an edible plant! You can use the stalks and shoots, spikes, pollen, sprouts, rootstock and the immature flower. How incredible is that and great to know if you are in the wild stranded without food for a period of time.

A Field Guide to Edible Wild Plants: Eastern and central North America

The leaves of this stately plant are sword like and erect. The stiff stems are unbranched and topped with cylindrical heads of tiny flowers. The male flower head is golden yellow when full of pollen and the female flower head is sausage shaped green at first and then turning to a warm brown.

It is one of the most versatile of the wild edible plant family. In springtime the young shoots can be pulled from the rootstock, peeled and then boiled for 10 to 15 minutes like an asparagus. It can also be eaten raw. The very young flower spikes can be prepared and eaten like corn on the cob with butter. Gather these before they erupt out of their paper like sheathing of leaves and boil. This makes a unique wild vegetable to enjoy. The young 2-4 foot stalks can be prepared and peeled to the white core and boiled just like the shoots. The pollen makes an excellent and rich in protein flour that can be used with wheat flour or on its own. Gather the golden flower spikes in early summer and put into a plastic bag to shake off the pollen. Before autumn the flower heads produce a horn like sprout that forms on the tip of the rootstock. These can be boiled for 10 minutes or added to salads. Cattails have a starchy core at their base that can be prepared like a potato. Last but not least during fall, winter and early spring the cattails rootstocks that are buried shallow have collected much starch. This starch can produce lovely white flour. Collect, wash well and peel the outer covering to reveal its core. Crush the core in a pail of cool water to separate fibers from the starchy substance. Remove fiber to allow starch to settle and then pour the water off. Repeat this process one more time and then you will have a nice flour to use or dry it to use at a later date. Always dry the flour and plants very well before storing to ensure freshness and keep rancidity at bay.

It is very enjoyable to do field studies and school yourself of the properties and uses of the wild edible plants that grow profusely in your vicinity. It may be of great importance to you and your loved ones. Enjoy the great outdoors and all it has to offer. Always enjoy the journey….

Stay tuned for more of my wild edible plant writings!

The photographs that accompany this article were taken by me in Indiana, Illinois and Kentucky.

  Foraging for Wild Carrot (Queen Anne’s lace), Sumac and Cattails My study, fascination and field knowledge started early with plants and herbs. I was intrigued by the “Old and Unique” Shaker


I have a tight budget. I’m talking, poverty level budget, and with survival products being over the top expensive, prepping can be really hard. There are hundreds of articles about prepping on a budget. They present us with products that are “budget friendly,” and ideas on what is the best way to prep and save money, but those products don’t fit the budget, those ideas don’t fit the forced lifestyle of the poor. The “Impoverished.”

I’m a college student and currently I gross $8000 annually, and have had to work extremely hard to get up my preps. The following are a few tips to help others with getting ready in a similar situation.

Be Patient

Every step of this process is going to take some time. It’s tempting to blow a whole paycheck on survival gear, I know, but it’s better to show yourself that you can work and wait for what you need. Think about growing vegetables, you can’t pick all of your tomatoes just because one of them is ripe. Everything has to be ready, at it’s own time. Don’t rush anything, even if it feels urgent. We’re turtles, and we will win the race.

Cut it Off

Get rid of what you don’t need. You can use a towel and wash it, instead of using paper towels. Doing dishes is not going to kill you. You don’t need Air Jordan’s if you aren’t on the college basketball team. Why do you have Wifi, if it comes free with your apartment? It’s slow, but it works.

Save money wherever you can, just to save it. Take shorter showers, turn off the water when you brush your teeth, and open the blinds, instead of turning on the lights.

P.S. You’ll be lucky to have running water, let alone internet, when SHTF.

Budget Everything

Budget gas, groceries, rent, savings, insurance, bus fare, fun. Whatever you need to pay for each paycheck, budget. Write how much you can spend, on each item and only spend that much. Seriously. For people like me the most important things are going to be rent, and gas/transportation to make my next check. Write what that costs, and then prioritize and move down the list. Fun is the last thing you budget after you read the next two items.

Budget a savings amount, I save 8% of each paycheck, when possible. After two years of doing this, I have a month of cushion, if I were to lose my job.  After your “Normal” expenses are accounted for, you need to budget in prepping. Just $10 per month. Less if you have less, more if you have more, this is a priority, above going to the movies or the bar; be responsible.

Make sure your math adds up, don’t have a $1,000 spending budget with a $500 paycheck. A good tip for those who are really struggling, is to make payments each paycheck; save a little from each paycheck to put towards your bills.

Learn and Practice

No book you buy can teach you more than you can learn for free, you’re on the internet, use it. Learn to make a fire, learn to make a shelter, learn how to fish and make traps. Learn to do this with just I knife and what nature has given you, because buying a tarp, might not fit your budget.
Learn what is edible and poisonous in your geographical area, how to identify it and how to cook it. I love clover, in salads and as an add in, in curry.

Practice all of this. It’s fun and free. Those two words are beautiful to see in the same sentence. Practice with kids in your family. Practice on a date; firelight and natural shelter in the woods, with some soup boiled over the fire… I say romantic. Run drills, for everything from fire and power outages, to riots and looters.

Don’t be a Gear Snob

I understand the importance of quality, the $1.00 knife you have is better than the $100 knife you would have someday. If you’re struggling to even eat, you don’t need to be turning up your nose. There is a time and place for quality, and yes, one $50 shovel may outlast five $10 Shovels, but we need to make sure that we have a shovel. Search before purchasing, find the best deals, that you can.

Hoard, Reduce, Reuse, Recycle

If it is safe and reasonable to keep using something, do. It saves money. Your backpack for school is your edc, last year’s backpack is your bug out bag. Make do. Use what you have. You can even learn to make a gas mask from a coke bottle and a beer can.

Shop the bulk aisle for groceries and for preps, I watched the store employee pour brand name flour in the bulk bin, once… that’s quality and quality at the cheapest price.

Public Resources

Use the library for information. Use the food shelf to find canned and bagged food to stock pile. Get help, if you’re below the poverty line, these resources are for you. USE THEM. My food stash is all canned goods from the food shelter, I just keep track of the date.

Save up

Now, I mean this as in after you have your basics. Once you have a decent emergency box BOB, car kit, and edc, you can buy more high quality products to replace what you have, especially when something breaks.

Live, Now

I told you how to save money, throughout this article, you should have preps and maybe even some money left over. Save up for something fun, with your leftovers. Life spent only planning for the future, isn’t really a life at all.

I could write books on this, but I have class, a job and a daughter to deal with. I hope I can help even one person in my situation to be ready for whatever the future may bring. Do what you need to do, only you know what you can do.

  I have a tight budget. I’m talking, poverty level budget, and with survival products being over the top expensive, prepping can be really hard. There are hundreds of articles about

When it comes to long term food storage, there are several obvious candidates. In Prepper and Survival circles, we talk about storing grains in Mylar bags packed in 5 gallon buckets with oxygen absorbers, creating a pantry and canning fresh foods from your garden, MRE’s and freeze-dried foods. I have some of all of these options stored for our family, but some foods are great for other reasons, not just surviving doomsday.

You can probably take your 5 gallon buckets of rice, beans and grains to your survival retreat with you provided you have a car and aren’t walking on foot, but you can’t hike cross country with them. Canned food is great for storing and preserving fresh fruits and vegetables without the need for refrigeration, but you don’t want to take them camping with you. MRE’s are designed to feed troops in combat, but they aren’t the tastiest meals and are much heavier than other options. Freeze Dried foods excel both in storage life and they are incredibly light-weight. Not to mention, they won’t break if you drop them. Sorry canned tomatoes.

I was sent several packets of Mountain House Freeze Dried foods. I had meant to write a review last month, but life has a way of throwing obstacles in my way some times and in the chaos, I completely forgot.

Jetboil Flash Personal Cooking System

Freeze-dried food usually comes in meal form although you can get Mountain House individual foods if you are looking at making your own meals. When it comes to camping or a bug out bag, I want simplicity and like I said, light weight. Taste and nutritional value are definitely important too, but if they can’t meet the first two requirements, the last two don’t matter to me. My family has carried Mountain House freeze dried foods with us on several backpacking trips and they are usually my go-to meal when I am camping during hunting season.

The two meals I started cooking up were Spaghetti with Meat sauce and Chicken Teriyaki with Rice. Both meals as tested have 230 calories and are designed to feed one person.

The only thing that is required to make these dusty granules into a warm meal is hot water. You can either boil some over your fire, or use a camp stove. My favorite so far is the Jetboil Flash personal cooking system. This can cook larger meals with a bigger pot, but since I primarily use it for coffee and freeze-dried foods, it’s main duty is boiling water. I tried cooking an apple dumpling type meal one time for my daughter and failed to judge how quickly it would get hot, then burn… That is what I get for not reading the directions. The last thing you want to do on a backpacking trip miles from civilization is try to get burnt apple turnover mess off the interior of your main water boiling device.

Mountain House Spaghetti with Meat Sauce – before water.

Another great thing about Mountain House meals (and probably all the other vendors), is that you don’t really need any cookware either, except for a spoon. You can eat the meals, once rehydrated right out of the bag. Preparation is so simple that anyone can do this. Just open the package, remove the bag of desiccant, add the required amount of hot water, stir and close the bag up. For these two meals, I only had to wait 8-9 minutes which gave me time to work on boiling the water for my coffee.

How do they taste?

The question everyone wants to ask, is But how do they taste? I’ll be honest and tell you two things. First is that I was in the Army for a long time and didn’t meet too many meals (if any) that I could not eat. Secondly, I am not a food snob. Now, that being said, I won’t eat just anything and I am not afraid to say something doesn’t taste right, but you will never find me gagging if the leftovers are a few days too old if you know what I mean.

Cooked and ready to eat.

Every one of the Mountain House meals I have tasted have been great considering what they are. The Spaghetti had plenty of flavor and I really only wished I had about two packets instead of the one. Of course, I should probably only have that much food for a single meal, but if you are hiking all day and need to replenish calories, one of the other meals or a larger packet might work better. It is also the case that I received samples, so the real meal might include more food. Actually, it only stands to reason they would.

The Chicken Teriyaki was not as good (personal taste) as the Spaghetti, but as food goes, it tasted perfectly fine and I wouldn’t ever turn my nose up to either meal if I was offered them. Are they beautiful to look at? No they aren’t but this isn’t fresh food prepared by a chef. This is freeze dried food that tastes much better than it looks and can last on a shelf for up to 25 years. One of the great things about Mountain House is there is so much variety so if you have some favorites, stock up on those and leave the less desirable ones to someone else. My favorite breakfast meal from Mountain House is the Breakfast skillet. Loaded with potatoes, eggs, sausages and onions, it is my choice for cold mornings around the campfire.

I like Mountain House for camping but like I said, they are in my Bug Out Bag too because they are light and only require hot water. Some people will say, you may not have time to boil water so you need to take foods that don’t require anything to eat. I can see that point, but I say if you don’t have time to boil water, maybe you shouldn’t be eating either. Throw a snack bar in your pocket and go, but if you are being chased through the woods by the zombie hordes food is probably the last thing on your mind anyway.

If you are looking for a tasty freeze-dried vendor for your next camping trip, long term storage plans or Bug Out Bag, Mountain House gets my vote.

When it comes to long term food storage, there are several obvious candidates. In Prepper and Survival circles, we talk about storing grains in Mylar bags packed in 5 gallon

At some point in your prepping journey you will need to think about Security and for many of us, these are the first thoughts that trigger an initial investigation into the world of prepping. Security in the context of prepping, from my stand-point encompasses your safety in a possibly unsafe world. Security is a broad topic that covers a lot of territory and seems to work itself into most aspects of life in one form or other in the grid-down hypothetical context and there is no shortage of debate when you start digging into the details, opinions and recommendations.

Security from the standpoint of your home deals with keeping you safe from people trying to get into your home. Security in a bug out scenario usually gets into threats from those who might try to harm you when you are out of the relative safety of any structure. Security is almost always focused on the threat of humans to your safety, but there are those who downplay any threat at all or who recommend a different tactic of running away as a solution.

My articles in Final Prepper have a definite slant towards using firearms as defensive options and I know that is anathema to some of you. There are people who simply do not believe that firearms should be allowed anywhere. There are others who believe that only the military or the police should have weapons. There are still others that believe you will surely die if weapons are involved because you are an idiot with no training so you should swim out to sea to avoid confrontation at all costs. All of these positions seem to me to ignore history completely and put preppers at a disadvantage that could end up killing your family more quickly than if you had taken the opposite tract and understood that the world is full of evil and evil rarely goes down without a fight. Some advocate our only hope is to pack up everything we have and move thousands of miles away. To me that is an incredibly naive position that assumes everyone has the resources and capabilities as they do.

Illusion Busting: The world is not a peaceful place

Can’t we all just get along? The immortal words of Rodney King still come to my mind when we talk about defending ourselves from violence. Sure, it would be great if everyone in the world settled their differences with calm reasoned debate and plenty of compromise, warm hugs and thank you cards, but that is pure fantasy. Today, when we have agreements and compromise, they really only have a chance of forming or lasting because there is some societal order. When consequences of a legal system for your actions are a clear possibility, people try harder to get along. When people are safe to complain about how you are acting without fear they will be injured, you play nice. Take that societal structure of safety away and we return to a more primitive style of handling things.

Ideals are peaceful, history is violent.

I recently watched the movie Fury. If you haven’t seen the movie, it is set during the end of WWII. Without getting into too many details, the main character; a battle hardened tank commander, is trying to get his fresh-faced new private to see the reality of war. When everything the new guy sees around him is so completely different from the world he grew up in, he shuts down and actually wishes to die rather than face the ugly reality of war. The commander says “Ideals are peaceful, history is violent” as a way of communicating the reality of their present situation. War is hell and people die. Bad guys will try to kill you and there isn’t any getting along right now. You can’t simply refuse to kill the enemy, because if you don’t kill them, they will surely kill you.

For what it’s worth, if you like war movies, Fury is a good one, but the line that apparently was Ad-libbed by Brad Pitt struck me as a poignant reminder of two things. First, that I prepare for bad times because history has a way of repeating itself. I think it is foolish to expect the best forever and always and I have millions of events on my side to back that precaution up. We have had it far too good for far too long. The second thing is that during history, we have seen as humans one heck of a lot of violence. That is our nature and violence is to be expected in certain situations. If there ever was a time to expect violence it is if the grid goes down or TEOTWAWKI happens.

Why is planning to avoid confrontation a losing strategy in the long run

I understand that due to location or background, some people are unable to own firearms. I understand that the average civilian with little training is no match for an organized group of mercenaries. I completely agree that a single person with a gun is not going to last for long in an Alamo stand against a mob of people intent on getting in. That is not the point of this article.

The point of this article is to try to convey to you that if you don’t plan for violence you may not be able to do anything about it. Could you die during the course of defending your life? Of course you could, but we all die eventually. I am not saying you should go out in a hail of bullets, but I am saying if you want to have a chance in a violent world, you should consider leveling the playing field. Sure, you might not win that gun-fight, but you definitely won’t win if you are hiding in the closet holding a bat when the bad guys with guns kick in the door.

Running away from a fight is a short-term strategy. If you can run away from a gun fight I think that is the wisest move you can make, but what if you can’t? What if you can no longer run? What if there is nowhere left to run? What if you sail out to sea thinking you are the smartest person in the world and pirates come and take over your boat because they out gun you? When your wife is getting raped on the floor in front of you, will you wish you had been able to at least try to defend her then?

I know this post may offend some of you and I won’t win over those who will say “I would rather die than live in a world like that”. There are some who simply disagree and that too is human nature. Some of you would rather die than try to defend your life and sadly, I think that is what will happen. But if that is your attitude, why are you prepping at all?

At a recent gun show I attended I was struck with how much the attendance had grown over the years. 10 years ago we might have had 2 gun shows a year in my town, now it is more like 7. Each show is more packed and I marveled at how full the parking lot was as I pulled in this time. People everywhere seem to sense that the echoes of history are sounding again and as it has been innumerable times in the past, it will likely be violent to some degree. I have said before that prepping is pro-life because I believe anyone who is prepping wants to live. They want to see their children grow up, get married and have grandchildren. We all want peace and to be able to get along, but there has always been and will always be those who are intent on killing and destroying.Unless you want to die, wouldn’t you prepare to fight violence? Wouldn’t you plan for the necessity of violence as a potential way of defending your life?

We prepare for those types of people if we want to survive.

At some point in your prepping journey you will need to think about Security and for many of us, these are the first thoughts that trigger an initial investigation into

As a concealed carry license holder, I am always looking for the best way to carry concealed in whatever situation I find myself in. What I have found over many years is that this requires a little bit of flexibility and the method of concealed carry and more importantly, whether it will work for you, greatly depends on what you are carrying, where you are carrying and what you are planning on doing when you are carrying.

Today I wanted to discuss some of the methods of concealed carry that I have personally tried and share some of the advantages and disadvantages of each method from my own experience. I will talk about what works (for me) and what doesn’t and give you different scenarios where each might be better than another method. I am writing this post because for so many years I have been listening to “the experts” who advocate one method of concealed carry over another as gospel. Like the debate over which caliber handgun is the best or which is the best SHTF rifle: AR-15 or AK47, the debate over your personal best way to carry concealed will generate some different opinions.

Why carry concealed in the first place?

Before I begin with the different methods of concealed carry, let me briefly divert into why I carry concealed in the first place. Simply put, I carry concealed because I want options. If a bad guy is intent on doing me, my loved ones or even a stranger deadly harm I want to be able to address the threat with as much force as a bad guy is likely to have. Just recently, a man (in the video below) walked into a liquor store and started shooting up the place. The reason he did this doesn’t matter. The man is a lunatic who wanted to kill everyone and he should be dealt with as quickly as possible to save lives. According to news reports, what you don’t see is a concealed carry holder confronts the man off camera and put an end to the violence in the store. Unfortunately, the shooter escaped to injure his parents before he was finally put down by police.


Can you imagine what it would have been like to be a patron of that store when this idiot walked in there and started shooting? If that ever happens to me, I want the option to do something about it. That is why I carry concealed. Options. Prepping is like that too. I prepare so I don’t have to go hungry if the stores run out of food. I won’t go thirsty if the town’s water is polluted and I can’t drink from the tap. If I have to bug out and leave everything I have behind, I have that option.

Different ways to carry concealed

Since I am talking about options, let’s look at a few concealed carry options that I have personally used and I will give you the situation I used these in and my observations.

Pocket Carry

Pocket Carry is probably the most common form (until recently) of concealed carry I have used. Why? Well, I work in an office where I sit down at a desk all day and work on a computer. I also have to dress up sometimes, meet clients and mingle. Pocket carry for me is as simple as it gets for the right size weapon. To facilitate pocket carry, I chose the KEL-TEC P-3AT. The KEL-TEC was my first weapon purchased for the express purpose of concealed carry and this has it’s good points and bad points.

Pocket Carry is the most discrete and worry free method of carry, but compactness has it’s drawbacks.

Pros of Pocket Carry

  • Drop it in the pocket and forget about it.
  • Very concealable – I never have had anyone ask me about what is in my pocket and I have never had anyone accidentally touch my firearm when I pocket carry.
  • Works great in dress pants or jeans. Easily the least worry of printing in almost any situation.
  • Lighter weapon means you can also use this with lightweight hiking shorts without your pants falling down.

Cons of Pocket Carry

  • To get a weapon that will easily conceal in a pocket you have to limit your firepower somewhat. I used a .380 which is really not enough power in my mind now to effectively put down an attacker quickly. I know, I know, it’s all about shot placement, right and a .22 to the brain will stop someone just as fast as a .45. I disagree on that one. Would you want to go up against a bear or a 220 pound man who is high on Flakka with only a .380?
  • Sitting down in the car, seat buckled makes it really hard to whip this thing out. I could do it if I popped off the seat belt and reared back pretty far.
  • Pocket lint – minor issue I know , but man there is a lot of lint on my KEL-TEC so cleaning frequently was a good idea if for nothing else than it was embarrassing.
  • In some pants with larger pockets like my hiking pants, the holster would turn sideways with the barrel facing to my right making the draw a slightly more complicated process. Eventually the weapon would start swinging like I had a big rock in my pocket.
  • Reduces you to one pocket because you can’t put anything in there with your firearm.
  • I actually had to learn to flick the holster off with one finger because just drawing out the firearm would occasionally leave the holster on. The last thing I want to do is draw my weapon only to have it still safely ensconced in its holster and me with a stupid look on my face.

Small of Back

When I got my Glock 30SF, this was my preferred method of carry most times. I have heard this referred to by a few different names. 4 o’clock position behind your strong side hip is where I would always keep my heavy 45 and this had some advantages and disadvantages as well. The results for me were pretty much the same regardless of whether I carried inside the waistband or outside. Actually inside the waistband was much less comfortable.

Small of Back is great when I am moving around, not sitting for long periods of time and works better for me in cooler climates. Holster is a sturdy leather.

Pros of Small of Back Carry

  • From the front, you are really concealed and there is no noticeable shape to discern.
  • Drawing from this position felt good and seemed natural. I didn’t have to manipulate my hand around the firearm, but again, this probably had some to do with the size of my handgrips too.
  • In the winter time or when I had more clothes needed for daily wear; this was my go-to concealed carry option.
  • Walking around this is very comfortable

Cons of Small of Back Carry

  • When you bend over, even slightly, people can see the lump in your back no matter the size of the weapon or whether it is inside the WB or outside.
  • You can’t tuck a shirt in with this method. Drawing would be a nightmare. Also, any kind of pack would be a pain with this method of carry.
  • If someone grabs you from behind, they might prevent you from drawing your weapon.
  • Someone could try to disarm you from behind and I know you are supposed to be more aware of things like this, but it is still a thought.
  • Sitting down is a pain. I couldn’t easily wear this at work.
  • On a long car trip? Forget it. Not only would your spine be out of whack, you would never be able to get to your firearm in an emergency.
  • I have been hugged and people will tap my firearm and ask me what that is. Depending on the situation I will either confess it is a weapon or lie and tell them it is an insulin pump.
  • Holstering might take a little longer. If you are carrying inside the waistband you might need to loosen your pants first.
  • Holster is right over my wallet which makes me have to carry the wallet in the front pocket.

Strong Side Hip

Carrying at the 3 o’clock position is what you typically see cowboys, military and police doing. This method places the gun directly on your belt, strong side so you can get to it easily in most situations.

Strong side carry is probably the most comfortable outside of pocket but the issues with printing are more pronounced. Holster is from Raven Concealed.

Pros of Strong Side Hip Carry

  • Drawing from the position was very intuitive and easy.
  • All you need is a slightly larger shirt or jacket to cover the weapon
  • Running or walking isn’t impeded by carrying in this position.
  • Holstering is simple.
  • This method of carry does not put the weapon in your back so sitting down isn’t a problem.
  • The weapon fits nicely beside your elbow so it is easy to maintain control or awareness of the weapon.

Cons of Strong Side Hip Carry

  • Even on the side, this method prints when you bend over and most people can see that you have something on your hip unless you are wearing a Fat Albert sized shirt.
  • In a car, this method is also usually covered by the seat-belt.
  • Again, this method is easily detected by hugs which happen from time to time.

Fanny Pack

Yes, I have used a fanny pack to conceal my .380 before when necessary. Fanny packs aren’t for everyone and they have to go on the front, not the fanny but they have some usefulness too.

Pros of Fanny Pack Carry

  • Many of the same advantages of Pocket carry. Drop it in the fanny pack and forget about it.
  • Very concealable – I never have had anyone ask me about what is in my fanny pack and I have never had anyone accidentally touch my firearm.
  • Works great in dress pants or jeans. Easily the least worry of printing in almost any situation.
  • Lighter weapon means you can also use this with lightweight hiking shorts without your pants falling down.

Cons of Fanny Pack Carry – Similar to Pocket Carry

  • To get a weapon that will easily conceal in a pocket you have to limit your firepower somewhat. I used a .380 which is really not enough power in my mind now to effectively put down an attacker quickly.
  • You do have to manage a zipper and possibly other things in the pocket before you draw.

Appendix Carry

This is the newest method I am trying to get used to because I finally got a hold of the new Glock 43 which is what I plan on carrying as my concealed weapon on most days now. Appendix carry takes some getting used to. Some people swear by it but I am still deliberating.

Appendix Carry is new to me, but with my new Glock 43 which boasts a lighter, yet powerful weapon, it may be the new choice in some circumstances. Holster is the Crossbreed Appendix Carry.

Pros of Appendix Carry

  • Arguably one of the best concealment of any method (outside of pocket carry) I have tried as long as I am standing up.
  • Can be used with a shirt tucked in or out
  • You can conceal a larger weapon
  • Drawing from Appendix carry might be a millisecond faster with practice.
  • You can drive while appendix carrying and still get to your weapon pretty easily.
  • I have never had anyone put their hands near my crotch at work.
  • Nobody hugs me down there.

Cons of Appendix Carry

  • Positioning, positioning, positioning. When I was first getting the hang of this, I think I pushed my holster too far down. Walking around this was OK, but bending over killed me. Once I lifted the holster up a little bit that got better.
  • Going to the restroom takes a little more finagling if you are carrying front and center.
  • I have to work a little more to get my thumb behind the grip because the weapon is pressed against my skin.
  • Might not be the best option for overweight people
  • If your weapon ever could go off, this is the absolute last place I would ever want it to be.

Ankle Holster

This is the last method I have tried and I only tried it for about an hour. I think I finally threw my ankle holster away because it was just too painful to even wear.

Pros of Ankle Holster

  • Great concealment with minimal printing

Cons of Ankle Holster

  • Small caliber needed to be practical
  • Weight of even the modest .380 hurt my ankles quickly
  • Drawing would require some additional physical movement and dexterity.

So there you have 6 different ways of carrying concealed. I know there are more like shoulder holsters and belly bands, but I have never used those methods myself. I used all of these methods based upon the situation and what I am carrying. For instance on business travel, I may pocket carry or appendix carry but never the other two. In the winter, outside of work I am more likely to strap the larger .45 on and carry behind my back because I won’t be sitting all day . I don’t think there is any one best way to carry concealed, but there are many different ways  that you can carry that suit you and the situation best.

Options.

What is your favorite way to carry concealed and why do you like that method?

As a concealed carry license holder, I am always looking for the best way to carry concealed in whatever situation I find myself in. What I have found over many

I work in a retail store’s warehouse. As anyone familiar with logistics work knows it’s basically just a big windowless box, and the lights are a long way off the ground, with lots of areas of shadow. One of my jobs is to drive order pickers down the rows and raise the platforms up around 40 feet in the air to gather orders off the shelves. Over the summer, I was all the way up at the top rack with my order picker, when I heard an explosion outside the building and the lights went black. The normally gloomy area was now completely dark; I couldn’t see my hand in front of my face. A lot of people told me afterward that if they’d been in my position they would have panicked. I didn’t, however, because I had something on me that I always carry, no matter what: a flashlight.

What had ended up happening was that lightning had struck a transformer across the field, flash-vaporizing the oil inside and cutting power to our whole building. The sad thing was, we only had a couple of flashlights and over forty people were on duty in the store at the time. Luckily I had two on my person and another three in my van, all of them with extra batteries. My coworkers laughed, but I was able to help locate confused customers and start restoring order.

The point of that anecdote was to provide a case study of a very mundane event—a power loss due to electrical storm—that my prepared mindset enabled me to react to in an efficient and helpful way. I got laughed at, sure, for having so many flashlights, but I had more people come up and thank me for being able to lend a hand.

Flashlights are often overlooked as a part of a prepper’s Every Day Carry, especially for beginners. They’re not sexy, like guns and knives and monkey fists. They’re often considered bulky, awkward to use, and unnecessary. But as my story goes to show—and I have numerous others from various jobs and situations—they are far from unnecessary. In fact, flashlights are one of the most useful pieces of prepper gear you can carry on you at all times. You’re far more likely to whip out your flashlight than your gun or even your knife (and I say this as someone who always carries at least two knives and owns numerous firearms) in day-to-day interactions.

So, with all that by way of introduction, what are some good characteristics of an EDC flashlight that will serve well both pre- and post-event? Let’s look at a quick overview.

Characteristics of a Good Every Day Carry Flashlight:

EDC flashlights have to do a few basic things: They have to be easy to carry, take readily available batteries, be lightweight, streamlined, easy to operate, and provide adequate illumination. Let’s break these categories down a bit.

The best flashlight is one you have on you at all times.

An EDC light that’s easy to carry is one that you are going to have no second thoughts about throwing in your pocket or purse. It’s kind of like the “Always Gun” concept for flashlights. For those of you unfamiliar with the Always Gun concept, it means that even if you have a bigger, more powerful gun for specific situations you still need a gun that you will always carry, meaning it’s small, light, and easy enough to use that you won’t leave it home. With a gun this could mean you carry your Ruger Redhawk when walking in bear country, but a Ruger LCR when you’re at work in the city. Applying this to flashlights, this is the difference between a big MagLite 4 D-Cell flashlight that you keep by your bed and don’t take anywhere, and the little MiniMag penlight you keep on your keychain.

Readily available batteries should be self-explanatory but for a surprising number of people it’s not. The current rage in prepper products is for all things Tacti-Cool. These items have the appearance of being for high-speed operators, but are in reality bulky hindrances designed for mall ninjas. Case in point: more and more modern flashlights come with rechargeable batteries. I’m not against rechargeable batteries per se, but I do think they make for a bad EDC choice. Many of these batteries require USB charging cables, meaning they need to charge off of a computer or mobile power pack. This may be fine for a flashlight you keep in a truck or charging on the nightstand, but it’s not convenient to carry when prepping for life’s little (or not so little) emergencies. If you don’t carry any spare batteries on you (which you should, since a single change of batteries for a good EDC light adds negligible pocket mass and weight) or if your batteries have expired or gone bad, having very common batteries allows you to either swap supplied with someone else who is similarly prepared (this is why my sister and I carry flashlights that take the same batteries, since we work together), or allows you to buy them quickly from almost any retail or convenience outlet. It also allows you to help others if their light has gone out. Recently I tried to help a man whose flashlight was on the blink, but couldn’t because his light was highly specialized and only took one specific kind of battery I not only didn’t have but had never heard of.

Goldenguy 5 Pack Mini Cree Q5 LED Flashlight Torch 7w 350lm Adjustable Focus Zoomable Light – Great stocking stuffer.

A side point to keep in mind, where practicable, is to keep as much commonality between the power sources for your EDC flashlight and any lights on your EDC handgun or go-to home defense long gun. This is not a hard and fast rule, and often not applicable, but it will streamline supplies if it is possible. My EDC flashlights and the lights I’ve attached to my Ruger 10/22 and Mossberg 500 20 gauge shotgun (I live in town so need lower-powered firearms for home defense) all take the same batteries, meaning I can supply them all from the same stockpile.

Weight is a major consideration for an EDC flashlight. Most of us can’t go around in military web gear or with assault packs on our backs. We need something that we can easily fit into a pants pocket or a purse, and that isn’t going to slow us up, pull our pants down, or give us a sore shoulder. I have never weighed any of my EDC lights to get an exact measurement, but I know that they all come in at only a few ounces, even with batteries.

Another consideration is a streamlined design. Lots of lights look cool and techno, or tactical, or retro, or whatever floats your boat. But when selecting an EDC light, you have to keep in mind what kind of clothing you’re most likely going to be wearing and what kinds of activities you will most likely be doing while carrying the light. Believe it or not, what kinds of work you’ll be doing actually has a lot to do with what kind of light you select. That’s why I have a modest array of lights I can choose from depending on what I’m going to be doing. If I’m going to be mostly sitting at a desk or riding in a car, then I don’t need to worry much about a light that’s easy to turn on in my pocket because I won’t be moving my leg much. On the other hand, if I’m going to be out in the woods, at work, or on the range, where I’m going to be doing a lot of moving, squatting, or bending, I’ll carry a different type of light that isn’t so easy to turn on by mistake. There’s nothing worse in the world of flashlights than to pull your light out of your pocket and not have it shine because you’ve accidentally worn down the battery. So pick something that will fit within your lifestyle and the kinds of clothing you wear. If you wear cargo pants you’ll be able to get away with one design, skinny jeans or dress pants will require a different approach.

One important feature when thinking about design is the activation method. There are two main activation types on flashlights: Twist and push. Twist-type flashlights require you to twist either the head or the end cap to get it to turn on. I don’t personally like them because they’re almost impossible to use one-handed, but their advantage is that they seldom if ever turn on in your pocket.

Push flashlights can be further subdivided into standard push lights—where the button is up near the head of the light—and tactical, where the button is on the end cap or somewhere near it. Obviously this is a generalization, there are tactical lights with the push button near the head, and non-tactical lights with end cap activator. But for the sake of discussion this broad classification will work. By and large I recommend a tactical-style light with a somewhat recessed end cap button, as this is the hardest to accidentally activate. Standard types are the easiest to burn out through careless pocket activation, but there are some with good stiff buttons that are more resistant to this.

Easy to operate is fairly straightforward: get a light that fits your needs and that you can easily grab and turn on without thinking or looking. Odds are that you’ll be in the dark when you need it, and fumbling for your light’s on/off switch is the last thing you want to be doing, as you’re more likely to drop it than anything else.

One other thing to keep in mind when considering ease of operation is the bulb type. I am a fan of LEDs because they never get hot, do not need to be changed, and will not break so easily if dropped. However, if you have very sensitive eyes and will need to be using the light in close proximity to your face, such as in very tight quarters or inside an engine or mechanical assemblies, you may want to consider a standard incandescent flashlight. While they do not last as long and do not put out nearly as much light, they are gentler on the eyes.

Personally, I like a high-lumen light that provides a very bright beam over a short, wide space.

Lastly, I want to touch on adequate illumination. This is a tricky subject because it’s going to be different for everyone. The illumination a flashlight offers is measured in lumens. Without going into the physics definition of what exactly a lumen is, this unit is used to measure and compare the brightness of a flashlight’s beam. A higher number of lumens will be a brighter beam, and most likely reach farther. However the latter is not assured, as other factors including the lens material of the flashlight, mirrors inside the light head, the condition of the lens, and a few others dictate exactly how far a beam will reach.

Personally, I like a high-lumen light that provides a very bright beam over a short, wide space. This is because I’m usually using the light in cramped quarters or indoors, so I don’t need it to illuminate very far. If I were going to be spending a lot of time in the dark outdoors I’d consider something with a longer beam. Take into consideration how much light your eyes need to function. My sister carries a relatively weak flashlight because she has very strong eyes and can practically see in the dark anyway. I, on the other hand, have very weak eyes and need a lot of light to do anything, so I carry a much brighter light most of the time. Another criteria is the type of beam you want. Depending on what you think you’re going to need the light for, you may want a very tight, long-range beam, a broad, well-defined inspection beam, a diffuse beam from the many smaller lamps of a pocket work light, an adjustable-focus beam, or yet another variety. Choose your light based on your normal environment and the kinds of things you expect could go wrong there. I personally work indoors and tend to be in tighter quarters, so I want a wider, short-range beam to illuminate more of my immediate surroundings and not cast so many shadows.

Earlier I mentioned flashlights getting the cold shoulder in favor of guns and knives and other defensive gadgets. While these tools are more effective in a truly deadly confrontation, I would be negligent if I didn’t address the defensive use of the flashlight before I close. A bright, easy-to-use flashlight ready on your person can be used to shine in a nighttime attacker’s eyes, blinding him and either giving you time to escape or draw a more effective weapon. Just one more reason to carry some form of pocket torch.

A flashlight may seem unnecessary in our modern world of 24/7 ceiling lights and power at the flick of a switch. But even without a major disaster it’s still possible to be left in the dark for minutes, hours, or even days. For the purpose of brevity I didn’t go into all the further points to consider when choosing a flashlight for your home or vehicle, but hopefully this short piece helped provide some items for consideration next time you’re looking over your EDC load.

I work in a retail store’s warehouse. As anyone familiar with logistics work knows it’s basically just a big windowless box, and the lights are a long way off the