Home2017September

Introduction to Slings (Part 2)

Last time we looked at the uses, types and history of slings.  Now let us consider how to choose a sling and look at some choices with potential for tactical use.

How to Choose a Rifle Sling

As is usually the case with anything, the first step in choosing the best rifle sling is to decide what you are going to use it for.  For a sport hunting arm, any old carrying strap will do.  A padded one will be comfortable for those long treks, and these are available in nylon and leather.  I tend to prefer the nylon ones as being more reasonably priced.  If you are doing competition shooting, go with what the rules of your events specify; a M1907 model sling might be optimal for some types of competitions.  For a tactical rifle or shotgun, a single point/two point convertible is often a good choice.

Slings are available in various widths.  I would tend to avoid 1″, the most common, when possible.  This is just because the narrower the strap, the more concentrated the weight applied where it contacts the body.  Of course, a sporting sling with a wider padded part would eliminate this concern, and in my day, I found Uncle Mike’s padded slings to be quite acceptable.  They do not appear to be sold these days, but if I were looking for one, I’d check out Butler Creek (same parent company as Uncle Mike’s), who appear to have some models which would be equivalent or even better.  For slings without a wide pad, the 1 1/4″ sling would often be a better choice than the 1″.

Wider slings are available, but usually only with clips for ring mounts.  For a tactical sling, I’d prefer 1 1/2″, and for a heavy tactical gun, I might even search for a 2″ sling.  There are a few padded tactical slings, but my theory is that if they were really superior, there would be a lot more of them.

When considering any sling, check out the “fixed” adjustment.  You want a sling which is big enough for any likely use of yours, without being too big for any use.  The fixed adjustment should be moderately easy to set, but more importantly, not move accidentally.  Some slings also need to have a “rapid” adjustment to switch between modes, separate from the fixed adjustment for size.  Make sure this adjustment mechanism is conveniently located, easily operated, and stays where you put it when it is not deliberately being moved.

Tactical Sling Choices

As mentioned, sport slings are not terribly different from each other, and competition slings tend to be specified by the competition.  The real excitement is in the tactical sling arena; usually a single point/two point convertible sling is a good choice, but there are a bunch of them, ranging in price from cheap ones from China to the $100 range.  Looking for one appropriate for a tactical shotgun, I set an arbitrary limit of $60.  The first one I considered was the Magpul MS3 or MS4, because they are a good company, and frankly, since they have their own QD clip, they “must know what they are doing”.  But they use 1.25″ webbing, which might be a bit narrow for such a heavy gun.  A very attractive one was the Cetacea Rabbit with two rapid adjustments instead of just one, but the 1″ webbing might be even less appropriate than the Magpul.  Finally, I found a 2″ wide one, the e-RUSH (enhanced Rapid Urban Sentry Hybrid) from Urban-E.R.T Tactical.  This is their top model, with all the sling bells and whistles.  They have a lower level model for economy and even a 1″ version if you like the style but don’t need the 2″ width.

Let’s take a closer look at the e-RUSH and the MS3.

e-RUSH sling

This photo shows the E-RUSH Sling transformed into a one point sling for single point use.

With a strap width of 2″, this is one of the better choices I’ve found for heavy long guns – if it will fit you.  Fixed adjustment is a simple sliding buckle providing one foot of adjustment.  The captured buckle means you can’t make it any shorter than two feet, and a very long label on the strap discourages you from getting three inches more than three feet;  there is a flat elastic section included.  Unlike the “bungee” section which is a more common methodology, this is at the forward end of the strap rather than at the butt end.  This is so that if you jump down and the weight of the gun stretches the sling downward, the elastic does not bring it back up to smack into your face.  And it is more comfortable and useful for chest expansion if you are breathing heavily.  The straps and attachments on each end of the 2″ strap are standard 1″.  With this and all the hardware, this means that using the strap like a normal sporting sling, for carrying (muzzle up) or shooting support, is not comfortable, and the moderate adjustment variance makes it too long for this anyway.  With all the hardware it has, you might be able to disassemble it and “build” it for “normal sporting” use, but it might still be too long and even if not, it hardly seems worth the effort.

On the butt end of the sling there is a locking strap system which allows you to attach a female buckle and ring, a female buckle and male buckle, or a female buckle and push button QD socket.  The female buckle is where you plug-in the male plug which is attached to the mount on the gun, and the ring/male buckle/QD socket is where you attach the forward end of the sling to convert it into a one point sling.  You can also attach a “CQB” adapter here instead, which eliminates the two-part buckle between the sling and the gun so it rides a few inches higher.  That is, the gun adapter is connected directly to the sling rather than through a quick disconnect buckle.

Read More: Top 5 Firearms you need to get your hands on now!

The other (forward) end of the sling has the same locking strap system.  This is attached to a fancy two function buckle.  On the top end, there is a small tab, which if you pull sharply, causes the buckle to come apart, giving an emergency exit from the sling.  The other end is a fast adjustment buckle, which allows you to tighten the sling by pulling on the protruding strap end, or loosen the sling by lifting up on the end of the buckle.  This gives you a rapid adjustment of sixteen inches.  On the other end of the rapid adjustment strap is the female buckle which attaches to the male plug connected to the forward sling attachment.  The rapid adjustment strap is handy to pull on to cinch up the system, but when the sling is cinched tight, that strap end can flop around.

Which QD adapters are available, you ask?  All the major ones are available, except for the Magpul one.  You can choose between the stud, the push button, the Mash clip, the HK clip, a locking strap (for a slot or fixed ring), and a version of the Universal Wire Loop using paracord instead of the stiffer and thinner wire (which may make it less versatile).  In order to use the ring to convert from two point to one point, you will have to use the Mash or HK clip on the front, and to use the QD socket to convert to single point, use the push button QD adapter on the front.  Or if you have the male plug for single point conversion, just unclip the front female buckle from the adapter in use, and fasten it to the male plug near the butt end.  This latter configuration allows you to have a female buckle attached to your belt, which allows you to fasten the male plug attached to adapter at the front end of the gun to that buckle to secure the front of the gun when quick access is not needed.

I’m quite large, and at the three-foot adjustment, it is just the right size.  If I had armor or a thick vest, it might not be long enough.  Functionally, this works quite well in one point mode with a shotgun or rifle with a pistol grip or any stock.  In two point mode, it is great for a pistol grip shotgun, but if the shotgun has a full size stock and a shell saddle, the butt end kind of sticks out (because the shell saddle is between the user and the gun.  The adapters which Velcro around the stock and the forearm to provide sling mount points on guns which don’t have them, or have them only on the bottom, work very well, except that putting it on an AR style stock prevents you from operating the charging handle, so should be avoided.

This system seems to meet my requirements for heavy tactical weapons, and is versatile enough that one sling can be used on any one of a variety of firearms.

MS3/MS4 sling

Magpul MS4 Gen 2 Multi-Mission Single Point / 2 Point Sling with Dual QD Swivels Nylon

This is kind of standard and simple in design.  There is their brand clip (MS3) or a QD clip (MS4) on the butt end, connected to a ring or QD socket.  Then the main strap to a buckle tasked as a double loop.  The fixed adjustment for this strap is two slide buckles, giving you about three feet of adjustment and more if you get creative.  The secondary strap gives you two feet of “instantaneous” adjustment and has another Magpul clip or a QD clip, and that’s it.  Simple and clean, it is more streamlined than the e-RUSH, but not as versatile.  You can also get a MS1 sling and upgrade it to a MS3 or MS4.

It is designed as a two point to one point convertible which means it can provide fast access, but no support for increased accuracy.  But it can be “tricked” into working as a standard sling, allowing the use of the “hasty sling” technique as well as muzzle up carry.  You’ll need a ring or QD socket forward and near the butt.  Rings are rare at the butt end, but you can install an unattached QD clip back there and that works adequately as a ring for the Magpul clip.  Then reassemble the fixed adjustment system to be much shorter (there will be a long strap end to feed back into the buckles) and it actually works fairly well for “hasty sling” and “normal” carry.

In its intended modes, it works quite well, with one big advantage and a couple of minor disadvantages.  The big advantage is the Magpul connecting clip.  This attaches to the ring parallel to the strap, rather than perpendicular like the HK or MASH clips.  And it doesn’t twist or rattle or slide around like those others.  With the cross lock, it is secure, yet very easy to attach or detach.  On the downside, there is no elastic element in the strap, so if you have it cinched up tight, you might restrict your breathing a bit.  The width is 1 1/4″ which is better than 1″, but not as good as bigger.  A heavy weapon gets a bit uncomfortable when hanging in single mode for a long period of time, which may not be normal usage.  And the quick adjustment tends to adjust itself sometimes.  Minor negatives, and for a medium or lightweight weapon, this is a pretty good choice.  There is a padded version of the MS1, which if upgraded to a MS3 or MS4 equivalent, might even be acceptable for heavy weapons.

Conclusions

Personally, I’d have any long gun I owned set up for a sling.  When you find you need a sling, it is often too late to install one.  Although I would be too cheap to have a separate sling for every gun, I would have at least one of every type of sling I would need.  I would install studs or QD sockets in every hunting rifle and shotgun, with a nylon padded sling (or two) with the matching clips.  For any competition gun, I’d probably stick with the sling attachments which came with it, and have a 1907 style leather sling (the one from Brownells used to be hard to beat) and any other sling required by a match I might go to.  For a tactical weapon, I’d have an ambidextrous mount between the stock and the receiver, and a mount in front which either was ambidextrous, or could easily be removed and mounted on the other side, as well as standard mounts forward and at the butt if practical.  My choice for a heavy tactical sling would be the e-RUSH sling, and I’d be tempted to get a couple of Magpul clips and integrate them into the e-RUSH since I like them much better than MASH clips and slightly better than QD clips (I won’t have anything to do with HK clips).  If I had several tactical weapons, I would also have a Magpul sling for the lighter ones.

Are there other slings besides Butler Creek, Brownells, Urban-ERT and Magpul?  Of course, there are many; some similar and a few significantly different.  There might be better ones, and from my experience, I can guarantee there are worse ones.  Some are cheaper and some are more expensive; more expensive ones are sometimes better than cheap ones, but not always.  There is often a choice of colors.  Pick the one (or more) which is suitable for your needs and budget.

Introduction to Slings (Part 2) Last time we looked at the uses, types and history of slings.  Now let us consider how to choose a sling and look at some choices

A Bug Out Bag is something that most of us are familiar with even if most of us do not have one loaded by the door or in the trunk of your car, ready to go at all times. For the uninitiated, the Bug Out Bag’s purpose is to give you everything you should need to live for 72 hours if you are forced to evacuate your location suddenly. A bug out bag should be pre-packed with all of your supplies so that you can grab it, throw it on your back and walk or run out your car, or head for the hills.

I have written a couple of other posts about Bug Out Bags and one dealt specifically on the subject of the contents of your bug out bag or BOB. My contention is that there are too many people that are throwing everything but the kitchen sink in their packs and I feel that there is something of an insane rush to get everything humanly possible into your BOB without much thought as to the why or the weight.


A bug out bag is not a U-Haul. It is not a Bug Out Suitcase even though I swear some people pack more into a Bug Out Bag than they do for a week down in Cancun. I have another post lined up to rehash this concept under a different theme, but I have heard others talk about packing 50 to 70 pounds in their Bug Out Bag and they plan to walk for hundreds of miles if necessary. 70 pounds???

I won’t get into weight or the absolute foolishness (in my opinion) of packing anything remotely that heavy in this post. I will talk about intelligently packing what you do have because regardless of whether you have an ultra-light pack or some behemoth weighing as much as a 4th grade boy, you need to pack this in a way that will make it as comfortable as possible to carry. We are going to talk about how to pack your bug out bag to take the most advantages of weight distribution and tried and true backpacking tips as possible. Backpackers have been bugging out for a long time and it pays to take a lesson or two from people who have more experience than the average Doomsday Prepper fan when it comes to packing everything they need for 72 hours on their back and living to talk about it.


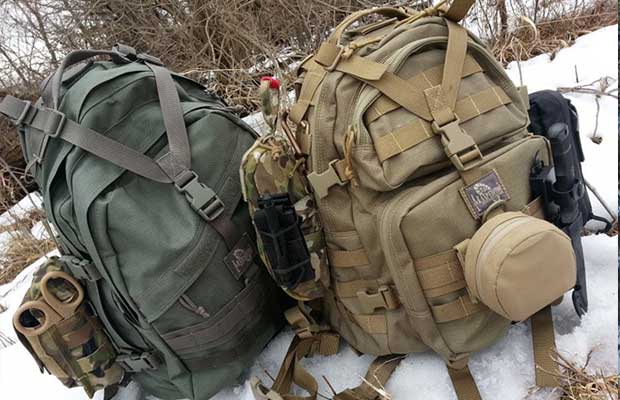
Packing a backpack and packing a bug out bag are virtually identical. I would argue that you could just as easily bug out with a back pack as you could with any military looking pack from Blackhawk, maybe even easier. There are 4 simple rules to packing any pack you are going to carry on your back.

  • Heaviest gear goes close to your back
  • Light gear away from your back
  • Frequently used items go on top
  • Less used items go on bottom

The Basics of Pack Loading

Packing a backpack or packing your bug out bag are pretty similar. To be successful, you want to pack the right gear, but you need to pack it the right way too and that means keeping your center of gravity as close to you as possible. The last thing you need is a big pack that keeps you off balance and puts unneeded stress on your back.

Sample Bug Out Bag loading diagram.

Items like water and food usually weigh the most unless you have some really heavy gear in your bug out bag. A lot of people have moved to carrying water bladders like a Camelbak and most new packs have a place right inside the back next to your spine for carrying this. Keep the heavy stuff as close to you as possible and low as opposed to above your shoulders.

The Bottom of the Pack

Using the guidelines above, I pack the items I am going to need to get to least,  at the bottom of the pack. My pack has a compartment in the bottom for my sleeping bag so that goes in first. Additionally, having your sleeping bag on the bottom gives you a nice soft cushion when you set your pack down. I have my sleeping bag in a compression sack, but if I have any fear of rain I would add a waterproof bag instead. Running out the door isn’t the time to worry about this, so it may make more sense for you to pack your sleeping bag in a waterproof sack regardless.

Next, I add my tent or hammock gear. I still prefer the tent and it is one of the last items I need so It goes in the bottom of the bag. Depending on the trip I also have a tarp that is attached at the bottom.

The Core of the Pack

Once I have my sleeping bag and tent in the bug out bag, I pack most of my spare clothes, then food and cooking gear. I say most of my clothes because depending on the weather I will carry a fleece or windbreaker too and I want this where I can get to it easily. My main food isn’t going to be eaten until I am at camp or stopped most likely.

I also carry a JetBoil that takes up about as much room as my food and I have my fuel in that same container. My jetboil can boil water for drinking, cook food or quickly heat my water for coffee in the mornings.

The Top of the pack

The top of your bug out bag or the pockets on the outside depending on what you are using should have the gear or equipment you are going to need the most. My pack has a compartment that is waterproof and that is where the lighters and fire kit go along with my headlamp and snacks. This way if I get hungry, I don’t have to dig in my bug out bag, just unzip the top compartment. On the backside of my pack, I have a zippered pocket for tp and spare cordage. I will also carry maps and maybe a camera.


What’s on the sides?

The sides usually hold the water filter, maybe some additional items depending on what I am carrying like spare water bladders. I carry two spares so that when I get to camp I can pump plenty of water for washing up, cooking and even breakfast in the morning. When they are empty they weigh nothing.  My pack also has side pockets for my water bottles too and those work nicely because I can easily reach water while I am walking. One of these days I am going to pull the trigger and get a Camelbak so that I don’t have to carry it, but I still think the good old bottle is easier in some aspects.

That’s how I do it. How do you pack your bug out bag?

A Bug Out Bag is something that most of us are familiar with even if most of us do not have one loaded by the door or in the trunk

Early long guns could be carried in two hands ready for instant use or in one hand for almost as quick use.  But you really could not do anything else with that hand or those hands.  It became quickly obvious that a hands-free way of carrying a long gun was needed, and probably the first sling was simply a piece of rope tied to each end of the gun. Times have changed and today this article will be begin with some history, but will also share how to choose the best rifle sling for your  use.

Introduction to Slings (Part 1)

In the late 17th century, as European militaries were arming more and more men with muskets, sling “swivels” started to appear on military firearms.  Generally this was a slotted ring on the bottom of the stock near the butt, and a matching ring on the underside of the forend.  A flat strap, usually of canvas, was then threaded through these rings.  There was generally some length adjustment ability.  In the 1870’s, a new U.S. military rifle was introduced which came with a fairly new concept: a sling made of leather.

As the experience with slings became more common, people found that besides allowing for hands-free carry, a properly set up and fitted sling could help achieve greater accuracy.  The model 1907 sling was the height of sling development as far as support while shooting goes, where the forward arm is inserted between the straps of the sling and “locked” in place with “keepers”.  Despite efforts to replace it, this model continued to be an official U.S. Military option until the days of the M16, which came with a simple adjustable nylon strap, returning the sling to a mere carrying device.

Note that even with a sling which is designed only for carrying, there is a technique of wrapping the sling around your forward arm which provides some of the stability of a M1907 style sling.  This technique is called “hasty sling” because it is pretty quick and doesn’t require a lot of adjustment.

Originally the sling attachment points, and thus the slings, were usually along the bottom of the gun.  This was not really a problem with early firearms, but as magazine fed guns started to appear, the sling and the magazine tended to interfere with each other a bit.  Slings along the side of the gun could fix this problem, but were by no means ambidextrous and did not work as well for shooting support.

Quick Disconnect Mounts

Civilian shooters preferred a sling which could be easily attached and detached, encouraging the development of quick detach sling attachments.  The strap is threaded through the QD attachments, which then can be easily attached to or removed from the matching mounts on the gun.  Nowadays there appear to be at least five possible true QD options to put on the end of your sling.

Which of these options can be used on a particular gun depends on what mounts are built-in or added to that gun.  It is optimal to have the same QD attachment on both ends of the sling, but it is not a requirement if having mismatched attachments is appropriate.  It is handy to have the same mount or set of mounts on similar guns, so you don’t necessarily have to have a separate sling for each one.

STUD Mount

One of the first choices was “studs” screwed into the wood or clamped around the barrel.  There was a hole through this stud and flat sides perpendicular to the hole, and the matching part had two flat flanges separated by the width of the stud, with a pin through them.  Attached, there was a flange on each side of the stud and the pin through the flanges and the stud.  Uncle Mikes has an extensive history with these swivels and still have a good selection.  They are pretty good on sporting arms, but for tactical use they are not optimal.  Early models could be “popped off” as the moving flange was merely spring-loaded.  Some later models have a threaded knob, which when screwed down to the flange, prevents it from unintentionally opening.

CUP or HOLE Mount

Another early option was a “cup” inlet into the stock with a groove around near the top.  The matching part had some small balls around the circumference, which clicked into these grooves.  A button in the center retracted the balls so the part could be removed.  An alternative mount to the cup is a hole in a piece of metal of the same thickness as the distance from the top of the cup to the groove.  This system is fairly heavy-duty and can rotate side to side, which can be both good and bad.  A few have built-in stops to prevent complete rotation, keeping the sling from getting twisted.

RING Mount

The M-LOK Paraclip Sling Mount is the M-LOK compatible variant of the older MSA – MOE Sling Attachment.

More recently, rings started appearing on tactical guns.  These can accept a quick connect hook, and there appears to be three common choices.  There is the Magpul Paraclip, slightly similar to a clothespin.  This is fairly bulky; on the one hand, it does not fit on smaller rings, but on the other hand, is very stable.  If it comes with a cross-bar lock (and you use it), it is highly resistant to unintentional release and even without using the lock I have not had a problem.  Next is the HK snap clip.  This is very versatile and flexible, but is a bit noisy and floppy, and if you twist it right, it can pop off by itself.  The third common option is the Mash Clip.  This has a structure similar to a split key ring, but rather than having to pry the layers apart, there is an area you squeeze to separate the layers.  Like the HK clip, it is a bit noisy and floppy, but is much more secure.

There are a few other hooks which might work and are available from some sling makers.  One is called a “trigger snap”.  There very well may be a version which is strong enough and secure enough for sling usage, but the ones I’ve used (on keychains and other non-sling items) release accidentally and even bend open.  Another is a freaky-looking hinged hook, which I don’t know the name of and have never seen in person.  Basically, before relying on any connector other than the common ones, investigate it thoroughly.  You want to make sure it won’t bend or break, won’t release accidentally, is acceptably easy to attach and detach, and does not get “tangled up” with the gun.

SLOT Mount

The slot mount, like the original slotted ring, is not a quick disconnect attachment.  Although it, like the original slotted ring, can approximate a QD attachment if you strap a quick connect buckle to the slot, and have the other part of the buckle on the end of the sling.

No Mount

Having no mount on your gun does not mean you must do without a sling or even without a QD sling.  One option is to have a strap wrapped around the stock or forend to which a sling can be attached.  Most often, this attachment point is a ring or a quick connect buckle.  If you have a picatinny rail on the gun, pretty much any kind of mount you want is available to be clamped on to the rail.

Combination Mounts and Adapters

There are a few “combination” mounts available, which offer more than one type of connection.  Blackhawk has a nice one to attach to a picatinny rail which offers a cup, slot and ring.  This is another way that one sling can connect to multiple guns, or different slings can connect to the same gun.  Another rare option is various “adapters”, which connect to one type of mount and provide the connection for a different QD connector.  Finally, there is the “Universal Wire Loop” which can connect to anything the wire or cord can fit through.

Sling Types

Nowadays, the most common slings are nylon or equivalent.  A few are woven out of paracord, and ones made of leather, including the venerable M1907 style, are still available.

The classic sling is attached to the gun at two points, near the butt and near the front.  These are known as “two point” or “dual point” slings.  These are pretty good for carrying a long gun, but have some problems in getting the gun into action quickly.  One option is to put one arm through the sling and hang the gun on the same side.  This is fairly quick to get into action, but very insecure; the gun can easily slide off the shoulder and down the arm, resulting in dropping the gun.  On the other hand, if you put your arm and head through the sling so that the sling bears on the opposite shoulder, this is very secure, but slow to get into action.

In the 1980s, there were attempts to improve the tactical capabilities of the sling by developing the “three-point” or “triple point” sling concept.  This added more strap, so that the shooter’s body was enclosed by the strap.  Thus the “three points” were the two points on the gun and the third point was the person carrying the gun (since the sling was “attached” to the body).  One common characteristic of a three-point sling seems to be an additional length of strap which goes between the two attachment points on the gun.  Often the forward part of the sling which was to be attached to the wearer’s body was attached along this length of strap.  The problem with this concept was that the additional strap along the gun could interfere with the mechanical operation or use of the gun.  Furthermore, some of these designs used various mechanisms to extend the gun for use or retract it for carrying, and these mechanisms could be easy to miss under stress, or a pain to return for carrying.  These designs tended to focus on transitioning from carry to use, and not providing support.

One interesting sling variation which actually attaches to the gun at three points (but is not considered a “three point sling”) is the “Ching sling“.  This was intended to approximate the support of the M1907 sling but be much quicker to get your arm into.

The next major evolution in slings was the single (one) point sling.  As you might expect, this sling is attached to the gun at just one point, usually right behind the receiver and not near the butt as was common up to this point.  The “other end” of the sling was attached not to the gun, but to the sling itself, allowing a quite secure attachment to the body.  This is a very good option for quick access, allowing a free range of movement of the gun and easily switching from strong side to weak side shoulder as needed to get around obstacles.  And if you suddenly need your hands, you just drop the gun and it hangs in front of you.  The down side is that being attached at just one point; the gun can swing around, bumping you and everything around you.  This is not a good option for long-term carrying, but is hard to beat when quick access is important.

As a solution to the weakness of the single point sling, the “convertible” sling was developed.  This is a two point sling with a ring or buckle near one end, to which the forward end of the sling can be attached, turning it into a one point sling.  This gives you the best of both types of slings.  Other improvements were elastic elements in the sling which helped to absorb shock or chest expansion, an attachment point on the sling or your belt, allowing you to tie down the forward end of the gun when in single sling mode, and wide-range quick-adjustment options.  By the time you combine these features, you get a sling which makes the three point sling obsolete.

Tune in next time for some hints on choosing a sling and a look at a few tactical choices.

Early long guns could be carried in two hands ready for instant use or in one hand for almost as quick use.  But you really could not do anything else

Imagine this is your home…

A darkened house in the suburbs of Columbus, around eight on a cold winter’s evening.

A little girl is snuggled under a blanket, next to her mother on a couch.  A couple of candles throw shadows against the family room walls.

“Mommy, where’s Daddy?”, asks Kayla.

“Honey, like I told you before, Daddy went on his business trip to Chicago before the power went out a week ago.  It’s not easy for him, but I’m sure he’s on his way home right now.”  replies her mother, Melissa.

“Well I hope he hurries up – he told me he was taking me to McDonald’s when he gets back!”

Her mother laughs, but inside she worries about her husband John and their own situation.  When the lights first went out, it seemed like an everyday outage.  Maybe the ice storm had knocked down the power lines, or maybe the cold weather had overloaded the system.  But now with the stores closed “for the duration”, and no news of help on the way, Melissa didn’t know how long the food in the pantry would hold out.

John had a hobby as a prepper, she knew, but she didn’t know exactly where anything was, or what the plans were, so she was hesitant to start rummaging around.  But now she was getting desperate and scared for her and her little girl. What should she do?

Could this scenario happen to your loved ones?

While some ideal families may work together to prepare for emergencies, many of you may be in my situation.  My kids and wife have their own activities and interests, so they look at me a bit oddly and are mostly uninterested when I bring up my prepping actions and purchases.  I have ended up being the sole person in my family responsible for preparing.  Despite their reactions, I want to make my family’s life easier, safer, and less stressful should I be sick, dead or otherwise not around when the SHTF.

Here’s what I’ve done:

  • Labeled all supplies and equipment, and kept them organized.
  • Prepared an Emergency Planning binder, with a separate section for each of my family’s needs.
  • Reviewed the contents with my wife.

My binder

Section A: Short-Term Emergency

Eight days or shorter for our family.  Foods need only be heated, lots of convenience foods and bottled water.  Life would be kind of like camping.  Each need is covered, same as in the Long-Term section, but some details differ.

Section B: Long-Term Emergency

Life would be very different and more difficult, so I made a separate tab for each need:

  • Food –This section contains a menu based on the food I stored, a short cookbook with recipes adjusted for our situation and family size, and a food inventory spreadsheet with amount stored, portion size, calories, etc.

I also detail how to prepare for life after our family’s food stores run out.  An example from our binder:

  1. If power goes out and LED flashlights don’t work with fresh batteries, immediately go to the corner store and buy as much food as you can carry with the emergency cash.
  2. Use our saved seeds to plant a large garden (as large as possible), with precedence given to foods that can be stored/preserved. Spring and fall growing seasons can provide a lot of food.
  3. Our stored wheat, barley and beans can be planted, eaten or sprouted.
  4. When protein supplies run low, hunting and snare use will be necessary.  Use the shotgun, or the stored snares.  Meat can be cooked fresh, salted and cured, jerked, or ground and dehydrated. See the meat preservation cookbook.
  5. Wild plants can be collected – dandelion leaves, young plantain leaves, spring cattail heads, as well as apples, persimmons, and pawpaws in the fall. See the wild edible plants handbook.
  6. Foraging in stores or houses is a last resort, because of the danger involved.

Even though I think I know how to tell if an EMP attack has occurred, my family doesn’t, so I gave explicit instructions as to what to do, since we only have 4 months of food stocked up so far. I also have guidebooks for them to use to plant, can, and other vital functions that I know how to do, but they don’t.

  • Drinking Water – how to filter and treat rainwater with pool shock, how to assemble and operate a water filter.
  • Hygiene & Sanitation –how and where to construct an outhouse, handle trash, wash clothes and dishes, and keep healthy.
  • Defense – a list of weapons, ammunition, and how to use them. Since my wife doesn’t shoot, this will be a tough one to communicate in writing, a very good reason to store more food, so my family doesn’t have to search for food outside during potentially dangerous times.
  • Power – including how to operate a solar-powered battery recharger for lanterns and other battery-operated devices.
  • Shelter – discuss what’s needed for basic house maintenance (shingles, plastic sheeting, plywood), and basic fortification with stored materials.
  • Heating – use of kerosene heaters, wood-burning stove, and where to safely collect firewood.
  • Medical care – inventory of first aid kit, medical supplies, and use of emergency medical and dental handbooks.
  • Communication – walkie-talkies are all we have, so that’s an easy one.
  • Transportation – Any vehicles, their fuel and supplies.

In summary, the best way to help your family prepare for when SHTF is by having them involved in the preparations.  But in case they aren’t yet receptive to this message, in case you aren’t around, or just to make the job easier in a very stressful time, it’s best to write down your family’s emergency plans now stored only in your head.

Imagine this is your home… A darkened house in the suburbs of Columbus, around eight on a cold winter’s evening. A little girl is snuggled under a blanket, next to her mother

As I read about the destruction that occurred in Houston and Florida last couple of weeks I was saddened for the people who were lost as well as those who must try to rebuild through those tragedies.

Tornados can happen anytime in the summer in the middle of the country. The bulk of tornadoes occur in what is called tornado alley which runs from central Texas, through Oklahoma, Kansas, and Nebraska and into South Dakota, although Tornadoes can happen in any state.

I recently read two articles on Survival Blog written by individuals with personal experience living through the tornado near Moore Oklahoma and another who lived through Hurricane Katrina in. As I read these two articles I made a mental note of some similar themes that each person encountered  (and made me think more about what happened in Houston and Florida) and I wanted to share those with you.

Lesson Number 1

If you can, get out of dodge quickly

Tornado Alley MapThis may apply more to people who live in coastal areas that may be more prone to hurricanes. Tornadoes don’t offer a lot of advance notice, but hurricanes are generally known for at least a week ahead of time. The usual response in a hurricane is to wait and see. If you are one of those who wait, deciding at the last minute is not going to work out. Roads will be jammed with cars and traffic will be at a standstill. Even after the hurricane, the people from Florida reported that they were essentially stuck in traffic for 5 hours unable to make it to their home. Imagine if you are trying to outrun a Hurricane before it hits.

Tornadoes give much less warning, but if you have a shelter, the ability to make it to that shelter quickly will be important. It goes without saying that it could save your life. Having access to a weather band radio and monitoring it during Tornado warnings should be a normal part of life for people living in these areas. Just so you know a Tornado warning means that you better seek cover quickly.

It would be a good idea to have at least 3 shelters you could go to if needed during a tornado. These can be public shelters, your own (ideally if you are home) or friends. Barring that, structurally sound buildings would be the next bet, but in a massive F5 tornado that doesn’t guarantee safety either.

Lesson Number 2

If all of your survival equipment is blown away, what will you do?

Like I said, we don’t usually worry about Hurricanes but the thought of having your emergency preparedness supplies blown all over the county isn’t pleasant at all. I fully appreciate that there are a lot worse circumstances to have to live through, but it struck me how what good will all of your emergency food do you if it is blown away.

For those who are living in areas prone to tornadoes I would try to plan on at least two storage places for most of my emergency supplies. If you live in tornado alley, I would store a survival kit, some long-term food and other disaster supplies at a location other than my home. This could be a storage facility in the next town or with a neighbor or family friend in their basement. This way you have some redundancy with your emergency preparations. Will OPSEC be an issue? I don’t think so with this type of situation. Who is going to look at you like you are crazy if you are living in Oklahoma and want to store some supplies at their house?

If that wasn’t an option, I would strongly consider burying some of those supplies underground on your property. At least with having some supplies, food and water stored away from your location you shouldn’t have to worry about losing everything if your home were to suffer a direct hit. What if the tornado wipes out the storage building instead of your house? Well, that is still lucky for you isn’t it?

Burying supplies underground might not be as safe in areas prone to flooding, but with the right waterproofing this is still possible. It just might take longer for the water to recede for your supplies to be in a condition to be retrieved. Again, I know this isn’t ideal, but having them float down the river isn’t either.

Lesson Number 3

Make a plan and then be prepared to throw it in the trash

In Hurricane Katrina, the author wrote about how his home was fairly high up so they didn’t worry about flooding initially. Then the water started coming in and they moved supplies off the floor. Then they had to move everything to the attic to escape the water. A well thought out plan is essential for dealing with any disaster, but Murphy and Mother Nature conspire to change your plans occasionally. I think having a plan is still a vital part of preparing. It helps you visualize potential problems before they happen. You can war game different scenarios in your mind and it helps to think through your options. In this case, the family had to adapt to the changing situation, but their gear and supplies were already with them and prepared.

Having a plan will if nothing else make you think about everything you would need to take with you. Your plan can help create your survival kit list and identify issues that may have slipped your mind. For instance, an emergency is no time to be looking for a flashlight so having a plan for dealing with a disaster at night could help you identify needs to procure a source of light and optionally how to store that flashlight so that you always know where it is. This could lead you to purchase back-up batteries for the flashlight. This might trigger the need to get a solar charger to recharge those batteries. On and on.

Lesson Number 4

Clean-up is almost always part of a natural disaster. Plan for it

In both the flooding as a result of Katrina and the destruction from the tornado everyone had some level of clean-up to do before their homes were livable again. For the flooding, water damage had to be abated quickly because mold and mildew set in almost immediately in the heat.  Everything had to be cleaned, water removed and disinfected with a bleach solution. Plan on storing a few extra bottles of bleach as this can be used not only to treat water, but kill germs.

Heavy gloves, boots and work pants will be very welcome if you are walking though debris strewn yards hauling shattered pieces of wood or soaking wet sheet-rock to the curb. I add these to my supplies as well as face masks and we keep old clothes in the attic for times like this. Items like pry bars, axes and chainsaws will help to clear downed trees.

Lesson Number 5

Just because the storm is over, the potential for injuries isn’t

In both of the disasters people who survived were affected by the tragedy. Within a day or two a foggy weariness overtook them, decisions were not easy to make and they acted as if their minds were on other things. The effects of Traumatic events last longer than the actual event so an awareness that you might need to take it easy and give as much grace as possible would be wise. If you have smaller children they might be prone to withdrawing or lashing out after a tragedy like this so they will need extra attention and care.

The mental side of the equation is not the only concern. Even after the flood waters reside and the skies have cleared, injuries are common. A solid first aid kit is a must in your disaster supplies, but knowing how to use it will be more important. With debris, cuts can be common and in a wet, dirty environment without running water, infections can set in quickly. This is where taking care with cleanup can save some injuries but you probably won’t avoid them all. Make sure you have the basic inoculations like tetanus up to date. Have a decent first aid kit with antibiotic and plenty of bandages as your minimum.

None of us know when or if we will ever be faced with a disaster like this and who knows what will happen when we do. Hopefully, some of these ideas can help you. If you have your own, I would love to hear them in the comments below.  Stay Safe.

As I read about the destruction that occurred in Houston and Florida last couple of weeks I was saddened for the people who were lost as well as those who

I had this thought as I was walking around the other day and wanted to jot down some answers to common questions I see asked and answered out there regarding the Prepper Movement. I do this in an effort to share my understanding of what we are, what we are doing and have some fun at the same time.

What are Preppers?

Preppers are normal everyday people just like you. Well, most of you. They go to work every day, pay the bills, have families and concerns and are somewhat in tune with current events but perhaps more so, historical lessons of the past. Preppers are people who have seen tragedies and may even have been part of some disaster themselves and want to take steps to mitigate the bad effects from any crisis going forward. Preppers come from all social statuses, geographic locations, religions, age ranges and ethnic backgrounds. Prepping is not solely an American concept and we Americans are not the only ones who are concerned enough to take steps to protect ourselves and our families.

To put it as simply as I know how, Preppers are interested in taking steps to protect themselves and their families from harm.

What kind of harm you ask? Oh, well that is where it gets interesting because there are a lot of very valid and some not so valid concerns in my opinion out there, but each person usually has one or two concerns that drive their prepping interests. It could be that you live in LA and are concerned about Earthquakes, or that you live near the eastern US coast and worry about Hurricanes or Tsunamis. People in the plains states have a real threat of Tornadoes and the list goes on and on from Economic concerns to alien invasion. The point is, that there is a reason people are concerned about what might happen to their family and they are taking steps to prevent that from happening, whatever “that” may be.

Why is everyone talking about prepping now?

Prepping has been around a long time and you might say, everyone was more of a prepper as recently as 100 years ago. Having food to last you and growing your own wasn’t trendy in the not too distant past. It was what everyone did simply to live. Without drug stores, power companies, family health clinics, grocery stores, automobiles, etc. life was completely different and so were people. As our society became more modern, we relied less and less on what used to be required skills and started purchasing more of what we need instead of making it or growing it.

Probably the most recent spike in the interest in Prepping was Y2K because the scenario that was presented to us was extremely dire. Everyone was convinced that on January 1st, 2000 all of the computers would freak out, planes would fall from the sky, power plants would stop and we would all be plunged back into the dark ages because computers wouldn’t recognize the new millennium and would shut down. I didn’t get into the prepping lifestyle or the mass panic back then, but we had a little food and water “just in case” the doomsayers were right.

I still remember vividly hanging out in our living room with some friends and their kids on New Years Eve that year and watching the countdown to midnight. As the ball dropped and nothing happened, I was a little surprised, maybe a little disappointed that all of the doom and gloom was for nothing. I don’t remember hearing about anything that stopped working on January 1st 2000, do you?

The reasons change a little with the times, but I think the core motivations are still the same. Prepping is becoming more mainstream now because I believe that people can see and maybe even feel in their gut that something isn’t right and we could be headed for a crash. If not that, there have been too many instances where normal, natural disasters have wiped out entire communities and our media has shown us all to clearly how being unprepared can hurt.

Do I have to fight with my siblings like they do on Doomsday Castle?

No. In fact, most of the self-confessed preppers I speak to are very level headed, rational adults who really do want to do good. Reality TV shows are pretty much designed for shock and awe. If you aren’t shocked, it’s boring so with each new show and each

National Geographic – Reality TV Show Doomsday Castle

new concept, the producers need to ratchet it up a notch. I am convinced that there is no reality in Reality TV anymore and that each participant is playing to the camera for the biggest effect possible.

Prepping does give most people an opportunity to speak to their family about concepts you are concerned with though. I have spoken to everyone in my family to various levels about the need to have basic supplies on hand, adequate water and a means of security. Some things we can agree on and others, we don’t see eye to eye but it is a conversation topic.

There are a million different ways to talk to someone about Prepping and just because your brother isn’t running out to the Gun Show with you to buy a new AR15 for your survival battery, it doesn’t mean you can’t still talk to them. Let your actions and the news of the day speak for you when you don’t have the words. Simply watching how people had to stand in line for hours after Hurricane Sandy because they didn’t have a supply of fuel stored up can start conversations that only a week before would have seemed crazy to some people.

Is owning camouflage or a 4 wheel drive a requirement?

No, but these are perks! You can’t have too much of either in my opinion but sadly, I am still building my supplies up in this regard. Oh, I have enough to get me through hunting season without any issues, but I do know guys that could wear camo every day of the week and not wear the same outfit twice.

A 4-wheel drive vehicle is a strong consideration for a bug out vehicle though so if your prepping takes you to that level, I would highly recommend one. There are a lot of us though, that aren’t planning on bugging out, or hiding camouflaged in the woods and that’s just fine. Prepping is primarily about safety and there are tons of ways you can take steps to protect your family that don’t involve a hummer or looking like the guys from Duck Dynasty.

Do I have to belong to a specific political party?

No. Preppers come from all backgrounds and ideologies. I know preppers that are liberal democrats and right wing republicans, independents, libertarians and political agnostics. I will say that the majority tends to lean toward the right side of this topic though but that doesn’t mean anything. If you have the will and mind to take care of your family, politics do not matter.

Camo isn’t required, it’s a perk!

Is there any test I need to pass?

There is no prepping test you can take on paper. Prepping is about dealing with what life throws at you so the test you take will be how you deal with life when it throws you a big curve ball. This may be something as drastic as a natural disaster or it could be as common as the loss of a job. Preppers spend a considerable amount of time and resources planning for things to go bad so the only time you really get to be tested is when they do. Unfortunately, even practicing for disaster and chaos can only prepare you a little. It is going through the fire that you see how well you will do.

What should I do to start?

I would start with analyzing your priorities. We have a series of posts called Prepping 101 on just this topic that walk you through the major fundamentals with links to other information sprinkled throughout. I like to think Final Prepper is a good resource for information that can help you be more prepared.

Knowing that you want to be more prepared is a great first step. Prepping doesn’t need a huge time or cost commitment, but having a plan will help you identify what you need to do to make sure your family is safe. That plan is your starting point and what you need to do will dictate where you go next.

When can I say that I am finally Prepared?

Nobody is ever prepared to the point of being able to sit down and say “I’m done”. Prepping is an act, it’s a lifestyle not a check box. Even if you had an unlimited amount of money and could buy your dream retreat in the mountains of Wyoming, fortified with a nuclear bomb proof bunker and food to last 20 years, you would still not ever be prepared for everything. Would you have an awesome head start on the rest of the world? Absolutely, but prepping isn’t only about buying things.

Prepping is also a process of learning and changing your life to become less dependent on other sources for a lot of what you need today. For me, this is a journey I started over 5 years ago and I hope to be prepping for the rest of my (hopefully) long life. Don’t look at this as a goal you can achieve and be finished.

What Next?

You need to get as many people as possible prepared now. If you have some level of preparation, share the message. Make sure that you inform others in whatever way you can so that we as a society are all less dependent on others for food, security, power and our wealth. It is a lofty goal, but one that is worth shooting for. If the world is prepared for what life can throw at us, nothing can defeat you.

I had this thought as I was walking around the other day and wanted to jot down some answers to common questions I see asked and answered out there regarding

The news seems to always be a sober reminder of the importance of being prepared for any one of a number of scenarios. Here at Final Prepper we try to present information in a way that is informative and compelling on a wide variety of topics. Readers have to analyze for themselves the information we share. If it makes sense, your job is to then use your best judgment and formulate a plan for how you will take steps to prepare your family. The individual steps and plans might all be different from person to person, situation to situation. To be fully prepared may take years, but what if you found out tomorrow that you didn’t have years? What if you found out tomorrow that you only had 36 hours to protect your family from a highly contagious and deadly outbreak of disease?

I am not trying to be sensationalistic; on the contrary I am trying to be realistic.  I have been prepping for years so I feel pretty confident that we are prepared at some level for just about anything but I wondered today if I haven’t become complacent. It is one thing to store up food and water, but another thing completely to have an actual emergency where the supplies you have been spending your time and treasure on will be put to the test.

The reason I started to wonder was a relatively normal headline in the news. The headline said, “New death in Saudi Arabia from SARS-like coronavirus MERS” and the article goes on to say how 6 other people have been registered as having the disease. Disease and death aren’t really new I know. People die every day just from driving a car or performing a thousand normal activities that have nothing to do with any type of disease. No, I wasn’t worried about this disease jumping over here to where I am, but the thought struck me that a scenario like this is possible and what would I do if there really was a threat like this.

I know you may be scratching your head right now and thinking to yourself that I must not have been reading what I have been writing for these many months. This blog is all about being prepared, anticipating events like this and taking steps to ensure you are in as good of a position as possible to deal with the threat to your survival. What is this about me suddenly thinking about the possibility of a pandemic? Don’t I do that all of the time?

The answer to that question is no. I don’t think about any type of global outbreak of disease every day. I have thought about this before though and have made preparations. What made me want to write about this is the scenario I described above. I started to ask myself if we did learn that this outbreak was coming and we only had 36 hours left to prepare, what would I do. If you are a prepper who has been stocking up on food and water, if you have some firearms and medical supplies, if you have the basics down, what do you do? As I started to visualize this potential scenario in my mind I found my pulse getting just a little bit quicker.

I realize the scenario might be a little unrealistic with diseases; it isn’t like the authorities know what a rogue disease will do and when it will hit your town. It is highly unlikely that we would ever get a 36 hour notice of something coming like this. Natural emergencies like hurricanes and floods would be more likely, but for the sake of argument, let’s stick with a disease outbreak that will keep you in your home for a long time.

I guess another way of asking the question is: If you are prepared right now, what happens when you find out you are going to be living through a situation like this? Do you head out to the store with everyone else to grab some last-minute items? Do you rush to the gas station to fill up the tanks? Do you run to the hardware store for materials to board up your windows? Do you run down the street to get the last box (if you are lucky) of N95 masks and nitrile gloves? Do you become another one of those people we have been talking about that add to the problem and potentially open yourself up to greater risk than you need to?

I think the reason this thought occurred to me was that I personally do not have everything I could ever hope to have in order to outlast every conceivable emergency. I have taken great strides over the years to be prepared and my family has a lot of supplies and skills we can use in a situation like this. However, we are lacking some things. Or, I guess there are supplies we could have more of. If I found out that in 3 days they would lock down everything, that streets would be deserted and everyone would be quarantined in their homes, I can’t right now say I wouldn’t leave the house because I have everything I would ever need. So what would I do with my 3 days before we entered lock-down mode? What do you focus on?

I started to write out a list of items I would try to acquire, but stopped. There aren’t any of the main bases that I don’t have covered in some capacity. Could I have more food? Of course. Could I use more water? Yes. Do I have enough firearms and ammo? Maybe. I have some of just about everything, but will that be enough? I think what started this thought was that nagging idea in the back of my head that I don’t have everything I need. That when a real emergency strikes, I will be missing something that my family needs in order to be healthy, protected or safe. It is one of the things that keep me up at night.

I think that most of us would want to get out there and grab some last-minute items, fill up the tanks and make final checks. To me, this is just human nature. This drive to protect my family is the reason I started prepping in the first place. Just because I have some “stuff”, that doesn’t mean I can take it easy. The driving force to be prepared doesn’t end when you buy 20 cases of freeze-dried food. The urge to keep your family safe isn’t satisfied when you purchase a new handgun with a laser sight. The fear that your family will be cold or hungry doesn’t end when you buy some sleeping bags and MRE’s. If it did then you wouldn’t be actually trying to prepare, you would simply be buying stuff.

The real value of understanding the need to be prepared for emergencies and taking steps to address issues that your family or loved ones can face doesn’t have a finish line. Your job of trying to protect your family will never be done and your vigilance can never end. Being prepared doesn’t mean that you get to sit on your porch and laugh as everyone hauls rear to the store to try and the last supplies of food. Being “Prepared” doesn’t mean that you are any less concerned as they are, but you have thought a lot more and planned a little more than they did. It doesn’t make those who have planned ahead better, but it does give those who have taken steps to be more prepared an advantage. The steps we have taken to prepare won’t inoculate us from any of the emergencies, but does give us a leg up on the competition so to speak.

I think the main point for me is understanding that I will never have enough preps or skills to feel completely comfortable and I guess that is a good thing. This isn’t about buying “stuff”. Rather than being complacent, I believe that regardless of what we have accomplished in the way of preparing we are still watching for signs. I am still going to do what I can to keep my family safe and I won’t rest easy while there are threats on the horizon. If we did get some type of warning (you could say we get them every day) of impending doom I would still be trying to do what I can to further ensure the safety and protection of my family. I am pretty sure that is what most of you would  be doing too.

The news seems to always be a sober reminder of the importance of being prepared for any one of a number of scenarios. Here at Final Prepper we try to

While Harvey moves away from Texas, it makes me start to mentally go over my preps and I start analyzing what I still haven’t done, or need to check on again. This happens almost every time there is a news story like this and it is with the full knowledge and belief that I am squared away at a level that I believe will keep my family fed and secure for a good bit of time. Could we last if everything descended into chaos tomorrow and there was wide-spread panic, looting, violence and wars? That, I don’t know. However, we have made a lot of preparations for our family so I don’t feel helpless if we are visited by a future doomsday scenario like that any time soon. I certainly don’t welcome it, but I don’t feel like we’ll be caught completely off guard either. I do think that it is wise to constantly be aware of your surroundings (as well as what’s going on in the world) and to take advantage of circumstances if you can, to give your family a leg up.

I will take the scenario and let’s say you have 12 hours advance knowledge of some event. Let’s say the stock market started tanking mid-day and the punditry and your own sixth sense was telling you that something serious was happening. By the close of business the market is down 30% and trading has been halted. Maybe the government declares a bank holiday, credit cards aren’t accepted and you only have the cash in your wallet or what you have hidden for a rainy day. You know you have to run to the store to get supplies before the rest of the world beats you to it and we will say that you have a limited budget of $200. What would you do? Where would you go and in what order would things need to be done?

Before I continue, I must say that this scenario, if it really was as dire as I am painting would be deadly for a lot of people. I don’t know that what you could grab from the store in 2 hours would keep you alive for years, but it could keep you alive for a week. Something as complex as financial Armageddon can’t be survived with a few cans of tuna fish and some pop tarts but you have to live to fight another day, right? It’s a start, but in a perfect world you would have begun your journey to being prepared a long time ago. We will assume this trip is just going to be adding to what you already have. You could just as easily apply most of the same concepts to a hurricane or flood. That said, let’s go!

What would you do?

Quickly define priorities

One of the first things that any prepper should do is take an inventory of what they need to have in order to survive any given period of time. Regardless of the disaster, the most basic list of priorities would be water, food, shelter and security. Ideally you would have prepared long ago for these basics, but in our scenario you haven’t or something happened and you need to resupply. I think it is safe to say that in terms of priority, if you don’t have all of the above already, security is going to be out so for now we will focus on food and water first and pray that you don’t need security.

It is right now that you need to quickly conduct a mental and physical inventory what you have and what you need. I say physical because I have been surprised in the past when a supply I thought I had plenty of was gone. (What do you mean all of the batteries I had ended up in the Wii remotes?) This is another reason to make sure you are constantly rotating your supplies and refilling when they are used. The time of year must be considered as well. Is it the middle of summer or the dead of winter? This is going to drive the priority of what you are looking for. In a time like this, if you don’t make it to the store quickly, there may not be anything left when you do. Provided you are paying attention and can act though you may beat the crowd before anyone even knows what is going on. Some quick examples are:

  • Do you have a gallon of water for everyone in the house for at least one week? Add more if the weather is hot and you may run into quantity limits if the news is out already. For a family of 4 you would need to have 28 gallons (4 X 7 = 28).  Do you have a way to capture and treat water after that?
  • Do you have enough food to feed everyone for 7 days that doesn’t require cooking?
  • Are there hygiene items you need or will need in the upcoming weeks?
  • Do you have basic first aid?

Make a Plan

Divide responsibilities if you have more than one person who can run to the store. Once you know what you need to get you can send one person to one store or even split up once you are in the store to grab the items you need quickly. One person can go to Sporting goods and the other person can run to the food aisles. Water is usually located in a couple of places, but they store a lot more of it back in the food section. 2 ½ gallon jugs are easier to carry.
Maintain communication – This is when those great two way radios come in handy. If you can radio the other person shopping, you will both be more efficient and can work better as a team. You can also find your way out of the store together if panic sets in.

Where would you go?

There are a lot of options from the corner grocery store to a convenience store to the big box retailers. I think that if you have access to them all, I would hit a Wal-Mart, or Target first over the other choices. The reasons are price and selection. You have to admit there isn’t much you can’t buy at Wal-Mart and if your time is limited it makes sense to go there instead of somewhere else. Now, can you get better food at Whole Foods or Fresh Market? Yes, but they will have less on hand, the stores are smaller so they will be more crowded and the cost will be higher. Even the parking lots are smaller so you might find your self unable to park, or worse, unable to get out. We are trying for survival here. If Wal-Mart isn’t available you will have to do your best, but that would be my preference. Why Wal-Mart and not a grocery store? Again, Wal-Mart or Kmart or Target each have more items than just food. They all have camping sections and in some cases Sporting goods and you won’t likely be able to pick up a box of 9mm rounds at the Piggly Wiggly.

If all you have is the local grocery store or even the CVS then by all means go there. In fact, the local drug stores have become more diversified in what they carry, but again they suffer from cost and variety. You may have to resort to shopping there, but it isn’t ideal. You will get less for your money and could end up with nothing.

What order would things need to be done?

Again, this depends on what you need the most. If you have a hundred gallons of water stored at home you would skip that possibly. Go for what you need the most of realizing that you can live without food longer than you can live without water.

  • Water first – Grab as much as you can. In our scenario above 28 gallons is going to cost you about $31. You can also get this from the tap for free if you have a means to store it.
  • Canned meats – think of canned meats like Tuna, Chicken or Ham. The cost on these is a lot higher though so you will need to augment your food with cheaper items. Plan on spending about $50
  • Canned veggies – Only grab what your family is going to eat and I would say get items that will go with the other ingredients in a stew. Corn, carrots, tomatoes, beans etc. $20
  • Rice and beans – or oatmeal. These will all keep for years and require just a little hot water to make them tasty. You can still get 50 pound bags of rice for under $20. – $40 for rice, beans and oatmeal to last.
  • Toilet Paper and Hygiene – It never fails that whenever there is some reason you don’t want to go to the store, you find out you are out of toilet paper. Same with other feminine needs. $12 for TP
  • Batteries and Flashlights – I prefer headlights that you can strap to your head. They make any task in the dark much easier than holding a flashlight. Make sure you have spare batteries to last you a week.  $30 for two headlamps and $10 for batteries
  • Peanuts and Pop-Tarts – Require no refrigeration and who doesn’t like Pop tarts? – Save the junk food for last because I think it will go first. $15

This list is limited and you may be thinking to yourself, that’s all I can get for $200? What if the power goes out? What about home defense? What if the gas stations stop pumping fuel? What about communications or protection against viral infections? Those are all great questions and I hope that if you haven’t started prepping yet, this post might make you reconsider. You do not want to be the person running around with no money trying to plan for your survival at crunch time. Please begin to take steps now, while the lights are still on to protect your family and hopefully this won’t be you.

While Harvey moves away from Texas, it makes me start to mentally go over my preps and I start analyzing what I still haven’t done, or need to check on