
How to Store Fuel Long Term
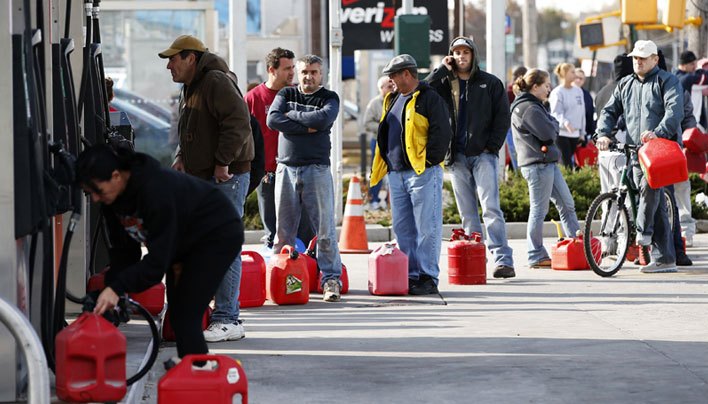
A generator without gas is like a rifle without ammunition. For this piece of machinery to be of any use to you outside of a very expensive and heavy paperweight, you need to have a plan for fuel storage. This is also the case if you don’t want to end up like millions of people each year who are unable to get gas after a natural emergency like Hurricane Sandy. A good fuel storage plan usually involves purchasing and properly treating a minimum amount of fuel to last you through whatever scenario you are planning for.
This might be fuel for your generators, or enough gas to get you to your bug out location. It is easier to pre-purchase fuel and store it so that in the case of an emergency, you aren’t standing in line. There are a few things to consider when you are planning to store fuel long-term that we will cover below.
What type of container should you store fuel in?
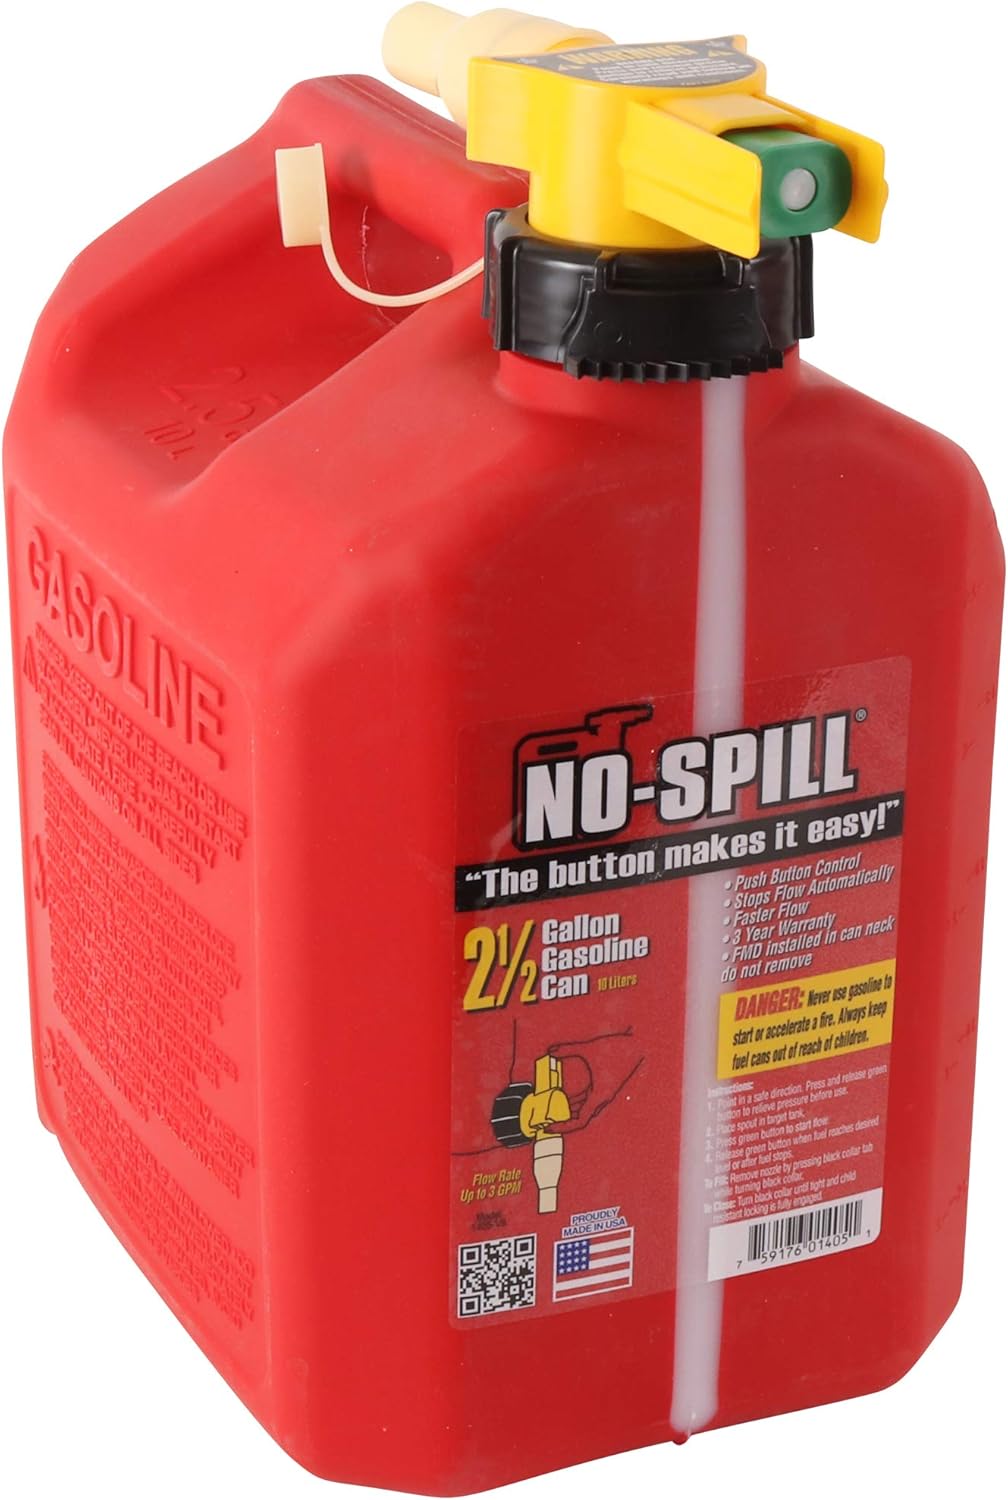
Similar to having water on hand in an emergency; having a supply of fuel in containers that protect the fuel and are easy to carry is important. Could you store gas in thousand-gallon tanks buried underground? Yes, and that is my dream scenario but for now, I and I assume most others will have to settle for something a little more cost-effective and portable. There are many different types of fuel containers but for gas, the most common style is plastic and red in color with a built-in spout of some form. Kerosene containers are blue, Diesel is Yellow and it is important to follow this handy color convention so that you don’t accidentally pour regular gas in your kerosene heater and fry your eyebrows off or worse.
Having a few containers of stored fuel could save you in an emergency.
You can get new fuel cans just about anywhere. Home Depot, WalMart, Lowes, and any hardware store will have some options for you. Most of the new models at Walmart near me are from a company called Scepter and have a new type of nozzle which is probably the result of stupid legislation that doesn’t work well at all. The nozzle requires you to press two tabs and pull them into a position for the fuel to dispense. This doesn’t work very well and the fuel doesn’t come out smoothly. I don’t think this is necessarily Scepter’s fault and they are probably only doing what is required from government regulations.
You can also pick fuel cans up at yard-sales or salvage companies. There is a salvage company down the road from me that routinely has perfectly good fuel cans for very cheap with the old gooseneck spouts. These are much superior in my opinion and if you are going to be pouring fuel out of a heavy can into a small hole I would recommend getting a good goose-neck or buying an older can. I have several of the new cans full of gas in my shed and a couple of older ones. If I need to pour anything out, I will use what is in the old-style cans first and then pour my gas from the new cans into the old cans. It is just easier for me that way.
Regardless of whether you have a new or old can, the place you store your fuel should be as airtight as possible. You don’t want fumes leaking into the area you have your fuel stored and gasoline evaporates quickly when exposed to air.
Using Fuel Additives for long-term fuel storage
Gas loses its potency over time and this also applies to Diesel and Kerosene. Diesel for example if stored at lower than 70 degrees will last about 12 months without any additives provided it is kept in a sealed container. If your temperatures are much above 70 that time slips by 50% to 6 months.
As diesel gets older, a fine sediment and gum forms in the diesel brought about by the reaction of diesel components with oxygen from the air. The fine sediment and gum will block fuel filters, leading to fuel starvation and the engine stopping. Frequent filter changes are then required to keep the engine going. The gums and sediments do not burn in the engine very well and can lead to carbon and soot deposits on injectors and other combustion surfaces.
Now, what can we do to prevent issues like this and protect our fuel because you don’t want to be trying to outrun the mutant zombie bikers from Mars and have your engine stop? Additives. There are two main additives that I have run across, STA-BIL and PRI-G. PRI has several lines of additives and the –G stands for gasoline. They also have PRI-D for diesel. PRI additives are designed to be added to your fuel on a yearly basis to maintain the fuel in the best condition possible and they even claim that if your fuel has aged already, just adding PRI-G has proven to restore the fuel to “refinery-fresh conditions”. I would rather not test that out but PRI-G does have a decent reputation.
How Much and Where do I store my fuel?
Can you ever have too much fuel? I don’t know that you can in a real emergency. If you are unable to get to the gas station or there are rations at the pump you can never have too much. Would 500 gallons be enough? It really depends. If you have a minor power outage that lasts a few days, then you wouldn’t need that much gas at all. If we have the end of the world and there are no gas stations anymore, that 500 gallons is going to be a huge help, but it won’t last forever.
What I think is a good baseline takes into consideration the 80/20 rule. What is the likelihood that you will need this fuel for? For most people I think storing fuel for a bug-out vehicle or a generator is the most common scenario to plan for. For your car, I would plan on storing as much gas as you need to get you to your bugout location and add 50% to that. So, if you needed 2 tanks of gas to get you to your retreat and your tank held 20 gallons, I would store 60 gallons of treated fuel. This way if for some reason the grid goes down, the SHTF and zombies are walking all over the gas station parking lots, you should have plenty to get you there.
For a generator, I think you have to look at what you plan to run and how long you plan to run it. 15 gallons would last me about a week as long as I was using the generator for necessities only. Of course, it depends on the time of year but that is an average. Everyone should have at least one can of gas stored for emergencies but I like to store a minimum of one tank of gas for my car which is roughly 17 gallons and another 10 for the generator
Fuel should be stored in a clean, preferably cool place away from where you live. Don’t store fuel in your house if possible because that is an accident waiting to happen. If my shed blew up I would be a lot less concerned than if my house blew up.
Don’t forget to rotate
There are many common mistakes preppers make and storing fuel should be considered as well. I wouldn’t buy 50 gallons of gas, throw in some stabilizer and forget about them. Use and rotate your fuel yearly and you will be in great shape if something does require you to use your supplies. Since they blend gas differently in the Winter, I buy my fuel around January and store that for a year. Before the next January comes around I load up my gas tank in my car expending my stores and then head to the pump for a fresh batch. This way I think my fuel will be in as good a condition as possible.

On a different note, here are some other self-sufficiency and preparedness solutions recommended for you:
The Lost Ways (The vital self-sufficiency lessons our great grand-fathers left us)
Survival MD (Knowledge to survive any medical crisis situation)
Backyard Liberty (Liberal’s hidden agenda: more than just your guns…)
Alive After the Fall (Build yourself the only unlimited water source you’ll ever need)
The Lost ways II (4 Important Forgotten Skills used by our Ancestors that can help you in any crisis)
The Patriot Privacy Kit (Secure your privacy in just 10 simple steps)
Thanks for reading and if you have any thoughts, please add them in the comments below.
A generator without gas is like a rifle without ammunition. For this piece of machinery to be of any use to you outside of a very expensive and heavy paperweight,