Home2020 (Page 14)

Booby traps are devices set up with the intent to surprise, harm, or even kill an unknowing victim. They are triggered by the presence or unwitting actions of another.

Booby traps have been used since ancient times. Cave drawings indicate even prehistoric humans used them as a means of capturing prey, such as in “pitfalls” where a large hole is dug and spikes placed inside. The hole is then covered.

Historically speaking, booby traps do not win wars. They are, however, considered a key element in psychological warfare. Also known as PSYWAR, psychological warfare is by definition, something that is done to either deceive, manipulate or otherwise influence an opponent and to incite hopelessness, fear, despair, and loss of morale. Used extensively in WWII and Vietnam, booby trap effects have caused many surviving soldiers long-term pain and trauma. They can also be an effective early warning system. However, they can also cause civilian casualties, be inadvertently set off by friendlies or neutral people within the vicinity, and sometimes even by animals or natural events. They are also dangerous to set up if using any explosive materials. Caution should be used. One way to hopefully limit unnecessary injury would be to secure the perimeter with non-lethal alert devices. Hopefully once someone has realized they are approaching traps, they will turn around. If they continue, then chances are they are either hostile or being driven that direction by hostile forces.

4 SENTRY ALARM MINES .22 Cal trip wire alarms MULTICAM PREPPER PACK

Booby traps come in two main categories: anti-tank, and anti-personnel. We will start with the former.

Automatic roadblocks work much in the same way as a regular trip wire except that they designed in ways that impede traffic and damage vehicles. The end of a strong wire is attached to a secure point on one side of the road. Perhaps looped around a large tree. On the other side it is attached to something to be pulled into the road. A common option is to attach an anchor to another tree and chop it almost to the point of falling. The cord must be taut and high enough that a vehicle will pull it in the correct direction and not run over it. The cut tree is pulled down into the road, damaging the vehicle and effectively creating a roadblock. This method was employed by the Japanese when fighting the Allied Forces in the Philippines. It can be effective as a standalone device to slow the opposition, or as the onset of an ambush.

Another tripwire mechanism that can be adjusted to block a road, is a simple explosive charge set next to a makeshift retaining wall on a hill or cliff. Rocks, stones, branches, and debris are piled behind the obstruction. It may be necessary to route the wire through small anchors to adjust for the angle of the hill. Once armed and triggered, a small avalanche plummets onto the road, injuring and blocking enemy forces.

Homemade booby trap found in the woods of Provo Canyon.

Caltrops have been used since Medieval times, possibly earlier, as a way to impede incoming troops and damage cavalry and have since evolved into an effective way to combat automobiles. A metal worker can create them quite easily out of small hollow pipes that are bent and welded together. This option allows for more rapid air escape and therefore faster deflation and blowout of the tire; theoretically, any metal strong enough and sharp enough to withstand the weight of the vehicle can be used as long as it is fashioned in such a way that one blade is always pointing up.

Even vehicles themselves have been used as booby traps. A charge can be detonated by opening the door or turning on the ignition (which seems to be popular in the movies). Bombs can also be detonated by impact, where the cars themselves were used as roadblocks. If an armored vehicle attempts to simply pummel through and push the vehicles aside, they explode.

Now we get to the category where most preppers are focusing their efforts. Home invasion protection and anti-personnel defensive booby traps.

The most common booby trap as far as prepping is concerned is probably the tripwire.

The most common booby trap as far as prepping is concerned is probably the tripwire. Easy to set up with nothing more than a piece of string and a personal panic alarm. It is easily improvised and can detonate explosives, fire weapons, or activate spotlights for early detection.

Pressure plates can be simple DIY projects or can be purchased prefabricated. Again, these can be improvised to either turn on lights, sound an air-horn, or detonate explosives. I personally would not attach explosives to these as they are usually placed quite close to your residence as a final warning someone has made it to your door. Some can be quite sensitive and can easily be activated by a dog or other fair-sized animal. If you are placing them further away from your home, or do not care about a potential house fire, explosives could be used. One additional and interesting use for these is their ability to be an automatic door opener, if you want a secret entrance and hide it well.

Mobility Denial System (MDS) is a deterring slime that can come in handy (if you can get your hands on any) It is a last line of defense as it will create an impassable surface directly around your home for 6-12 hours. It was invented for the Marine Corps and police riot protection. It is not readily available, however, if you were to put your mind to it, you could up with something along the same lines. You want to deter any hostile party, by any means necessary, before they ever get that close to you, and preferably either drive them back or keep them at bay until you can retaliate.

Spike booby trap used during Vietnam.

Spikes. They can be as simple as large nails in boards turned upwards around your yard in the tall grass. They could be placed over a hole so that when stepped on with any force, the person’s foot snaps the board, goes into the hole and the nails impale their ankles. In times of war, they were often coated with toxic material or feces to promote infection. Some people attach them to stones or logs to create pendulum contraptions that are triggered by a tripwire. Personally I find this a foolish waste of time. A well-trained individual can evade such a device. It would probably take less time to dig small trenches, which might at least sprain some ankles, but to each their own. Spikes on boards can also be weighted and submerged into creek beds and ponds.

Razor wire and barbed wire is another option for underwater depending on how long it stays there. It can also be used similarly to tripwire in heavily vegetative areas where it can be concealed. I’d recommend a matte finish, camouflaged to blend in. In can be used along top fencing, around windows etc… Anywhere you would want to deter someone, perhaps diverting them into even more unfavorable habitat where you have a greater advantage.

Bullets can be set inside a small section of bamboo, atop a firing pin, and buried until just the tip is exposed. If stepped on with any amount of force the bullet explodes.

Hand Grenades. If you can acquire them, all you need is a tin can and a piece of string and duct time and you can secure any door. This is dangerous for the person loading them but was widely used in WWII and Vietnam. Tie a string around the grenade under the handle. Depress the trigger handle and pull the pin. Quickly and carefully slide it into the tin can. Secure the can somewhere with tape or wedge it tightly. Attach the string to a door handle or use as a tripwire. When the door is open or trap is triggered, the grenade dislodges from the can and detonates.

Remember that booby traps are just one element in the line of defense. Their primary purpose is to slow down the enemy, instill fear, reduce morale, and possibly to injure, maim, or kill. The time these traps may buy you can be greatly varied. Use it wisely and remember, offense and defense are opposite sides of the same coin. You need both or you are broke.

Recognizing the extreme injustice of recent liability suits awarding home invaders large sums for getting injured while burglarizing a house, it could be considered foolish to construct booby traps unnecessarily, regardless of intention or the degree of danger. That being said, I don’t know anyone who wouldn’t use them or wish they had them to use when put into a potentially deadly situation.

Stay safe, and happy prepping!

Booby traps are devices set up with the intent to surprise, harm, or even kill an unknowing victim. They are triggered by the presence or unwitting actions of another. Booby traps

Dogs and cats are a vital part of the homestead or when your prepper nightmare come true. Whether you plan to bug out or bug in, your pet may play an important role as a protector for you family, or a great alarm system, in addition to being loving companions.

They provide much needed pest control, if you’ve got a good mouser on your hands. A dog can provide great livestock protection, and help with hunting and tracking. They can also help keep rabbits, moles and other small game away from your garden.

Feeding your pets from a prepping prospective, or just trying to find a free way to feed your animals presents some questions.

How do you know what your animals need? How do you acquire their food? What’s safe for them? And what does all this knowledge actually look like in your pet’s food bowl?

Check it out.

Want to learn how to grow nutrient dense foods that will nourish your mind and body? Discover more here.

Dietary Needs of Dogs and Cats

You may think dogs are the most carnivorous of the two, but in fact, felines need more protein in their diet than canines. Carbohydrates however, are not a necessary addition in your cat’s diet. Cats are carnivores first and foremost. Healthy, adult Cats may only need 5-10% carbs, usually obtained through ingesting animal protein, for reference, a mouse carcass is about 3% carbohydrates. They need 30-50% fat, and 50-60% protein. Of course, your cats’ specific need vary based on their life stages and activity level.

There is some debate on what exactly is the perfect ratio of protein, fats, and carbs for canines. Part of that is because there are so many different breeds with varying sizes and body types. Also, because there are still ongoing discussions about whether dogs are omnivores or carnivores. Nevertheless, dog food companies create “well balanced” food for canines by the thousands of pounds for us to buy and feed to our furry family members.

Here’s what we do know and some general guidelines to abide by. An adult dog may only need 18-25% protein in their diet. Athletic dogs, like sled dogs, puppies, or working dog in a bug out situation, may need more protein. A dog’s diet can contain 30-70% carbohydrates, and 10-15% fat. These percentages will change throughout your dog’s lifespan and with different activity levels.

Make sure the meals you make for your pet meet its individual and breed specific needs. It is important to make sure cats get enough of their food from animal products. There are many vitamins, minerals, amino acids, and fatty acids that cats can only get from animal proteins. In contrast, dogs have the ability make up for some of these needs by converting pre-vitamins into the vitamins they need. A dog can thrive with high levels of carbohydrates where cats lack the enzymes to break them down and absorb their nutrients.

Another important factor to consider is your animals water intake. Even if you’re feeding them a perfectly balanced diet, without proper water consumption your pets body won’t be able to carry important nutrients into cells of the body. Water also helps the body maintain a normal body temperature. Without it, organs will begin to fail and the body will start to shut down.

Cats naturally have a low thirst drive, and even if they’re supplied with a fancy water fountain, they don’t make that deficit up by themselves. Store bought kibble usually contains only 5-10% water, by making your own food at home you can take control of some of that water consumption by adding it to their food.

​Want to learn about essential health practices, the right way to take vitamins, and why they currently aren’t working for you? Details HERE.

Food/Herbs to Avoid

Not everything in your garden is safe for everyone on the homestead. Feeding toxic foods on the homestead could be a costly mistake, even worse if you’re relying on your dog after the end of the world as we know it. Here are just some of the things commonly found on the homestead or in a bug out bag that are hazardous to your pet:

  • Coffee and caffeine can cause gastric upset and if enough is consumed can cause seizures or death.
  • Garlic, Onions and Chives can cause gastro intestinal irritation. Onions are the most toxic to cats.
  • Raisins and grapes can cause kidney failure for unknown reasons.
  • Milk and Dairy can cause digestive upset because pets can’t break down the lactose in those foods.
  • Nuts have high levels of fats that can cause vomiting and diarrhea. Just 6 macadamia nuts can be toxic to dogs.
  • Yeast dough can cause gas in the digestive system, this could cause bloat or gastric torsion (stomach twisting) which may need surgery and is life threatening. In addition, the yeast can make ethanol as a biproduct which is the same as giving them alcohol.
  • Alcohol can cause an array of problems, the worst of which are coma or death.

So, you have an idea of what providing a diet for your dog or cat can take, and what foods you may encounter that aren’t safe for them. That presents the question – Where do you get the food? As homesteaders, you probably don’t want to come up with the cash for this. How can you provide this food directly from your homestead or after the dust settles?

Look at these options:

Trading Goods/Services

Do you regularly grow too many tomatoes, have too much goat’s milk, extra wool or like me, too many eggs? Do your neighbors raise cattle while you raise goats or sheep? Make a fair meat trade to create some variety in your pet’s diet. I regularly trade my extra eggs for a basket of veggies, or groom my neighbor’s dogs in exchange for help around my homestead.

Maybe you make amazing quilts or pottery, or you even have teaching or barber skills. Get to know the owners of your local feed store, they may be willing to make a trade if you have something they need. Without the exchange of money, both parties leave feeling like they got a great deal.

The point is, if you have a skill or a good to trade for dog or cat food, DO IT! Bartering is a great way to acquire the things you need on the homestead, and will surely be an integral part of the post-apocalyptic world. Brush up on these skills and make the connections you can trust now and that you’ll need later.

Food Scraps

Maybe there’s no one you know who has extra dog food kibble, what about what you or your neighbors do have, that your grow or raise for yourself and your family. There are always extra’s when processing livestock. The extra parts your neighbors throw out, the heart, tongue, eyes, brain, and other organs, all the stuff that your kids cringe at eating. Have that meat ground or chopped, better yet do it yourself. It’ll be a great free protein to add to your pet’s diet.

Growing some safe extra’s in the garden or foraging for some wild edibles on your way to your bug out location is also a great way to nourish your pet.

Check out some of the things they can indulge on that you probably have on your homestead or can find nearby.

  • Apples, pears and oranges are a great source of vitamins A and C, also Fiber. Make sure to take the core and seeds out first. And peel the orange as it is poisonous.
  • Blueberries, cranberries and strawberries are vitamin rich.
  • Bell peppers help boost the immune system.
  • Carrots are low in calories and high in fiber.
  • Sweet Potatoes and Pumpkin offer water, fiber and nutrients.
  • Watermelon is high in water so is great for keeping your pet hydrated.
  • Eggs can be given in moderation for added protein.
  • Bones are an important source of calcium which is a must have in a dog and cats diet. They can be ground into the meat to prevent choking and splintering hazards.

The list goes on, just make sure what you’re giving your pet, either straight from the land or from your plate, hasn’t been modified with added sugars or salt that can be unhealthy for your pet.

Hunting

If you’re a skilled hunter or fisherman raking in extra for your animals means fresh dinners for everyone! Your cat will love extra salmon or whatever fish you can get locally. Just keep an eye out that you’re not feeding them fish that’s too high in mercury. Use it sparingly.

If you’re prepping for the inevitable collapse, you may want to think about making a hunting dog earn their keep. If your beagle wants to have rabbit tonight, he can help track them down and spook them out. Your bird dog will play a vital role in making sure no kill goes unfound. You may allow them to track and hunt their food on their own.


Plenty of barn cats fend for themselves by doing their job and can help keep the homestead barn a mouse and snake free place. This may wind up saving your precious eggs from thieves in the night, and keep predators away from your hens.

The Raw Dog and Cat Food Diet

Everyone has their opinions on whether feeding animals raw diets is safe. If you’re allowing your cat or dog to hunt on their own, you’ve already made the decision to allow some of these dangers around your home. If you plan to provide each ingredient for your pet’s food you may want to weigh your options with feeding raw or cooked meals.

Raw meaty bones are controversial even with pro-raw dieters. Some say no whole bone is a safe option for dogs. Others believe that if you’re giving a large meaty beef bone, preferably after a meal, there can be great advantages. Steer clear of poultry and pork bones as they can splinter too easily.

A bone can be a great after dinner treat as long as its longer than the length of the muzzle, and you supervise your dog to make sure no chunks of bone are breaking off. Refrigerate the bone between uses, as it probably still has traces of meat on it, and discard it after a few days of use.

There are both advantages and dangers and associated with the Raw diet. You should always ask your trusted veterinarian their opinion with regards to your pet’s ideal diet. Ask them about what a raw food diet should look like for your pet’s specific needs. They may suggest adding supplements like calcium if you don’t plan to use bones, fish oils for omega 3s and fatty acids, or cod fish oil for DHA.

Like any new food, start out slow to allow your pets body time to adjust. Remember it’s not all or nothing, half raw, half cooked is always an option if raw meat isn’t for you.

Some advantages to the raw diet include:

  • Avoiding Pet Food Recalls – Food recalls that have been recently circulating the mainstream media. When a recall occurs, your pet may have already been exposed to something harmful. Homemade and locally sourced food limits this danger.
  • Oral Health – Better oral health is associated with the raw diet because it requires your pet to tear and chomp on raw meat and bones, creating a flossing and scrubbing action that keeps teeth and gums clean.
  • Weight Maintenance- Because of the higher amount of protein in the raw food diet, a lot of pets lose fat and maintain muscle mass.
  • Muscle Strength – Because of all the work put into chewing and tearing meat from bones, your pets neck, jaws, shoulders and back muscles may strengthen.
  • Better Digestion and Improved stool quality are also associated with the raw diet.
  • Organic Options- Depending on where you get your products, the diet you provide can be free of pesticides and harmful chemicals. Not to mention added hormones you could find in beef and poultry products.

Disadvantages of the raw diet are:

  • Some dog cannot process raw foods due to their level of activity. If your dog is less active, you should feed them less meat.
  • Risk of infectious diseases- Salmonella and E. coli are just some of the infectious diseases that you and your pet could come into contact with while ingesting the raw diet. There is also a risk of shedding these diseases to other pets or people once infected.
  • Nutritional Risks – By not adding enough variety, starting puppies out on a raw diet to early, or making sure you pet is getting the nutrients it needs from animal protein you could risk a nutrient deficiency occurring.
  • Some view the risks of allowing a pet to have meaty bones too great to enjoy the benefits like improved oral health and better breath.

Whether you’re planning to keep your pets with you when SHTF or you’re planning to take the next step in self-sufficient homesteading, learning what your canine or feline friends needs out of their diet and avoiding harmful or toxic products is the first step in providing homemade pet food. Deciding where and how you’ll source your ingredients is essential to creating the raw pet food diet or cooked from scratch recipe’s your pets will love.

Does all this information make your head spin? Do you want to know what to include in your pet’s bowl? Check out some tried and true recipes to get some ideas about what a complete meal looks like and what your pet might enjoy for dinner.

Cat Friendly Recipes

Rice and Chicken recipe

Ingredients

½ pound pulled chicken

1 large hard-boiled egg

¼ cup rice

4 teaspoons olive oil

1 cup chicken stock

Directions:

Finely chop the boiled egg. Place all ingredients into a saucepan, bring to the boil. When the stock is boiling, reduce the heat and simmer until the liquid cooks down. The rice will absorb most of the liquid. Remove cat food mixture from the heat and allow it to cool. Blend the mixture in a food processor or use an emulsion blender until all the ingredients are well blended and serve.

Beef and Oats Recipe:

1-pound ground beef

1 cup rolled oats

2-3 spinach leaves

3 cups water

1 hard-boiled egg

2 tablespoons vegetable oil

Boil the rolled oats in water until they become very soft and begin to absorb the water. Next, Boil an egg. When it’s cool enough, remove the eggshell and the chop the egg. Add egg into the oats. Chop spinach. If you don’t want it raw, in a fry pan, add the oil and beef and cook thoroughly. Add the beef into the oat and egg mixture and stir in spinach. Finally, mix the ingredients together well.

Dog recipes:

Ground Turkey and veggies:

Ingredients

3 pounds ground or shredded turkey

1 zucchini

1 ½ cups brown rice

3 cups baby spinach

2 carrots

½ cup peas

1 tablespoon olive oil

Directions

In a large saucepan with 3 cups water, cook rice. Heat olive oil in a large stockpot over medium heat. Next add ground turkey and cook until browned. Leftover pulled turkey would work great also. Chop or shred carrots, zucchini and spinach. Finally, stir in spinach, carrots, zucchini, peas and brown rice until the spinach has wilted and the mixture is heated through, and let cool completely.

Beef Stew Recipe:

Ingredients

1 pound of beef chunks

½ cup of flour

½ cup of green beans

1 small sweet potato

½ cup of carrots, diced

½ cup of water or organic vegetable oil,

1 tablespoon of oil of choice for frying

Directions

Bake a sweet potato until its tender, it still needs to be a little firm. Cut stew pieces into desired size chunks based on the size of your dog. Cook the beef chunks in cooking oil until cooked through. Remove the beef chunks from the pan, but don’t forget to save the juices for later.

Cut the sweet potato into small pieces. On low, heat up the leftover beef drippings. Add flour a little at a time to create a thick gravy, keep whisking. Add as much water or oil as needed to the gravy. Add the beef, sweet potato, carrots and green beans into the gravy and stir to coat. Let simmer until carrots are cooked through.

Treats:

There’s always room for treats in our house! Some raw veggies, like carrots, peas, and green beans make great treats for your dogs. Your cat may enjoy something steamed like, asparagus, broccoli or celery. If you want to spoil them with a more complex treat option, check out these recipe’s below:

Bacon Biscuits

This is a great way to give your pets a little taste of yummy bacon, without ruining their waistline.

Ingredients:

1/2-lb pastured bacon

3 cups whole grain flour

1 egg

1 cup water or stock

Directions:

Cook the bacon in a pan or bake it in the oven until crispy. Chop the bacon into desired size pieces. Add in all other ingredients. You can add more flour or whichever liquid you chose if needed to make this a semi-hard dough. Add balls of dough to a cookie sheet. You can make large or small biscuits depending on the size of your dog. Flatten to desired thickness, and bake until done.

Dried Liver Treats

These are super lean and healthy for both cats and dogs. First pan fry beef liver in olive oil over low heat until cooked through. Let it cool enough so you can handle it, and slice it to desired thickness. Smaller for cats, bigger for your large breed dog. Spread cooked slices on a baking sheet and slow bake in the oven at 200 degrees F. Turn the slices over after two to three hours until they are dry and crispy.

Catnip Toy

Grab an old sock that you don’t use anymore (a child’s sock works great) or if your crafty you can knit your own little mouse or ball. Just add in a handful of dried catnip, and knot the ankle for hours of free feline intoxication. To make your own dried catnip, just hang a small bunch upside down in a window until dry. Crumble off the leaves in a bag or jar to keep.

What’s your pet’s favorite food? Let us know in the comments section below.


Other self-sufficiency and preparedness solutions recommended for you:

The Lost Ways (The vital self-sufficiency lessons our great grand-fathers left us)

Survival MD (Knowledge to survive any medical crisis situation)

Backyard Liberty (Liberal’s hidden agenda: more than just your guns…)

Alive After the Fall (Build yourself the only unlimited water source you’ll ever need)

The Lost ways II (4 Important Forgotten Skills used by our Ancestors that can help you in any crisis)

The Patriot Privacy Kit (Secure your privacy in just 10 simple steps)

Dogs and cats are a vital part of the homestead or when your prepper nightmare come true. Whether you plan to bug out or bug in, your pet may play

When we work our way toward a goal of self-sufficiency, a lot of times producing and preserving food comes up. There are lots of methods, and there are thankfully things like dry meats, grains and legumes, and fruits and veggies that can go straight into cellars and other cold storage. However, for most of us, canning eventually rears its head. How many canning jars we’ll need depends on whether we’re growing, foraging, fishing, hunting and raising livestock with an aim for total self-sufficiency in a societal breakdown or just some supplementary uses, and what we choose to grow or raise. Either way, we need a pretty big pile of jars (and lids). That’s a big commitment to storage space.

There are several types of canning jar lids that are reusable. That’s an area where everybody can make their own call based on what they prefer. Many of us are going to choose disposables. For every jar we get, we should make sure we have at least a couple of backup lids each.

So how many canning jars do we need? That depends on our plans. Small livestock could potentially be harvested and consumed, but if there’s no working freezer and we’re out of canning jars, taking advantage of migratory birds and preserving beefs and deer is going to be limited to smoking and drying or using up enormous amounts of our stored salts.

When the Granny Miller website was still up and running, the chart below was posted.

VegetableRequirementsChart

You are going to need a butt load of canning jars….

Get More Canning Jars … and Lids

It has flaws but it’s handy in many ways – starting point for row yields, estimating seed and start needs. In this case, it’s canning yields. For two cups of veggies a day for four people, her suggestions would require 800-1200 jars. That’s a lot of jars. That’s not a lot of calories, and most of the veggies won’t leave somebody feeling full for very long. It doesn’t account for cellar potatoes or squashes, grains, or dry legumes, of course. It also doesn’t include any jellies or a lot of never-canned fresh food like lettuces (diet food).

800 jars is a mighty pile alone: 67 flats. In quarts, that’s nearly 700# of storage on its own. It’s eight five-foot stacks taking up a bit over a one-foot square somewhere, or sixteen 2-3’ stacks we could run as a counter in a shed or bedroom if we’re inclined (my pick). We’re looking at devoting a fair amount of space to canning jars if we’re planning to delve in big time and live off our land during a crisis.

Others have also taken a stab at suggesting canning jars for self-sufficiency and preparedness, or jars-per-garden ratios, like the old Victory Garden guides and the “How Many Canning Jars” post (take this with a grain of salt: same totals for an individual as a couple, but the initial per-day breakdown is handy).

And again, to be able to can it all over again, we need spare lids.

canning-jars-breanne

Storage Space for your canning jars

Unless we’re already self-sufficient, it’s unlikely we’re using 800-1200 or more than 2K canning jars each season. That creates a lot of dead space. Jars can be stored outside in extreme temperatures, but it’s still dead space.

Happily, it doesn’t have to be wasted space. We can use our non-canning jars for some of our storage.

Water immediately spring to my mind, since few of us really have enough water storage for a comfortable buffer between a contaminated well or loss of utilities and a backup plan, but that would require actually canning them to seal it – which renders the first batch of lids “used” before a crisis even starts. There are other options, though.

Everyday Life

A lot of my dehydrated produce and herbs ends up in various quart and pint jars. I also keep in instant milk and sour cream powder. The canning jars make a far more bug-resistant storage vessel than Mylar bags or pasteboard boxes, in volumes that I can easily move through. Oxygen absorbers inside the jars keep them nice and fresh in the meantime.

009

Canning jars can be used with and without oxygen absorbers to store temporary and long-term dry foods like nuts, beans & grains, powdered mixes, and dehydrated produce.

We’re a hash brown family – any time, any day, grated potatoes make us happy. Cheesy grated potatoes make us even happier. Since I rarely make one box of instant mac-and-cheese, I tend to cheat a little. They think it’s ‘cause I love them. I’m really using evaporated milk and grating cheese so that I can stash 1-2 packets of cheese powder. That way I can use it for cheesy hash browns on a night or morning I don’t feel like cooking or am rushed.

Not only are there whole canning jar flats of my own and commercially purchased bulk hash browns in my “shop first” closet, there’s an additional flat where all my collected mac-and-cheese packets live. (Yes, we’re that lazy and that addicted to artificial colors and flavors, and we eat that much mac-and-cheese.) When I empty the jar in the pantry, I just pop in and grab more instant cheese flavoring. I do the same thing with those hideous Hamburger Helper cheese toppings.

I also use canning jars to take or send some of the tasty boxed noodles with cheese and cream sauces camping and hiking. A pint fits 2-3 packages much more compactly and with less breakage and more water resistance than their original boxes. That started as a storage supply trick, but it was just so darn handy that now some of our buddies do it just for camping.

filling-canning-jars

Salsa from all your tomatoes and peppers is a great canning idea. Make sure you stock up on chips too.

Canning Jars for Non-Food Storage in Daily Life

Canning jars are allowed for some of our shop-type and office-type detritus, but even though I will boil them all (I know – new rules), I still just mentally can’t deal with some things going in canning jars I will ever want for foods. Too, I don’t want them rolling around and screws and nails gouging the glass and providing a haven for grungies or chemicals.

Image: Canning jars can be used for non-food storage – just be aware of what’s going into them to avoid scratches and harmful chemicals.

Still, I do use them for banana clips, paperclips, sticky pads and flagging stickers, various tiny glue tubes, ear plugs, some sewing supplies, sugar and stirrers when I travel, some drawing-craft supplies, and some animal supplies like Cutter for fleas, the caches of Heartguard, and various dewormers.

I also keep some homemade cloth *bleach* wipes (dish detergent wipes and Windex wipes) in canning jars on my counter, and have trained my family that it’s totally normal to have a canning jar sitting in its lid and rim in the “dump the pockets” alcove and the laundry room. It’s just easier for me to haul the coins to the bank in a reasonable-sized jar with a fitting lid.

Image: I’m not the only one who keeps canning jars available for dumping coins from pockets.

There are all kinds of ways to use canning jars in our daily life. Some of them cross over into preparedness like my cheese sauce packets. Some of them are solely for daily life, like dehydrated peppers in my fridge and coins on my dryer.

30694_strawberry_blueberry_crisp_jar

Whole meals can be canned, in this case dessert!

Salty & Crunchy Snacks can be stored in canning jars

Besides popcorn and banana chips, when we talk about feel-goods for storage, salty and crunchy foods don’t really get a lot of play. Maybe it’s because so many of those items get trashed in storage in bags, have relatively short shelf lives, and are expensive from MRE Depot and Thrive.

That’s the perfect kind of thing for canning jars.

Oxygen absorbers help extend the shelf life of our foods way past the original best-by or expiration date, and the solid walls of the jars keep delicate items safe from being crushed in the vacuum or by other bags. Portable? Not so much, maybe a few jars. But sanity saving in an outage, personal financial reversal, or serious crisis? Almost assuredly.

Think about the mood boost inside a household if you got a $5 packet of O2-absorbers, then took $13, $25 or $50+ dollars to Walmart and the dollar store, and picked up a weekly or monthly something special, something that isn’t another spoon meal like pudding or having peaches instead of berries in oatmeal.

There are also items that we only crave once in a while, but when we crave them, we’re insatiable until we get them. For some of us, those things are crunchies, be they salty or sweet.

Some of the things that can be stored for years in canning jars with oxygen absorbers are:

  • Goldfish & Chez-Its in their many wondrous flavors
  • Teddy Grahams
  • Pretzels (small rods and twists)
  • Tortilla chips (quarts or larger; don’t be silly here)
  • Corn chips
  • Graham cracker blocks
  • Cold cereal
  • Rice Krispies & Chex (yes, they rate their own listing)
  • Cookies (Crisp, dry cookies; not soft ones)
    *Think generics

Depending on the size of the cookies, it may take a couple of quarts and have some “wasted” air space inside per serving, or maybe it’s planned for just a couple of cookies with an evening lemonade or afternoon cup of tea. It depends on family size and cravings, but we don’t want a single cookie almost ever – it just points out that we don’t get cookies much. One exception would be the types of cookies we stick in the side of a bowl of pudding almost as a garnish, something just there as an extra special treat and a little crunchy finger food.

Portion Control

Another really nice aspect of storing our treats in canning jars is the portion control. It’s harder to decide not to eat a whole bag of chips, M&Ms, or cookies, or not make a whole box of Rice Krispy treats when it’s right there. It’s easier if we’ve reached into a specially marked tote or trunk or dark corner of the basement and only brought out a jar or two of whatever our vice is.

I can also shake the stuffing out of cake mixes and divide them between jars, scan the directions, stick those inside with the mix, with the note that it’s half or a third of the total – whichever divides best for the oil and eggs. I don’t usually need a whole cake mix, not really. In a crisis, a single-layer round pan or square pan or a bread loaf pan that’s been split for filling will be a mood boost as it is. When it’s just two or three of us, that’s already more than sufficient for multiple servings. I already split a baking mix when I do dessert for us a lot of the time, or I’ll freeze one layer or one bread loaf pan to turn into biscotti or triffle another time.

In an emergency, I don’t really want leftovers. Even more than now, I don’t want resentments about who got extras and who didn’t, and I don’t want bugs. Better if I can make the right number of cupcakes or a smaller pan of brownies. Canning jars let me do that.

Bonus: Even though they’re clunky and heavy, storing cake mixes in canning jars actually saves a lot of wasted air space in our cache. The jars are also a lot more water and pest resistant than boxes and cellophane.

Portion control with canning jars goes for just about anything, not just baking mixes. I do it with Chex cereal in daily life so I can open a reasonable amount of Chex Mix and not grab a handful from a big cookie jar every time I wander through the kitchen.

Large and small marshmallows for toasting, s’mores, rocky road, or cocoa are common ones in our storage. It’s one of the ways I mentally allot out feel-goods like chocolate chips to add to pancakes or bannock on a monthly basis in a disaster.

That budgeting applies to all phases of prepping storage. One jar of Milky Bones and one of chewies a week, then doggies get no more, or we stand a chance of running through all of them in three months. One jar of Kleenex, then use hankies. One jar of special-treat drink mix packets and extra tea a month, and then it’s just the daily plan for juices and caffeine. One jar of tampons, and then wear the moon cups or cloth pads. One jar of instant seasoning packets, then do it from scratch.

Image: Portion control and “budgeting” using canning jars extends to feel-good consumables and things like custom photo puzzles and miniature, party favor sized toys, games, & crafts.

I even use jars to hold some of the feel-good consumables for holidays and birthdays, and special-treat gimmicks like mini activity books and Oriental Trading Co. craft kits. Some things I store are:

  • sponge-pill animals
  • miniature Farkle & Piggy games
  • marbles, jacks
  • keychain games & puzzles
  • cutesy soaps, lotions, mini body wash
  • custom photo puzzles

By portioning them into jars, I’m not as tempted to give them too often or grab too many at once the way I am with the ones in storage totes.

Canning Jars for Storage

Since we’ll need so many of them in a crisis or to truly go off grid, and since it’s one of the rare household goods items that really doesn’t exist in enough quantity in stores to make for a reasonable resupply once everyone has died off, canning jars and lids are something we should go ahead and lay on – in quantity.

Image: Most stores don’t carry enough canning jars and lids for even one family’s meat or vegetable needs for 3-9 months, so they’re something to stock up on ahead of a disaster – they’re not like hammers and underwear that should still be available well after a major life-ending collapse.

That requires a lot of space, but we can make use of some of the “dead” space with other parts of our storage. Doing so is sometimes even more space efficient than original packaging, even with the density of jars.

Small oxygen absorbers (20cc, 50cc, 100cc) work well to seal jars to the same level that the factory cleaning does when we get them new. By that, I mean that it forms a vacuum. The seal is air-tight and more than sufficient for keeping out moisture. However, it’s not creating so much pressure that it deforms the lids. That means it’s safe to use a lid I’ve vacuum sealed with an O2 absorber for pressure or water bath canning later.

They’re not the lightest things on earth, so we have to make sure we’re using pretty sturdy shelving. Stacking them works, but make sure they’re stacked level or upper boxes like to slide forward and take out the next couple in line with them when they go.


Here’s some other self-sufficiency and preparedness solutions recommended for you:

The Lost Ways (The vital self-sufficiency lessons our great grand-fathers left us)

Survival MD (Knowledge to survive any medical crisis situation)

Backyard Liberty (Liberal’s hidden agenda: more than just your guns…)

Alive After the Fall (Build yourself the only unlimited water source you’ll ever need)

The Lost ways II (4 Important Forgotten Skills used by our Ancestors that can help you in any crisis)

The Patriot Privacy Kit (Secure your privacy in just 10 simple steps)

When we work our way toward a goal of self-sufficiency, a lot of times producing and preserving food comes up. There are lots of methods, and there are thankfully things

Tell me what you eat, and I’ll tell you what you’re made of. Your body is your most precious thing so take care of it! Did you know that what you eat impacts not only your physical health but also your mood and your mental health?

Cancer and depression are at an all-time peak in history and we can certainly say that processed food has something to do with it.

We have put together a deadly combo list, if you consume all of these regularly, you need to start making changes to your diet asap.

Some of these foods lead to obesity high blood pressure, high cholesterol, heart disease, diabetes, Alzheimer’s, and cancer.
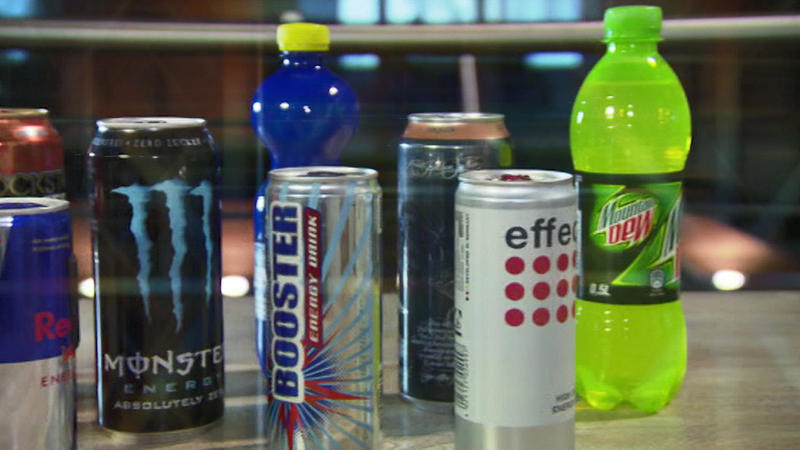
 

Soda

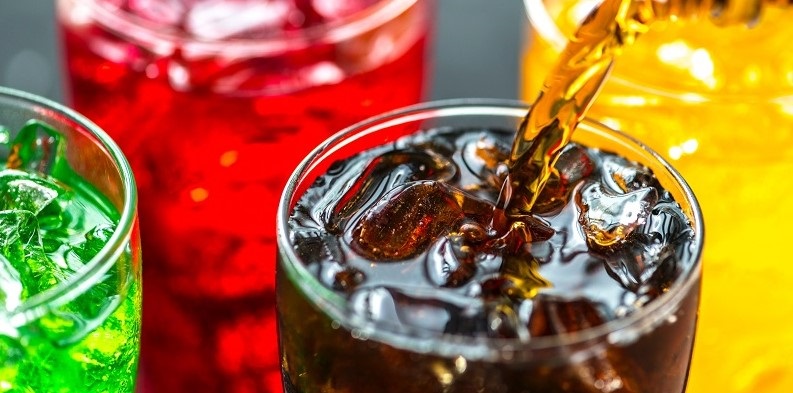
Soda companies say their drinks contains nutrients and vitamins but you shouldn’t really trust this. Soda is bad for you, it contains so much sugar that it’s a ticket to diabetes if you are consuming it everyday. All it contains is a bunch of sugar, food dyes and preservatives.

Soda mess up everything in your body, from your skin, blood sugar levels, to your hormones and mood. Research has shown that drinking soda is tied to early menstruation and poor semen quality. A recent study also revealed that drinking soda frequently was linked with a 20 percent reduction in the average monthly probability of conception for both men and women.

What is so bad in soda? Sugar, colourants and aspartame! Aspartame is not good for the human body and should be avoided. It has been linked to infertility and birth defects through DNA damage and endocrine disruption, which leads to hormonal imbalance.

Canned Foods

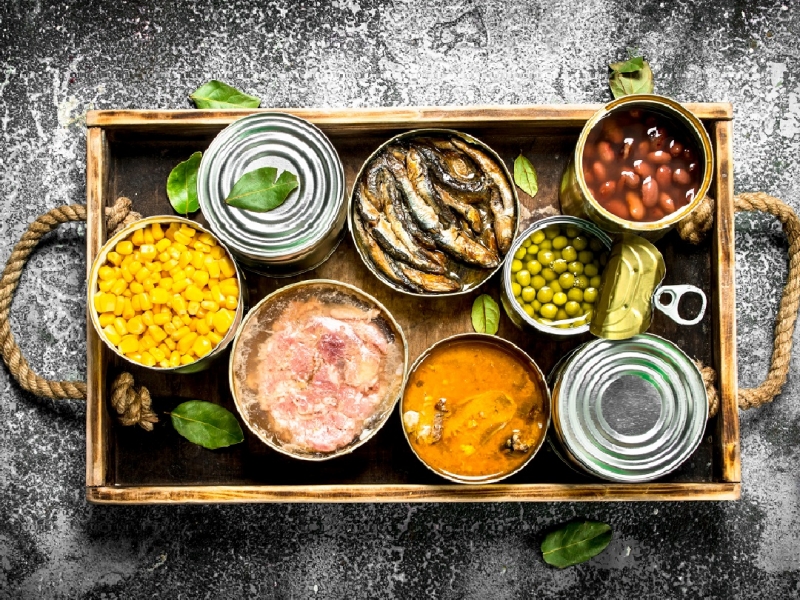
Canned food is handy and a good alternative to fresh food when you don’t have the time to cook but you should try and eat fresh food as much as you can. Here are the reasons why:
– Canned food is a hidden source of sugar and contains preservatives
– It contains trace amounts of Bisphenol A (BPA). Even at low doses, BPA has been implicated in various human cancers and developmental disorders.
– You might be ingesting aluminium. The way it works is that the food is put into an aluminum can, the can is then sealed and then heated to cook the food, to supposedly retain the food freshness. Well, it will certainly also retain the aluminum free radicals released during the heating process and contaminating the food. Over a period of time, aluminum accumulation in body can cause memory problem like Alzheimer’s.


Try and eat fresh food as much as you can! The risk of developing many chronic diseases such as cancer, heart disease, obesity, diabetes, nervous system disorder and Alzheimer’s goes down by consuming fresh foods that do not have any packaging.

Sugar


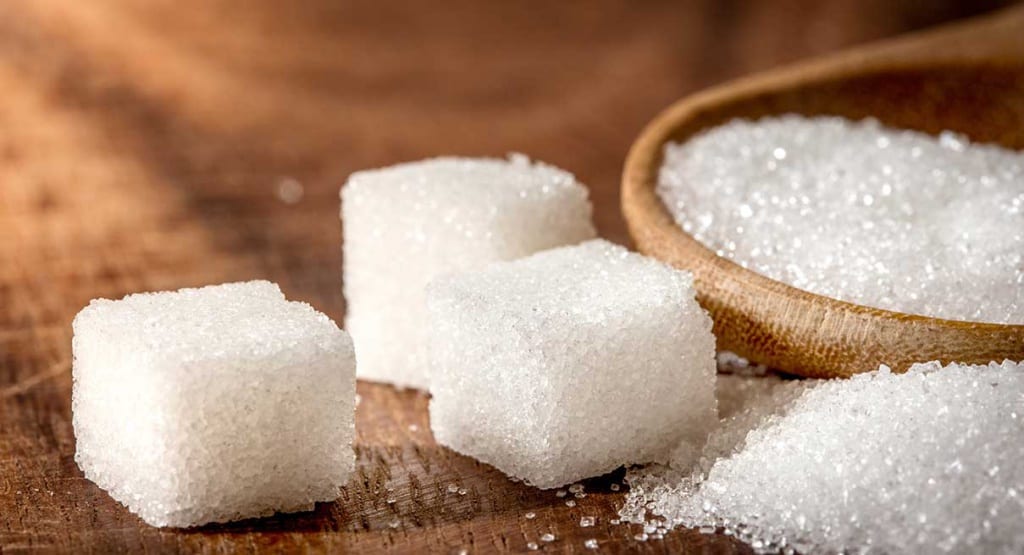
You have probably heard that sugar is addictive, and it’s true.

Eating sugar gives your brain a huge surge of a feel-good chemical called dopamine, which explains why you’re more likely to crave a candy bar at 3 p.m. than an apple or a carrot. Because whole foods like fruits and veggies don’t cause the brain to release as much dopamine, your brain starts to need more and more sugar to get that same feeling of pleasure. Similar to drugs don’t you think?

Sugar also ages your skin faster, damages your liver making it resistant to insulin and have other bad effects. It’s basically messing up your body so make sure you start putting honey in your tea and coffee rather than sugar. Also eat fresh food as much as possible, all processed food and ready-to-eat meals contain sugar.

Lunch Meats


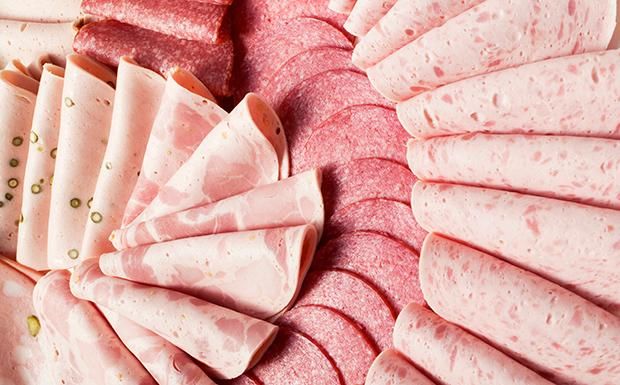
Lunch meats, also known as cold cuts, luncheon meats, cooked meats, sliced meats, cold meats and deli meats are precooked or cured meat, often sausages or meat loaves, that are sliced and served cold or hot in sandwiches. They can be bought pre-sliced in vacuum packs at a supermarket or grocery store.

This kind of meat is full of nitrates, sodium, preservatives, and additives. Also you’re not always sure where the meat was sourced and what else has been added to it …All these substances can increase the risk of cancer, heart disease, diabetes, and even behavioral problems and learning difficulties in children.

We strongly recommend you to avoid these foods. It’s better to pay a little more money to buy quality meat from your butcher, even if it means you will eat meat less often. As a matter of facts, guys, you actually don’t need to eat meat everyday, that’s what companies specialised in mass-production want you to believe!
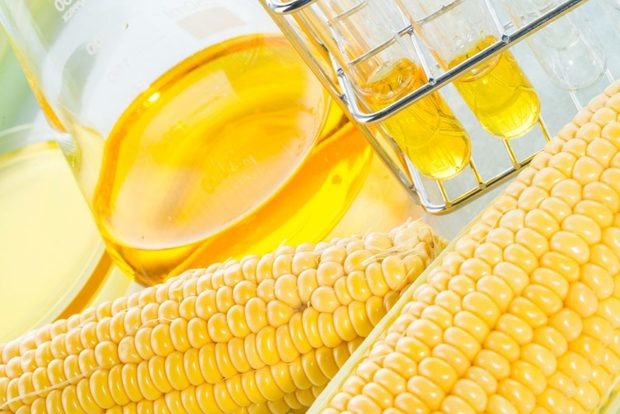
Vegetable Oils


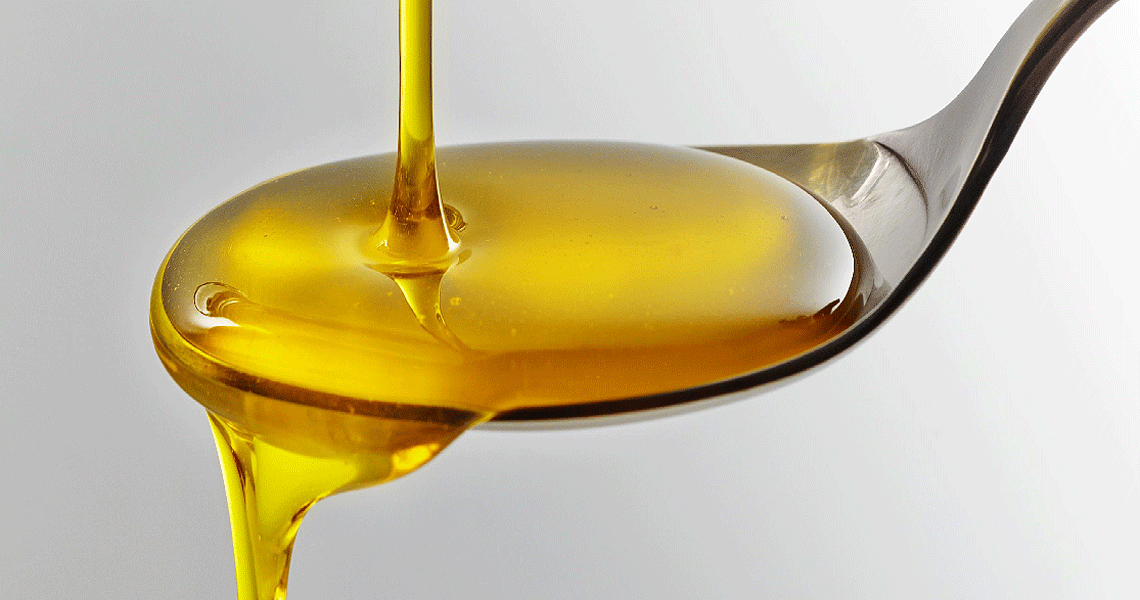
Vegetable oils such as safflower, sunflower, corn, cottonseed and soybean oils, are rich in a type of fat known as linoleic acid. That acid can lower LDL or “bad” cholesterol when it replaces saturated fats in the diet.

However, be careful about the quality of the oil you’re picking. Some of these oils are GMO and we have no idea yet what long-term effects these products can have.

Also, even though a small amount of these oils is good for us, they are incredibly fat and the amount needs to be really small. You shouldn’t consume more than 12 grams of linoleic acid per day for women between the ages of 19 and 50, and 17 grams for men of the same age. The amount drops slightly over the age of 51.

A tablespoon of oil has 120 calories, and contains 10 grams of linoleic acid, so too much in the diet can contribute to weight gain and obesity.

Margarine


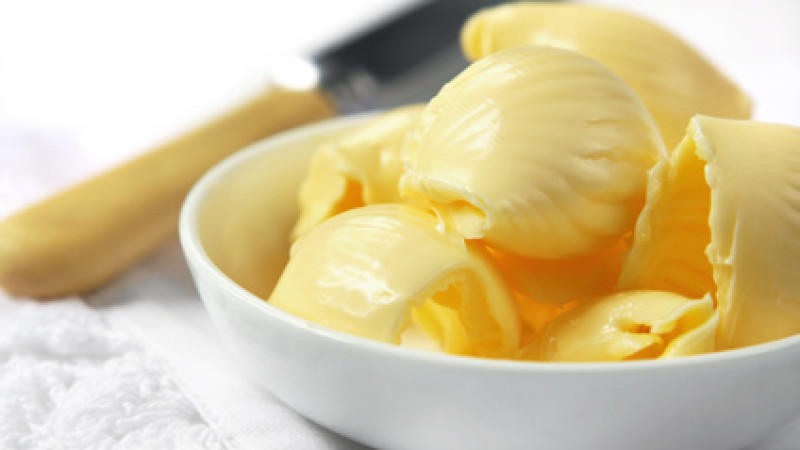
Margarine is made of vegetable oils (like canola, olive, soybean and safflower), water, salt, emulsifiers, butter flavoring, and yellow, buttery coloring. Not very natural is it? It’s highly processed so that oils remain solid at room temperature. Margarine in stick form is generally hydrogenated to keep its shape and extend its shelf life, and that’s what turns some of the oils into trans fats.

Trans fats, also known as trans fatty acids or TFA, are a type of fat found in small amounts in a wide variety of foods. They are considered a ‘bad’ fat because, like saturated fats, they can increase levels of LDL-cholesterol in the blood.

Trans-fat free margarine does exist, but it does often contains palm oil which is also super bad for you, so if you were looking in that direction for diet reasons, you may consider going for butter.

What do we need margarine for anyway? There are way healthier alternatives for cooking like butter, olive oil and avocado oil.

Chips


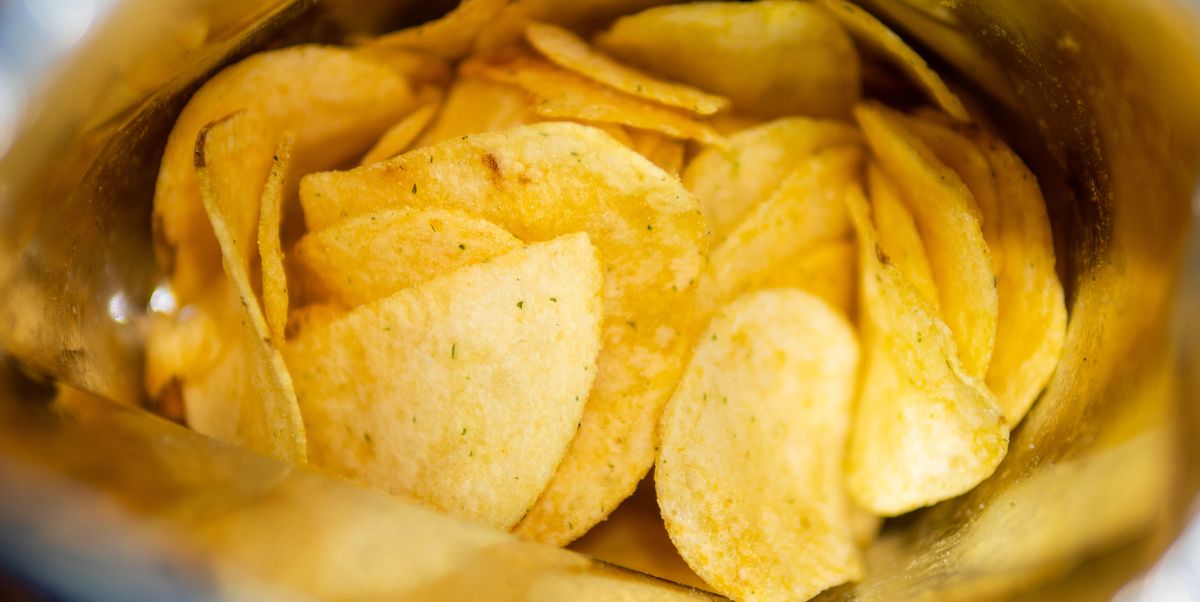
People consumed three times as many chips in 2014 than in 1974, including frozen chips bought in the supermarket, according to a National Food Survey.

A recent survey revealed that eating chips more than twice a week can double your risk of dying. Researchers tracked 4440 people aged between 45 and 79 over an eight-years period, during which time 236 of them died. Looking closely at the participants’ potato-eating habits, researchers identified a marked increase in mortality risk among those who regularly consumed fried potatoes.

It’s important that you eat chips that have been cooked in a healthy way, we mean by that in good oil that hasn’t been reheated. Be careful where you choose to eat. If chips are prepped in good oil that hasn’t been reheated, cooked for not-too-long and naked of mayo and ketchup, it’s okay to have them from time to time.

Bottled Salad Dressings


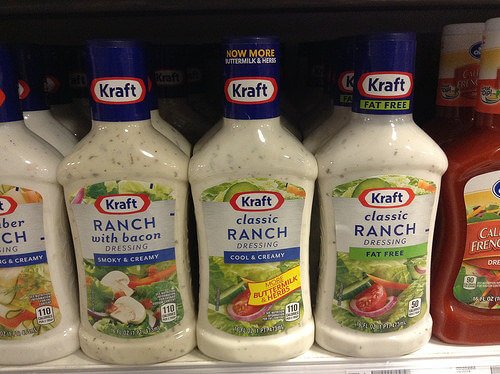
Bottled salad dressings are full of sugar, artificial colours, and high fructose corn syrup. Those dressings are chemicals and what we, human, need is to eat products from the earth and not processed food. Anyway, they don’t even taste that nice.

Drop the bottled salad dressings, and use lemon juice, apple cider vinegar, or balsamic vinegar along with some olive oil for a healthy salad dressing. It’s so much tastier and it only takes two minutes to make your own dressing.

Artificial Sweeteners

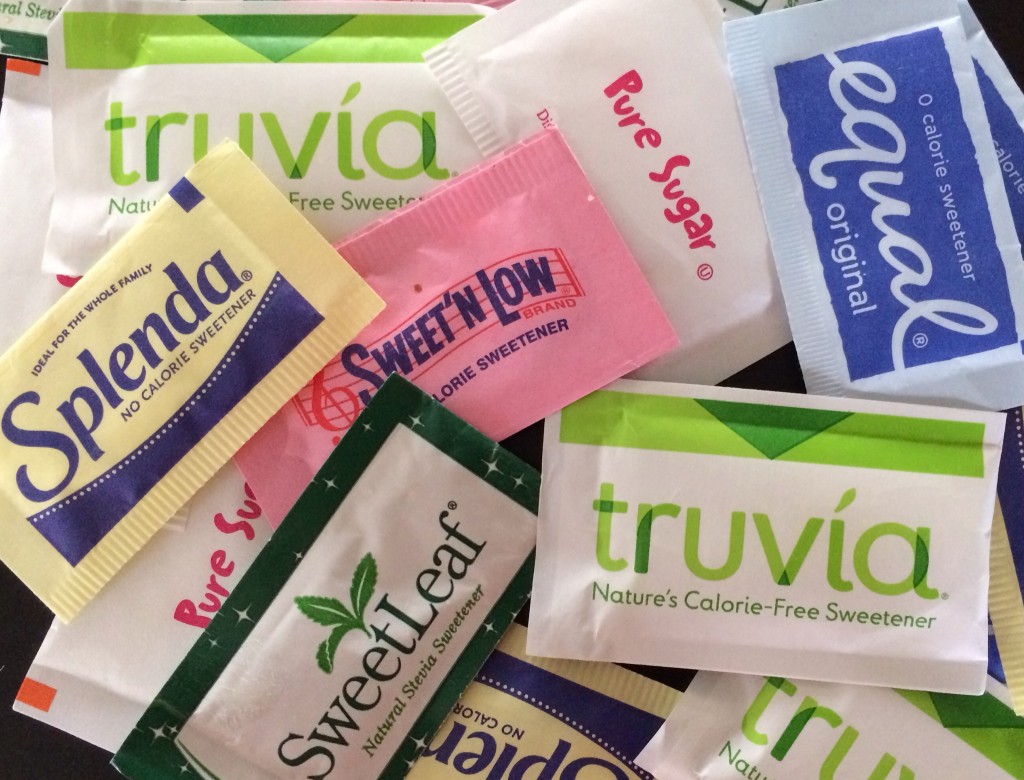
Artificial sweeteners such as aspartame, neotame, acesulfame potassium, etc. might contain fewer calories, but they can still increase the risk of diabetes, high blood pressure, heart disease, and metabolic syndrome.

Aspartame is an artificial non-saccharide sweetener used as a sugar substitute in some foods and beverages. In the European Union, it is codified as E951, make sure you check what products contains it (soda does).

Aspartame acts as a neurotransmitter in the brain by facilitating the transmission of information from neuron to neuron. Too much of it kills certain neurons by allowing the influx of too much calcium into the cells. This influx triggers excessive amounts of free radicals, which kill the cells. They basically “excite” or stimulate the neural cells to death. That’s the kind of effects it generates when consumed too much: Headaches/migraines. Fatigue, Anxiety attacks, nausea, sleep problems, depression, abdominal pains, vision problems, asthma/chest tightness.

Artificial sweeteners aren’t in any case an healthy alternative to sugar, honey is probably the best option.

Alcohol


We’re sorry to break this to you, and we know opinions on the topic are controverted but alcohol has no health benefits. It’s extremely high in calories, can cause dehydration, liver damage, weight gain, depression, and skin problems. Not to mention the bad decisions you make when under the influence.

Alcohol limit consumption is 14 units a week (1 unit being one small drink). Over that, it is a fact that alcohol is harmful for you.
It’s also a cancer risk factor. We understand that life is stressful but for your own sake, when you had a bad day, go to the gym and let go.

Refined flour

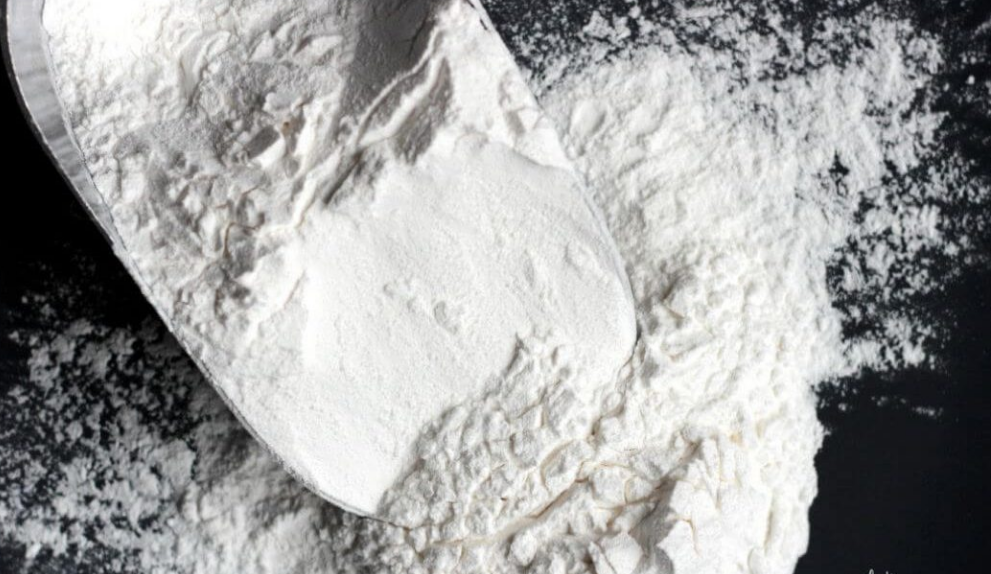
If you’ve ever been to a bakery or had a bowl of pasta, you’ve consumed white flour. White flour is a highly refined substance that is used in a variety of processed foods and baked goods because it is light, airy and cheap. Unfortunately, refined white flour is completely stripped of its nutrient value, with means no vitamins, minerals, or fats to speak of.

Vitamins and minerals in our food normally aid the workers (enzymes) of our bodies. When we remove these nutrients from what we consume, we must get them from somewhere else in order to properly metabolize food. Our tissues become the reluctant donors, and this eventually leads to a vitamin and/or mineral deficiency, which eventually leads to a health condition.


Some of the most popular foods that contain white, refined flour are:

Bread, Pasta, Cookies, Cakes, Pretzels, Chips, Muffins, Crackers, Cereals, Pizza Crust, Pie Crust, Doughnuts

Some healthy flours you can chose instead are almond flour, coconut flour, buckwheat flour (especially good for people with Celiac Disease or gluten sensitivity), teff flour (an ancient grain, healthier than modern wheat), quinoa flour.

Potatoes


We read a lot about the benefits of potatoes, but not so much on the downsides. Potatoes can cause weight gain, depending on the way they are cooked and how often you consume them.

If your potatoes are deep fried, you can expect them to have way more calories than if they’re baked. Another problem with eating potatoes in fried form is that it can be easy to get carried away with them and this is not great for your waistline! Potatoes are also High Glycaemic Foods, which means they can quickly raise your blood sugar levels. When choosing potatoes, you need to watch out for the green colour as this means they probably contain solanine, which is toxic for humans. If you see a green potato in your pack, it’s better to be safe than sorry, so throw this away. Healthier options of potatoes are sweet potatoes, which have less calories and are overall healthier for your body.

Cow’s Milk

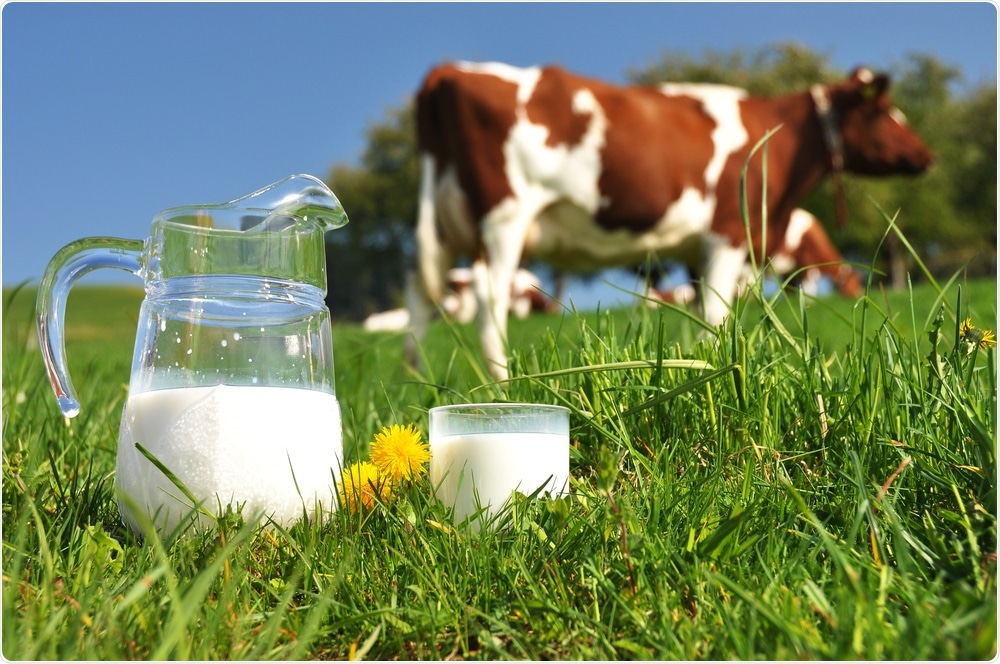
If you drink a lot of cow’s milk, it might be time to think again as it could be doing more damage than good. Cow’s milk contains lactose; a sugar which can be difficult to digest. If you are lactose intolerant, which many are, the potential effects of this on the body include nausea, bloating, cramps and many other nasty ailments which can affect day to day life. If you drink a glass of milk and end up with problems with your stomach, you can assume you are lactose intolerant. It is also thought that cow’s milk could be responsible for causing acne and migraines. If you enjoy milk, it is not to say that you can’t consume any, but it is best to avoid in large quantities, or switch to an alternative, such as almond milk, rice milk or coconut milk. Luckily, there are lots of other (tasty!) options out there.

Agave Syrup

We all know that sugar is bad for us, but if you thought about replacing sugar with agave syrup, think again! If possible, this is even worse for you. The reason it is so unhealthy is that it is full of fructose, which can cause weight gain, insulin resistance and even fatty liver disease. Agave syrup is often sold as a healthier replacement for sugar, but it is no such thing and should be avoided at all costs. If you need your dose of agave syrup, just make sure it’s in small quantities, as otherwise it may be damaging for your health. It would be better to replace sugar with a sweetener, if you really need something extra in your tea or coffee! Nothing would be even better; it takes a while, but you get used to it.

Fruit Juice from Concentrate

It may seem like choosing fruit juice from concentrate is just as healthy, if not healthier than drinking water, but this is untrue. The problem with fruit juice from concentrate is that water is removed through several processes; evaporation, filtration and extraction. This means that the fruit nutritional value is much less than you might expect and there are additives used to give it more colour. In short, it might look like it’s bursting with goodness, but it has little nutritional value and additivities which aren’t too great for the body. Stomach ulcers can result from drinking a lot of fruit juice from concentrate and potentially, acid reflux. It’s a healthier option than soda drinks, but it would be much better to drink fresh fruit or water. The nutrients you get from fresh fruit are much higher than fruit juice from concentrate. If you can squeeze the fruits yourself, all the better!

Sports Drinks


Sports drinks are often sold in a way to entice you to drink them after a workout, they seem to be full of vitamins and minerals to help you recover after a workout. Unfortunately, this is not the case and sports drinks are not as healthy as they may appear to be.

The reason is that sports drinks contain a lot of sugar. Not as much as soda drinks but not far off it. They also contain artificial flavours and often food colourings. The sugar in the sports drink will spike your insulin, giving you a burst of energy but will cause you to slump straight after. Sports drinks are not good for your insulin or your human growth hormone production. The sodium levels are also often too high in sports drinks, so generally speaking, it is best to avoid these drinks. Nothing can really beat water after a workout, it will hydrate you, without any added sugars or other additives.

Ready Meals

Ready meals may seem like a convenient choice when time is not on your side, but they lack the nutrients you get from preparing and cooking your own meal. Like takeaways, ready meals also have a very high sugar and salt content. The portions may be smaller than a takeaway, but they are so small that they probably won’t fill you up, so you’ll just feel like snacking again soon after. Ready meals also tend to be packed full of chemicals and contain fake vitamins and minerals. Ready meals may seem like a simple option, but they are not worth the money and there are many quick, simple recipes you can cook from scratch.

Raw Cashews

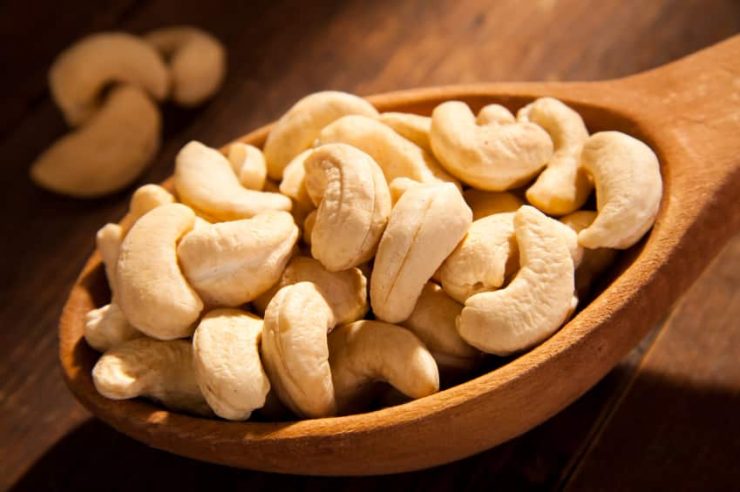
Cashews are well known to be a good addition to your diet, as they contain lots of the good stuff, including protein, fibre and iron. It is important to stick to small quantities though, as they are quite high in calories. Cashews taste great but you want to avoid eating raw cashews. Raw cashews are rarely found in supermarkets but if you find them anywhere, it is safer to avoid them. Cashews in this form are highly poisonous as they contain urushiol, a toxin which is also present in poison ivy and poison oak. The potential side effects include itching of the skin and rashes etc. It may have more serious consequences depending on your reaction. It is safe to eat cashews you find in shops, as these have been roasted to destroy the toxins. However, if you find raw cashews anywhere, it is better to avoid at all costs, as you never know how your body might react.

Kidney and Lima Beans

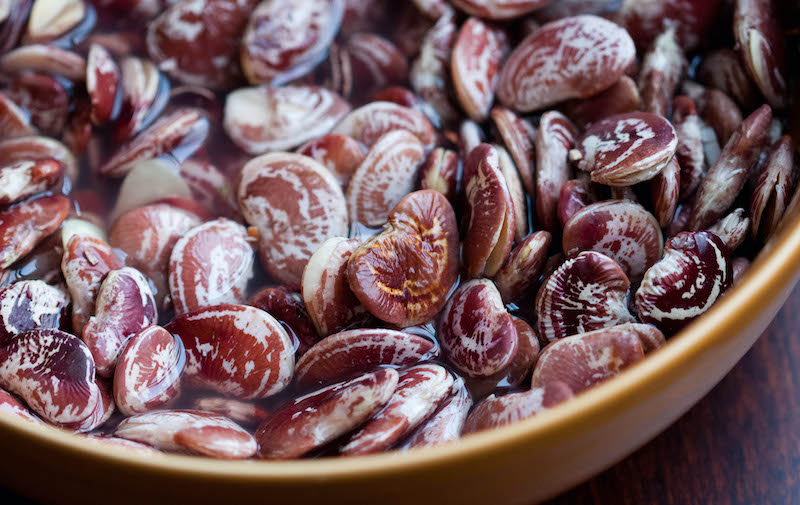
Kidney and lima beans are fine to eat if they are cooked but you should never eat these beans raw. The reason for this is that raw kidney beans contain lectins which, in undercooked foods, are toxic. Raw lima beans have linamarin and this can turn into hydrogen cyanide, which is also toxic. If you eat raw kidney or lima beans, you could end up very sick. In high quantities, it could even be fatal. It is best to avoid eating beans in raw form, if you cook and drain the beans, they offer a lot of nutritional benefits. Beans are the types of food which you would think would be safe to eat raw but if you are about to tuck into a tin of raw beans, think again – unless you want to end up with nausea, diarrhoea and sickness. Boil for around ten minutes to get rid of all the nasty toxins.

Nutmeg

This delightful spice used as an addition to coffee and other treats, especially during the festive period is not as innocent as it may seem. It may be hard to believe this, but nutmeg is also a hallucinogenic drug, if consumed in large quantities. The powerful drug is like taking a dose of LSD, with effects lasting as long as 12 hours. The side effects after this include a dry mouth and panic attacks and symptoms similar to a hangover, lasting as long as two days. A large dose would be difficult to eat as nutmeg is not soluble and is not designed to be consumed in this way. Nutmeg of course, in small doses, sprinkled over food etc is perfectly fine but avoid in large doses. You would really need to be seeking to eat a high dose though, as it won’t be very enjoyable chocking down large quantities of nutmeg.

High Fructose Corn Syrup

This is a sweetener which is made from corn starch and can be found in a range of foods, including soda, candy, frozen foods and even salad dressing. You may even find it in your breakfast cereal, granola bars or ice cream. It is often sold as a healthy option, but it is far from it. There are many more foods which contain high fructose corn syrup, so it is worth checking the label if you are concerned. It may seem like a good alternative to sugar, but, it’s just as bad for you. High fructose corn syrup may be a contributor to obesity, cancer, tooth delay, liver failure and other problems, especially if it is consumed in large quantities. It is best to avoid this altogether as it doesn’t offer any real value to your health. The foods which contain high fructose syrup, including candy and soda, should never be eaten with any regularity anyway, as they are not good for your overall health.

Rhubarb Leaves

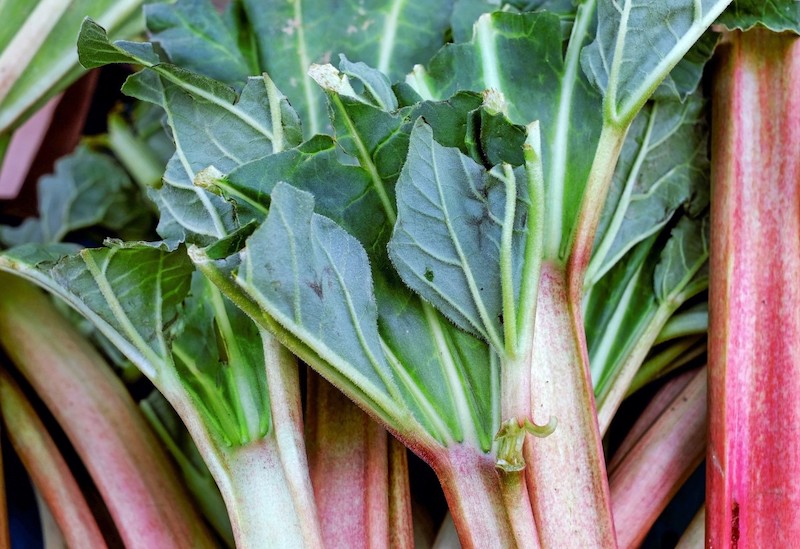
Rhubarb is often used in pies, desserts or eaten on their own, but it is important to stick to eating just the stalk and not the leaves. Rhubarb leaves contain a chemical compound, oxalic acid which is poisonous. This is also present in other everyday foods, such as broccoli, but the quantity is much higher in rhubarb leaves, which is why it is poisonous. If you eat a high volume of rhubarb leaves, it could be lethal but even if you stick to a small amount, you can end up being sick or suffering from nausea. Other known symptoms of consuming rhubarb leaves include, burning in the mouth and throat, kidney stones, eye pain and seizures. There is not really any safe way to eat rhubarb leaves, as you don’t know what effect they may have on you due to the oxalic acid, so best to just avoid these completely.

Raw Eggs

You’ll probably heard of people who eat raw eggs, they are particularly popular with athletes. Although there are some potential benefits to eating raw eggs, including Vitamin D and omega-3’s, there are also potentially serious drawbacks. There is the potential for raw eggs to be contaminated, particularly with the hazardous bacteria, Salmonella enteritidis, usually just known as salmonella. Salmonella is basically food poison from eating contaminated food which lives in the stomach and grows. As the stomach and digestive tract are affected, the result of this is diarrhoea, cramping, nausea and other stomach problems. The ailments could potentially be even more serious than this. The likelihood of raw eggs being contaminated is small, however, it may be worth avoiding eating eggs in this way, as you can never be sure what you’re getting. Cooking your eggs is a much healthier option!

Raw Meat

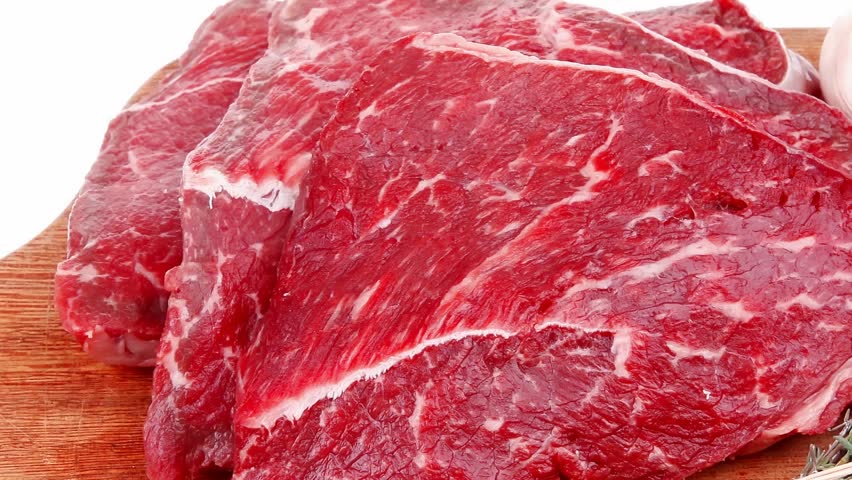
If raw meat is contaminated, it can cause toxoplasmosis, a disease which can lead to several ailments, including muscle pain, headache, sore throat and enlarged lymph nodes. The symptoms may be more severe if you already have problems with your immune system. These may include blurred vision and confusion. Of course, not all raw meat is contaminated and even if it is, there is nothing to guarantee that you’ll get sick, but there is always a risk. The risks associated with eating raw meat are not as bad if the meat is fresh, however, if the meat has been left out in the air, it will start to decay, which means it will attract bacteria. Human beings are not really designed to eat raw meat, so it is highly likely that you will have an upset stomach, if you are not used to eating it. The best way to prevent this is to make sure your meat is cooked all the way through.

Raw Honey

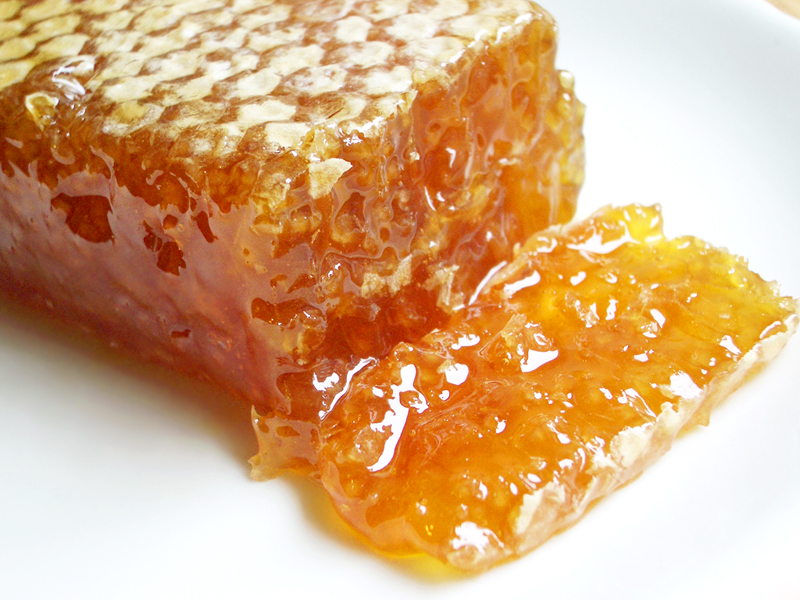
We are often told about the benefits of honey, not so much about the downsides. Honey is filtered, which removes the particles and pollen grains, but raw honey can end up with some pollen grains and this has been known to cause allergic reactions in some people. Those with hay fever should be extra careful about consuming raw honey as this could cause serious reactions. Raw honey may also have the bacterium Clostridium botulinum which can cause intestinal botulism, and this can have some nasty symptoms, including lethargy, muscle weakness and in some cases, it could even be fatal. Intestinal botulism is most common in younger children, but it can affect anyone. It is advisable not to feed honey to young children under one year old. If you have allergies, it is also a good idea to avoid eating raw honey.

Bitter Raw Almonds

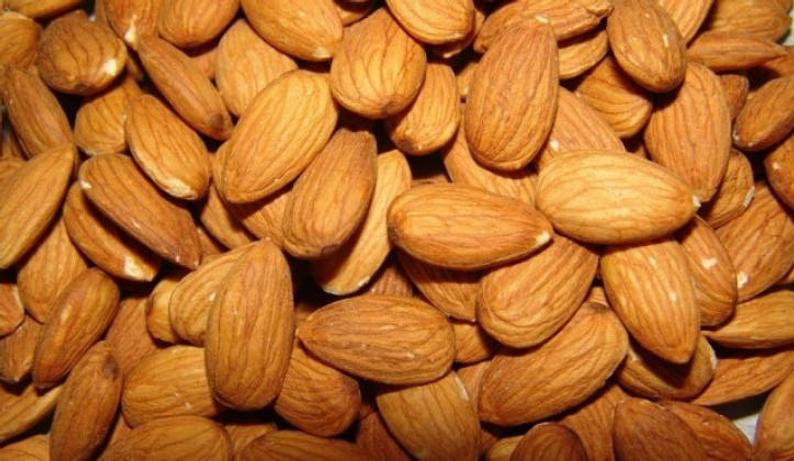
Almonds are a super healthy snack and we are often encouraged to add these to our diet. However, if you have ever bitten into a bitter raw almond, there is a real reason it tastes so bitter, and it’s not pretty! Almonds have a small amount of cyanide in them, but bitter almonds suggest that there is a higher quantity of cyanide than there should be. Cyanide can prevent oxygen getting around our body, if eaten in high quantities and this can cause a drop in blood pressure, respiratory failure and in some cases, it could even cause death. Almonds are great but if you taste a bitter almond, don’t be tempted to carry on and eat it, these almonds are not good and shouldn’t be consumed. Cyanide is good in small quantities which you get from normal almonds, but in large quantities, cyanide’s effects are deadly.


Other self-sufficiency and preparedness solutions recommended for you:

Healthy Soil + Healthy Plants = Healthy You

The vital self-sufficiency lessons our great grand-fathers left us

Knowledge to survive any medical crisis situation

Liberal’s hidden agenda: more than just your guns

Build yourself the only unlimited water source you’ll ever need

4 Important Forgotten Skills used by our Ancestors that can help you in any crisis

Secure your privacy in just 10 simple steps

Tell me what you eat, and I'll tell you what you're made of. Your body is your most precious thing so take care of it! Did you know that what

Energy bars, aka power bars, aka food bars, are small rectangular, nutritious, palatable, have a long shelf life, are simple to prepare, and are easy to carry. The recipes I have presented below make use of several common ingredients; peanut butter, wheat bran, wheat germ, protein powder, and honey. Here are five recipes for delicious, nutrient dense, calorie dense food bars.

1) Krispy Meal Replacement Bars

I miss Carnation Instant Breakfast bars. They were delicious, inexpensive and convenient. Why must companies stop making products that are so good? Dedicated foodies may start a petition to bring back discontinued favorites, but until then, take the initiative and come up with substitute recipes. Here is my version:

Ingredients:

  • 1 cup Rice Crisp cereal
  • One packet of Carnation French Vanilla instant breakfast mix, or chocolate, or strawberry, flavor instant breakfast mix. Or mix all three flavors together. Why not?
  • ½ cup Peanut butter
  • ½ cup Milk or Dark chocolate chips
  • ½ cup honey
  • ¼ cup oat bran or wheat germ

Preparation:

Melt honey over low heat in a heavy bottomed pan. Stir in peanut butter. Turn the heat off, and it is time to move fast. Add in the packets of carnation instant breakfast, the oat bran, and chocolate chips, a and Rice Crisp cereal. Press into baking dish, and let it harden in the freezer.

Shelf life: These bars will remain fresh and edible for months if kept at refrigerator temperatures of around 45 degrees F. They will be edible for a week or more at room temperature, but will soften. These bars are also fragile and prone to breaking and crumbling, but will still be edible.

2) Morning Oatmeal Bars

These are very simple, no bake, delicious chewy oat bars, and are packed with nutrients. They are also calorie dense, and intended as either an emergency food, or a meal replacement bar. This recipe will provide fiber, protein, complex carbohydrates, and numerous vitamins, minerals, and antioxidants.

I used a five grain hot cereal mix for the bars I photographed below, but oats, wheat flakes, rye flakes, barley flakes, or any combination thereof will work. You could also get some good results using a few packets of good quality instant oatmeal.

Ingredients:

  • 1 cup Oats or other whole grain flakes
  • ¼ cup Honey
  • ½ cup Peanut butter
  • ½ cup Chocolate chips
  • ½ cup any combination of raisins, golden raisins, and/or dried cranberries

Preparation:

Heat a heavy bottomed pan over low heat. Put honey in pan and let it liquefy. Stir in the peanut butter. Stir in the chocolate. Turn the heat off. Now you will have to work fast as the mix will harden rapidly, similar to epoxy setting once it is mixed. Add the raisins, cranberries and oats, and mix together. Place onto the oiled cookie sheet. Spread it out evenly. Place the pan in the freezer for an hour or so, then remove and cut into bars or squares.

Shelf life: This will keep for months in the fridge or temperatures around 45 degrees F. They will be edible for a week or more at room temperature, but will soften.


3) Vanilla- Lemon Hard Tack

Some of the recipes here are not actually bar shaped, but they fit the criteria listed in the introduction. (You could call a cracker/cookie an energy disc). This is a healthier and better tasting cracker- cookie version of the infamous Civil war era hard tack biscuit.

In addition to provide an indefinite shelf life food source, the original hardtack could be hurled at the enemy to cause massive blunt force trauma, or used as a trauma plate to stop large caliber rounds, or shrapnel from artillery. I exaggerate slightly. Seriously, the original, two ingredient recipe yields a hard giant cracker. It is tasteless, and typically has to be dipped in coffee, tea or soup to make it edible. Saltines or oyster crackers are the modern descendant of hardtack. This recipe adds two other ingredients to give it a sweeter, vanilla and lemon flavor. It is still rock hard, and long lasting, but also much more nutritious.

Ingredients:

  • 1 cup of Bisquick
  • About ¼ cup of water
  • 1 packet of Carnation French Vanilla Instant breakfast mix, or Vanilla Whey Protein powder
  • 2 packets Myer’s Lemon flavored

Preparation:

Preheat your oven to 350 degrees. Oil a cookie sheet. Mix Bisquick, protein powder, and Myers Lemon EmergenC together, gradually add water until you reach a thick, doughy consistency. Go easy with the water; you will need less than you think. Oil your hands lightly, and pinch off a piece of the dough. Roll into balls and place on the oiled cookie sheet. Place in the oiled cookie sheet. Press the balls flat and Stick with a fork, making a pattern if you want to get creative. Lower the oven temperature and bake for 45 minutes at 200 degrees, or until the crackers harden and dry out.


 Shelf life: At least months if you keep them dry; probably longer.


Bonus recipe: Protein Pancakes

OK, these are not bars, but they can be folded up and eaten cold. They are also delicious of course served hot with maple syrup and butter. Use the real stuff from Vermont and Quebec, not that horrid artificial maple flavored, artificial-colored High Fructose Corn Syrup – syrup. The batter can also be baked in the oven in a skillet at 350 degrees for about 30 minutes to make a simple but nutritious cake. You could cut the cake into bars if you must.

  • 1 cup Bisquick
  • 2 tbsp. flax meal
  • 2 tbsp. wheat germ
  • 2 tbsp. oat bran
  • 3 tbsp. flax oil
  • 1 scoop Vanilla protein powder
  • Milk or water to reach desired consistency. The thinner the batter, the thinner the pancake. Try using dark beer or cider for a different taste. The carbonation in the beer will also make for a fluffier pancake if you give it a little time to rise.

Preparation:

Mix all dry ingredients, and add liquid. Whisk together thoroughly. Let the batter sit for at least 30 minutes at room temperature, covered with a clean dishtowel or paper towel for best results, e.g., nice fluffy pancakes. Pour spoons of batter on to a hot oiled or non-stick griddle or pan. Cook on one side until you see bubbles in the batter. Carefully flip over and finish cooking. Serve with butter and maple syrup, or add apricot or raspberry jam, and roll up.

Shelf life:  The prepared pancakes will keep for a day or two.  The best way to extend the shelf life is to store the dry ingredients in a Ziploc bag. The contents can be mixed with whatever liquid you have on hand, whether water, milk, cider or beer when you are ready to make the cakes.

Conclusion

As you may have noticed throughout, I am very critical of poor quality ingredients. It is a fallacy that if you blend enough stuff together you can make it tastes good. Use the best quality ingredients you can get and the finished product will taste best. You will not need any correcting with sweeteners or flavorings to make a recipe edible. The idea of making things from scratch is quality control, you know what you are eating, and can put together something highly nutritious.


Other self-sufficiency and preparedness solutions recommended for you:

The Lost Ways (The vital self-sufficiency lessons our great grand-fathers left us)

Survival MD (Knowledge to survive any medical crisis situation)

Backyard Liberty (Liberal’s hidden agenda: more than just your guns…)

Alive After the Fall (Build yourself the only unlimited water source you’ll ever need)

The Lost ways II (4 Important Forgotten Skills used by our Ancestors that can help you in any crisis)

The Patriot Privacy Kit (Secure your privacy in just 10 simple steps)

Energy bars, aka power bars, aka food bars, are small rectangular, nutritious, palatable, have a long shelf life, are simple to prepare, and are easy to carry. The recipes I

If you have ever heard the term EDC or Every Day Carry and know what that means, there is almost without fail mention of a flashlight. Flashlights are one of those items that can be used for far more than you might expect and are sorely missed if you don’t have one at the right time. I started carrying a flashlight daily over 3 years ago and was surprised at how often I found myself using this simple but important device.

Most of us grew up with some concept of a flashlight. The flashlight in my home growing up was stored in a central location, the kitchen cabinet. There was the single light in my house for a lot of years that was the go-to device anytime the power went out, a fuse blew or the pilot light on the stove needed to be lit again.  That single flashlight was all we really had until I got a little older and rechargeable flashlights started coming out. In my teens I had my own flashlight for camping trips and playing in the woods behind my house. With my flashlight I thought I was so cool.

The flashlights of my childhood had the single screw in incandescent bulb and were usually powered by a couple of D-cell batteries. If your flashlight was really fancy you had a replacement bulb in the bottom cap under the spring. They weren’t bright at all in comparison to the models today, but in the dark we thought they were awesome. Then sometime around the early 80’s the Maglite started appearing. This was a revolution in flashlight design and capabilities and everyone wanted their own. The Maglite was very bright and cast a long beam, but it was so heavy though (you needed 4 D-cells) that it could also be used as a weapon or to hold up your car, that they weren’t really practical for more than sitting in that kitchen cabinet or being stored behind the seat in the truck.

Now, flashlights have experienced a renaissance period of sorts since the advent of LED. Flashlights now are smaller, brighter, controlled with microprocessors and use a lot less energy. These new models are compact enough to easily be carried every day (hence EDC) and offer a lot of advantages for the prepper.

What is a tactical flashlight?

A tactical flashlight has a different purpose of use than your normal kitchen cabinet model. Tactical flashlights are designed with different materials, usually aerospace grade aluminum. They are designed for high impact stress because they are usually mounted to a weapon like a shotgun or M4/AR15 platform and most are waterproof to varying degrees. Tactical flashlights have textured grips and anti-roll profiles and are usually small enough to easily fit in a pocket. If you are looking for a light for your home defense weapon of choice you will most likely be using a tactical light.

There are quite a few manufacturers of tactical flashlights now and the prices vary wildly. Later in this article we will give you a few recommendations on models.

Why should you carry a flashlight?

  • Self Defense – Flashlights can easily assist you in a self-defense situation. For starters, most modern tactical flashlights are very bright. By bright I mean it hurts your brain to look at them – bright. If someone is threatening you, just flash the light in their eyes and blind them temporarily while you make your get away or maneuver into position. Also, a lot of tactical flashlights have bezel edges. These are supposed to assist you in breaking a window, but I wouldn’t try that with my flashlight. What they would be good at though is cracking a skull. If you blind an attacker and then smash him on the head with your flashlight that will definitely get their attention and will break the skin at a minimum.
  • Identify threats – It’s a light. If you are ever walking in the dark and need to shine a light on a dark or murky area, your trusty flashlight is perfect for that. Lights can easily light up dark corners even in the back seat before you approach your car so you know what is around. With the brightness of modern tactical flashlights you can do this from a pretty good distance too.
  • Help in emergency situations – In an emergency, the power can go out. Having your flashlight on you will mean that you instantly have light. I have been sitting in the house before and the power went out. I just reached down to my side and grabbed my flashlight and Voila! Remember the shooting in the movie theater in Aurora? If someone would have been able to blind the shooter with a flashlight, they might have saved a life or bought a couple of seconds’ time to use to get out of the theater.
  • When you lose the remote – Seriously, you will be amazed at the number of times you will reach for your flashlight that you never thought of. Even my family now instinctively says “Dad, let me see your flashlight” when they need to find something. That and looking down throats to make sure someone does not have a raging case of strep throat. Flashlight tag… millions of potential uses.

What should you look for in a good flashlight?

SOG DE-03 Dark Energy

This is the million dollar question isn’t it and there will be just as many opinions. I will stick with just a few of the basics but I would love to hear from you in the comments if you have other ideas. First you want a light as bright as possible. Why do I say that? Because the difference in a 90 lumens light and a 200 lumens light is incredible. With a higher lumens, you will suffer some battery life of course, but having a brighter light will allow you to see more, throw a further beam and in the case of attackers, blind them more effectively.

Most of the flashlights I see on the market have a rear button for on/off and this works great for me. You can hold your flashlight with a tight grip, similar to an ice pick and press the beam off and on. As well as easy on and off, you want a flashlight with different brightness settings. Normally you will have low which gives you the least amount of power, but the longest life. High gives you the brightest light and least amount of burn time. Additionally, they will usually have strobe mode. This is designed to disorient an attacker and if used correctly could conceal your movement if you are running while shining the strobe in their eyes. I guess this could be used in a survival scenario too when you are trying to signal someone. For me, the strobe is the least useful feature but I don’t want to get rid of it. Also the different settings are accessed usually by pressing the on/off button multiple times. Press it once for low, again for high and a third time for strobe. This means that every time you want to use it you are pressing that button 3 times and that seems clunky to me. The flashlight I carry is supposed to come on with a half press but this hasn’t worked for me.

Lastly, the main difference outside of quality in a tactical flashlight is the battery. There are several different types out there that require odd battery configurations. While they may last longer, I prefer to use good old Double AA batteries for my flashlight. These are ubiquitous and you can find them anywhere. If the grid goes down, you will be hard pressed to find 123A 3 Volt Lithium Batteries or some other odd style. Stick to batteries that you can find at the gas station down the street for the most flexibility or buy a ton of those special batteries now.


How to hold a flashlight when you are using a gun

Having a flashlight on you while you are going into a dark place, or clearing your home from an intruder will give you a tremendous advantage. How do you hold both of these tools together? There are a few methods listed below.

Chapman

Chapman Technique

The Chapman Technique

The Chapman is named for the first IPSC world champion, Ray Chapman. Chapman wanted a flashlight-handgun technique that would work with the flashlights of the day that would be superior to the old FBI method (not the one listed below). The Chapman technique holds the flashlight like a sword and rests the holding hand next to your weapon. This method was designed with the old style flashlights like the Maglite that have a switch on the top or upper shaft of the flashlight. This method does not work well with the newer tactical flashlights that have the button on the tail cap.

Ayoob

Ayoob Technique

Ayoob Technique

This technique is very similar to the Chapman Technique in that it was designed for side mounted switch flashlights. The drawbacks to this technique are the same in that this method does not work well with the newer tactical flashlights that have the button on the tail cap.

Harries

Harries Technique

Harries Technique

This technique is named after Michael Harries, a pioneer of modern practical combat shooting. The most popular of the hands-together techniques, the Harries Flashlight Technique was developed in the early ’70s for use with large-bodied “police flashlights.” This method doesn’t rely on the hand you are holding your flashlight on to contact the weapon and is used as a steadying force for some people.

Rogers/Surefire Hold

Rogers

Rogers/Surefire

The Rogers technique, which was later refined by Surefire coincidentally enough for use with the company’s grip-ring-equipped CombatLights, allows for rapid flashlight deployment when it’s being carried in Surefire’s CombatLight holster. The Surefire model has a molded grip that fits nicely between your fingers. This hands-together method closely approximates a normal, two-handed firing grip, but is restricted to only small, push button-equipped flashlights and won’t work well on the big old Maglite.

Neck

Neck Index

Neck Index

This technique takes the flashlight away from your weapon hand completely. The position of the light is near your cheek so that the light shines where your eyes are looking. This also puts the light in a position to use as a defensive weapon and can be used with older style flashlights almost as well as the newer style. One main criticism of this technique as well as the others is that a bad guy is going to shoot at where they see the light. If the light is right in front of you or like the Neck index method, near your head, guess where those rounds are going to be headed?

FBI

FBI Technique

FBI technique

This method seems to make the most sense to me if you are in a situation where you fear that someone will be shooting back at you. By holding the light up and away from your body, you make the chance that you will be shot lower. The bad guy, if they are aiming for the light shouldn’t be hitting anything major. They might hit your hand, but you hand should be away from vital organs. You can also modify the position of the light, raising and lowering the light, moving closer and further away from your body to confuse the other guy.

Where to carry your flashlight?

The hardest part of any type of EDC gear is making sure that you carry it every day. If you are going to be carrying a concealed weapon, a flashlight will augment that system so deciding where to carry your light is important. If you can’t get into a rhythm with your system that you will be comfortable with you will start to leave it home. This won’t help you very much when your tools that you depend on are miles away. My Fenix came with a carrying case that held up really well for a couple of years. Eventually, those bevels that I was describing as being so good for smashing skulls, well they also cut through canvas eventually. If I could find a leather case in the right size for my light that would be perfect. I am sure they make them but I just haven’t looked hard enough. That is another reason why I am evaluating a replacement light.

For me, the best place to carry a flashlight during a normal day is on the hip next to my Leatherman. It keeps it ready when I need it but doesn’t crowd my pockets. For a right-handed person, your flashlight should be on the left side of your body. This way if you need to use it as described above you won’t have to fiddle with your gun hand. For days when I am dressed up or am traveling, my flashlight goes in my laptop bag or checked luggage so I don’t risk having to forfeit it to TSA. Women have their purses, or in a lot of cases, key chains for easier access. The bottom line is you should keep it somewhere that you have it when you need it and can get to it quickly.

Suggested Flashlights

Like I said, there are a ton of flashlight manufacturers out there and just as many sellers of flashlights. Before purchasing a tactical flashlight, I would shop around because you can spend a fortune for a good light. The three most popular I believe are Surefire, Fenix and Streamlight with Surefire being the most expensive. There are also a ton of sites that do flashlight reviews. Nutnfancy’s YouTube channel has an entire playlist devoted to flashlight reviews and he does a more than thorough job on each and every one. I highly recommend his site if you are shopping for flashlights, weapons, camping or tactical gear.

So what tactical flashlights would I personally recommend? I have personally owned Fenix flashlights and overall I was very satisfied with the performance. Just recently the Fenix light I had (LD10) stopped working and I don’t feel like I got a full life out of what I bought. I could send it back for repair, but it simply isn’t worth the hassle to me for the price I paid ($55 3 years ago). I have ordered some cheaper flashlights to try them out and by cheaper, I mean dirt cheap. I will write that review up when I have evaluated them.

Surefire has an excellent reputation along with a hefty price tag. I know of guys who were given Surefire weapon lights as presents before they were deployed to Iraq and I have one myself that was a gift. I haven’t been able to really test it in harsh conditions but I am sure it would be fine. I can’t justify the price though unless you are a soldier getting deployed and will depend on this daily in harsh environments.

I have also had Streamlight flashlights as well as cheap Cree flashlights that I got from Costco (3 for $21) and they all work fine. I would again, just suggest you shop around and buy within your price range. I am sure you will find plenty of options that are affordable and will give you a decent light for the price.

I hope that gives you some helpful information as you make your choice on purchasing your own tactical flashlight for your EDC or home use.


If you have ever heard the term EDC or Every Day Carry and know what that means, there is almost without fail mention of a flashlight. Flashlights are one of

This is not just another article on survival. This is about the things our great-grandfathers built or did around the house, in order to survive. Looks like they succeeded.

People really should avert their gaze from the modern survival thinking for just a bit and also look at how folks 150 years ago did it. These guys were the last generation to practice basic things-for a living-that we call survival skills now.

We all want to become self-sufficient. The way to get there is not always an easy one.

Don’t you want to know all edible and medicinal plants in North America?

How about recipes for long-forgotten superfoods that will outlast you.

Are you ready to turn back the clocks to the 1800s for up to three years?

Because this is what will happen after the next SHTF event.

Preparing for worst using these lost skills is a very good start. Because depending on Uncle Sam isn’t much of a plan. Even if all you want is keeping your family well no matter what happens.

To banish any and all fears of starvation for good, our ancestors mastered the lost skills of wild plants. Their pharmacy was in the great outdoors. They were turning ordinary plants into powerful remedies. And preparing superfoods that cost almost nothing to make and require no refrigeration. Pretty awesome right? We’re talking centuries ago. Before globalization made as all forget who we are, and how we survive to live the day.

We all know how to turn a computer on or how to send a message on a smartphone, but how many of us are good at identifying the plants you need to survive any crisis? How many of us are good at preparing natural painkillers more effective than drugs? These plants could prove to be our lifelines, and still, we prefer to treasure our digital life more.

Are we really prepared for what’s to come?

Some of us are. Because we take facts into consideration, not promises and lies. So what is there to do? You inform yourself and get ready.

It’s simple, in order to survive, you need to be healthy. Right? Right.  

In order to be healthy, you need to eat as such.

Wouldn’t it be amazing getting to know almost all edible and medicinal plants around you? OR learning about a powerful painkiller, a driveway antibiotic weed, a back-pain relieve plant?

For example, there is an amazing wild lettuce recipe that was not invented by us. Or yesterday. But hundreds of years ago. When things were simpler.

Lucky these skills and recipes work regardless of your taste in history. But isn’t this a great opportunity to profit from it?

Here, at Final Prepper, we offer you a simple understanding of how human beings can survive in case of a catastrophe, such as natural disasters, economic decline, and war.

According to countless studies, Americans are currently changing for the worst; the various conveniences presented by modern technology have rendered mankind too complacent. People no longer brace themselves for the worst eventualities.

As a result, human beings have gradually lost survival skills that can help them survive various shortages in life. Here are just a few examples :

  • How to collect and store water for your family without spending any money.
  • Mastering the art of poultices making using the ingredients that our ancestors once used.
  • Tips on how to catch an assortment of animals and guidance on how to set foolproof animal traps.
  • The course of action human beings can take in the event that they ran out of bullets.
  • How to make nutritious food using ingredients that were first suggested by the Native American scouts.
  • How to build underground houses like the American natives.

In recent years, there has been a growing demand for survival guides. To meet this demand, we found one of the most comprehensive guides that helps people learn various survival techniques by copying what their ancestors did many years ago. You will re-discover and acquire ancient survival skills, and several beneficial tips and tricks that may be used by Americans today to survive both natural and man-made disasters more easily. Some of the things you will learn from this book include:

  1. Food – recipes of nutritious food that were first used by the Native American scouts. Such recipes teach people how to make nutritious food using common and readily available ingredients.
  2. Traps – Setting up traps can provide a steady supply of food in times of food shortage or crisis. Learn how to set up various traps and how to catch an assortment of animals—especially in winter.
  3. Housing – a detailed guide on how to construct underground houses. The houses illustrated in this guide are big enough to accommodate up to 4 families—a concept similar to the one used by the Native Americans.
  4. Water – insight into how you can collect and store water affordably. Water can be scarce during a disaster or a war. We included a guide on how to collect and store water without spending a dime.
  5. Poultices – guidance on how to make poultices using ancient ingredients that were being used by our ancestors for the same purpose.
  6. Bullets – how human being s can preserve bullets during a crisis and what you can do in the event that you no longer have bullets.

These are just some of the topics covered to help you learn the survival skills one needs to thrive. We believe it is about time that Americans went back to their roots and learn what made their ancestors survive various challenges and hardships in their environments.

We shouldn’t take for granted the given “luxury” of being born in such advanced times. We already know how powerless and clueless our modern society becomes în the aftermath of a simple blackout.

For these moments, we need to get ready. Are you?


This is not just another article on survival. This is about the things our great-grandfathers built or did around the house, in order to survive. Looks like they succeeded. People really

The most common substance in this world is water and therefore it is essential that we could say by default it is greatly important! We have learned that only 1% of the Earth’s water is suitable for drinking, 97% of it is ocean or sea and what about the other 2%? It is unusable, it’s frozen. Now, we always wanted what is best and safe for our drinking water. As a matter of fact, Americans drink more than a billion glasses of tap water per day.

Your day has been sluggish and you are dying to drink that glass of water even from the tap just to quench your thirst. But do you really know whether or not it’s secure for your family? Or let me be more direct, do you even bother to know what’s on it? It doesn’t matter if you say that your water is clean by just tasting it or inspecting it with the naked eye, there are things that are in there that we don’t know about.


Here are the important things that you didn’t know in your drinking water.

1. Lead

Just like any stubborn bad guy, this colorless, odorless and tasteless metal can leach from lead pipes and plumbing fixtures will definitely go undetected.  Excessive amounts of lead place adults at higher risk for cancer, stroke, kidney disease, memory problems and high blood pressure. At even greater risks are children, whose rapidly growing bodies absorb lead more quickly and efficiently. Just because your home is less than 20 years old doesn’t necessarily mean you’re lead-free.

Big Berkey BK4X2 Countertop Water Filter System with 2 Black Berkey Elements and 2 Fluoride Filters

2. Fluoride

Fluoride develops naturally in water; though rarely at the optimal level to protect teeth. Many assume that consuming fluoride is only an issue that involves your dental health. But according to a 500-page scientific review, fluoride is an endocrine disruptor that can affect your bones, brain, thyroid gland, pineal gland and even your blood sugar levels. More people drink fluoridated water in the US alone than in the rest of the world combined. In Western Europe, for instance, 97% of the population drinks non-fluoridated water. Adding fluoride is definitely a forced medication.

3. Iron and Manganese

Iron and Manganese are non-hazardous elements but can be a nuisance to your drinking water. They are similar metals and can cause similar problems; can root offensive taste, appearance, and staining. When the water is aerated they are oxidized to oxides that are of low solubility and that’s the reason why it creates significant discoloration and turbidity that are concerned for health among the two, iron is frequently found in water supplies. Manganese is often found in water that contains iron.

4. Perchlorate

Perchlorate is a man-made chemical primarily used in the production of rocket fuel, missiles, fireworks, flares, and explosives. It has been found in drinking water and surface waters in the United States (at least 26 states) and Canada. Although it is a strong oxidant, perchlorate is very persistent in the environment. At high concentrations perchlorate can interfere the thyroid hormone production.

5. Bisphenol A

Bisphenol a (BPA) is an important chemical building block and additive in a wide variety of plastics. It is manufactured worldwide for approximately 3.2 million metric tons/year. This can be found in some plastic water bottles and the dangerous part is that it can leach into food and drinks. According to National Institute of Environmental Health Sciences, it may acquire health risks, especially to infants and children. One good thing: there are quite a number of BPA-free bottles that are available now. However, you must have to be extra careful still; for the reason that some BPA-free plastics may still leach unwanted chemicals into your water when exposed to sunlight or microwaves or dishwashers, NPR reported.

6. Arsenic

Throughout the 19th century, lurid tales of dresses dyed with the arsenic-infused Paris and Scheele’s Green poisoning people filled magazines and newspapers.

Arsenic is a natural element that is also tasteless and odorless that you wouldn’t be able to distinguish that it’s in your water. It is found widely in the earth’s crust and may be found in some drinking water supplies, including wells. Research shows that exposure to high levels of arsenic can cause health effects, the worst is human cancer.

7. Pathogens

Bacteria are a natural part of life; in fact, there are many forms and functions of bacteria we couldn’t live without. Let’s say Coliform bacteria may not cause disease but can be indicators of pathogenic organisms that cause serious diseases. It can cause intestinal infections, dysentery, hepatitis, typhoid fever, cholera, and other illnesses. Luckily, these pathogens are much better controlled today than they once were. We just have to be practical on having our water tested but definitely the best strategy to get rid of these pathogens.

8. Agricultural chemicals

Agriculture is one big part of the community that is heavily dependent on fertilizers and pesticides that boost crop production. The major contaminant is nitrate and found in fertilizers and in animal waste, is another major pollutant associated with agricultural use. These contaminants can seriously develop in a high concentration in our water resources that can cause health risks. One good example is methemoglobinemia, or blue-baby syndrome, in bottle-fed infants under 3 months of age.

9. Chlorine

Chlorine have had been good in doing as a disinfecting treatment in killing off most microorganisms in the water. As a matter of fact, it is a powerful oxidant added to the water by several municipal water systems to control these microbes.  While learning that the United States has one of the safest water supplies in the world because of this disinfecting agent, it is also appropriate to check it for once in a while. It can be absorbed through physical consumption as well as through your skin while bathing and can severely dry skin and hair and cause irritating effects to your eyes and nose.

10. Mercury

This silvery heavy metal can be found in various natural deposits. Mercury can flow into water supplies from improperly discarded devices containing it, as runoff from landfills & farm land, dumped by factories, or from natural deposits. With this being said, this extremely toxic liquid metal must be precaution in handling or disposing of it. Being exposed to high levels of mercury over time can cause kidney damage.Water can be purified of many contaminants if treatment facilities are available, but supplies must be monitored so that contaminants can be properly identified in the first place.
The safest way to ensure that these toxins do not make it into your body is to have your water tested to determine which contaminants your tap water may contain. Once you have identified the contaminants present, you can select a water filtration solution that is best for you.

The most common substance in this world is water and therefore it is essential that we could say by default it is greatly important! We have learned that only 1%

Most people see a dandelion growing and immediately reach for the weed killer, but I am hoping to change a few minds on the usefulness of this “weed”. Dandelions are useful as an herbal remedy, detoxifier, and food source. The are full of vitamins, minerals, and healthy antioxidants.

Medicinal Use of Dandelion Roots

People have been using dandelion root as a detoxifier for the liver for many years, but recent research shows that it may have many more uses. Research published in the International Journal of Molecular Sciences shows that dandelion root is helpful in regulating blood sugar and insulin levels in diabetics. It works by controlling fats in the blood. Additional research at the University of Windsor found that it is useful in fighting a chemo-resistant melanoma and preventing the cancer cells from multiplying.

It has also been shown to calm inflammation, prevent urinary tract infections, reduce stomach upsets, and treat joint pain from arthritis and similar problems. Herbalists use it to treat infections, ease aching muscles, flush excess fluids from the body and as a detoxifier for the liver and gallbladder. With all of these medical benefits going for it, it seems such a waste to spray it with weed killer, doesn’t it? Instead, lets dig it up and make some use from the plant.

Related: Healthy Soil + Healthy Plants = Healthy You

Harvesting Dandelion Roots

Look for a clean source of dandelions such as a meadow or field away from traffic and human pesticide and herbicide use. Contaminated plants are not good for you or the environment. Let the plant grow through the summer and produce seeds for the next year. Harvest the roots in the fall after the weather has turned cooler. At this time, the insoluble fiber levels (inulin) are highest and the plant has the highest medicinal value.

You can also harvest in the early spring while the plant is still dormant. Spring roots are sweeter, less bitter, and easier to chew, if you harvest them before they bloom. Spring roots are useful for digestive ailments and stimulate more bile production.

Ideally, you want to dig up the dandelion root whole with as little breakage as possible. The plant has a central tap root which has all the medicinal properties of the plant.

Dig deep with a dandelion digger, trowel, or garden fork. Loosen the soil around the plant and pull it up from the base.

Wash the roots well to remove all dirt and slice them into pieces strips or slices for drying. Thin slices dry faster. I dry my dandelion roots on a dehydrator set to 95 F until they are completely dry and brittle.

Snap a few pieces in half and make sure they are dry all the way through. Alternately, dry them in a warm (but not hot) oven.

Store the dried roots in a cool, dry place for up to a year.

Related: The Plant You Can Use as a Diuretic But Also To Make a Great Wine!

Using Dandelion Root

For most medicinal uses, a decoction, infusion, or tincture is made to extract the medicinal compounds from the tough root. Go slowly when you first start using dandelion root, it is a diuretic. Start with one cup of dandelion root decoction daily, increasing it slowly if desired. Here are some general recipes to get you started:

Dandelion Root Decoction

A decoction is an infusion made with water. It may be consumed as a tea but is often made stronger. To make a dandelion root decoction:

  • 1 ounce dried dandelion root or 2 ounces fresh root, chopped
  • 1 pint filtered or spring water

Place the chopped root pieces in a small pot with one pint of water. Bring it to a boil, reduce the heat to a simmer and cover the pot. Allow the decoction to simmer for 20 minutes. Strain the tea and enjoy.

Related: The type of salt that can be used for Sprains, Muscle Pain, Muscle Spasm, Constipation, Cardiac Conditions, and even as a Sedative

Dandelion Root Tincture

dandelion root tinctureBecause it is an alcohol extract, Dandelion Root Tincture retains some different extracts than the decoction. It can also be made ahead and stored for long periods so that it is always available. It is valuable for people who do not like the tea, since less is needed for the same effects

  • 1 pint jar of dandelion root, chopped
  • 1 pint of 80 proof or stronger vodka.

Fill the jar 3/4 full with dandelion root pieces and fill the jar with 80 proof vodka. Cover the jar with a tight fitting lid. Shake and tap the jar, removing all air bubbles. Steep the root for 4 to 6 weeks, shaking it daily. Keep the jar in a cool, dark place while steeping. After 4 to 6 weeks, strain out the root material and put the tincture in a dark glass bottle. Keep the tincture in a cool, dark place, tightly covered for 1 to 3 years. Use 10 to 15 drops of tincture daily, as needed.

Dandelion Flower Tea

Place 1/2 ounce of dried dandelion flower petals or 1 ounces of fresh petals in a tea ball and place in a cup of boiling water. Steep and enjoy warm or cold. Use Dandelion Flower Tea for weight loss, as a diuretic, a detox, or as a healthy beverage.

Dandelion Root Coffee

Harvesting and Using Dandelion Roots 6

Roasted Dandelion Roots

Dandelion Root Coffee is made with roasted dandelion roots that are ground like coffee and brewed. It is enjoyed like coffee and makes a good coffee substitute. Here is the recipe:

Chop dried dandelion roots into small pieces and spread onto a roasting pan or cookie sheet.

Roast the dried root in a 200 F oven for approximately 4 hours, stirring and turning occasionally. The roots should be completely browned.

Cool the roasted roots and grind them in a coffee grinder. Brew like coffee, or steep 1 teaspoon of ground in a cup of boiling water for 10 minutes. Strain and enjoy.
Store the roasted roots in an airtight container and grind fresh for best flavor.

Precautions

The dandelion plant is edible and considered safe for most people. Some people may be allergic to dandelion and should not use it. It can also interact with some medications, including diuretics, lithium, and Cipro. It is always best to consult your doctor before using any herbal product if you are taking prescription medications or have a health condition.


Other self-sufficiency and preparedness solutions recommended for you:

Healthy Soil + Healthy Plants = Healthy You

The vital self-sufficiency lessons our great grand-fathers left us

Knowledge to survive any medical crisis situation

Liberal’s hidden agenda: more than just your guns

Build yourself the only unlimited water source you’ll ever need

4 Important Forgotten Skills used by our Ancestors that can help you in any crisis

Secure your privacy in just 10 simple steps

Most people see a dandelion growing and immediately reach for the weed killer, but I am hoping to change a few minds on the usefulness of this “weed”. Dandelions are

To understand why diseases flourish in a blackout you first have to understand the affects a long-term blackout have on infrastructure. We are most accustomed to short term blackouts and we don’t see the lasting effects very often.

In a long-term scenario, you will have things like water treatment failure, diesel, and other fuel will run out, medical backup generators will fail, having lasting effects on public health. You will also have serious malnutrition because food shipments and commerce will be affected in the region.


Each one of these things will affect the reemergence of diseases that we currently have protections in place for. We have seen many real-life examples of this in our modern world.

LA COUNTY AND TYPHUS

Because of the overwhelming failure in managing the homeless population, LA County has seen a reemergence of Typhus in the streets. The public health system does not have an answer for the homeless population so it would seem that this issue will continue.

VENEZUELA AND ACCESS TO MEDICINE

The Venezuelan health care system is in total disarray thanks to the economic collapse. Along with the massive rolling blackouts in the nation people are suffering from a majority of common healthcare issues but do not have access to basic medicines.

SYRIA AND MEASLES

Vulnerable populations in Syrian refugee camps are facing serious measles outbreaks. The measles is a serious disease that is also popping back up in the United States. While we think we have eradicated these diseases, in the right conditions they come raging back.

5 Diseases That Will Flourish in a Long-Term Blackout

STDS

One of the first things that will happen is people will get bored because their phones and devices will run out of battery. So few have prepared with backup power to recharge these devices that run our lives.

In their boredom, they will turn to passing time the old ways. There is a reason birth rates skyrocket 9 months after major hurricanes. It’s just what we do. So, with a lack of protection available, the spread of STD’s will be prolific.

Dysentery

Swelling of the large intestine with serious abdominal cramps and diarrhea, dysentery is a third world disease that is brought on by drinking contaminated water. If we see a massive blackout, we are going to face this issue because water treatment will be compromised.

Most people are not storing 6 months’ worth of water or water filters or catching water in barrels. Because of this, they will have to either stand in water lines to receive water from aid stations or they will risk drinking the water from the tap.

Typhus

This disease is brought on by fleas. When you have populations of people that are not practicing personal hygiene, they bring on these pests. These pests pass on the disease by biting people. Typhus is a serious disease that can be deadly in some cases.

Personal hygiene is something that has to be carried out even when the water system is compromised, and you have run out of things like soap. Do you know how to make soap? It’s a pretty simple process that can make a world of difference when dealing with diseases like Typhus.

Measles

At this moment we have robust medical establishments that vaccinate children at birth and in their young age for things like measles. After a long-term blackout, these things will no longer happen. It won’t be long before large groups of people are suffering from measles.

The measles can be deadly and the best way to deal with them, thus far, comes from vaccination at a young age.  Some communities try to build immunity by having exposure parties to get kids together, but this can be very dangerous.

Cholera

There are fewer than 1000 cases of cholera in the nation today. That is a serious victory. However, with water and food sources being contaminated after a blackout we will see those numbers rise. This disease is very common in countries where there is no access to clean water.

Storing food and collecting water is going to give you an edge over those who have not taken those precautions.

What Precautions Can You Take?

It’s well known that our own power grid is indefensible and that it could be compromised by either terrorist’s attack or hacker. Even a targeted EMP strike could take out large swaths of power to our nation.

Do you know where to start to handle something like this?

Have you any idea how to address needs like water and food through advanced preparations?

There are lots of resources out there, but The Doomsday Book Of Medicine is a standout resource that can be placed on a shelf in your home. It is not data that can be compromised in the blackout.

If you’re wondering what will you do when there are no doctors or medicine, this 800+ page encyclopedia has it all.

Conclusion

Living in a first-world nation it’s easy to take much of the daily processes for granted. It’s easy to take supply chain and tap water for granted. It’s hard for us to understand the types of things that are happening in places like Venezuela and Syria.

At this moment we have greater access to knowledge and resources than ever before. We are literally capable of buying things and having them at our door in a matter of hours. That means there are no excuses for not preparing for an eventual disaster.

Spend some time thinking about how you could best address the things like personal hygiene, water, and food in a serious disaster. Get ahead of the game today while it’s cheap and easy. Don’t wait till something goes wrong and you and your family are forced to scramble.

Click here to read more about The Doomsday Book Of Medicine.

To understand why diseases flourish in a blackout you first have to understand the affects a long-term blackout have on infrastructure. We are most accustomed to short term blackouts and

A ton of preparedness projects and skills can be completed in as little as an afternoon, regularly with minimal outlay of cost. Some of them can even be done with kids, significant others and neighbors, without even admitting to being a prepper. That can be a great way to learn yourself but also help others be more prepared, and fostering a work-together and DIY mindset can be huge. The confidence to do, build and create carries forward in daily life for both kids and adults, boosting other types of preparedness as well.

There’s a whole list of other ideas to research for quickie free-time, afternoon and even weekend projects at the bottom of the article. I’m not big into pushing every prepper into the Survivor-man aspect or tons of primitive/colonial skills from the outset, so you’re not going to see those from me.

Instead, here are some insights on half a dozen preparedness projects and skills that can be learned and put together in short bursts or even a single afternoon, things that can immediately affect our self-sufficiency and preparedness for daily life and major disaster events. The projects require minimal tools that most of us (should) already have.

Feather Sticks

I tend to make several when I make one, because you can use the extras to save a fire that starts to go out.

Feather sticks are handy-dandy tools anytime you’re making a fire or starting a grill, even on a small-scale with a mini rocket stove. You basically shave a stick into a fluffy cone. Doing so creates the thin shavings, increases airflow and surface area for early kindling uses, and in damp conditions has the added benefit of exposing potentially drier wood inside. They can be made with pocket knives, survival knives, and even machetes if needed.

I tend to make several when I make one, because you can use the extras to save a fire that starts to go out. That’s particularly handy in wet, windy conditions, and it’s handy while you’re learning to pyramid stack, use Swiss torches, or bank a fireplace or wood stove so it stays lit through the night.

#1 Mostest Importantest-Ever Tip: Cut away from yourself. Especially for these.

That means, do not brace a branch on your knee, ankle or thigh and then scrape a blade over a stick that could snap or have a knot that sends your blade skittering. Important tendons, blood vessels, and ligaments are in your limbs.

I won’t say anything if you’re inclined to put a stick in your shoulder and pull a blade toward your neck and eyes – Darwin is obviously working from beyond the grave and I try not to get in Darwin’s way.feather-stick

Internet hunting & phone gathering

This isn’t actually a one-off. This is setting time aside to poke around sites with free and cheap used stuff, and hunting up “curbside pickup” locations.

In just one “free curbside pickup” listing, I see: high hoop poles + boards for water catchment shelves; metal trellis or bird-exclusion net supports; totes & drawers for water catchment or sub-irrigated or standard containers (big enough for shrubs and mini trees, even); and a laundry basket for growing potatoes in straw and compost

It’s also time set aside to find out who still chips trees to see if we can get ourselves a mulch source, time for calling around to see who still gets icing so we can get free buckets for food storage, and time for sourcing more buckets by calling around to see if the local humane society/ASPCA, Petsmart, Petco, or animal rescue gets kitty litter in buckets – and if they’d be willing for us to take them off their hands.

We can use Craigslist, Freecycle, and the phone to find sources for:

  • Wooden pallets (all kinds of projects, from mini raised beds to tall keyhole beds, sheds, muddy-spot bridges, etc)
  • Painter’s drop cloth (greenhouse, hoop material weatherproofing windows)
  • Replaced storm doors & windows or mesh from the same (shade covers, exclusion frames) (general contractors, handyman, window repair specialists)
  • Replaced windows and doors (cold frames to grow vegetables in cooler temperatures)

wood-pile

A downed tree look more like firewood or a hugel bed to me, and construction or renovation trash looks like my next source for all kinds of lumber, plus shelving I can use for raised beds pretty quickly and easily, poles for trellises and extending clothes lines, and plastic I can use as a weed exclusion, machine cover, to extend water catchment, provide shade, or to warm soil in spring and autumn.

  • Creative material for trellises, fencing, and supplies to make other items on the list from others’ refuse (2-5 drawers and a deep raised bed from a filing cabinet; old wire shelving unit; DVD racks for trellises; buckets from delis, caterers, bakeries, restaurants; liquor and appliance stores for cardboard for weed exclusion and water sinks in deep beds)
  • Dinged and scratched solar panels from roadside signs & hurricane netting from roadway construction & repair companies

Bucket rain catchment

We hear about rain barrels, but they can be pretty expensive to buy. Buckets are cheap or free, and easier to haul to the point of use, rearrange, and clean.

Especially early on, we might find some real benefit even in just stacking buckets on each other in a pyramid, or on a chair or stool, then a few bricks, then a couple of sticks or a boards, and angling them a bit so they overflow into each other and then maybe a lidless storage tote or freebie kiddie pool.

Rain catchment can be as simple or complex, large or small-scale as we want to make it – just getting started is more important than having a pretty, fancy system

If we cover them with old pillowcases, cut-up freebie sheets and towels, or shirts from yard sale leftovers piles, we prevent mosquitoes. We can also hide some of the “ugly” that way if we have neighbors or partners who don’t want to look at them.

We can also go higher tech with angled or laddered systems of several levels, drilling our double overflow and spigot holes as we collect hose, PVC and plumbing attachments.

Go higher tech with angled or laddered systems of several levels

Even if we don’t want to filter the captured water for human use, it can impact the amount we have to water plants or be used for cleaning purposes.

Draft-proofing

Draft-proofing (or at least locating) is about increasing the efficiency of our homes. We want to close doors and turn off lights, and creep around looking at the bottoms of doors and around the door jambs. If we have a partner, we can work at night, looking for places where their flashlight comes through. We can also carry a candle around – the dancing of the flame will help us locate and pinpoint drafts.

Some utilities will come out with sensors to help us find even the little holes where pipes and cables come into our homes.

Windows and doors can have various types of window weather-stripping, bottom-of-door weather strips, and “draft rolls” – homemade or purchased – put in place. We can also lay on clear insulating plastic to cover our windows with – or even a never-used door. There are also silicone sealants we can use with a caulk gun in some areas.

Cutting drafts can save us money on heating and cooling right now. It can also make our whole-house fans and our fireplaces more efficient – now and when we depend on them because grid power is out.

Earth boxes

Buckets and totes, metal and plastic drawers, and even some wooden drawers can be readily turned into planters. If they’ll hold water, we can also turn them into Earth Boxes and “self-irrigated” containers.

*They’re not really self-irrigated, they’re sub-irrigated but you hear it both ways


Both input water through tubes to a reservoir space, and soil or wicks then pull it to the root zones, limiting evaporation and making our water use hugely efficient.

There are all kinds of DIY tutorials out there. What I will add to them is: Be sure you don’t actually have to buy something before you do.

I know for a fact that socks that have lost their mates can be filled with the exact same soil I plant in, and work just fine as a wick without buying any specialty baskets. Chunks of wood will eventually decay, but for a long time, they work as well as PVC or bricks for supporting the grate, mesh or upper container we drilled a million holes in. Do you need PVC, or can you daisy-chain some soda bottles together to create an input tube?

We have enough expenses in this life, especially in preparedness. Pocket what you can. Buy another can to put back or go wild and treat yourself, a partner, or the family to Value Menu sundaes or a new DVD when you can.

earth-box-4

I don’t have a lot of problems with nutrient runoff with these buckets, but you could elevate containers above other buckets, tubs or pools to collect it if you do, then dump the water back in. I’m just not big into the water-shedding lids (I hate not using rain). Mulch helps preserve more water and protect soil from compaction, which is another issue some folks have with bucket planters and container gardens.

Don’t have all the materials yet? No big.

Use the buckets as containers. Drill holes a few inches up or as much as 4-6” if you’re going to build one in the future. Fill to the holes with pine cones, sticks, logs, gravel, or mulch to limit your fill dirt to 6-16” – that’s sufficient even for corn, with a healthy mix, and the bottom becomes a water storage reservoir still, while promoting drainage. You can upgrade them into earthbox-type planters later.

More preparing with quickie skills and projects

Some other quickie afternoon, one-day and weekend projects and skills to consider are:

      • Creating and scouting positions for small-game and bird snares
      • Homemade solar cookers
      • 550 cord fishing lures (or make them out of boot laces) get crazy creative and pick out extra threads to make newts and frogs, too

  • perfect casting your fishing line (set up competitions in the yard)
  • Pace count (multiple terrains)
  • Pace count in full pack (or a small pack with equivalent weight inside); with one leg strapped straight for a hobbling effect; with an arm tucked inside your shirt/a sling
  • Disposable Straws for EDC, BOBs, and camping ***Go easy if you’re inclined to put flammables like cotton, sawdust, etc. in your straws, and try to think about the flame you’re going to use for sealing it before you play with alcohol, hand sanitizer, or pre-shaved magnesium.

straw

  • Solar showers from garbage bags and garden sprayers
  • Solar cooking grains in a canning jar by hanging it inside dark plastic or cloth
  • Swedish torch
  • Rat-trap squirrel traps
  • Master sharpening knives – properly – Angles and tasks matter with blades. Dull and wrong-angle, curled-over, nicked blades increase the labor it takes to do our work. Mister P would not be allowed near my knives if I had to hold them in my teeth and use a curb to sharpen them. Papa P, now, that man could probably sweet-stone a shaving edge on a machete or a chopping wedge onto a box cutter if he needed to. The skill matters now. If we’re ever cut off, it matters more.
  • Bucket-can & bucket-shingle mouse & rat traps
  • Garden journal/binder
  • Important document binder (& electronic versions)
  • Medical DIY home-remedy binder
  • Quiet step in woods & water
  • Proper knots for hauling, packing, tying off, and building tepees – which can in turn support poles and racks for clothes lines and drying foods or creating shade and plant protection
  • Rat-trap visual perimeter alarms
  • Carrying and stacking wood – It’s not always as easy as you’d first think, and there are some camping and backpacking hacks that help, and some nifty circular or beehive piles that put tons of wood in a very small footprint
  • Cord nets
  • Ash cakes

Outdoor/Clay bread ovens (and research the order of baking and ways colonists used all of the heat generated efficiency; no reason to heat up the house unnecessarily)

Bannock bread – Skip the complicated versions:

  • 1 cup flour (doesn’t matter)
  • 1 tablespoon sugar
  • 1 teaspoon baking powder
  • pinch of salt
  • herbs to taste (onion, garlic, Italian blend, lemon & thyme, black pepper) or dried fruit and nuts, or use chocolate chips or jimmies, brown sugar and cinnamon, and do a dessert version with apple or cherry pie filling or canned pears

Add small amounts of water to make a sticky dough or even a near-batter thickness for pans; this stuff is pretty forgiving and you don’t need 5-8 ingredients for the bare-bones survival version to be great with fresh fish or a can of chili.

You don’t have to take a lot of time to increase preparedness, and it doesn’t have to cost a fortune. In fifteen-minute increments, in a few hours, or with a weekend, you can start seriously impacting your preparedness with small, easy projects and useful skills.

A ton of preparedness projects and skills can be completed in as little as an afternoon, regularly with minimal outlay of cost. Some of them can even be done with