
The 5 Essential Seeds Every Prepper Should Stockpile For Self-Sufficiency
In uncertain times, the ability to grow your own food becomes not just a hobby, but a survival necessity. Whether facing economic instability, supply chain disruptions, or natural disasters, your seed stockpile becomes your food security insurance policy. While commercial preparedness supplies serve valuable functions, developing a strategic seed bank provides a renewable food source independent of outside systems.
Today, I’m sharing the five most critical seeds that deserve a place in every prepper’s pantry. These selections offer high nutritional value, relative ease of growing, and most importantly—the ability to harvest your own seeds for continued planting season after season.
Why Your Seed Selection Matters
The modern food supply faces mounting challenges from climate change impacts, transportation vulnerabilities, and increasing corporate control. According to the Intergovernmental Panel on Climate Change (IPCC), we can expect continued global climate warming over the coming decades, affecting traditional growing patterns.
Creating your own seed bank with heirloom seeds gives you control over your food supply. Unlike genetically modified varieties, heirloom seeds:
- Come from original cultivar plants
- Often develop natural disease resistance
- Produce seeds you can harvest and replant
- Contain no laboratory-modified genes
WARNING: Many seed companies have been acquired by large agricultural corporations. When building your seed bank, source from companies that explicitly state they are GMO-free. Companies like Seeds Now and others listed in their “About Us” sections often detail their commitment to non-GMO practices.
1. Squash Seeds

Squash varieties provide exceptional nutritional and caloric value for survival situations. These versatile vegetables offer:
- Rich sources of vitamins A and C
- Essential minerals including magnesium and potassium
- High carbohydrate content for sustained energy
- Versatility in both sweet and savory dishes
Depending on your climate, you might focus on summer squash for cooler regions or varieties like butternut and pumpkin for warmer areas. Though thirsty plants, their nutritional density makes them worth the water investment.
Harvesting Squash Seeds:
- Cut open a fully mature squash and remove the seed mass with pulp
- Rinse seeds thoroughly in a colander until all pulp is removed
- Spread cleaned seeds on absorbent paper, ensuring no seeds touch
- Dry in a cool, dry location for approximately one week
- Select the largest seeds for best germination potential
- Store in paper envelopes in a cool, dark place
2. Green Beans
Green beans rank among the easiest crops to grow while delivering impressive nutritional benefits:
- High in vitamins A, C, B6, and B12
- Packed with antioxidants for immune system support
- Require minimal space with vertical growing patterns
- Produce abundant harvests with basic care
Even dwarf varieties benefit from simple cane supports, and most varieties are prolific producers throughout the growing season.
Harvesting Bean Seeds:
- Stop watering plants around September to encourage pod development
- Allow larger pods to remain on plants until leaves begin to die back
- Harvest these mature pods specifically for seed collection
- Carefully open pods along the seam and extract seeds without damaging them
- Dry seeds on paper-lined trays for 1-2 weeks in a cool, dry place
- Store in sealed jars away from light and moisture
3. Spinach

This nutrient-dense leafy green provides exceptional nutritional value per square foot of garden space:
- Exceptional source of vitamins A and C
- Rich in iron, potassium, and magnesium
- Versatile for consumption both raw and cooked
- Thrives in spring and fall growing seasons
For maximum seed production, baby spinach varieties typically perform best.
Harvesting Spinach Seeds:
- Allow plants to bolt and flower (note: leaves become bitter at this stage)
- Identify female plants (green seed balls) and male plants (yellow seed balls)
- Assist pollination by gently shaking male plants to release pollen
- Harvest female plants when they begin turning yellow
- Hang plants upside down in a dry location for about two weeks
- Collect the small seeds by shaking dried plants over paper
- Store in sealed containers; spinach seeds typically remain viable for one season
4. Potatoes

A staple crop throughout history, potatoes provide substantial caloric value with minimal growing space:
- Excellent source of potassium, copper, and vitamin B6
- High-yield crop from minimal planting stock
- Can be grown in containers, traditional beds, or specialized towers
- Varieties available with resistance to common diseases
For long-term preparedness, focus on disease-resistant varieties like Charlotte, Caribbean, Purple Peruvian, and Prince Hairy, which resist common blights and potato beetles.
Working with Potato Seeds:
True Potato Seeds:
- Harvest green seed pods when soft and ripe
- Crush pods in water and let sit overnight to separate seeds
- Collect the small seeds that sink to the bottom
- Dry thoroughly on absorbent materials
- Note: Growing from true seed requires two seasons to produce edible tubers
Seed Potatoes (Recommended Method):
- Save sprouting potatoes from previous harvests
- Place in egg cartons with sprout end up
- Allow to “chit” (pre-sprout) for about 6 weeks in a light, frost-free area
- Plant when sprouts reach approximately 1 inch in length
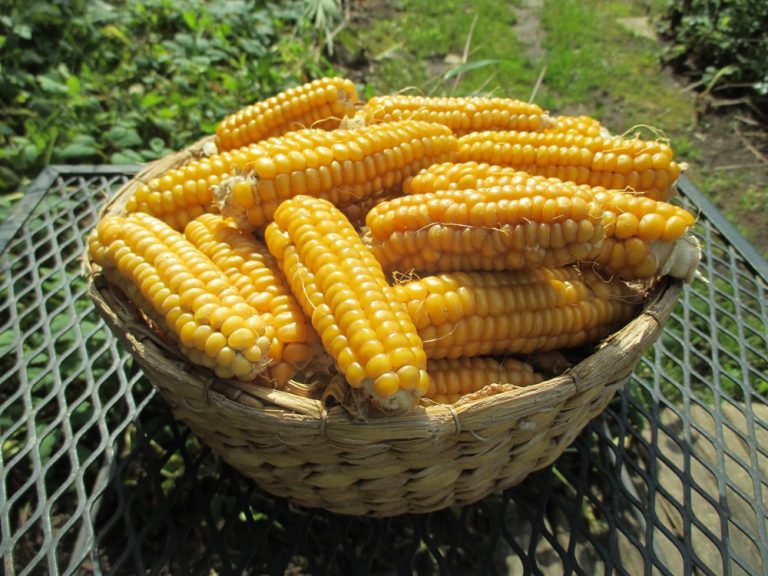
5. Corn

In suitable climates, corn provides excellent caloric density and versatility:
- Substantial source of carbohydrates for energy
- Contains iron and vitamin B6
- Versatile for multiple food preparations
- Can be ground for cornmeal and flour
For successful corn cultivation and seed saving, plant in blocks rather than rows to improve wind pollination.
Harvesting Corn Seeds:
- Leave mature ears on stalks for 6 weeks after normal harvest time
- Allow ears to dry completely on the stalk (protect from rain if possible)
- Test kernels for dryness—they should resist denting with a thumbnail
- Hand-rub dried kernels from the cob
- Continue drying loose kernels for 1-2 additional weeks
- Remove any remaining silk or debris
- Store in sealed containers in a cool, dry location
IMPORTANT: To prevent issues with inbreeding, maintain a diverse genetic pool by growing at least 100 plants for seed saving purposes.
Building Your Long-Term Seed Bank
Beyond these five essential seed types, continue expanding your collection based on your region’s climate, personal nutritional needs, and growing experience. Consider complementary crops like tomatoes, carrots, and leafy greens to create a well-rounded survival garden.
Store your seed collection in a cool, dry location using:
- Paper envelopes for breathability
- Glass jars with desiccant packets
- Vacuum-sealed bags for longer-term storage
- Clearly labeled containers with variety and harvest date
Remember, a true seed bank isn’t just about quantity—it’s about quality, diversity, and the knowledge to successfully grow and save seeds season after season.
Other Self-sufficiency and Preparedness solutions recommended for you:
The Lost Ways (The vital self-sufficiency lessons our great grand-fathers left us)
Survival MD (Knowledge to survive any medical crisis situation)
Backyard Liberty (Liberal’s hidden agenda: more than just your guns…)
Alive After the Fall (Build yourself the only unlimited water source you’ll ever need)
The Lost ways II (4 Important Forgotten Skills used by our Ancestors that can help you in any crisis)
The Patriot Privacy Kit (Secure your privacy in just 10 simple steps)