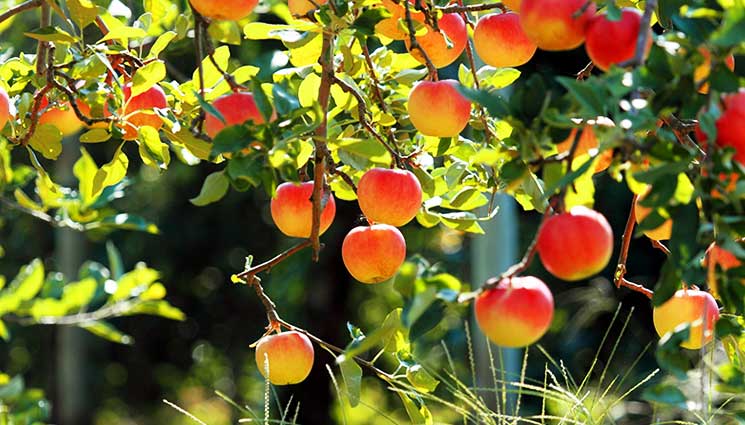

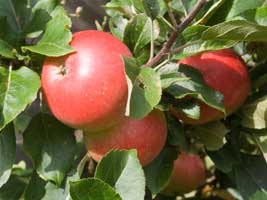
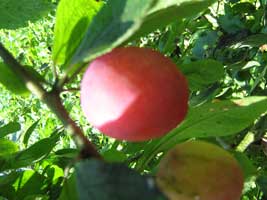
As a child I grew up in a house named The Orchard and although the land had long since been sold off several large apple trees remained which gave us a reasonable harvest each year. I have fond memories of the delicious fruit pies and crumbles my mother used to prepare. Growing fruit is one of the most efficient forms of gardening – once the trees are established you can expect an abundant supply for decades with only a little pruning and mulching to keep them happy.
Without doubt, the cheapest way to start a mini-orchard is to buy bare-rooted plants: those sold without a pot and delivered while the weather is still cold and the plants are dormant. As well as saving money, you will often find a much wider selection of varieties and sizes available as bare-rooted trees. Many wonderful types of apples, pears, plums etc can be grown by the home gardener that are never available in supermarkets and the trees can be trained to fit the area you have.
However, bare-rooted trees need to be planted correctly and given careful treatment during the first year in order to establish healthy root systems and give a reliable harvest…
Timing
The biggest stresses on a new fruit tree are usually below ground. Getting sufficient water and nutrients in the first few months after planting is essential and that’s why the timing is crucial. The number one priority is helping your new tree establish a healthy root system. The best time to plant bare-rooted trees is towards the end of winter or the first half of spring – once the ground is no longer frozen so it can be easily dug but before new growth starts.
It’s usually worth consulting a tree nursery that know your area and can advise on the window of time when they lift the young plants and deliver them and when conditions are right for your area. In the mild maritime climate where I live, trees can be planted from November onwards and this gives them a few extra weeks for the roots to establish but in harsher areas you’ll want to wait until spring. You will need to plant them quickly once they arrive – usually within a couple of days, though it’s possible to pack the roots with moist earth to extend this period if conditions outside aren’t favourable.
If you miss the ideal window of time for your area but still want to plant this year, it’s worth paying more for container-grown plants. These will already have roots that have grown into the soil around them and as long as you don’t disturb these too much when planting, they’ll be ready to draw up moisture and nutrients during warmer weather.
Location, Location, Location
Fruit trees don’t like to be moved so it is important to get the location right first time. Things to consider are:
- Sun or Partial Shade: Nearly all fruit trees require plenty of sun but by carefully scouring catalogues you’ll find there are some less well-know varieties that are tolerant of partial shade. Don’t just consider the ground – it’s the leaves that need sun and this often opens up possibilities for otherwise unproductive areas.
- Soil: Most fruit trees will want free-draining soil, enriched with compost. Avoid areas that regularly flood or higher ground that dries out quickly.
- Wind and Snow: Be aware of the direction of prevailing wind and any large buildings nearby. A wall or fence may create a sheltered environment perfect for heat-loving fruits, or it could funnel icy winds during winter. Roofs can dump a ton of snow on an unsuspecting tree below, snapping its branches. Observe your garden closely to choose the best spot.
- Other Plants: Trees are remarkably good at drawing up nutrients and water from the surrounding area. Unless you’re using raised beds, remember that a nearby fruit tree or bush may compete with your other plants.
Planting Tips
Many good fruit-tree suppliers will sell reasonably priced kits that include a stake, tie, mulch mat etc and I think it’s a false economy to skip these items.
Follow these simple steps to give your tree the best start:
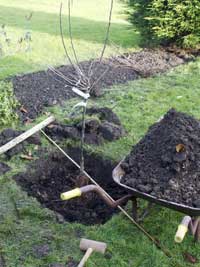
- Dig a hole about a spade’s depth and around 3ft (1m) wide. Although it’s natural to dig a round hole, a square one is better as it encourages the roots to push out into the surrounding ground. Keep the soil you have removed in a wheelbarrow or on a large plastic sheet.
- Add a few inches of good garden compost and work it into the base of the hole using a garden fork. Mixing is important so that the tree’s roots don’t meet a sudden boundary between compost and regular soil. Also, mix some compost into the soil you removed.
- Look for the slightly darker ‘watermark’ on the tree’s trunk that indicates where the soil level was when it was first grown. Place the bare-rooted tree in the centre of the hole and a cane across the hole so you can check that this line is level with the soil around your hole as trees shouldn’t be planted deeper or shallower than they were first grown. If necessary, add or remove soil to achieve this. Most fruit trees will be grafted onto a rootstock and the join should always be above ground.
- Remove the tree and put in a thick wooden stake a couple of inches from the centre of the hole and on the side where the prevailing wind comes from. Hammer this firmly into the ground using a mallet.
- Place the tree back in the hole, position it so the trunk is close to the stake and start to shovel the soil-and-compost mixture back around the roots. Gently firm this in with your boots, being careful not to damage the roots. When it’s half full, pull the tree up an inch and then let it drop again as this helps the soil to fill in around the roots.
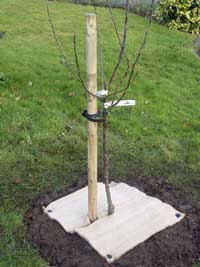
- Once all the soil has been added and firmed, use the supplied strap to fix the tree to the stake, leaving enough room for the tree trunk to grow but not so much that it wobbles about. Also add a protective tube around the trunk if animals are a problem. At this stage I also sprinkle a little seaweed meal fertilizer around and cover it with a bio-degradable hemp mat to suppress weeds.
- Water the soil well to stop the roots drying out and to further settle the soil around them.
The First Year for Fruit Trees
Fruit trees always seem to be such strong, healthy plants that we forget how vulnerable they are when first planted. Yet during the first year, the tree can easily die from not getting enough water or nutrients. Until the root system is at least as large as the tree it supports, it is particularly vulnerable to environmental stress.
During the first year or two, keep the tree well watered, especially during dry weather. A good soaking once or twice a week is much better than surface watering daily, though during very hot weather it can be worth doing both. It’s also vital to keep the area around the tree completely free of weeds and grass as they will compete with the young tree, which is why mulch mats are very effective.
Finally, don’t forget to remove all blossom from the tree in the first year. Although it’s tempting to let some fruit develop, doing so will again place more stress on the tree as it establishes and forgoing the first year’s fruit will result in a much healthier tree and better harvest in years to come.