HomePosts Tagged "hunting"

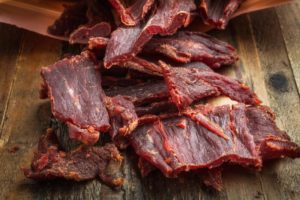
Beef jerky…the stories I could tell you about this stuff. I’m just going to say that I would marry beef jerky if that were possible (thinking about moving to state or country). Anyway, beef jerky’s awesome and, from where I stand, has but one caveat – not enough of it to go around. I mean, c’mon, I know it’s supposed to be emergency food or trail food, but who in God’s name eats just one 20g bag? It’s like saying “hey, it’s game night, and I’m gonna drink just one beer or eat one bag of chips.”

As far as a survival food is concerned, jerky’s the right call since it’s packed with just enough protein and fats to keep that engine of yours running. Sure, they’re salty AF and feels like you’re chewing on a rubber band, but it’s amazingly delicious. Since most of you are busy with your jobs and have neither the time nor the mood to replenish your beef jerky stocks, I thought about sharing with you my mouthwatering homemade beef jerky recipe.

It’s super easy to make and, most importantly, it mostly requires ingredients you probably have in your pantry. Why make beef jerky at home when you can always order some online? Because, let’s face it – as cheap as store jerky is, it’s pretty hard to find one that’s exactly the way you like it. Some are chewy, others salty as Hell and some, well, taste like crap.

First of all, preparing your own beef jerky puts you in full control of the dish, from choosing the beef cuts, all the way to the cooking part. Second, by choosing to cook rather than buy, you can make it as salty or sweet as you like. Last, but not least, beef jerky’s one of those recipes that don’t require an advanced degree in rocket science in order to prepare.

So, without further ado, here’s how to make some delish beef jerky at home.

Ingredients and Utensils

For this recipe, you will need the following:

  • Angus beef sirloin. I use around two pounds of beef for this recipe. Once you get it dried, you end up with one large zip-lock bag of beef jerky.
  • Worcestershire sauce (three-quarters of a cup).
  • Soy sauce (three-quarters of a cup).
  • Smoked paprika (one tablespoon).
  • Honey (one or two tablespoons).
  • Ground black pepper (two teaspoons).
  • Hot chili flakes (one or two tablespoons, depending on preference).
  • Garlic powder (one teaspoon).
  • Onion powder (one teaspoon).

That’s it for the ingredients. As for kitchen utensils, you will need a large bowl to mix your ingredients, an oven tray, baking paper, a pair of scissors, and, of course, a zip-lock bag for the jerky. All done gathering your utensils and all of the ingredients? Take your time. I ain’t going anywhere. When you’re ready, here’s how to put everything together.

Preparing mouthwatering beef jerky

Step 1. Take your beef cut out of the bag and wash it thoroughly. Dry with a couple of paper towels or place in a strainer.

Step 2. In a large bowl add your Worcestershire sauce, soy sauce, smoked paprika, honey, ground pepper, hot chili flakes, powdered garlic, and powdered onions. Whisk the ingredients using a fork or, well, a whisk.

Step 3. Cover the bowl with some plastic wrap and place it inside the fridge for half an hour.

Step 4. It’s now time to tend to the meat. Using a very sharp butcher’s knife, cut the meat into thin strips – if it’s easier, make stake-sized bits.

Step 5. Take a big zip-lock bag from the pantry and put the beef inside.

Step 6. Get the bowl out of the fridge and pour over the beef. Seal the bag and place in the refrigerator. Leave the meat to soak up all those juices for at least a couple of hours. Ideally, you should leave it overnight. Remember – the longer you marinate your meat, the tastier it will be. I usually keep it in the fridge for one or two days.

Step 7. When you’re ready to cook the meat, preheat the oven to 176 degrees – yup, you’ll need ultra-low heat. The idea is to dry the beef cuts, not to bake it.

Step 8. Take the marinated beef out of the bag.

Step 9. Place the meat on an oven tray covered with baking paper. Use a paper towel to soak the excess marinade.

Step 10. When the oven reached the desired temperature, stick the tray in the oven and cook for 4 to 5 hours. Every hour or so, flip the beef cuts.

Step 11. When they’re done, take them out of the oven, allow the cuts to cool down, and cut them into thin strips using a pair of scissors or a knife. Bag and tag!

Another Way to Prepare Beef Jerky

Don’t go anywhere, because this was just the warm-up. Okay, so you now know how to prepare beef jerky at home. But can you do the same, say during a shit hits the fan situation? Beef jerky is, more or less, the beauty of the best – thought it looks totally unpalatable, it’s actually delicious, nutritious, and, on top of that, it can be made anywhere and with any type of meat.

Now let’s imagine for a moment that you’re lost in the woods and you run out of food. Obviously, you’ve got to do something about it. Now, if you still have your bug out bag with you, whip out a snare and wait. Keep in mind that beef jerky can be made with any kind of meat.

However, if you want your trail snack to contain all the proteins and fats your body needs to keep on going, you would want to stick with red meat or fish. When you’re done with the gutting and butchering parts, here’s what you will need to do in order to prepare jerky.

Step 1. Find a clean spot to set up your working area.

Step 2. Use your survival knife or a very sharp rock to cut the flesh into very thin strips (half a centimeter). Don’t forget to cut across the grain, not with the grain (those muscle fibers will make meat harder to chew).

Step 3. While the meat’s still wet and tender, season it with your condiments of choice. I like to keep stuff like ginger, cumin, sugar, salt, pepper, and chili in small pill bottles. You can also make your own mix which you can use to season the meat. Put a little bit of sugar if you have some in your bug out bag.

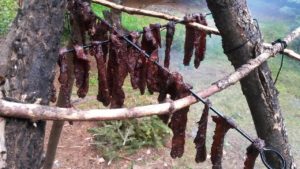
Step 4. It’s now time to create some sort of drying rack. Look around for twigs, long stick or branches. If there’s nothing available, you can always hang the meat cuts by a low-lying branch using heavy duty zip ties. Just be careful to place that meat within eyeshot because it’s bound to attract some unwanted attention (flies, mosquitoes, and, yes, even bears).

(Optional) If you want to a little smokey flavor to your meat, place it over a small campfire. Don’t leave there too long, though. You’ll want to dry your meat, not cook it. Of course, there’s nothing wrong with some BBQed game, but it tends to spoil faster.

Step 5. If you manage to improvise a drying rack, flip the meat every couple of hours. Depending on weather conditions, like wind, humidity, and temperature, it can take up to four days for the meat to lose all moisture.

Yes, I know it’s a painstaking process. More so because you’ll need to be on the lookout for critters. On that note, when it’s time to hit the sack, don’t forget to bring the meat inside your tent or improvised shelter. Obviously, you won’t be able to keep an eye out while you’re asleep.

Step 6. After a couple of days have passed, take a look at the meat. You’ll know it’s ready to eat when the meat has a brittle aspect. If you prepare jerky from red meat, the color you’re looking for is a purple-brown. On the other hand, if you’re using white meat, the jerky will turn pink-grey when it’s done.

Step 7. All that remains to be done is to cut the meat into thinner strips and to store it in a zip-lock bag or an airtight container.

Wrap-up

Taking all these facts into account, I would have to say that jerky is indeed the ultimate survival food. Given the right storage conditions, a batch of jerky can last for at least a couple of months, if not for a whole year.

Now, as far as the oven-drying version is concerned, I would advise ditching the salt. Yes, I know that salt and jerky is a marriage made in Heaven, but the soy sauce adds and smoky taste to the meat, which means that it doesn’t need extra. Of course, if you’re not a big fan of soy, you can always replace with two tablespoons of rock salt.

I don’t know about you, but I like to add some kick to my jerky. If you want your snack to be spicier, you can add half a teaspoon of Tabasco in addition to the chili flakes. Yes, I know it sounds pretty hardcore, but hey, at least your jerky won’t be bland.

One of my friends told me that it’s also possible to prepare beef jerky using a dehydrator. Remember my powdered eggs recipe? Well, the method’s more or less the same. The only advantage of using a dehydrator instead of a regular oven set on ultra-low heat is that it reduces the cooking time by at least one, maybe two hours. If you have one of those gadgets in the kitchen, you should definitely try it out.

One more thing – the meat itself. Though I highly recommend using sirloin for this recipe since the cut will be, well, chewier, you can use whatever meat you prefer. Just be sure it has the same amount of fat as sirloin. Haven’t tried it yet, but from what I heard, jerky prepared from fish like rainbow trout, tuna or salmon is absolutely divine. Trouble is that it’s very hard to get ahold of a good recipe and most of the stuff on the market looks way too nasty.

So, here’s where I take my love. Hope my little winding has managed to convince you that making your own beef jerky is better than having to go through hundreds of Google pages in order to find the right one. As always, don’t think of cooking as something you need to do – have fun around the kitchen. Play some tunes. Work on your air guitar skills; whatever floats your boat. What do you think about my beef jerky recipe? Hit the comments section and let me know.

Beef jerky…the stories I could tell you about this stuff. I’m just going to say that I would marry beef jerky if that were possible (thinking about moving to state

Nothing beats mom’s homemade food. Unless you live alone or don’t have any cooking skills or no emergency food left in the pantry. Well, you know how it goes – when life wants to throw crap at you, it uses a shovel. However dim the perspective may be, Mother Nature will always provide, if you know how to ask.

In today’s article, I’m going to talk about one of the most interesting birds out there – the pigeon. Some love them because they’re friendly and chatty and pettable, others not so much. I personally neither like nor hate them – they’re okay as long as they stay away from my car!

Anyway, even though the perspective of catching your own food is not something one would do out of pleasure, there are times when stop caring about those things and do what’s best for your growling stomach. If you find yourself without food, you can always enjoy a nice and tasty pigeon stew or steak.

The idea of eating pigeon meat may appear as revolting. However, history reveals that pigeon meat is not only palatable but a delicacy which once adorned royal feasts. During the 19th century, around Boxing Day, young couples and families would head out of the house to do a little bit of ice-skating.

As the weather was nippy, the skaters needed something hot and tasty to put some color back into those flushed cheeks. The snack of choice was the so-called Pigeon Pie Mystery. Fast-forward in time, pigeons have become associated with nasty things like car-wreaking, necrophagic behavior, and uncleanliness.

Despite these objections, pigeon meat is safe to eat, but you’ll need to catch them first. Sure, they may be friendly and a bit curious, but that doesn’t mean they’ll allow you to gut them.  In today’s article, I’m going to show you a quick and rather ingenious way of trapping pigeons, using common household items. Enjoy!


Gathering the materials for your first pigeon trap

For this project, you will need the following materials:

  • Plastic straw rope (you can replace it with dental floss or any kind of cordage).
  • An old plastic bottle.
  • Plastic bucket.
  • Wire cage (it doesn’t have to be new; if you can’t find one around the house, you can always go and buy one from your local flea markets or thrift shops).
  • Styrofoam board (should be about the size of the wire cage).
  • Crafts knife.
  • Pole.
  • Glue.
  • Small wooden board.
  • Hammer and nails.

Are you done gathering the necessary materials? Wonderful. Here’s how to piece together your first pigeon trap.

Crafting the backyard pigeon trap

Step 1. Remove the part of your wire cage. For this project, you may want to get one of those rectangular cages (mine is an old chicken coop I found in the attic).

Step 2. Glue the Styrofoam board to the top part of your cage. Allow the glue to work its magic before proceeding to the next step.

Step 3. Using your crafts knife, cut a hole in the Styrofoam board. The hole should be wide enough for your plastic bucket to pass through with any problems but, at the same time, prevent the pigeon from escaping.

Step 4. Once you’re done cutting the hole in the Styrofoam board, use the same knife to cut two small entrance on each side of the plastic bucket. If you really don’t want to sacrifice a bucket, you can go for one of those one-kilo yogurt containers. Just be sure you keep the lid.

Step 5. Apply some glue over the edges of the lid and place in on the bucket. Allow the glue to dry.

Step 6.  It’s now time to craft your wooden lever. Nail the small wooden board to the top part of the pole. Make sure that the board can move up and down freely.

Step 7. Plant the pole-and-board lever into the ground, just above the Styrofoam board opening.

Step 8. Make one small hole in the front part of the board and another one in the back.

Step 9. Draw some cordage through both holes. Ensure that the cord drawn through the hole made in the front back of the board is long enough as to allow the bucket to reach inside the cage.

Step 10. Tie the front string to the bucket’s handle.

Step 11. Fill your plastic bottle with water and tie it to the back string.

Step 12. Place a couple of seeds, kernels or breadcrumbs on the bottom of the bucket, and wait. Congrats! You’ve just built your first pigeon trap.

More on the makeshift backyard pigeon trap

The idea behind this simple trap is simple: attracted by the seeds or kernels placed on the bottom of the plastic bottle, the pigeon will land on the edge of the Styrofoam board. Bear in mind that pigeons are cautious by nature, meaning that they will take a good look at your thingamajig before stepping inside the trap.

If you cut only one small hole in the side of the bucket, the pigeon will not approach the seed, because it will realize that they’re no way out of there. That’s why you should have two openings.

Once the little sucker starts eating, it will probably figure out that everything’s okay and will step on the bottom to stuff its beak with them goodies. The second it steps inside, the bucket will be lowered inside the coop, trapping the bird.

You should pay extra attention to how the bucket’s lowered inside the cage. For this trap to work, the cord’s length should allow for the bucket’s body to reach the inner part of the cage, with the lid blocking the opening made in the Styrofoam board.

I can’t give you any precise measurements – it’s a trial-and-error process. One last thing: the plastic bottle’s contents. It would be wise to fill it with water instead of sand or earth; the trap’s sprung by the pigeon’s own weights. Putting anything heavier inside the bottle will make the trap useless.

That’s it on my makeshift pigeon trap. What do you think? Hit the comments section and let me know.


Other self-sufficiency and preparedness solutions recommended for you:

The Lost Ways (The vital self-sufficiency lessons our great grand-fathers left us)

Survival MD (Knowledge to survive any medical crisis situation)

Backyard Liberty (Liberal’s hidden agenda: more than just your guns…)

Alive After the Fall (Build yourself the only unlimited water source you’ll ever need)

The Lost ways II (4 Important Forgotten Skills used by our Ancestors that can help you in any crisis)

The Patriot Privacy Kit (Secure your privacy in just 10 simple steps)

Nothing beats mom’s homemade food. Unless you live alone or don’t have any cooking skills or no emergency food left in the pantry. Well, you know how it goes –


Deer hunting can be done in two ways; either by using rifles or using bows. If you are one of the many hunters who prefer the latter option, this is the perfect article for you to know the practice tips to hunt deer with a bow. Dedicated hunters will know that practice sharpens your skill on shooting a bow with precise and accurate shots. Thus, here are a few tips to pave your way to become a skilled bow hunter.

Practice during unfavorable conditions

Obviously, a good hunt is scheduled during the peak seasons when the weather is favorable for hunting and trekking. However, weather can be a greatly unpredictable thing, and while out on a hunt, it’s better to be prepared for anything.

Practicing in windy conditions where the direction and force of the wind can greatly affect your accuracy can improve your bow skills. Think of this way; if you can shoot well in crappy weather, then you can do so better in normal conditions. More importantly, you are prepared for any kind of situation when you’re out hunting.

Take it slow

If you’re planning to shoot your first buck from a tree stand, you cannot do so successfully without learning how to shoot from a higher position.

It’s not wise to push your limits while at the beginner stage of bow hunting. The best strategy to gauge your skills is to start slow. Start shooting at small distances until you can perfect your shot at that distance. Only then should you further increase the increments.

This strategy can also minimize frustration because it will let you know the farthest distance where you can shoot most accurately. On the field, it will help you gauge your Effective Kill Range (EKR), or the distance range wherein you are most likely to take down a deer without messing up the shot.

Learn how to use a bow sight

A bow sight is an essential tool when shooting long distance. The best bow sight can greatly enhance your long-distance shooting by a tenfold. Basically, it has pins set at different distances which can help you shoot long-distance targets from stagnant position, such as a tree stand.

Other than a bow sight, you should also use other essential bow accessories such as a bow stabilizer. A bow stabilizer, on the other hand, is an accessory that helps minimize torque, stabilize shots, and increase the accuracy of your shots.

Know how to shoot from a higher position

If you’re planning to shoot your first buck from a tree stand, you cannot do so successfully without learning how to shoot from a higher position. Because the trajectory will change once you shoot from an elevated place.

So one of my tips is to practice shooting dummy targets from a tree stand. Once you get a hold of this skill, you’ll find tree stand hunting an easy task.

Target for easy-kill areas

The most humane way to kill a deer is to shoot it in the chest area, where the arrow can pierce through the lungs or heart and deliver almost instant and painless death. To practice this skill, you can use target print-outs of a deer in order to enhance your ability to kill instantly.

Moreover, this will also minimize the possibility of the deer running away because of a shot in the belly, hind, or legs. With accurate shots to the chest area, you can harvest your kill easily.

Don’t hesitate to ask questions

If you’re not sure about something, ask a more experienced bow hunter than you. Remember that it’s not a competition of who is best. Every great bow hunter starts somewhere, and while you’re a beginner, it’s best to take advice from experts and use it to work on your weak points.

Other than constructive criticism, you can also form bonds with other bow hunters and potentially join them on their next bow hunt. This will be a big plus for you: because not only do you have new hunting buddies, you also have a lot of people to help you work on your skills.

Practice with your bow in low-light conditions

You can also master shooting with it during near sunset or near dawn conditions.

Most often, whitetail deer make an appearance before sunset when the light is dimming and your bow sight is getting difficult to use. Although most bow sights come with a glow-in-the-dark pin feature, it will be much wiser and a skill-builder to practice shooting in low light.

If you have a bow sight with a low-light feature, you can also master shooting with it during near sunset or near dawn conditions. In this way, you won’t need to fumble with your bow sight while on the field.

Adjust your bow according to the wind

The wind plays a big role in the accuracy of your shot because, as said before in this article, it can affect the direction and/or trajectory of your shot. When hunting deer with a bow, you’re also most likely confined to shooting from far distances. Therefore, it’s better if you learn to adjust your aim with the wind.

Most importantly, with this skill you can reap rewards when a supposed to be sunny day turns into a windy one. Remember: the weather is completely unpredictable, and as a hunter, don’t expect it to always be in your favor.

Work on your form

As a beginner, the best form for archery is one of the most difficult aspects to master. It’s imperative that you work on your form every time you practice shooting. Moreover, you can also ask an experienced bow hunter to evaluate your form and tell you the mistakes that you’re making.

Why does this need to be done? Well, a great form will directly affect the accuracy of your shot and help you shoot better. Otherwise, a bad form can lead to inaccurate and imprecise shots that will just leave you discouraged. Thus, remember to work on this aspect along with everything else.

Learn how to wait for the perfect shot

In deer hunting, timing is everything, whether you shoot with a bow or a rifle. The proper timing of your shot will decrease the chances of a botched kill. Since deer are highly receptive of sound, you can scare away a bunch of them if you have off timing with your shots and they end up on a nearby tree or the ground.

Unfortunately, the only way to practice your timing is to do it on an actual deer. Because automated practice targets have predictable movements, they aren’t great options for practicing timing. Unlike with deer, you can learn how to assess their movements and make it predictable to you.

Conclusion

Here, we’ve highlighted the best practice tips to hunt deer with a bow. It’s not the actual camping and hunting that’s the most difficult part, but the practice on shooting a bow. Thus, the best option you have in order to be the most prepared hunter in the world is to practice at every chance you get.

Did you like this article? If you did, leave us a comment below and tell us what you think. You can also share this with your friends. Thanks for reading!

  Deer hunting can be done in two ways; either by using rifles or using bows. If you are one of the many hunters who prefer the latter option, this is