Emergency Food Strategies
The various types of emergency foods that are available, coupled with the commercial hype surrounding them, can understandably lead the prepper to make less than optimal decisions with regard to the types and amounts of emergency foods to acquire. In this article I will briefly recap the most common types of emergency food and describe how each would fit in to a practical survival strategy.
The common types of emergency food stores include:
- Canned Foods – Canned foods consist of fruits, vegetables and meats that have been prepared for long-term storage in jars and cans. Canned foods can be prepared at home and are available at virtually any grocery store. Depending on the type of food, they can either be ‘dry-pack canned’ or ‘wet-pack canned’. (Wet-pack canning involves immersing the food in hot water – sometimes in a pressure cooker – prior to vacuum-sealing.) Dried beans and dried white rice are the dry-pack canned foods most commonly stored by preppers and survivalists because they have an extremely long shelf life (up to 25 years!) and provide a good supply of proteins and carbohydrates.
-
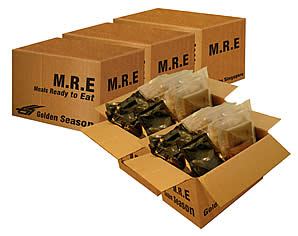
MRE’s are a common choice for Emergency Food.
Dehydrated Foods – Dehydrated foods have been processed in a food dehydrator to remove much of their moisture. This inhibits the growth of microorganisms that cause the food to spoil.
- Freeze-dried Foods – Freeze-dried foods have been processed in a commercial freeze-drier in such a way that virtually all water has been removed (much more than is removed by a dehydrator). This process results in food that is lightweight and which has a very long shelf life.
- Cured Meats – Cured meats have been treated with chemicals (usually nitrates) in such a way as to inhibit the growth of microbes and extend the unrefrigerated shelf life of meats.
- Smoked Meats – Smoked meats have been exposed to the heat and smoke such that the increase in temperature dehydrates the meat (which inhibits microbial growth) while the smoke deposits an anti-microbial chemical layer over the meat.
- Meals Ready-to-Eat – Originally developed for the military, MREs are portable, long-shelf-life food packets that contain complete meals. MREs can quickly be prepared and consumed. Often these packets include built-in food heaters and provide complete meals.
ISSUES RELATED TO NUTRITION
In general, all of the above forms of preserved foods provide good nutritional value. While the heating associated with some canning processes can degrade some water-soluble vitamins such as vitamins A, C, thiamine and riboflavin, they still serve as a good source of these and other nutrients. While nutritional value is preserved in the above types of foods, the nitrates used to cure meats have been shown to be carcinogenic in larger quantities. Salt and sugar may be added to canned foods to improve taste, which can also affect the nutrition offered by such foods (be sure to check the labels of any canned foods for references to sugar and salt!).
MREs provide good calories and some nutrition, but also contain a large quantity of sodium, which has been show to have adverse health effects when consumed excessively (MREs are designed to simply “get the soldier across the battlefield”).
SHELF LIFE OF DIFFERENT EMERGENCY FOOD TYPES
The shelf lives described here assume the foods are kept at room temperature of about 70 degrees Fahrenheit.
Canned fruits and vegetables typically have a shelf life of between 2 and 5 years. There is much anecdotal evidence of canned meats being eaten (and having good flavor and nutrition) after being stored for as long as 10 years. Some dry-canned foods such as dried beans and dried white rice can have a shelf life that exceeds 25 years.
Dehydrated fruits and vegetables typically have a shelf life of up to one year, while dehydrated meats have a shelf life of only about one month.
Freeze-dried foods have a shelf life that ranges between 5 and 25 years, depending on how well it is packaged (plastic food pouches have a shorter shelf life, while cans have a a much longer shelf life).
Smoked meats have an unrefrigerated shelf life of only a few weeks.
Cured meats have an unrefrigerated shelf life that ranges from a few weeks to as long as a year, depending on the type of meat and how it was cured.
Canned foods offer offer the most nutrition at the least cost. The other forms of food have the advantage of lighter weight and/or longer shelf life, but at significantly greater cost.
Smoked meats have an unrefrigerated shelf life of only a few weeks.
NOTE: While the storage of cured and smoked meats is of limited value in the time leading up to disaster; the ability, equipment and supplies required to smoke and cure meats will certainly be valuable skills to have in the aftermath if refrigeration systems are unavailable.
Modern MREs have a shelf life of between 3 to 4 years when stored at room temperature, however that shelf life can decrease rapidly when stored at higher temperatures (in a desert environment the shelf-life for a MRE may be as short as one month!). Also, when purchasing MREs you should be certain of their date of manufacture – otherwise you won’t get the benefit of the full shelf life.
DETERMINING YOUR OWN EMERGENCY FOOD NEEDS
A good way to begin to understand the types of emergency food supplies you will need is to consider how you will most probably be traveling during and after a major disaster. If you expect to be sheltering-in-place then the bulk of your emergency food supplies should consist of canned foods, as canned foods offer a very good shelf life and provide a lower cost per meal than other forms of emergency food. Even though canned foods are heavier than other types of emergency food, if you are sheltering-in-place then portability becomes a less important consideration than cost.
If you expect to be traveling on foot for an extended period, then the weight of your food will be a major consideration. In these circumstances you should plan on having freeze-dried food available, as freeze dried foods have an extremely long shelf life and are extremely light.
If you expect to be traveling by vehicle then weight is less of an issue and the ability to “eat while on the move” becomes important. MREs are an excellent choice for these circumstances because they can typically be unpackaged, heated and eaten without the need to interrupt travel. Also, because they utilize a chemical reaction to generate heat, the preparation of MREs does not produce smoke that might attract undesired attention.
When considering these factors you should not only be anticipating your travel needs when bugging out, but also potential future needs to travel overland for trade, barter and defense. Of course no one has a crystal ball to be able to predict these needs with certainty; however you should at least be able to develop a reasonable estimate. Additionally, you should build into your estimates the expected duration of the disaster, which should ideally be the amount of time required for you to become self-sufficient.
A quick way to estimate your emergency food needs is to answer the following questions:
- How many people are in my group?
- What duration disaster (in days) am I planning for or how long do I anticipate before achieving self-sufficiency?
- If bugging out to another location, how many days of travel will be required?
- In the aftermath of disaster, what percentage of total group members’ time will be spent on extended trips away?
- What percentage of meals will utilize basic dry-canned foods such as beans and rice?
The answers to these questions can help you to estimate your own emergency food needs. If MREs are used exclusively for travel, for example, then the total number of MREs needed for travel is simply the product of number of group members, number of days of travel and number of meals per day. You may then increase this number so as to plan to use MREs for a percentage of post-disaster travel when concealment and speed are a top consideration.
Amounts of freeze-dried meals can be estimated as the product of average number of people traveling, the number of days of travel and the number of meals per day (while there will be some double coverage of travel by MREs and freeze-dried food, it’s never a bad idea to have some extra food on hand).
The balance between dry-packed “beans and rice” type meals and canned foods will be much more subjective, however by thinking in terms of the percentage of beans-and-rice meals vs. other meals, and of course considering the number of people you are planning to feed and the expected duration of the disaster, you will be able to identify the types and quantities of these bulk emergency foods that will meet your preparedness needs.
NOTE: Even before disaster strikes you should normally be consuming and replenishing your supply of canned disaster food so that you do not find yourself with a cupboard filled with expired canned food when disaster does strike!
The various types of emergency foods that are available, coupled with the commercial hype surrounding them, can understandably lead the prepper to make less than optimal decisions with regard to


