HomePosts Tagged "soap"

Ever stopped to think just how useful a bar of soap can be? No, you can’t shave it and turn it into plastic explosive as Frank Burns from M*A*S*H said, but there are lots of other stuff you can do with it beyond washy-washy. No matter if you’re using the old rectangular bar, the liquid variety or dishwasher detergent, each and every one of them could save your skin one day.

Most seasoned survivalists and bushcraft experts carry at least one bar of soap with them and, as you might expect, it’s not only for washing soiled jammies or getting the dirt off your hands.

Since soap is another one of those household items that should get its own statue in the survival hall of fame, I’ve decided to do write this short and sweet piece on how soap may serve your bushcraft purposes.

So, because talk’s cheap, here are 5 ways you can use soap to get out of a potentially life-threatening situation.

  1. Shampoo

I know that most of you don’t really see the purpose of washing your hair during an SHTF situation, especially because, I don’t know, priorities tend to shift. Still, hygiene’s very important, and you really wouldn’t want to end up with lice in your hair and worse.

Don’t know for sure if the rest of you people have even considered the thought of adding one bottle of shampoo to your B.O.B or at least an all-purpose shower gel (great for hair, body, carpets, upholstery and anything in between), but I really don’t see the point of getting one if I have one or more soap bars.

Sure, you won’t get curls or fluffy hair, but at least your head’s clean and lice-free. By the way, if you find yourself without shampoo\shower gel, you can also use liquid soap or dishwashing detergent to wash your hair. Just be careful not to use that dishwasher stuff on more sensible body areas because you’ll end up with sores (true story).

  1. Removing ice from the driveway nice and fast

No rock salt or kitty litter? No problem. You can create your own ice-busting concoction using regular liquid dish soap, water, and a bit of alcohol (don’t get your hopes up because you’ll want to rub alcohol for this concoction). Here’s what you’ll need to do: take a bucket and fill it halfway with hot water. Add one tablespoon of rubbing alcohol and one tablespoon of undiluted dishwashing liquid soap. Mix and use this concoction to remove ice from your driveway.

  1. A sure-fire remedy for poison ivy poisoning

Do you know what’s worse than having a bear on your ass? Having to resist the urge to scratch after getting into contact with poison ivy. What’s even worse about this type of poisoning is that the blisters can spread if you pop those oil-filled pustules.

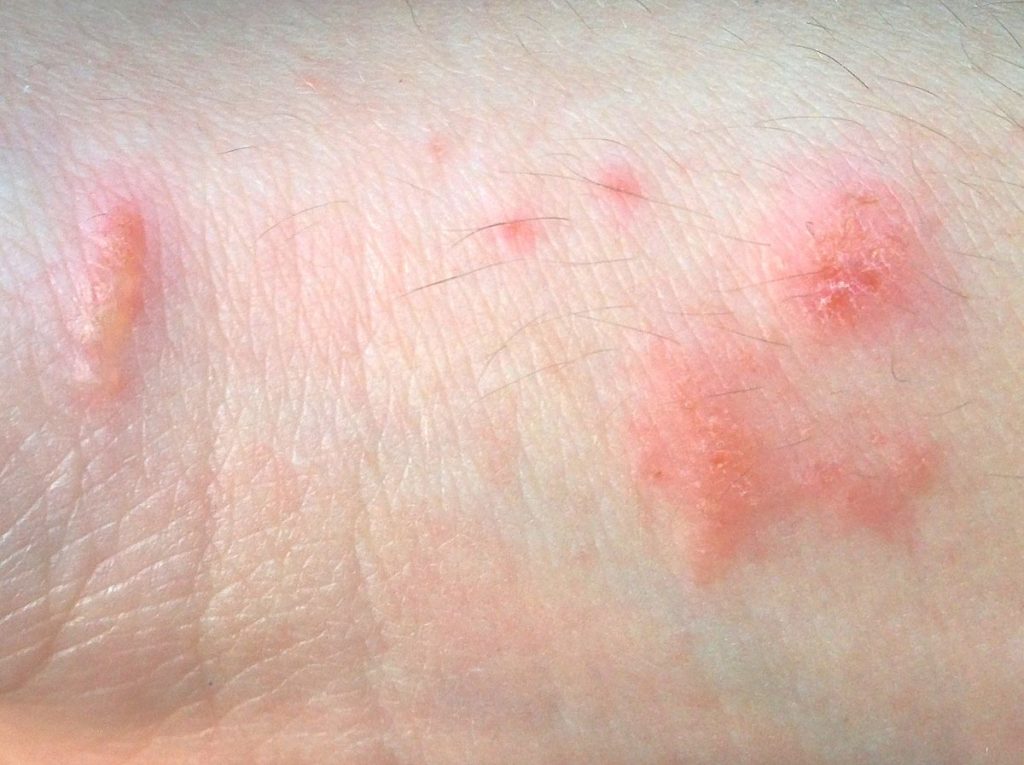
How to solve this? Using dishwashing liquid soap, of course. Since the stuff’s designed to deal with oil stains, it will eliminate the excess oils from the area, thus stopping the blisters from spreading. Moreover, using liquid soap on poison ivy blisters increases the healing rate of your skin.

  1. Keeping them nasty bugs away from your food

Now that spring’s finally arrived, we turn our attention to things more romantic like picnics, BBQs, and campfire sing-alongs with your intoxicated buddies. The only thing that annoys me the most, apart from having to clean that bathroom (sorry, hun) is insects crawling over my food.

Yes, I should know by know that a picnic’s not exactly, well, a picnic, but I do hate to share meals with overly insistent ants, and God knows what.

After doing a bit of snooping on the Internet, I found out that you can actually protect your food from pests using diluted dishwashing soap. It sounds crazy, but believe me, it works. And no, the food will not have a soapy taste to it. To prepare your own pest repellant from soap, get yourself one of those spray bottles and fill it with others. Add two teaspoons of dish soap, shake, and spray the table area.

Yes, you can even spray the food – in its watered-down form the stuff’s safe to eat. Only don’t use too much of it because your food will certainly end up tasting funny.

  1. Getting rid of sticky things in your hair

Well, what can I say? Shit can happen even at home. Doesn’t matter how hard you try to maintain hygiene, because there’s always that moment when you forget that you just dunked your hands in Vaseline, but that itchy spot on the top of your hand just refuses to go away. For moments like this, be thankful for the fact that dish soap exists.

This stuff’s powerful enough to remove anything from the flue, Vaseline, nail polish, gum, and, yes, even peanut butter.

However, do keep in mind that dish soap was made for washing dishes and not to be used as a shower gel. Here’s what you will need to do in order to get rid of that nasty stuff from your hair. First of all, stop scratching because you’ll only spread around the stuff, and rip some hair locks in the process.

Now, pour a tablespoon of your favorite dish soap into your palm and apply it over the sticky area. Rub the area for 5 to 10 minutes. After that, wait a while for the soap to sit and do its job. After that, get into the bathroom, rinse your hair with plenty of water.

You can also use a little bit of shower gel or shampoo to ensure that there’s no more dish soap in your hair. I know it sounds nasty, but then again you really had to scratch that itch.

That’s it for my short and sweet list of how survivalists use soap, regardless if its liquid, solid or the kind used for washing dishes. Do you believe my list lacks certain applications? Hit the comments section and let me know.


Other self-sufficiency and preparedness solutions recommended for you:

The Lost Ways (The vital self-sufficiency lessons our great grand-fathers left us)

Survival MD (Knowledge to survive any medical crisis situation)

Backyard Liberty (Liberal’s hidden agenda: more than just your guns…)

Alive After the Fall (Build yourself the only unlimited water source you’ll ever need)

The Lost ways II (4 Important Forgotten Skills used by our Ancestors that can help you in any crisis)

The Patriot Privacy Kit (Secure your privacy in just 10 simple steps)

Ever stopped to think just how useful a bar of soap can be? No, you can’t shave it and turn it into plastic explosive as Frank Burns from M*A*S*H said,

Isn’t Wikipedia amazing? I needed and intro for my soap article. And nothing is better than starting with some hard facts. Here we go.

The earliest recorded evidence of the production of soap-like materials dates back to around 2800 BC in ancient Babylon.A formula for soap consisting of water, alkali, and cassia oil was written on a Babylonian clay tablet around 2200 BC.

The Ebers papyrus (Egypt, 550 BC) indicates the ancient Egyptians bathed regularly and combined animal and vegetable oils with alkaline salts to create a soap-like substance. Egyptian documents mention a similar substance was used in the preparation of wool for weaving.

In the reign of Nabonidus (556–539 BC), a recipe for soap consisted of uhulu [ashes], cypress [oil] and sesame [seed oil].

My point is, people understood they needed something to wash away the aftermath of their daily activities, so they got very inventive. Some even scientific. At least the ones who realized there’s more to living than surviving. And inventing soap helped us not only survive and kill germs, but it also helped us thrive.

It’s easy to focus on the major needs when talking about survival. Food, water, fire and a few other things get a lot of airtime, when it comes to discussing what we need. But the reality is, there are a lot of minor things that are necessary as well. Having enough clean water to drink and food to eat won’t matter for much, if you and I end up dying of disease.

That’s why we need soap. Yes, something as simple as soap is actually important to our survival. It’s one of the biggest and best defenses we have against disease. Soap not only helps us to clean dirt and germs off of our hands, but it is a fairly good antibacterial as well.

But what do you do when there’s no soap to be found? One option is to use the root of the yucca plant.

Yucca grows throughout the Midwest and Southwest, from Texas up to Alberta, Canada, although it is found mostly in warmer climates. This amazing plant is useful for a lot of things, with the roots being edible. The root of the plant is a tuber, like a potato; with the liquid pressed out of it is also usable as soap and shampoo.

Digging Up the Yucca

DIY Wilderness Soap And Shampoo From This Plant
Figure 1 – Flowering Yucca plant


Yucca are fairly easy to dig up, as the tuber is the only real root of any size. The rest of the roots are hair size and break easily. But the tuber itself can go quite deep, especially on a large plant like the one shown above. If you’re going to dig up a yucca, I’d recommend using a smaller plant, like the one I’m digging up below.

Before going any farther, I need to mention that it is not legal to dig up yucca in all places. I was able to dig this plant up, because it was on private property and the owner wanted to get rid of it.

The plant shown in this photo was found in the wild and would have been illegal for me to harvest. So before you do this, make sure you’re doing it someplace where it is legal; unless, of course, you’re in a survival situation.

As I’m doing this for survival purposes, I decided to try digging it up with a machete, rather than a shovel, under the assumption that I might not have a full-sized shovel available to me.

I wouldn’t want to try and dig up a yucca with the small folding shovel I have in my bug out bag, because the ends of the leaves are all thorns. Digging it up with that small a shovel would probably see my hands scratched up pretty badly.

DIY Wilderness Soap And Shampoo From This Plant
Figure 2 – Digging up the Root with Machete

As you can see in the photo, I’m holding the leaves aside, while I dig with my machete. What I did was insert my arm under the leaves, and then lift it up, pushing the stiff leaves up with my arm. I was then able to turn my hand around and grasp them, getting them out of my way.

Once the leaves are out of the way, it’s a simple matter to stab the machete into the ground, all around the root. I made a circle about eight inches in diameter, which was enough. Then, grasping the plant’s stalk, near the root, I simply wiggled it back and forth, breaking the root free and was able to lift the plant out of the ground.

DIY Wilderness Soap And Shampoo From This Plant
Figure 3 – The cleaned root

The leaves of the yucca can be used for other things, like making some pretty good sandals; but for now, all we need is the root, so I cut it off at ground level, with one swipe of my machete. Once cleaned, the root looks like this.

Cutting Up the Root

DIY Wilderness Soap And Shampoo From This Plant
Figure 4 – Cutting off the husk

As you can see in the picture above, the root is covered by a thick skin or husk. We’re going to need to cut that off, much like cutting the outside off of a pineapple. It is hard, but not all that difficult to cut. In order to make it easier, I cut the root in half, allowing me to put the flat, cut end on my cutting board. The skin of the root cuts off fairly easy, if you have a good, sharp knife. I had no problem, but I’m using a very high quality knife with a really sharp edge. Notice the red around the edges of the pieces in the foreground. This all needs to be cut off, as well as the dark lines you can see in the piece I’m cutting.

DIY Wilderness Soap And Shampoo From This Plant
Figure 5 – Dicing the root

The peeled root is then sliced and diced. I did about ½” cubes. You can do smaller, but I wouldn’t recommend any larger. The ½” cubes worked well for my needs.These cubes of yucca root then need to be broken down. Even though I’m working in my kitchen at this point, I didn’t use a food processor or blender for this. We’re doing this for survival soap and I doubt that any of us keep a food processor in our bug out bags or survival kits. We need something that’s more on the order of what we’d use in such a situation.

DIY Wilderness Soap And Shampoo From This Plant
Figure 6 – Grinding the root

I used a Mexican molcajete, which is a traditional mortar and pestle. Rather than being made out of ceramic, they are usually made out of lava rock, which is very porous. Mine is made out of granite, which isn’t as porous, making it grind less, but is much easier to clean. Traditionally, the Mexicans use these for making salsa and guacamole.The root is hard enough that I found it necessary to beat it with the pestle, breaking it down, before grinding it. You want to get it as fine as you can, ending up with a fibrous mush. Actually, the finer you grind it, the more usable soap you’ll get out of it.

The molcajete isn’t the only way you can grind up the yucca root for use. The same thing can be done with the type of grinding stone that the Indians used for grinding corn. However, I don’t happen to have one of those and it would have been expensive to buy. In the wild, I would look for a flat stone I could use to grind on, with a rounded rock out of a river or stream as my pestile.

Now the Soap

DIY Wilderness Soap And Shampoo From This Plant
Figure 7 – Extracting liquid soap

With the root thoroughly ground, you’re ready to extract the soap. All that’s needed it to take the ground root in your hands and squeeze it. The liquid that comes out is usable as soap or shampoo.

If you need to really scrub something, such as a greasy pan, you can use the ground up root as soap. In this case, the fiber in the root will act as a scouring pad, helping you to clean the surface.

But you’ll need to use a fair amount of pressure with it, so as to press the soap out of the fiber as you go.

Even after we’ve gotten a lot of liquid out of the ground root, it is still useful for cleaning. We can dry the root in the sun and save it.

Then, when we need more soap, we can reconstitute it with water, which will draw more of the chemicals we need out of the ground up root, giving us more soap.

It is best, when doing this, to not have pressed out all of the liquid from the ground root, as you will get better soap from it the next time around, if there is still some liquid in it when it is dried.

Isn't Wikipedia amazing? I needed and intro for my soap article. And nothing is better than starting with some hard facts. Here we go. The earliest recorded evidence of the

The good part about getting older is you stop trying to prove anything to anyone, including yourself. All you are in the pursuit of is collecting experiences – beautiful, fragile little soap bubbles that you store in your heart, and every once in a while you pull one out and gaze at the delicate pictures it shows you. No soap? No worries. That’s what we’re here for.

There are several ways to make soap, all of which start with lye.

One of the simplest ways to make some soap is, after using a frying pan over a hardwood camp fire, take some of the ashes from the fire and sprinkle them on the fat in the pan, add some water. They will combine and make you a small batch of soap. You cannot use softwoods like pine to make lye because of their high resin content, so stick with hard woods like oak, maple, and as, for example.

Larger quantities of soap can easily be made by constructing a lye-leaching container.

To make a lye-leaching container you have to:

  • use a wooden barrel, or a plastic or a steel container. Lye has a pH of 13 and will eat through aluminum, it is a very dangerous, strongly alkaline solution.
  • Drill or punch holes in the bottom of the container to allow drainage
  • Fill the bottom of the container with a layer of gravel on top of which will be a two or three inch layer of straw or dried grass, on top of that will go your wood ashes.
  • Tamp down the ashes to compress them and make a depression in the middle of the ashes.
  • Now the top of the container has to be open so you can pour water onto the ashes and allow that water to dissolve the lye from the ash and then pass through the straw and then the gravel for a second filtration.
  • You should fill the depression with water and then wait several hours as the water slowly trickles out the bottom.

The first batch produced will be the strongest. You can get a second batch of lye by using the same barrel’s contents and passing water through it. This second pass lye has to be re-passed through the barrel to make it strong enough. The lye is then combined with animal fat to make soap; you have to keep adding enough fat to consume all the lye. ere are actual tables called saponification tables that tell you the required ratio of fat to lye. You can also use any vegetable oil instead of animal fat.

Remember, oils are just liquid fat at room temperatures.

Caution: If you get lye in your eyes you have to douse them with milk; if you get lye on your skin douse it with vinegar to neutralize it. Lye is a very caustic substance… meaning it burns like hell! Anything at either end of the pH spectrum will be dangerous…either a strong acid with a very low pH or a strong base or alkali with a very high pH. Lye has a pH of about 13, which is very strong. Lye will easily eat right through things like aluminum.

HOW TO MAKE ACTIVATED CHARCOAL

Activated charcoal can be made from charcoal you have made in your improvised oven and then it needs to be treated with acid and reheated again. From the stage of making charcoal you can also make black powder or wood alcohol or just leave it as charcoal if you want to smelt any metals, since charcoal burns much hotter than wood and thus has been used in forges since ancient times.

The best way is to start with the smallest pieces of wood, so cut up your wood as best you can. Eventually, you are going to have to grind these small pieces up into a fine powder, so it is critical to start with very small pieces of wood. A hardwood sawdust would be an ideal place to start.

Whatever you use for making the oven to burn your charcoal, it has to have two common features — it has to be able to be sealed to prevent oxygen from entering, or you will just completely burn the wood and form ash but no coal. Secondly, you need to have a vent hole, large enough to allow the volatile chemicals in the wood to escape after they have been changed into gases yet small enough to prevent oxygen from being drawn in.

You have to design a setup so your closed oven can be suspended over a fire, allowing it to heat up without the presence of oxygen, to boil off the water and eventually cook off all the volatile chemicals that are in the wood; once these two are gone you will have your carbon and ash left.

Since water boils off at about 212 F at sea level ( as you go up in altitude water will boil at a lower temperature), the first thing you will see exiting your vent hole will be steam.

  • Once you see steam coming out you should cook the wood for at least another four hours. This is not written in stone and depends on the amount of wood you have in your oven and the heat production of your fire, etc.
  • After four or five hours have passed and you think you are finished making your charcoal, remove the oven from the fire. This step is critical. You have to wait until the oven has completely cooled down before you open it, otherwise the char will burst into flame if it is hot and exposed to a sudden rush of oxygen by you opening the oven.
  • At this point you have made charcoal, and if you want to go on to make black powder or use it for smelting an ore, you are ready to do that.
  • For our purposes we need to acid-treat the charcoal and reheat it before we have made activated charcoal.
  • For an acid a good source is battery acid, which you can buy in any auto supply store. Be advised, this acid is very dangerous and has to be handled very carefully to avoid serious acid burns. You should be wearing an apron, goggles, gloves, and a mask over your nose and mouth to keep from inhaling any noxious fumes.
  • Pour the acid into a glass cooking pan, put each piece of coal into the acid bath and allow it to soak for about five minutes, then carefully remove the charcoal and drain off the excess acid and place the charcoal back into the oven.
  • Keep repeating this process until you have soaked all of the charcoal in acid.

As an alternative to battery acid, which is strong sulfuric acid, you can use hydrochloric acid which you can buy in pool supply stores as muriatic acid. It is used to clean the linings of cement swimming pools or you can find it in hardware stores. You can also use nitric acid, but that is harder to find and usually you can only get it from chemical supply stores that probably won’t sell it to you.

  • Now put all the acid-treated charcoal back into your oven
  • Reseal it and reheat it for another four or five hours until it is completely heated.
  • Just like in the earlier step, you need to allow the oven to cool down before you open it and expose it to oxygen or you will have another flash fire as the activated charcoal catches fire.
  • Carefully open up the oven, remove the charcoal and grind it up into as fine a powder as you can, and now you have made activated charcoal.

Note: for the purposes of home water purification, if you are making your own activated charcoal, coconut husks are supposedly the best material to use for this. The problem with that is, where are you going to find coconut husks unless you stockpile them now for later use, unless of course you live in a tropical area then it will not be a problem. If you do happen to live in a tropical environment with many coconuts available you should also learn how to make coconut oil which has many medicinal as well as nutritional uses.

An alternative method for making your own activated charcoal involves

  • using two steel barrels, one fifty-five gallon and one thirty-five gallon with its lid, and a few thick, long pieces of rebar.
  • Cut two one foot by one foot holes in the fifty-five gallon drum’s sides and then take the thirty-five gallon drum and drill nine or ten holes in its bottom.
  • Now fill the fifty-five gallon drum with your firewood.
  • Fill the thirty-five gallon drum with the wood you want to make into charcoal and seal it up so the only holes are those in its bottom, facing the fifty- five gallon drum fire.
  • Slide the thirty-five gallon drum onto the long rebar rods and place it on top of the fifty-five gallon drum.
  • Now, light the fifty-five gallon drum’s wood on fire.
  • Cook it as above for four or five hours and then remove the thirty-five gallon drum from the fire and allow it to properly cool and once it is cooled, open it and there is your charcoal.

The difference with this and the previous method is the gas in the thirty-five gallon drum has nowhere to go but out into the fire below, thus stoking that fire and letting it burn even hotter, so in effect you are circulating the wood gases back into the fifty-five gallon drum’s fire to make it even hotter.

There are many other methods available to you on YouTube and other websites.

Or you can just get Dr. Ralph La Guardia’s The Doomsday Book of Medicine, and have it all in one place.

Follow the link and find out more about this book. It will simply teach you how to build your own healthcare system. That means prepping for day to day problems and issues. Because becoming a final prepper takes practice. You don’t have to wait until it’s too late to open a survival book.

Get this book now if you want something to change.

Spoiler alert – it’s all about good soil. And it’s not a metaphor, even if it also works like that.

How much do you know about activated charcoal? Well, seems like it knows a lot about you. Read here about its many medical uses.