HomePosts Tagged "survival kit"

🎧 Prefer to Listen? 
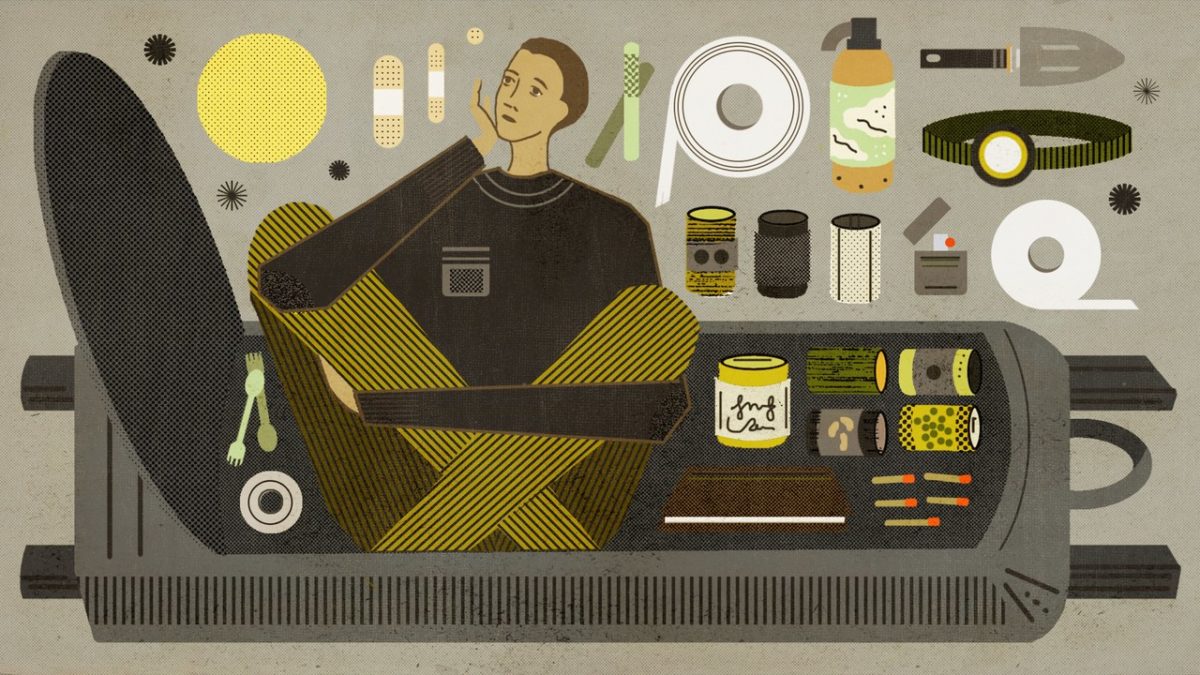
What desk item should be in every adventure kit?

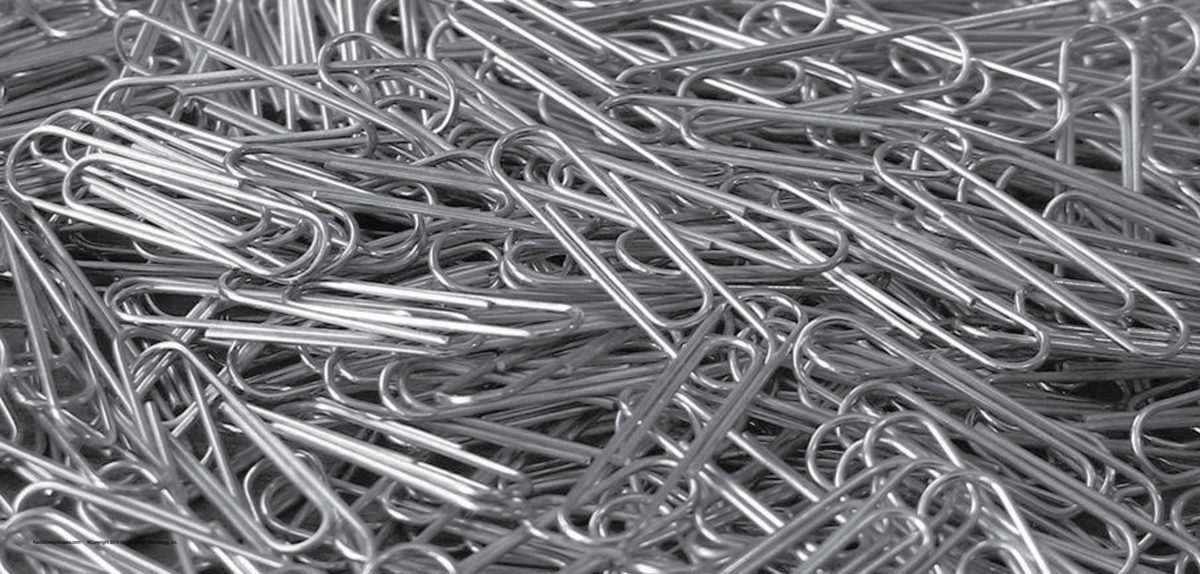
Ever notice how the most useful tools aren’t always the ones with fancy packaging and high price tags? Sometimes they’re hiding in plain sight—like that small metal object sitting in your desk drawer right now.

The same principle applies to survival skills. Sometimes, the most valuable knowledge isn’t about the latest high-tech gear—it’s about knowing how to use what you already have. If you had to build something from scratch in an emergency, would you know where to start? There’s a surprising resource that can teach you just that—this one might change the way you think about preparedness.

I accidentally discovered last summer when my expensive gear failed during a backcountry trip. With no outfitter for miles, I reached into my pocket and found something I’d absent-mindedly brought from the office. Within minutes, I’d fixed my broken equipment and was back on the trail.

What makes this tiny item so valuable outdoors? It’s lightweight (you won’t even notice carrying it), incredibly versatile (it transforms into different tools in seconds), and so inexpensive you can pack several without thinking twice. Let me show you 10 ways this ordinary office supply becomes extraordinary when you’re miles from civilization.

  1. Improvised Navigation: Crafting a Field Compass

When your primary navigation tools fail, a paperclip can help you find your bearings. To create an emergency compass, straighten a paperclip and cut a segment using your multitool. Magnetize this segment by repeatedly stroking it against your survival knife or any steel implement with magnetic properties.

Fill a small container with water, place a small leaf on the surface, and carefully position your magnetized paperclip segment on the leaf. The metal will naturally align with the Earth’s magnetic field, indicating the north-south direction. This rudimentary compass can provide crucial orientation when electronic devices fail or batteries die.

  1. Emergency Communications: Signal Amplification

In survival situations, small, unexpected tools can make all the difference. But what if you needed something bigger—like a way to build your own long-term survival solutions? Imagine needing a sturdy shelter, a custom tool, or even a reliable backup for broken equipment. Where would you even begin? Believe it or not, there’s a step-by-step guide that can show you exactly how to prepare for that.

Communication becomes critical during emergencies, but terrain, infrastructure damage, or equipment limitations can hinder your ability to connect. A properly shaped paperclip can temporarily extend your device’s range.

For two-way radios or emergency weather receivers, bend a paperclip into an L-shape and attach it to the existing antenna’s tip. This improvised extension can increase reception just enough to capture vital weather alerts or emergency broadcasts that might otherwise remain out of range. While not a replacement for proper communications equipment, this technique has helped many preppers maintain situational awareness when conventional methods falter.

  1. Tech Recovery: Resetting Electronic Devices

Modern survival often involves balancing traditional skills with appropriate technology. When electronic devices malfunction in the field, a paperclip can access those tiny reset buttons designed to restore factory settings.

For smartphones with removable batteries, locate the small reset hole (typically labeled) after removing the back cover and battery. Insert a straightened paperclip segment and hold for 5-10 seconds. This procedure can revive frozen devices, though be aware it will consume approximately 10% of remaining battery power during the restart process.

This technique works for various devices including GPS units, tablets, and some emergency radios—potentially restoring critical functionality when you need it most.

  1. Field Repairs: Impromptu Fix-It Tool

Paperclips provide remarkable utility for field repairs across numerous applications. Their malleable yet strong composition makes them ideal for temporary fixes that can extend equipment life during critical situations.

Replace lost eyeglass screws by carefully cutting and shaping a paperclip segment to match the required length. Torn clothing can be temporarily secured using bent paperclips as fasteners. Even damaged gear can benefit—fashion a smartphone stand for hands-free operation, improvise fishing hooks from straightened and sharpened segments, or create makeshift closures for broken zippers or containers.

The versatility of paperclips for impromptu repairs makes them invaluable when specialized tools aren’t available.

  1. Survival Hunting: Small Game Acquisition

When food procurement becomes necessary for survival, paperclips can be transformed into hunting implements for small game. While not as effective as purpose-built tools, they provide options when alternatives aren’t available.

Straighten multiple paperclips and sharpen one end using your multitool or a rough stone. These can be used as projectile points for improvised hunting implements. Create a rudimentary blowgun using hollow reeds, bamboo sections, or plastic tubing, then use your paperclip darts for targeting small game like squirrels, rabbits, or birds.

While certainly not ideal, this method demonstrates the paperclip’s potential role in emergency protein acquisition—a critical component of survival situations.

  1. Medical Application: Field Splinting

Minor injuries often occur during survival situations, and proper stabilization can prevent further damage. Paperclips can serve as improvised splinting materials for fingers and toes when professional medical care isn’t immediately available.

For digit injuries, straighten two paperclips and position them on opposite sides of the injured finger or toe. Secure them with clean cloth strips, creating a stabilizing framework that limits movement and promotes proper healing. While not a replacement for proper medical attention, this temporary solution can prevent additional trauma until professional care becomes available.

Remember to clean the injured area with available antiseptics (saline solution or mild soap if available) before applying the splint to reduce infection risk.

  1. Field Hygiene: Preventing Infection

Maintaining proper hygiene becomes increasingly important during extended emergency situations. One often overlooked aspect is fingernail cleanliness—a seemingly minor concern that can lead to serious infections if neglected.

In field conditions, dirt, bacteria, and contaminants frequently accumulate under fingernails. If left untreated, this can lead to serious infections like paronychia (inflammation around the nail) or even tetanus. A straightened paperclip provides an effective tool for carefully removing debris, helping maintain hand hygiene when standard implements aren’t available.

This simple preventative measure can help avoid potentially debilitating infections that would otherwise compromise your survival capabilities.

  1. Camp Cooking: Improvised Food Preparation

Even experienced campers occasionally forget crucial cooking implements. Paperclips can be repurposed into miniature cooking tools when standard equipment isn’t available.

Create impromptu skewers by straightening heavy-duty paperclips, which work effectively for cooking small food items over an open flame. These makeshift tools excel with items like small meat pieces, vegetables, or marshmallows. The steel composition withstands moderate heat, though prolonged exposure to high temperatures will eventually compromise the metal.

While not ideal for extensive cooking operations, these improvised skewers have saved many campfire meals when conventional tools were forgotten or lost.

  1. Gear Organization: Key Management

Efficient gear organization becomes crucial during emergency situations, particularly for high-use items like keys. Paperclips provide a lightweight solution for expanding keychain capacity or temporarily securing important keys.

Create a supplementary key loop by bending a paperclip into a circular shape and attaching it to your existing keychain. While this should be considered a temporary solution not suitable for heavy items, it provides immediate functionality when commercial alternatives aren’t available.

For more permanent applications, multiple paperclips can be interlocked and secured to create stronger configurations, though purpose-built hardware remains preferable for long-term use.

  1. Gear Repair: Zipper Tab Replacement

Quick fixes are great, but what about when you need something more permanent? Let’s say you’re in the wild, and a crucial piece of gear breaks beyond a simple repair. Could you build a replacement with what’s around you? If you don’t have the right skills yet, this resource is a game-changer—it lays out exactly how to turn raw materials into survival necessities, no expertise required.

Few gear failures are more frustrating than broken zipper pulls, especially on critical items like backpacks, tents, or outerwear. When a zipper tab breaks in the field, the functionality of essential equipment becomes compromised.

A paperclip provides an immediate solution—simply bend it into a suitable loop shape and thread it through the zipper slider where the original pull tab was attached. This field repair restores full functionality to critical gear, preventing potential exposure to elements or loss of contained supplies.

While seemingly minor, this application demonstrates how paperclips can maintain the utility of expensive gear when purpose-built replacements aren’t available.

CONCLUSION: THE UNEXPECTED SURVIVAL ESSENTIAL

The paperclip exemplifies the prepper philosophy of finding multiple uses for everyday items. Its lightweight, compact form belies incredible versatility in emergency scenarios, earning it a permanent place in any well-designed survival kit.

Whether you’re creating essential tools, making critical repairs, or addressing unexpected challenges, these humble office supplies provide solutions that far exceed their modest appearance. For preppers who understand that true readiness lies in adaptability and resourcefulness, paperclips represent the perfect marriage of simplicity and functionality.

What’s your favorite unconventional use for paperclips in survival situations? Share your experiences in the comments below!

Ever notice how the most useful tools aren't always the ones with fancy packaging and high price tags? Sometimes they're hiding in plain sight—like that small metal object sitting in

Kit, gear, or whatever you like to call it. The equipment we buy to survive, protect, get home, bug out, etc. Some of us that have served in the military and had to use all kinds of gear for our jobs, realized some of it was excellent and some just didn’t work for us. So we either bought or improvised our gear or kit to ensure we had what worked for us. This article will discuss organizing your survival kit into levels more so than the specific contents. I will discuss each level in more detail in further articles.

When it comes to buying your kit, look at what works for you. Do not go and buy the latest and greatest because of a slick marketing campaign or trend. Always find the biggest bang for your buck. A word of caution, do research and read reviews of those who used and/or tested the gear. You do not want to buy cheap gear that won’t last, but you don’t also have to buy expensive gear that does not work for you. So it is a personal choice. I don’t buy just from a single brand, I own items from various manufacturers like:

  • HSGI taco pouches
  • TAG battle belt
  • 5:11 backpacks
  • Duluth pants
  • Solomon hiking boots
  • Boker knives
  • SOG multi-tools, etc.

I research the items for the specific need I will use and in most cases look at the multipurpose use of the item. I also look for the compatibility of the brands with other brands for modularity. One note to make; be sure to check the fastex buckles on the items, not all brands use the same type of buckle, and make sure they are good for the weight/tension that will be placed on them. You don’t want to be moving through the Appalachians to your bug out location and have your chest rig fail and fall apart at the wrong moment. You will need to be ready to make some field repairs once you establish security. So always have some 550 cord, heavy-duty sewing needles, 100 MPH tape, and/or sturdy safety pins on hand.


When I plan out my survival kit or gear, I think of it in levels. Each level has a purpose and compliments the others. One level of kit has duplicate items as the others so you can resupply your lower level kits or it has more robust items that may weigh heavier and require more logistics. In each kit you need the basic sustainment items to build a fire, gather, carry and purify water, build a shelter, signal for help or link up, hunt or trap for food, fix things, and basic medical needs like trauma to colds. The higher the level of kit, the more you have at your disposal.

Level 1 Kit – Think of Every Day Carry (EDC)

Level 1 should be items that you will have on your person no matter what you are doing. Some items are a good knife (folder or fixed), Flashlight, Watch, Wrist compass, Lighter, 550-cord bracelet, Multi-tool, and/or Concealed carry firearm. So imagine walking around the mall with your family, what do you have on your person that can help in a crisis? Medical items can be a CAT tourniquet on your belt or in a pocket to a bandana for an improvised tourniquet. It would be hard to always have that IFAK level of TCCC gear on your person. There are some decent “Patrol” IFAK’s out there that are slim in design.

Level 2 Kit

Should be some kind of load bearing equipment. Like a chest rig, old style LBE, or battle belt (w or w/o suspenders). It is also your get home bag, since this bag is smaller than a bug out bag and only set up to “get you home” it will have supplemental items that are similar to your chest rig. So depending on your scenario, you might only have the GHB and not your chest rig. I will discuss more the GHB in another article.


On this level, you can have items that will augment your level 1 kit. Enable you to carry ammunition for your rifle and/or pistol to be readily available. You will have your Individual First Aid Kit (IFAK) attached. You can also add more items for redundancy (2 is 1 and 1 is none). This kit can be kept in your vehicle, place of work, or at your residence.

Level 3 Kit

This kit should be a back pack of some type, about 4,000 to 6,000 cubic inches or 65 to 95 liters. This would be considered a week-long bag. A bug out bag should not only be “72 hrs.” you should have enough gear to last you 5-7 days depending on your skill sets, AOR, and proximity of your other levels of kit. This level 3 Kit is also used as your Bug out Bag, which will be discussed further in another article. Remember, Bugging Out refers to leaving your homestead to another location for an undetermined amount of time. Hopefully you have planned out your scenarios to ensure you have the mindset, skill sets, tactics and kit to make it to where you are going. This kit should be kept in your home, unless you plan on bugging out from your work location etc.

Level 4 Kit

This Kit should be several durable containers or bags that you can load into your vehicle. The containers could be pelican cases, action packers, military kit bags or other type of durable containers. They should not be too large to move by oneself. Your vehicle should be part of this level of kit. Since you can load more fuel, water and gear in and on your vehicle. Your GHB bag, that you take with you to work and trips will become a “bail out bag” if you have to retreat from your vehicle under duress. Level 4 should contain items that will aid you in moving longer distances to get to your destination. Ideally, it is located at your house to aid you if you need to bug out and move to your cabin in the Appalachians.


If you are departing from your house, load up your Level 3 Backpack and your level 2 GHB (now bail out bag) and/or Chest rig for additional augmentation depending on the situation. If you have to move on foot due to vehicle breakdown, then you have your Level 3 backpack, level 2 chest rig and GHB is you designed it to attach to your Level 3 BOB. But one thing to remember always make every attempt to stay with and repair your vehicle during a crisis. Your vehicle provides a lot of advantages but also has several disadvantages. It may give you a sense of security, noise, harder to hide, and mobility is restricted to where a vehicle can go.

As you can see, the levels of kit you have, augment and complement each other. Don’t forget your homestead should also have plenty of supplies. You could use this TTP and make your house your level 5. So depending on your scenario, you may not have all levels of kit with you. I normally have my Level 1 (EDC), Level 2 (GHB), and Level 4 (modified) with me whenever I drive my vehicle anywhere within my AOR. If I have to drive further like to another state or across the country, I add more items to my Level 4.

How to use your levels of kit

You should always use your kit from the highest to the lowest, Level 4 to Level 1. So you always have the critical gear on your person if you need to abandon the vehicle or your backpack. If you do use items form your level 1 or 2 use the higher levels to resupply those items. For example while I was in the military it was SOP that we drink out of our 2 QT canteens attached to our rucksacks before we drink out of our 1 QT canteens on our LBE/Chest rig. This way if we did a recon patrol without our rucksack we had full canteens or if we made contact and had to ditch/destroy our rucks we had full canteens.


Other self-sufficiency and preparedness solutions recommended for you:

The vital self-sufficiency lessons our great grand-fathers left us

Knowledge to survive any medical crisis situation

Liberal’s hidden agenda: more than just your guns

Build yourself the only unlimited water source you’ll ever need

4 Important Forgotten Skills used by our Ancestors that can help you in any crisis

Secure your privacy in just 10 simple steps

Kit, gear, or whatever you like to call it. The equipment we buy to survive, protect, get home, bug out, etc. Some of us that have served in the military

A couple of days ago, I had some friends over for a backyard BBQ. Several beers and patty flips later, one of them hits me with the oddest prepping question ever: “say, do you have any of odd stuff in your dark chest of wonders (that’s what I call my household survival kit)?”.

I really didn’t know what to answer. I mean, most of the objects us preppers carry and hoard (and don’t you try to deny that!) can be peculiar to some. Take magnesium rods, for instance. Aside from preppers, ex-military, and maybe some people who really don’t know how to spend their money, no one even considers owning such an object. Why would they?

Anyhow, for the time being, I considered the matter settled. But the question popped into my head again. Naturally, with my wife and kids fast asleep, I tiptoed downstairs and took a quick inventory of my prepping (what else could a man do on a Saturday night?).

Wouldn’t you know it, there are some things in there which may pass as peculiar to some, but handy nonetheless. So, after some careful consideration, I’ve decided to do a short piece about the odd and useful stuff every prepper should have around the house or hunting cabin or whatever. So, without further ado, check out my list of 5 outlandish items worth their weight in gold.

  1. Foldable pruning saw

If you’ve ever got around to do a bit of gardening, then you know how hard it is to get rid of vines or saplings. Yeah, long before I ever knew such a tool existed, I had to use a hacksaw or my survival knife to deal with stubborn outgrowths. Fast-forwarding a bit, during a yard sale, I came across this rather brutish tool.

I kid you not that when I first saw it, my first thought was “torture implement.” However, the guy selling the saw said it’s for pruning and not for chopping off fingers or garrotting someone. I feel a bit silly for thinking that no tool’s going to help me get rid of the backyard vegetation.

Needless to say, I pretty much came to enjoy messing around the garden now that I had the right tool. So, if you need to get rid of branches, saplings, twigs, vines, go for a foldable pruning saw. While you’re at it, you may want to consider adding one to your B.O.B – they’re awfully useful for quite a lot of jobs, and yes, in case of an emergency, they can be used for self-defense.

2. Quadruple-O Steel Wool

Here’s another doozie for you – 0000 steel wool. It’s sort of a byproduct of metalworking and very useful if you want to start a fire very fast. Yup, as you’ve probably guessed it, it’s highly flammable, which means that I wouldn’t store it next to a heat source or something. What I like to do with quadruple-O steel wool is to use in conjunction with char cloth.

For that, I’ve crafted my own version of the tinder, an old-school and ingenious way of whipping up a quick fire when you lack matches or lighters. My tinder box contains a small piece of 0000 steel wool wrapped in char cloth. I’ve bought mine from Amazon, but you can probably find them in every military surplus or sports store (they usually come in a pack that resembles smoking filters for rolling tobacco).

3. Guitar strings

Never quite got around to learning how to play the blasted thing, but I do stock up on strings as often as I can. There’s great for all sorts of things – setting up snares, cutting dairy products like hard cheese, or even hanging heavier pictures or wall decorations.

A while ago, my wife got for her birthday this awesome stone replica of the Dendera Zodiac. The trouble was that the plaque’s heavy as shit, which means that a regular string or wire won’t do. I managed to find a workaround by using a bass string – those are thicker compared to solo guitar strings.

4. Pencil sharpener

Having one pencil sharpener around the house is no big deal. Even though the PC industry has skyrocketed, there are those, including yours truly, which prefer to stick to pen and paper. Hell, some of the articles you see here were laid on paper before getting them live. Now, I know this may sound a bit strange, but I got a whole box of pencil sharpener tucked away in the garage.

No, I don’t have that many pencils to sharpen, but they do have their uses. For instance, if you run out of tinder, you can always use a pencil sharpener to make more. Moreover, the blade can be salvaged and made into a trap.

Of course, if you know your way around weapon crafting, you can always take a bunch of pencil sharpener blades, and fashion yourself a club or something. Of course, the mount is melted down and turned into nail (I melted a box of bladeless sharpers and used the metal to forge me a bushcraft knife).

5. Machete

I really like knives. The bigger, the better. Anyway, a machete’s useful for pretty much any job that requires extra muscle. I personally like to use it for chopping small wood and some last-minute weed-whacking.

Like with any other knife, you should definitely aim for quality. It’s true that this type of blade might be too cumbersome for your B.O.B, but no one’s stopping you from getting one the next time you go for a hike. Just be sure to get one that’s made from carbon steel and not stainless.

Think the list needs some improvement? Let me know what you think in the comments section.

Most of the objects us preppers carry and hoard can be peculiar to some. Take magnesium rods, for instance. Aside from preppers no one even considers owning such an object.

Where would we be today without mouthwash? Probably brushing our teeth several times per day in order to get rid of all those food pieces. Wouldn’t call it a marvel a technology, but mouthwash does have its uses and, some of them, go way beyond oral hygiene.

And because I was thinking the other day about reasons to stockpile even more mouthwash than usual, I ended up burning the midnight oil to see what that stuff’s good for apart from, well, using it to wash your mouth. Of course, I won’t bother you with tall tales about guys using mouthwash and mumbo-jumbo to summon otherworldly beings, but I did discover some very interesting facts about this stuff.

Did you know that there was a time when FDA was seriously considering blackballing mouthwash on account of a freak study that linked this substance to oral cancer? Of course, it was later proven that the study was a bogus and that the only severe reaction mouthwash can cause is the so-called black tongue – basically, the tongue grows tired of shedding dead skin cells which end up sitting there, is not pretty.

The black color is the result of a chemical reaction between an oxidizer commonly found in mouthwash and the dead skin cells. No reason for alarm, as it is not life-threating (just use a brush with soft bristles to scrape your tongue or chew some gum).

Anyway, back to the topic du jour – mouthwash in survival. As many common household items, mouthwash can also be used during an SHTF situation. Here are my choices in alternative uses of mouthwash.

Antiseptic

Let’s start by stating the obvious – since mouthwash was designed to kill bacteria responsible for tooth decay and bad breath, it’s safe to assume that it has strong antibacterial properties. If you don’t have anything else on hand, you can always pour a bit of mouthwash on small scrapes and nicks. Word of caution though – this stuff’s going to sting like hell.

Have you ever tried to disinfect a minor wound with medicinal alcohol? It stings even worse than that. Don’t forget to wash with clean water and flush the area with a saline solution – mouthwash contains other substances that really don’t belong inside the wound.

Get this book now and learn such facts as: The Antioxidant 550 times stronger than vitamin E and 6,000 x More Powerful Than vitamin C. Get your copy here.

Washy-washy the toothbrush

As I’ve said countless of times, oral hygiene’s very important, no matter how shitty the situation is. If you ever find yourself stranded in the field, it may be possible to sterilize your toothbrush with a little bit of mouthwash. In fact, it’s quite advisable to do so before putting that thing in your mouth, especially if you’ve been on the road all day.

If you want to make sure that toothbrush’s germ-free, I would advise soaking it in mouthwash – grab a zip-lock bag or small airtight container, put the toothbrush inside, pour a little mouthwash, seal, and stir.

No more stinky feet

Yeah, I know that this not qualify as an SHTF situation, but try sleeping in a closed tent after a day of walking, hiking, running or whatever. In case you don’t have any soap nearby, just drizzle some mouthwash on those mutton chops, rinse with water, and dry yourself with a towel. Yes, you’ll have less mouthwash, but at least you’ll get a good night’s sleep.

Itchiness and Accidental Poisoning

There’s nothing more thrilling than the feeling of tiptoeing through poison ivy or nettles. Don’t fret, don’t whine, and, most importantly, stop scratching. Put a bit of mouthwash on the sting, and you’ll be up on your feet in no time. Just be sure you use an alcohol-based solution – the other kind won’t be of any use to you in this situation.

Ensuring that your cooking stuff is germ-free

One thing hikers and backpackers fail to observe are keeping their food utensils clean. Yes, I know no one will be in the mood for washing plates and cutlery after a hearty meal, but this would mean extending an invitation to all kind of nasty germs.

Now, if you don’t have anything on hand to sterilize your plates, and that includes clean water, you can always use a bit of mouthwash. Shake the bottle for some foam – it will be easier to remove grease and anything sticking to the plate.

Makes body stink go away

Because no good deed should go unpunished, the result of pushing your body beyond its limits is a nasty smell. From where I stand, there are two options – either you wait until you find a source of water to take a bath or do something before the smell curls your toes.

If you have nothing else in your B.O.B, use a tiny amount of mouthwash to wash those stinky body parts. Works great for the armpits, chest, and legs, but I wouldn’t try it elsewhere.

No hand sanitizer? Not a problem.

Hygiene’s important but it becomes vital in a shit hits the fan situation. Apart from the fact that most of the environments you’ll be traversing are riddled with all manner of germs that would like nothing more than to take a bit out of you, your hands will be in permanent contact with icky stuff. I don’t know if your B.O.B contains soap or not, but it should at least have a small bottle of hand sanitizer.

In the event you run out of the stuff, use some mouthwash to sterilize your hands. Might not be as powerful as a regular hand sanitizer, but at least your hands are clean enough to handle food or tend a wound. I don’t judge.

And so, we come to the end of yet another entertaining piece of how everyday items can save our lives in a potentially life-threatening situation. Mouthwash is indeed a good thing to have around the home, regardless if you’re a hygiene freak or not. Just to be safe, you should throw in a couple of small mouthwash bottles in your B.O.B. Missed anything? Drop a line or two in the comment section and let me know.


Other self-sufficiency and preparedness solutions recommended for you:

The Lost Ways (The vital self-sufficiency lessons our great grand-fathers left us)

Survival MD (Knowledge to survive any medical crisis situation)

Backyard Liberty (Liberal’s hidden agenda: more than just your guns…)

Alive After the Fall (Build yourself the only unlimited water source you’ll ever need)

The Lost ways II (4 Important Forgotten Skills used by our Ancestors that can help you in any crisis)

The Patriot Privacy Kit (Secure your privacy in just 10 simple steps)

Where would we be today without mouthwash? Probably brushing our teeth several times per day in order to get rid of all those food pieces. Wouldn’t call it a marvel