Preparing for a Power Outage
The number one thing I prepare for is a POWER OUTAGE when SHTF. Every SHTF series of events includes the inevitable power outage. In fact, whenever the power goes out, even temporarily, I wonder if SHTF has arrived. I lived through several hurricanes in Houston, Texas where the power went out for a week. I’ve also traveled to Beirut, Lebanon several times where I learned how they deal with daily rolling power outages. I find it interesting that Beirut has blackouts each day and people manage to persist with their normal daily lives. One day, in Beirut, I was having my hair cut when the power went out, but the hairdresser simply pulled out a flashlight and continued my hair in the semi-dark. I’m not going to discuss basic prepping in this article. Instead, I am going to present a list of things to consider that relate directly to short-term, long-term, and permanent power outages. In fact, as you develop your preps and preparation plans it is essential to consider every aspect of your preparations with regard to short-term, long-term, and permanent SHTF situations. I would not have considered all these things if I didn’t have the experiences without power. I hope these ideas help others in their preparations.
Plan ahead for living through a power outage
1. Getting stuck in an Elevator. One of the number one concerns of residents in Beirut is not getting stuck in the elevator each day during their power outage. They often live in buildings with many floors of stairs but most people opt to take the stairs rather than risk the elevator. I witnessed someone nearly every day trapped in the elevator. Unfortunately, some of the elderly cannot climb stairs. I learned never to take the elevator after this experience because you really never know when you could get trapped. People die or become seriously injured sometimes because they try to get out and fall into the elevator shaft. Consider the number of people in elevators each day at any given moment! One day, unknown to anyone, the power could go out and strand all those people inside the elevator. I justify taking the stairs as not only a safe option but an opportunity to get a little exercise.
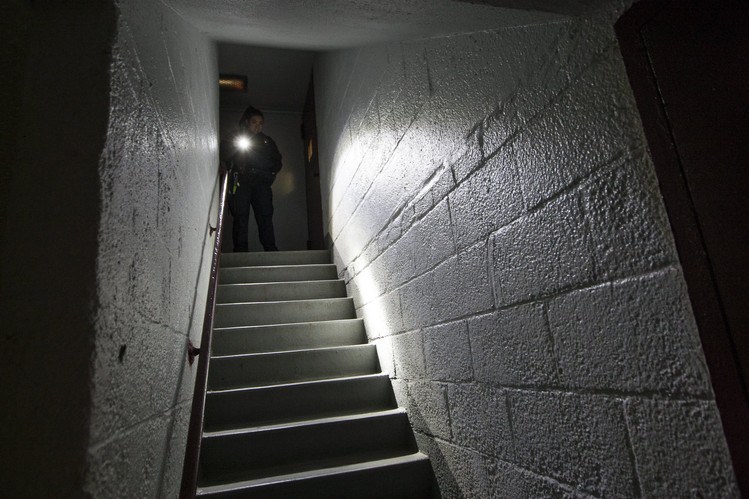
Make sure you take the stairs if you don’t want to be stuck in the elevator.
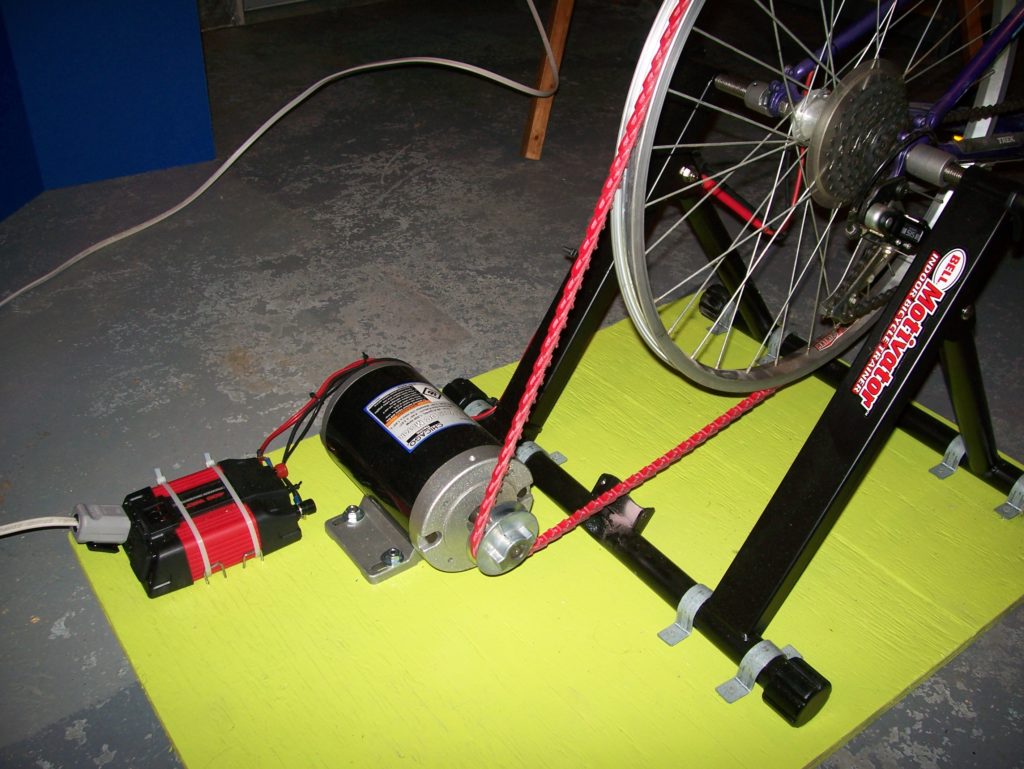
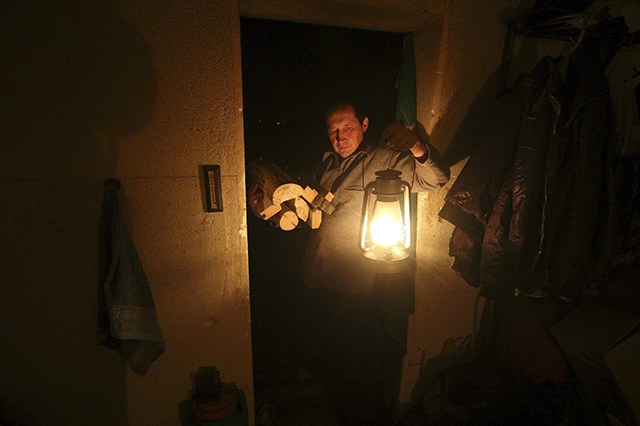
2. Rig your house to have backup lights. In Beirut, many people have cleverly put strings of lights all around the house attached to a car battery. There are two light switches so when the power goes out they simply flip the other switch. I’ve thought of a series of variations for this same idea. In addition to LED string lights, I also have solar string lights. In addition to a car battery, I also have a solar generator and solar power sources. I found solar lights are generally listed as gardening decor. After experiencing Beirut’s daily power outage, I realized no matter how many candles and matches you store, these will run out one day. Keeping your solar items in Faraday cages is most likely the only long-term lighting solution for a variety of SHTF events.
3. Keep keys with you to your home/business/buildings instead of relying on electric card keys. Not everyone needs to worry about card keys but If you do rely on a card key to enter your apartment or buildings this could be a grave problem. You certainly don’t want to get locked out during an emergency so it is wise to keep regular keys with you even if most of the time you rely on card keys.
4. Make sure you own some manual Tools. You need a variety of manual tools and backup tools in case they break. During a hurricane, I couldn’t find my manual can opener and panicked searching around for it for over an hour one day. Now I have six can openers. I try to find very sturdy, all-metal manual tools. The cheap ones are not reliable or worth the risk. I want to purchase a wringer washer like my grandma used to use. It is a shame that we lost contact with manual tools and how to use them. During hurricanes, I’m amazed how fast dirty clothes accumulate, especially if the weather is hot and you have difficulties getting clean. I can only imagine how smelly people will become in SHTF.
5. Prepare your refrigerator and freezer. Learn which foods spoil first so you know what order in which to eat the food during the power outage. Eggs can last longer outside the fridge if you coat them in olive oil. During the hurricanes, I had about 30 jars of pickles in my fridge. Pickles can last outside the fridge so long as every day you skim the top of the jar. I have a butter saver which is the old-fashioned way to preserve butter. The butter saver is a ceramic cup that you fill with butter and place inside another cup with cold water; you have to change the water each day to keep it fresh. If you keep water bottles in the freezer you can prolong the time your freezer will keep the food cold and then switch some of the refrigerator food into the freezer. You don’t want to open the fridge or freezer too much when the power is out so you have to know what is inside, plan carefully, and close the door quickly. Also, you don’t want to throw away your food. During a hurricane people often get together and grill the contents of their freezer with their neighbors. In Beirut I was surprised to see how people cook and save leftovers without relying constantly on power. I didn’t know many things really don’t need refrigeration if you eat it by the next day, like rice or cheese. People with gas stoves fare better than those with electric stoves during hurricanes.
Power outages are too common for you not to be prepared for them.
6. Keep lots of fresh fruit in your house if you think a power outage is coming. Fresh fruit really doesn’t need to be kept chilled and this is one of my last second hurricane preps. During hurricane season I constantly have extra fresh fruit around the house just in case. I think this is a great SHTF practice all the time.
7. Utilize the last drops of water. Being without a fresh source of water becomes an issue much more quickly than you imagine. Obviously, you need water for so many daily activities! When I learn a hurricane is on the way the first thing I do is fill every single container I have with water and cover them with plastic wrap. I put containers of water in the bathrooms and by the bed. I have an old-fashioned water and pitcher which is great for hand washing. I save the old water too, and reuse it for some other purpose. I have a Water Bob that I use to store last-minute water in the bathtub. Also, when the water goes off you can still suck a few more cups out of the pipes for flushing the toilet. If you are lucky enough to foresee any kind of power outage, I can’t stress this last-minute collecting enough. When you think you have enough, think again and keep filling those containers. I have a water barrel for long-term water needs but I plan to rely on that after my short-term water supply is finished. I learned from hurricanes that when the water goes out, you must beware of the first water out of the tap because it is contaminated. I filter my water anyway, but people always get sick drinking contaminated water after the hurricane. Get in the habit of drinking the juice from the can of fruit and cooking with the water from the can of vegetables.
Make cleaning up easier in a Power Outage
8. Baby wipes and Facial Wipes. I stock up on baby wipes before a hurricane because without power it is hard to stay clean. I really appreciate face wipes so I can wash my face without using any water. This prep clearly doesn’t last forever but I figure that the longer you can maintain a ‘normal’ life the better. I plan to prolong ‘normal’ as long as possible, especially for my children.
9. Have Paper plates, napkins, and silverware. These are a staple for the hurricane. Again, this isn’t a long-term prep but it maintains a normal feeling. It takes a lot of water to wash your plates and silverware. Also, it is a good idea to have lots of trash bags because the paper plates end up creating more garbage. The garbage piles up very badly even during a week-long power outage.
10. Flush the Toilet with a bucket of water. If you save the water you use, reuse the water to flush the toilet as long as you can. You’ll eventually need a camping toilet or a bucket. Cat littler is a good idea for the toilet/bucket. Plus, it is essential you bury the contents of the toilet. However, I was pleased that my toilet flushed during outages. The easiest thing to do is scoop water from a nearby pool and flush the toilet. I keep a large glass jug (old wine jug) by the toilet for the hurricane. During hurricanes, there are always reports of people in apartment complexes around Houston who go to the bathroom in the hallways. You have to wonder what is wrong with people who can’t figure out a plan for a week without power when they knew a hurricane was coming in advance and had an opportunity to prepare. The lesson here is that people will do surprisingly disgusting things not long after SHTF.
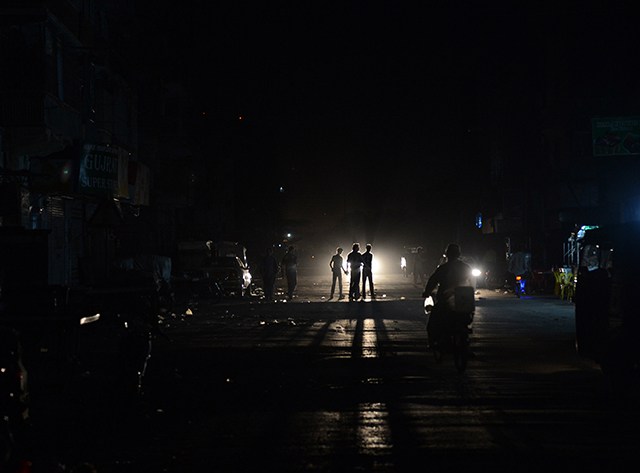
This picture taken on February 24, 2013, shows Pakistani youth crossing a street during a nationwide power blackout in Karachi. Pakistan was hit by a nationwide blackout for more than two hours after the breakdown of a major plant caused power stations to stop working across the country, officials said on February 25. AFP PHOTO/Asif HASSAN
11. Stores will become EMPTY faster than you can imagine. If people notice a need to prepare in advance and that they are not prepared, the food and supplies will disappear within seconds. When we experienced our first hurricane we didn’t understand the need to prepare.
By the time we went to the grocery store, there was NOTHING there but a can of squeezed cheese. The squeeze cheese has become a family joke of what happens if you fail to prepare in time. I’ve been to stores immediately after a hurricane. It is so weird to see stores as they start to restock but the power is still out or unreliable. The credit card machines don’t work and they only accept cash. The gas won’t pump. Some unethical vendors raise the prices even though it is illegal. I’ve been to stores before a hurricane and seen people fighting over cans of food. Right before a hurricane in Houston, it is impossible to find a bottle of water. I read that statistically people have only three days worth of food in their house.
Once, at a Denny’s, a waitress was lamenting to me that a thief came and emptied the contents of her kitchen, which she said was in total: a package of Funyuns, a six-pack of orange Slice and a package of Marlboro Lights. I fear that this woman’s testimony of her kitchen supplies is more typical than I would imagine. In Beruit even the poorest survivors of the recent wars always stock rice and powdered milk.

12. Life without 911. It is not a comforting feeling knowing that you are completely on your own regarding medical problems and safety. I put burglar bars at my house just because I needed that extra feeling of security, especially during hurricanes. I can’t imagine a power outage without self-defense. I’ve heard of looting and rioting in other areas immediately when a power outage begins. I’m proud to say that my neighborhood in Houston has signs that say residents are armed. I’ve never once heard of reports of looting during hurricanes here. I’m certain that the reality of armed citizens keeps away looters and others who would take advantage of a power outage. Also, if you know that you can’t go to the hospital, and maybe the hospital generators are about to go out too, you learn to be extra careful. During the power outage you have to be able to put out a fire yourself, so stock up on fire extinguishers. Fireproofing your home is a good idea.
13. People die doing weird things when the power goes out. After a hurricane, there is always a strange series of reports on the news about how people died in dumb ways. Once, a lady cleaned her bathroom with the windows and door closed and the chemical fumes killed her. She was found dead after the hurricane because she lived alone. The lesson here is that when the power goes out, especially if you are alone, take extra precautions for your safety. The elderly always die during hurricanes because they fail to regulate their temperatures or run out of medicine. This means, that if you are at risk you really need to make sure you don’t run out of medicine, have a solar fan, or some way to keep cool/warm. When I believe a power outage is pending, I check up on my elderly neighbors and offer to help them get supplies. After hurricanes, people drive into the water and drown. During the power outage, people play in the water outside and it turns out that the water is filled with fire ants, rats, roaches, dead cats, dead dogs, worms, fleas, snakes, and the occasional alligator. Some people become immediately unhinged when the power goes out and are ready to kill someone over a can of food. 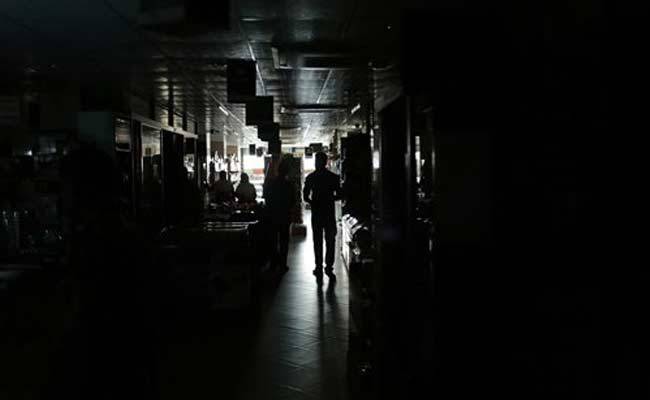
14. Beware of mass evacuations. I’ve witnessed multiple mass evacuations out of Houston. First, people become panicked. Second, everyone runs out of gas. Third, the gas stations run out of gas. Fourth, the freeways become parking lots. In one mass evacuation, a bus from a nursing home exploded into flames because it overheated. One of my friends was in an evacuation and he mentioned that he, his wife, his five kids, and two dogs all became overheated and suffered from heat sickness complete with gastrointestinal issues. Basically, avoid mass evacuations by trying to find another route if you must leave. I think more people died in the mass evacuation than in the hurricane itself.
15. Create a ‘last minute’ shopping list. It is possible you might get the opportunity to do some quick last-second preparations before SHTF. Have in mind a list of warning signs which indicate when you will run out of last-minute supplies. Tell your family if they see certain events begin to happen that they should immediately stock up on water. For example, my family knows that if North Korea bombs South Korea or if a nuke goes off anywhere in the world they promise to immediately stop at the store and buy extra water. This is one of my triggers, along with if I know a hurricane is coming or if some huge terrorist attack happens in the USA. Even if the lights don’t go out, it is never stupid to have bought extra water. In Beirut, the people who have survived the recent wars are very paranoid about leaving the house if they suspect any sort of violence is possible. Thus, if they need last-minute supplies they refuse to travel further than about a block from home.
16. Act like everyone else during SHTF. You certainly don’t want everyone around you to become aware that you are not suffering from a lack of preparation like they are. When the government comes after the hurricane to hand out water and bananas I always get mine like everyone else. Even if you only accept a handout in order to trade it later, just act in need like everyone else. I do not have a plan to accept vaccinations if the government insists we take them during SHTF. I feel they could easily taint medicine, food, and water. I also believe that if certain things happen in SHTF the government might offer food if you trade in guns.
17. Beware of FEMA shelters. Luckily I have not been to a shelter during a power outage in Houston but I know multiple people who shared their experiences. They didn’t feel safe sleeping in a giant room with strangers, there is not enough privacy and there are always reports of rapists and thieves at these shelters. They never have enough supplies. After Hillary mentioned ‘fun camps for adults’ I always wonder if they really want to help you with these shelters or if they will use the crisis to create concentration camps or reconditioning camps. In Houston, these FEMA shelters pop up for a variety of reasons; power outages, flooding, chemical spills, and large apartment fires. They round people up onto buses and deliver them to a makeshift FEMA shelter at a school or a giant sports stadium. I’ve seen some schools have watch towers like prisons. Sometimes they relocate students from public schools to a shelter without parental notification until later. Whatever the case is about these FEMA shelters, now or in the future, I do not plan to ever go to one for any reason.
18. Boards for your windows. During hurricanes, everyone puts boards on their windows in order to keep debris from breaking them. I think boards are a great prep for power outages because you’d not want to have a broken window, they deter people from breaking in and they secure privacy. I also like large wooden privacy screens and wooden shutters. Black-out curtains would become essential for a long-term power outage so you don’t draw attention to yourself.
19. Own backup Radios. After the hurricanes, I realized how important crank radios are for news and a connection to the outside world. I know this is a common preparation but I’m stressing the need to have backup crank radios with phone chargers. It will be important to remain updated as much as possible and any information you can gain about what is going on during SHTF will be helpful.
20. Plan family activities and fun when the blackout starts. When everyone is nervous, obsessed over the news and the power outage begins it is easy to just sit there, waiting and fretting. I always feel sick to my stomach with anxiety when the hurricane starts. Having been through multiple power outages, I find that especially for the well-being of my kids, it is a good idea to make an effort to have a family dinner with candles, play some games, and celebrate the time you have together. Plus, when you plan a family night in reaction to a power outage you don’t feel like a victim and you can de-stress a little. Some of my favorite family memories actually happened during power outages.
Other self-sufficiency and preparedness solutions recommended for you:
The vital self-sufficiency lessons our great grand-fathers left us
Knowledge to survive any medical crisis situation
Liberal’s hidden agenda: more than just your guns
Build yourself the only unlimited water source you’ll ever need
4 Important Forgotten Skills used by our Ancestors that can help you in any crisis
Secure your privacy in just 10 simple steps
The number one thing I prepare for is a POWER OUTAGE when SHTF. Every SHTF series of events includes the inevitable power outage. In fact, whenever the power goes out,