HomePosts Tagged "emergency food"

Being prepared means being prepared all the time; at least in my book it does. That can be a bit challenging at times, especially since we don’t really know what life is going to throw our way. That’s why I always carry a complete survival kit as part of my EDC, along with emergency equipment in my car. This includes a variety of food items so that I always have something to eat with me.

Granted, there are few places where you can drive in this great land of ours, where you aren’t going to find food to eat. Even so, I’ve been in a few. I’ve also been stranded in my car a number of times, whether because of mechanical failure or simply being stuck in traffic. At those times, it’s nice to have something to eat, especially something for the kids to eat. They just don’t understand phrases like, “There isn’t a McDonald’s here in the middle of nowhere.”

Keeping food in your car can also help out with a number of other emergency and semi-emergency situations, such as low blood sugar, heat exhaustion, and low energy. So it really makes sense to keep food in the car, even if you’re not thinking of bugging out or getting stranded. Now the only question is, what to keep? Here are the types of things I find useful to keep in mind.

Water

I always start out by putting a couple of gallons of water in the car. I know some people prefer to use bottles, but I find that I can carry more water in less space if I use gallons. If I need to drink that water, I can easily pour it into water bottles; but if I need to use it for the car, gallons are more convenient.


The water bottle in this picture is aluminum. I always use metal water bottles, because they can be put in the fire. So, I can use this water bottle to purify water, heat up water for coffee, and heat up water for soup. That’s a whole lot better than using a plastic water bottle and needing to have something extra for heating up water.

Gatorade Powder

I live in a hot part of the country, so it’s not unusual to overheat and become dehydrated from sweating too much. Many people deal with that here by drinking copious amounts of Gatorade. Carrying liquid Gatorade in bottles is one option, but it takes up space. Since I’m carrying water anyway, I tend to carry the powdered Gatorade, rather than the bottles.


Of course, the container of powdered Gatorade is pretty large too; about the size of a number 10 can. So for the car, I just dump some of it into a label. This jar held pickles at one time until I cleaned it out and repurposed it for my Gatorade. A plastic container would work too.

You might want some instant coffee, as well as your Gatorade, especially if you do a lot of driving at night. With the metal water bottle and a way to start fires, you’ll be all set to make yourself a cup of coffee, even if you are in the middle of nowhere.
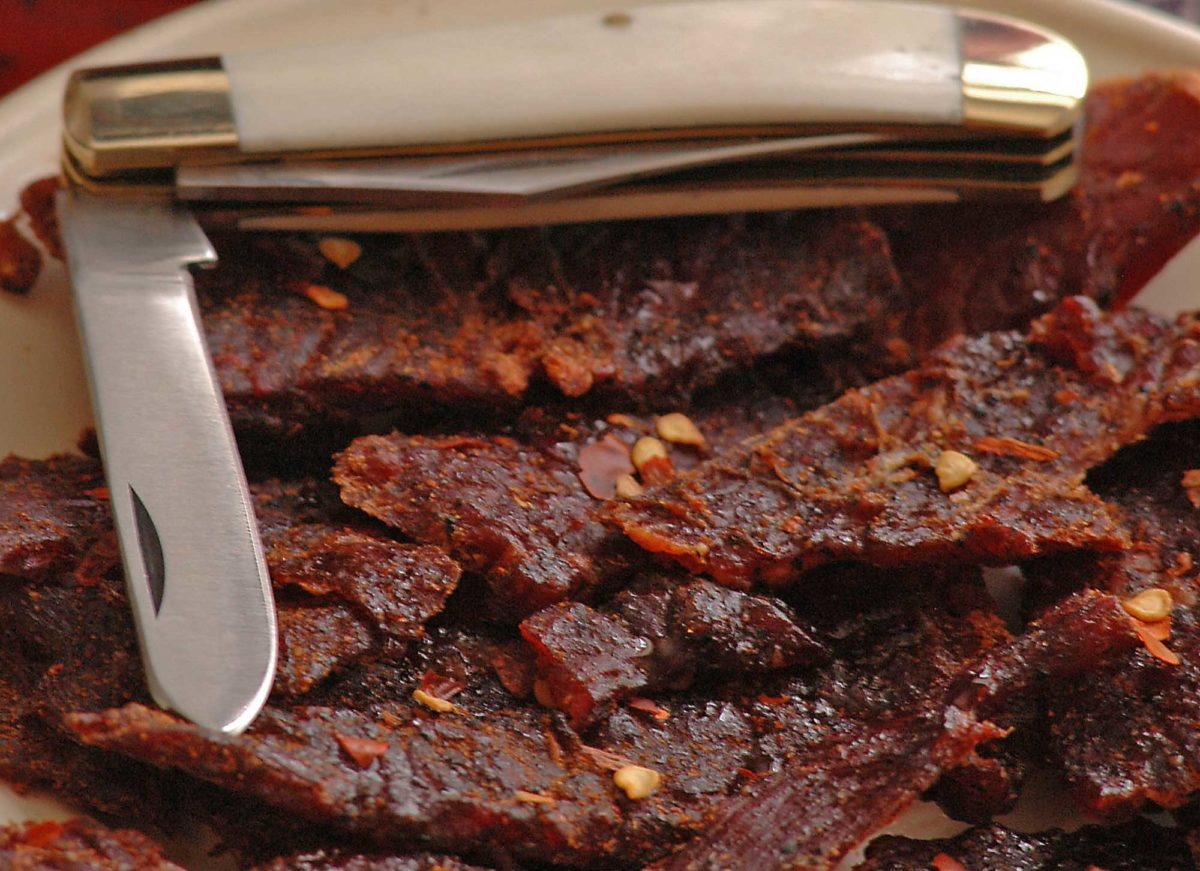
Jerky

My favorite snack food is jerky. Nutritious, low calorie and it is meat; what more could you ask for? The American Indians made jerky as survival food and our early ancestors learned that from them. While there are other places in the world that make something similar, our jerky tradition goes back to those early Indians.

Jerky also provides you with something that you can make a meal out of. Mix it with Ramen noodles and come dried veggies and you’ve got a fairly decent soup; something that can keep you going and warm you up on a cold night.

Just remember that you will need to replace your jerky periodically if you don’t eat it. Heat will draw the oils out of it, drying it even further.

Ramen & Dried Vegetables

Good old Ramen is the college staple. I think every college student goes through a time when they live off of it. It’s a great source of carbohydrates to give you energy to keep you going. Mix it with some cut-up jerky and some dehydrated vegetables and you can have a much heartier soup.

This kind of Ramen comes with dried vegetables already mixed in. I usually dry my own, but I’m out of them until harvest time, so I bought the kind that comes with veggies. While a bit more expensive, it really doesn’t cost all that much. Besides, it comes with a cup to mix it in.

Dry Fruit

Speaking of carbohydrates, fruit is another excellent source for them. If you have someone with low blood sugar, giving them fruit is much safer than giving them a candy bar. The natural fructose sugar is much easier for the body to digest and won’t shock their system like candy will.

Dried fruit also provides you with something that’s easy to take along, if you have to leave your car for any reason; whether due to an emergency, taking a hike, or for work. A bag of dried fruit in your pocket can keep away hunger pains for the whole afternoon.

Canned Fruit

Canned fruit, like dried fruit, is a great source of carbohydrates and sugar. Some people prefer it. I wouldn’t want to carry this around in a backpack, due to the extra weight; but last I checked, that much weight isn’t going to bother anyone’s car.

These mandarin oranges and applesauce are “canned” in plastic cups, with foil lids. That works well for short-term canning; but not for long-term (more than a year). The plastic might release some chemicals into the fruit during hot times, so you want to be careful about that. Even so, canned fruit can be much more refreshing than dried when you need something to eat.

Granola Bars

I’m almost as big a fan of granola bars for emergency food as I am of jerky. It’s worth spending the money to buy the better brands, even though they are considerably more expensive. But the amount of nutrition you get from those better brands makes them worth the money.

Granola bars are great, in that they are an ideal pick-me-up sort of snack, packing a lot of carbohydrates into a small amount of food. Watch out for the ones with chocolate or yogurt, as those ingredients can melt, making a mess for you to deal with.


Nuts & Sunflower Seeds

Nuts are a good source of both fats and protein. Of all the nutrients we eat, protein is one of the most important, as the body can’t really synthesize it well, without having consumed proteins to break down into amino acids. Fats digest slower than carbohydrates, providing you with long-term energy to burn. Eating a combination of fats and carbohydrates together will keep you going for hours.

I always keep sunflower seeds on hand, as well. Like nuts, they provide you with protein and fats, but they also do something else; they help keep you awake. If you’re driving long distances, especially at night, eating sunflower seeds while you are driving will keep you active enough that you can probably keep driving all the way through the night.

Hard Candies & Gum

These might be a bit surprising, but I have a good reason for keeping them in my car. First of all, hard candies are great for that quick burst of sugar, when you need some energy. They’re a whole lot safer to eat than energy drinks too. But they also work to help you if you have a sore throat and don’t have any throat lozenges around. Sometimes, I just carry the throat lozenges and use them as hard candy.

Peppermint is also useful for settling an upset stomach or relieving pain. Peppermint essential oil is one of the best ways to relieve headaches there is. So if you’re in pain, have a headache, or have indigestion, mints are nice to have.

The gum isn’t as much for use as candy, as it is for relieving the pressure in your ears when changing altitude quickly. If you’ve spent any time traveling by air or in the mountains, you’re familiar with the need to pop your ears every once in a while. Chewing gum helps with that. It can also help to keep you awake while driving at night, just like the sunflower seeds.

Breakfast Cereal

This is for the kiddies. If you have small children, breakfast cereals, especially sweet breakfast cereals are one of the easiest ways of quieting them down, when they are hungry. Not only do they like the taste, but they like eating the cereal out of these cool little containers. Yeah, you can put it in baggies too; but for the price, these are worth it.

Doritos

Many people have touted Doritos as a fire starter. Actually, what they are is a good tinder for a fire.

The combination of the dried corn and the oils they are cooked in, make the chips burn well. You can even ignite them with a spark, let alone using a flame to get them going.

If you don’t need them for a fire, I suppose you can always eat them. Doritos, like any other chips, are a good source of carbohydrates.

Being made of corn, rather than potato, they probably digest a little slower; so they’ll help you feel full longer than if you were just eating potato chips.


Spices

This is another one that you might think is a bit strange, but there is a good reason for it.

Whether you’re in an actual survival situation or you’re just stranded somewhere, there’s a good chance that you’ll end up eating things that you might otherwise not want to eat.

But when you’re hungry, you go for what’s available, right?

But that doesn’t mean that you have to choke it down if you don’t like it. Rather, bring some spices with you, so that you can make it more appealing. It’s amazing what you can do with just a few spices, especially if they are stronger flavors that you like.

Both of the container styles shown below were bought on eBay.

The ones with the red stoppers are small test tubes and the others are just miniature containers. I wrote on them with a Sharpie marker and I’d recommend covering that with tape, so that the marking doesn’t wipe off. Put the closed containers in a small zipper bag, so that nothing can rub against the lids and open them.


Other self-sufficiency and preparedness solutions recommended for you:

The vital self-sufficiency lessons our great grand-fathers left us

Knowledge to survive any medical crisis situation

Liberal’s hidden agenda: more than just your guns

Build yourself the only unlimited water source you’ll ever need

4 Important Forgotten Skills used by our Ancestors that can help you in any crisis

Secure your privacy in just 10 simple steps

Being prepared means being prepared all the time; at least in my book it does. That can be a bit challenging at times, especially since we don’t really know what

Beef jerky…the stories I could tell you about this stuff. I’m just going to say that I would marry beef jerky if that were possible (thinking about moving to state or country). Anyway, beef jerky’s awesome and, from where I stand, has but one caveat – not enough of it to go around. I mean, c’mon, I know it’s supposed to be emergency food or trail food, but who in God’s name eats just one 20g bag? It’s like saying “hey, it’s game night, and I’m gonna drink just one beer or eat one bag of chips.”

As far as a survival food is concerned, jerky’s the right call since it’s packed with just enough protein and fats to keep that engine of yours running. Sure, they’re salty AF and feels like you’re chewing on a rubber band, but it’s amazingly delicious. Since most of you are busy with your jobs and have neither the time nor the mood to replenish your beef jerky stocks, I thought about sharing with you my mouthwatering homemade beef jerky recipe.

It’s super easy to make and, most importantly, it mostly requires ingredients you probably have in your pantry. Why make beef jerky at home when you can always order some online? Because, let’s face it – as cheap as store jerky is, it’s pretty hard to find one that’s exactly the way you like it. Some are chewy, others salty as Hell and some, well, taste like crap.

First of all, preparing your own beef jerky puts you in full control of the dish, from choosing the beef cuts, all the way to the cooking part. Second, by choosing to cook rather than buy, you can make it as salty or sweet as you like. Last, but not least, beef jerky’s one of those recipes that don’t require an advanced degree in rocket science in order to prepare.

So, without further ado, here’s how to make some delish beef jerky at home.

Ingredients and Utensils

For this recipe, you will need the following:

  • Angus beef sirloin. I use around two pounds of beef for this recipe. Once you get it dried, you end up with one large zip-lock bag of beef jerky.
  • Worcestershire sauce (three-quarters of a cup).
  • Soy sauce (three-quarters of a cup).
  • Smoked paprika (one tablespoon).
  • Honey (one or two tablespoons).
  • Ground black pepper (two teaspoons).
  • Hot chili flakes (one or two tablespoons, depending on preference).
  • Garlic powder (one teaspoon).
  • Onion powder (one teaspoon).

That’s it for the ingredients. As for kitchen utensils, you will need a large bowl to mix your ingredients, an oven tray, baking paper, a pair of scissors, and, of course, a zip-lock bag for the jerky. All done gathering your utensils and all of the ingredients? Take your time. I ain’t going anywhere. When you’re ready, here’s how to put everything together.

Preparing mouthwatering beef jerky

Step 1. Take your beef cut out of the bag and wash it thoroughly. Dry with a couple of paper towels or place in a strainer.

Step 2. In a large bowl add your Worcestershire sauce, soy sauce, smoked paprika, honey, ground pepper, hot chili flakes, powdered garlic, and powdered onions. Whisk the ingredients using a fork or, well, a whisk.

Step 3. Cover the bowl with some plastic wrap and place it inside the fridge for half an hour.

Step 4. It’s now time to tend to the meat. Using a very sharp butcher’s knife, cut the meat into thin strips – if it’s easier, make stake-sized bits.

Step 5. Take a big zip-lock bag from the pantry and put the beef inside.

Step 6. Get the bowl out of the fridge and pour over the beef. Seal the bag and place in the refrigerator. Leave the meat to soak up all those juices for at least a couple of hours. Ideally, you should leave it overnight. Remember – the longer you marinate your meat, the tastier it will be. I usually keep it in the fridge for one or two days.

Step 7. When you’re ready to cook the meat, preheat the oven to 176 degrees – yup, you’ll need ultra-low heat. The idea is to dry the beef cuts, not to bake it.

Step 8. Take the marinated beef out of the bag.

Step 9. Place the meat on an oven tray covered with baking paper. Use a paper towel to soak the excess marinade.

Step 10. When the oven reached the desired temperature, stick the tray in the oven and cook for 4 to 5 hours. Every hour or so, flip the beef cuts.

Step 11. When they’re done, take them out of the oven, allow the cuts to cool down, and cut them into thin strips using a pair of scissors or a knife. Bag and tag!

Another Way to Prepare Beef Jerky

Don’t go anywhere, because this was just the warm-up. Okay, so you now know how to prepare beef jerky at home. But can you do the same, say during a shit hits the fan situation? Beef jerky is, more or less, the beauty of the best – thought it looks totally unpalatable, it’s actually delicious, nutritious, and, on top of that, it can be made anywhere and with any type of meat.

Now let’s imagine for a moment that you’re lost in the woods and you run out of food. Obviously, you’ve got to do something about it. Now, if you still have your bug out bag with you, whip out a snare and wait. Keep in mind that beef jerky can be made with any kind of meat.

However, if you want your trail snack to contain all the proteins and fats your body needs to keep on going, you would want to stick with red meat or fish. When you’re done with the gutting and butchering parts, here’s what you will need to do in order to prepare jerky.

Step 1. Find a clean spot to set up your working area.

Step 2. Use your survival knife or a very sharp rock to cut the flesh into very thin strips (half a centimeter). Don’t forget to cut across the grain, not with the grain (those muscle fibers will make meat harder to chew).

Step 3. While the meat’s still wet and tender, season it with your condiments of choice. I like to keep stuff like ginger, cumin, sugar, salt, pepper, and chili in small pill bottles. You can also make your own mix which you can use to season the meat. Put a little bit of sugar if you have some in your bug out bag.

Step 4. It’s now time to create some sort of drying rack. Look around for twigs, long stick or branches. If there’s nothing available, you can always hang the meat cuts by a low-lying branch using heavy duty zip ties. Just be careful to place that meat within eyeshot because it’s bound to attract some unwanted attention (flies, mosquitoes, and, yes, even bears).

(Optional) If you want to a little smokey flavor to your meat, place it over a small campfire. Don’t leave there too long, though. You’ll want to dry your meat, not cook it. Of course, there’s nothing wrong with some BBQed game, but it tends to spoil faster.

Step 5. If you manage to improvise a drying rack, flip the meat every couple of hours. Depending on weather conditions, like wind, humidity, and temperature, it can take up to four days for the meat to lose all moisture.

Yes, I know it’s a painstaking process. More so because you’ll need to be on the lookout for critters. On that note, when it’s time to hit the sack, don’t forget to bring the meat inside your tent or improvised shelter. Obviously, you won’t be able to keep an eye out while you’re asleep.

Step 6. After a couple of days have passed, take a look at the meat. You’ll know it’s ready to eat when the meat has a brittle aspect. If you prepare jerky from red meat, the color you’re looking for is a purple-brown. On the other hand, if you’re using white meat, the jerky will turn pink-grey when it’s done.

Step 7. All that remains to be done is to cut the meat into thinner strips and to store it in a zip-lock bag or an airtight container.

Wrap-up

Taking all these facts into account, I would have to say that jerky is indeed the ultimate survival food. Given the right storage conditions, a batch of jerky can last for at least a couple of months, if not for a whole year.

Now, as far as the oven-drying version is concerned, I would advise ditching the salt. Yes, I know that salt and jerky is a marriage made in Heaven, but the soy sauce adds and smoky taste to the meat, which means that it doesn’t need extra. Of course, if you’re not a big fan of soy, you can always replace with two tablespoons of rock salt.

I don’t know about you, but I like to add some kick to my jerky. If you want your snack to be spicier, you can add half a teaspoon of Tabasco in addition to the chili flakes. Yes, I know it sounds pretty hardcore, but hey, at least your jerky won’t be bland.

One of my friends told me that it’s also possible to prepare beef jerky using a dehydrator. Remember my powdered eggs recipe? Well, the method’s more or less the same. The only advantage of using a dehydrator instead of a regular oven set on ultra-low heat is that it reduces the cooking time by at least one, maybe two hours. If you have one of those gadgets in the kitchen, you should definitely try it out.

One more thing – the meat itself. Though I highly recommend using sirloin for this recipe since the cut will be, well, chewier, you can use whatever meat you prefer. Just be sure it has the same amount of fat as sirloin. Haven’t tried it yet, but from what I heard, jerky prepared from fish like rainbow trout, tuna or salmon is absolutely divine. Trouble is that it’s very hard to get ahold of a good recipe and most of the stuff on the market looks way too nasty.

So, here’s where I take my love. Hope my little winding has managed to convince you that making your own beef jerky is better than having to go through hundreds of Google pages in order to find the right one. As always, don’t think of cooking as something you need to do – have fun around the kitchen. Play some tunes. Work on your air guitar skills; whatever floats your boat. What do you think about my beef jerky recipe? Hit the comments section and let me know.

Beef jerky…the stories I could tell you about this stuff. I’m just going to say that I would marry beef jerky if that were possible (thinking about moving to state

One of the central pillars of preparedness is being able to feed yourself. Preppers focus some of their attention on stockpiling food as well as creating renewable sources like gardens or livestock (chickens and rabbits) as protection against the possibility that the local grocery store is no longer able to provide something to eat. The average person it has been said only has about 3 days’ worth of food in their homes and if that is true, feeding your family in certain disasters could prove to be possibly your biggest problem.

We have already seen time and time again, scenes of grocery store shelves stripped clean anytime there is a concern in the public. Greece was just the most recent example of this behavior preppers warn against. Starvation would surely be a horrible way to die and it seems as though collectively we all consider this a threat that must be dealt with to ensure the safety of our loved ones. The question is how you will deal with the risk of not being able to feed your family. Will you stock up on food now while you are able, or will you try to swim through the crowd of potentially thousands of other people raiding the local grocery store in the hopes that you can secure enough food to last your family through whatever disaster you are facing?

For many preppers, this may not be as grave of a concern from your perspective. If you have been diligently preparing, you may already have quite a large supply of food that would conceivably last you and anyone else in your home a long time. You might have plenty of food stocked already so you plan to sit back in the safety of your home while everyone else goes crazy; fighting over the last can of olives. But as you are sitting back feeling confidently comfortable, gazing at your full pantry, those 5-gallon buckets of Winter Wheat and metric tons of beans, have you ever considered how long that food will actually last you when you start needing to eat it?

Determining how long your food storage will last

The default amount of calories we consider to be recommended for an adult is approximately 2,000 calories per person. I know there are differences in age, activity level, and gender, but for simplicity’s, sake let’s just take that amount as our baseline. For general health, each member of your survival group will need to consume on average 2,000 calories per day to simply maintain a “healthy” weight.

Rice and beans are a great long-term stable food supply for preppers. They have an impressive storage life as long as they are kept cool and dry and they are very cost-effective as well. You can purchase a 50-pound bag of rice for around $20. Rice and Beans together give you carbohydrates and protein. Each 50-pound bag of rice has approximately 500 servings and there really isn’t anything like the satisfaction you can get from staring at a shelf full of rice and beans. But how long will that last your family?

A 50-pound bag of rice has about 500 servings.

Each serving (1 cup) of rice is 206 calories

Each serving of pinto beans has 245 calories

If you ate three meals of Rice and Beans in a day you would consume only 1353 calories. (451 X 3). If you had a family of 4, that 50 pound bag would last you about 41 days but that isn’t all the calories you would need. To just stay healthy and not lose any weight you would need to come up with another 700 calories per person, per day.

Calories are more important to measure than servings

Well, you could supplement that rice and beans with the wild game you plan on hunting, right? Did you know, a 0.5-1 pound roast venison tenderloin has a whopping 127 calories? That doesn’t get you much further toward your calorie targets, does it? What about chicken? One grilled chicken breast has only 141 calories.

Now let’s make the assumption that life without grocery stores is going to require more work out of you. Possibly much more work. So, the 2,000 calories per day amount aren’t likely to be a realistic count of the number of calories you will actually need. You might be digging latrines to deal with sanitation, hunting for food, or foraging in the forest all day. You could be patrolling your neighborhood or lugging water from a mile away. You would be washing clothes by hand, chopping wood; building fires and the 2,000 calorie amount would likely be more like 3,000 or 4,000 for some people just to maintain their weight. How long will your food last now?

To really get a good idea of how much food you have, you need to look at how many calories that food you plan on eating is going to give you. You can’t simply look at serving amounts and call it done because a serving of a fruit roll-up might make you think you will get a meal out of it, but they won’t come anywhere near close to what you need.

In addition to food make sure you plan on a good source of vitamins to augment austere eating conditions. This won’t be as good as the real thing but could help stave off some health effects of a less than ideal diet. You should take the time to conduct at least a cursory inventory of your food stockpiles, check the serving size and calorie amounts. You can get really detailed and put this into a food storage spreadsheet if you like, but that will give you a true picture of the amount of time your food will last the number of people you have. Instead of looking at this from a poundage viewpoint, you consider calorie counts. That way it will be easier to forecast how long your food will last and adjust for different people in your care.

What happens when we start to starve?

The more food you have, the better off you will be in a collapse scenario where we have no hope of the lights coming back on. Gardens and livestock greatly add to this cumulative total you have, but unless you have a very productive garden or a large supply of animals, the food you have on hand is likely to start running out. At some point in time, if the supply of food is interrupted, rationing might be a consideration you need to make.

Another consideration is the needs of the various people in your group. You may find you have hard choices to make. Someone who is old for example, who is less active may not get the same share of food as a younger person who is working outside all day. You may have to choose between roles and which people in which roles are given extra allotments of food. What if someone is out digging graves all day? Do you believe that someone who is sitting inside or not working as hard should get the same ration of food or the same dispensation of calories? If so, how long before the person who is working physically harder starts to decline in health? How long could you shovel or defend your home in a starvation state?

We talk about food storage as a solution to the grocery stores closing, but that will only buy us time in a true collapse. Yes, it will help your family tremendously to have additional food stocked up, but it will run out if the crisis lasts long enough. When calories are seriously limited, health starts to decline.

When we don’t get enough calories for a long enough time, our organs begin to shrink and gradually start to lose function. We can have bouts of chronic diarrhea, anemia, reduction in muscle mass, and the weakness that goes with that.

We have all seen images of refugees on TV. Poor children covered in flies with distended bellies staring blankly at the camera might elicit a sense of guilt in us today as we sit on the sofa and flip through the channels. In Haiti, there are areas where people make and sell mud pies for people to eat because there is no other food and the worms in their stomachs would rob the person of any nutritional value from real food before it could help them.

What will you do when these poor souls are your children?

Kwashiorkor and Marasmus

Kwashiorkor and Marasmus are two conditions that are seen with acute malnutrition. It causes the swollen bellies you see on TV and I can see this appearing in our country where we to go through some horrible SHTF event. The pictures you see on TV could be not from around the world, but in your own backyard.

As in other places in the world, this will lead to violence and death as everyone fights for food resources to fend off dying.

“Kwashiorkor is the most common and widespread nutritional disorder in developing countries. It is a form of malnutrition caused by not getting enough protein in your diet. Foods that contain protein include meat, milk, cheese, fish, eggs, soy, beans, nuts, seeds, and some types of grains like quinoa.”

Children who are deprived of calories for long enough will never reach their full potential for height and growth. These two conditions are treated in the beginning by simply getting more food with a healthy balance of protein. In more severe cases, you can’t just give a starving person a cheeseburger. You will have to introduce food slowly and something like powdered milk is good (reconstituted of course) to start them out until strength has increased and more food can be slowly added to their diet.

Anyone who has children will tell you that they will do anything to take care of their family. This manifests itself in a lot of imaginative ways, some violent. Before you have to get to that place where you are thinking of doing whatever is necessary to feed your family, make plans now to have as much food security as possible. A good strategy of food storage to include foods you eat every day, long-term store-able food, and renewable sources will put you in a better position to provide for your family. Think about this now so you have to worry about this less when it actually is an issue.

What are your food storage plans and how long will your food hold out?


Other self-sufficiency and preparedness solutions recommended for you:

The vital self-sufficiency lessons our great grand-fathers left us
Knowledge to survive any medical crisis situation
Liberal’s hidden agenda: more than just your guns
Build yourself the only unlimited water source you’ll ever need
4 Important Forgotten Skills used by our Ancestors that can help you in any crisis
Secure your privacy in just 10 simple steps

One of the central pillars of preparedness is being able to feed yourself. Preppers focus some of their attention on stockpiling food as well as creating renewable sources like gardens

The various types of emergency foods that are available, coupled with the commercial hype surrounding them, can understandably lead the prepper to make less than optimal decisions with regard to the types and amounts of emergency foods to acquire. In this article I will briefly recap the most common types of emergency food and describe how each would fit in to a practical survival strategy.

The common types of emergency food stores include:

  • Canned Foods – Canned foods consist of fruits, vegetables and meats that have been prepared for long-term storage in jars and cans. Canned foods can be prepared at home and are available at virtually any grocery store. Depending on the type of food, they can either be ‘dry-pack canned’ or ‘wet-pack canned’. (Wet-pack canning involves immersing the food in hot water – sometimes in a pressure cooker – prior to vacuum-sealing.) Dried beans and dried white rice are the dry-pack canned foods most commonly stored by preppers and survivalists because they have an extremely long shelf life (up to 25 years!) and provide a good supply of proteins and carbohydrates.
  • mre

    MRE’s are a common choice for Emergency Food.

    Dehydrated Foods – Dehydrated foods have been processed in a food dehydrator to remove much of their moisture. This inhibits the growth of microorganisms that cause the food to spoil.

  • Freeze-dried Foods – Freeze-dried foods have been processed in a commercial freeze-drier in such a way that virtually all water has been removed (much more than is removed by a dehydrator). This process results in food that is lightweight and which has a very long shelf life.
  • Cured Meats – Cured meats have been treated with chemicals (usually nitrates) in such a way as to inhibit the growth of microbes and extend the unrefrigerated shelf life of meats.
  • Smoked Meats – Smoked meats have been exposed to the heat and smoke such that the increase in temperature dehydrates the meat (which inhibits microbial growth) while the smoke deposits an anti-microbial chemical layer over the meat.
  • Meals Ready-to-Eat – Originally developed for the military, MREs are portable, long-shelf-life food packets that contain complete meals. MREs can quickly be prepared and consumed. Often these packets include built-in food heaters and provide complete meals.

ISSUES RELATED TO NUTRITION

In general, all of the above forms of preserved foods provide good nutritional value. While the heating associated with some canning processes can degrade some water-soluble vitamins such as vitamins A, C, thiamine and riboflavin, they still serve as a good source of these and other nutrients. While nutritional value is preserved in the above types of foods, the nitrates used to cure meats have been shown to be carcinogenic in larger quantities. Salt and sugar may be added to canned foods to improve taste, which can also affect the nutrition offered by such foods (be sure to check the labels of any canned foods for references to sugar and salt!).

MREs provide good calories and some nutrition, but also contain a large quantity of sodium, which has been show to have adverse health effects when consumed excessively (MREs are designed to simply “get the soldier across the battlefield”).

SHELF LIFE OF DIFFERENT EMERGENCY FOOD TYPES

The shelf lives described here assume the foods are kept at room temperature of about 70 degrees Fahrenheit.

Canned fruits and vegetables typically have a shelf life of between 2 and 5 years. There is much anecdotal evidence of canned meats being eaten (and having good flavor and nutrition) after being stored for as long as 10 years. Some dry-canned foods such as dried beans and dried white rice can have a shelf life that exceeds 25 years.

Dehydrated fruits and vegetables typically have a shelf life of up to one year, while dehydrated meats have a shelf life of only about one month.

Freeze-dried foods have a shelf life that ranges between 5 and 25 years, depending on how well it is packaged (plastic food pouches have a shorter shelf life, while cans have a a much longer shelf life).

Smoked meats have an unrefrigerated shelf life of only a few weeks.

Cured meats have an unrefrigerated shelf life that ranges from a few weeks to as long as a year, depending on the type of meat and how it was cured.

Canned foods offer offer the most nutrition at the least cost. The other forms of food have the advantage of lighter weight and/or longer shelf life, but at significantly greater cost.

Smoked meats have an unrefrigerated shelf life of only a few weeks.

NOTE: While the storage of cured and smoked meats is of limited value in the time leading up to disaster; the ability, equipment and supplies required to smoke and cure meats will certainly be valuable skills to have in the aftermath if refrigeration systems are unavailable.

Modern MREs have a shelf life of between 3 to 4 years when stored at room temperature, however that shelf life can decrease rapidly when stored at higher temperatures (in a desert environment the shelf-life for a MRE may be as short as one month!). Also, when purchasing MREs you should be certain of their date of manufacture – otherwise you won’t get the benefit of the full shelf life.

DETERMINING YOUR OWN EMERGENCY FOOD NEEDS

A good way to begin to understand the types of emergency food supplies you will need is to consider how you will most probably be traveling during and after a major disaster. If you expect to be sheltering-in-place then the bulk of your emergency food supplies should consist of canned foods, as canned foods offer a very good shelf life and provide a lower cost per meal than other forms of emergency food. Even though canned foods are heavier than other types of emergency food, if you are sheltering-in-place then portability becomes a less important consideration than cost.

If you expect to be traveling on foot for an extended period, then the weight of your food will be a major consideration. In these circumstances you should plan on having freeze-dried food available, as freeze dried foods have an extremely long shelf life and are extremely light.

If you expect to be traveling by vehicle then weight is less of an issue and the ability to “eat while on the move” becomes important. MREs are an excellent choice for these circumstances because they can typically be unpackaged, heated and eaten without the need to interrupt travel. Also, because they utilize a chemical reaction to generate heat, the preparation of MREs does not produce smoke that might attract undesired attention.

When considering these factors you should not only be anticipating your travel needs when bugging out, but also potential future needs to travel overland for trade, barter and defense. Of course no one has a crystal ball to be able to predict these needs with certainty; however you should at least be able to develop a reasonable estimate. Additionally, you should build into your estimates the expected duration of the disaster, which should ideally be the amount of time required for you to become self-sufficient.

A quick way to estimate your emergency food needs is to answer the following questions:

  • How many people are in my group?
  • What duration disaster (in days) am I planning for or how long do I anticipate before achieving self-sufficiency?
  • If bugging out to another location, how many days of travel will be required?
  • In the aftermath of disaster, what percentage of total group members’ time will be spent on extended trips away?
  • What percentage of meals will utilize basic dry-canned foods such as beans and rice?

The answers to these questions can help you to estimate your own emergency food needs. If MREs are used exclusively for travel, for example, then the total number of MREs needed for travel is simply the product of number of group members, number of days of travel and number of meals per day. You may then increase this number so as to plan to use MREs for a percentage of post-disaster travel when concealment and speed are a top consideration.

Amounts of freeze-dried meals can be estimated as the product of average number of people traveling, the number of days of travel and the number of meals per day (while there will be some double coverage of travel by MREs and freeze-dried food, it’s never a bad idea to have some extra food on hand).

The balance between dry-packed “beans and rice” type meals and canned foods will be much more subjective, however by thinking in terms of the percentage of beans-and-rice meals vs. other meals, and of course considering the number of people you are planning to feed and the expected duration of the disaster, you will be able to identify the types and quantities of these bulk emergency foods that will meet your preparedness needs.

NOTE: Even before disaster strikes you should normally be consuming and replenishing your supply of canned disaster food so that you do not find yourself with a cupboard filled with expired canned food when disaster does strike!


The various types of emergency foods that are available, coupled with the commercial hype surrounding them, can understandably lead the prepper to make less than optimal decisions with regard to