HomePosts Tagged "vinegar"

Remember when we were kids, and our moms used to tell us to wash the carpets with water and vinegar? Yeah, the aroma alone was enough to send an elephant to the ICU but, surprisingly enough, everything smelled like brand-new afterward. And because I hated doing the carpets and upholstery as a kid, I did my best to stay as far away from that stuff as possible. Big mistake!

Anyway, vinegar does not only go well in salad dressing or to clean various household objects but has many other purposes. And since we simply cannot ignore the fact that vinegar’s just as useful around the house like baking soda and rock salt, I’ve decided to write this not-so-short and an awesome piece on how you can take full advantage of the ghost of wine past in an SHTF situation.

So, without further ado, here are 14 reasons why every prepper should stockpile as much vinegar as possible.

  1. No more bumper stickers and decals

The worst thing about buying a car from a second-hand dealer is that no matter how hard you look at it, you’ll still end up with a surprise or two. Mine was bumper stickers and decals. I don’t know who was the former owner of my car, but that person really had a thing for sticky logos and drawing.

I’m not kidding you when I say that those damned things were everywhere – windshield, side windows. There’s was even one on the left tail light. Anyway, the dealer offered a pretty good bargain, and apart from the stickers, the car was otherwise in great shape.

Now, if you somehow wound up in the same situation as me, forget about WD 40 or sprays for bumper sticker removal. Put two tablespoons of vinegar in a bucket of water and pour over the area covered in stickers.

Wait a couple of minutes and then use an ice scraper to remove the sticker. It works like a charm, and the sticker will come off without leaving any glue marks on the window. You can also try it on decals – same recipe, but repeat the process three times for good results.

Related – Knowledge to survive any medical crisis situation

  1. Getting rid of acne

Acne’s now a welcoming sight, regardless if you’re 14 or 44 (yeah, it can happen during late adulthood too). The bad news is that apart from taking your prescription meds and ensuring that your face is al clean and oil-free as possible, there’s not much you can do about it; and, of course, there’s the scratching.

Now, in order to get rid of the itchiness, mix water and four teaspoons of apple cider vinegar in a glass. Use this mixture to wash your face and rinse with clean water. This also helps the tissue heal faster and prevents the icky stuff from spreading.

  1. Making your candle or propane lantern wicks last longer

Emergency candles and propane lanterns are great for those not-so-romantic moments when the power grid fails. However, neither is a long-term solution. If you have reasons to believe that you’ll need to brave the dark a while longer, try soaking the wicks of your emergency candles and propane lanterns in an all-vinegar solution. This will give you at least 3 to 4 hours of flame per candle\lantern.

Related 4 Important Forgotten Skills used by our Ancestors that can help you in any crisis

  1. Removing Warts

Even the thought of having to endure another wart makes my skin crawl (had one right on my sole). You can go to your local drug store and spend tens of dollar on wart removal solutions which won’t help you with anything other than making a dent in your wallet or you can try this neat prepper remedy.

In a tall water glass, put four teaspoons of apple cider vinegar, and one teaspoon of vegetable glycerin. Shake and leave it be for a couple of minutes.

In the meantime, wash the wart and the surrounding area with soap and clean water and dry off with a towel. Dap both the wart and the area around it with betadine or another disinfectant.

Now, soak a gauze in the vinegar+water+glycerin mixture and clean the warty area. Do these two or three times a day. By the end of the second day, you’ll see that the wart begins to shrink. Continue the treatment until the bulge disappears. You’re welcome!

  1. Stop the tummy-rumbling.’

In case you forgot to buy antacid or any other kind of tummy pill, you can soothe your rumbling stomach by drinking a glass of water mixed with two teaspoons of vinegar. Also does wonders for heartburns, heartaches, and, possibly, broken hearts.

  1. No more dandruff

This may no quality as an SHTF situation, but then again, dandruff is neither healthy nor aesthetic. I found that regular anti-dandruff shampoos don’t do shit about that white stuff. However, if you add a splash of apple cider vinegar to your hair before using regular shampoo, dandruff will bother you no longer.

Here’s what you’ll need to do – get some moisture into your hair and add two squirts of vinegar. Massage your scalp and wait at least five minutes. Rinse with plenty of water. Finish up with regular shampoo or conditioner.

Bear in mind that depending on your type of hair and skin you may need to repeat this process. I myself had to wash my hair three times a week with vinegar and shampoo for two weeks before I got rid of dandruff.

  1. Best pest-repellant ever

I admit that I sometimes forget to drive my pets to the vet clinic for their regular checkups and, of course, delousing. But that doesn’t mean that I allow those awful fleas to do as they will.

Now, if you really haven’t the time nor the money for the vet, because shit happens, put one teaspoon of vinegar in a glass of water and use this mixt to wash your dog’s fur (haven’t tested it on my cats ‘cause, you know cats and waters really don’t mix). Wait for at least a couple of hours before rinsing with plenty of water.

Related –How to make the ultimate painkilling tincture

  1. Making veggies green again

You really don’t need to throw every wilted veggie in the fridge. All they need is a little love, tenderness, and a splash of apple cider vinegar. In a spraying bottle, mix one tablespoon of vinegar with cold water. Give your veggies good spraying, and they’ll regain that hunter-green color in no time.

  1. Keeping diabetes in check

You know that you really don’t need to use that insulin pen each time there’s a small variation in your blood sugar levels, right? In most diabetes cases, glucose levels can be kept at a normal value by eating the right stuff.

Now, in case you have issues controlling that blood sugar level, drink a glass of water mixed with two teaspoons of apple cider vinegar. Please keep in mind that this is only a short-term solution, which means that you will still need to take your prescription meds and use insulin if there are bigger variations.

  1. Removing rust from moving parts

In the past, vinegar has been successfully employed to remove rust from moving parts like cogwheels, springs, and levers. You can also use it to get rid of rust from just about any kind of metallic.

In order to free up a mechanism that simply refuses to budge on account of the rust, take out all the moving parts and soak them overnight in water and vinegar. Take out, allow them to dry, and reassemble the mechanism. If there’s still friction, take it apart again and repeat the procedure.

  1. Removing candle wax from wooden surfaces

Nothing beat a romantic candlelit dinner, especially after the light goes out. Dinner – good, removing candle wax from furniture and tablecloth – very, very bad. Well, it’s not that hard to get the excess wax out, but it tends to leave a nasty behind.

Here’s how to get rid of candle wax fast and easy – use a hair drier to heat up the wax. Mix water and vinegar in a small bowl. Use this concoction to scrub the area.

  1. Eating pesticide-free veggies

I love going to the farmer’s market to purchase my favorite veggies. Still, whatever I do doesn’t seem to make a difference when it comes to the pesticide part – sure, there, more or less, safe to eat, but they sure have a funky taste. Sometimes I even contemplate skipping dinner and grab some take-out because I lack the emergency to wash every lettuce or cabbage leaf.

In searching for ways to get rid of dirt and pesticides from veggies fast, I stumbled upon this little prepper’s trick which involves the use of apple cider vinegar and baking soda. I can state for the fact that it works – even the taste’s different.

Here’s how to do it – fill your sink with clean and cold water (don’t forget about the plug). Add one tablespoon of apple cider vinegar and one tablespoon of baking soda. Now place your veggies inside and let them soak for at least 15 minutes. Drain the water, rinse with cold water, and enjoy a pesticide-free veggies dinner.

Related –The vital self-sufficiency lessons our great grand-fathers left us

  1. Crafting a fly trap

Word of caution before I tell you how to piece together the trap – this only works for gnats or fruit flies. I wouldn’t try out on other flying critters.

Anyway, grab the biggest mason jar you find around the house and use a nail or your survival knife to poke a couple of holes in the lid. Bear in mind that these holes must be big enough for the flies to pass through. Fill the jar halfway with apple cider vinegar and place on the kitchen counter. Attracted by the sweet smell, the flies will go inside and drown.

  1. Getting rid of callouses on your feet

Staying on your feet from dusk till dawn is probably one of the best health shots. Still, your feet might have a thing or two to say at the end of the day. Callouses are nasty, and there but the first step to other ‘wonderful’ things such as blisters and even warts.

There’s a way to get rid of those callouses and, of course, the not-so-great smell that goes along with them. Before hitting the sack, fill the bathtub with warm water. Add two tablespoons of apple cider vinegar and soak your feet for at least 20 minutes. I personally prefer to add a little bit of Epsom salts – they’re very soothing for the skin and prevents crackling.


Did I manage to convince you to stockpile more apple cider vinegar? Hit the comments section and let me know your thoughts.

I thought you needed a break from our Weed Week. 

However, starting a pot stock-pile is also a very good idea.

I’m just saying.

God Bless.


Other Self-sufficiency and Preparedness solutions recommended for you:

The Lost Ways (The vital self-sufficiency lessons our great grand-fathers left us)
Survival MD (Knowledge to survive any medical crisis situation)
Backyard Liberty (Liberal’s hidden agenda: more than just your guns…)
Alive After the Fall (Build yourself the only unlimited water source you’ll ever need)
The Lost ways II (4 Important Forgotten Skills used by our Ancestors that can help you in any crisis)
The Patriot Privacy Kit (Secure your privacy in just 10 simple steps)

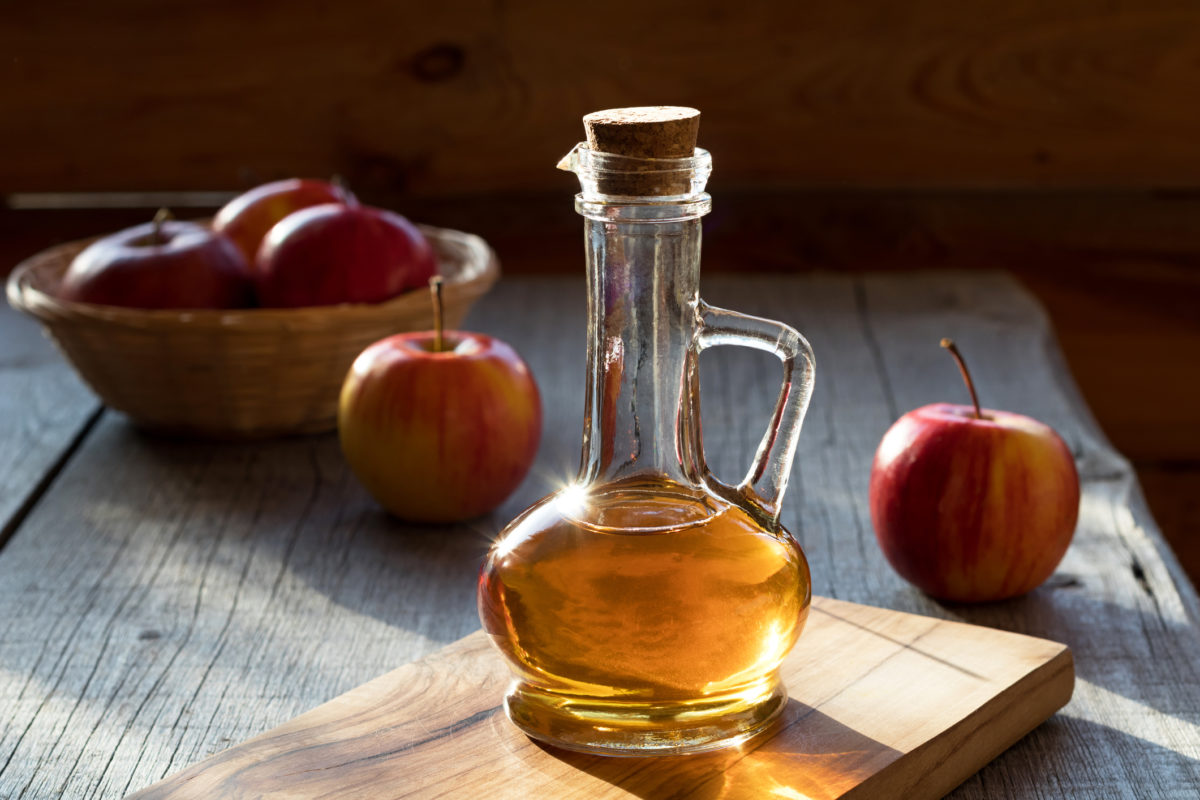
Ok, let's talk vinegar. Or what happens when wine goes bad. Or, as we preppers like to call it, the stuff that dreams are made of.

As Final Preppers, we need to be ever resourceful, and growing our own food and making our own medicines certainly is part of that mindset. Here are some simple instructions in making two things – first, hard apple cider (cider with alcohol) and secondly, further fermenting the hard cider to make apple cider vinegar.

Making Hard Apple Cider

The first thing you need, naturally, are apples. Not just any apple will do, you will need apples that ripen in the fall or winter. These apples contain more sugar than summer and green apples, which don’t make good cider. In a pinch you can use any apples; you might just have to increase the sugar content of your ferment, more on this later. Let us begin:

  1. Gather up the fruit you need and wash it to remove any dirt and debris from the skins of the apples.
  2. Now, take the fruit and crush it into pulp, if you have an apple press it will be much easier.
  3. Drain off the juice from the pulp. If you don’t have an apple press, use cheesecloth to strain the juice and separate it from the pulp.

You can also make your hard cider from apple cider that you have bought. It can be from commercial ciders because they are usually pasteurized and this will ultimately affect the flavor.

There are two kinds of pasteurization, cold and hot.

Cold pasteurization is done with ultraviolet light to kill o the microorganisms and this is the preferred method because it impacts the flavor less than heat pasteurization.

At this point you have two choices.

You can put the juice in a large glass bottle and cover the top with a double layer of cheesecloth and secure it with a rubber band and place it in a dark, cool place for several months, the ideal temperature being around 60 degrees F. Natural wild yeasts in the air will enter the juice and start the fermentation process. Is slower than the second method of adding active yeast cultures to your juice.

Note: Bread yeasts are not good for this. You can use dry wine yeasts that work fine; these can be found online or from any home-brew store. Dry wine yeast packs are very inexpensive and work just as well as cider yeasts.

You can also make your own starter. This is your own active culture which you can add to lots of batches of cider. The formula for your own starter is:

  • First, pour out about one-fifth of your cider out of its bottle; you will need this room for fermentation.
  • Crumble one cake of cultivated yeast into the remaining one quart of cider.
  • Reseal the bottle and shake it vigorously for a few seconds and then reseal the bottle.
  • Within five or six hours you should start to see bubbling in the bottle; now fermentation has begun.
  • Once you see this, lift a corner of the bottle’s lid to release the pent up gases within the bottle and then reseal it and put it in the refrigerator.
  • To use it as a starter you will need to take it out of the refrigerator again and let it sit at room temperature for a few hours before you add it to your next batch of cider.

This will make enough starter for approximately five gallons of cider. Doing this step is optional, but I recommend doing it because if you have a bad batch of yeast then you have not ruined a large bottle of cider. You will know if it is a bad or dead batch of yeast because it will not begin the bubbling signifying that fermentation has begun.

Only use glass, ceramic, or stainless steel to make cider, do not use other metals or plastic which will react with the ferment and leach out toxins into the cider. The acid in the cider will also corrode most metals except stainless steel.

It is best to sanitize your container or vessel. This step is not critical but highly recommended or you could possible spoil your cider. Sanitizing your container is relatively easy; here is how I recommend it:

  1. Pour a cup of bleach into your vessel or container
  2. Fill it with cold water
  3. Swish it around
  4. Let it sit for about a half an hour
  5. Then pour it out and rinse thoroughly with cold, clean water.
  6. Repeat this process one or two more times to get any smell of bleach out of the container.

Now take your cider and add either your starter or directly add your yeast.

  • Stir the mix with either a plastic or stainless steel spoon for several minutes to mix it well and then seal the lid.
  • Place your container in a room, closet, or basement.
  • The ideal temperature for fermentation of cider is about 60 F, but anywhere from 60-75 degrees F will work.
  • If the room is too cold it will stop the fermentation and if it is too warm it will speed it up too much and will change the flavor.
  • The temperature is very important for proper fermentation and you should make every effort to keep it as close to 60 degrees F as you can; doing this correctly now will really pay off in the end.
  • Within a few days, you will see gas bubbling from the airlock. This is great news; that is carbon dioxide, a by-product of the fermentation process. We are now on our way to making some great cider.
  • This bubbling will subside after about two weeks, signaling the end of the first step or primary fermentation.
  • Now let the cider sit for a few more weeks to allow the yeast in it to settle out.
  • At this point, you can pour the cider off into smaller bottles or jugs that have been sanitized
  • Reseal them and allow them to sit for a week or two and then they will be ready to drink. When performing this step be careful not to slosh around the large container as this will raise the yeast sludge from its bottom and cloud up your cider. This is only cosmetic and does not affect the cider in any other way.
  • Keep in mind that your cider will most likely be “still”, meaning it is not fizzy.
  • However, if you let it sit for several months the fermentation will produce some fizz. Cider is like wine, it does improve with age.
  • The alcohol content of your cider can be raised by raising the amount of sugar that is in your cider for the yeast to ferment and change to alcohol.
  • To sweeten the cider, add either honey or brown sugar before you add the yeast or starter to it. This will raise the sugar content of the cider and once fermented will raise its alcohol content as well.

Now you have completed the first step in making hard cider. This step is also known as yeast fermentation for obvious reasons, and is done anaerobically or without oxygen. If you want to drink some of your cider, now is the time. Usually the alcohol content of most ciders is about twice that of beer, so enjoy yourself.

Making Apple Cider Vinegar

Now if you want to go on to make apple cider vinegar, this involves changing the alcohol of the cider to acetic acid of vinegar.

This step is known as “acetic acid fermentation” and is carried out by the acetobacter bacteria and unlike step one, this is done aerobically or in the presence of oxygen. The production of apple cider vinegar from apple cider involves two critical factors; temperature and oxygen content.

The temperature has to be as close to 60 F as you can get it and you have to stir your brew daily to introduce oxygen into the mix. Also covering the brew with cheesecloth will allow oxygen to enter.

The first step in the conversion of hard apple cider to apple cider vinegar is to pour off the cider into the containers you want to use to ferment your cider. These have to be sanitized as explained above. Only fill the containers about three-quarters of the way, and cover it with cheesecloth and keep it out of direct sunlight and as mentioned at as close to 60 F, but no warmer than 80 F. Take a large, stainless steel or plastic spoon and stir the contents daily to introduce oxygen into your mix.

Each time you are finished stirring, replace your cheesecloth cover. This will allow oxygen to continue to enter your mix and will allow the bubbling off of carbon dioxide from the fermentation. A mat of what is known as mother will develop at the bottom of your mix. This is harmless and is a natural part of the fermentation by the acetobacter bacteria.

Full fermentation will take about three to four weeks. As the vinegar is maturing, the mix will get a vinegar smell. This is from the acetic acid formed by its conversion from alcohol. The taste will mature over time. You should taste your mix periodically to see how far along you have reached.

When your vinegar is fully fermented you can filter it through either several layers of cheesecloth, or a plain coffee filter will work just fine. The filtering will remove the “mother of vinegar” or the cloudy sediment that has accumulated from the fermentation process. This does not have to be done and is only a matter of preference. Personally, I prefer the mother in my vinegar. However, if you choose to remove the mother this will prevent further fermentation and will prevent the vinegar from ultimately spoiling.

Another method to prevent spoilage and ensure indefinite storage of your vinegar is to pasteurize it. Pasteurization is done with heat and you have to do it at just the right temperature. This requires a minimum of 140 degrees F and a maximum of 160 degrees F. This will kill off the acetobacter bacteria and allow the vinegar to be stored indefinitely.

You do this by placing the bottle of vinegar in a large pan of water and bringing the water to the 140 to 160 F range as stated above. You should use a cooking thermometer to ensure the proper temperatures. As soon as this level is reached, remove your vinegar bottle from the pan of water and allow it to cool. Store it out of sunlight in a cool area at as close to 60 degrees F as you can. Remember, the vinegar reacts with its container and can only be stored in glass, ceramic, or stainless steel bottles.

Flavoring Your Vinegar

You can also flavor your vinegars if you like. This can be done with a variety of items including garlic, green onions, ginger, and various herbs. is will also boost the nutritional content and allow you to make some delicious vinegar that is also very nutritious.

Flavoring your vinegar with plant parts whose molecular size is too large to normally use in essential oils is not a problem, and they can easily be introduced into vinegar. The reason this can be done is because vinegar is being ingested, broken down and absorbed by your intestinal tract.

This will also allow you a method to introduce larger plant molecules that can be ingested and absorbed in the intestines that otherwise would be too large to cross the skin in an essential oil. To flavor a vinegar, suspend the vegetable or herb that you want in a small cheesecloth bag and leave it in the vinegar, usually for four days with the exception of garlic, which is only one day. Make every effort not to overload the vinegar, too much vegetable matter will ruin the acid and ruin the preservation of the vinegar and ultimately cause it to spoil.

A good rule of thumb is to mix as follows:

For every two cups of vinegar add the following for each flavor:

  • Fresh Herbs
  • use half a cup Dried herbs,
  • use one tablespoon Garlic,
  • use two large cloves Green onions, use eight small

What do you think? Still here with me? Would you surprised to find out this recipe comes from a book that has it all? Written by real doctor? His name is Ralph La Guardia. And the book is The Doomsday Book Of Medicine. And you can only find it here, at Final Prepper. Like, really.

I’m just saying.

You do the math.

Until next time, God Bless. And don’t forget to tell me when I’m right or wrong, good or bad…

As Final Preppers, we need to be ever resourceful, and growing our own food and making our own medicines certainly is part of that mindset. Here are some simple instructions

For those who live a self-sufficient lifestyle whether it’s on a 50-acre homestead or a ¼ acre urban homestead, efficiency is very important. Storage space is a perennial issue for those who prepare and those who homestead.

The more multiuse items you store at home the better it is going to be for that limited storage space. We are all fighting storage issues, income issues and maybe even family issues when it comes to getting prepared.

There are several multi-use items that can be stockpiled in your home. The cheapest and most effective must be vinegar. There is nothing that you can create yourself that does as much as vinegar. From personal ailments to disinfection and even food preparation, vinegar is a core item for self-reliance.

10 Ways to Use Vinegar for Self Sufficiency

To quantify how effective vinegar can be for you in disaster and everyday life, let’s look at 10 powerful uses for vinegar.  

  • Cleaning

We could never store all the cleaners that we use on a weekly basis in quantities that would be effective for long term disaster or self-sufficiency. Instead, you can dilute and fortify vinegar to become the base of many cleaners.

It can polish glass as well as disinfect.

  • Pest Treatments

Vinegar can be used to affect pests both in your home and in your garden. It can be used to take care of fleas on dogs, catch gnats and it can be added to a spray for your garden.

  • Pickling

Without any special gear, tools or even fuel, you can turn fresh food into preserved food with vinegar. Of course, a little sugar and some onion might make it even better, some salt would help. However, just vinegar will pickle foods and extend their life.

  • Kill Moss and Weeds

You can take care of bothersome moss and weeds by spraying them with vinegar.

  • Soak for Rust Removal

Got tools and things that have rusted or rusted together. A few soaks in vinegar can deal with that trust. Just be sure to refresh the vinegar after 8, or so, hours.

  • Sore Throat

Vinegar can help with a sore throat. You can use it with some salt as a great gargle.

  • Digestion

For a long time, people drank things like balsamic vinegar after dinner as something that would help with digestion. The added acidity can help break down your food.

  • Meat Marinade

On the culinary side of things, you can use vinegar as a meat marinade that will help break down tougher cuts of meat and impart flavor.

  • Probiotic

If you use our method below to make your own vinegar you will have a raw apple cider vinegar that contains healthy probiotics to improve things like gut health.

  • Tincture

While the most popular base for tincture is alcohol, you can create tinctures for healing and natural remedies with vinegar, as well.

DIY Raw Apple Cider Vinegar

Now that you see how effective this simple solution can be, its time to talk about making your own raw apple cider vinegar. The process is so simple that it’s hard to understand how we started buying the stuff at the supermarket.

You are going to need a handful of things for this DIY

  • 3 apples
  • 3 tsp raw sugar
  • 1-quart mason jar
  • Filtered water

The Process

  1. Chop your apples up and rinse them.
  2. Place them in the mason jar and sprinkle your sugar over them. Stir the mix a bit.
  3. Cover the mix with water and fill the jar to the top. This water is going to become the base of your vinegar.
  4. Cover with a paper towel or cheesecloth. Affix it with a rubber band. You want the mix to be able to breathe so don’t cover it completely with a mason jar lid.
  5. Place in a warm dark place, like a pantry, for three weeks. This environment will promote the fermentation that is necessary for this process to work.
  6. Strain the apples out of the liquid and place the liquid back in the pantry for 4 more weeks. Do not use too fine a strainer as you will want the sediment that has formed at the bottom of the jar.
  7. At this point, you can screw on that mason jar lid. You have made raw apple cider vinegar!

By adding more apples, more sugar, and more water you can make as much of this vinegar as you’d like. This raw apple cider vinegar will have sediment in the bottom and that sediment is called the mother. This is where the probiotic benefits come from.

Do not strain out that mother as this is the most beneficial part of the whole process.

Build a Powerful Stockpile for Disaster

Vinegar is just one example of the many items that you can store in your stockpile. If you are prepping for disaster or just managing a homestead, the things you have on hand could, one day, become the only things you have!

There are many other multiuse items out there. Do you know any other? There is an extensive list of items to stockpile in The Doomsday Book Of Medicine. This extensive collection of base preparedness knowledge teaches you what to do when there’s no doctors or meds.

Start your stockpile of powerful multiuse items, like vinegar, and save time, space and money. The Doomsday Book Of Medicine can guide you on your path from start to finish.


For those who live a self-sufficient lifestyle whether its on a 50-acre homestead or a ¼ acre urban homestead, efficiency is very important. Storage space is a perennial issue for